
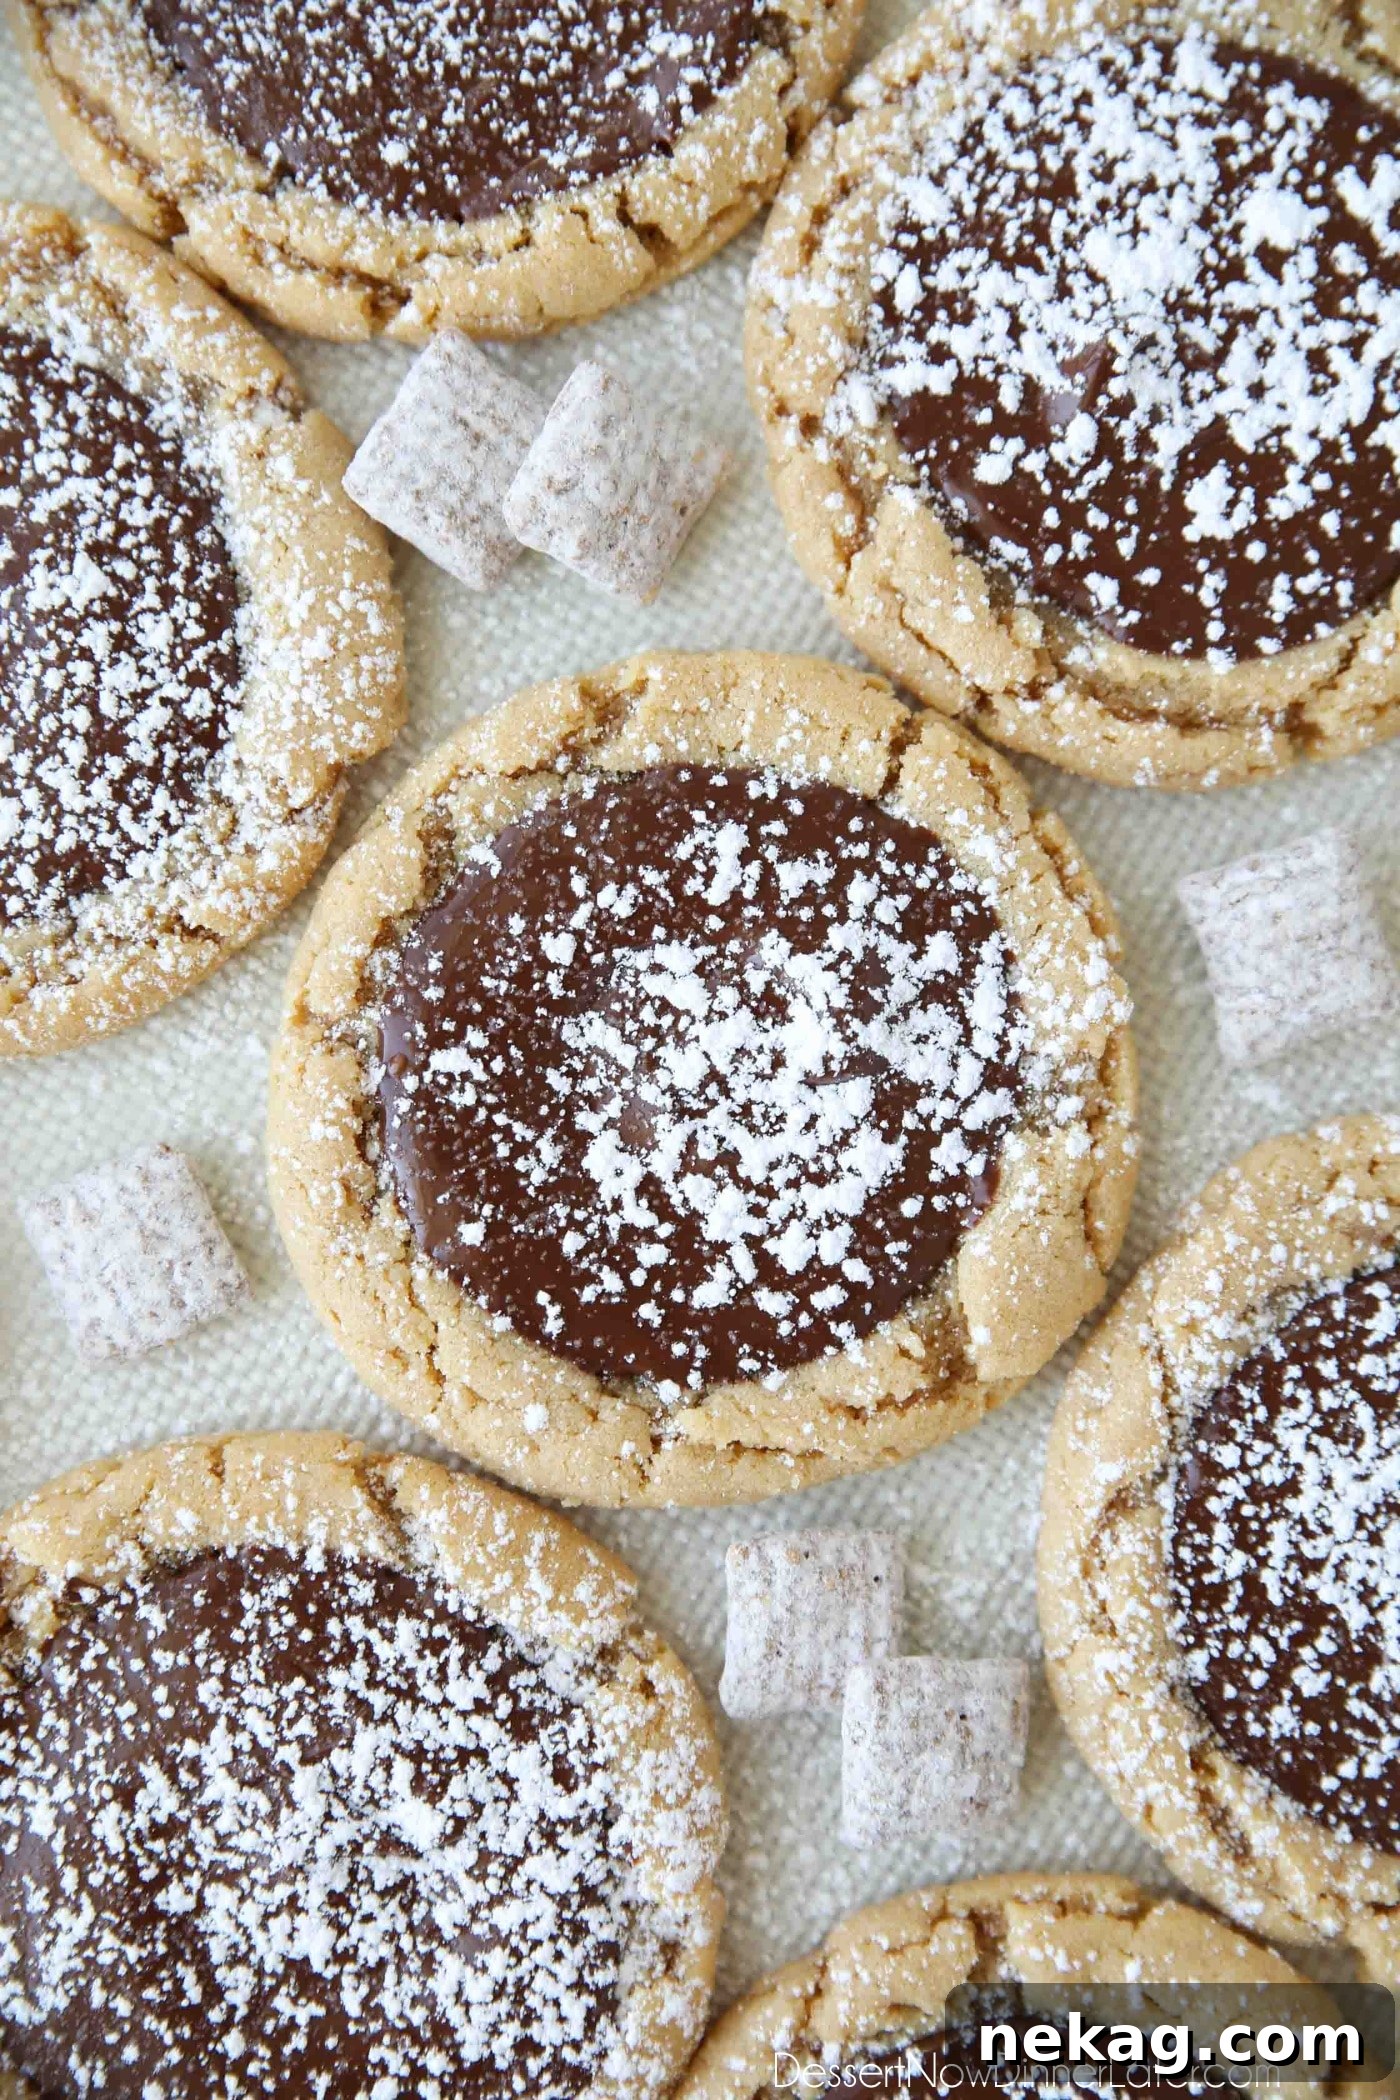
Irresistible Muddy Buddy Cookies: Your Ultimate Peanut Butter Chocolate Treat!
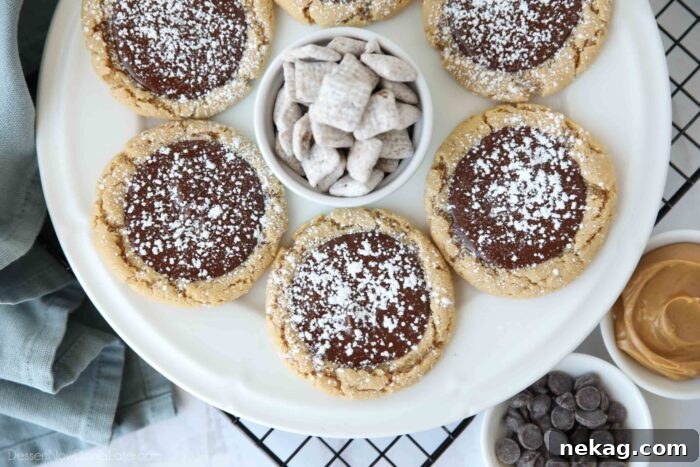
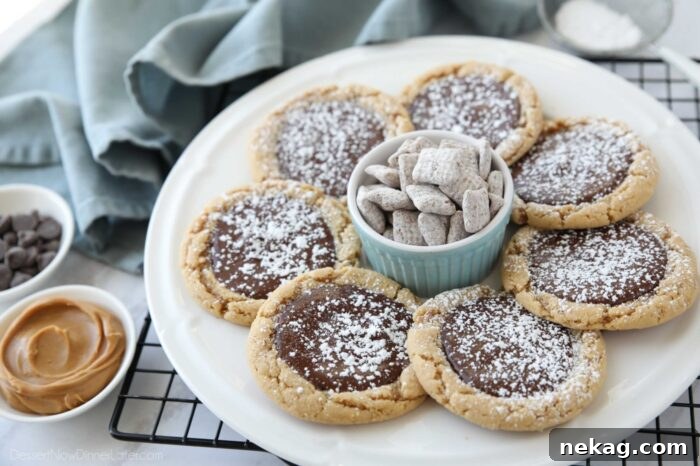
Step into a world where your favorite nostalgic snack mix transforms into an exquisite cookie experience. These Muddy Buddy Cookies are the pinnacle of peanut butter and chocolate perfection, designed to captivate your taste buds from the very first bite. Imagine sinking your teeth into a remarkably soft and chewy peanut butter cookie, generously crowned with a luscious layer of melted chocolate, and elegantly dusted with a delicate sprinkle of powdered sugar. It’s all the beloved, irresistible flavors of classic Muddy Buddies (or Puppy Chow) Chex mix, reimagined and perfected in a delightful cookie form. Prepare to fall in love with a dessert that’s both comforting and sophisticated, simple to make yet impressive to serve.
The Magic of Muddy Buddy Cookies
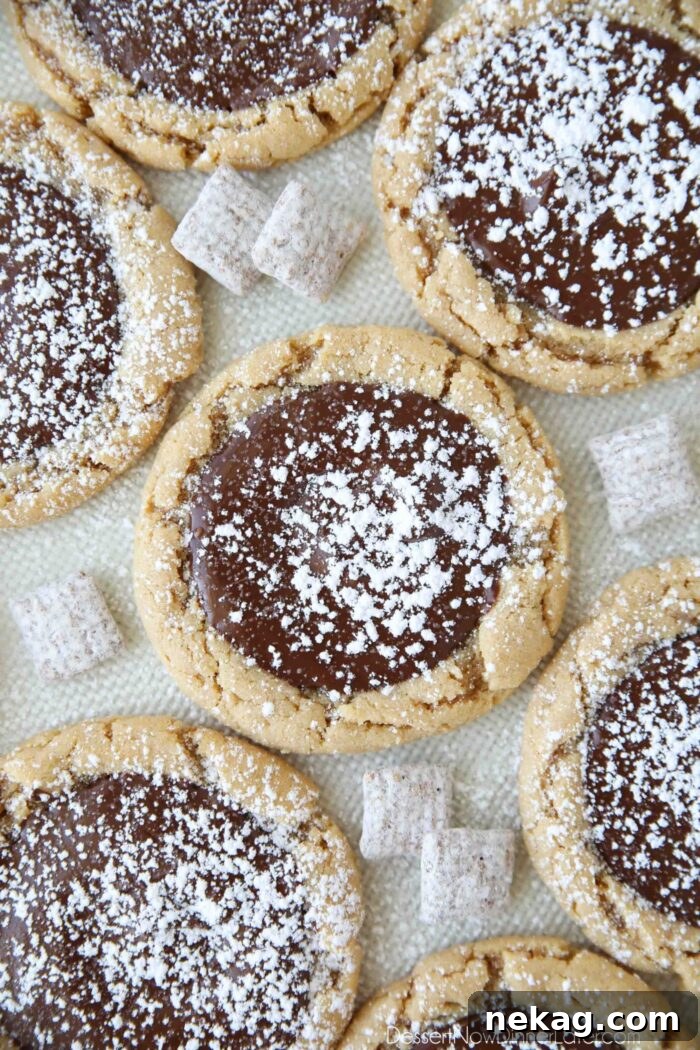
This unique Muddy Buddy Cookies recipe elevates the concept of a simple peanut butter cookie to a whole new level. While many are familiar with the delightful peanut butter blossom, featuring a chocolate kiss pressed into its center, our rendition takes a different, arguably superior, path. Instead of a single chocolate morsel, we blanket the entire top of the cookie with smooth, melted chocolate. This thoughtful design ensures that every single bite delivers that exquisite peanut butter and chocolate harmony, a sensation that truly defines the original Muddy Buddies snack. The convenience is an added bonus; forget the tedious unwrapping of individual candies – a simple melt and spread streamlines the process, making it surprisingly efficient.
Moreover, while peanut butter chocolate chip cookies offer their own charm, the distinct creamy layer of chocolate on these thick and chewy peanut butter cookies provides an unparalleled texture contrast. The smooth, slightly firm chocolate topping paired with the soft, yielding cookie base creates a dynamic eating experience that’s far more luxurious. It’s this intentional layering of flavors and textures that sets our Muddy Buddy Cookies apart, making them not just a dessert, but a true indulgence.
Perfect for Every Occasion: Holidays, Celebrations, or Just Because
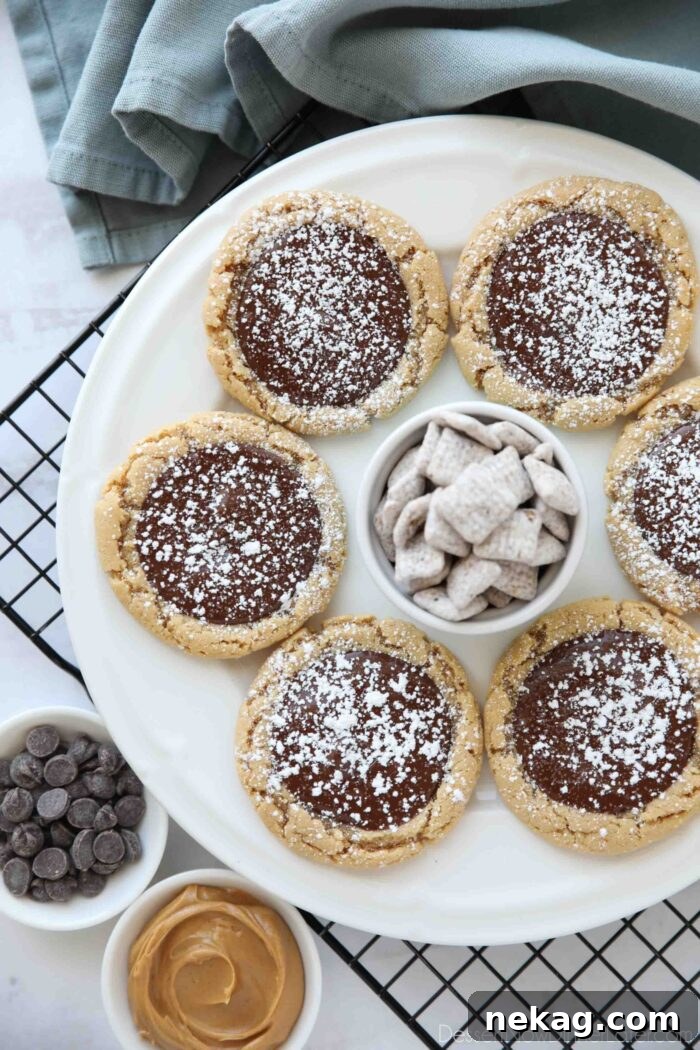
The subtle dusting of powdered sugar on top of these delectable peanut butter and chocolate cookies bestows an elegant finish, rendering them perfectly suited for holiday gatherings, special celebrations, or any festive occasion where a touch of sophistication is desired. Yet, despite their refined appearance, the baking process is straightforward and enjoyable, making them simple enough for everyday enjoyment. They’re the ideal treat to brighten a weeknight or satisfy an afternoon craving.
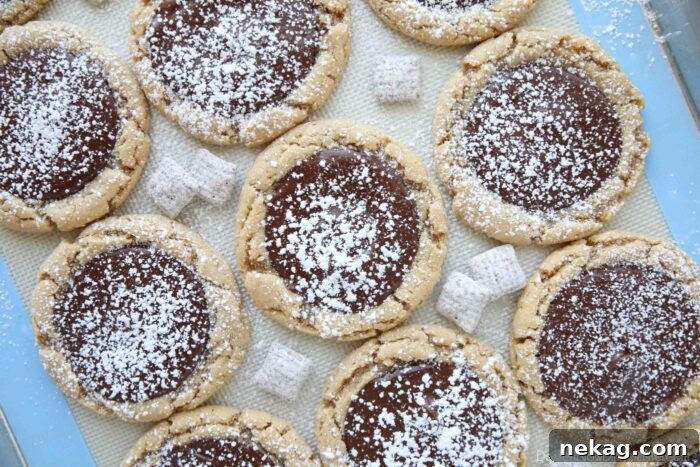
These cookies also offer incredible versatility for customization. You can effortlessly omit the powdered sugar for a simpler look, or swap it out for various colored sprinkles to match different holiday themes or party palettes. Imagine green and red sprinkles for Christmas, pastels for Easter, or orange and black for Halloween! For a truly show-stopping dessert, consider adding a few genuine Muddy Buddies™ Chex mix pieces on top of the chocolate before it sets. This instantly transforms your creation into a delightful Crumbl copycat recipe, adding an extra layer of crunch and visual appeal that’s sure to impress.
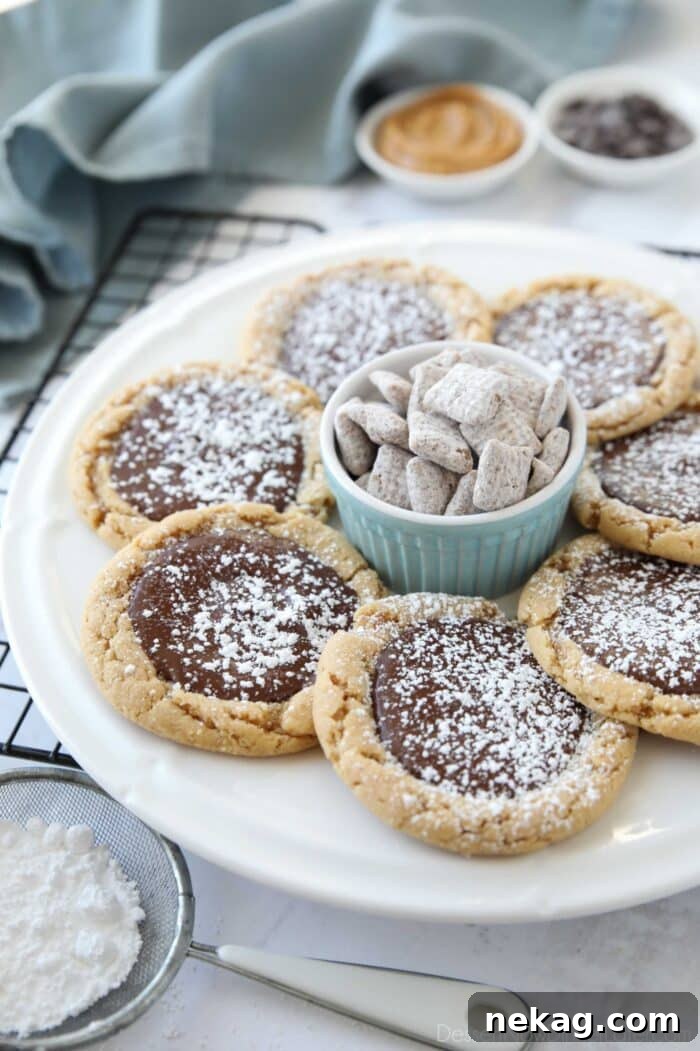
Essential Ingredients for Your Muddy Buddy Masterpiece
Crafting these extraordinary cookies begins with a careful selection of quality ingredients. Each component plays a vital role in achieving that perfect balance of flavor and texture. Gather these items to embark on your baking adventure:
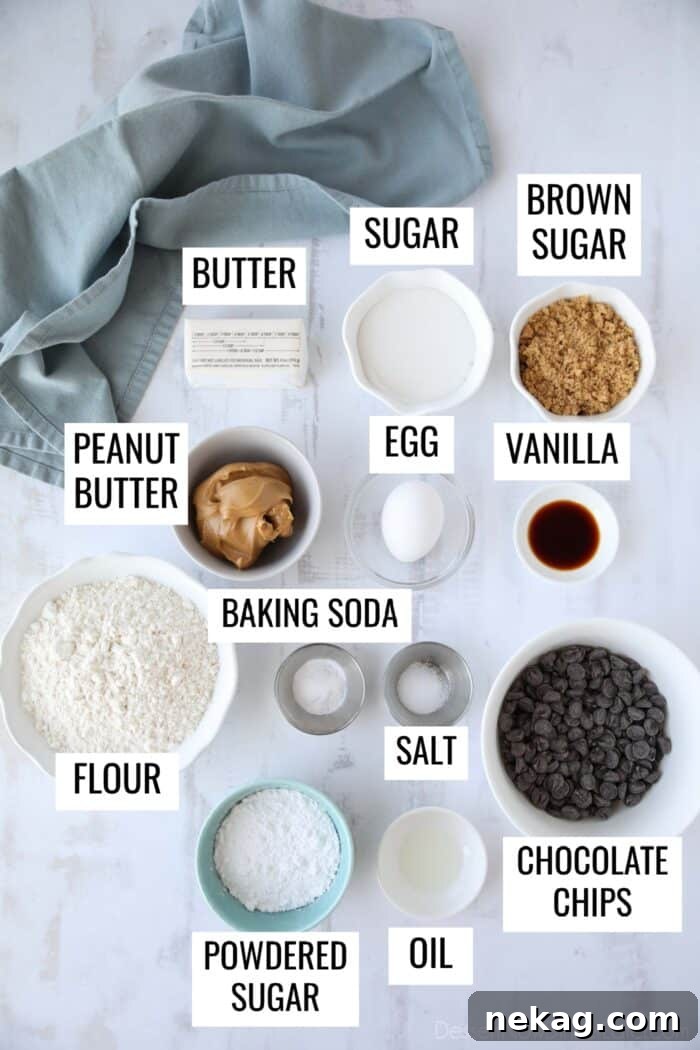
- Unsalted Butter: Using unsalted butter allows you precise control over the overall salt content in your cookies, which is especially important when pairing with naturally salty peanut butter. Ensure it’s at room temperature for optimal creaming.
- Granulated Sugar: Provides sweetness and contributes to the cookie’s tender texture and slight crispness at the edges.
- Brown Sugar: The molasses in brown sugar adds a deep, caramel-like flavor and ensures a moist, chewy interior, characteristic of a truly great peanut butter cookie.
- Creamy Peanut Butter: Crucial for the texture and flavor of these cookies. Opt for a creamy, shelf-stable variety like Jif or Skippy. Natural peanut butters, which often separate and require stirring, tend to yield drier, more crumbly cookies due to their different oil and sugar content.
- Large Egg: Acts as a binder, adding moisture and richness, and helping the cookies achieve their structure and chewiness.
- Vanilla Extract: A fundamental flavor enhancer in almost any cookie recipe, vanilla extract beautifully complements both the peanut butter and chocolate, adding depth and warmth.
- All-Purpose Flour: The structural backbone of the cookie. Proper measurement is key to prevent dense or dry cookies.
- Baking Soda: A leavening agent that helps the cookies rise and spread, contributing to their soft, puffy texture.
- Salt: Balances the sweetness and enhances the flavors of both the peanut butter and chocolate, making them pop.
- Semi-Sweet Chocolate Chips: The star of the topping! Semi-sweet is a classic choice, offering a balanced chocolate flavor that isn’t overly bitter or sweet. Milk chocolate chips can also be used if you prefer a sweeter, creamier chocolate topping.
- Flavorless Oil: A small amount of neutral oil like canola, vegetable, or a light-tasting olive oil is added to the chocolate chips to create a smoother, more pourable and spreadable chocolate topping. This also helps prevent the chocolate from seizing and gives it a beautiful sheen. Shortening or coconut oil are excellent alternatives.
- Powdered Sugar: The final flourish! This fine sugar dust gives the cookies their signature Muddy Buddy appearance and adds a subtle extra touch of sweetness.
Crafting the Perfect Peanut Butter Cookie Dough
With all your ingredients ready and waiting, it’s time to bring your Muddy Buddy Cookies to life, starting with the foundation: the irresistible peanut butter cookie dough. Precision in these initial steps lays the groundwork for perfectly textured cookies.
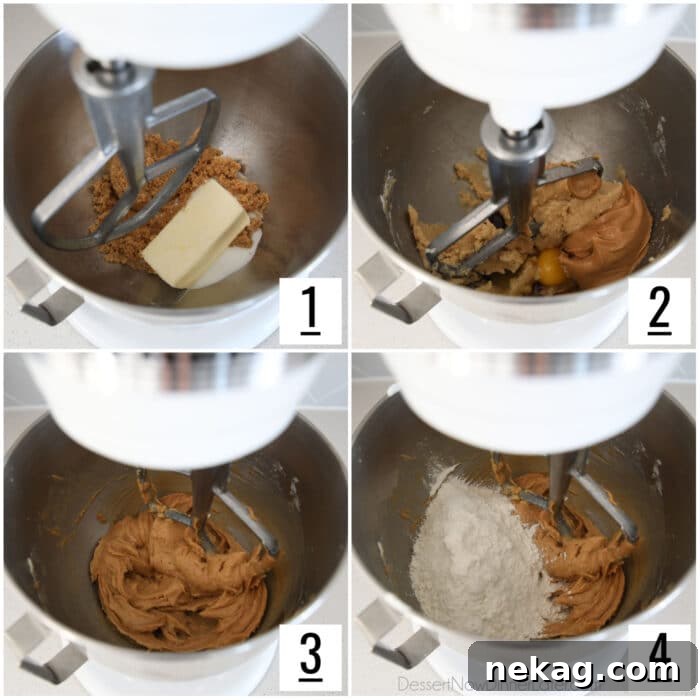
- Cream the Wet Ingredients: In the spacious bowl of a stand mixer, fitted with the paddle attachment, begin by combining the softened unsalted butter with both the granulated and light brown sugars. Beat these together on medium speed for about 2-3 minutes, until the mixture becomes light, fluffy, and noticeably pale. This crucial step incorporates air, contributing to a tender cookie texture.
- Incorporate Flavor and Moisture: Next, add the creamy peanut butter, the large egg, and the aromatic vanilla extract to the creamed butter and sugar mixture. Continue to mix on medium speed until all these wet ingredients are thoroughly combined and smooth. Be sure to stop the mixer and scrape down the sides and bottom of the bowl with a rubber spatula to ensure everything is evenly incorporated, preventing any unmixed pockets.
- Prepare the Dry Ingredients: In a separate, medium-sized bowl, whisk together the all-purpose flour, baking soda, and salt. Whisking ensures these dry ingredients are well distributed, preventing clumps and ensuring even leavening throughout the dough.
- Combine Wet and Dry: Gradually add the dry ingredient mixture to the wet ingredients in the stand mixer. Mix on low speed, just until the flour is incorporated and no dry streaks remain. Be careful not to overmix the dough, as overmixing can develop the gluten in the flour too much, leading to tough cookies. The dough should come together into a soft, cohesive mass.
Assembling and Finishing Your Muddy Buddy Cookies
Once your rich peanut butter cookie dough is perfectly prepared, the exciting part begins: transforming it into the iconic Muddy Buddy Cookies, complete with their signature chocolate topping and powdered sugar dusting. Follow these steps for a perfect finish:
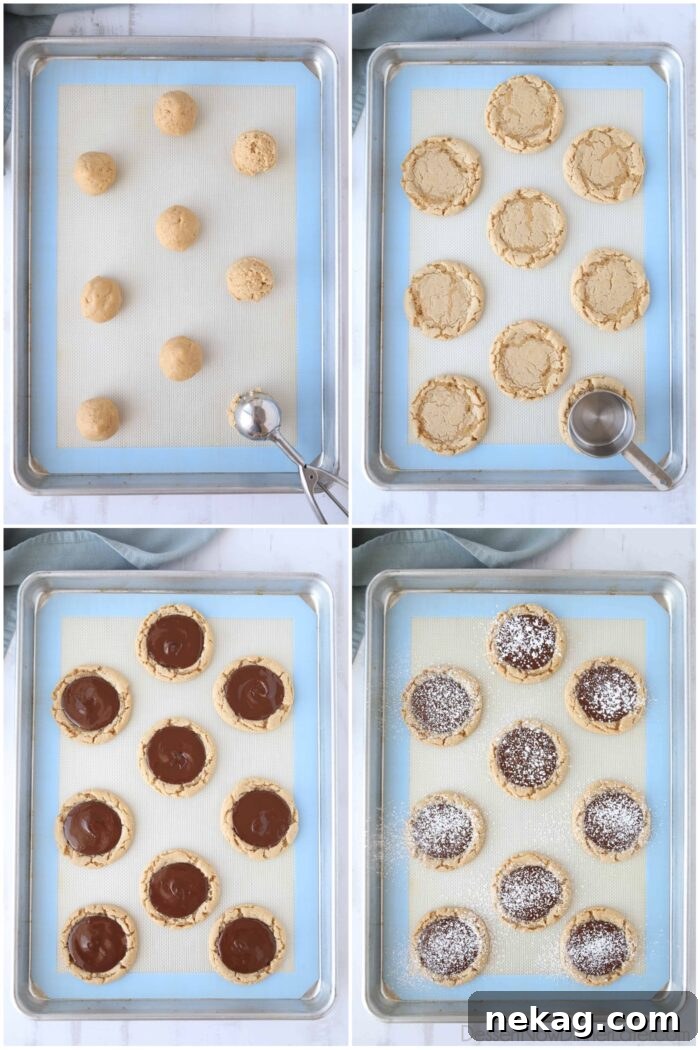
- Shape and Bake the Cookies: Preheat your oven to 350˚F (175˚C) and line your baking sheets with silicone baking mats or parchment paper. Scoop the prepared peanut butter cookie dough into uniform balls, each approximately 2 tablespoons in size (a #30 cookie scoop works perfectly for this). Gently roll each portion of dough between your palms to create smooth, round balls, which helps to prevent rough edges and contains the chocolate better later. Arrange them several inches apart on your lined baking sheets. Bake for 11-12 minutes, or until the edges are lightly golden and the centers appear just set—they will look puffy and matte, not glossy.
- Create the Chocolate Well: The moment the cookies emerge from the oven, while they are still warm and pliable, immediately use the bottom of a 1/3 cup measuring cup or a similar rounded object to gently press down into the center of each cookie. This creates a perfect little well or indentation, ready to cradle the melted chocolate topping. Allow the cookies to cool completely on the baking sheet at room temperature for about 1 hour, or speed up the process by placing them in the refrigerator for 15-20 minutes. This complete cooling is critical; it prevents the warm cookies from melting the chocolate right off the edges when applied.
- Melt the Chocolate Topping: In a microwave-safe bowl, combine the semi-sweet chocolate chips and the flavorless oil. Microwave in short bursts of 20-30 seconds, stirring thoroughly between each interval. Continue this process until the chocolate is entirely melted and smooth, typically taking about 1 minute and 30 seconds in total. Stir until no lumps remain and the mixture is glossy.
- Apply the Chocolate Layer: Spoon a generous amount of the melted chocolate into the center well of each cooled cookie. Using the back of the spoon, gently spread the chocolate evenly across the indented surface, creating a smooth, inviting layer.
- Cool and Dust with Powdered Sugar: Allow the chocolate to set completely. This can be done at room temperature for approximately 2 hours, or more rapidly in the refrigerator for 15-20 minutes. Once the chocolate is firm to the touch, use a mini fine mesh strainer to evenly sprinkle a liberal amount of powdered sugar over the top of each cookie. It’s essential for the chocolate to be fully cooled and set before adding the powdered sugar; otherwise, the warmth will cause the sugar to melt and dissolve into the chocolate, losing that signature “muddy buddy” look. Enjoy your beautifully finished cookies!
Expert Baking Tips for Flawless Muddy Buddy Cookies
Achieving bakery-quality Muddy Buddy Cookies is entirely within reach with a few key baking techniques. These tips will help ensure your cookies are perfectly soft, chewy, and topped with just the right amount of chocolatey goodness.
- Start with Room Temperature Butter: This is a golden rule in baking! Room temperature butter (soft enough to leave a slight indentation when pressed, but still holding its shape) creams beautifully with sugar, incorporating air that creates a lighter, more tender cookie texture. Cold butter won’t cream properly, and melted butter will lead to greasy, flat cookies.
- Master the Flour Measurement: Flour is the structural foundation of your cookies, and its measurement can significantly impact the final texture. Flour tends to compact in its container. To measure correctly, first, lightly fluff the flour in its bag or canister with a spoon. Then, gently spoon the flour into your measuring cup until it overflows, without packing it down. Finally, level off the excess with the straight edge of a knife. This method prevents you from adding too much flour, which can result in dry, dense cookies.
- Stick to Creamy Peanut Butter: For these cookies, creamy, hydrogenated peanut butter varieties like Jif or Skippy are highly recommended. These types of peanut butter contain stabilizers that help the cookies maintain their moisture and chewy texture, preventing them from becoming dry or crumbly. Avoid 100% natural peanut butter (whether stir or no-stir), as its oil content can separate during baking, leading to a less predictable and often drier result.
- Hand-Roll Your Cookie Dough Balls: While simply scooping and baking often works for many cookie recipes, taking a moment to gently roll the cookie dough into smooth, uniform balls with your hands for this recipe is beneficial. This extra step helps create a smoother exterior, reduces the chance of rough edges, and ensures that the indentation you create for the chocolate is clean and perfectly centered, leading to a more aesthetically pleasing cookie.
- Respect the Cooling Times: Patience is paramount with these cookies! It is absolutely essential to allow the baked cookies to cool completely before adding the melted chocolate, and for the chocolate to fully set before dusting with powdered sugar. Rushing these steps will lead to disastrous results: warm cookies will cause the chocolate to melt and run off the sides, and warm chocolate will dissolve the powdered sugar, losing that iconic “muddy buddy” look. To speed up the process, you can carefully transfer the baking sheets (or the cooled cookies onto another tray) to the refrigerator between layers.
- Don’t Overbake: Peanut butter cookies are best when they are soft and slightly chewy. Watch your oven carefully and remove the cookies when the edges are just set and lightly golden, and the tops still look a bit puffy and matte, rather than shiny. They will continue to set as they cool on the baking sheet.
Storing and Freezing for Future Enjoyment
To keep your Muddy Buddy Cookies fresh and delicious for as long as possible, proper storage is key. Whether you plan to enjoy them in a few days or save them for a special occasion, these guidelines will help.
Storing at Room Temperature: Your freshly baked Muddy Buddy Cookies can be kept in an airtight container at room temperature for up to 5 days. This method preserves their soft texture and rich flavor perfectly. If your home tends to be particularly warm, you might consider refrigerating them to prevent the chocolate topping from becoming too soft, though they truly taste best when brought back to room temperature before serving.
Freezing Baked Cookies: These cookies freeze beautifully, allowing you to prepare them in advance or save extras for later cravings. To freeze, arrange the cooled cookies in a single layer in a flat-bottomed airtight container. For multiple layers, separate each layer with parchment paper or waxed paper to prevent sticking. They can be frozen for up to 3 months. However, there are a couple of important notes regarding freezing:
- Powdered Sugar and Freezing: The powdered sugar topping will unfortunately melt or dissolve during the freezing and thawing process due to moisture. To maintain the classic Muddy Buddy appearance, it’s best to either leave the powdered sugar off before freezing and add it fresh after thawing, or be prepared to dust them with more powdered sugar once they are fully thawed.
- Chocolate Bloom: Occasionally, the chocolate topping may develop a slight “bloom” after being frozen. This appears as a grayish or whitish film on the surface. While it might alter the appearance slightly, rest assured that chocolate bloom is harmless and the cookies will still be perfectly fine and delicious to eat.
Thawing Frozen Cookies: When you’re ready to enjoy your frozen treats, remove the cookies from their airtight container and place them in a single layer on a plate lined with paper towels. Allow them to thaw gradually at room temperature. The paper towels will absorb any condensation that forms during thawing, preventing the cookies from becoming soggy or sticking together. Once thawed, if desired, dust them with a fresh sprinkle of powdered sugar for that perfect finishing touch.
More Irresistible Chocolate and Peanut Butter Desserts
If you’ve fallen in love with the classic combination of chocolate and peanut butter in these Muddy Buddy Cookies, you’re in for a treat! This dynamic duo is a favorite for a reason, and there are countless ways to enjoy it. Explore more delicious recipes that celebrate this perfect pairing:
- Easy Peanut Butter Balls: A simple, no-bake classic.
- Old Fashioned Peanut Butter Bars: Rich, dense, and utterly satisfying.
- Peanut Butter Pretzel Bites: A perfect balance of sweet and salty crunch.
- No Bake Peanut Butter Pie: Creamy, dreamy, and incredibly easy.
- Peanut Butter Cup Ice Cream: A homemade scoopable delight.
- No Bake Peanut Butter Bars: Quick to make and a guaranteed crowd-pleaser.
- Peanut Butter Pretzel Bars: The ultimate chewy, crunchy, sweet, and salty bar.

Muddy Buddy Cookies
Soft peanut butter cookies topped with melted chocolate and a sprinkle of powdered sugar.
Ingredients
Peanut Butter Cookies:
- ½ cup (113 g) unsalted butter, room temperature
- ½ cup (100 g) granulated sugar
- ½ cup (100 g) light brown sugar, gently packed
- ½ cup (132 g) creamy peanut butter* (like Jif or Skippy)
- 1 large egg
- 1 tsp vanilla extract
- 1 ½ cups (180 g) all-purpose flour (stir, spoon & level)
- 1 tsp baking soda
- ½ tsp salt
Topping:
- 1 cup (170 g) semi-sweet chocolate chips
- ½ tsp canola oil (or other neutral tasting oil)
- 2 Tbsp powdered sugar
Equipment
- KitchenAid 5-Qt. Stand Mixer
- Silicone Spatula Set
- Aluminum Half Sheet Tray (2 Pack)
- Silicone Baking Mat
- #30 Cookie Scoop
- Fine Mesh Strainer
Instructions
- Preheat oven to 350 degrees Fahrenheit. Line sheet trays with silicone baking mats or parchment paper. Set aside.
- Cream the butter and both sugars together in the bowl of a stand mixer using the paddle attachment.
- Add the peanut butter, egg, and vanilla. Mix well and scrape the bowl.
- Combine the flour, baking soda, and salt. Add the dry ingredients to the wet ingredients and mix until just incorporated.
- Scoop the peanut butter cookie dough into balls about 2 Tbsp each. (I use a #30 scoop.) Then roll with hands and space several inches apart onto a silicone or parchment lined baking sheet.
- Bake at 350˚F for 11-12 minutes, or until just set — the tops will be puffy and matte, not shiny, when done.
- Immediately after removing from oven, use the bottom of a (1/3 cup) measuring cup to flatten the center of each cookie, creating a well for the chocolate. Allow cookies to cool completely at room temperature for about 1 hour, or in the refrigerator for about 15-20 minutes. NOTE: Waiting for the cookies to cool prevents the chocolate from melting over the edges of the cookies.
- Melt the chocolate chips and oil together in a microwave-safe bowl in the microwave for 20-30 second bursts. Stirring in-between each interval, until melted completely. Total time to melt chocolate will be approximately 1 minute and 30 seconds.
- Spoon some of the melted chocolate into the center of each cookie. Spread evenly with the back of the spoon. Let the chocolate cool at room temperature for about 2 hours, or in the fridge for about 15-20 minutes.
- Sprinkle powdered sugar over each cooled cookie and enjoy. NOTE: Waiting for the chocolate to cool prevents the powdered sugar from melting/dissolving into the chocolate.
Notes
- Natural peanut butters may cause these cookies to dry out and crumble apart. Use a creamy peanut butter, like Jif or Skippy, for these cookies.
- For thicker cookies, don’t press the centers too far down after baking.
- Chill the cookies in the refrigerator between each step to speed things along.
- Store cookies in an airtight container at room temperature for up to 5 days.
- Freeze cookies in a flat-bottomed airtight container with the layers separated by parchment paper or waxed paper for up to 3 months. Place cookies on a paper towel-lined plate to thaw at room temperature. Add powdered sugar once thawed.
Nutrition
Disclaimer: Nutritional values were calculated using a third-party tool and are provided as an estimation only.
Sharing this recipe with a link is both encouraged and appreciated. Copying/pasting and/or screenshots of full recipes to any social media is strictly prohibited. Content and photographs are copyright protected.
Did you make this?
Don’t forget to leave a rating below and make sure to follow on Pinterest and Instagram for more!