
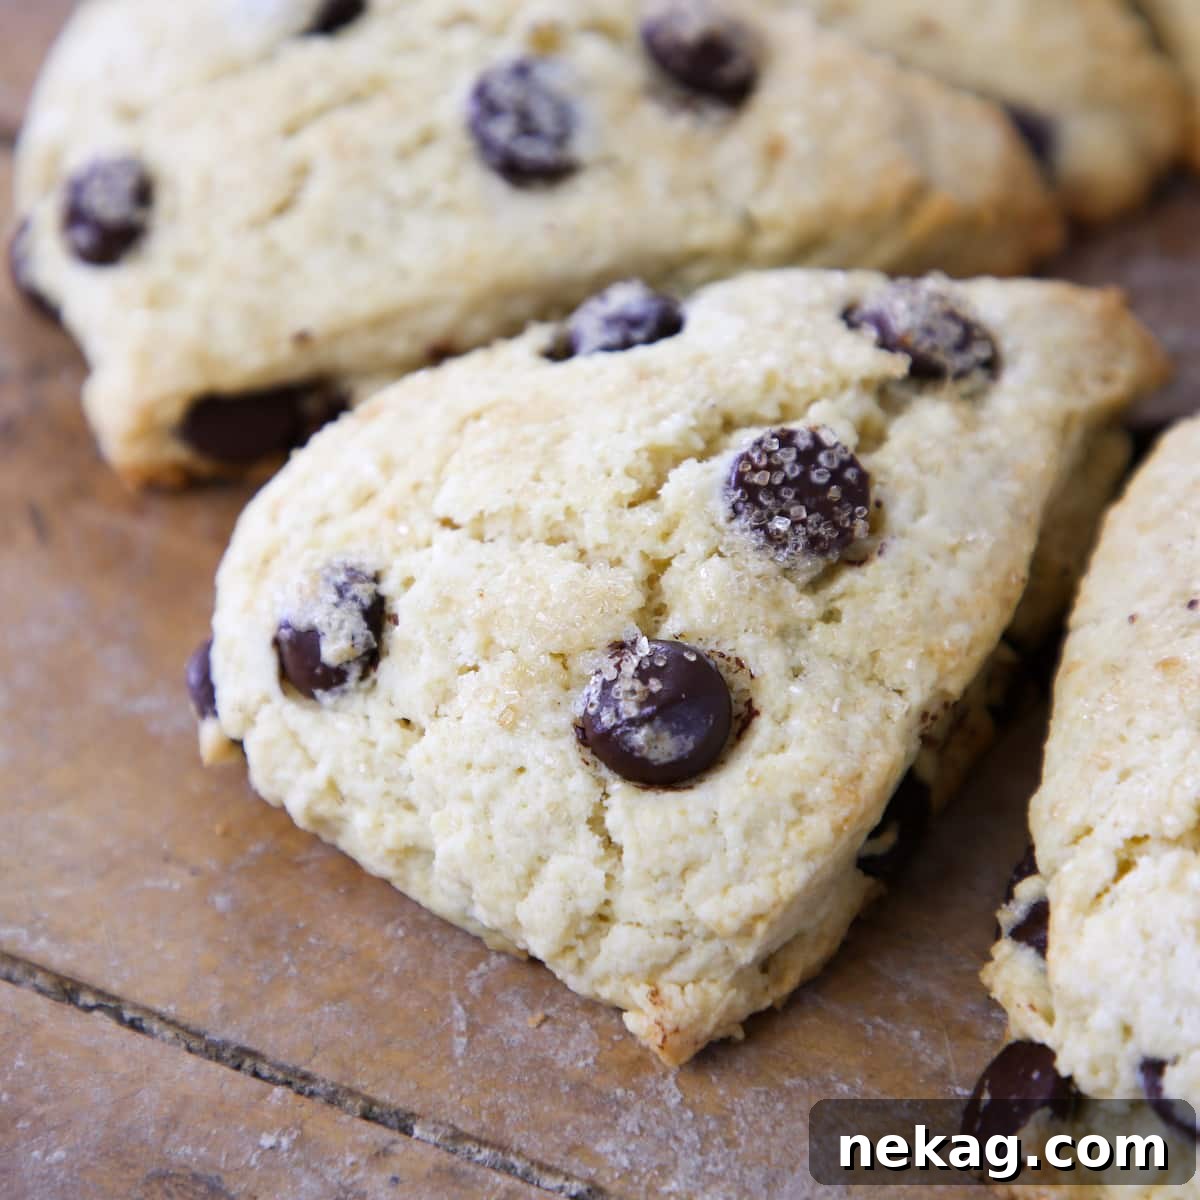
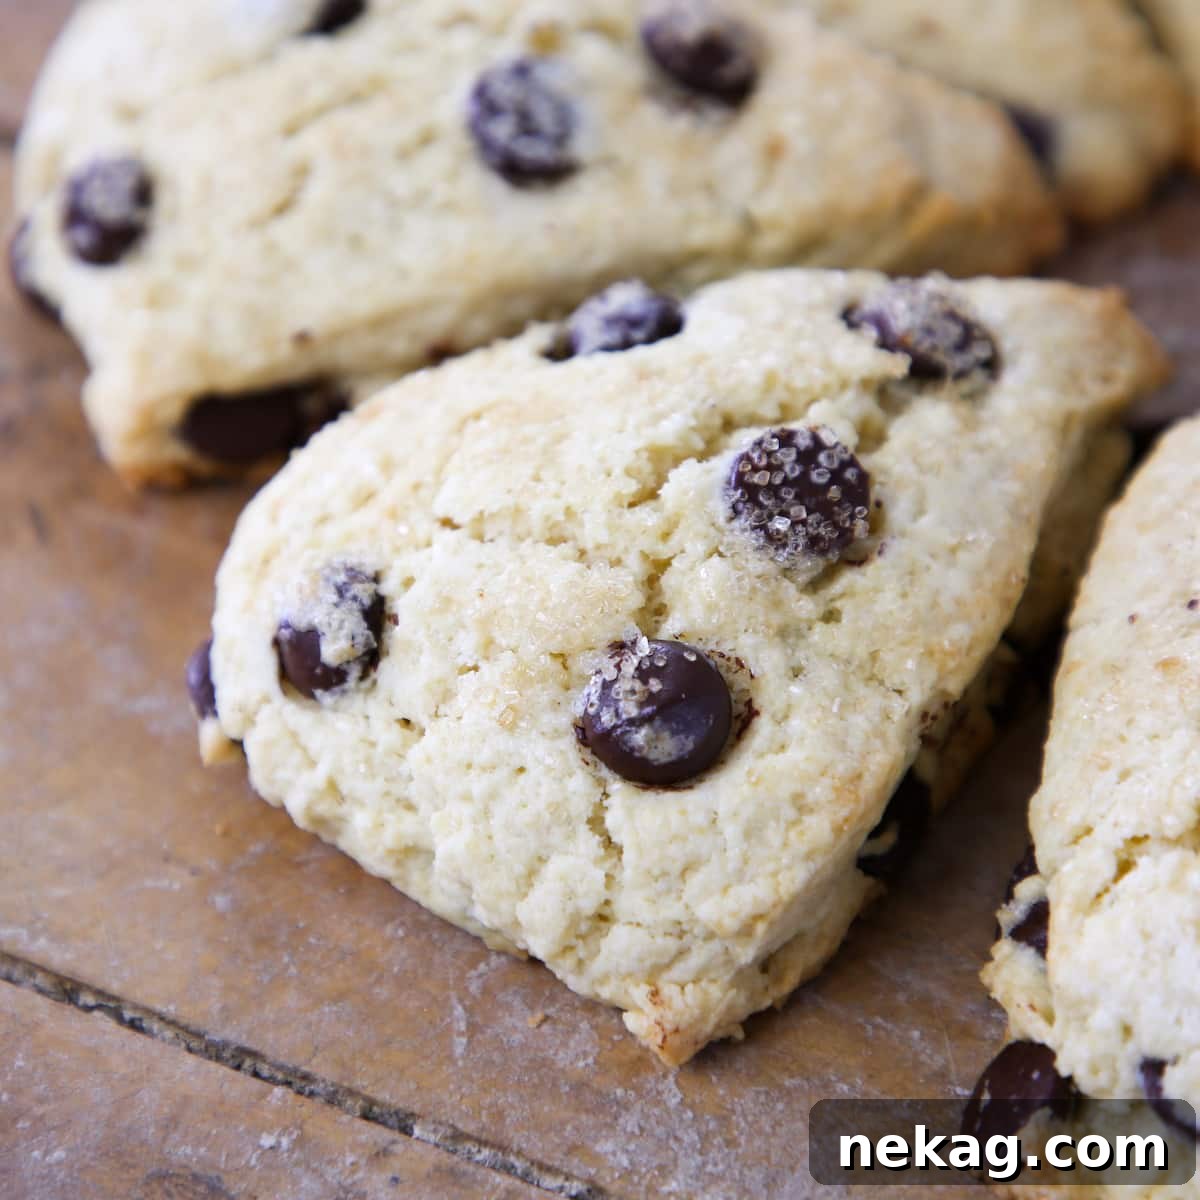
Welcome to the ultimate guide for creating the most delightful Chocolate Chip Scones you’ve ever tasted! These aren’t just any scones; they are incredibly soft, wonderfully tender, and generously packed with sweet, melty chocolate chips. Each bite offers a slightly sweet, richly buttery flavor, perfectly moist with a delicate crumb that will make your taste buds sing. Prepare to elevate your breakfast, brunch, or afternoon tea experience with this truly irresistible recipe.
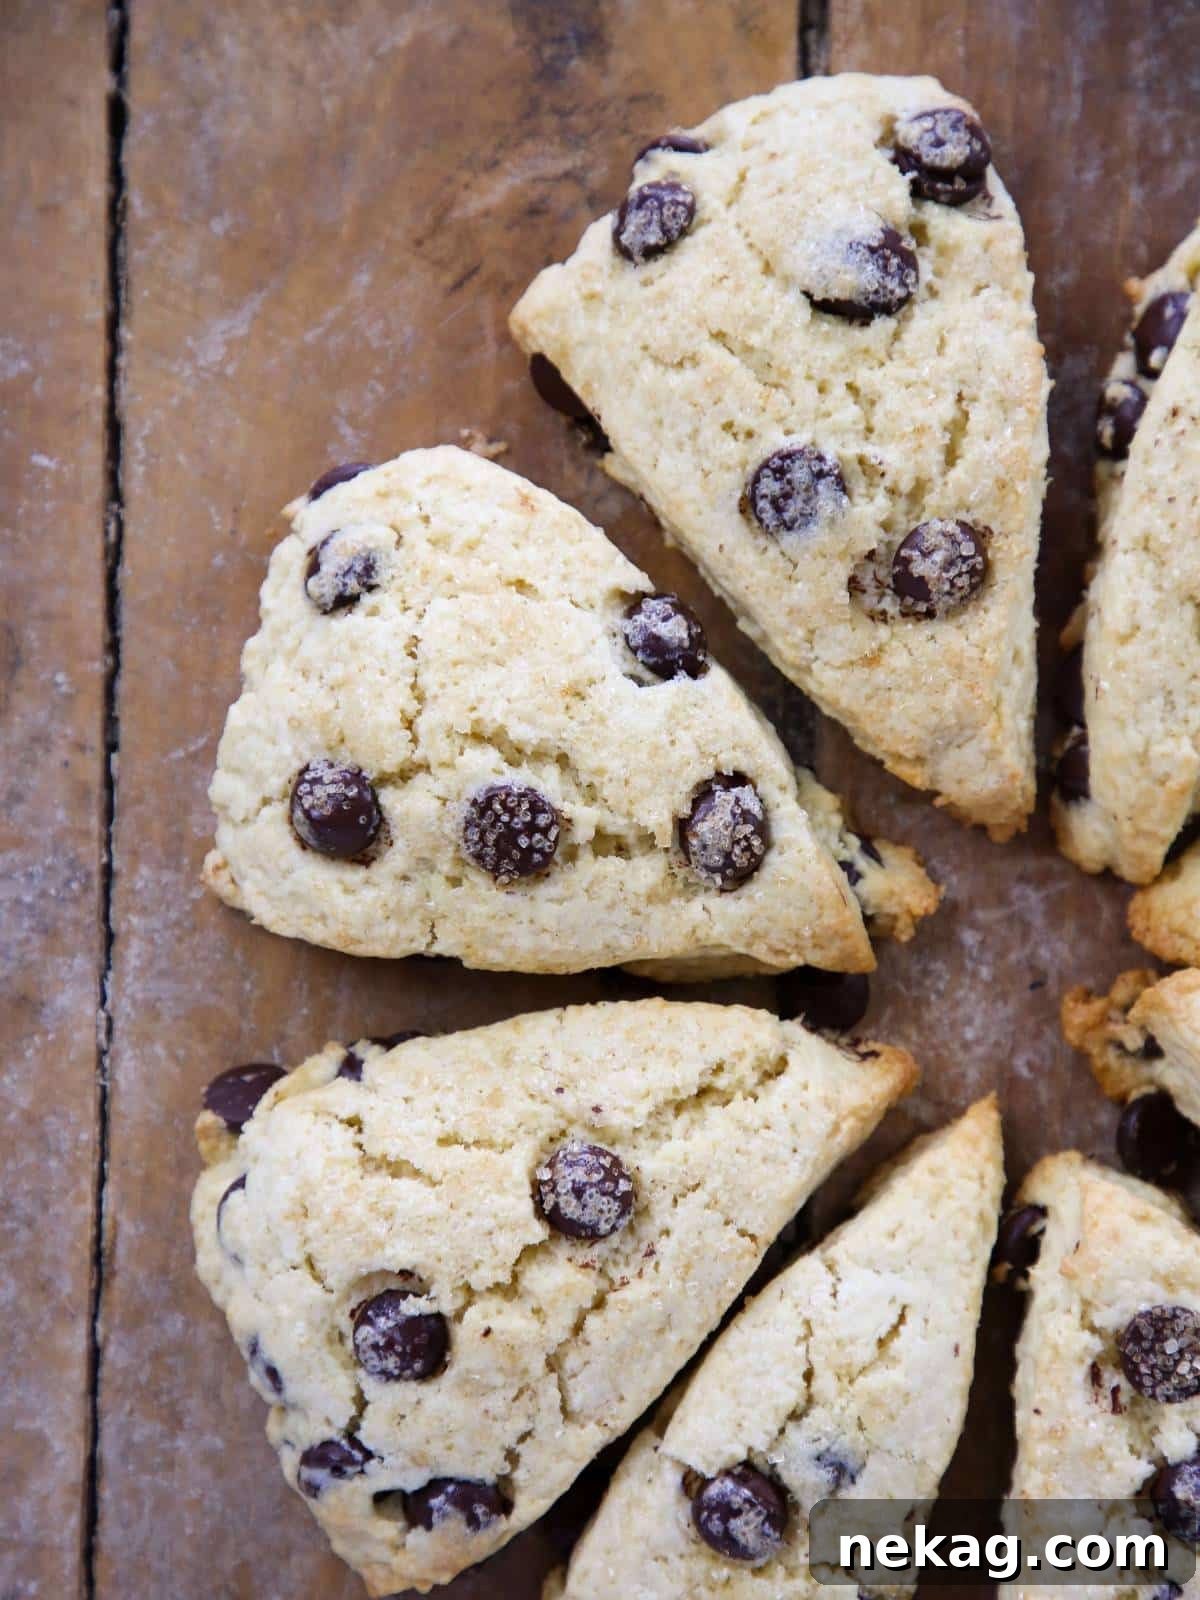
These are truly the best chocolate chip scones you’ll ever bake! My recipe is lovingly inspired by the soft, comforting British scones I cherished in my youth. They boast a tender and moist texture, crumbling just perfectly, without ever being dry or cakey – a promise we rigorously uphold here at Chef Lindsey Farr! Once you master our unique scone technique, a world of delicious possibilities opens up. You’ll be able to whip up a whole assortment of scones perfect for any occasion, from a casual breakfast to an elegant brunch or a traditional afternoon tea. If you’ve enjoyed my carrot cake scones, you’ll find these chocolate chip versions equally, if not more, enchanting. Get ready to be hooked forever!
Table of Contents
- Why You’ll Adore These Chocolate Chip Scones
- The Secret to Unbelievably Tender Chocolate Chip Scones
- Essential Ingredients for Perfect Chocolate Chip Scones
- Creative Variations to Customize Your Scones
- Step-by-Step Guide: How to Make Chocolate Chip Scones
- Expert Baking Tips for Scone Success
- Make-Ahead and Freezing Instructions
- Frequently Asked Questions About Scones
- Chef Lindsey’s Pro Tip
- Chocolate Chip Scones Recipe Card
- Before You Go
Why You’ll Adore These Chocolate Chip Scones:
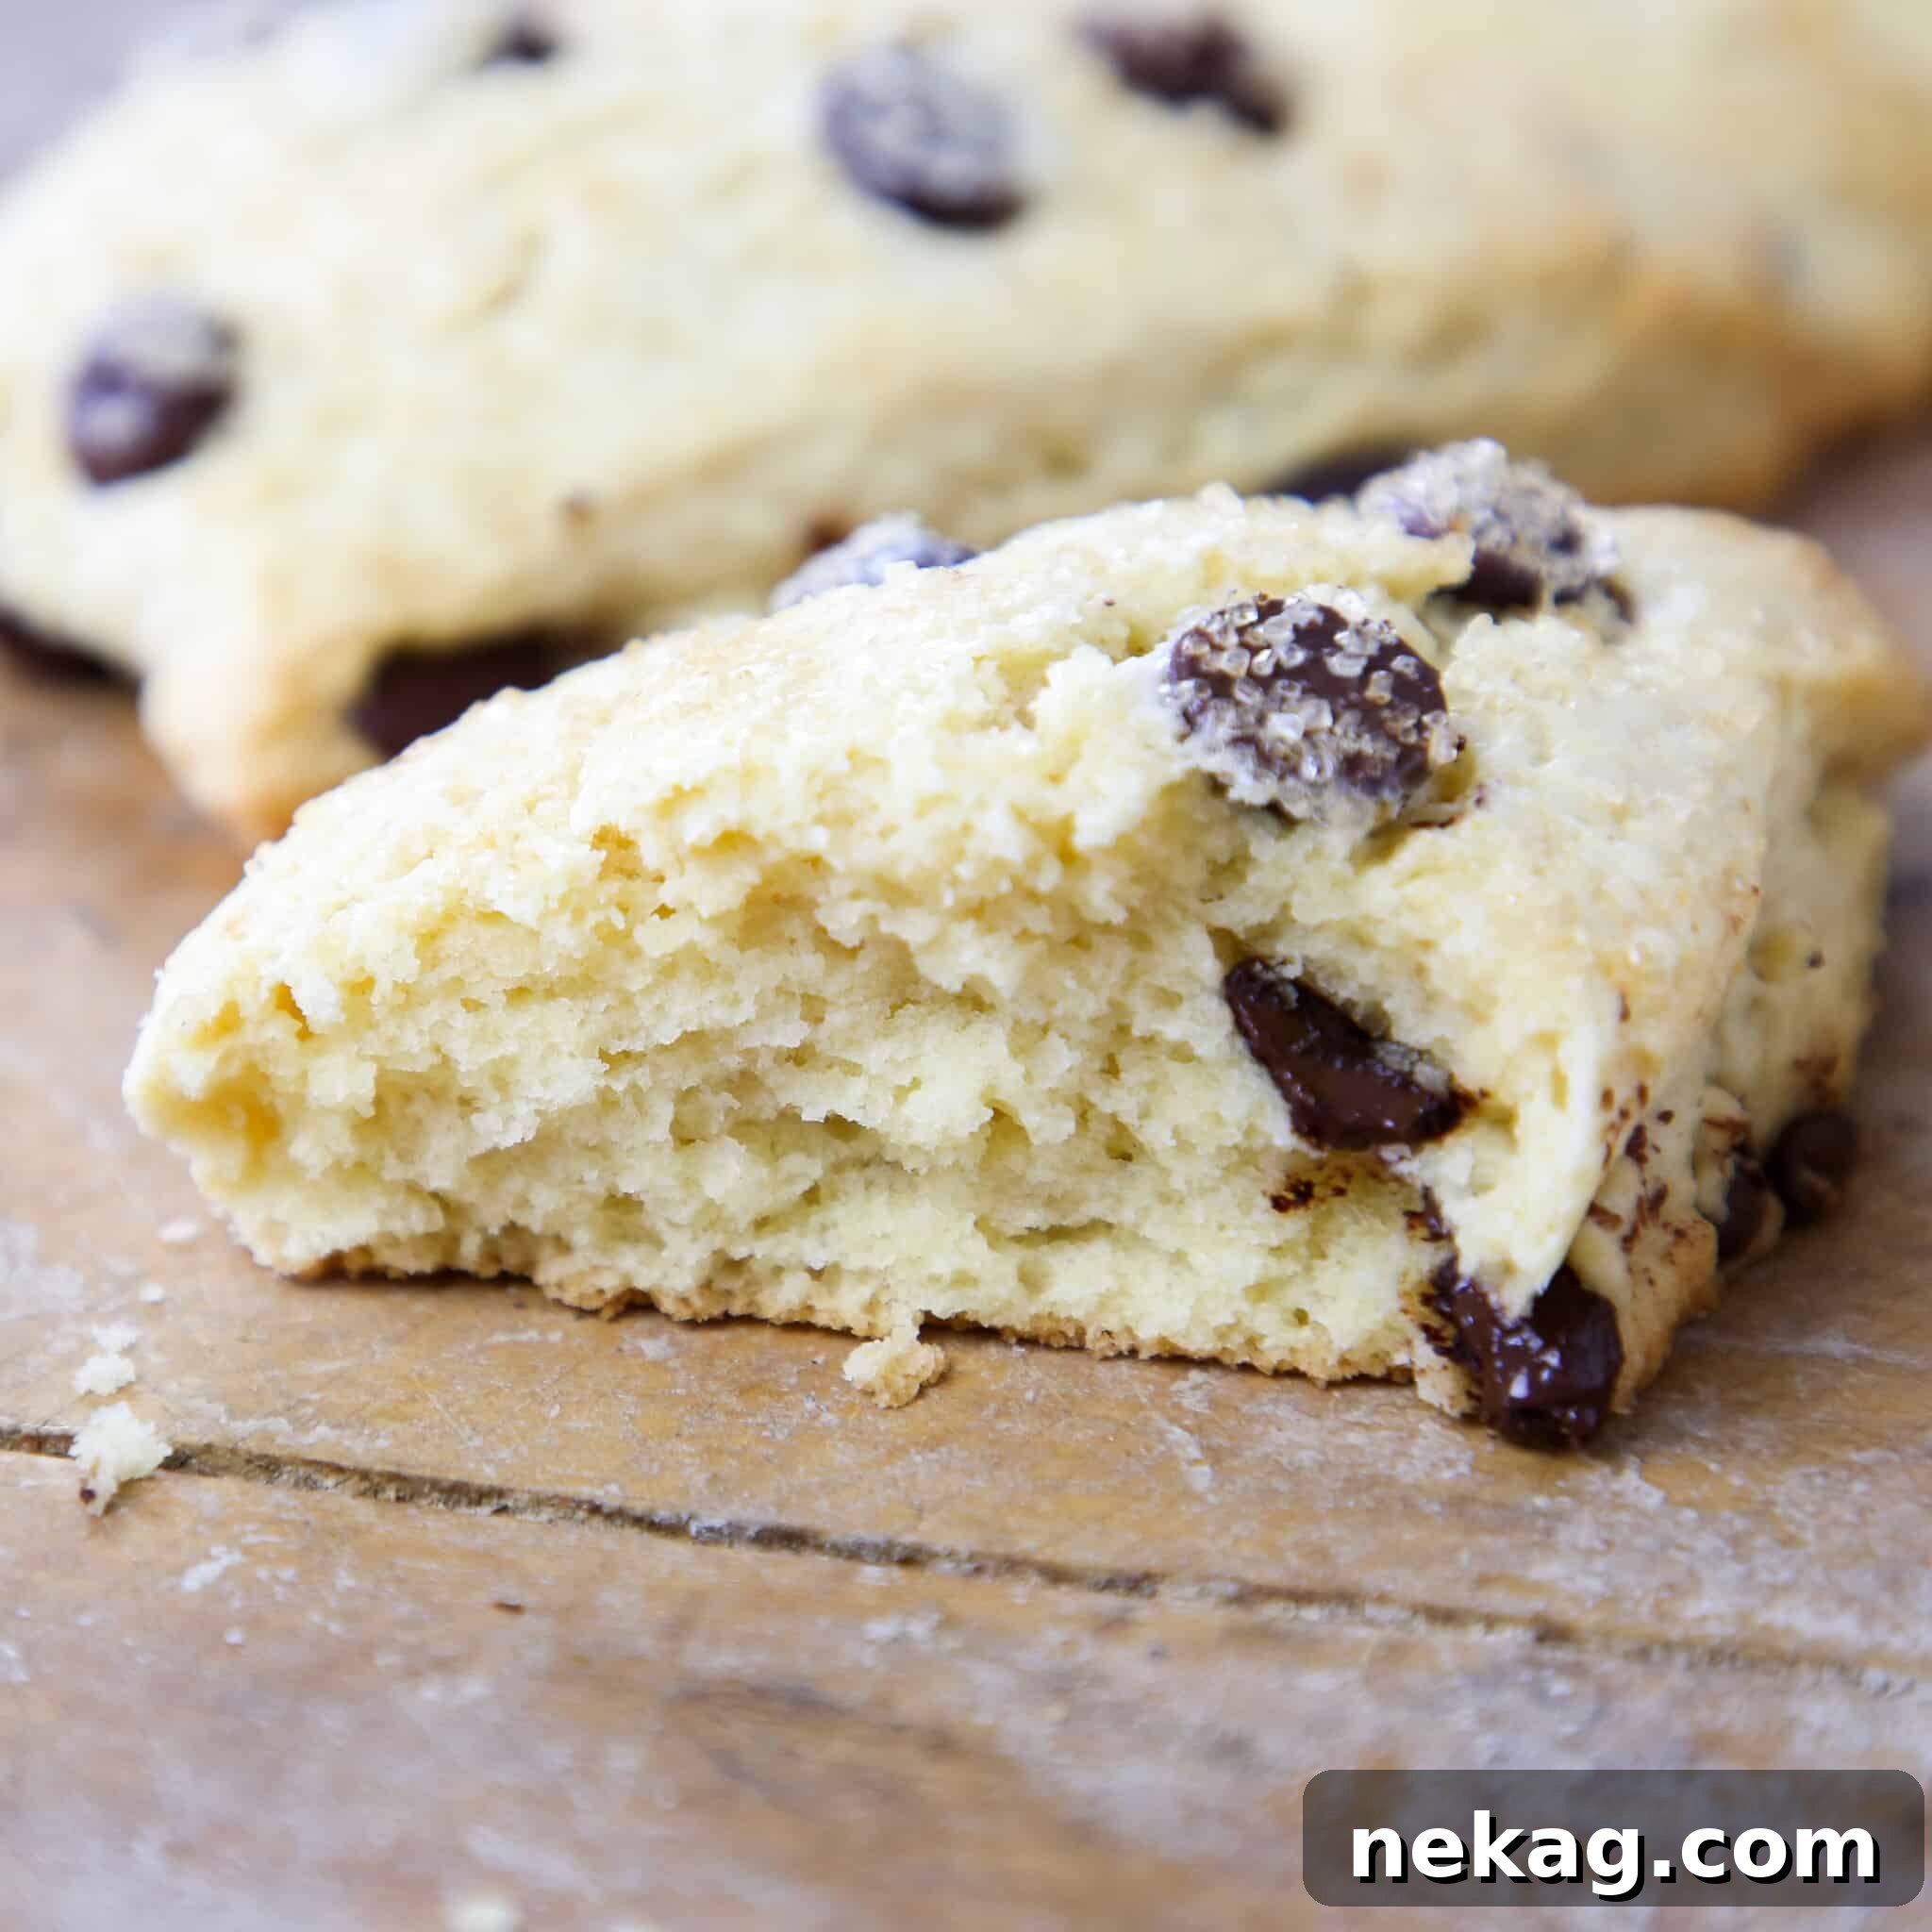
- Soft, Tender, and Buttery Perfection: Imagine biting into a scone that simply melts in your mouth, with a rich buttery flavor and pockets of soothing, melty chocolate. These scones deliver that dream, offering a crumb so tender you’ll wonder how you ever settled for anything less.
- Generously Packed with Chocolate: True to their name, these aren’t just “chocolate-flavored” scones. We’ve ensured every scone is absolutely choc-full of chocolate chips, guaranteeing a delightful burst of sweetness and decadence in every single bite. This recipe is designed to maximize that indulgent chocolate experience!
- Effortless Coffee Shop Quality at Home: Why spend a fortune at a coffee shop when you can create bakery-quality chocolate chip scones right in your own kitchen? Master this recipe, and you’ll be able to enjoy fresh, warm scones anytime. Plus, with our make-ahead options, you can freeze the dough and bake a fresh batch whenever the craving strikes, making a cozy scone break an everyday luxury.
The Secret to Unbelievably Tender Chocolate Chip Scones
Achieving the perfect scone texture – that coveted light, tender crumb that isn’t dry or dense – comes down to a few critical techniques. After years of baking countless batches in professional kitchens, I’ve honed these methods to ensure consistent, exceptional results every time:
- Fully Incorporate Cold Butter into Dry Ingredients: This might contradict some traditional scone recipes that advocate for pea-sized butter chunks. However, my experience shows that completely cutting cold butter into the dry ingredients makes for the most tender and moist scones. This method coats the flour particles with fat, effectively shortening gluten strands and preventing excessive gluten development, which can lead to tough scones. It also means you need less liquid to bring the dough together, further contributing to tenderness.
- Whisk Wet Ingredients Thoroughly Before Adding: This step is crucial for efficient mixing. Whether you use an immersion blender for larger batches or a simple whisk for this recipe, ensuring your cream, egg, and vanilla extract are perfectly smooth and combined before they touch the dry ingredients is key. This prevents you from overmixing the dough while trying to incorporate the liquids, thus avoiding gluten development and maintaining a tender texture.
- Finish the Dough by Hand: While a stand mixer is excellent for the initial mixing, gently finishing the dough by hand offers unparalleled control. It allows you to incorporate any remaining dry spots and fold in the delicate chocolate chips without overworking the dough. Overmixing is the enemy of tender scones, so a gentle hand ensures the perfect, delicate crumb.
Essential Ingredients for Perfect Chocolate Chip Scones
Each ingredient in this recipe plays a vital role in creating the ultimate chocolate chip scone. Understanding their function will help you achieve baking success every time:
- All-Purpose Flour: This versatile flour provides just the right amount of gluten to create a wonderfully flaky texture without making the scones tough. For an even more delicate crumb, you could opt for pastry flour, which has a lower protein content.
- Sugar: Granulated sugar is used not only for its sweet flavor but also for its critical role in baking. It helps retain moisture, contributing to the scone’s moist texture, improves the overall crumb structure, and adds stability to the dough.
- Kosher Salt: Don’t underestimate the power of salt! Kosher salt, being less dense than table salt, is perfect for baking as it allows for better control of seasoning. It significantly heightens the flavor of all the other ingredients, preventing your pastries from tasting bland or flat.
- Baking Powder: Our secret to a stable, beautiful rise! Double-acting baking powder reacts twice: first when it comes into contact with liquid ingredients, and again when exposed to heat in the oven. This dual action ensures a slower, more consistent rise compared to baking soda alone, making these scones freezer-friendly and allowing for make-ahead convenience.
- Unsalted Butter: Always use unsalted butter for baking to control the salt content precisely. Butter is absolutely integral to tender scones because its fat coats the flour’s gluten strands during mixing, preventing them from forming an overly strong network. This shortening effect results in a delicate, crumbly texture rather than a tough, bread-like one. Ensure it’s cold and cubed for best results!
- Vanilla Extract: A touch of pure vanilla extract adds a beautiful, aromatic depth of flavor to the scones. Beyond its own delightful notes, vanilla also acts as a flavor booster, enhancing the richness of the chocolate chips and other ingredients.
- Whole Eggs: Eggs contribute fat, moisture, and additional leavening to the scones. The richness from the yolk helps maintain moisture and adds depth of flavor. As a primary liquid ingredient, eggs help bind the dough together without over-developing the gluten in the flour.
- Heavy Cream: This “miracle ingredient” is essential for a truly moist and tender scone. Heavy cream provides ample liquid and fat, significantly contributing to the scone’s luxurious flavor and delicate texture. Since this recipe doesn’t use brown sugar, heavy cream and eggs are the primary sources of moisture for the dough, making its quality paramount.
- Chocolate Chips: The star of the show! I often use a blend of semi-sweet chocolate chips and bittersweet chocolate chips to create a dynamic flavor contrast and balance the overall sweetness. Sometimes, I’ll even mix in some larger dark chocolate pistoles for an extra melty experience. However, the golden rule is always to use your favorite chocolate chips – whatever brings you the most joy!
Creative Variations to Customize Your Scones
Once you’ve mastered the basic chocolate chip scone, feel free to unleash your creativity! Here are some delightful variations to try:
- Embrace Different Chips: Go beyond chocolate! Replace the chocolate chips with cinnamon chips for a warm, spiced scone, or opt for butterscotch chips for a sweet, caramel-like twist. Don’t forget to tell me in the comments how they turn out!
- Add a Decadent Glaze: A simple glaze can elevate your scones to an even higher level of indulgence. Prepare a quick glaze using milk, salt, sugar, and a hint of vanilla extract, similar to my Classic Donut Glaze – and you’re in for a treat! For fellow chocolate enthusiasts, yes, there’s also a rich Chocolate Fudge Glaze option that pairs perfectly.
- Get Fruity with Your Scones: If you love fruit in your baked goods, scones are incredibly versatile. Explore other beloved CLF recipes like Spiced Apple Scones, vibrant Blueberry Scones, or refreshing Strawberry Lemon Scones. There’s always a reason to be on a scone kick!
Step-by-Step Guide: How to Make Chocolate Chip Scones
Follow these detailed instructions to create consistently perfect chocolate chip scones every single time. Further precise measurements and additional details can be found in the recipe card below.
Make the scone dough:
Step 1: Combine Dry Ingredients. In the bowl of a stand mixer fitted with the paddle attachment, add the all-purpose flour, granulated sugar, kosher salt, and baking powder. Mix these dry ingredients on low speed, or by hand, just enough to ensure they are well distributed and thoroughly combined. This initial step prevents pockets of leavening or salt in your finished scones.
Step 2: Incorporate Cold Butter. Add the cold, cubed unsalted butter to the dry mixture. Mix on low speed, allowing the paddle attachment to cut the butter into the flour. Continue mixing until the butter is no longer visible in distinct pieces and the entire mixture takes on the appearance and texture of wet sand. This thorough incorporation of butter is fundamental to achieving tender scones.
Pro Tip for Tenderness: Completely cutting cold, cubed butter into the dry ingredients helps to coat the flour’s gluten strands with fat. This is a crucial technique that minimizes gluten development, ensuring your scones remain tender and flaky, never tough!
Step 3: Prepare Wet Ingredients. While your mixer works on the butter, combine the heavy cream, whole eggs, and vanilla extract in a separate bowl. Use an immersion blender to mix these ingredients until the mixture is completely smooth and emulsified. If you don’t have an immersion blender, a regular whisk will do the job just as effectively, though it might require a bit more effort. Ensuring this mixture is homogenous before adding it to the dry ingredients is vital.
Mixing Smarter, Not Harder: Preparing your wet ingredients separately and ensuring they are thoroughly blended allows for their quick and even incorporation into the flour mixture. This prevents you from needing to overmix your dough to combine liquids, a common pitfall that can lead to excessive gluten development and tough scones.
Step 4: Combine Wet and Dry Mixtures. With the stand mixer running on its lowest speed, slowly and gradually pour the smoothly blended cream mixture into the flour and butter mixture. Mix only until the wet ingredients are almost fully incorporated into the dry, and no large pockets of dry flour remain. The dough will still appear shaggy and not completely uniform at this stage.
Step 5: Finish Dough by Hand. Gently scrape the dough out of the mixer bowl onto a clean, dry work surface. Now, with clean hands, carefully knead the dough together. Use a gentle folding and pressing motion – think “folding with love” – just until the dough comes together and forms a cohesive mass. Avoid vigorous kneading, as this will develop too much gluten.
Step 6: Fold in Chocolate Chips. Once only a few visible dry spots remain in the dough and it’s mostly cohesive, gently fold in the chocolate chips by hand. Distribute them evenly throughout the dough with light, quick movements to prevent overworking the dough. This ensures every scone gets a generous chocolatey surprise.
Even Chocolate Distribution: For a professional touch and to ensure every scone slice gets its fair share of chocolate, I like to reserve a small portion of my chocolate chips. These can be sprinkled directly onto the cut dough just prior to baking, guaranteeing visual appeal and deliciousness in every bite!
Portion and chill dough:
Step 1: Shape and Cut. Lightly flour your work surface, if necessary, then gently press the scone dough out into a uniform circle or rectangle, aiming for a thickness of approximately ½ inch (about 1.25 cm). Using a sharp bench scraper or a pastry cutter, divide the dough into 12 equal sections. Traditional wedge shapes are classic, but squares or rounds also work beautifully.
Step 2: Chill Thoroughly. Arrange the cut scone pieces on a baking sheet lined with parchment paper. It is absolutely essential to chill the dough completely before baking. This typically takes around 2 hours in the refrigerator. Chilling solidifies the butter, which then creates steam and pockets of air during baking, resulting in a lighter, flakier scone. For ultimate convenience, you can also wrap the cut dough very well in plastic wrap and freeze it. This chocolate chip scones recipe bakes beautifully from frozen!
Bake scones:
Step 1: Preheat Oven. Preheat your oven to 325°F (160°C) with the rack in the middle position. This lower temperature helps ensure the scones bake evenly without browning too quickly.
Step 2: Prepare for Baking. Just before baking, gently brush the tops of the chilled scones with a little extra heavy cream. This helps them achieve a beautiful golden-brown crust. For an added sparkle and a hint of crunchy sweetness, generously sprinkle them with Turbinado sugar.
Step 3: Bake to Perfection. Place the prepared baking sheet with scones into the preheated oven. Bake for approximately 15 minutes. The scones are done when they are golden brown around the edges, visibly puffed up, and the centers offer a slight resistance when gently touched. They should still feel somewhat soft, not firm.
Doneness Test: If your scones feel firm to the touch, they are likely overdone and will be dry. For an accurate test, you can insert a cake tester or a wooden skewer into the center of a scone; it should come out clean when perfectly baked.
Step 4: Cool and Enjoy. Once baked, transfer the scones from the hot baking sheets to a wire rack to cool completely. While they are delicious cooled, there’s nothing quite like a warm scone straight from the oven, especially when the chocolate chips are still wonderfully melty! Sometimes, I even gently re-warm my cooled scones for a few minutes to bring back that irresistible melty chocolate goodness.
Expert Baking Tips for Scone Success
To ensure your chocolate chip scones turn out perfectly every time, keep these expert tips in mind:
- Mastering Mixing Methods: Remember, the secret to tender scones lies in how you handle the butter and wet ingredients. Thoroughly cutting cold, cubed butter into the dry ingredients creates pockets of fat that yield a flaky texture, while quickly incorporating pre-mixed wet ingredients prevents overworking the dough. Both practices are vital for achieving tender chocolate chip scones!
- Maximize Chocolatey Goodness: Don’t just dump all the chocolate chips in at once! I recommend reserving a small portion of your chocolate chips to scatter evenly over the cut dough just before baking. This not only ensures a beautiful presentation but also guarantees that everyone gets some delicious, melty chocolate in every single bite.
- Know When They’re Perfectly Done: Overbaking is the quickest way to dry, hard scones. Your scones are ideally baked when the thickest part offers a slight, gentle resistance when lightly touched. They should feel somewhat soft, not rigid. If they feel firm, they’ve likely been in the oven too long.
The Cake Tester Trick: For absolute certainty, insert a thin cake tester or wooden skewer into the center of a scone. It should come out clean when the scones are perfectly baked, indicating no raw dough.
Make-Ahead and Freezing Instructions
One of the best features of this chocolate chip scone recipe is its fantastic make-ahead potential! You can absolutely bake these scones directly from frozen, allowing you to enjoy fresh, warm scones with minimal effort whenever you desire.
If you prepare the dough as directed above, cut it into portions, and wrap them very well in plastic wrap followed by aluminum foil or an airtight freezer bag, your pre-cut scone dough will last for up to 3 months in the freezer. Once you have your frozen dough ready, follow these simple make-ahead instructions for baking:
Step 1: Adjust Oven Temperature. Preheat your oven to 325°F (160°C) on the convection setting, or 350°F (175°C) if using a regular oven. The slightly higher temperature for a regular oven helps compensate for the cold dough.
Step 2: Prepare Baking Sheet. Place your desired number of frozen scones onto a baking sheet lined with parchment paper. Ensure they are spaced adequately apart to allow for even baking.
Step 3: Brush and Sugar. Brush the tops of the frozen scones with heavy cream and sprinkle them generously with Turbinado sugar. Don’t worry if the cream seems to freeze on contact or the sugar doesn’t adhere perfectly at first; as the scones warm and begin to bake in the oven, the cream will melt, and the sugar will adhere beautifully, creating that signature crust.
Step 4: Bake from Frozen. Bake the scones in the pre-heated oven for approximately 22-25 minutes. The exact bake time will vary depending on your oven and the thickness and size of your scones. Look for golden-brown edges and centers that provide a slight resistance when gently touched. They should feel baked through but still tender.
Bake Time Note: Keep in mind that precise bake time will depend on the thickness and size of your individual scones. Always go by visual cues and the doneness test mentioned earlier.
Step 5: Serve and Enjoy. Once the scones are baked to golden perfection, remove them from the oven. You can serve them immediately while warm, or allow them to cool completely on a wire rack for later enjoyment. A fresh, warm scone from frozen is a delightful treat!
Frequently Asked Questions About Scones
Baked scones, if unglazed, can be stored in an airtight container at room temperature for up to 3 days. For longer storage, refrigerate them for up to 7 days or freeze them for up to 3 months. However, for the freshest taste, I highly recommend freezing the pre-cut dough and baking them as needed. This way, you always have a warm, fresh scone on hand!
Yes, chilling your sliced scone dough for about two hours in the refrigerator (or freezing it) before baking is crucial. This step helps to solidify the butter, which then creates steam during baking, contributing to a light, flaky, and tender texture. Don’t skip this important step!
Absolutely! I’ve personally tested this scone recipe in a professional commercial bakery setting, scaling it up successfully in an 80-quart mixer with great success. You are only limited by the capacity of your particular mixer and oven, so feel free to double or even triple the recipe for larger gatherings or to stock your freezer.
Yes, you can freeze both baked and unbaked scones. My preferred method is to freeze the cut, unbaked dough. This allows me to bake them fresh whenever I want, ensuring a warm, delicious scone is always just minutes away!
Scones typically become dry and hard for a few common reasons. The most frequent culprit is overbaking, so always watch for the signs of doneness. Another reason can be insufficient fat in the dough, which this recipe addresses with plenty of butter and heavy cream. Lastly, if the butter isn’t properly cut into the flour, gluten strands can develop too much, leading to a tough texture. By following the precise techniques in this recipe, you’ll avoid these common mistakes and keep your scones perfectly tender.
Heavy cream is a miracle ingredient in this recipe. Along with the eggs, it provides the essential moisture for the dough and contributes significant fat, which is key to tender, moist scones. You can substitute half-and-half if absolutely necessary, but I strongly advise against using regular milk, as it lacks the fat content needed and will result in serious textural repercussions, yielding much drier and less flavorful scones.
Chef Lindsey’s Pro Tip
While a stand mixer is incredibly helpful for efficiently creating a more tender scone dough, always make sure to finish the dough by hand. This crucial step gives you the precise control needed to incorporate any remaining dry ingredients and, most importantly, fold in those delicate chocolate chips without any risk of over-mixing. Overworking the dough is the number one enemy of light, flaky scones, so a gentle hand at the end ensures perfect results.

Chocolate Chip Scones Recipe
Chef Lindsey
30 minutes
15 minutes
1 hour
1 hour
45 minutes
12
Scones
Comment
Print Recipe
Ingredients
- 2 ½ cups all-purpose flour
- ½ cup sugar
- ¾ teaspoon kosher salt
- 1 teaspoon baking powder
- ½ cup unsalted butter cold, cubed
- 1 teaspoon vanilla extract
- 2 eggs
- ½ cup heavy cream
- 1 cup chocolate chips your favorites or whatever you have on hand!
- ¼ cup turbinado sugar for finishing
- 2 tablespoons heavy cream for finishing
Instructions
Make the scone dough:
-
In the bowl of a stand mixer fitted with the paddle attachment, add the flour, sugar, salt, and baking powder. Mix the dry ingredients with the paddle or by hand just enough to distribute the ingredients.
-
Add cold butter and mix on low to cut it in. Continue to mix until the butter is no longer visible and the mixture resembles wet sand.
-
While the butter is being cut in, combine the cream, egg, and vanilla in another bowl with an immersion blender. If you don’t have an immersion blender you can use a whisk. Blend the cream mixture until it is smooth.
-
With the mixer running on low, slowly pour the cream mixture into the flour mixture and mix until almost incorporated.
-
Dump the dough out onto a dry surface and knead it together (gently, with love!).
-
Once only a few visible dry spots remain in the dough, gently fold in the chocolate chips.
Portion and chill dough:
-
Press the dough out into a circle of about a ½ inch thickness. Using a bench scraper or pastry cutter, cut the dough into 12 sections.
-
Chill the dough completely before baking. This will take around 2 hours. You can also wrap it very well and freeze it. It is entirely possible to bake this chocolate chip scones recipe from frozen!
Bake scones:
-
Preheat the oven to 325°F.
-
Brush scones with heavy cream and sprinkle with Turbinado sugar.
-
Bake scones in the preheated oven for about 15 minutes or until golden brown around the edges, puffed, and the centers provide a little resistance when touched gently. If the scones feel firm, then they are overdone. You can also insert a cake tester when baking your scones and it should come out clean.
-
Cool completely on baking sheets or eat them warm! Sometimes, I’ll even re-warm my scones so the chocolate chips are just a bit more melty!
Video
Notes
Flavor Tips – To ensure every bite is bursting with chocolatey goodness, I always reserve some chocolate chips to distribute more evenly on the cut dough just prior to baking. This makes for a visually appealing scone and a more satisfying flavor experience.
Technique – While the stand mixer is invaluable for the initial dough preparation, always finish integrating the ingredients and folding in the chocolate chips by hand. This gentle, manual touch gives you superior control, preventing overworking the dough which can lead to tough scones.
Helpful Tools – For perfectly emulsified wet ingredients, I like to use an immersion blender to ensure they are thoroughly combined before adding them to the flour mixture. Alternatively, a simple whisk will achieve excellent results with a bit more elbow grease!
Variations – These scones are a fantastic base for customization! For an indulgent twist, consider adding a quick glaze made from milk, salt, sugar, and vanilla extract (like my Classic Donut Glaze). Chocolate lovers can opt for my rich Chocolate Fudge Glaze!
Storage – Store baked, unglazed scones in an air-tight container at room temperature for up to 3 days, in the refrigerator for up to 7 days, or frozen for up to 3 months. For peak freshness, I recommend freezing the pre-cut dough and baking as needed. This allows you to enjoy a freshly baked scone anytime!
Nutrition
Breakfast, Snack
British
318
Like this? Leave a comment below!
Before You Go
I genuinely hope you enjoyed this professional chef-tested recipe for perfect chocolate chip scones. Baking should be a joy, and with these techniques and tips, you’re well on your way to creating bakery-quality treats right in your own kitchen!
Don’t stop here – continue your scone adventure by checking out our other delicious, chef-developed scone recipes. From fruity delights to savory sensations, there’s a scone for every palate and every occasion. Happy baking!