
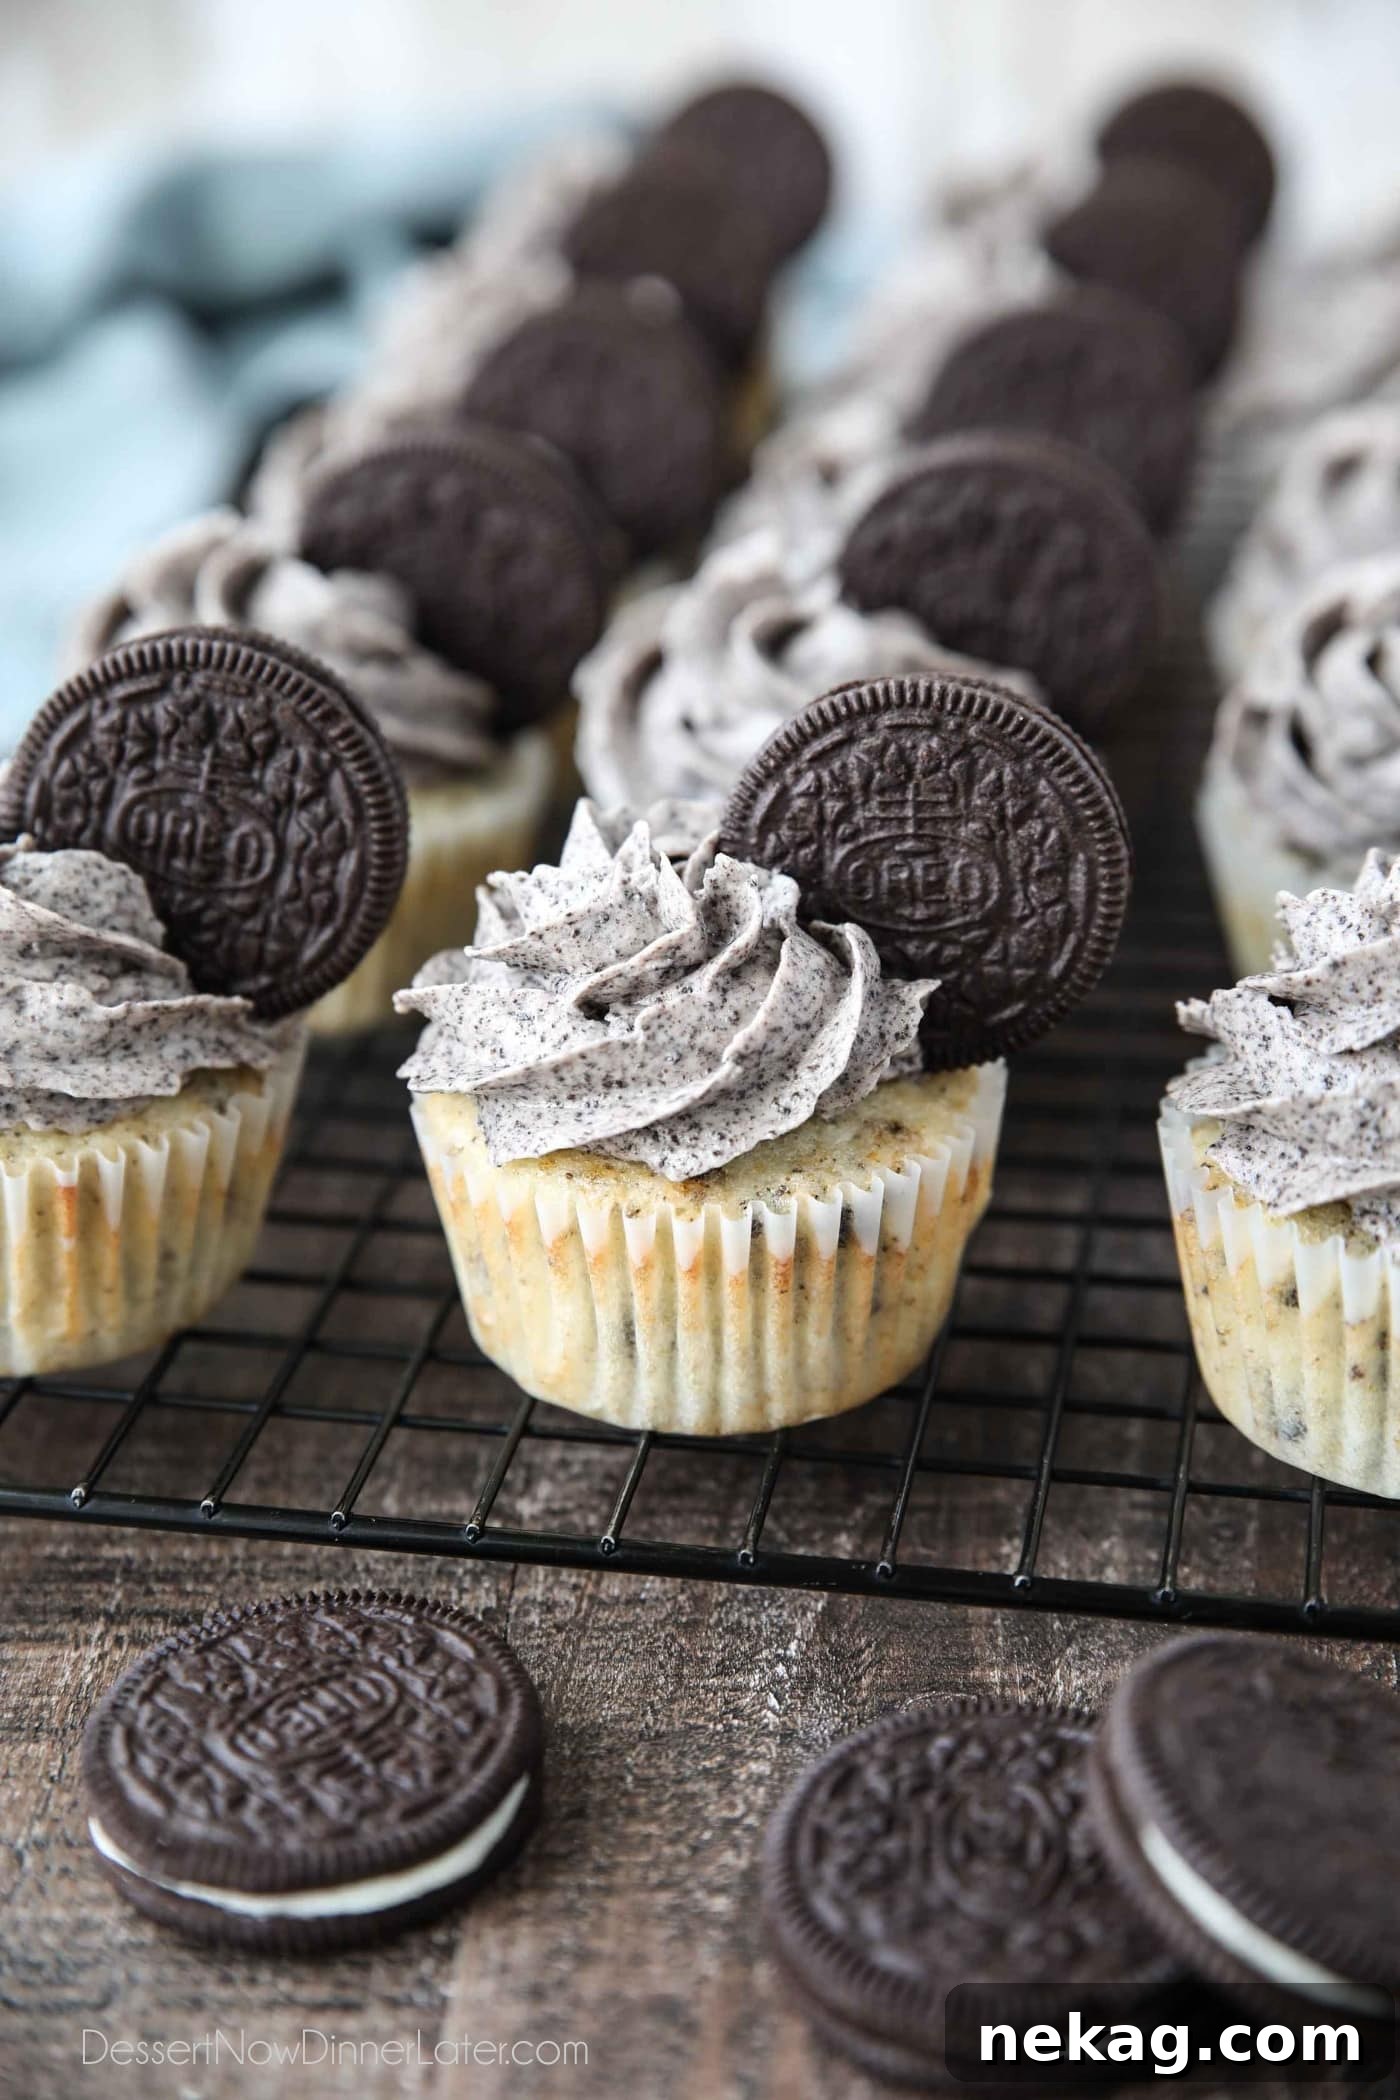
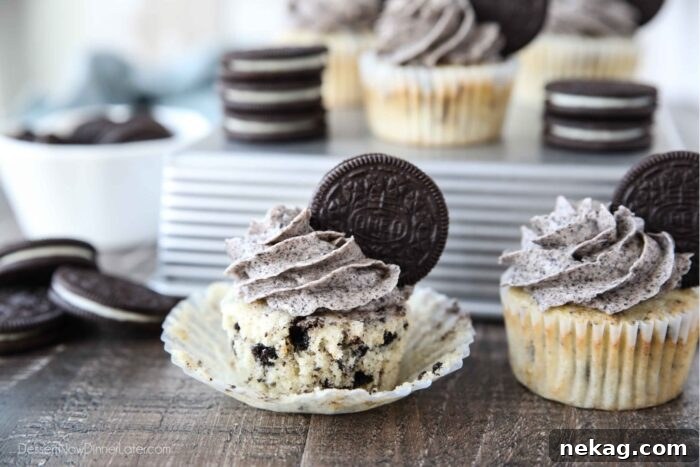
Cookies and Cream Cupcakes are an absolute dream come true for dessert lovers, offering a delightful fusion of creamy vanilla and crunchy chocolate sandwich cookies in every bite. These incredibly easy-to-make homemade vanilla cupcakes are generously studded with chunks of America’s favorite cookie, Oreos, and crowned with a luscious, velvety Oreo buttercream frosting. Perfect for brightening up any celebration, whether it’s a birthday party, a holiday gathering, or just a special treat for friends and family, these cupcakes promise a memorable dessert experience that’s both fun to make and irresistible to eat. Prepare to indulge in a symphony of textures and flavors that will leave everyone asking for more!
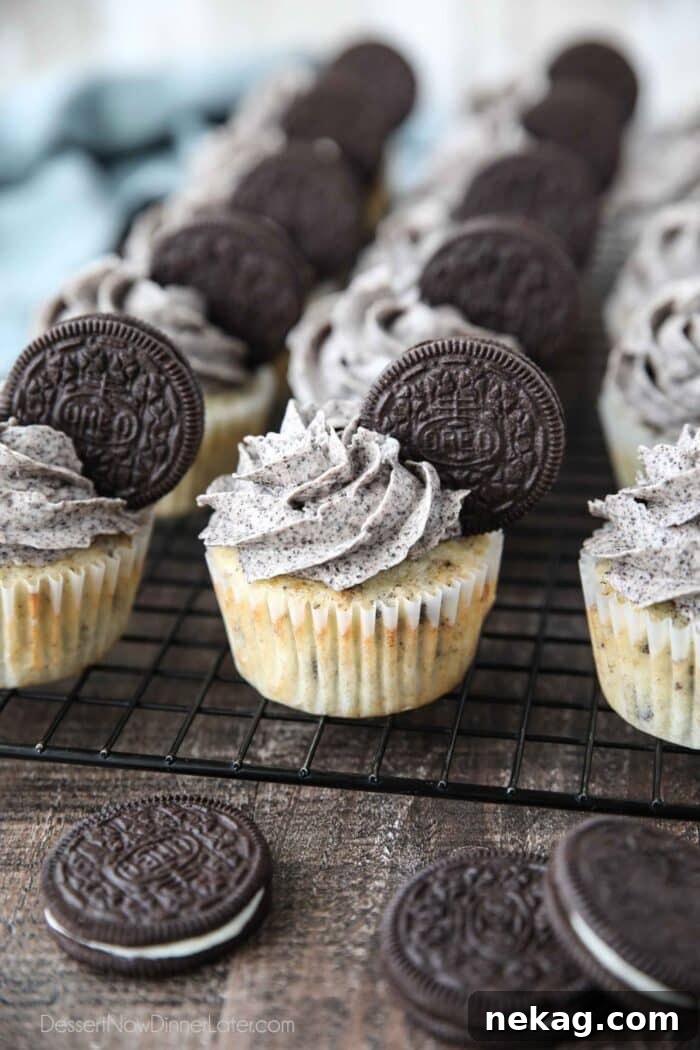
The Ultimate Cookies and Cream Cupcakes: A True Oreo Lover’s Delight
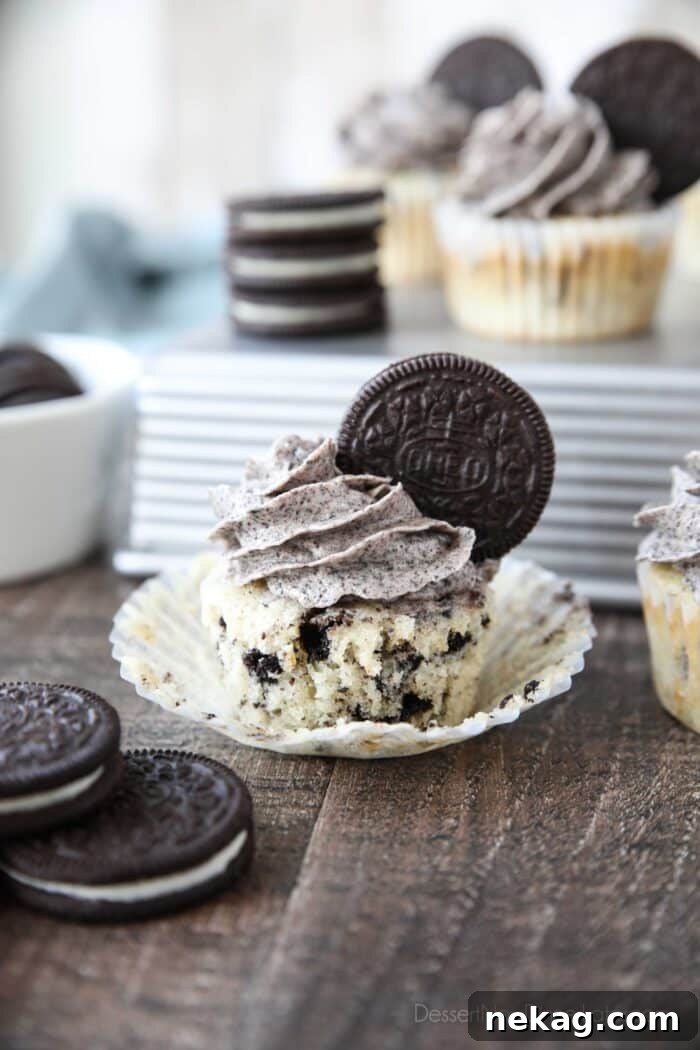
There’s something undeniably magical about the classic combination of cookies and cream. It evokes feelings of childhood nostalgia and pure comfort, making it a timeless flavor that transcends generations. Our Cookies and Cream Cupcakes take this beloved flavor profile to new heights, creating a dessert that’s truly an Oreo enthusiast’s paradise. Imagine biting into a fluffy, moist vanilla cupcake, only to discover pockets of crunchy Oreo pieces embedded within the cake. Then, as if that weren’t enough, your taste buds are greeted by a smooth, rich frosting, generously infused with finely crushed Oreos, and often adorned with an extra cookie for good measure. With cookies both inside the cake and in the decadent frosting, what’s not to adore?
The iconic chocolate sandwich cookie, with its rich dark wafers and sweet vanilla cream filling, holds a special place in the hearts of millions. It’s no wonder it consistently ranks as one of America’s most cherished cookies. My personal affection for Oreos runs so deep that I’ve even experimented with crafting my very own homemade Oreo cookies, striving to recreate that perfect balance of chocolatey goodness and creamy sweetness. Growing up, cookies and cream wasn’t just *a* favorite ice cream flavor; it was *the* favorite, the one I eagerly requested for every birthday celebration. It seemed only natural to extend that passion into a cupcake creation, resulting in these magnificent Cookies and Cream Cupcakes that perfectly capture the essence of that beloved ice cream.
These cupcakes are more than just a dessert; they’re an experience. They bring joy to any table and are consistently a hit at parties, potlucks, and special occasions. The contrast between the tender vanilla cake and the slightly bitter crunch of the chocolate cookies is simply divine, while the sweet, creamy frosting ties it all together into a harmonious symphony of flavors. Get ready to impress your guests and satisfy your sweetest cravings with this delightful recipe.
Mastering Oreo Preparation for Perfect Cupcakes and Frosting
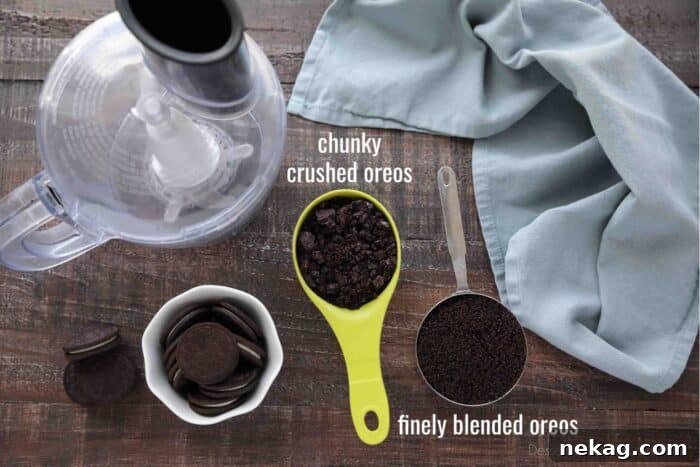
The secret to truly outstanding Oreo Cupcakes lies in the meticulous preparation of the cookies themselves. To achieve the perfect balance of texture and flavor throughout this recipe, you’ll need approximately 18 regular-sized Oreo cookies. These will be divided and processed into two distinct textures: chunky pieces for the cake batter and finely blended crumbs for the smooth, luxurious frosting.
To prepare your Oreos, gather all 18 cookies and place them into a food processor. Begin by pulsing the processor about 10 times. This initial series of pulses will break the cookies down into varying sizes. Carefully remove about 3/4 cup of these chunky crushed Oreos and set them aside. These larger pieces will be folded into the cupcake batter, ensuring that delightful crunch in every bite of the cake. After removing the chunky pieces, continue to process the remaining cookies in the food processor until they transform into very fine, almost powdery crumbs. This should yield approximately 1 cup of finely blended Oreo crumbs, which are essential for creating a smooth, pipeable frosting without any large chunks that could clog your piping tip.
For an extra touch of elegance and an undeniable visual appeal, it’s always a good idea to have a few extra whole or half Oreo cookies on hand to garnish the finished cupcakes. This adds a professional flourish and clearly signals the delicious flavor within. To ensure you have an ample supply of Oreos for the cake, frosting, and those charming garnishes, I highly recommend purchasing a family-size package of regular Oreos. This will give you more than enough to work with, preventing any last-minute dashes to the store. The precise preparation of your Oreos is a small but crucial step that significantly impacts the overall texture and success of these delightful cookies and cream cupcakes.
Crafting the Perfect Vanilla Base for Cookies and Cream Cupcakes
When embarking on the creation of these irresistible Cookies and Cream Cupcakes, a significant decision arose: should the base be a rich chocolate cupcake or a classic vanilla? After much deliberation, the vanilla option emerged as the clear winner. My ultimate goal was to allow the distinctive, comforting flavor of the Oreos to truly shine through, rather than having it compete with or be overshadowed by a strong chocolate cake flavor. Opting for a vanilla base ensures that the subtle nuances of the cookies are celebrated, creating a harmonious and balanced taste sensation that highlights the star ingredient.
For this recipe, we’re utilizing our tried-and-true vanilla cupcake recipe, a beloved choice renowned for its simplicity and exceptional results. This particular recipe is remarkably user-friendly, almost as straightforward as using a boxed mix, yet it yields a homemade quality that is far superior. A key ingredient for its signature moistness is oil, which offers a different texture profile compared to butter-based cakes, resulting in an incredibly tender and moist crumb every time. This ensures that each cupcake is perfectly soft and pillowy, providing an ideal canvas for the crunchy Oreo pieces and creamy frosting. The combination of easy preparation and guaranteed moisture makes this vanilla base the perfect foundation for our cookies and cream masterpiece, ensuring a delightful treat that everyone will love.
The First Step: Sifting the Dry Ingredients for a Lighter Texture
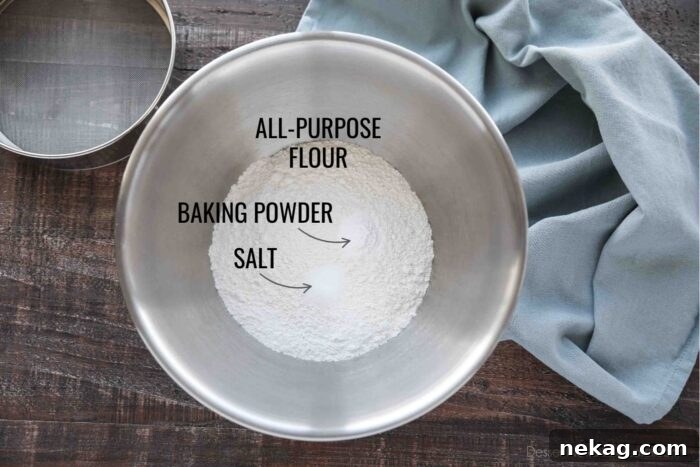
To begin the journey of making these delectable cookies and cream cupcakes, proper preparation of the dry ingredients is essential for achieving a light and airy texture. This initial step helps to eliminate any lumps and evenly distribute the leavening agents, ensuring a uniform rise and delicate crumb in your finished cupcakes.
- First, in a medium-sized bowl, combine the **all-purpose flour**, **baking powder**, and **salt**. It’s highly recommended to sift these ingredients together using a fine mesh sieve. Sifting not only removes potential lumps but also aerates the flour, which contributes to a softer, more tender cupcake. If you don’t have a sieve, don’t worry! A thorough whisking with a balloon whisk will achieve a similar effect, ensuring these dry ingredients are well combined and evenly distributed. Set this mixture aside as you prepare the wet ingredients. This simple step lays the groundwork for perfectly textured cupcakes.
Combining the Wet Ingredients for a Moist Cupcake Batter
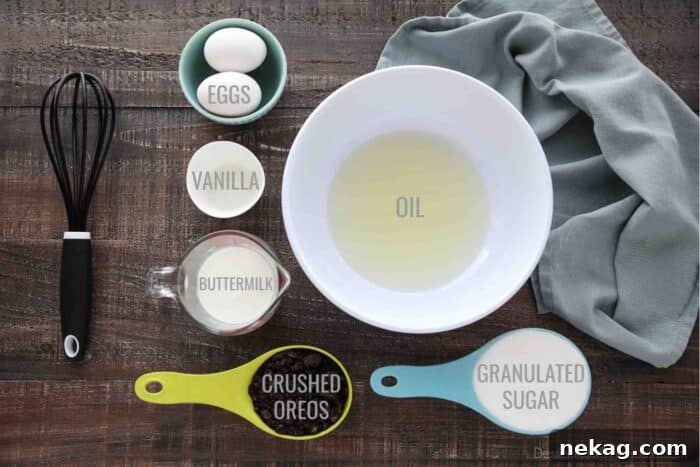
Once your dry ingredients are prepared and set aside, the next crucial step involves carefully combining the wet ingredients. This mixture forms the foundation of the cupcake’s moisture and sweetness, and incorporating each element correctly will contribute to the overall success and delightful texture of your cookies and cream cupcakes.
- In a separate, large mixing bowl, begin by whisking together the **oil** and **granulated sugar**. Continue whisking until the mixture is well combined and takes on a slightly lighter color and thicker consistency. The oil contributes significantly to the cupcakes’ moistness, a characteristic that sets this recipe apart, ensuring a tender crumb that stays fresh longer.
- Next, add the **eggs** one at a time. After each egg, whisk thoroughly until it is fully incorporated into the sugar and oil mixture. This gradual addition helps to create an emulsified base, which is vital for a stable and uniform batter. Using room temperature eggs is highly recommended, as they integrate more smoothly and evenly into the mixture, preventing any curdling and leading to a more consistent batter.
- Finally, stir in the **vanilla extract**. Vanilla is a classic complement to chocolate and cream, enhancing the overall flavor profile of the cupcakes without overpowering the star Oreo ingredient. Mix until the vanilla is just incorporated, and your wet ingredients are ready for the next stage of combining with the dry mixture.
Expertly Combining Dry and Wet Ingredients for a Tender Crumb
The method of combining your dry and wet ingredients is paramount to achieving the perfect, tender crumb in your cookies and cream cupcakes. Overmixing can lead to tough, dry cupcakes, so a gentle hand and careful timing are key during this stage. The alternating addition of flour and buttermilk helps to maintain the batter’s consistency and ensures all ingredients are uniformly incorporated without excessive gluten development.
- To start, add **half of the sifted dry ingredients** to your wet mixture. Using a whisk or spatula, mix until they are just combined. You’ll notice some streaks of flour are still visible, which is perfectly fine at this point. The goal is to avoid overworking the gluten in the flour.
- Next, add **ALL of the buttermilk** to the batter. Mix until it is just combined. Buttermilk, with its acidic properties, reacts with the baking powder to create a lighter, more tender crumb and adds a subtle tang that balances the sweetness of the cupcakes. If you don’t have buttermilk on hand, you can easily make a substitute by adding 1 teaspoon of white vinegar or lemon juice to regular milk and letting it sit for 5 minutes before using.
- Finally, **gently fold in the remaining dry ingredients** along with the **chunky crushed Oreo pieces**. Use a spatula for this step to ensure you are folding rather than mixing vigorously. Continue until all the ingredients are *just* combined and no streaks of dry flour remain. Be vigilant: **do not over mix!** Overmixing will develop the gluten in the flour too much, resulting in dense, chewy cupcakes instead of the light, fluffy ones we’re aiming for. The chunky Oreo pieces will be beautifully distributed throughout the batter, ready to create delightful pockets of cookie goodness in every bite.
Preparing and Baking Your Cookies and Cream Cupcakes to Perfection
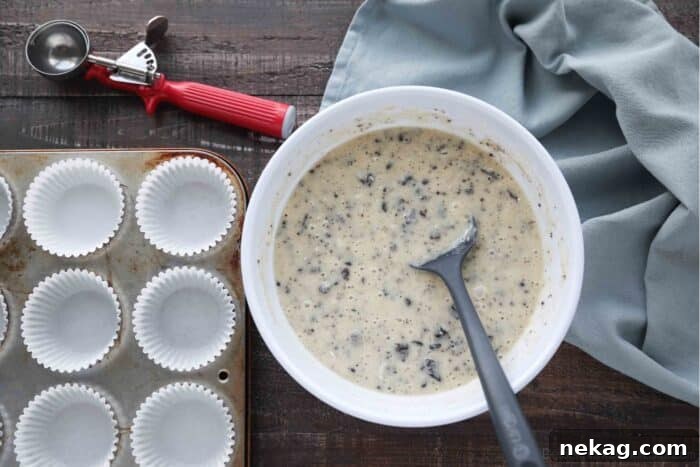
With your meticulously prepared batter ready, the next exciting step is to scoop it into your cupcake pans and bake these delightful treats. Precision in scooping and careful attention during baking are crucial for achieving beautifully uniform and perfectly cooked cupcakes.
- Before you begin, ensure your oven is preheated to 350 degrees Fahrenheit (or 375˚F for high altitude baking, as a slightly higher temperature can help with structure). Line your muffin tin(s) with paper cupcake liners. This not only prevents sticking but also makes for easy cleanup and a professional presentation.
- Using a **#24 scoop** (which holds approximately 1/4 cup) is an excellent way to ensure each cupcake is consistently sized and bakes evenly. **Scoop the batter until each liner is about 2/3 full.** It’s very important **not to over-fill** the cupcake liners, as this can cause the cupcakes to spill over the sides, resulting in uneven tops and a less appealing appearance. This recipe typically yields about 15 cupcakes, so plan accordingly with your muffin tins.
- Once scooped, place the cupcake pans into the preheated oven. **Bake for 15-20 minutes.** Baking times can vary slightly depending on your oven, so keep a close eye on them. To test for doneness, insert a toothpick into the center of a cupcake. If it comes out clean or with just a few moist crumbs attached, your cupcakes are ready! Avoid opening the oven door too frequently, especially in the first 10 minutes, as this can cause the cupcakes to sink.
- Once baked, remove the cupcakes from the oven and let them cool in the muffin tin for a few minutes before transferring them to a wire rack to cool completely. Allowing them to cool fully before frosting is essential; otherwise, your beautiful buttercream will melt and slide right off. This patience will be rewarded with perfectly baked, ready-to-decorate cookies and cream cupcakes.
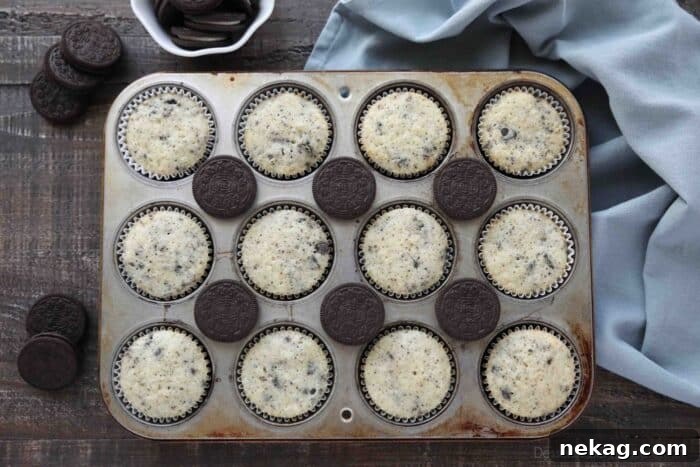
Whipping Up the Dreamy Cookies and Cream Frosting
What would a Cookies and Cream Cupcake be without an equally spectacular Cookies and Cream Frosting? It’s the crowning glory that ties the entire dessert together, providing a creamy, sweet counterpoint to the vanilla cake and crunchy cookie bits. This frosting isn’t just an afterthought; it’s a critical component, elevating these cupcakes from good to absolutely unforgettable. Our recipe for this luscious topping is essentially a classic vanilla buttercream, enhanced with the irresistible flavor and texture of finely blended Oreo cookies.
Creating this frosting is a straightforward process, but a few key steps ensure its smooth, fluffy texture and rich flavor:
- Begin by placing the **butter** in a large mixing bowl. Using an electric mixer (either a stand mixer with a paddle attachment or a hand mixer), cream the butter on medium speed until it becomes light, fluffy, and noticeably pale in color. This process incorporates air into the butter, which is crucial for a light and airy buttercream. Ensure your butter is at room temperature for optimal creaming; it should be soft enough to indent with your finger but not melted.
- Next, gradually add the **powdered sugar**, also known as confectioners’ sugar. Do this about 1/2 cup at a time, mixing well after each addition. Starting slowly prevents a cloud of sugar from erupting in your kitchen. Continue mixing until the sugar is fully incorporated and the frosting is smooth. If the frosting seems too thick, you can add a tablespoon of milk or cream at a time until you reach your desired consistency.
- Finally, add the **vanilla extract** and the **finely blended Oreo cookie crumbs**. Mix until these ingredients are just combined. Be careful not to overmix at this stage, as it can diminish the fluffy texture you worked hard to achieve. The finely blended Oreos are key here; they integrate seamlessly into the buttercream, infusing it with that signature cookies and cream flavor without creating large, unmanageable chunks that could hinder piping.
NOTE on Butter: I personally prefer to use salted butter for my frosting recipes. The slight saltiness beautifully cuts through the sweetness of the powdered sugar and Oreos, creating a more balanced and complex flavor profile. However, if you’re using unsalted butter, you can easily adjust by adding a pinch or two (approximately 1/8 to 1/4 teaspoon) of fine salt to your frosting, depending on your personal preference and salt tolerance. Always taste and adjust as you go for the perfect sweet and salty harmony.
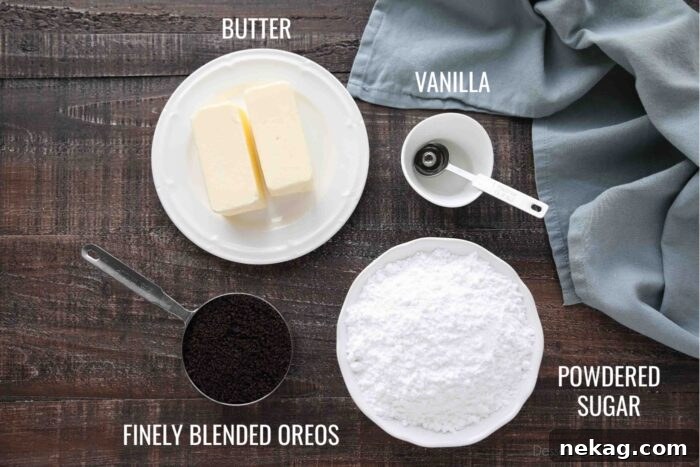
Decorating Your Cookies and Cream Cupcakes with Style
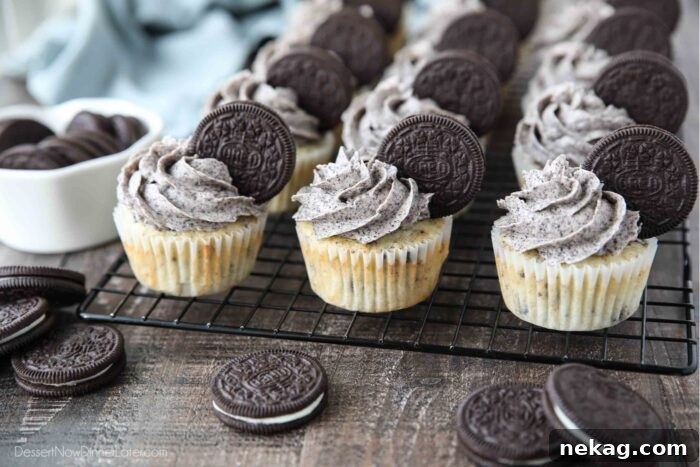
The final touch to these exquisite Cookies and Cream Cupcakes is, of course, the frosting! Piping a beautiful swirl of Oreo buttercream not only makes these treats visually appealing but also adds to the overall indulgent experience. The good news is that if you’ve followed the instruction to blend your Oreos into **really fine crumbs**, you’ll find that the frosting is quite versatile and can be used with almost any large cupcake piping tip you prefer. This ensures a smooth flow and an elegant finish without the worry of blockages.
However, if you’re slightly concerned about the possibility of small cookie chunks getting stuck, or if you simply prefer a more robust flow, I recommend opting for a piping tip that features a larger opening. Excellent choices for this include a **Wilton 1A (a classic round tip)** or a **Wilton 1M (an open star tip)**. The Wilton 1M, with its characteristic star shape, creates a beautiful, ruffled swirl that adds height and texture, as demonstrated in the accompanying pictures. These tips provide ample space for the cookie crumbs to pass through smoothly, ensuring a flawless piping experience.
To pipe, fit your chosen tip into a piping bag, then fill the bag with your prepared Oreo frosting. Twist the top of the bag to seal and apply steady, even pressure as you pipe the frosting onto each cooled cupcake. You can start from the outer edge and work your way in, or create a lovely tall swirl by starting in the center and working outwards and upwards. For a final flourish, consider garnishing each cupcake with a mini Oreo, a half Oreo, or even a sprinkle of extra cookie crumbs. This not only enhances the visual appeal but also reinforces the delicious “cookies and cream” theme. Now, all that’s left is to present your beautifully decorated cupcakes and watch them disappear! Enjoy every decadent bite of these homemade masterpieces.
Explore More Irresistible Oreo Cookie Recipes
If you’re anything like us, the love for Oreos doesn’t stop at cupcakes. This iconic cookie is incredibly versatile and can be incorporated into a wide array of delicious desserts, making every treat a little more special. Once you’ve mastered these Cookies and Cream Cupcakes, you might find yourself craving more ways to enjoy that beloved chocolatey, creamy goodness. From fudgy delights to refreshing frozen treats and creative baked goods, there’s an Oreo recipe out there for every occasion and every craving. Dive into these fantastic ideas to keep your Oreo adventures going strong:
- Oreo Fudge: A simple, rich, and incredibly decadent fudge packed with crunchy Oreo pieces.
- Mint Oreo Cheesecake Bars: A refreshing twist on cheesecake, featuring a vibrant mint flavor and classic Oreo crunch.
- Oreo Pizza: A fun and customizable dessert pizza with an Oreo crust and creamy topping.
- Cookies and Cream Popcorn: The perfect sweet and salty snack for movie nights or casual gatherings.
- Fudge Brownie Oreo Pizza: A rich brownie base topped with frosting and Oreos, a true chocolate lover’s dream.
- Cookies and Cream Cookies: Soft-baked cookies loaded with white chocolate and crushed Oreos.
- Oreo Ice Cream Dessert: A no-bake, layered ice cream cake that’s perfect for warm weather.
- Cookies and Cream Rice Krispies: A chewy, delightful twist on a classic childhood favorite.
- Oreo Cookie Balls: Simple, no-bake truffles that are incredibly addictive and easy to customize for any holiday.
- Oreo Fudge Ice Cream: Homemade ice cream swirled with fudge and plenty of Oreo chunks.
- Cookies and Cream Donuts: Start your day with a sweet treat, featuring an Oreo glaze and crumbs.
Each of these recipes offers a unique way to enjoy the incredible flavor of Oreos, proving just how versatile and beloved these cookies truly are. Happy baking (and eating)!
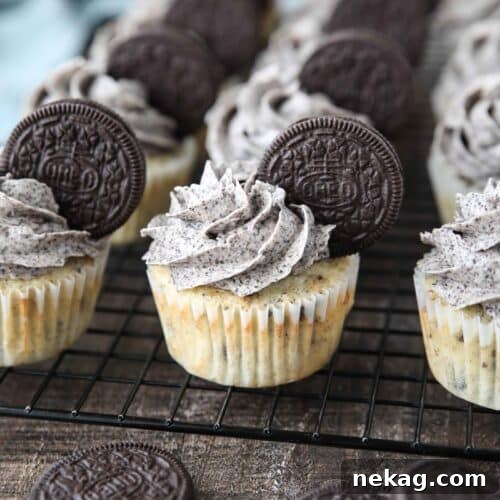
Cookies and Cream Cupcakes
Created by Amber Brady
Prep: 30 mins
Cook: 15 mins
Total: 45 mins
Cookies and Cream Cupcakes — homemade vanilla cupcakes are filled with chunks of Oreos and topped with a cookie buttercream frosting. A perfect dessert for any occasion, these cupcakes are easy to make and guaranteed to be a crowd-pleaser. The tender vanilla base combined with the delightful crunch of Oreo pieces and smooth cookie frosting creates an irresistible treat that embodies pure indulgence.
Pin Recipe
Yields: 15 cupcakes
Ingredients
Cupcakes:
- 1 ¼ cups (150 g) all-purpose flour, (stir, spoon, & level)
- 1 tsp baking powder
- ½ tsp salt
- ½ cup (118 ml) oil, (canola/vegetable)
- 1 cup (200 g) granulated sugar
- 2 large/XL eggs, room temperature
- 2 tsp vanilla extract
- ½ cup (118 ml) buttermilk, (or milk with 1 tsp white vinegar/lemon juice)
- ¾ cup (81 g) chunky crushed Oreos*
Frosting:
- 1 cup (226 g) butter, (2 sticks) room temperature
- 2 cups (240 g) powdered sugar
- 1 tsp vanilla extract
- 1 cup (116 g) finely blended Oreos*
Equipment
- 6-Quart Steel Mixing Bowl
- Cupcake Pans
- 6-inch round sifter
- Wilton 1M Tip
Instructions
- Preheat oven to 350 degrees Fahrenheit (375˚F for high altitude). Line muffin tin(s) with paper cupcake liners.
- *Prepare Oreos. Place 18 Oreo cookies in a food processor or blender and pulse 10 times. Remove 3/4 cup of the larger chunks for the cake batter, then pulse the remaining cookies until fine crumbs, which should equal to 1 cup. Set aside the fine crumbs for the frosting.
FOR THE CUPCAKES:
- Sift together the flour, baking powder and salt into a bowl with a fine mesh sieve. Set aside.
- In a separate large bowl, whisk together the oil and sugar.
- Add the eggs one at a time, whisking well after each one. Then add the vanilla and mix until incorporated.
- Add HALF of the dry ingredients. Mix until just combined.
- Add ALL of the buttermilk. Mix until combined.
- Fold in the remaining dry ingredients and crushed Oreo pieces until just combined. Do not over mix!
- Scoop batter 2/3 full (with a #24 scoop) into prepared cupcake pans (about 15 cupcakes). Do not over-fill.
- Bake at 350˚F (or 375˚F for high altitude) for 15-20 minutes until a toothpick inserted into the center comes out clean or with a few moist crumbs. Allow cupcakes to cool completely.
FOR THE FROSTING:
- Cream the butter in a bowl with an electric mixer until light and fluffy.
- Add the powdered sugar 1/2 cup at a time, mixing well after each addition.
- Add the vanilla and fine Oreo cookie crumbs. Mix until combined.
- Fit a piping bag with a large cupcake tip (like a Wilton 1M or 1A). Add the frosting and pipe onto each cupcake. Insert one Oreo cookie into the frosting of each cupcake for decoration.
Notes
- Buy the family-size package of regular Oreos to have enough for the cake, frosting, and garnish.
- If making buttermilk with milk and white vinegar/lemon juice, allow mixture to rest for 5 minutes before using.
- Store cupcakes in an airtight container up to 3 days. NOTE: The Oreo inserted into the frosting may become soft and fall off the cupcakes when stored, so add the cookie just before serving.
Nutrition Information
Serving: 1 cupcake | Calories: 318 kcal | Carbohydrates: 50 g | Protein: 3 g | Fat: 12 g | Saturated Fat: 2 g | Polyunsaturated Fat: 10 g | Cholesterol: 25 mg | Sodium: 211 mg | Fiber: 1 g | Sugar: 36 g
Disclaimer: Nutritional values were calculated using a third-party tool and are provided as an estimation only.
Sharing this recipe with a link is both encouraged and appreciated. Copying/pasting and/or screenshots of full recipes to any social media is strictly prohibited. Content and photographs are copyright protected.
Did you make this?
Don’t forget to leave a rating below and make sure to follow on Pinterest and Instagram for more!