
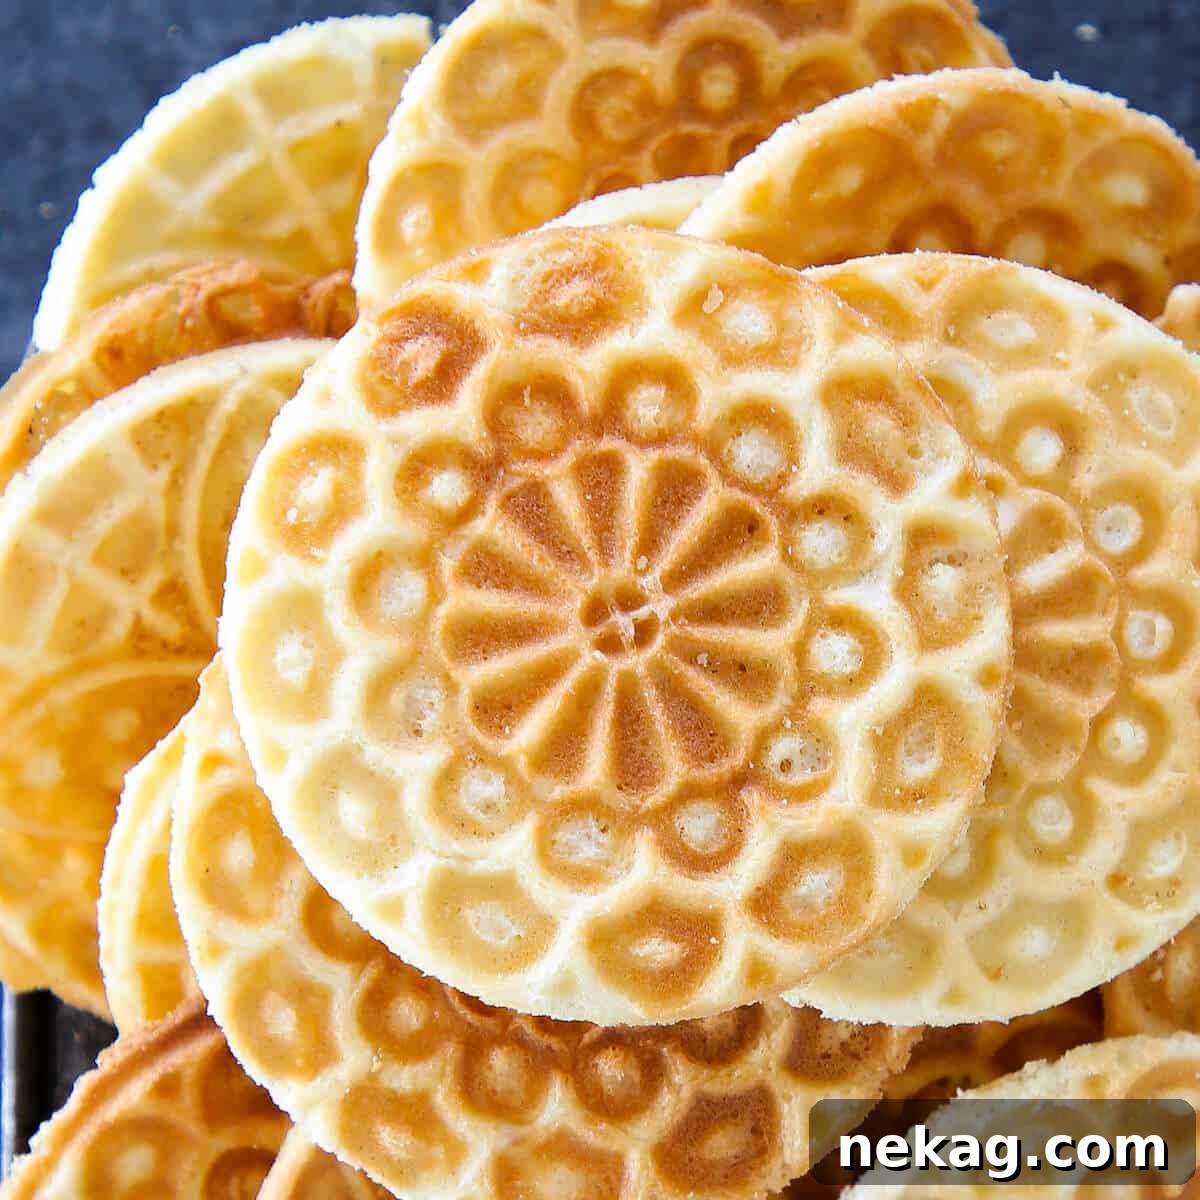
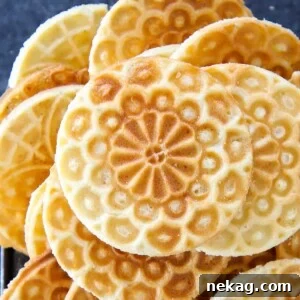
Delicate, irresistible, and steeped in tradition, Italian Pizzelle are a true culinary gem. These thin, crispy cookies, often flavored with aromatic anise and a hint of vanilla, are a staple in Italian households, particularly during the holiday season. Using a specialized pizzelle press, this simple yet authentic recipe will guide you to create perfectly patterned, tender-crisp cookies that evoke the charm of Italy with every bite.
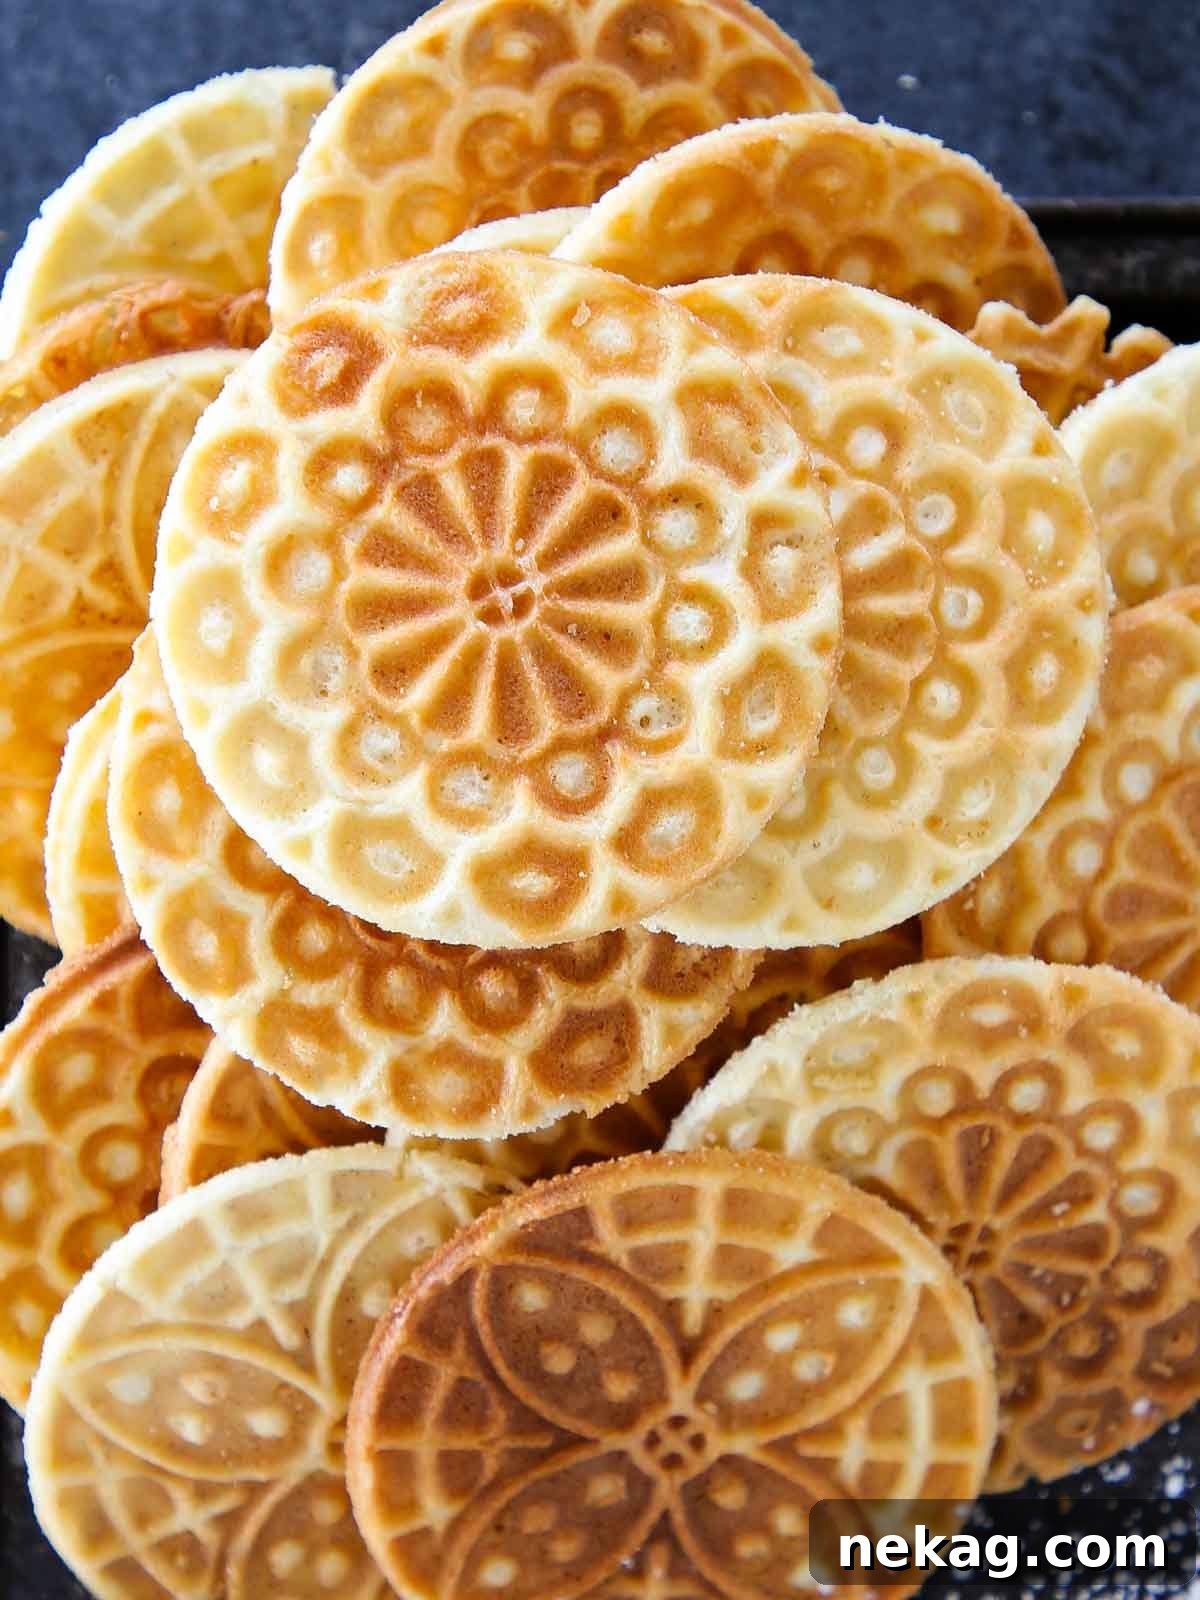
A Quick Look at This Authentic Pizzelle Recipe
Before diving into the detailed steps, here’s a snapshot of what to expect when making these delightful Italian cookies.
- Prep Time: 10 minutes
- Cook Time: 10 minutes
- Rest Time: 1 hour (crucial for texture!)
- Total Time: 1 hour 20 minutes
- Yields: Approximately 50 delicate cookies
- Calories: ~52 kcal per cookie (based on detailed nutrition panel)
- Technique: A straightforward process involving whisking a light, airy batter, a brief resting period, and then cooking to golden perfection in a heated pizzelle press.
- Flavor Profile: A harmonious blend of crisp texture, subtle sweetness, and balanced notes of classic anise and warm vanilla.
- Difficulty: Easy. Once you establish a rhythm with your pizzelle press, the process becomes incredibly simple and enjoyable, even for novice bakers.
Rave Reviews for Our Pizzelle Recipe!
Don’t just take our word for it – here’s what satisfied bakers are saying:
⭐⭐⭐⭐⭐ “The best recipe ever! Light and fluffy! Thank you!” – Sarah Piano
Why You’ll Fall in Love with This Pizzelle Recipe
This isn’t just another cookie recipe; it’s a doorway to creating cherished memories and delightful treats. Here’s why this pizzelle recipe stands out:
- Exquisite, Subtly Sweet Flavor: These Italian cookies are a masterclass in delicate balance. Lightly sweetened, they boast the distinctive, pleasant warmth of anise extract, beautifully complemented by the comforting aroma of vanilla. It’s a flavor combination that’s both traditional and universally appealing.
- Achieve Unrivaled Crispy, Crunchy Texture: The hallmark of a perfect pizzelle is its ethereal crispness. This meticulously developed batter ensures thin, airy cookies that maintain their delightful crunch long after cooling. Say goodbye to soft, chewy pizzelles – this recipe guarantees that coveted crispy texture every single time.
- Unlock Expert Tips and Hard-Won Tricks: As a former pastry chef in renowned Italian restaurants, I’ve honed the art of pizzelle making. I’m sharing all my professional secrets, from achieving perfectly uniform cookies to troubleshooting common issues, ensuring your homemade pizzelles are nothing short of spectacular. You’ll gain insights typically reserved for a professional kitchen!
- Versatile for Every Occasion: While traditionally associated with Christmas and other festive holidays, pizzelles are incredibly versatile. They make an elegant accompaniment to coffee, tea, or espresso, are fantastic with ice cream or affogato, and can even be shaped into edible cups or cones for creative dessert presentations.
Table of Contents
- A Quick Look at This Authentic Pizzelle Recipe
- Why You’ll Fall in Love with This Pizzelle Recipe
- The Story Behind the Perfect Pizzelle
- Essential Ingredients for Perfect Pizzelle
- What is a Pizzelle? An Italian Cookie Tradition
- Creative Variations & Substitutions
- Professional Tips for Mastering Pizzelle
- Do You Need a Pizzelle Press? The Essential Tool
- How to Make Italian Pizzelle: Step-by-Step Guide
- Chef Lindsey’s Special Recipe Tip
- Pizzelle Recipe FAQs
- Recommended Festive & Christmas Cookie Recipes
- The Classic Pizzelle Recipe Card
- Before You Go: Explore More Deliciousness
The Story Behind the Perfect Pizzelle: A Pastry Chef’s Journey
My culinary journey with pizzelle cookies began during the intense recipe testing phase for the opening menu of Davide, a sophisticated Italian restaurant nestled in the vibrant Meatpacking District of NYC. It was there that I first truly encountered and instantly fell in love with these delicate, crunchy Italian cookies. Their intricate patterns and subtle flavor captured my imagination, leading me to later feature them prominently on the dessert menu at Peasant, where I proudly served as the pastry chef.
Through countless batches and dedicated experimentation, I refined this recipe to perfection. Now, I’m thrilled to share with you my professional insights and all the essential tips for consistently making perfect pizzelle every single time. This guide will teach you the nuances of creating beautifully uniform, evenly cooked cookies with that signature crispy texture that sets authentic pizzelles apart.
While pizzelles are traditionally served during Christmas and other festive holidays, their light and elegant nature makes them a delightful treat to enjoy year-round. Imagine them alongside a rich affogato, or as part of a luxurious Italian cookie platter featuring other beloved classics like chewy amaretti cookies, fragrant almond crescent cookies, rich pignoli cookies, and the absolute best double chocolate biscotti. They’re more than just cookies; they’re a celebration of Italian heritage and culinary artistry.
Essential Ingredients for Perfect Pizzelle
Crafting the perfect pizzelle begins with understanding the role each ingredient plays in achieving that distinctive flavor and crispy texture. Quality ingredients and proper measurements are key to success.
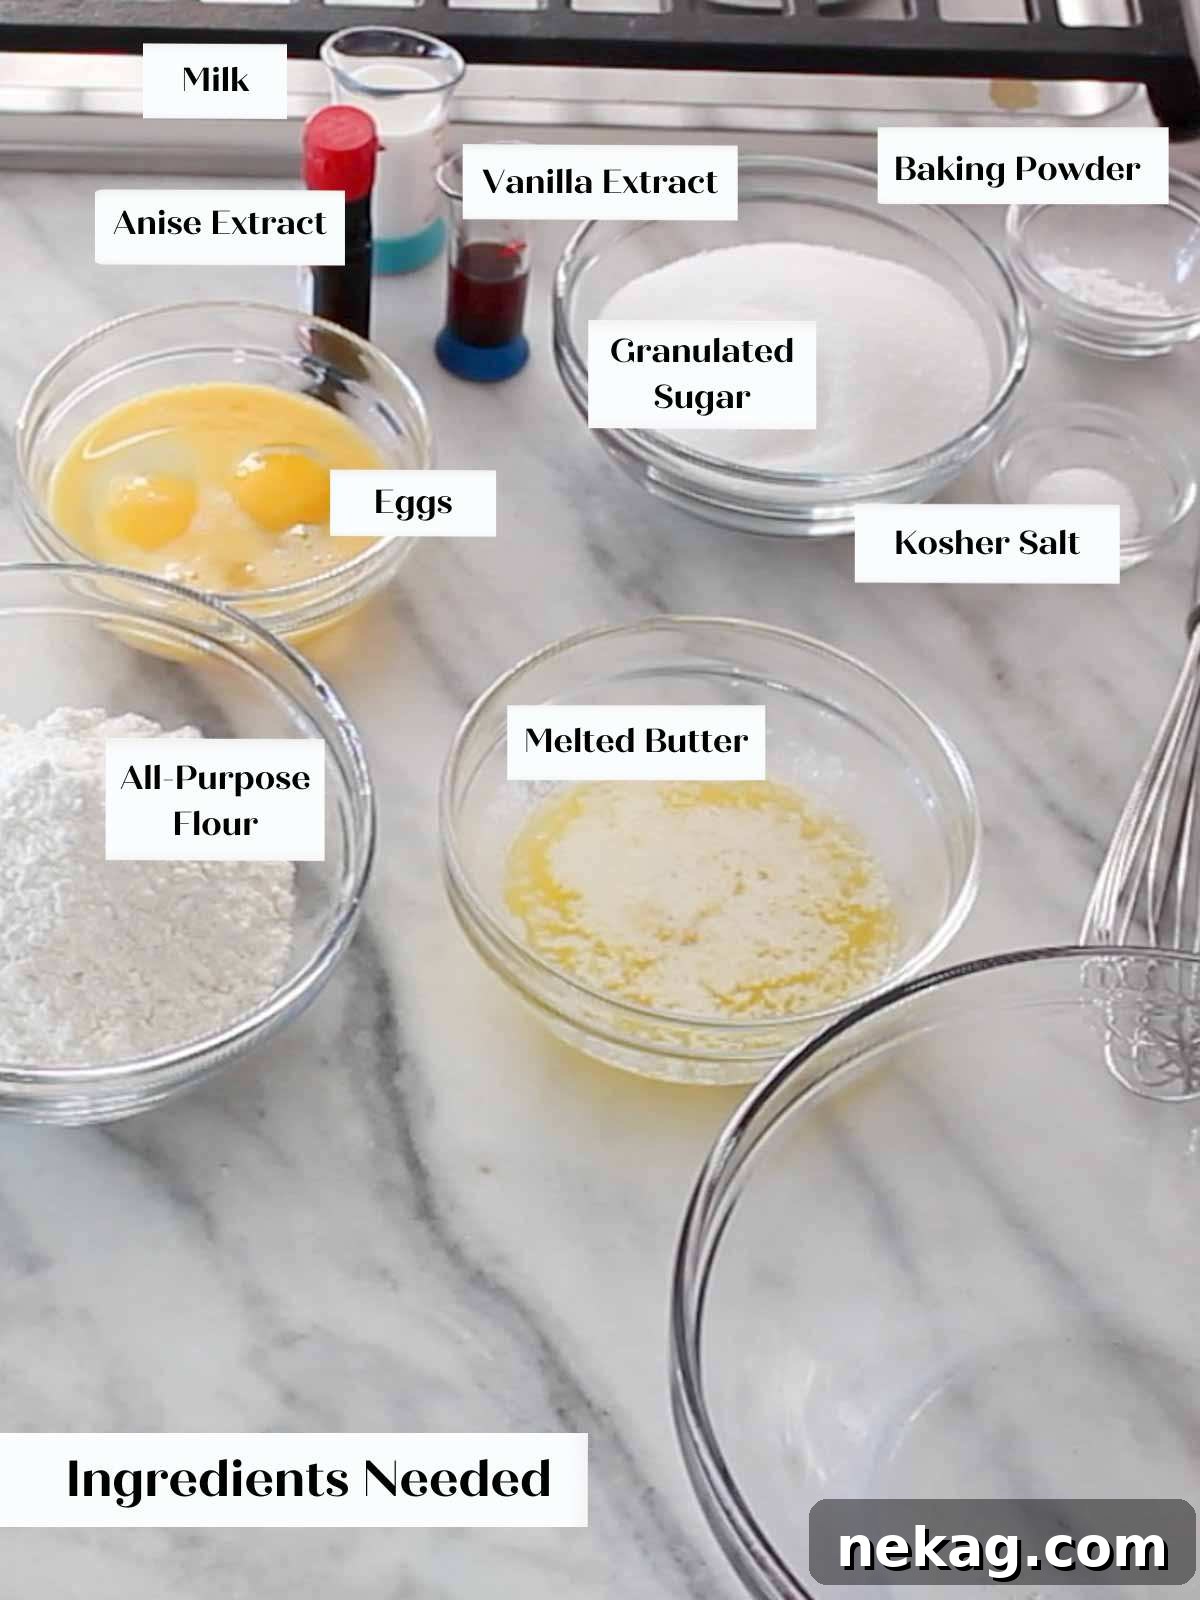
- Whole Eggs: Eggs are more than just a binder here; they contribute vital fat, moisture, and leavening to the batter. Beating them just enough (not over-whipping) introduces air, which influences the final texture, from slightly lighter to denser. They also act as an emulsifier, ensuring a smooth, cohesive batter. Make sure your eggs are at room temperature for best incorporation!
- Granulated Sugar: Providing the perfect level of sweetness, granulated sugar works in ideal proportion with the butter and flour to create a delicate cookie. Beyond flavor, sugar plays a critical structural role by shortening the gluten strands in the flour, which is essential for achieving that signature tender, crunchy pizzelle texture.
- Unsalted Butter (Melted): I always recommend unsalted butter for baking. This allows you complete control over the total salt content in your recipe. Melted butter ensures a smooth, even distribution of fat throughout the batter, contributing to both flavor and crispness.
- Whole Milk: A precise amount of whole milk brings the batter together without making it tough. The liquid content necessitates careful mixing; overmixing will develop the gluten in the flour too much, resulting in a chewier, less delicate cookie. Room temperature milk also helps in creating a smoother batter.
- Vanilla Extract: Vanilla is a foundational flavor in many baked goods, and pizzelle are no exception. A good quality vanilla extract adds a beautiful, warm flavor on its own and also enhances and rounds out the other flavors in the cookie, particularly the anise.
- Anise Extract: This is the star flavor of traditional pizzelle, giving them their characteristic, slightly licorice-like, aromatic taste. For those who love it, anise extract is non-negotiable. The recipe calls for a modest amount, allowing you to adjust to your preference – add a little more for a bolder anise presence, or less for a subtler hint.
- All-Purpose Flour: Proper flour measurement is paramount for pizzelle success. The best method is to fluff the flour in its bag or container, then gently spoon it into your measuring cup. Level it off with the straight edge of a knife. Avoid scooping directly with the measuring cup or tapping/compressing the flour, as this can result in too much flour, leading to dry, crumbly cookies.
- Baking Powder (Double-Acting): Double-acting baking powder provides leavening in two stages: once when mixed with wet ingredients (acid) and again when exposed to heat in the pizzelle press. This ensures a light, airy texture and contributes to the cookie’s crispness.
- Kosher Salt: Often underestimated, salt is a flavor enhancer, not just a seasoning. Kosher salt is preferred because its larger crystals make it less salty by volume compared to finer table salt, giving you better control. It brightens the overall flavor profile and prevents the cookies from tasting bland or flat, balancing the sweetness and rich notes.
What is a Pizzelle? An Italian Cookie Tradition Explained
Pizzelle are more than just cookies; they are an iconic symbol of Italian baking, particularly beloved during holidays like Christmas, Easter, and weddings. The name “pizzelle” itself is rooted in Italian, derived from “pizze,” meaning round and flat, combined with the diminutive suffix “elle,” indicating “small.” So, technically, a single cookie is a “pizzella,” but as anyone who has tasted them knows, it’s impossible to stop at just one!
These thin, crispy, and often intricately patterned Italian cookies are traditionally made with flour, eggs, sugar, butter or oil, and a distinct flavoring, most commonly anise or vanilla. What truly sets them apart is the specialized cooking tool: the pizzelle press. This unique iron, resembling a shallow, decorative waffle maker, imprints beautiful, often snowflake-like designs onto each cookie, making them as visually appealing as they are delicious.
While commonly associated with the Abruzzo region of Italy, where they are often considered the world’s oldest cookie, other regions also boast their own versions and origin stories. Legends even suggest that two neighboring towns in Abruzzo claim to have invented pizzelle to celebrate the expulsion of snakes from their villages – a charming testament to their ancient roots and cultural significance.
The magic of pizzelle lies in their delicate texture, which is a result of the thin batter and the quick, high-heat cooking process in the press. This method creates a cookie that is shatteringly crisp, yet melts in your mouth, leaving behind a subtle, aromatic aftertaste. They are a testament to the simplicity and elegance of traditional Italian confectionery.
Creative Variations & Substitutions for Your Pizzelle
While traditional pizzelle are beloved, these cookies are incredibly adaptable. Feel free to get creative with flavors and presentations to suit your taste or occasion:
- For the Anise-Averse: I understand that anise isn’t for everyone. If you’re not a fan of its licorice-like flavor, simply omit it! You can replace it entirely with a full 2 ¼ teaspoons of high-quality vanilla extract for a pure vanilla pizzelle. Alternatively, a touch of almond extract works beautifully, adding a delightful nutty note. Almond-flavored cookies hold a special place in my heart, reminiscent of festive treats like these Christmas crinkle cookies, delightful cherry cookies, and elegant raspberry ribbon cookies. You could also infuse the batter with bright citrus zest from lemon or orange for a refreshing twist.
- Shape Your Pizzelles into Edible Works of Art: The versatility of pizzelles extends beyond their flat form. While they are still warm and pliable (work quickly!), you can easily shape them. Roll them into elegant cones, press them into small cups or bowls, or form them into delicate tubes. These molded pizzelles make excellent mini ice cream cones, waffle bowls for fruit or custard, or even unique serving vessels for a savory palate cleanser, perhaps filled with a vibrant citrus or herb sorbet.
- Explore Savory Pizzelle Options: Don’t limit pizzelles to just dessert! They can be surprisingly delicious in savory applications. Infuse the batter with finely chopped fresh herbs like rosemary, basil, or thyme for an aromatic cracker. For a subtle kick, crack in some fresh black or pink peppercorns. Savory pizzelles pair wonderfully with cheese boards, dips, or as an unexpected side to a hearty meal like this simple Italian sausage soup, offering a fun deviation from traditional potato dinner rolls.
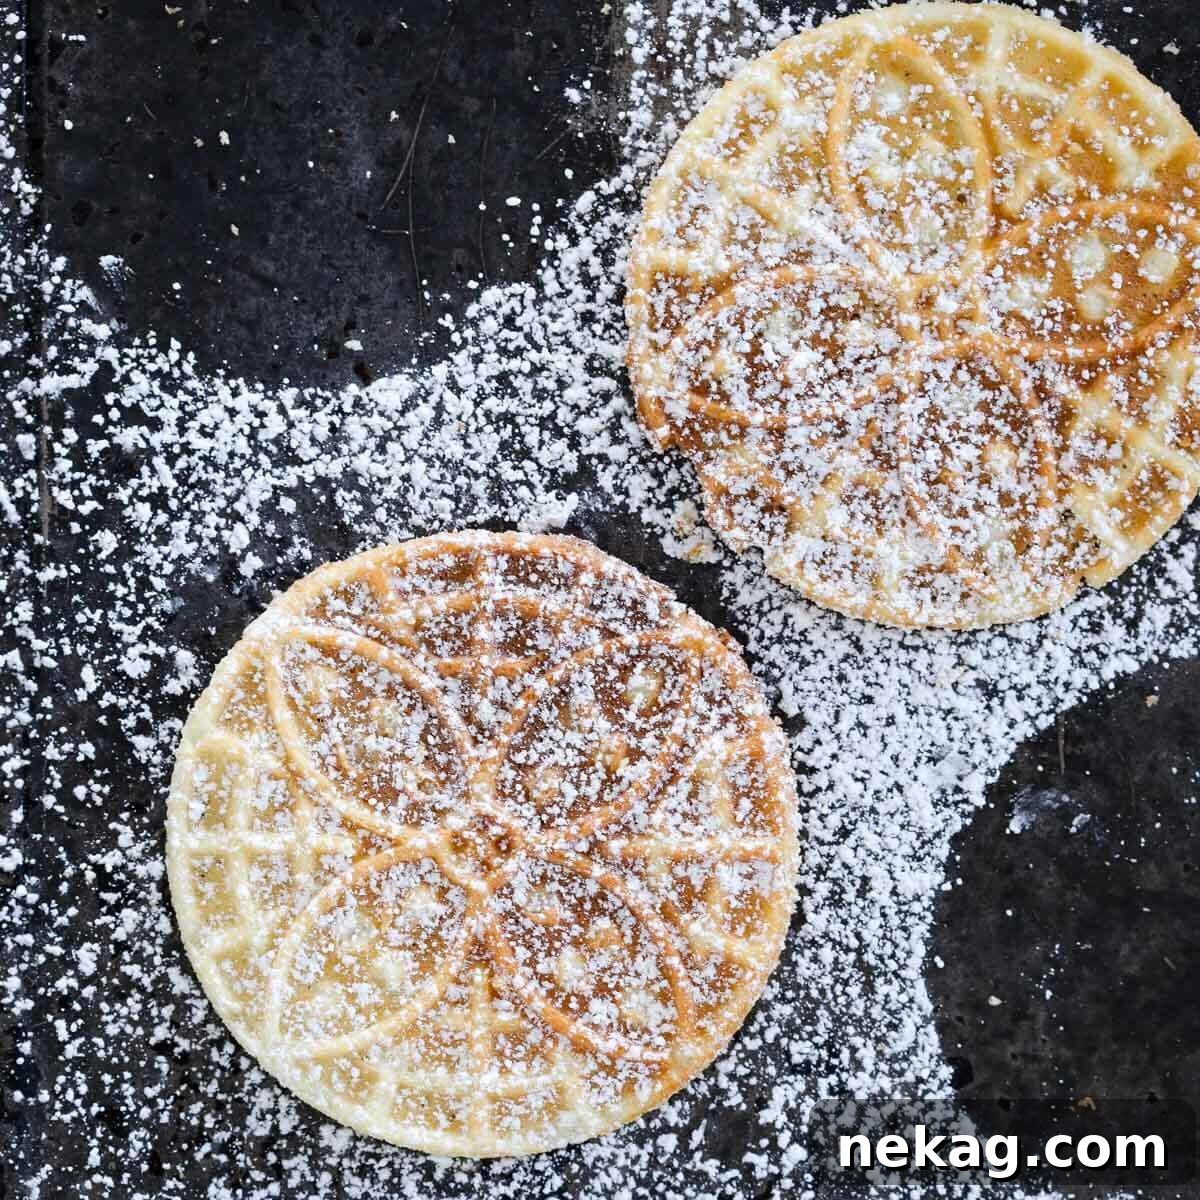
Professional Tips for Mastering Pizzelle: Secrets from a Pastry Chef
Achieving bakery-quality pizzelles is simple with a few insider tricks. These professional tips will help you produce perfectly crispy, beautifully shaped Italian cookies every time:
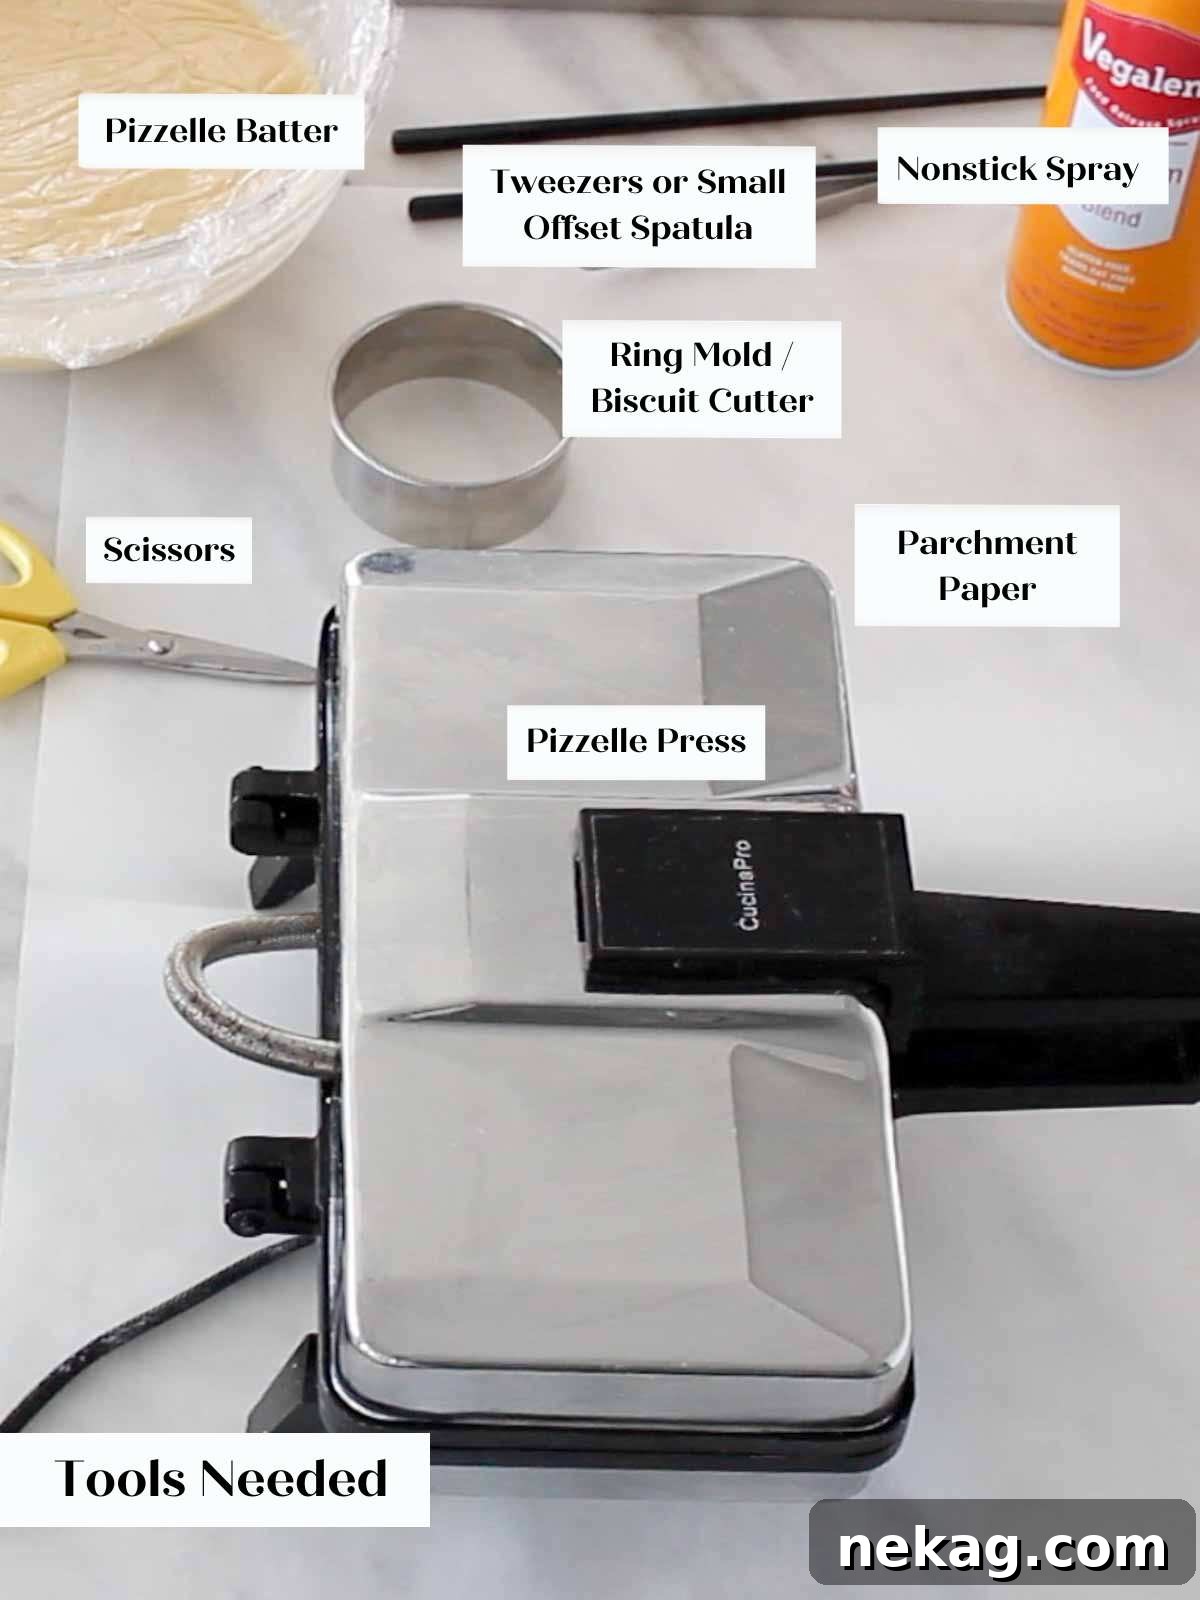
- The “Preheat, Spray, Cook, Repeat” Mantra: This is the golden rule for non-stick pizzelle success. Always ensure your pizzelle iron is *piping hot* before you begin. A hot iron guarantees immediate crisping and prevents sticking. Lightly spray both surfaces with a nonstick cooking spray for the first batch, and then repeat this light spray every few rounds. Don’t underestimate this step – a well-maintained, properly heated, and lubricated iron is your best friend.
- Trim While They’re Hot (Carefully!): Pizzelles become brittle very quickly as they cool. For perfectly round or neatly trimmed edges, you must work swiftly while the cookies are still hot and flexible. Using kitchen scissors to trim the edges, or a round biscuit cutter to stamp out perfect circles, is ideal. Wearing heat-resistant gloves can protect your hands while handling the warm cookies. Alternatively, embracing their rustic, unfinished edges is perfectly fine and adds to their homemade charm.
- Protect Your Countertops with Parchment Paper: Overfilling the pizzelle press is an inevitable part of the learning process, especially in the beginning. Batter will inevitably overflow the sides. To save yourself a sticky cleanup, place a large sheet of parchment paper directly underneath your pizzelle press. It will catch any drips and make tidying up a breeze.
- Cool Pizzelles in a Single Layer for Maximum Crunch: This tip is critical for achieving and maintaining that signature crispness. Never stack warm pizzelles, as the residual heat and trapped moisture will cause them to soften and lose their desired crunch. Instead, line a large baking sheet with parchment paper and arrange the freshly cooked pizzelles in a single layer to cool completely. Once fully cooled and crisp, they can then be carefully stacked for storage. I often use one side of the baking sheet for cooling and the other for stacking the cooled cookies.
- Practice Makes Perfect: Don’t be discouraged if your first few pizzelles aren’t perfect. It takes a little practice to gauge the exact amount of batter and the optimal cooking time for your specific press. View the initial batches as a learning curve, and enjoy the “tester” cookies!
Do You Need a Pizzelle Press? The Essential Tool for Authentic Pizzelle
The short answer is: yes, absolutely. To make true, authentic pizzelles properly, a dedicated pizzelle press is an indispensable tool. There’s simply no substitute that can replicate the unique characteristics of these Italian cookies.
A pizzelle press is specifically designed to create thin, crispy cookies with intricate, decorative patterns. It functions much like a shallow waffle iron, but with crucial differences. The plates of a pizzelle press are flatter and feature much more delicate, embossed designs, which are essential for the cookie’s aesthetic appeal.
The precise ratio of batter to heat, combined with the pressing action of the iron, is what creates that perfect, delicate, and uniformly crispy texture. When you close the iron, it not only cooks the batter but also spreads it thinly and pushes out any excess, ensuring a very fine, almost wafer-like consistency. Attempting to make pizzelles in a standard waffle iron, a griddle, or any other pan will not yield the same results. Waffle irons are designed for thicker, softer, chewier waffles, and they lack the delicate patterns and extreme thinness required for pizzelles.
Investing in a pizzelle press is a worthwhile decision for any baking enthusiast interested in recreating this classic Italian treat. It’s the key to achieving the distinctive look and irresistible crunch that defines an authentic pizzelle.
How to Make Italian Pizzelle: A Detailed Step-by-Step Guide
Creating these delicate Italian cookies is a rewarding process. Follow these detailed steps to ensure perfectly crispy and flavorful pizzelles. Further precise details and measurements can be found in the comprehensive recipe card below.
Part 1: Preparing the Pizzelle Batter
Step 1: Combine Dry Ingredients. In a small bowl, thoroughly whisk together the all-purpose flour, baking powder, and kosher salt. Whisking ensures that the leavening agent and salt are evenly distributed throughout the flour, which is crucial for uniform texture and flavor in your cookies. Set this dry mixture aside.
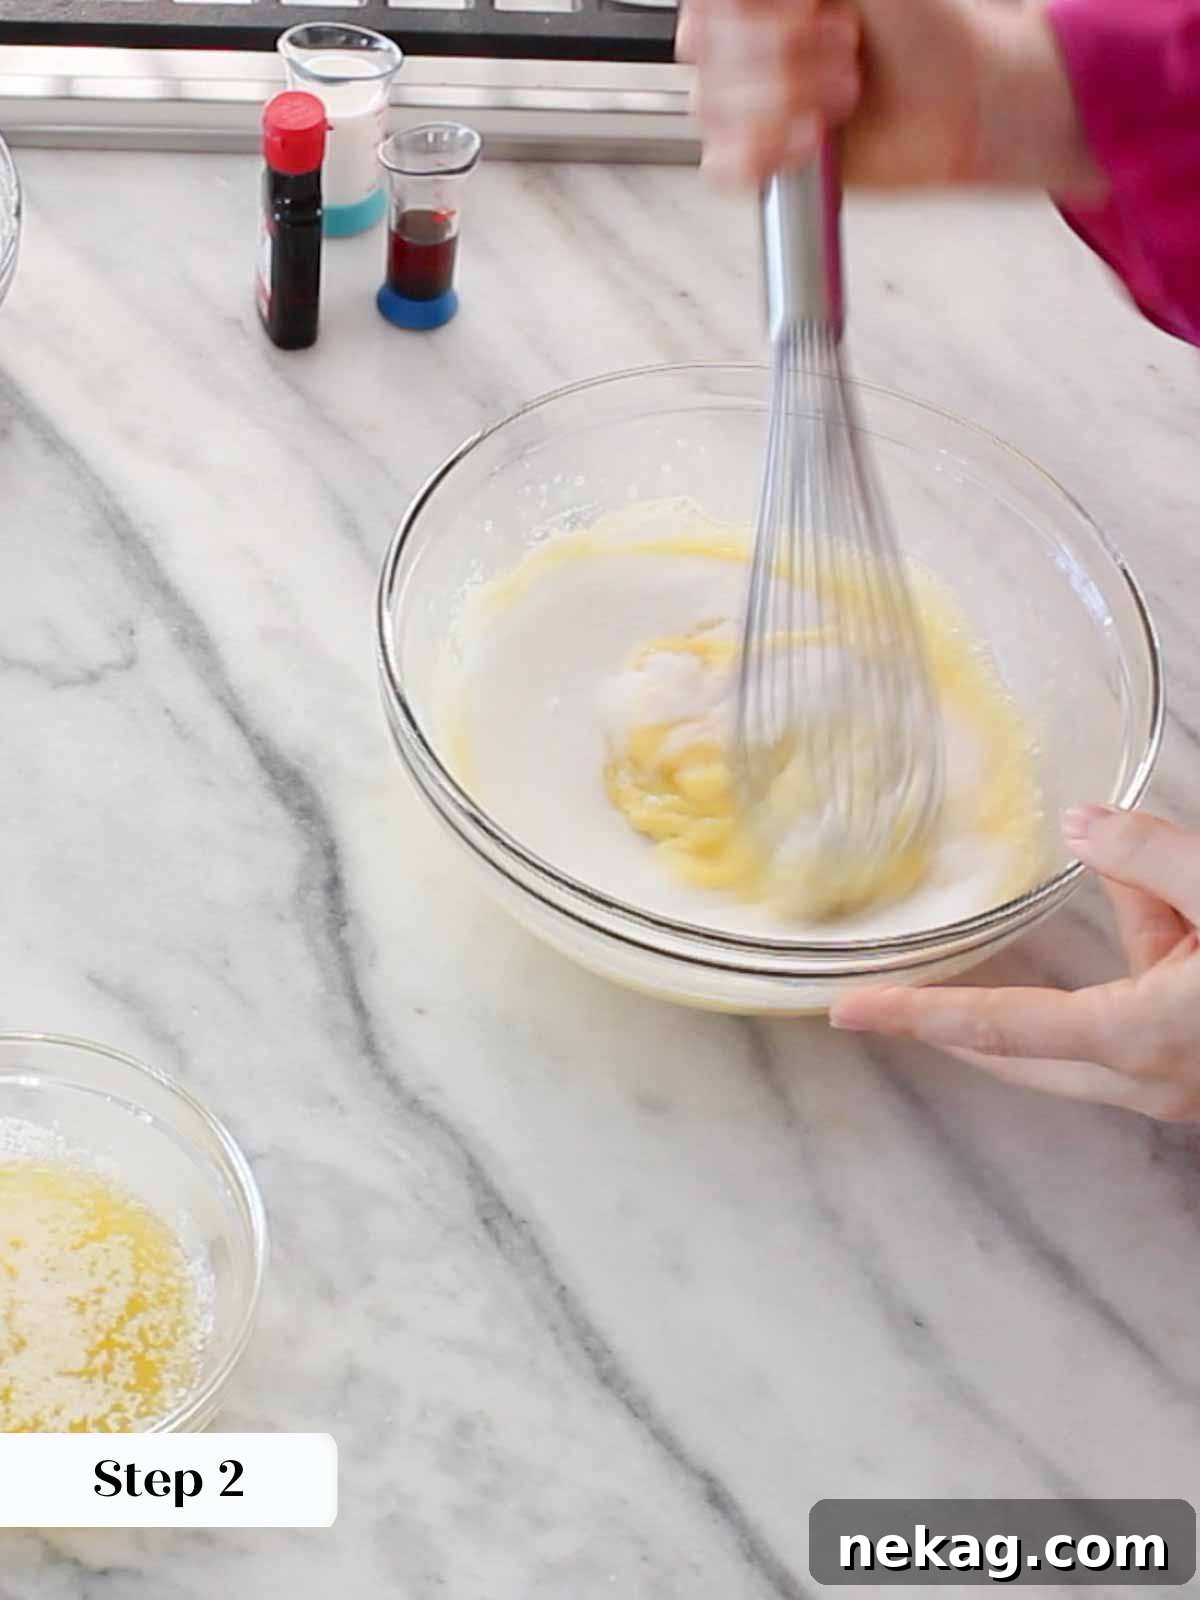
Step 2: Mix Wet Ingredients. In a separate, larger bowl, begin by whisking the whole eggs until they are smooth and light in color. Gradually whisk in the granulated sugar until well combined, then incorporate the melted butter, whole milk, and both vanilla and anise extracts. Once the wet ingredients are thoroughly mixed, gently fold in the reserved flour mixture until just combined. Be careful not to overmix; over-developing the gluten will lead to tougher cookies.
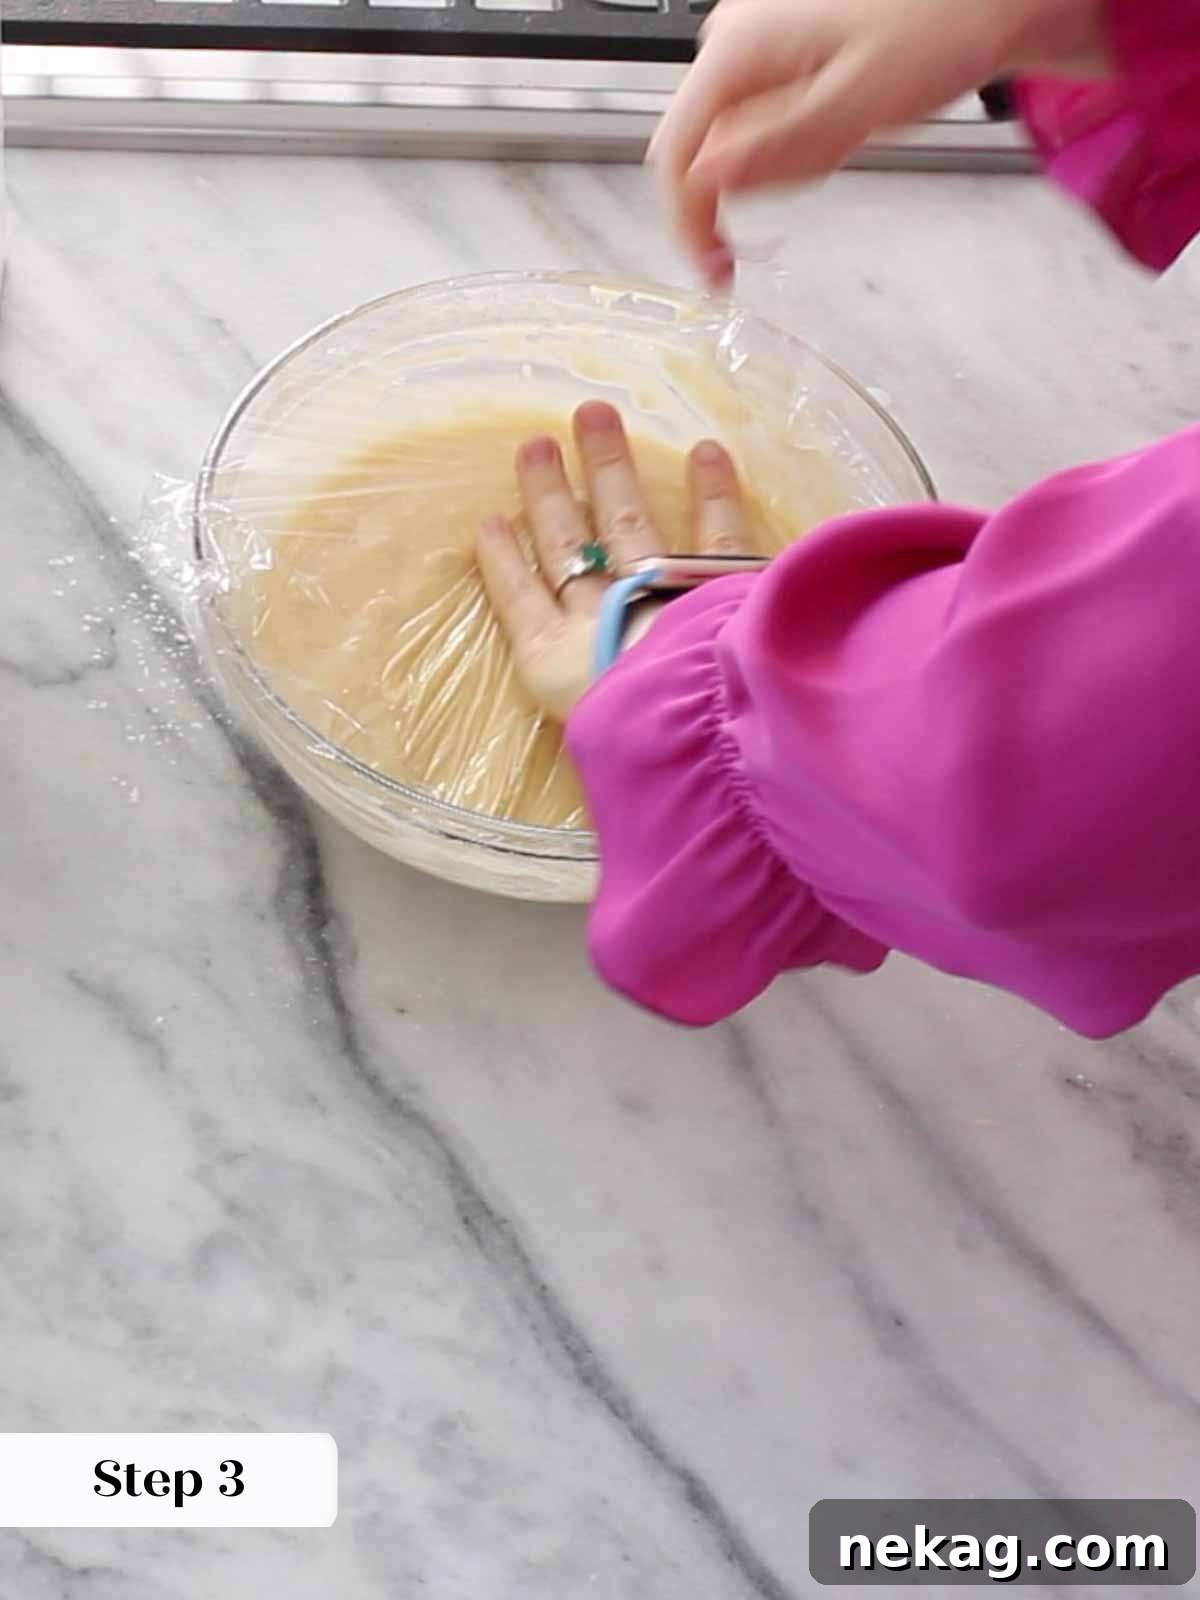
Step 3: Allow the Batter to Rest. Cover the bowl with plastic wrap, ensuring the wrap touches the surface of the batter to prevent a skin from forming. Allow the batter to sit at room temperature for at least one hour. I often refrigerate it, but it’s not strictly necessary. This resting period is critical and should not be skipped! It allows the flour to fully hydrate, resulting in a more tender cookie, and gives the gluten a chance to relax, which contributes to the desired crispy texture.
Chef’s Tip: Make Ahead! You can prepare the pizzelle batter up to 3 days in advance. Simply store it in an airtight container in the refrigerator until you’re ready to bake. This makes holiday baking much less stressful!
Part 2: Cooking Your Pizzelles in the Iron
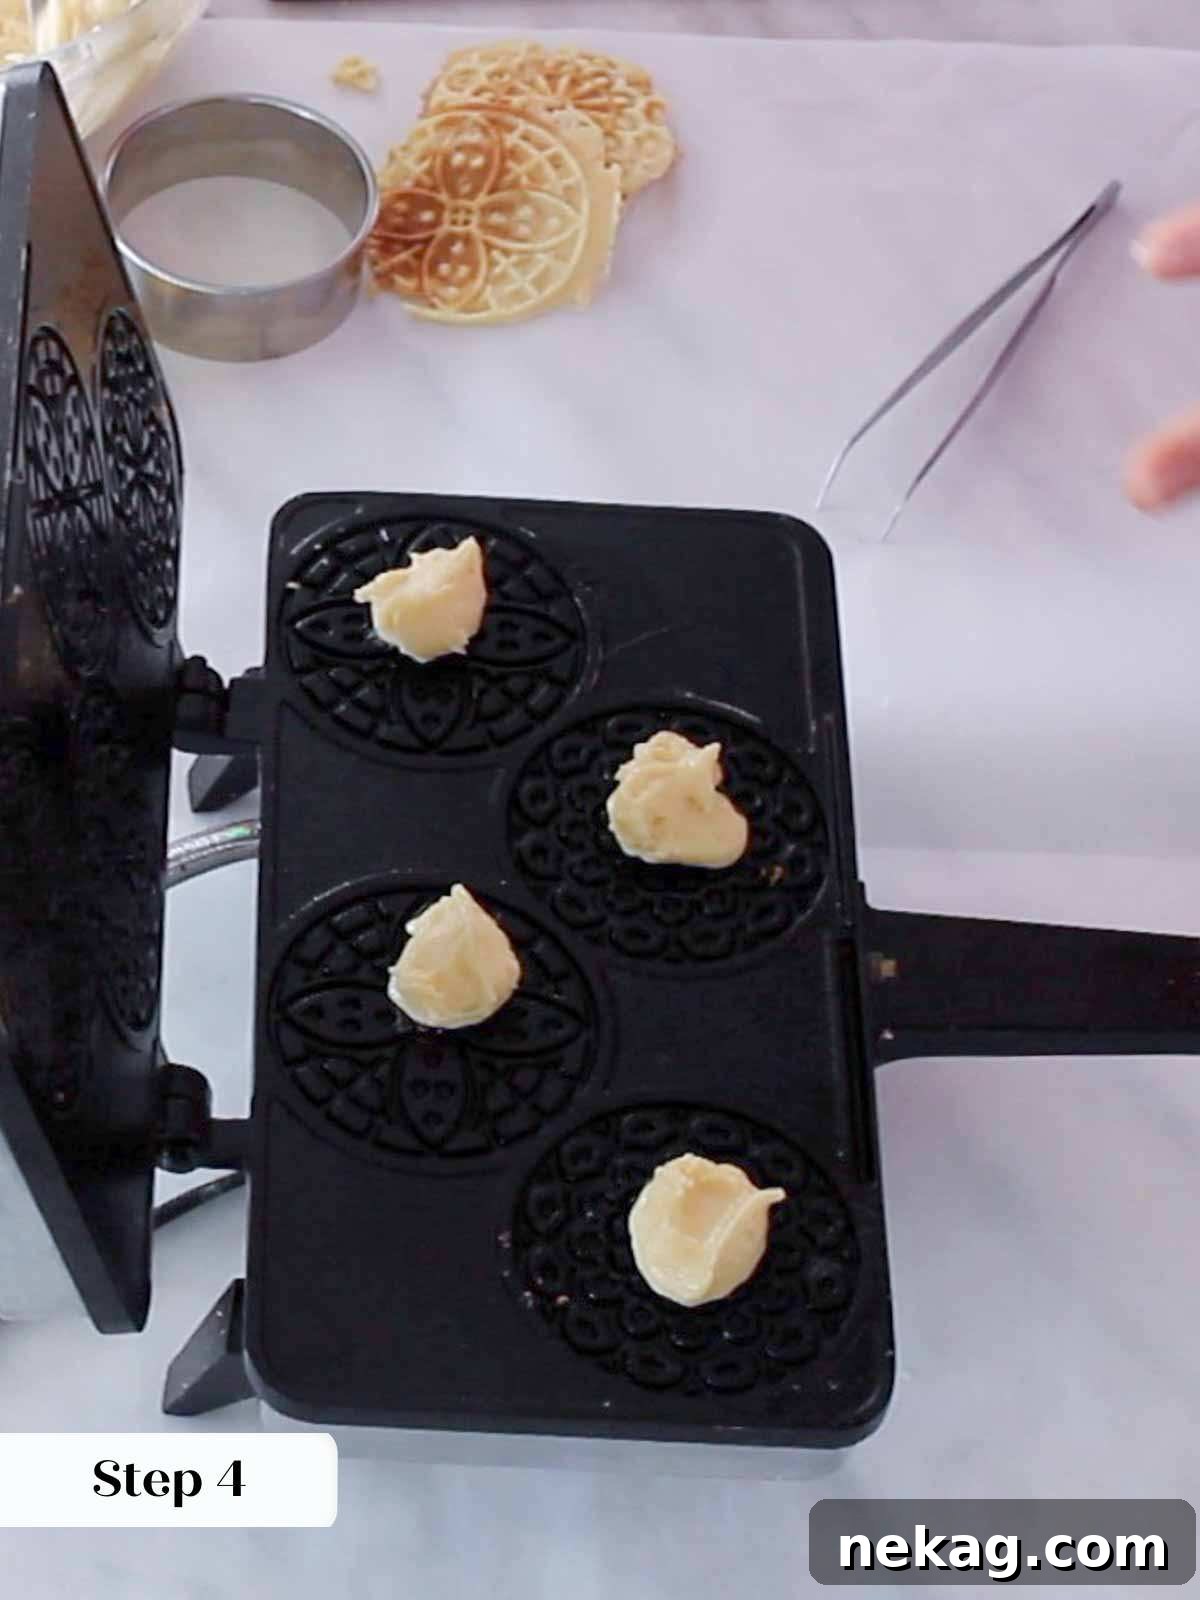
Step 4: Prepare the Pizzelle Iron. Preheat your pizzelle iron until it is smoking hot. A properly heated iron is essential for achieving the right texture and preventing sticking. Once hot, lightly spray both cooking surfaces with nonstick cooking spray. Spoon approximately 1 teaspoon of batter onto the center of each section of the iron’s mold. It might take a little trial and error with your specific press to determine the exact amount of batter needed to perfectly fill the mold without excessive overflow.
Step 5: Press and Cook. Firmly press the iron down and close it with its latch every time you cook a batch. This crucial step ensures that the batter is pressed thinly and evenly, resulting in thin, crispy cookies. Some excess batter will inevitably squeeze out the sides; this is normal. As mentioned in our pro tips, placing a piece of parchment paper under the press will make cleanup significantly easier.
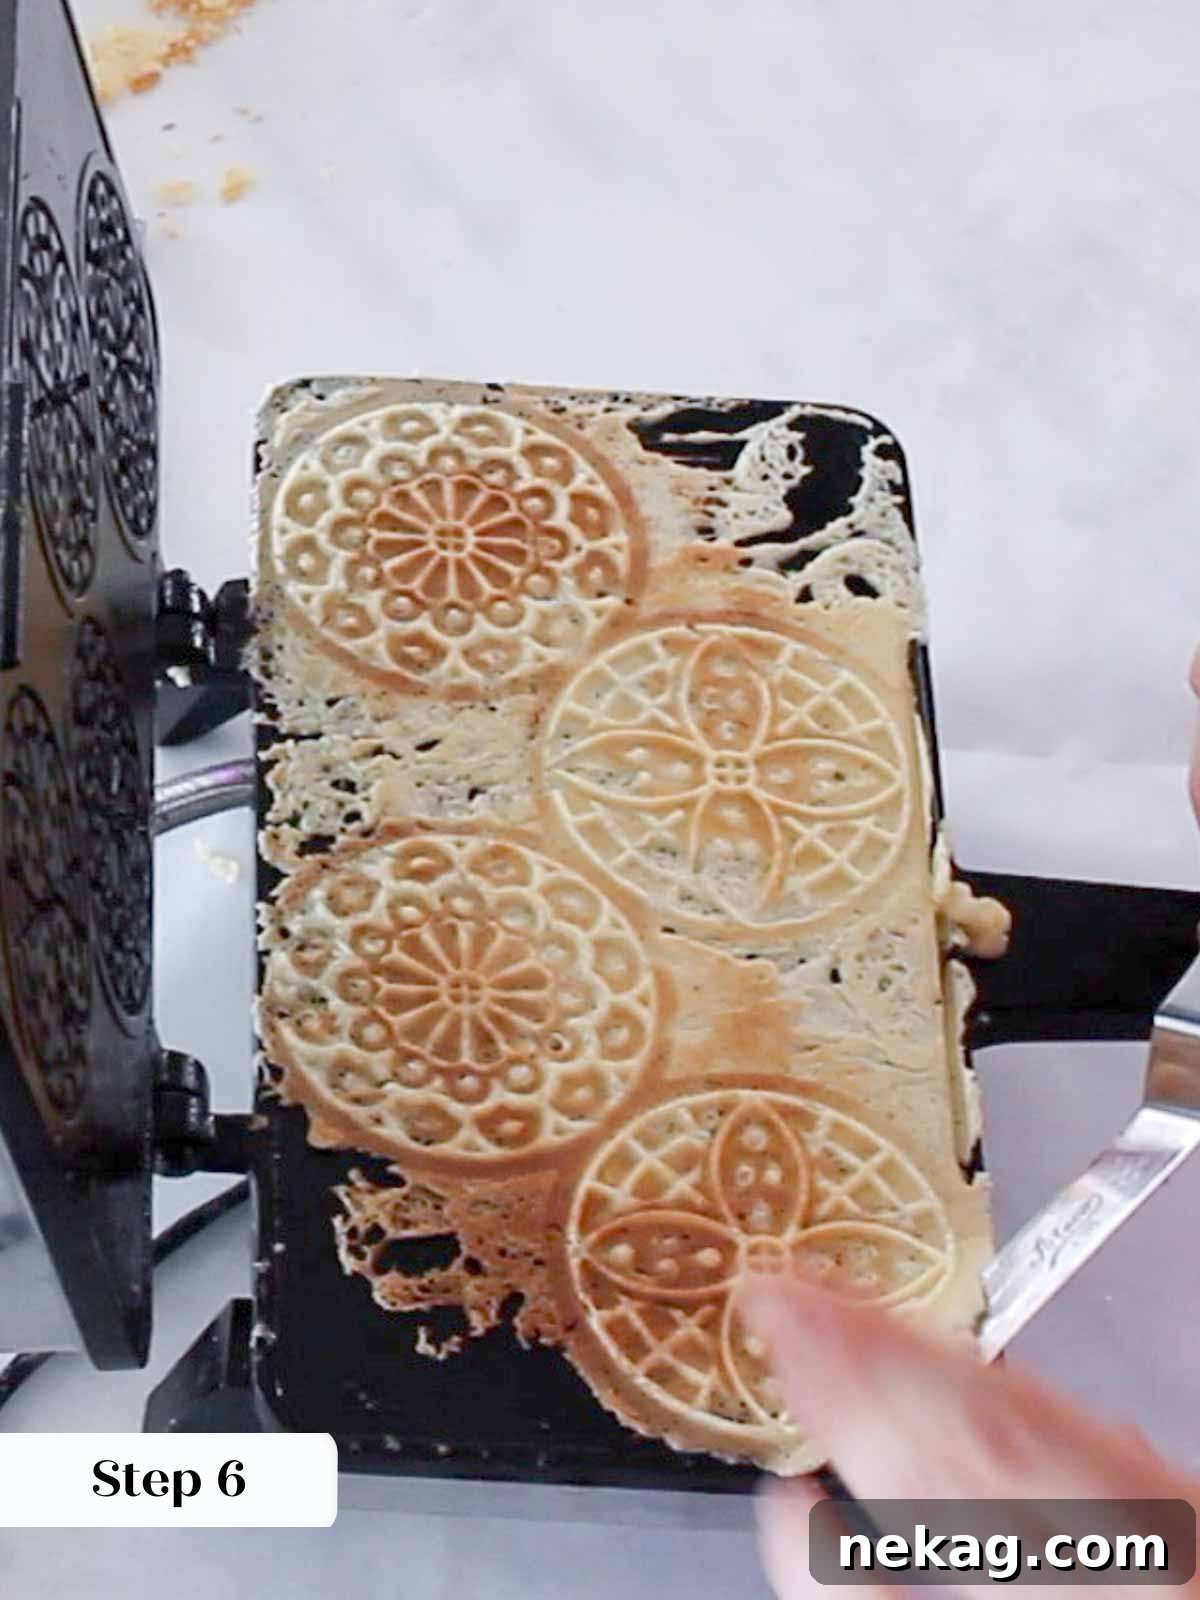
Step 6: Monitor Cooking & Steam Release. As the pizzelles cook, a considerable amount of steam will be released from the iron. Wait until the steam largely subsides before checking the cookies. They should be a beautiful golden brown color. If they are not yet golden or crispy enough, close the iron and continue cooking for a few more seconds until desired doneness.
Avoid Premature Opening! Resist the urge to open the pizzelle iron too early. If you do, the partially cooked batter can stick to both the top and bottom plates, preventing the cookies from fully forming into one cohesive piece. If you’ve ever opened a waffle iron prematurely, you’ll know exactly what I mean!
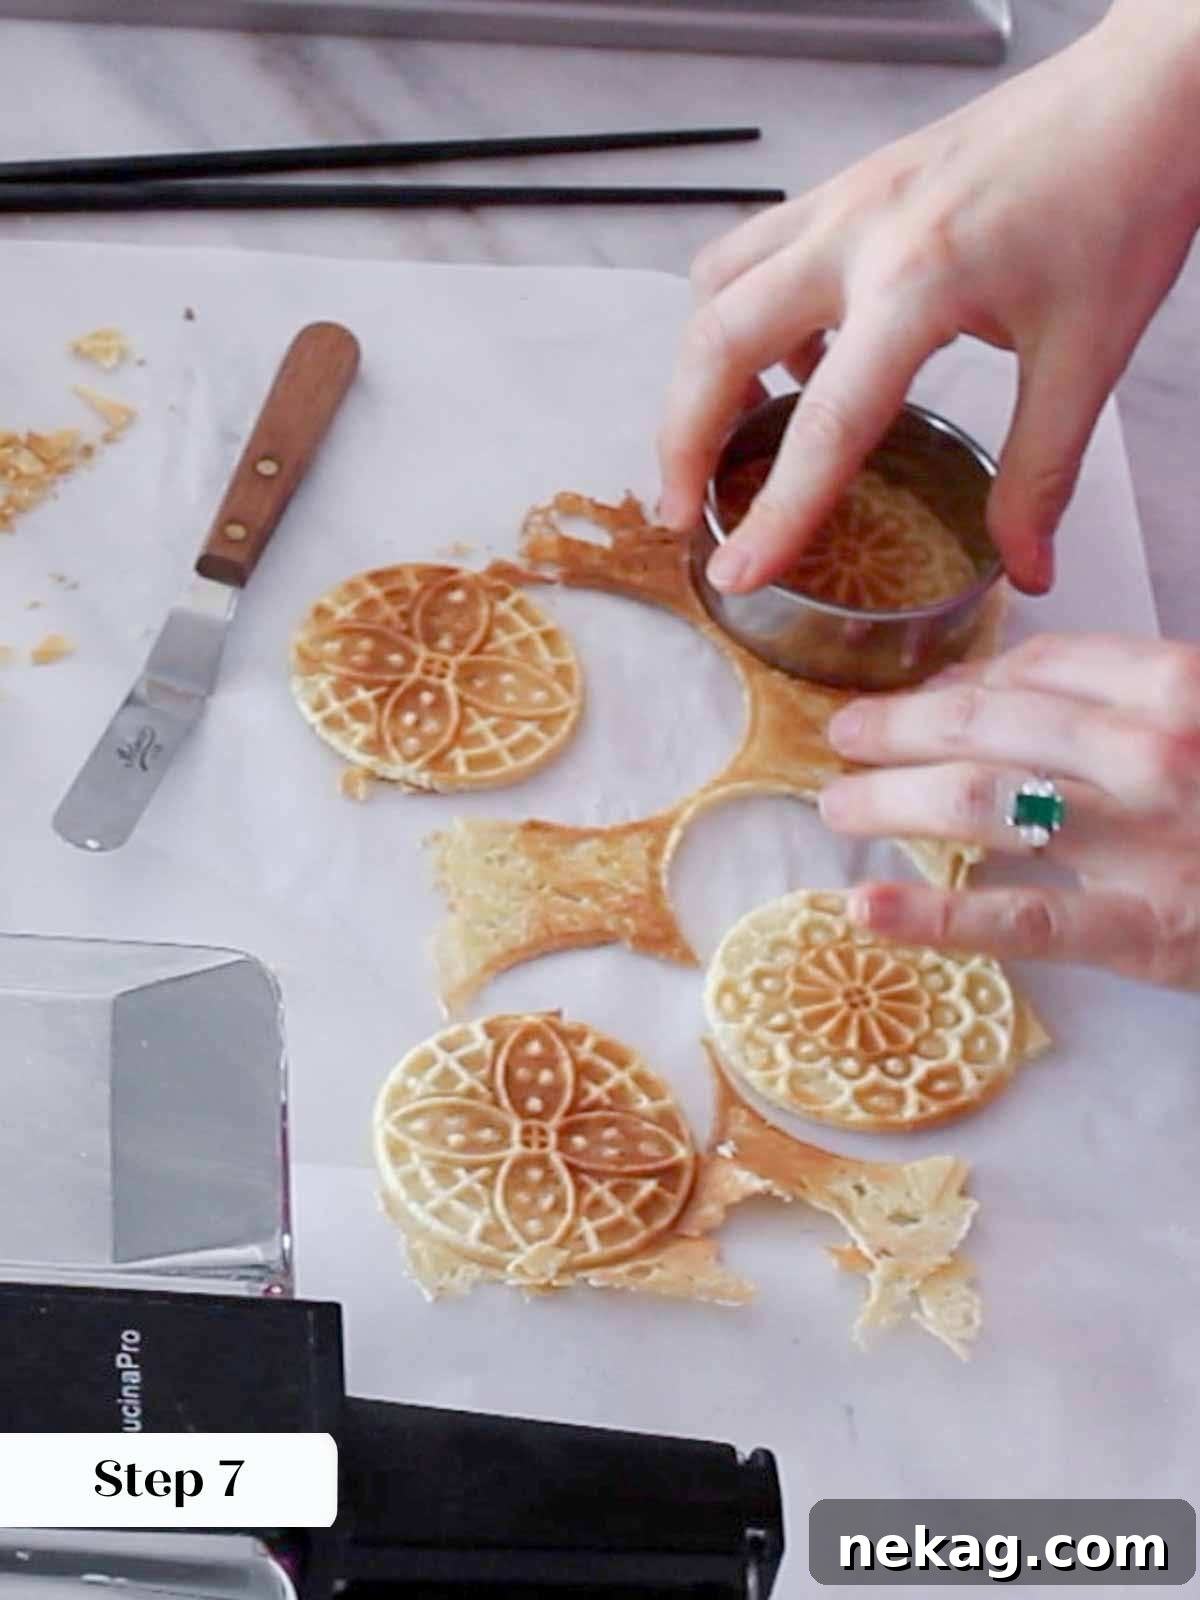
Step 7: Remove and Shape (Work Quickly!). Open the press and gently remove the hot pizzelles using a small offset spatula or large kitchen tweezers. This is where speed is key! While the cookies are still warm and pliable, you can either trim around their edges with scissors (heat-resistant gloves are helpful here!) or use a round biscuit/cookie cutter or ring mold to create perfect circles. Transfer the finished pizzelles to a parchment-lined baking sheet to cool in a single layer (as per our pro tip) and immediately start the next round of cooking.
Don’t Forget to Re-Spray! After every few rounds of cooking, give your pizzelle press another light spray with nonstick cooking spray. This preventative measure is vital for consistent non-stick performance. Trust me, from experience, trying to clean dried, burnt batter from the intricate grooves of an unsprayed iron is an unforgettable – and unforgettably awful – task. It’s worth the extra spray!
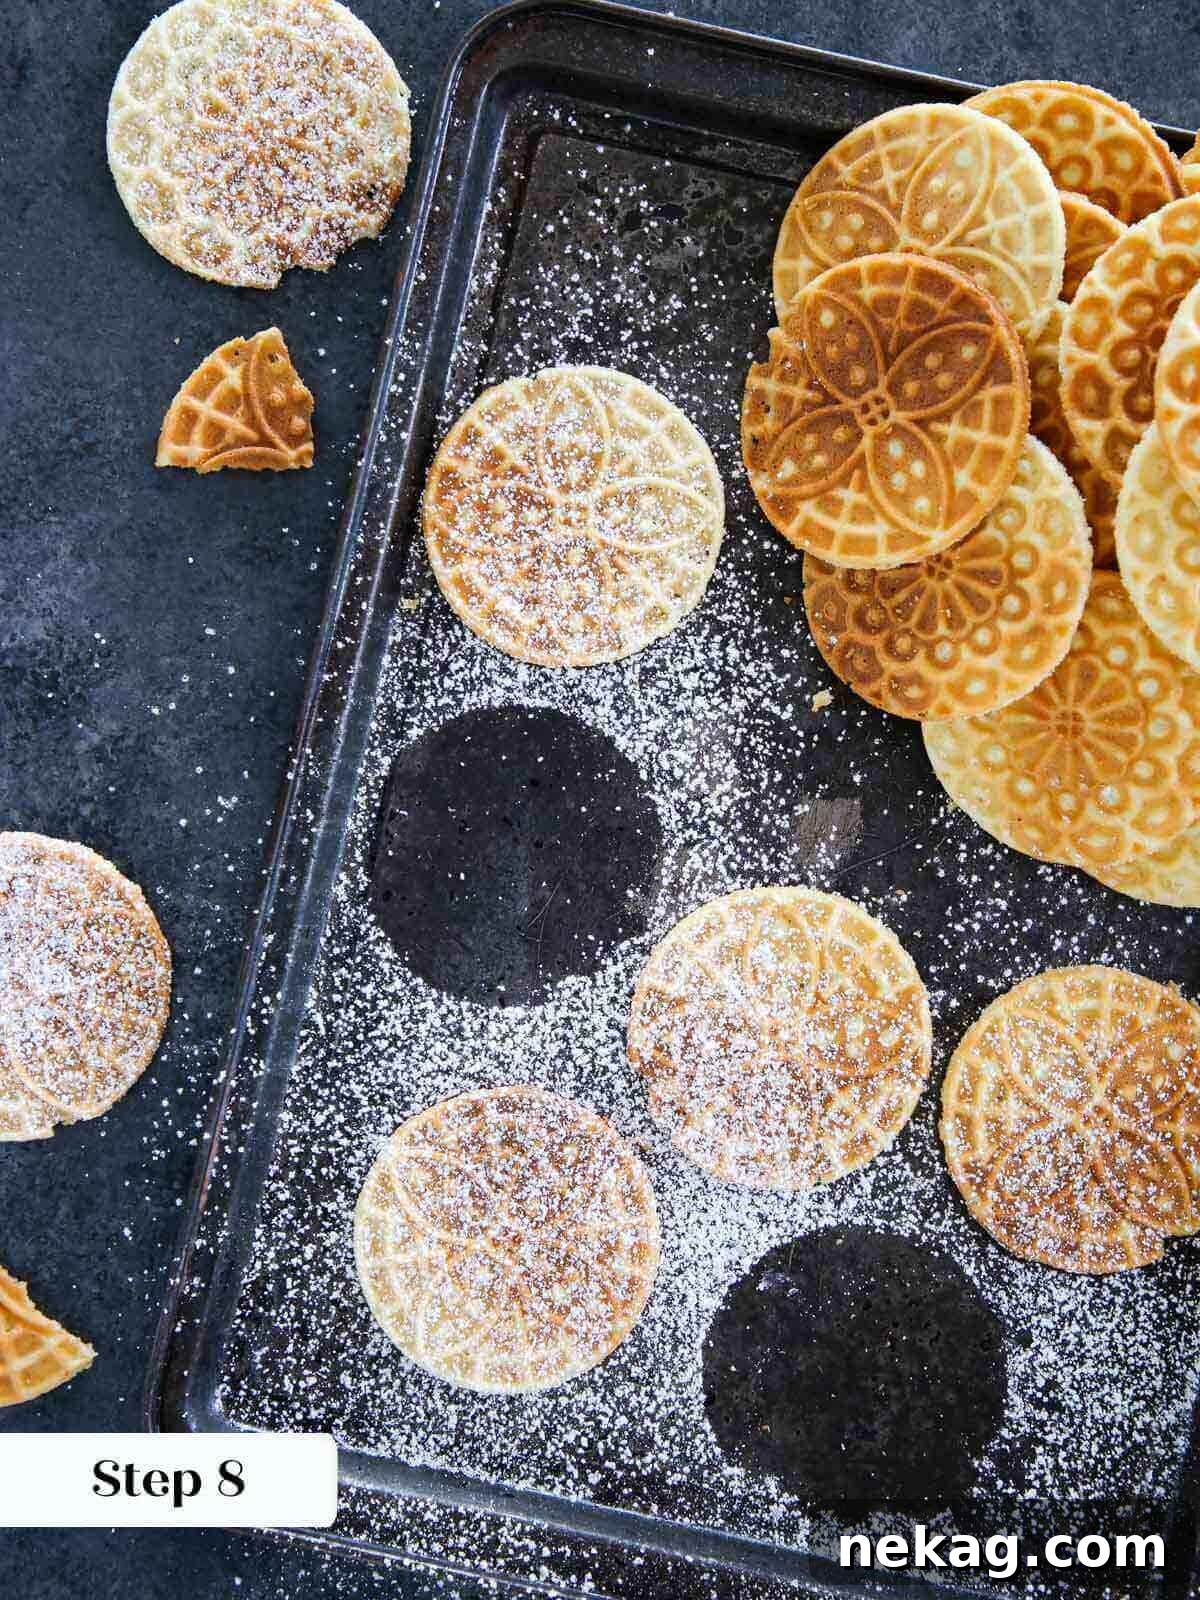
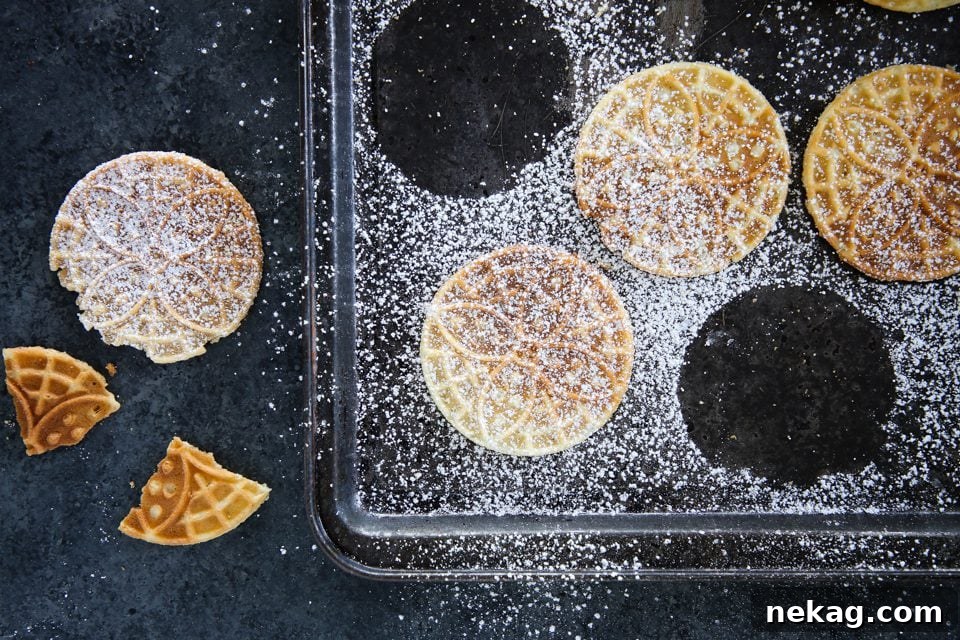
Step 8: Final Touches. Once cooled, you can optionally dust your pizzelles with a light coating of powdered sugar before serving. While it adds a beautiful aesthetic, I often enjoy them plain, allowing their inherent flavor and crispness to shine. However, a dusting of powdered sugar makes them look particularly festive for special occasions.
Chef Lindsey’s Special Recipe Tip: Embrace Imperfection!
Even in a professional kitchen, scraps and “sad,” misshapen cookies are an inevitable part of the baking process. Don’t let these go to waste! Think of them as chef’s perks. Snack on them as you bake, offer them as immediate treats to anyone passing through the kitchen, or save them for creative culinary uses. They’re perfect crumbled over a sundae, layered into a decadent trifle, or used to add a welcome crunch atop any dessert! Imagine a warm brown butter brownie with a scoop of creamy vanilla bean ice cream, all drizzled with a rich, warm hot fudge sauce, and then crowned with pizzelle crumbles. Right?! Absolutely delicious!
Pizzelle Recipe FAQs: Your Questions Answered
To preserve their signature crunch, store your pizzelle cookies in an airtight container at room temperature for up to 2 weeks. It is crucial not to store them with other types of cookies or baked goods, as they will absorb moisture and quickly lose their crisp texture, becoming soft. While still edible past two weeks, they will begin to taste stale.
Unfortunately, these delicate pizzelle cookies do not ship well. Their extreme thinness and crispness make them very fragile, and they are highly likely to arrive broken into crumbles. For shipping, it’s best to opt for more robust cookies such as Almond Linzer Cookies, hearty Pfeffernüsse Cookies, or classic Italian Butter Cookies, which can better withstand the journey.
The most common reason for soft pizzelles is improper cooling or storage. It is absolutely essential to let the cookies cool completely in a single layer on a wire rack or parchment-lined baking sheet before stacking or storing them. Stacking warm pizzelles traps steam, which softens them. Also, ensure your pizzelle iron is hot enough and that the batter is spread thinly enough during cooking; a thicker cookie will also be less crispy.
I cannot emphasize enough the importance of the “preheat, spray, cook, repeat!” method. Make sure your pizzelle iron is piping hot before adding any batter. Always give it an initial light spray with nonstick cooking spray, and then re-spray after every few rounds of cookies. A hot, lightly greased iron is the key to preventing sticking. If they still stick, your iron might not be hot enough, or you might be opening it too soon.
Pizzelle are widely considered to be among the world’s oldest cookies, with their origins tracing back to the Abruzzo region of Italy. Local folklore tells tales of two neighboring towns claiming to have invented pizzelle to commemorate driving snakes out of their villages. The word “pizze” in Italian means “round” and “flat,” while the suffix “elle” indicates the plural of “small.” So, a single cookie is technically a “pizzella,” though few can ever truly make or eat just one!
Pizzelles are wonderfully versatile. They are delightful served simply alongside a warm cup of coffee, tea, or espresso, making a perfect delicate accompaniment. They also pair exquisitely with desserts; try them with an affogato (espresso poured over ice cream), a scoop of your favorite ice cream, or a creamy custard like caramel pudding. For a creative presentation, shape the warm pizzelles into elegant cones or small bowls to serve ice cream, pudding, or refreshing sorbet. You can even roll them into tubes and fill them with a sweet cannoli filling for a non-fried take on a classic Italian dessert!
Recommended Festive & Christmas Cookie Recipes
Recipe Roundups
20 Traditional Christmas Cookies
Cookie Recipes
Moravian Christmas Cookies
Cookie Recipes
Pignoli Cookies
Cookie Recipes
Almond Crescent Cookies
If you tried this recipe and loved it, please consider leaving a 🌟 star rating and share your thoughts in the comments below. I genuinely love hearing from you; your feedback truly makes my day!
The Classic Pizzelle Recipe
Author: Chef Lindsey
Summary: Italian Pizzelle Cookies are exquisitely crunchy and tender, and this recipe is specifically crafted for baking in a pizzelle press! Infused with classic anise and delicate vanilla, they are the ideal accompaniment to a cup of coffee or a luxurious affogato. Master these traditional Italian treats with ease!
- Prep Time: 10 mins
- Cook Time: 10 mins
- Rest Time: 1 hr
- Total Time: 1 hr 20 mins
- Servings: 50 cookies
Ingredients
- 3 whole eggs (room temperature for best results)
- 1 cup granulated sugar
- ½ cup unsalted butter melted
- 2 tablespoons whole milk (room temperature)
- 2 ¼ teaspoons vanilla extract
- ¼ teaspoon anise extract (add more if desired, or substitute with almond/lemon extract)
- 1 ⅔ cups all-purpose flour (measured correctly, see tips)
- 1 ½ teaspoons baking powder
- ½ teaspoons kosher salt
Instructions
- In a small bowl, whisk together the all-purpose flour, baking powder, and kosher salt until well combined. Set aside.
- In a separate large bowl, whisk the eggs until smooth. Then, gradually whisk in the granulated sugar until fully incorporated. Continue by whisking in the melted butter, whole milk, vanilla extract, and anise extract until the mixture is uniform. Gently fold in the dry flour mixture until just combined, being careful not to overmix.
- Cover the batter bowl tightly with plastic wrap, ensuring the wrap touches the surface of the batter. Allow the batter to rest at room temperature for at least one hour. This crucial step allows the flour to hydrate and the gluten to relax, contributing to the pizzelles’ delicate and crispy texture. (You can also refrigerate for up to 3 days.)
- Preheat your pizzelle iron until it is smoking hot. Lightly spray the cooking surfaces with nonstick cooking spray. Spoon about 1 teaspoon of batter onto the center of each design on the iron. (Adjust batter amount as needed for your specific press). After every few rounds, give the iron another light spray for best results and easy cleanup.
- Firmly close the pizzelle iron, engaging the latch, to press the batter thinly. Cook until steam subsides and the cookies are a beautiful golden brown. Avoid opening too early to prevent sticking.
- Once cooked, carefully remove the hot pizzelles with a small offset spatula or kitchen tweezers. While still warm and pliable, trim the edges with kitchen scissors or a round biscuit cutter if desired for perfect shapes. Transfer to a parchment-lined baking sheet to cool completely in a single layer.
- Once fully cooled, pizzelles can be lightly dusted with powdered sugar before serving, if preferred.
Video
Notes
- Yield: Approximately 50, 3-inch Cookies
- Presentation: For perfectly neat edges, use kitchen scissors or a 3-inch biscuit cutter to trim around the edges of each pizzelle while they are still warm and flexible.
- Technique Key: Allowing the batter to rest and chill is absolutely essential for achieving the best possible crispy and tender pizzelles. Do not skip this step.
- Storage: Store these crunchy cookies in an airtight container at room temperature for up to 2 weeks. To maintain their crispness, never store them with other types of cookies or baked goods, as they will absorb moisture and soften.
Nutrition
Below is the nutritional information per cookie:
- Calories: 52kcal
- Carbohydrates: 7g
- Protein: 1g
- Fat: 2g
- Saturated Fat: 1g
- Polyunsaturated Fat: 0.1g
- Monounsaturated Fat: 1g
- Trans Fat: 0.1g
- Cholesterol: 15mg
- Sodium: 49mg
- Potassium: 10mg
- Fiber: 0.1g
- Sugar: 4g
- Vitamin A: 72IU
- Calcium: 12mg
- Iron: 0.3mg
Recipe Information
- Course: Dessert
- Cuisine: Italian
- Calories per serving: 52
Before You Go: Explore More Deliciousness
If you’ve enjoyed crafting and tasting these classic Italian pizzelles, we invite you to explore our wider collection of chef-developed Cookie Recipes! Whether you’re seeking everyday indulgence or special occasion treats, you’ll find a recipe to inspire your next baking adventure.
And if you’re baking for a festive time of year, don’t miss our comprehensive guide to traditional Christmas cookies, featuring timeless favorites and new classics, including elegant treats like these delicate Linzer cookies. Happy baking!