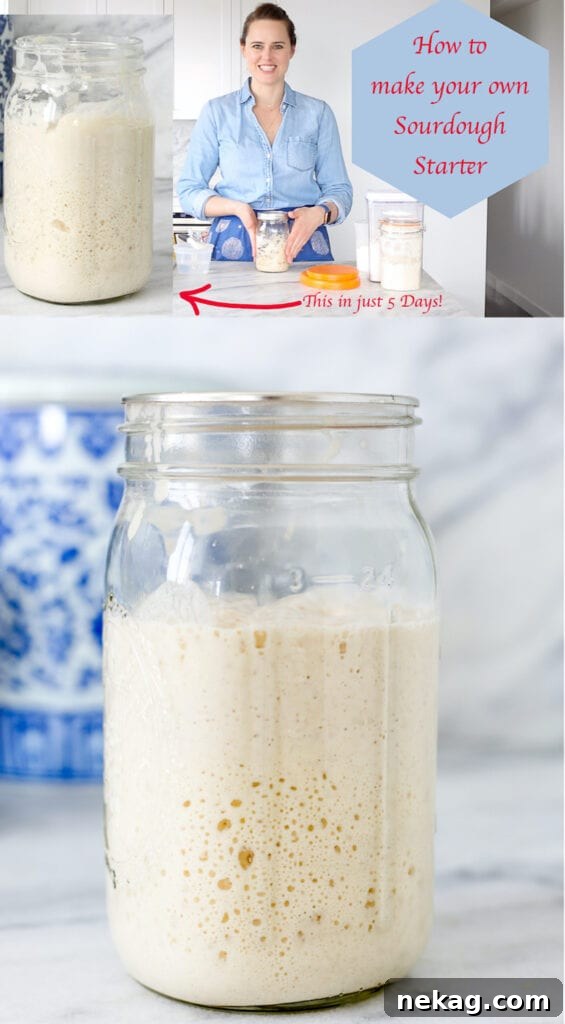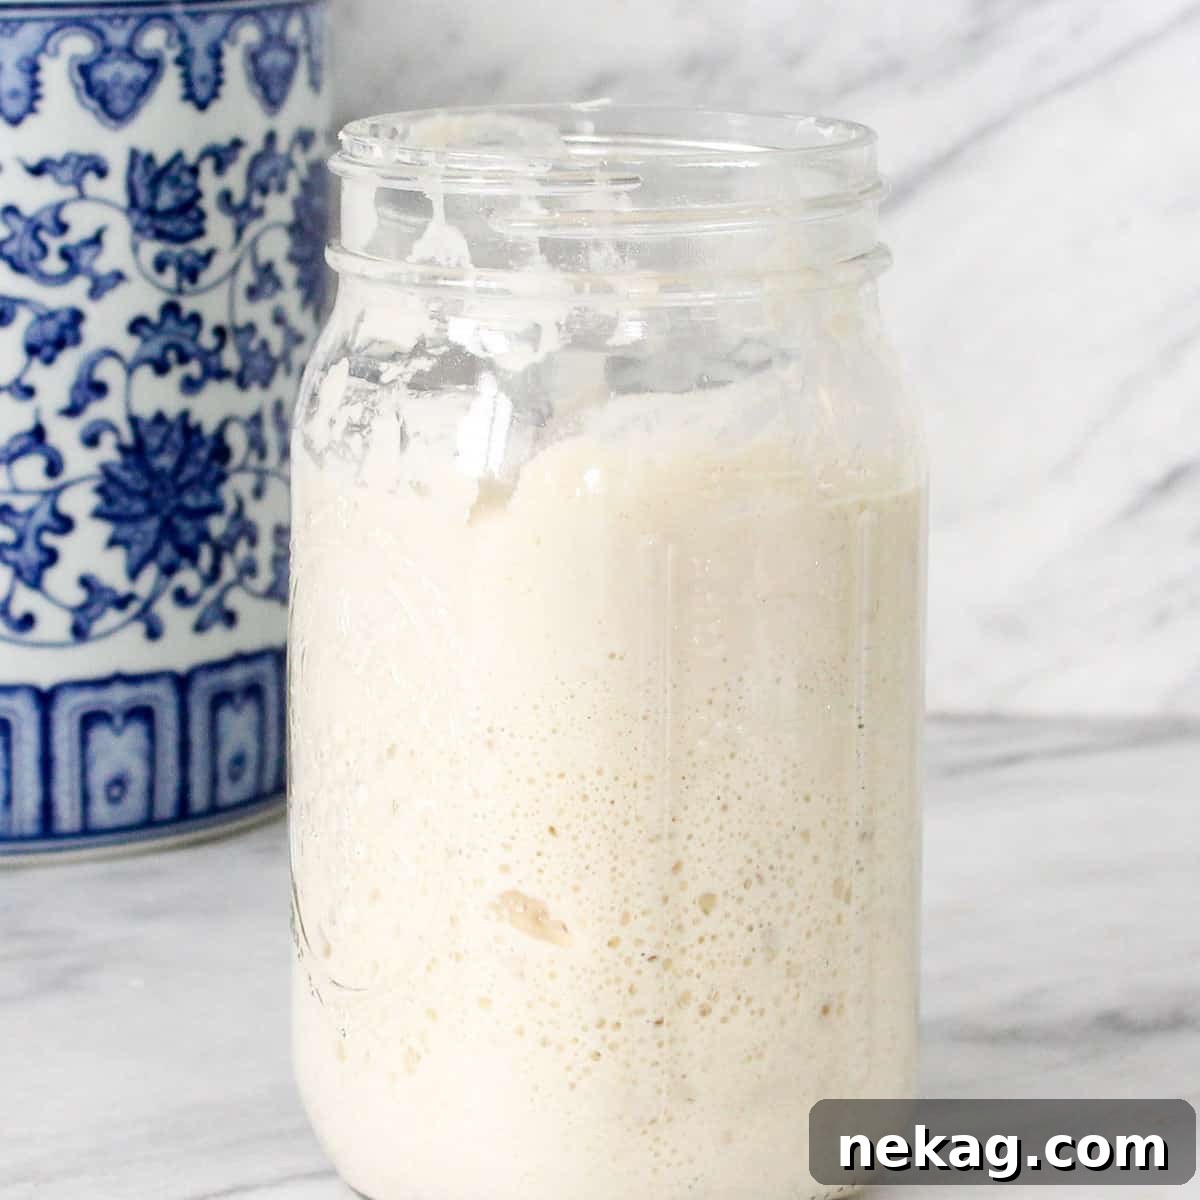
Embark on your journey into the world of artisanal baking with this incredibly easy-to-follow sourdough starter recipe. In just five days, you’ll cultivate a vibrant, active sourdough starter, ready to transform into your very first loaf of fresh, homemade sourdough bread! This comprehensive, day-by-day guide provides all the detailed instructions and answers to every question you might have about creating and maintaining your own sourdough starter.
A Quick Look At The Recipe
This is a brief summary of the recipe. Jump to the recipe for full details.
Jump to Recipe
Prep Time
5 days
Total Time
5 days
Servings
6 servings (based on recipe output)
Difficulty
Easy, but requires consistent daily care and patience.
Calories *
417 kcal per serving
Technique
Daily feeding with a blend of rye and all-purpose flour, combined with water, to cultivate wild yeast.
Flavor Profile
Develops a mildly tangy, distinctively yeasty, and earthy aroma over time.
* Based on nutrition panel for typical starter proportions.
Summarize & Save this content on
Featured Comment
⭐⭐⭐⭐⭐ Thank you for all the tips and tricks on how to start and keep a starter happy! My starter is doubling and seems happy, can’t wait to make my first loaf! – Mara
Table of Contents
- The Magic of Sourdough Baking
- What is a Sourdough Starter?
- Ingredients & Substitutions
- Professional Tips for a Thriving Starter
- Liquid vs. Stiff Levain: Understanding Your Starter’s Hydration
- How to Make This Sourdough Starter Recipe: A Day-by-Day Guide
- Chef Lindsey’s Recipe Tip
- Recipe FAQs: Your Sourdough Starter Questions Answered
- Recommended Sourdough Bread Recipes
- Sourdough Starter Recipe
- Before You Go: Continue Your Sourdough Journey
The Magic of Sourdough Baking
The sourdough starter is the living heart of any truly great sourdough bread, a simple yet miraculous concoction that harnesses the power of nature. All you truly need to create your own robust starter are three fundamental elements: flour, water, and a generous dose of patience. By capturing and nurturing the wild yeast and beneficial bacteria naturally present in flour, water, and the very air around us, you can cultivate an active, bubbly starter in as little as five days! I am here to guide you through every step of this rewarding process, from mixing your first ingredients to confidently caring for your mature starter. For a visual aid and extra insights, be sure to watch my dedicated video, along with my 10 Sourdough Starter Tips video, which offers invaluable advice to ensure your success.
Once you’ve successfully cultivated and cared for your sourdough starter over these crucial days, the next exciting step is to transform it into delectable bread! For beginners, I highly recommend starting with my easy sourdough bread recipe, which is specifically designed to build your confidence. If you’re feeling a bit more adventurous, try this delightful cherry pecan sourdough bread. And for those moments when you simply can’t wait, explore a same-day sourdough bread recipe to satisfy your cravings without the long fermentation.
What is a Sourdough Starter?
At its core, a sourdough starter is much more than just a mixture of flour and water; it’s a vibrant, living ecosystem. This naturally fermented culture hosts a stable and beneficial community of wild yeasts and lactic acid bacteria. These microorganisms work in synergy to consume sugars in the flour, producing carbon dioxide (which leavens the bread) and a variety of organic acids (which impart sourdough’s characteristic tangy flavor and aroma). Sourdough baking predates commercial yeast by thousands of years, offering a traditional method of bread making that brings numerous benefits, including improved digestibility and nutrient availability due to the fermentation process. The more consistently nurtured and aged your starter becomes, the more profound and complex flavors, along with a superior texture, it will impart to your homemade breads.
The Science Behind the Sourdough Magic
The magic of sourdough lies in its microbiology. Wild yeasts (primarily Saccharomyces cerevisiae, among others) and lactic acid bacteria (LAB), like Lactobacillus and Bifidobacterium species, form a symbiotic relationship within the starter. The yeasts produce carbon dioxide, creating the airy crumb, while the LAB produce lactic and acetic acids. These acids contribute to the unique “sour” flavor, act as natural preservatives, and also help break down gluten, making sourdough bread often easier to digest for many people. This complex interplay of microorganisms is what gives sourdough its distinctive qualities, far beyond what commercial yeast can achieve.
Ingredients & Substitutions
Crafting a robust sourdough starter requires just two main ingredients, but understanding their role and potential substitutions is key to success:
- Rye Flour: I highly recommend initiating your levain (another term for sourdough starter) with rye flour. Whole grain flours, such as rye or whole wheat flour, are significantly less processed than conventional all-purpose flour. This means they retain a higher concentration of natural wild yeasts and beneficial bacteria, giving your starter a powerful “kick-start” and accelerating the initial fermentation process. After establishing this strong foundation, I typically transition to unbleached all-purpose flour on Day 4. The reason for this switch is that rye flour possesses a very distinct and strong flavor profile, and I prefer that all my resulting sourdough breads don’t exclusively taste like fermented rye. By switching to all-purpose flour, you create a more neutral sourdough base, which still provides all the wonderful sourness and leavening power without overpowering other flavors in your bread. If a rye flavor is desired in a specific loaf, it can always be added directly to the bread dough later.
- Water: The quality of your water plays a subtle but important role. Standard tap water usually works perfectly fine for most individuals, as long as it’s not heavily chlorinated. If you have concerns about chlorine or simply prefer, bottled spring water or filtered water are excellent alternatives, though I haven’t found a significant difference in results. For optimal yeast and bacterial activity during feeding and growth, it’s best to use water at room temperature (around 70-75°F or 21-24°C). However, if you notice your starter is exceptionally vigorous and doubling too rapidly for your baking schedule, using slightly colder water can help slow down its activity, giving you more flexibility.
- All-Purpose Flour: After the initial boost from rye flour, I switch to unbleached all-purpose flour for subsequent feedings. This choice is deliberate to maintain a neutral flavor profile for the starter itself, ensuring it complements a wide variety of baked goods. Bread flour can also be used, as its higher protein content can further strengthen your starter. This versatility allows me to produce a diverse range of sourdough delights, from sweet sourdough hot cross buns to hearty whole wheat sourdough bread, all from the same adaptable starter.
For precise measurements and quantities, please refer to the detailed recipe card below.
Professional Tips for a Thriving Starter
Creating and maintaining a sourdough starter is an art backed by science. Here are some professional insights to help you succeed:
- Weigh your starter! Accuracy is paramount. In baking, especially with delicate processes like cultivating a starter, precision is crucial. Treat this endeavor like a scientific experiment, because it is! While volume measurements (like cups or tablespoons) can vary significantly depending on how compactly flour is packed or how airy your starter is, weighing your ingredients in grams provides consistent and accurate ratios every single time. One tablespoon of starter at its peak activity might contain vastly different amounts of yeast culture than one tablespoon of a sluggish starter. Investing in a reliable kitchen scale is the single best tool you can acquire for consistent sourdough success, ensuring you don’t inadvertently over or under-feed your precious culture.
- Patience is undeniably key. Embrace the journey. Remember, you are fostering a complex living ecosystem from scratch. This process requires time for the wild yeasts and bacteria to colonize and multiply sufficiently. Resist the urge to rush it! The exact number of days required for a strong, bubbly levain to fully develop can vary, influenced by factors such as ambient temperature, humidity, and the specific type of flour you’re using. If you happen to be using bleached or bromated all-purpose flour, be aware that these highly processed flours typically contain very little, if any, natural yeast, which can significantly hinder or even prevent your starter from ever becoming strong enough. Always opt for unbleached flour for the best results.
- Get to know your starter. Become its best friend. Over time, you’ll develop an intuitive understanding of your starter’s behavior. Pay close attention to how long it takes for your starter to reliably double in size after feeding. This “peak” activity point is critical, as it’s the ideal time to use it for mixing your dough. Observe its texture, aroma, and the size and distribution of its bubbles. You also have the power to influence its growth rate. For instance, if your starter consistently doubles in a short 6-hour window, it indicates that its environment (likely a warm spot in your kitchen) is highly conducive to rapid growth. If you need to slow it down, perhaps because you’re not ready to bake, consider moving it to a cooler part of your house, placing its container in a pot of ice water overnight, or feeding it with slightly colder water. Conversely, if it’s sluggish, a warmer spot will help. Always remember to weigh your ingredients, sticking to a consistent ratio, typically 10% of the flour weight for your “old” starter in routine feedings.
Liquid vs. Stiff Levain: Understanding Your Starter’s Hydration
The terms “liquid levain” and “stiff levain” refer to the hydration level of your sourdough starter, and understanding the difference is crucial for successful baking. A traditional starter, often referred to as a “stiff levain” or “low-hydration starter,” typically uses equal parts flour and water by weight (a 100% hydration ratio). In contrast, a “liquid levain” or “high-hydration starter” contains more water than flour, leading to a thinner, more pourable consistency. For example, a 125% hydration liquid levain might consist of 100g flour + 125g water + 10g old starter.
While both can be incredibly effective, they offer slight differences in behavior and impact on your final dough. A liquid levain is generally easier to mix and incorporate into doughs, but due to its higher water content, it can “peak” (reach its maximum activity) faster than a stiff levain. Stiff levains tend to be more resilient and have a slower, more sustained rise. These hydration differences also influence the resulting bread dough in distinct ways: a liquid levain will introduce more overall hydration to your bread recipe, often contributing to a more open, airy, and lighter crumb structure. It’s essential to pay close attention to what your specific sourdough bread recipe calls for and feed your levain accordingly. The good news is that you can easily convert your existing starter from a stiff to a liquid levain (or vice versa) simply by adjusting the feeding ratios. Generally, I prefer and use a 125% liquid levain in my recipes that call for it, typically following a ratio of 100g flour + 125g water + 10g of your mature, active starter.
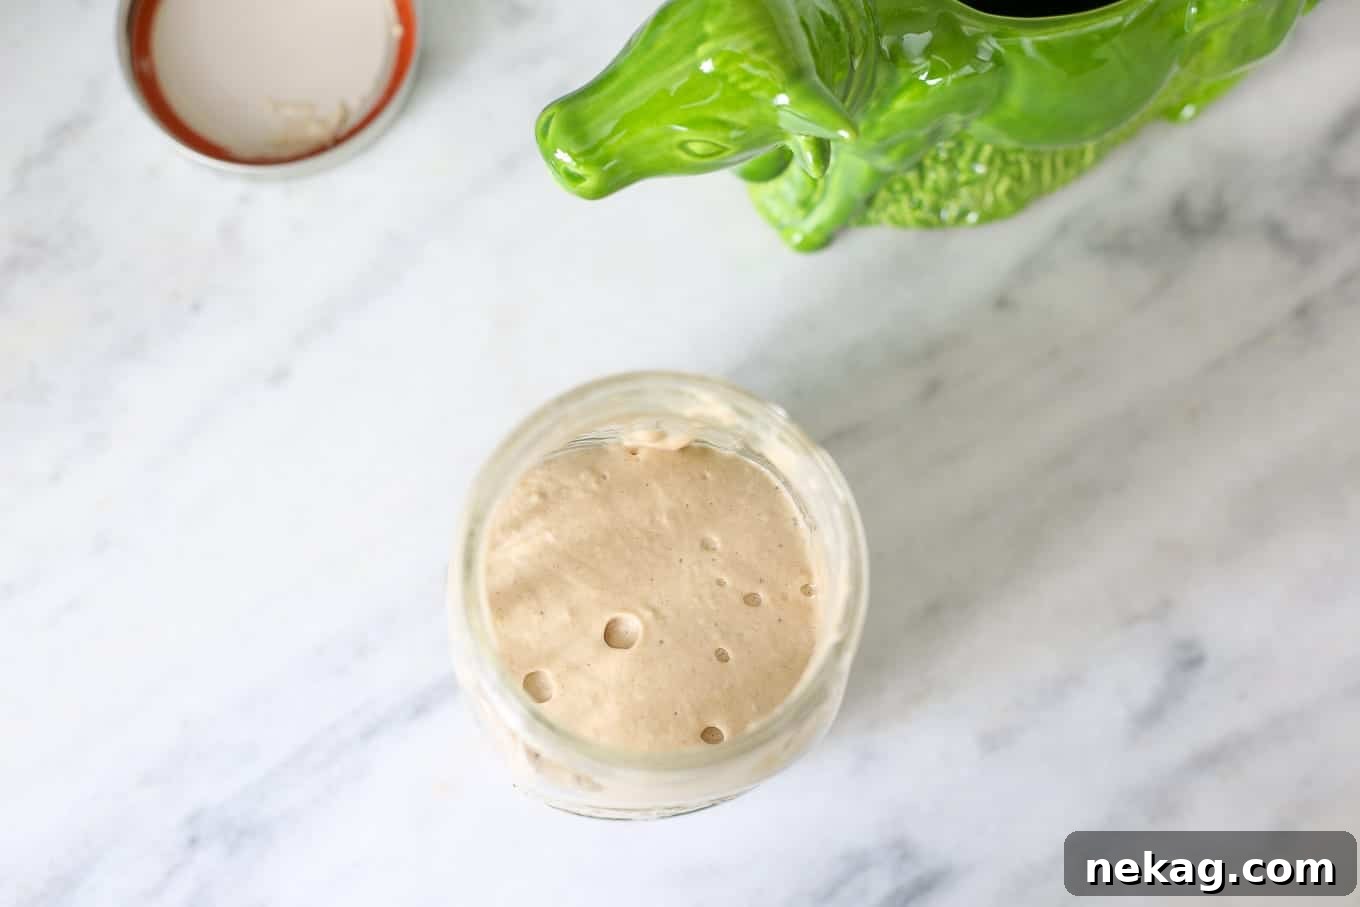
How to Make This Sourdough Starter Recipe: A Day-by-Day Guide
Follow these detailed instructions to create your very own vibrant and active sourdough starter. For precise measurements and quantities, please consult the full recipe card located below.
Day 1: Initiate Fermentation with Flour and Water. Begin by thoroughly combining 100g of rye flour with 100g of room-temperature water in a clean, clear container, such as a glass jar or a food-grade plastic container. Ensure all the flour is fully hydrated and there are no dry pockets remaining. Cover the container loosely with a lid, plastic wrap, or a breathable cloth (like cheesecloth secured with a rubber band) to allow air circulation while preventing it from drying out. Let this mixture rest at room temperature (ideally between 70-75°F or 21-24°C) for a full 24 hours on your kitchen counter. You might not see much activity yet, but the wild yeasts are beginning their work!
While you can start with unbleached all-purpose flour, note that it typically contains fewer natural yeasts than whole grain flours like rye. This often means using all-purpose flour from the start will result in a slower initial fermentation process, taking longer for your starter to become active and ready for baking. For a vigorous start, whole grain is highly recommended.
Day 2: Encourage Activity with the First Feeding. After 24 hours, you should begin to see some initial signs of life – perhaps a few small bubbles on the surface or around the sides, and a slightly acidic aroma. In a separate clean container, combine 100g of fresh rye flour, 100g of room-temperature water, and 100g of yesterday’s starter (discarding the remaining starter from Day 1). Stir everything together until well combined. Cover loosely and let it sit at room temperature for another 24 hours. You should notice a significant increase in bubbles and activity compared to Day 1, a positive sign that your wild yeast culture is developing.
A helpful tip for maintaining cleanliness and efficiency is to have two jars that you rotate. This way, one jar is always clean, dry, and ready for your next feeding. If you only have one container, you can transfer your 100g of starter to a clean bowl, add the new flour and water, mix, and then scrape it back into the freshly cleaned original jar. This prevents crusty buildup and keeps your starter healthy.
Day 3: Amplify Fermentation by Repeating Day 2. By this point, your starter should be showing robust signs of fermentation. Repeat the feeding process exactly as you did on Day 2: In a clean container, combine 100g of rye flour, 100g of water, and 100g of yesterday’s starter, discarding the excess. Cover and allow it to ferment at room temperature for another 24 hours. You should observe your starter doubling in size, or even more, with abundant bubbles and a pleasant, slightly tangy aroma. This is a strong indicator of a healthy and active culture.
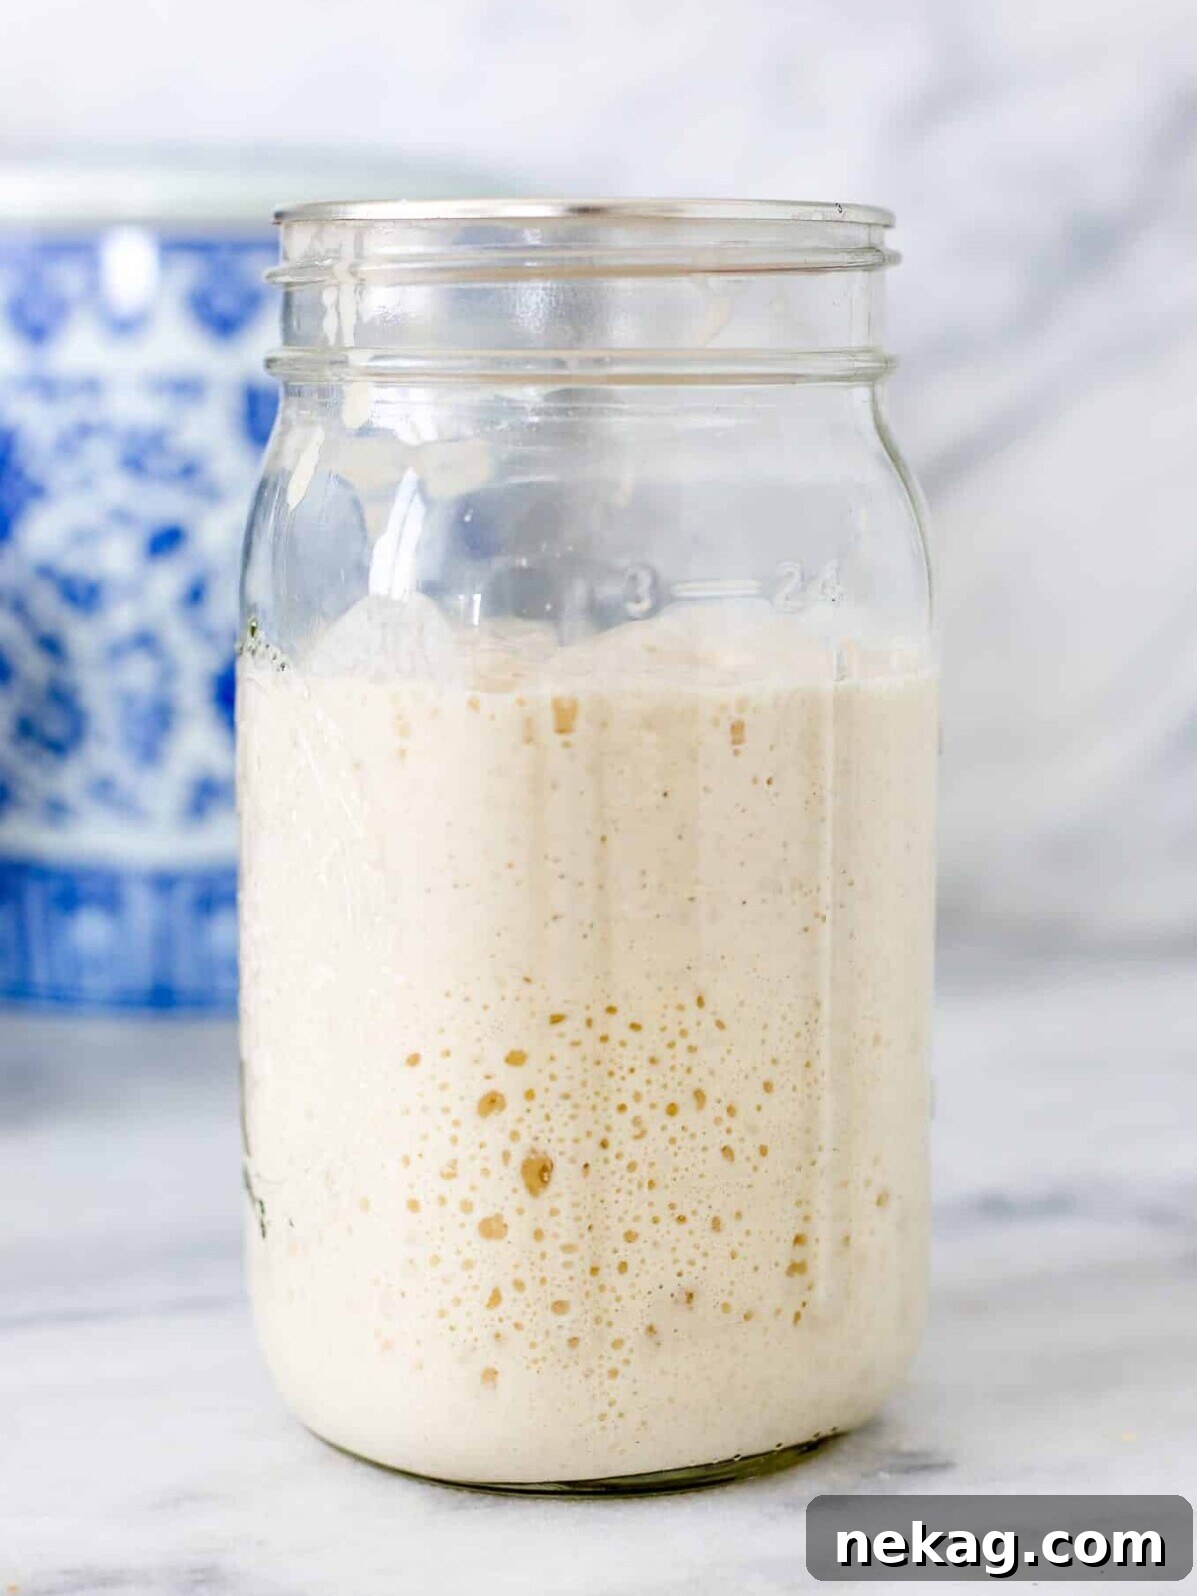
Day 4: Transition to All-Purpose Flour. Today marks a shift in your starter’s diet. In a clean container, combine 100g of unbleached all-purpose flour, 100g of room-temperature water, and 100g of yesterday’s active starter, discarding the remaining amount. Mix thoroughly, cover loosely, and let it sit at room temperature for 24 hours. You should now see very distinct activity: the starter will definitely double (or even triple) in volume, showcasing larger air pockets and a more pronounced yeasty, tangy smell. This is a crucial step towards creating a versatile starter.
Important Checkpoint: If, for any reason, your levain has not consistently doubled in size by Day 4, I recommend pausing the switch to all-purpose flour. Continue feeding it with rye flour and water for an additional day or two, following the Day 2 instructions, until you observe consistent doubling. Patience here will pay off in a stronger starter.
Day 5: Solidify Your Active Starter. Repeat the feeding process from Day 4: Combine 100g all-purpose flour, 100g water, and 100g of yesterday’s starter in a clean container, discarding the excess. Cover and let it ferment at room temperature for 24 hours. By now, your starter should be incredibly active and consistently tripling in size within 6-12 hours after feeding. Congratulations! Your sourdough starter is now robust and ready to be used to leaven your first batch of delicious sourdough bread.
Days 6 & 7 and Beyond: Establish a Consistent Feeding Schedule. To continue building strength and maintain your starter’s vitality, repeat the Day 4 feeding schedule for Days 6 and 7. After this initial week, your starter will be well-established and ready for regular maintenance, whether on your counter or stored in the refrigerator.
Feeding Your Sourdough Starter for the Long Term: Maintaining Health and Peak Performance
Once your starter is active and mature (typically after 7 days), your goal shifts to achieving controlled, predictable growth, especially when you plan to bake. This control is primarily achieved through your consistent feeding schedule and ratios. For general maintenance, and particularly when aiming for a versatile starter, you can switch to the following ratios:
For a stiff levain (100% hydration):
- 100g room-temperature water
- 10g active previous day’s starter
- 100g unbleached all-purpose flour (or bread flour)
Or for a liquid levain (125% hydration, as often preferred for lighter crumbs):
- 125g room-temperature water
- 10g active previous day’s starter
- 100g unbleached all-purpose flour (or bread flour)
Remember to always discard a portion of your starter before feeding to maintain a manageable amount and concentrate the yeast and bacterial activity in the fresh flour and water. This prevents your starter from becoming too acidic or diluted over time.
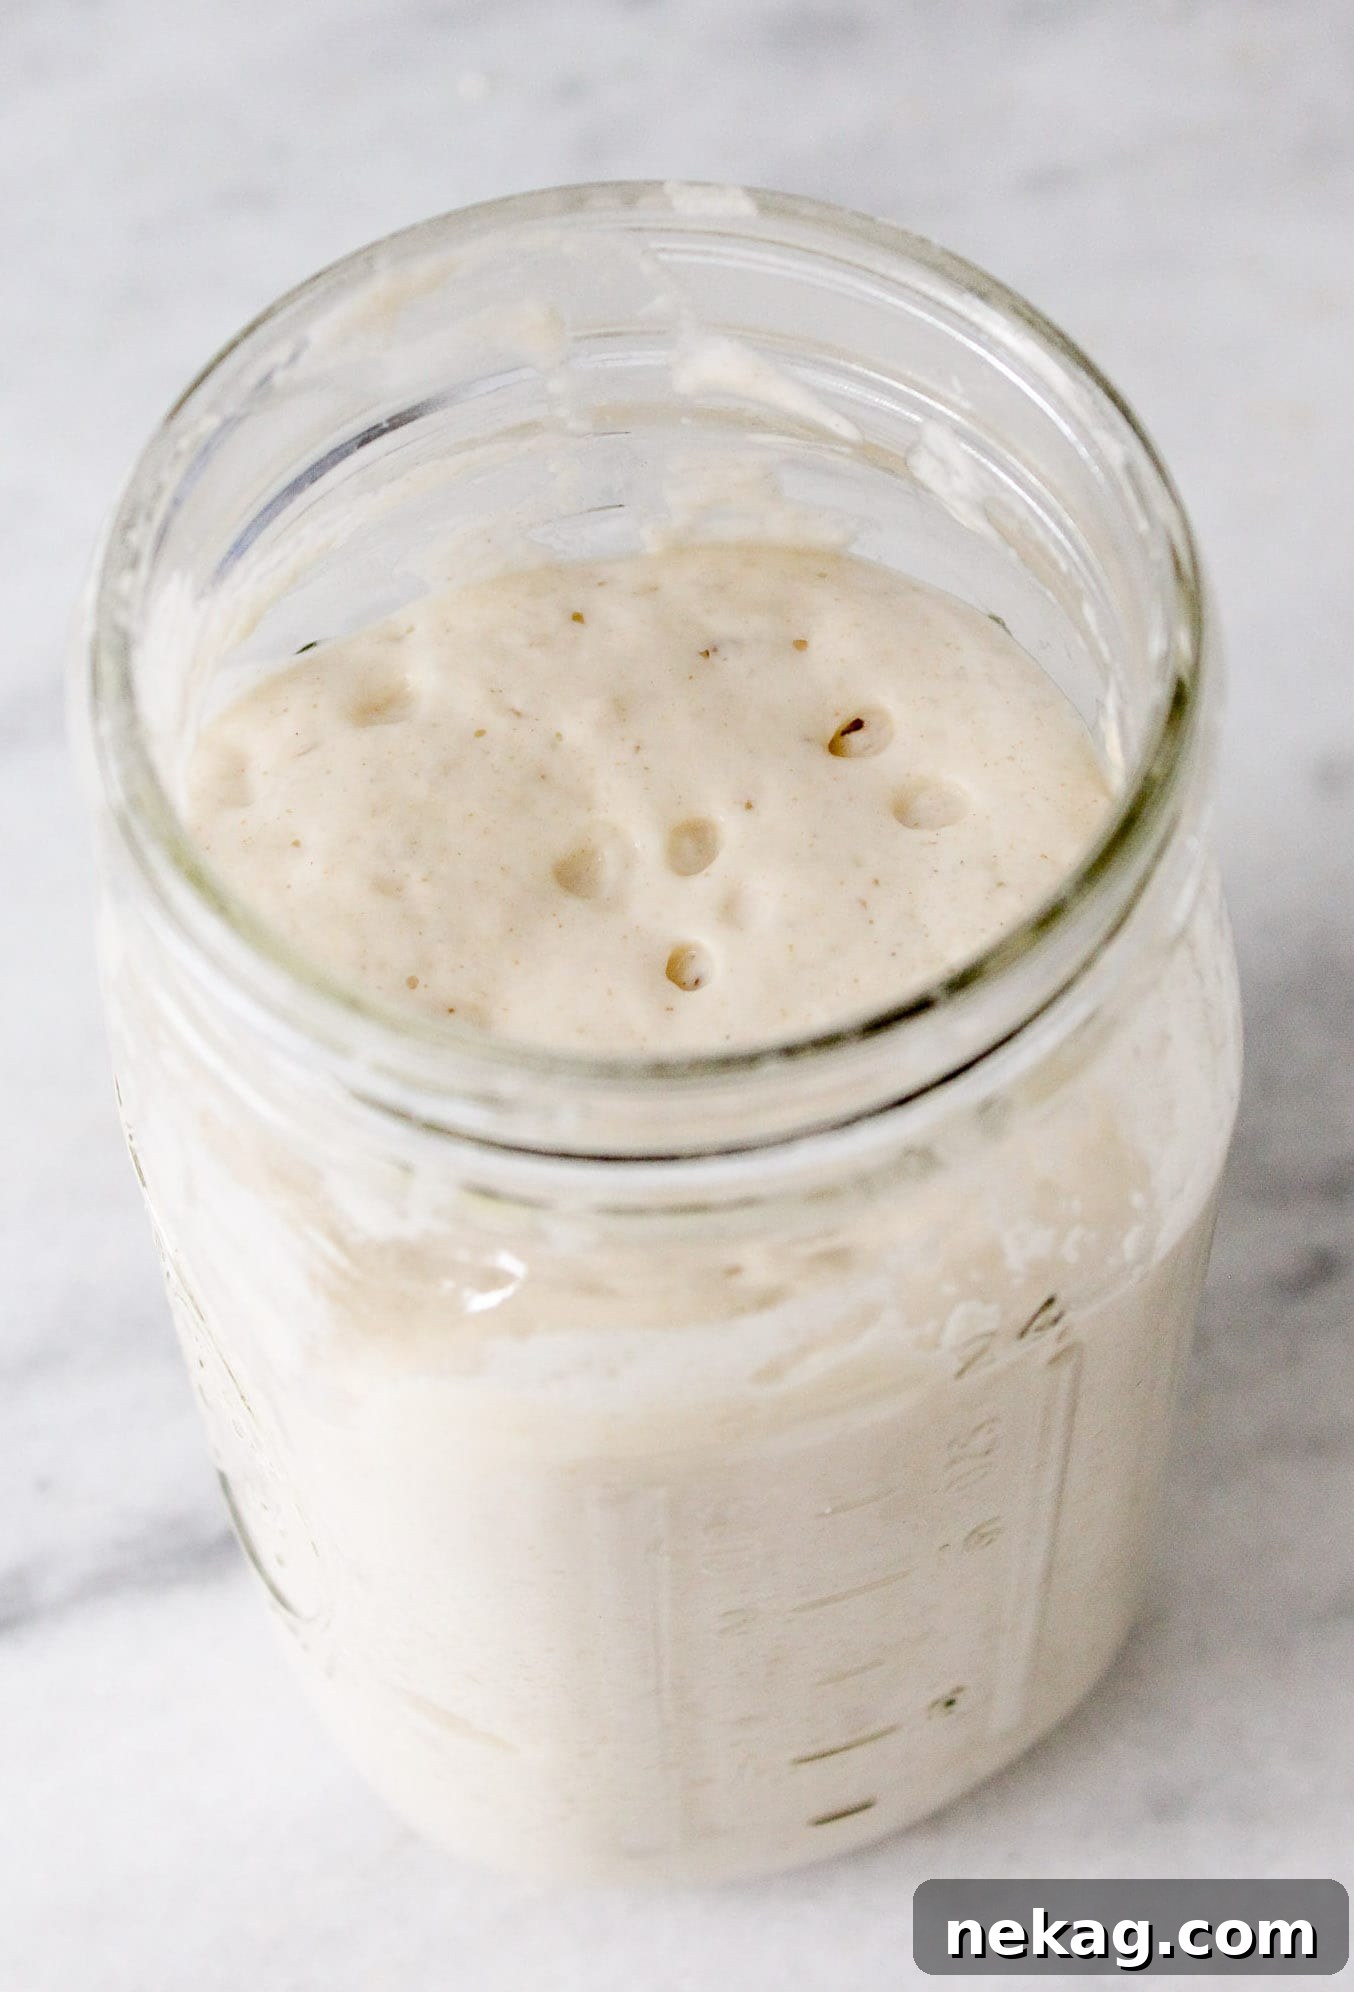
Chef Lindsey’s Recipe Tip
One of the easiest and most effective ways to accurately track the rise and fall of your sourdough starter is to mark its starting point. After you’ve freshly fed your starter and scraped the sides of the jar clean, simply place a rubber band around the jar at the level of the starter. This visual cue will immediately show you how much your starter has grown and whether it has truly doubled or even tripled, helping you understand its peak activity and readiness for baking.
Recipe FAQs: Your Sourdough Starter Questions Answered
Storing your sourdough starter correctly is crucial for its longevity and health. Always keep your starter in a clean glass jar with a breathable lid. Mason jars or quart containers work wonderfully, but ensure the lid isn’t airtight, as the starter produces gas. If you plan to bake frequently (daily or every other day), you can keep your active starter at room temperature, feeding it every 12-24 hours. For less frequent baking, storing it in the refrigerator is best. In the fridge, the cold temperatures significantly slow down its metabolism, meaning you only need to feed it once every week or two. Before baking with a refrigerated starter, take it out, let it come to room temperature for 8-12 hours, then feed it as usual, allowing it to become active and bubbly before use. For very long-term storage, like during extended travel, you can even dry your starter or store it in the freezer, feeding it every other month. However, for a consistently happy and strong starter, refrigeration with bi-weekly feedings is generally recommended over freezing.
Take a deep breath – it’s highly unlikely you’ve truly killed your sourdough levain! Sourdough starters are incredibly resilient. Most “near-death” experiences are simply signs of neglect and can be revived with a little attention. A common sight is a dark, watery layer on top of your starter, often black or grey. This is known as “hooch,” and it’s your starter’s urgent way of signaling that it’s extremely hungry! Don’t worry, it happens to even the most experienced bakers. Simply stir the hooch back in (it adds flavor, though you can pour it off if preferred), leave your starter out at room temperature for about 8 hours, then resume its regular feeding schedule. The longer your starter has been neglected, the more consecutive feedings it will need to regain its strength before returning it to the refrigerator. For example, if it’s been neglected for two weeks, feed it for two consecutive nights. If it’s been two months, plan on at least five consecutive days of feeding, or until it consistently doubles within 12 hours after feeding. Consider drying a portion of your starter as a backup if panic attacks over neglect are a regular occurrence!
While the term “discard” suggests waste, it’s a necessary part of maintaining a healthy, naturally leavened starter, and you absolutely don’t have to throw it away! Sourdough discard refers to the portion of your starter that you remove before each feeding. This isn’t waste; it’s a flavorful ingredient! You can collect your sourdough discard in a separate, covered jar in your refrigerator and use it for a multitude of delicious recipes that don’t require the starter to be active and bubbly. Some of my absolute favorites include fluffy sourdough pancakes and crispy sourdough waffles, perfect for breakfast. You can also make savory treats like crunchy sourdough discard crackers or transform it into incredible sourdough pizza dough for the best homemade pizza crust. The options are endless, ensuring no part of your sourdough journey goes to waste.
Getting to know your sourdough starter means familiarizing yourself with its various shades and appearances throughout its lifecycle. When you first begin your starter, especially if you use rye or another whole-grain flour, its color can range from a brownish-red to a light grey, depending on the specific type and grind of flour. As you transition to feeding it with unbleached all-purpose flour, your starter will gradually lighten to a medium-cream color. The precise shade of this cream color can also vary slightly based on how processed your all-purpose flour is. However, there is one critical color to watch out for: pink. If your starter develops a pink or orange hue, this is a definite sign of contamination with a harmful mold or bacteria, and you should immediately discard the entire starter and start fresh. A healthy sourdough starter’s acidic environment is generally inhospitable to harmful molds, but contamination can occur if a non-sterilized container or utensil is used.
Recommended Sourdough Bread Recipes
Once your sourdough starter is thriving, dive into these fantastic recipes to begin your baking adventure:
Sourdough Bread Recipes
Easy Sourdough Bread Recipe
Sourdough Bread Recipes
Sourdough Raisin Bread
Dinner Roll Recipes
Sourdough Rolls
Sourdough Bread Recipes
Cherry Sourdough Bread
If you tried this recipe and loved it, please leave a 🌟 star rating and let me know how it goes in the comments below. I love hearing from you; your comments make my day!
Sourdough Starter Recipe
Chef Lindsey
5 days
5 days
Makes 300-400g active starter
Pin Recipe
Comment
Print Recipe
Ingredients
- 300 g rye flour (for initial feedings)
- 700 g water (room temperature, preferably filtered)
- 400 g unbleached all-purpose flour (for later feedings)
Instructions
-
Day 1: In a clean container, combine 100g of rye flour and 100g of water. Stir until all flour is fully hydrated. Cover loosely and let it sit at room temperature (70-75°F / 21-24°C) for 24 hours.
-
Day 2: Discard all but 100g of yesterday’s starter. In a clean container, combine 100g of fresh rye flour, 100g of water, and the 100g of old starter. Stir well, cover loosely, and let sit at room temperature for 24 hours. You should start noticing small bubbles.
-
Day 3: Repeat Day 2’s feeding process. Discard all but 100g of starter. Feed with 100g rye flour and 100g water. Cover and let sit for 24 hours. Your starter should now be nearly doubled or more in volume.
-
Day 4: Discard all but 100g of starter. Switch to unbleached all-purpose flour: combine 100g all-purpose flour, 100g water, and the 100g old starter. Cover and let sit at room temperature for 24 hours. Your starter should show vigorous doubling and larger air pockets.
-
Day 5: Repeat Day 4’s feeding process. Your starter should now be consistently tripling in size after feeding, indicating it’s active and ready to leaven bread!
-
Days 6 & 7: Continue to repeat the Day 4 feeding schedule to ensure your starter is robust and fully established before long-term storage or consistent baking.
-
Feeding your starter for the long term: To maintain a healthy, active starter for regular baking, once established, you can switch to the following feeding ratios. Remember to always discard all but 10g of your previous day’s starter before feeding:
For a stiff levain (100% hydration):
100g water
10g previous day’s starter
100g all-purpose flour
OR for a liquid levain (125% hydration):
125g water
10g previous day’s starter
100g all-purpose flour
Video
Notes
For a visual step-by-step guide, please watch the accompanying video.
Flavor Tips: Your starter’s flavor profile will be directly influenced by the type of flour you use for feeding. If you consistently feed it with whole wheat flour, your bread will carry those distinct whole wheat notes. For maximum versatility and a neutral base that complements any bread recipe, I highly recommend using unbleached all-purpose flour for its regular feedings. This allows the starter’s natural tang to shine without specific flour flavor dominance.
Technique: For optimal yeast and bacterial growth, your sourdough starter needs to ferment at a consistent room temperature (ideally 70-75°F / 21-24°C). If storing in the fridge or freezer, always remove it, let it come to room temperature for 8-12 hours, feed it according to your chosen ratio, and then allow it to ferment at room temperature overnight or until it’s bubbly and active before using it in a recipe.
Storage: Store your active sourdough starter in a clean glass jar with a loosely fitting lid. Quart containers or Ball jars are excellent choices. The key is to keep it covered to prevent drying out, but not airtight, to allow gases to escape.
Nutrition
Carbohydrates: 89g |
Protein: 12g |
Fat: 1g |
Saturated Fat: 1g |
Polyunsaturated Fat: 1g |
Monounsaturated Fat: 1g |
Sodium: 8mg |
Potassium: 258mg |
Fiber: 8g |
Sugar: 1g |
Calcium: 26mg |
Iron: 4mg
Bread
American
417
Like this? Leave a comment below!
Before You Go: Continue Your Sourdough Journey
I sincerely hope you enjoyed the fulfilling process of creating your very own sourdough starter! Now that you’ve successfully established a strong, active levain, a world of delicious sourdough baking awaits you. Don’t stop here – be sure to explore my other fantastic sourdough bread recipes to put your new starter to good use. You might love these incredibly fluffy sourdough cinnamon rolls for a sweet treat, or perhaps these savory rosemary sourdough rolls to complement any meal. Happy baking!