
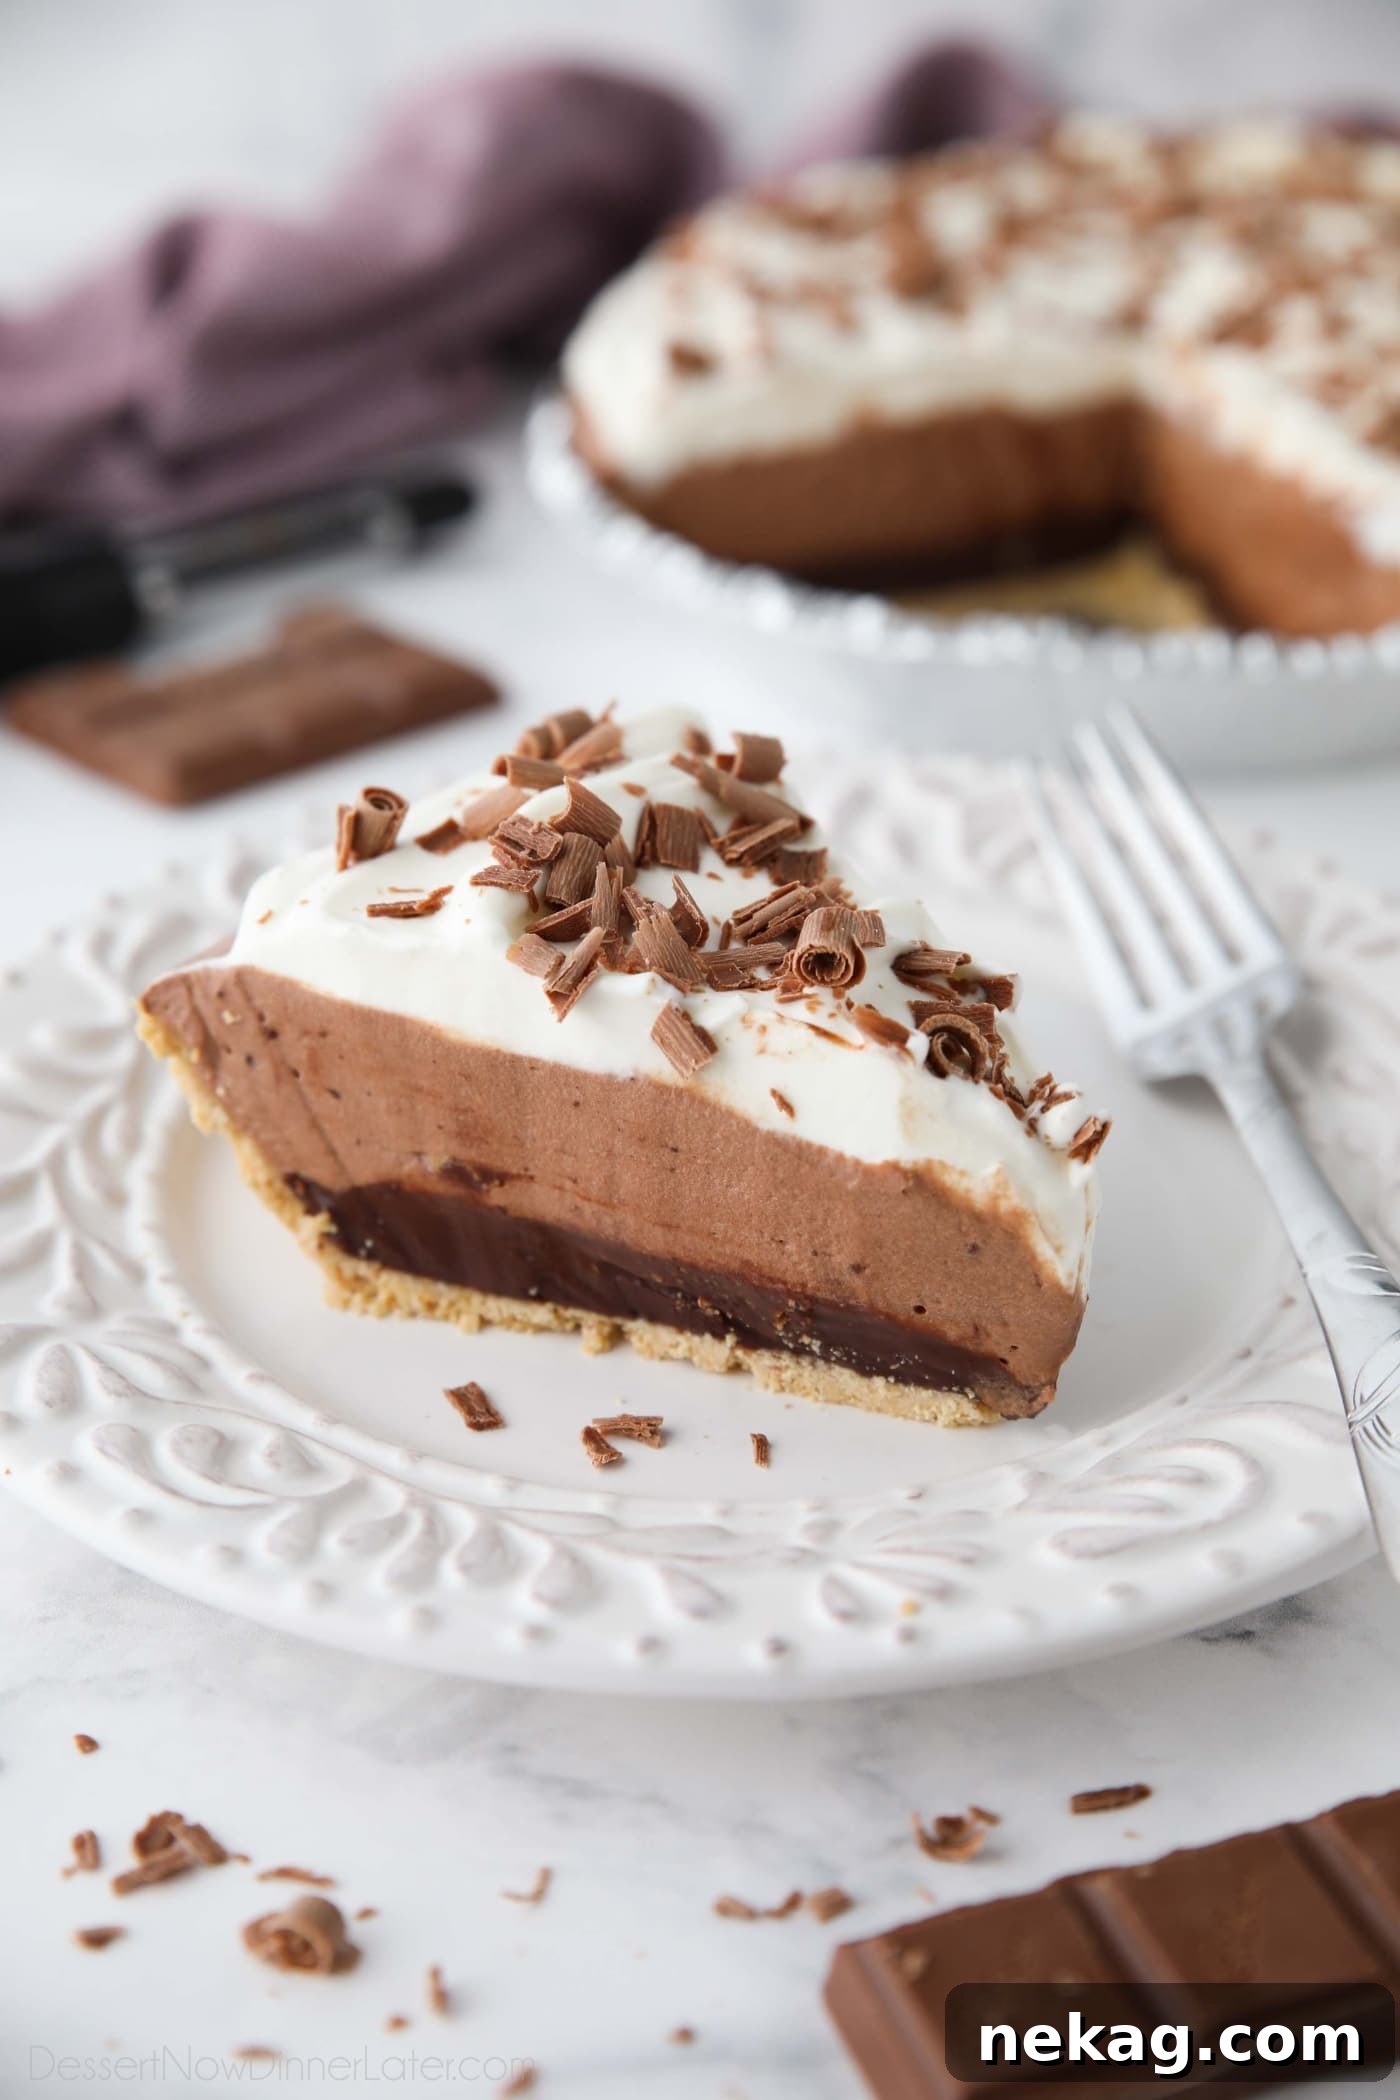
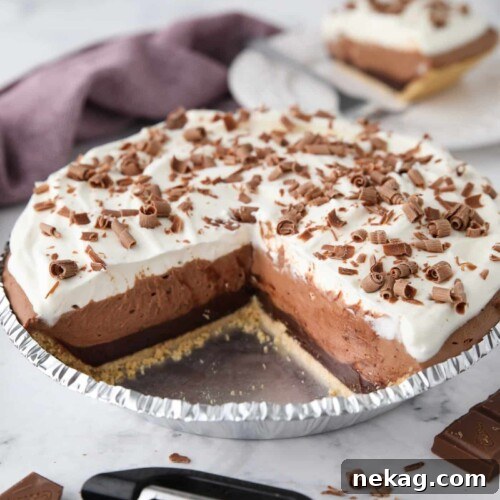
Chocolate Truffle Pie is a truly irresistible, no-bake dessert that brings together an exquisite blend of textures and rich chocolate flavors. Imagine a silky-smooth ganache base, topped with a light and airy whipped chocolate filling, and crowned with fluffy, sweetened whipped cream—all nestled within a crisp graham cracker crust. This make-ahead pie is not just a treat for the taste buds, but also a stunning centerpiece that promises to impress with minimal effort. It’s the perfect indulgent dessert for holidays, special gatherings, or simply when you crave a deeply satisfying chocolate experience.
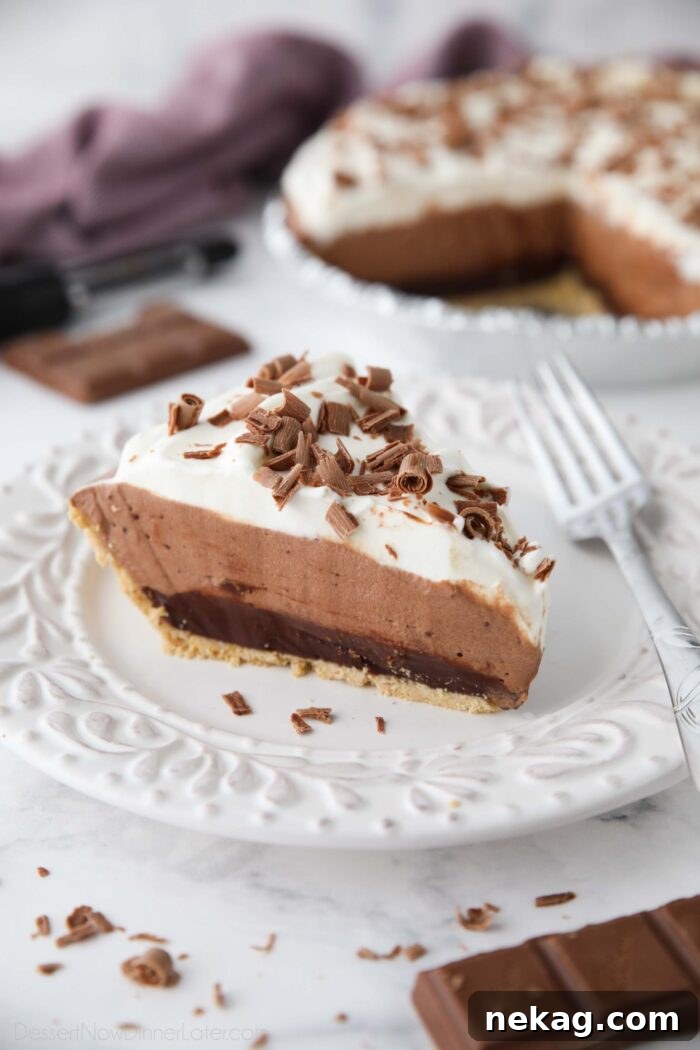
Why You’ll Adore This Chocolate Truffle Pie Recipe
If you consider yourself a true chocolate aficionado, the very mention of “truffle” likely ignites a craving. But beyond its decadent name, this Chocolate Truffle Pie offers a multitude of reasons to become your new favorite dessert. It combines luxurious flavor with impressive simplicity, making it a standout choice for any occasion.
- Effortlessly No-Bake: Say goodbye to hot kitchens and oven preheating. This delightful pie requires absolutely no baking, relying solely on the refrigerator to set its rich layers. This makes it an ideal dessert for warmer months, busy holidays, or any time you want a fantastic treat without the fuss of baking.
- Remarkably Simple with Few Ingredients: You might be surprised to learn that this intensely flavorful and complex-tasting pie is made with just five core ingredients (six, if you count the optional chocolate shavings for garnish!). These staple pantry items transform into a gourmet dessert that tastes far more elaborate than it is to prepare.
- The Ultimate Make-Ahead Dessert: Planning a dinner party or a holiday feast can be stressful, but your dessert doesn’t have to be. Since each layer requires time to chill and set properly in the fridge, this chocolate truffle pie is perfectly suited for preparation a day or even two in advance. This allows the flavors to meld beautifully and frees up your valuable time on the day of your event, letting you focus on other preparations or simply relax.
- Decadent & Luxurious Texture: Each bite delivers a symphony of textures, from the dense, fudgy ganache to the light, mousse-like whipped chocolate and the soft, sweet whipped cream. It’s a dessert that feels incredibly indulgent, yet surprisingly light, tempting you to enjoy more than just one slice.
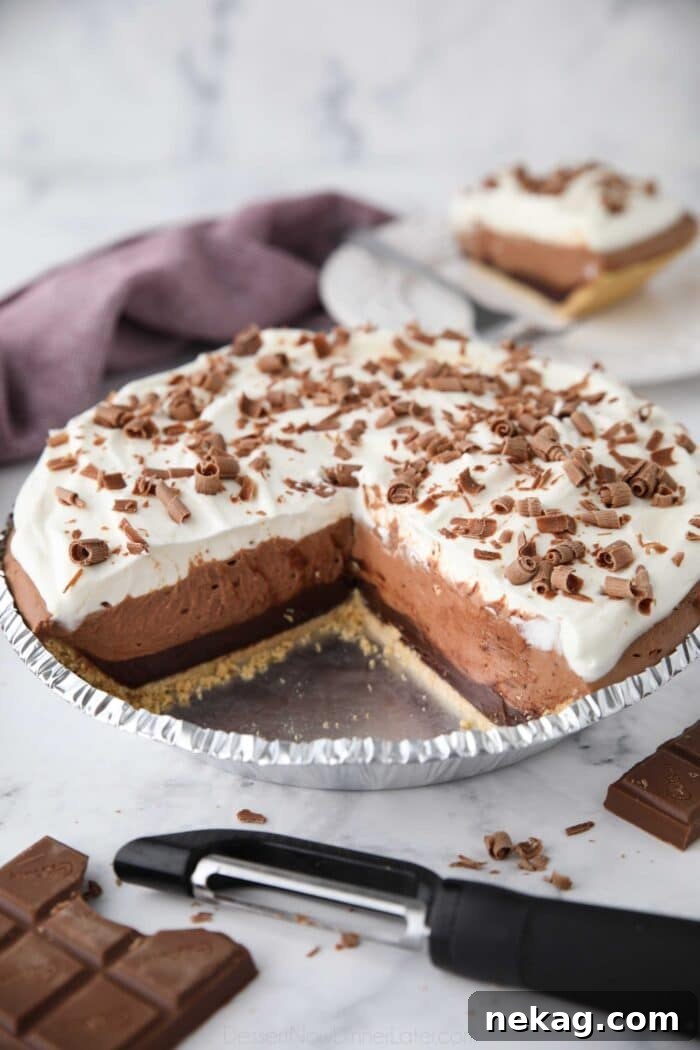
Chocolate Truffle Pie: A Decadent Delight in Every Layer
This recipe for Chocolate Truffle Pie, inspired by culinary traditions, delivers an unparalleled level of decadence. It’s a dessert that embodies pure, creamy chocolate pleasure. While it’s incredibly rich, its light and airy qualities prevent it from being overly heavy, making it dangerously easy to indulge in bite after satisfying bite.
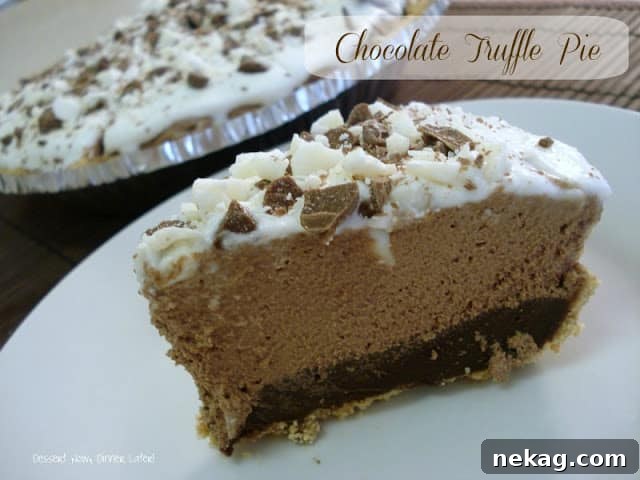
The magic of this pie lies in its meticulously crafted layers, each contributing a unique texture and depth of flavor. There are three primary luscious fillings, beautifully contained within a classic graham cracker crust, with an optional but highly recommended garnish bringing the total to four delightful components:
- Truffle Filling (Rich Chocolate Ganache): This forms the foundational layer of the pie. Essentially a high-quality chocolate ganache, it provides a dense, intensely chocolatey, and almost fudgy base. This layer is the essence of what gives the pie its “truffle” designation, offering a deep, dark chocolate experience that is both smooth and satisfying.
- Whipped Chocolate Filling: Building on the ganache, this middle layer is a lighter, airier version. It’s made by whipping cooled chocolate ganache with additional heavy cream until it transforms into a fluffy, mousse-like consistency. This creates a wonderful textural contrast with the denser truffle layer below, maintaining the rich chocolate flavor while introducing a delicate, cloud-like quality.
- Sweetened Whipped Cream Topping: To crown this chocolate masterpiece, a generous layer of freshly whipped cream is essential. We’re talking about homemade, pillowy whipped cream here, not the store-bought tub variety. Its subtle sweetness and airy texture provide a crucial balance to the richness of the chocolate layers, adding a refreshing creaminess that completes the pie.
- Optional Chocolate Shavings (Garnish): For an elegant finish and an extra touch of chocolatey goodness, delicate chocolate shavings are scattered over the whipped cream. This simple garnish adds a beautiful visual appeal and a delightful, subtle textural crunch that elevates the entire dessert.
The choice of a graham cracker crust for this truffle pie is deliberate and brilliant. Its slightly sweet, subtly salty, and wonderfully crumbly texture acts as the perfect counterpoint to the deep, smooth richness of the chocolate fillings. It provides a sturdy yet delicate foundation that ties all the layers together without competing with their flavors. Moreover, the fresh whipped cream on top isn’t just for show; it actively works to balance the intensity of the chocolate, introducing a refreshing lightness and an unparalleled creaminess that truly harmonizes the entire pie. This thoughtful combination of layers and textures ensures a sublime dessert experience with every forkful.
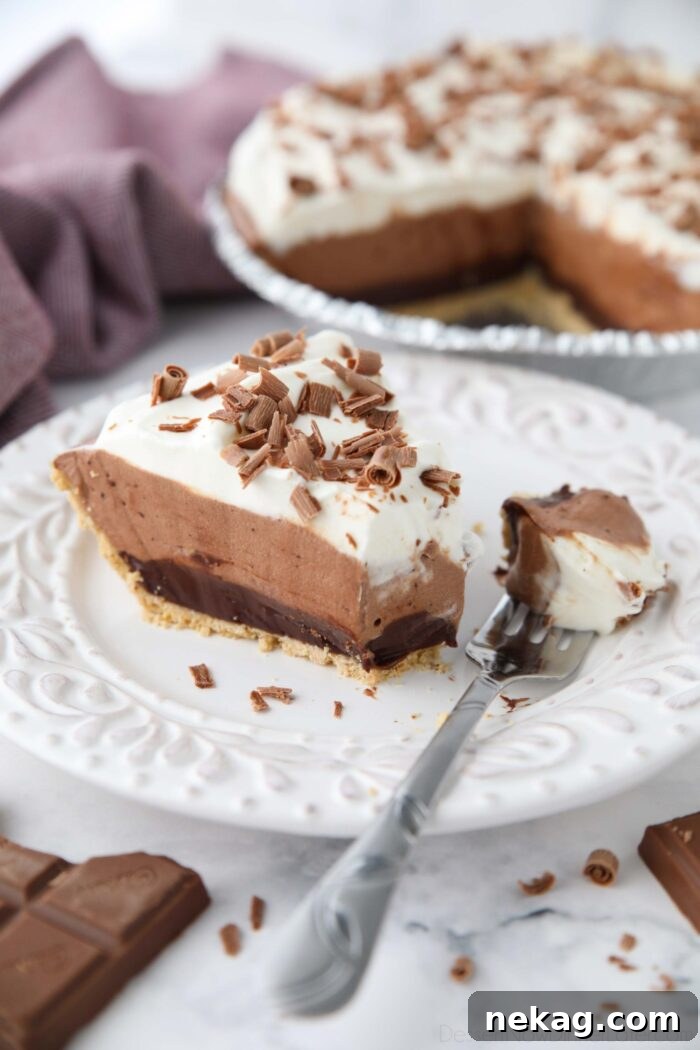
Essential Ingredients for Your Chocolate Truffle Pie
Crafting this exquisite chocolate truffle pie requires surprisingly few ingredients, making it an accessible and straightforward recipe for any home cook. With just five core components (and one optional for garnish), you’ll create a dessert that tastes incredibly complex and luxurious. Here’s a closer look at what you’ll need and why each ingredient is important:
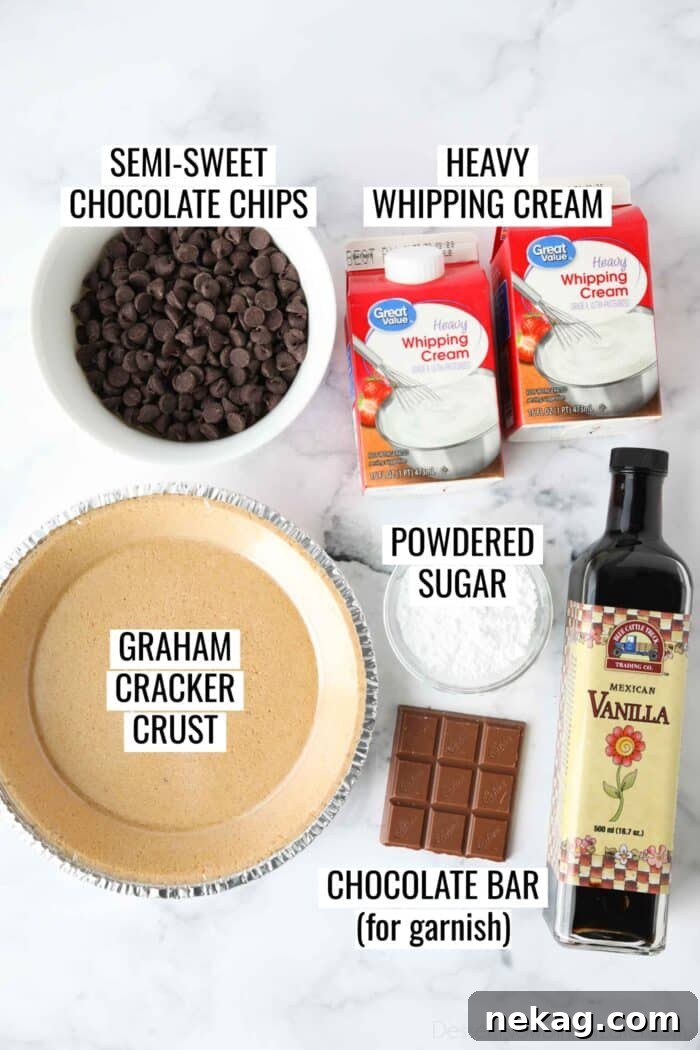
- Graham Cracker Crust: To simplify this no-bake recipe even further, a store-bought 9-inch graham cracker crust is a perfect choice. It saves time and ensures a consistent result. However, if you prefer a homemade touch, you can easily prepare your own graham cracker crust from scratch. For a delightful variation, an Oreo crust can also be used, offering a slightly different flavor profile. The key is to ensure the crust is chilled (or baked and then chilled, if using a homemade version that requires baking) to maintain the completely no-bake nature of this truffle pie.
- Semi-Sweet Chocolate Chips: The quality of your chocolate chips truly makes a difference in this recipe, as chocolate is the star ingredient. Investing in a good brand like Guittard or Ghirardelli will yield a superior flavor and smoother melt. While these are often preferred, using a readily available quality brand, such as Kirkland semi-sweet chocolate chips, can also produce excellent results if that’s what you have on hand. The semi-sweet variety provides a balanced chocolate flavor that isn’t overly sugary, allowing the true essence of the chocolate to shine.
- Heavy Whipping Cream: This is arguably the most versatile ingredient in this pie, playing a crucial role in every single layer. It’s the essential component for creating the rich truffle ganache filling, it’s whipped with additional ganache to form the light and airy whipped chocolate filling, and it’s finally whipped on its own to create the fluffy, sweetened topping. Its high-fat content is what allows it to be whipped into stable peaks and create such luxurious textures.
- Vanilla Extract: A touch of vanilla extract works wonders in enhancing and deepening the overall chocolate flavor without overpowering it. It adds a subtle warmth and aromatic complexity that rounds out the sweetness and richness of the fillings. Be sure to use pure vanilla extract for the best results.
- Powdered Sugar: This fine sugar is used to lightly sweeten the homemade whipped cream topping. Powdered sugar is preferred over granulated sugar for whipped cream because its fine texture dissolves instantly, preventing a grainy consistency and ensuring a perfectly smooth, silky topping.
- Milk Chocolate Bar (Optional Garnish): For those beautiful, delicate chocolate shavings that elevate the pie’s presentation, a milk chocolate bar is ideal. Its slightly softer texture makes it easier to shave with a vegetable peeler compared to semi-sweet chocolate. This step is optional but highly recommended for an elegant finish.
You’ll notice that this recipe incorporates very minimal added sugar beyond what’s already present in the semi-sweet chocolate chips and a small amount in the whipped cream. This deliberate choice ensures that the pie is perfectly sweet without being cloying, allowing the deep, nuanced flavors of the chocolate to truly shine through. Now, let’s dive into how incredibly easy it is to assemble this masterpiece.
Crafting the Decadent Truffle Filling
Since we’re opting for the convenience of a pre-made crust, our journey begins with the very first and most foundational layer: the truffle filling. This rich, dense layer sets the stage for the entire pie, delivering an intense burst of pure chocolate flavor and a smooth, luxurious texture.
At its heart, chocolate truffles are elegantly simple: a harmonious blend of chocolate and cream, also known as ganache, often with added flavorings. For the base of our pie, we’ll focus on the pure chocolate and cream, reserving the delightful addition of vanilla for our middle layer.
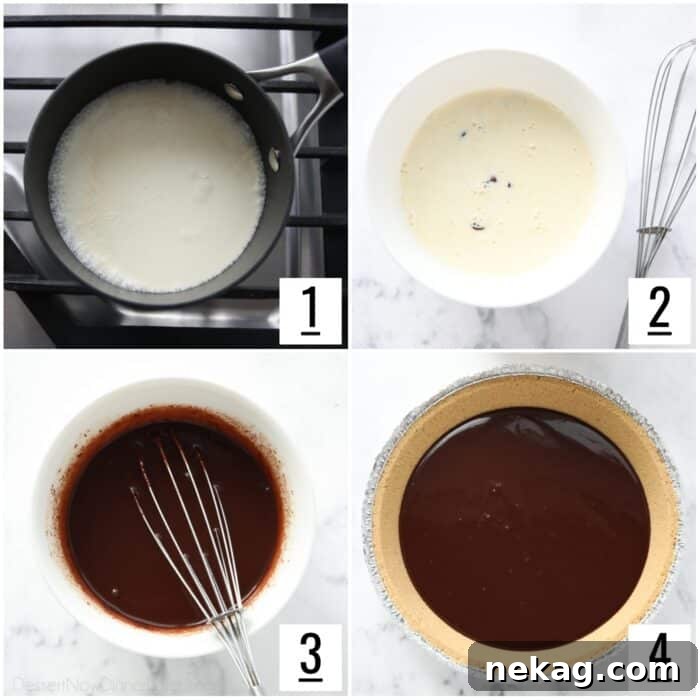
- Simmer the Cream: In a small saucepan, gently bring 2/3 cup of heavy cream to a simmer over medium heat. Watch it carefully; you want to see small bubbles just forming around the edges, but avoid a rolling boil. This ensures the cream is hot enough to melt the chocolate effectively.
- Combine with Chocolate: Place 6 ounces of your chosen semi-sweet chocolate chips into a heatproof bowl. Once the cream has reached a simmer, immediately pour the hot cream directly over the chocolate chips.
- Let Stand and Whisk: Allow the mixture to sit undisturbed for 1 minute. This crucial resting time allows the residual heat from the cream to melt the chocolate chips evenly. After 1 minute, gently whisk the mixture. Start from the center and slowly work your way outwards until the chocolate is completely melted and the ganache is smooth, glossy, and uniform in consistency.
- Spread and Chill: Carefully spread this rich truffle filling over the bottom of your graham cracker crust, ensuring an even layer. For optimal setting, place the pie in the freezer for 20 minutes. This quick chill will firm up the base, preparing it for the next delicious layer.
Preparing the Secondary Chocolate Ganache
While your truffle filling is chilling in the freezer, it’s the perfect time to prepare the second batch of chocolate ganache. This ganache will form the base for our light and airy whipped chocolate filling, adding another dimension of chocolatey goodness to the pie.
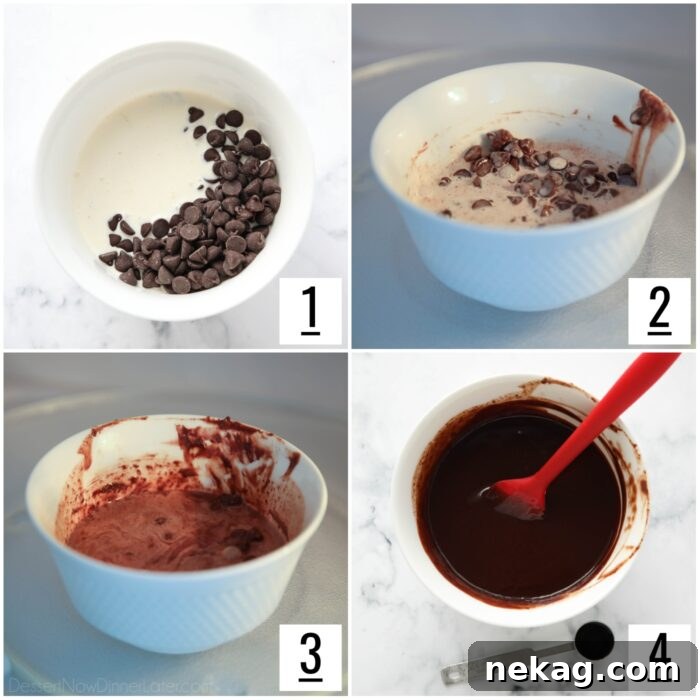
- Combine Ingredients: In a microwave-safe bowl, combine 6 ounces of semi-sweet chocolate chips with 1/2 cup of heavy cream. Ensure the bowl is large enough to allow for stirring.
- Microwave with Intervals: Heat the mixture in the microwave at half power for 30-second increments. After each interval, remove the bowl and stir the mixture thoroughly, even if it doesn’t look fully melted. This gentle heating prevents the chocolate from scorching and ensures an even melt.
- Achieve Smoothness: Continue microwaving and stirring in 30-second increments until the chocolate is fully melted and the ganache is perfectly smooth and glossy. There should be no lumps remaining.
- Add Flavor and Cool: Stir in the vanilla extract, which will enhance the chocolate flavor beautifully. It’s crucial to let this chocolate ganache cool completely to room temperature before proceeding to the next step. If you’re in a hurry, you can place it in the refrigerator for 5-10 minutes, stirring occasionally, to quicken the cooling process. Ensuring it’s cool is vital for proper whipping.
Whipping Up the Velvety Chocolate Filling
With both the truffle filling chilled and the second batch of chocolate ganache cooled, we’re ready for the transformative step of whipping the chocolate filling. This process turns a rich ganache into a light, mousse-like layer that provides a delightful contrast to the denser base.
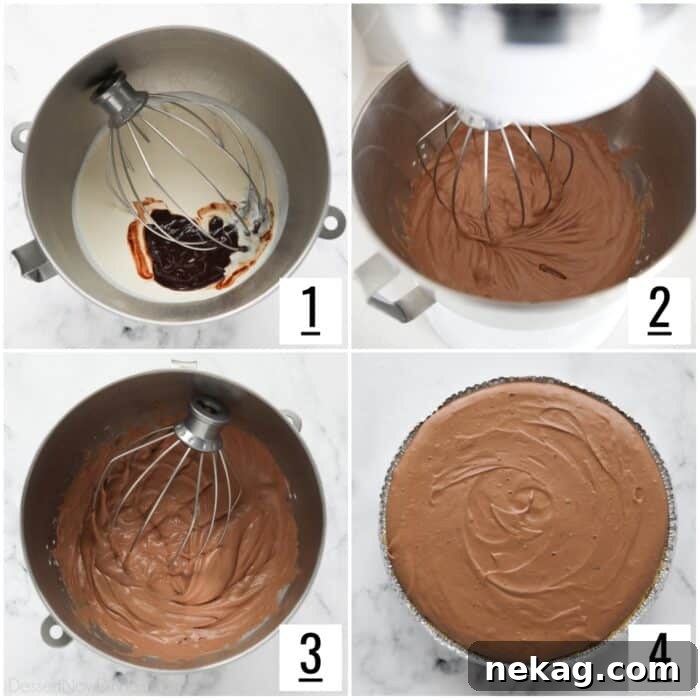
- Prepare for Whipping: While the chocolate ganache is cooling, place a clean mixing bowl (preferably metal or glass) and your beaters (from a hand mixer or stand mixer) into the refrigerator or freezer for about 10-15 minutes. Chilling your equipment is a secret weapon for achieving perfectly whipped cream and chocolate fillings.
- Combine and Beat: Once the ganache has cooled to room temperature and your bowl is chilled, combine the cooled chocolate ganache with 1 cup of cold heavy cream in the chilled mixing bowl. Begin beating on medium-high speed.
- Form Medium Peaks: Continue beating the mixture until it thickens significantly and medium peaks form. You’ll know you’ve reached medium peaks when the mixture holds its shape fairly well when the beaters are lifted, but the very tip of the peaks curl over slightly, rather than standing straight up. The filling will look visibly lighter in color and much more voluminous.
- Texture Check: At this stage, the whipped chocolate filling will have some delightful ripples and a soft, spreadable consistency, similar to a rich chocolate mousse. Be careful not to overbeat, as it can become grainy.
- Assemble and Chill: Gently spread this luscious whipped chocolate filling evenly over the firm truffle filling in your pie crust. Once spread, place the pie back into the refrigerator to chill for a minimum of 6 hours, or ideally, overnight. This extended chilling period is crucial for allowing all the layers to set completely and for the flavors to fully meld. You may lightly cover the pie with plastic wrap to protect its surface from absorbing any refrigerator odors.
Preparing the Fresh Whipped Cream Topping
Just before you’re ready to serve your magnificent Chocolate Truffle Pie, it’s time to prepare the final, crowning glory: fresh, homemade whipped cream. This light and airy topping provides the perfect balance to the rich chocolate layers and adds an undeniable touch of elegance. Homemade whipped cream is far superior to store-bought, offering a fresher taste and a cloud-like texture that cannot be replicated.
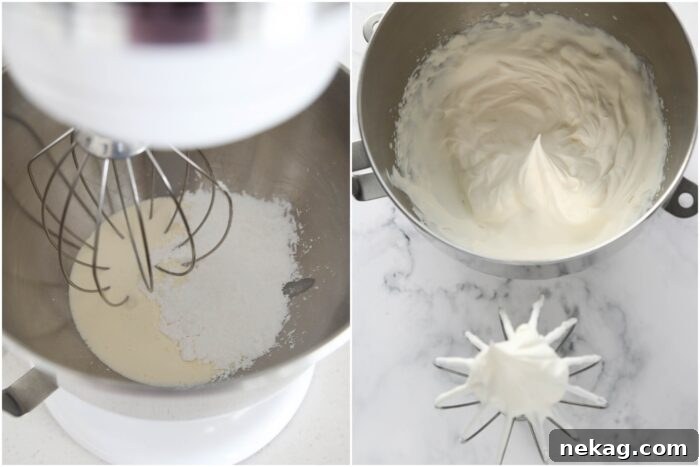
- Combine Ingredients: In the clean, chilled bowl of an electric mixer (using a stand mixer with a whisk attachment or a hand mixer), combine 1 cup of very cold heavy cream and 1/4 cup of powdered sugar. Ensure your heavy cream is straight from the refrigerator, as cold cream whips up much better and holds its shape longer.
- Beat to Stiff Peaks: Begin beating the cream and sugar on medium speed, gradually increasing to high speed. Continue to beat until stiff peaks form. Stiff peaks are achieved when the whipped cream holds its shape firmly and stands straight up when the beaters are lifted. The texture should be smooth and voluptuous. Be careful not to overbeat, as whipped cream can quickly turn grainy and eventually into butter if beaten too long.
The Grand Finale: Topping Your Chocolate Truffle Pie
With all the layers perfectly set and your fresh whipped cream ready, it’s time to assemble the final presentation of your decadent Chocolate Truffle Pie. This last step adds both visual appeal and a delightful textural contrast.
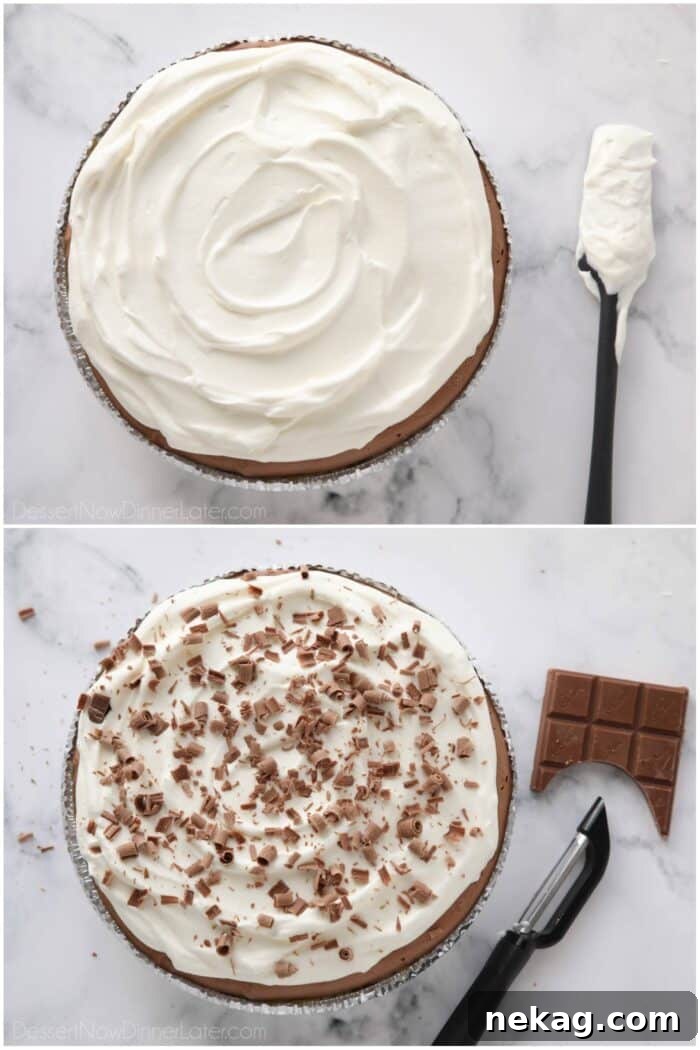
- Spread the Whipped Cream: Gently spoon the freshly whipped cream over the top of your chilled chocolate truffle pie. Using an offset spatula or the back of a spoon, carefully spread the cream into an even, beautiful layer. You can create a smooth, elegant surface or swirl it artfully for a more rustic look.
- Garnish with Chocolate Shavings: For an exquisite finishing touch, take your milk chocolate bar and a vegetable peeler. Holding the chocolate bar firmly, carefully run the vegetable peeler along the edge to create delicate chocolate shavings directly over the top of the pie. The shavings will fall lightly onto the whipped cream, adding a beautiful visual texture and an extra layer of chocolate flavor.
Serving and Storing Your Culinary Masterpiece
Presenting and preserving your Chocolate Truffle Pie correctly ensures that every slice is as perfect as the first. This decadent dessert is not only a joy to make but also straightforward to serve and store.
Serving Your Pie:
For the cleanest, most impressive slices, use a sharp, thin-bladed knife. After each cut, rinse the knife under hot water and wipe it clean with a towel before making the next cut. This simple trick prevents chocolate from sticking to the knife and creating messy edges, allowing for beautifully defined layers in every serving. Serve immediately to enjoy the freshest texture and flavor of the whipped cream.
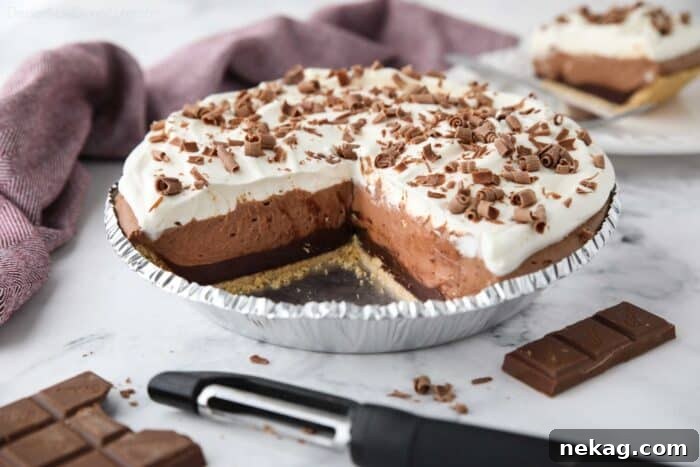
Storing Leftovers:
REFRIGERATE: Any leftover Chocolate Truffle Pie should be covered tightly with plastic wrap or placed in an airtight container and refrigerated promptly. When stored correctly, it will maintain its deliciousness for up to 5-7 days. The longer it chills, the more the flavors meld, though the whipped cream is best enjoyed within the first few days.
FREEZE: This pie freezes exceptionally well, making it perfect for preparing far in advance or enjoying portions over time. To freeze, first place the uncovered pie on a baking sheet and freeze until it is completely solid, which usually takes about two hours. Once solid, remove it from the freezer and wrap it tightly in two layers of plastic wrap. For an extra layer of protection against freezer burn, cover the plastic-wrapped pie with a layer of aluminum foil or transfer it to an airtight freezer-safe container. When properly frozen, the pie will retain its quality for 1-2 months. To enjoy, simply thaw the pie in the refrigerator overnight before serving.
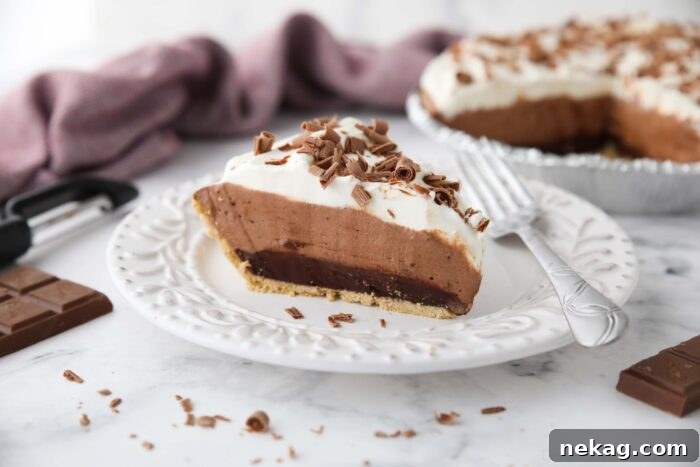
This Chocolate Truffle Pie is not only incredibly simple to put together but also guaranteed to wow your guests, especially during the holidays or any special celebration. Its rich flavor, luxurious texture, and elegant presentation will leave a lasting impression. You absolutely will not be disappointed with this delightful dessert!
Explore More No-Bake Pie Creations
If you loved the ease and deliciousness of this no-bake Chocolate Truffle Pie, you’re in for a treat! The world of no-bake desserts is vast and wonderful, offering endless possibilities for effortless indulgence. Here are some more fantastic no-bake pie recipes that promise rich flavors and simple preparation:
- Oreo Crust Peanut Butter Pie: A dreamy combination of creamy peanut butter filling and a classic Oreo cookie crust, this pie is pure bliss for peanut butter lovers.
- Chocolate Cream Cheese Pie: Indulge in a smooth, tangy, and rich chocolate cream cheese filling set in a delicious crust for a comforting and satisfying dessert.
- Grasshopper Pie without Alcohol: Enjoy the refreshing mint and chocolate flavors of a classic grasshopper pie, made accessible to all with this delicious alcohol-free version.
- Creamy No-Bake Cheesecake: Achieve the luxurious texture and rich flavor of cheesecake without ever turning on your oven. This recipe is wonderfully creamy and endlessly customizable.
- No-Bake Chocolate Cheesecake with Cocoa Powder: For those who can’t get enough chocolate, this cheesecake combines the velvety texture of a no-bake cheesecake with a profound cocoa flavor, creating a truly decadent experience.
If You Make This Recipe, Please Rate and Review it in the Comments Below. THANKS!
Chocolate Truffle Pie
No bake chocolate pie with silky smooth layers of ganache, whipped chocolate, and sweetened whipped cream nestled inside of a graham cracker crust.
Pin Recipe
Ingredients
Truffle Filling
- ⅔ cup (159 ml) heavy cream
- 6 oz (170 g) semi-sweet chocolate chips, about 1 cup
- 1 9-inch graham cracker crust, **See Notes
Whipped Chocolate Filling
- 6 oz (170 g) semi-sweet chocolate chips, about 1 cup
- 1½ cups (355 ml) heavy cream, divided
- ½ tsp vanilla extract
Whipped Cream Topping
- 1 cup (237 ml) heavy cream
- ¼ cup (30 g) powdered sugar
Garnish
- 1 oz (30 g) milk chocolate bar, optional (approx. 1/3 of a 3-oz. bar) – for shavings)
Equipment
- Silicone Spatula Set
- Nylon Whisk
- Pyrex Glass Bowl Set of 3
- Vegetable Peeler
Instructions
- TRUFFLE FILLING: In a small saucepan over medium heat, bring 2/3 cup of heavy cream to a simmer. Place 6 oz of semi-sweet chocolate chips in a bowl and pour the hot cream over the chocolate. Let stand for 1 minute, then gently whisk until smooth. Spread the truffle filling over the bottom of the graham cracker crust. Freeze for 20 minutes.
- WHIPPED CHOCOLATE FILLING: Combine 6 oz of semi-sweet chocolate chips with 1/2 cup of heavy cream inside of a microwave-safe bowl. Microwave at half power in 30 second increments, stirring in-between each interval. Repeat until fully melted and smooth. Stir in the vanilla and let the chocolate ganache cool to room temperature. (May place in fridge for 5-10 minutes to quicken the process.)
- In a chilled bowl, combine the chocolate ganache with 1 cup of heavy cream. Beat until thickened and medium peaks form. Medium peaks hold their shape fairly well, but the tip of the peaks curl slightly when the beaters are lifted. The mixture will have some ripples, but still look soft and spreadable. Spread the whipped chocolate filling over the truffle filling and refrigerate pie for 6 hours to overnight. (May cover lightly with plastic wrap to protect the pie.)
- WHIPPED CREAM TOPPING: Just before serving, combine 1 cup heavy cream and 1/4 cup powdered sugar inside the bowl of an electric mixer. Beat until stiff peaks form (tips stand straight). Spread the whipped cream over the top of the pie.
- GARNISH: Use a vegetable peeler to peel chocolate shavings directly over the top of the pie. Use a knife to cut the pie into slices. Rinse and wipe the knife with a towel after each cut to create clean slices. Enjoy immediately.
Notes
- NOTE: A 9-inch crust will be FULL (mounded) with filling. If you can find or make a 10-inch pie crust, you’ll have more room for the filling. Use the graham cracker crust recipe in my no bake cheesecake recipe.
- REFRIGERATE: Cover and refrigerate any leftovers for up to 5-7 days.
- FREEZE: This chocolate truffle pie will freeze well for 1-2 months. Place the uncovered pie on a baking sheet and freeze until solid, about two hours, before wrapping in two layers of plastic wrap. Then cover the pie with a layer of foil, or place inside of an airtight container for extra insurance from freezer burn. Thaw in the refrigerator before enjoying.
Nutrition
Calories: 672kcal |
Carbohydrates: 50g |
Protein: 6g |
Fat: 54g |
Saturated Fat: 31g |
Polyunsaturated Fat: 19g |
Trans Fat: 1g |
Cholesterol: 107mg |
Sodium: 141mg |
Fiber: 3g |
Sugar: 35g
Disclaimer: Nutritional values were calculated using a third-party tool and are provided as an estimation only.
Sharing this recipe with a link is both encouraged and appreciated. Copying/pasting and/or screenshots of full recipes to any social media is strictly prohibited. Content and photographs are copyright protected.
*Originally published 9/25/2012. Post updated October 2023.