
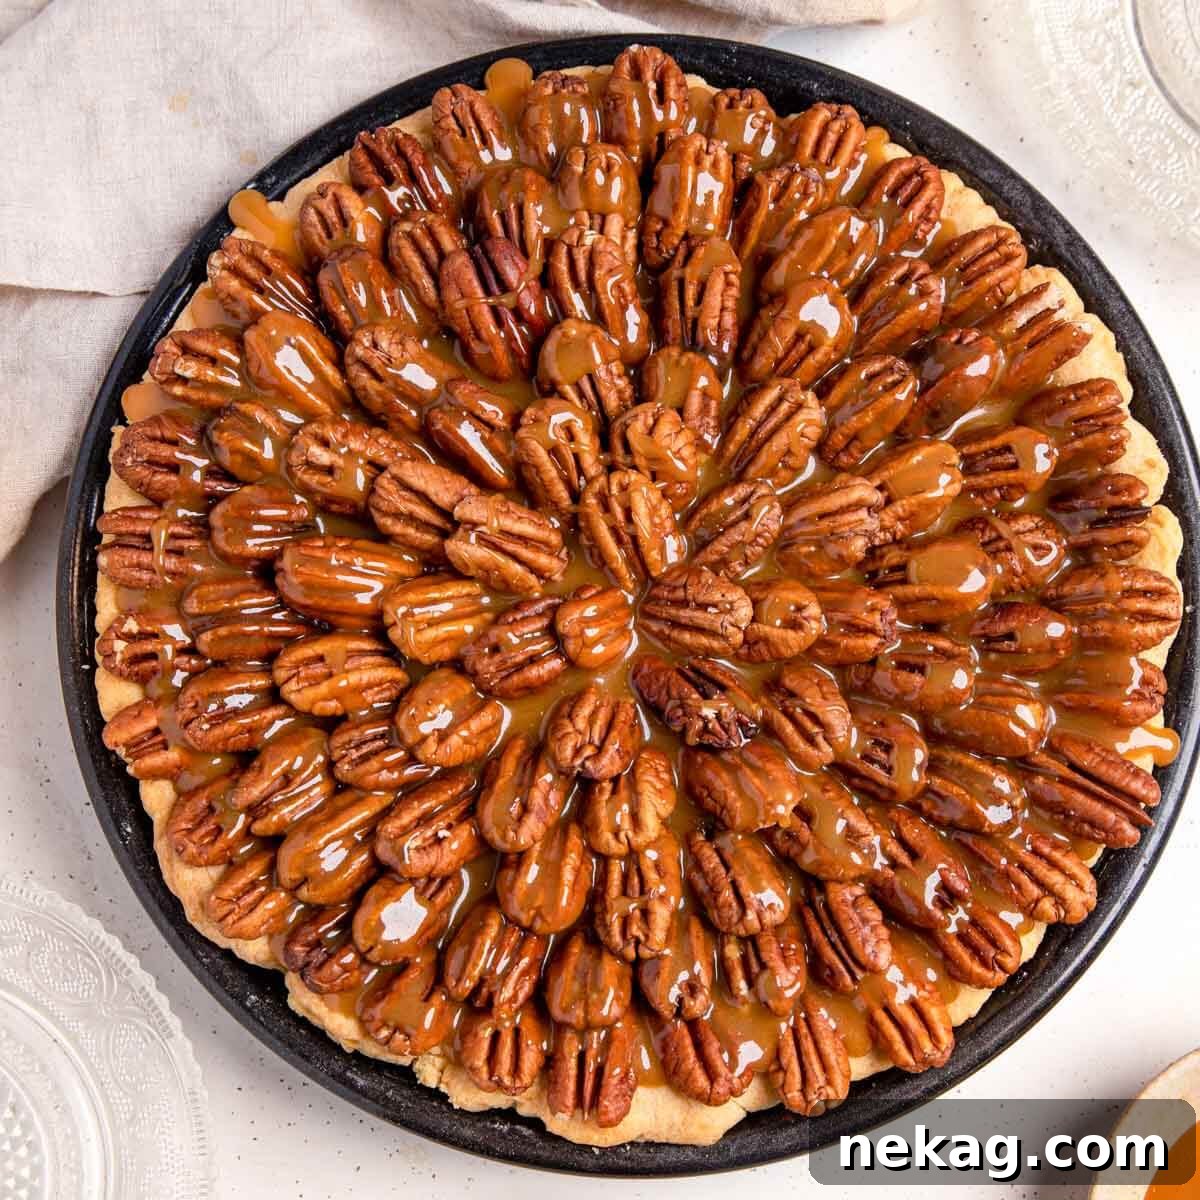
Decadent Salted Caramel Chocolate Pecan Pie: A Chef’s Ultimate Recipe
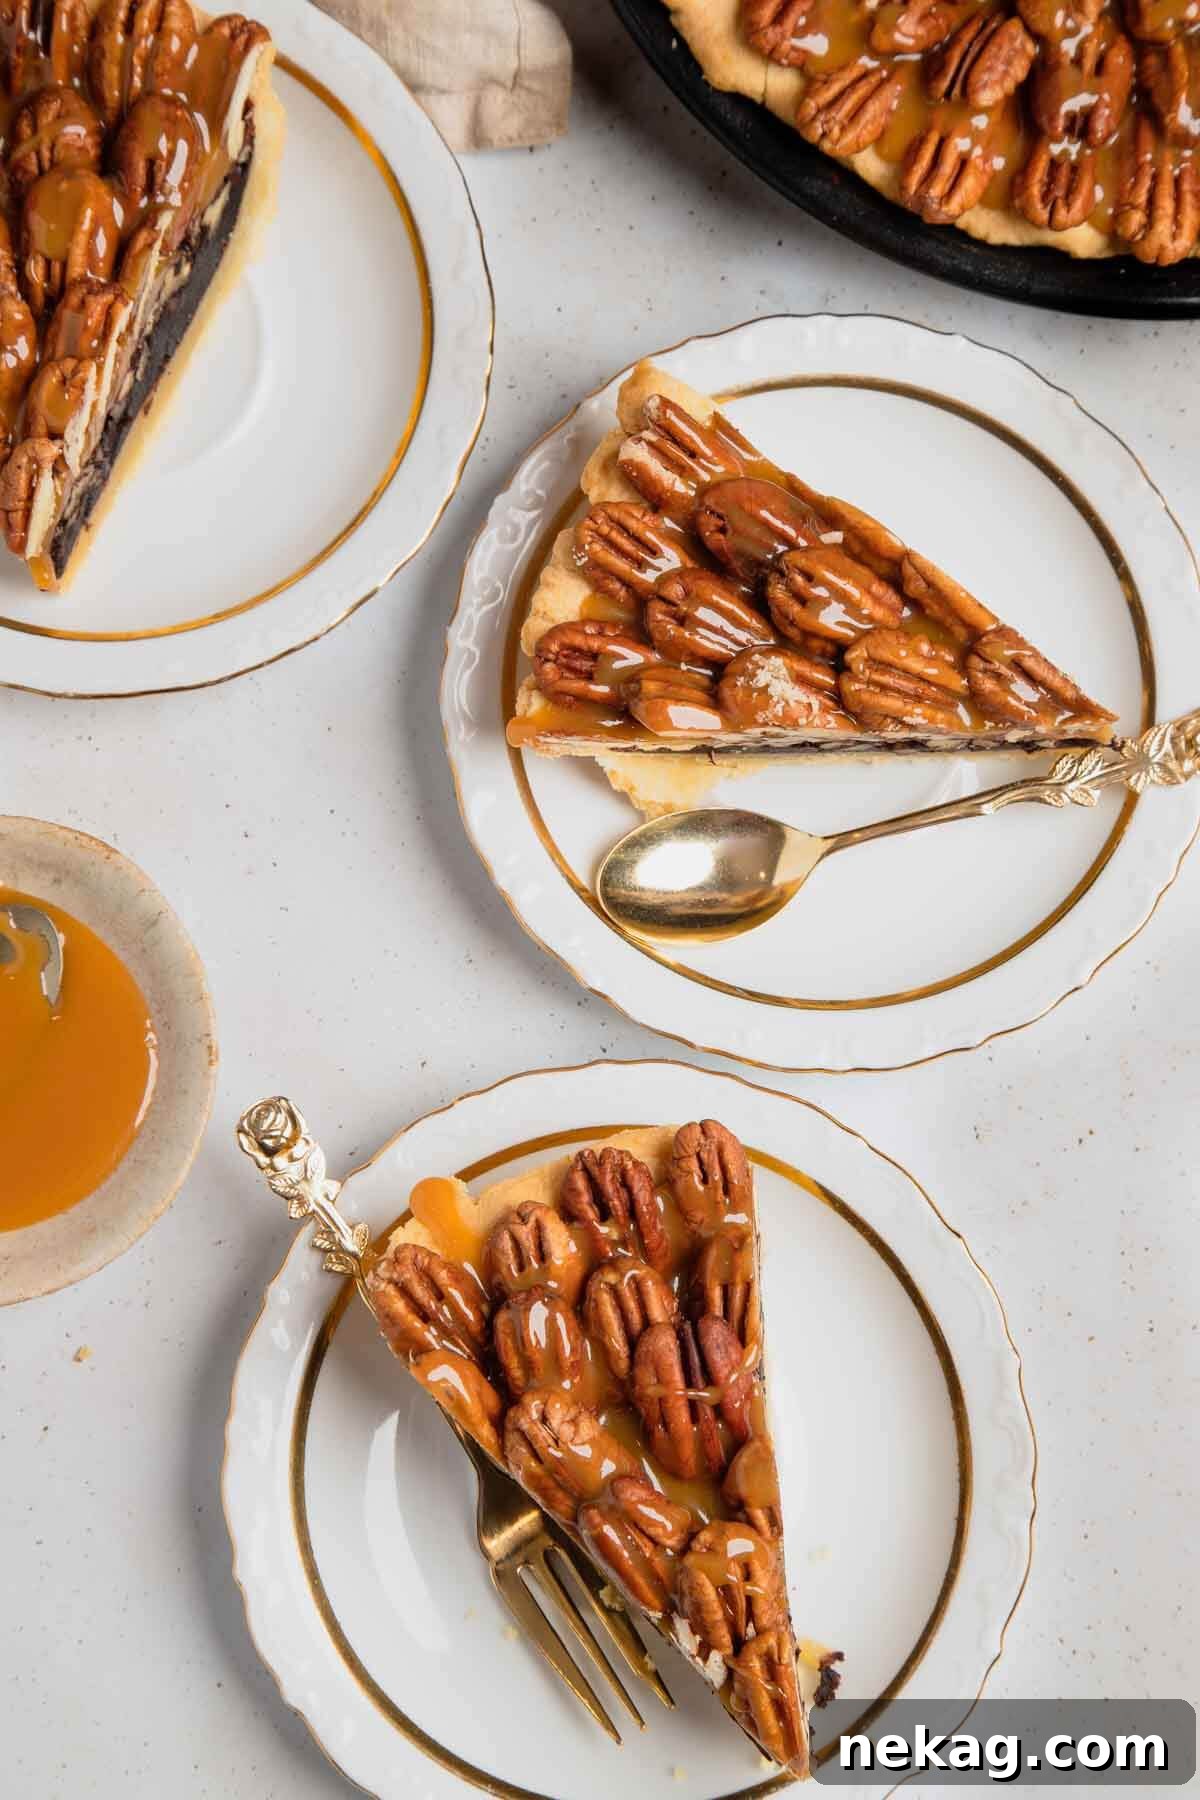
Prepare to be utterly captivated by this sensational **Chocolate Pecan Pie**, a true masterpiece that marries the cherished traditions of Southern baking with an elevated, gourmet twist. It’s far more than just a dessert; it’s an unforgettable culinary experience that will leave a lasting impression. Imagine sinking your fork into a perfectly flaky, golden-brown crust, giving way to a luxuriously thick, intensely chocolatey filling studded with fragrant, toasted pecans. And if that wasn’t enough to make you swoon, this masterpiece is crowned with a shimmering drizzle of homemade salted caramel sauce and a delicate sprinkle of flaky sea salt. This phenomenal combination of rich, dark chocolate, the earthy crunch of toasted nuts, and the exquisite balance of sweet and savory creates a symphony of flavors and textures that is truly unparalleled.
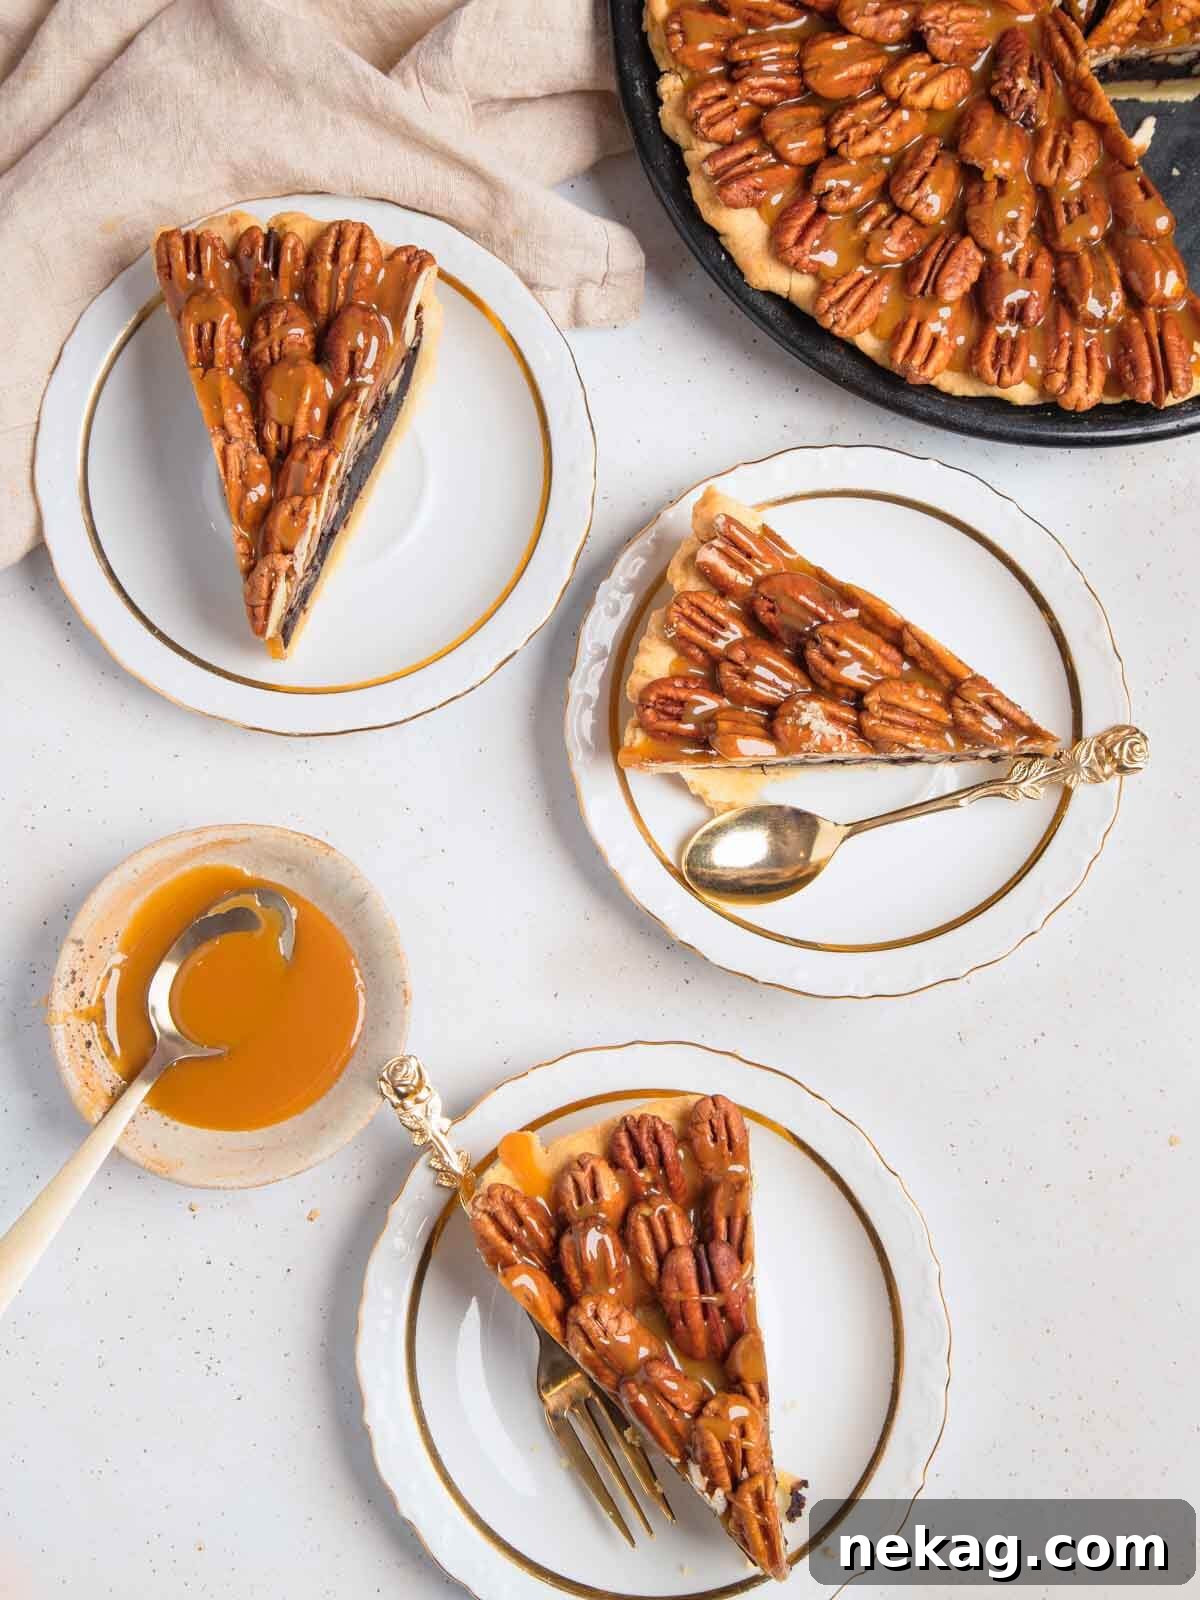
This pie truly transcends the ordinary, offering a sophisticated take on a classic. Each bite delivers a perfect harmony: the satisfying snap of a tender, buttery crust, followed by the deep, comforting embrace of a velvety chocolate-pecan filling that is consistently thick and delightfully soft – never runny. The intricate textures and profound flavors are further enhanced by the artful topping of additional toasted pecans and a smooth, pourable salted caramel sauce. This is Southern cooking redefined, showcasing its finest qualities with an added touch of refined elegance, making it a truly rich and decadent treat.
The biggest challenge during the festive season, particularly Thanksgiving, might just be deciding which pie to feature on your dessert table! While beloved classics such as an easy chocolate pie, a robust bourbon pecan pie, or even the best classic pecan pie undoubtedly command attention, this salted caramel chocolate pecan pie promises to be the undeniable showstopper. For many, a generous slice of this pie, perhaps alongside a scoop of creamy French vanilla ice cream, is an unwritten rule at family gatherings. However, rest assured, its exquisite flavor and perfect balance mean this pie is utterly divine and complete, with or without any additional accompaniment.
Table of Contents
- Why You’ll Fall in Love with This Chocolate Pecan Pie Recipe
- Professional Tips for Pie Perfection
- Essential Ingredients for Your Decadent Pecan Pie
- Variations & Clever Substitutions to Customize Your Pie
- Step-by-Step Guide: How to Make Chocolate Pecan Pie Perfectly Every Time
- Chef Lindsey’s Secret Baking Tip: The Art of Pecan Arrangement
- Frequently Asked Questions About This Decadent Pecan Pie
- Classic Chocolate Pecan Pie Recipe Card
- Before You Go! Explore More Chef-Developed Recipes
Why You’ll Fall in Love with This Chocolate Pecan Pie Recipe
This isn’t just another dessert recipe; it’s a meticulously crafted culinary experience designed to impress and delight with surprising ease. Here are the compelling reasons why this particular chocolate pecan pie will undoubtedly earn a permanent spot in your baking repertoire:
- Effortless Assembly with an Extravagant Taste: Despite its sophisticated presentation and deeply complex flavors, the process of assembling this pie is remarkably simple. You merely combine your pre-measured filling ingredients, pour them into a prepared crust, and it’s ready for the oven. For those seeking maximum convenience without compromising on quality, utilize pre-chopped pecans, a high-quality store-bought pie crust, and even a ready-made caramel sauce. You’ll be astonished at how quickly you can create a truly show-stopping dessert that tastes like it came straight from a gourmet bakery, effortlessly impressing friends and family.
- Guaranteed Thick, Silky, and Never-Runny Filling: Say goodbye to the disappointment of a runny pecan pie! This recipe is expertly formulated with a precise blend of thickening agents that consistently deliver a thick, sumptuously soft, and perfectly sliceable filling every single time. There’s no need for the extra step of pre-cooking the filling ingredients, nor does it require excessively long baking times. The ingenious combination of a small amount of all-purpose flour, eggs, and a touch of light corn syrup works in perfect synergy to create a beautifully set custard that maintains its integrity when sliced, offering a delightful texture with every forkful.
- Developed and Refined by a Professional Pastry Chef: This recipe is a testament to rigorous testing and refinement by a seasoned professional pastry chef. Every minute detail, from the precise ingredient ratios to the optimal baking temperatures and techniques, has been meticulously fine-tuned to ensure consistent, flawless results. This means you can bake with complete confidence, knowing that this cherished Southern heritage recipe has been elevated to perfection. Even if you consider yourself a baking procrastinator, this recipe provides professional-grade excellence without any guesswork, allowing you to achieve impressive results with ease.
- The Perfect Harmony of Sweet and Salty: What truly distinguishes this pie is the masterful interplay between the deep, bittersweet notes of dark chocolate, the naturally sweet and buttery essence of pecans, and the glistening layer of homemade salted caramel. The touch of salt in the caramel is not merely an addition but a critical component that expertly cuts through and balances the sweetness, enhancing all the other intricate flavors. This creates an irresistible sweet-and-salty dynamic that is incredibly addictive, ensuring each bite is a perfectly balanced delight and prevents the pie from ever tasting overly saccharine.
- A Versatile Dessert for Any Celebration: While chocolate pecan pie traditionally graces holiday tables, its elegant appearance and universally loved flavor profile make it a versatile dessert suitable for any special gathering. Whether it’s a festive dinner party, a casual potluck, or a cherished family celebration, this pie consistently earns rave reviews and prompts requests for the recipe. It’s a dessert that feels both comforting and sophisticated, making it ideal for creating memorable culinary moments throughout the year.
Professional Tips for Pie Perfection
Achieving a truly exceptional pie, one that’s remembered and requested long after the last crumb is savored, often boils down to mastering a few key techniques. Here are my professional secrets to ensure your chocolate pecan pie is nothing short of spectacular and consistently perfect:
- Always Partially Bake Your Pie Crust (Blind Bake): This step is non-negotiable for a truly superior pie. While some recipes might suggest skipping it, I cannot overstate the importance of par-baking, or blind baking, your pie crust. This crucial technique creates a beautifully flaky, wonderfully crispy base that acts as a barrier, preventing the crust from becoming soggy from the moist filling during baking. It ensures your pie base is as delightful and texturally perfect as the filling itself. For a comprehensive understanding of this essential step and detailed instructions, be sure to consult my dedicated tutorial on how to par-bake pie crust.
- The Transformative Power of Toasted, Chopped Pecans: This seemingly small extra step yields immense flavor dividends. Lightly toasting your pecans before incorporating them into the pie filling truly makes a world of difference. Toasting intensifies their inherent nutty flavor, unlocking deeper, more complex aromas that beautifully complement the sweet chocolate and caramel. Furthermore, chopping the pecans (or opting for pre-chopped ones) ensures a more even distribution throughout the filling, making each slice easier to cut and ensuring a satisfying pecan crunch in every single bite.
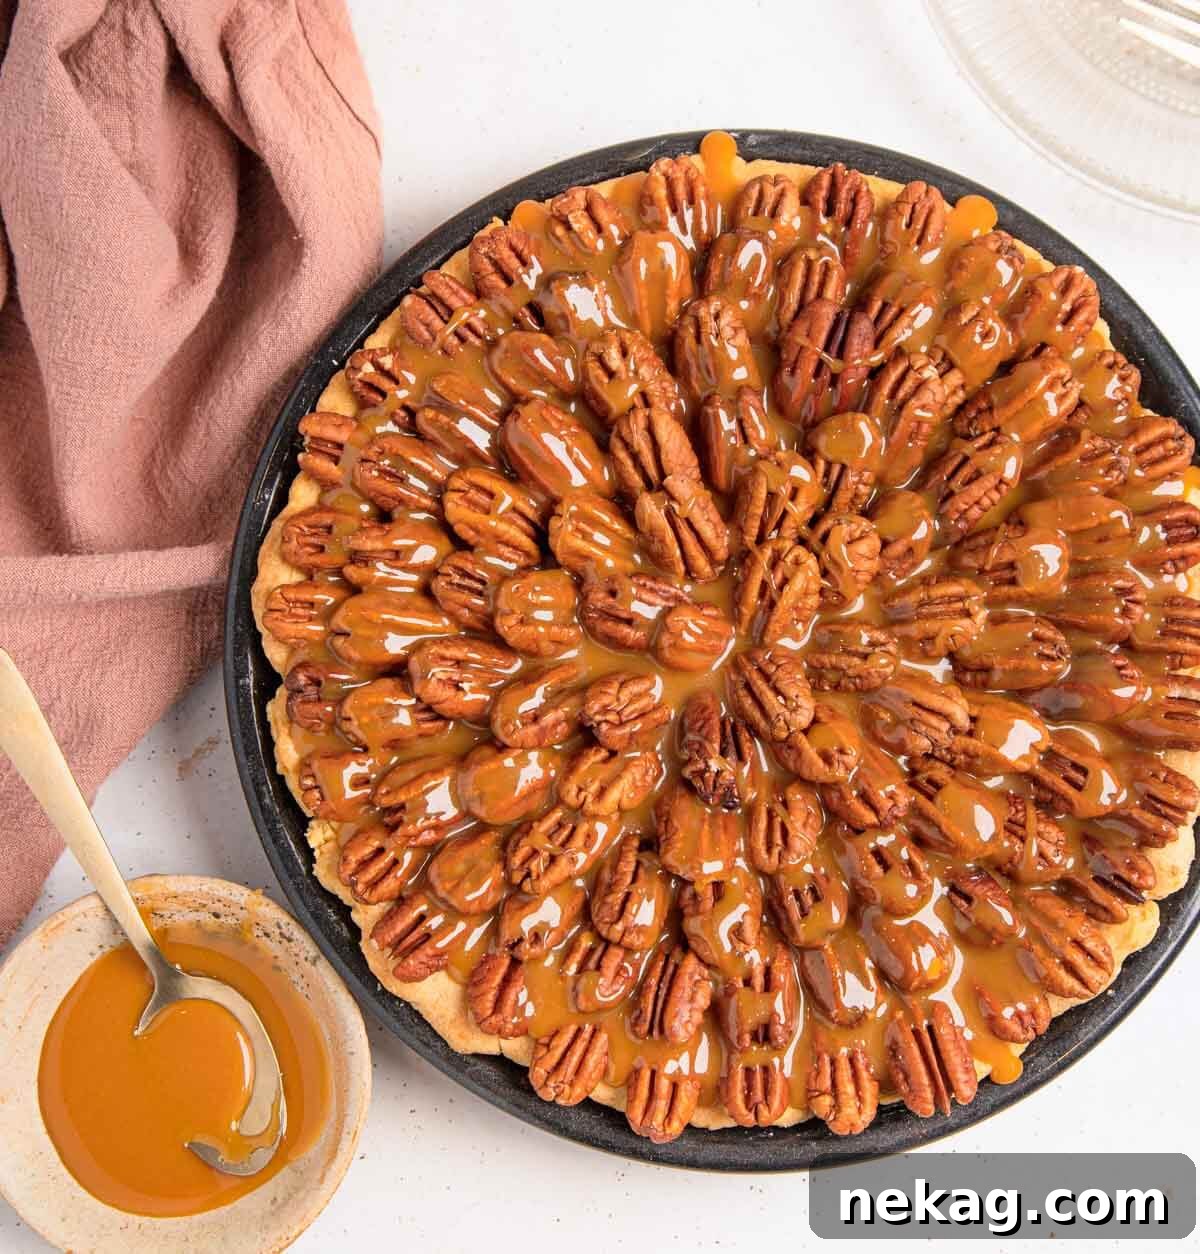
- Artful Pecan Arrangement for Stunning Presentation: For a dazzling visual appeal that will rival any bakery display, take a moment to meticulously arrange whole pecan halves on top of the chocolate filling before it goes into the oven. You can create a symmetrical flower-like pattern, concentric circles, or any other design that pleases your eye. This thoughtful touch not only makes the pie look incredibly inviting and professional but also adds an additional layer of texture and visual interest to your finished dessert, hinting at the deliciousness within.
- Master the “Press-Test” for Perfect Doneness: Knowing precisely when your chocolate pecan pie is perfectly baked is a critical skill for consistent success. The filling should appear set and firm around the edges, but when gently pressed in the very center with the back of a spoon or your fingertips, it should yield slightly and gently, much like a firm Jell-O. The pie should not exhibit excessive jiggle in the center, and you might observe a slight puffing. Over-baking can result in a dry, crumbly filling, while under-baking will lead to a runny pie. Trust this tactile “press-test” for achieving the ideal, sliceable consistency.
- Allow Ample Cooling Time: The Virtue of Patience: I understand the temptation to slice into a warm, fragrant pie straight from the oven, but patience is an absolute virtue when it comes to pecan pie. Allowing the chocolate pecan pie to cool completely and undisturbed on a wire rack for several hours (at least 3-4, or even overnight) is absolutely vital. During this extended cooling period, the filling undergoes a crucial setting and firming process, which guarantees clean, elegant slices that hold their shape beautifully. Rushing this step almost inevitably leads to messy, structurally unsound slices.
Essential Ingredients for Your Decadent Pecan Pie
Every truly exceptional pie begins with a foundation of high-quality, thoughtfully chosen ingredients. Here’s a detailed breakdown of what you’ll need for this exquisite chocolate pecan pie, along with an explanation of why each component plays a crucial role in achieving baking perfection and optimal flavor:
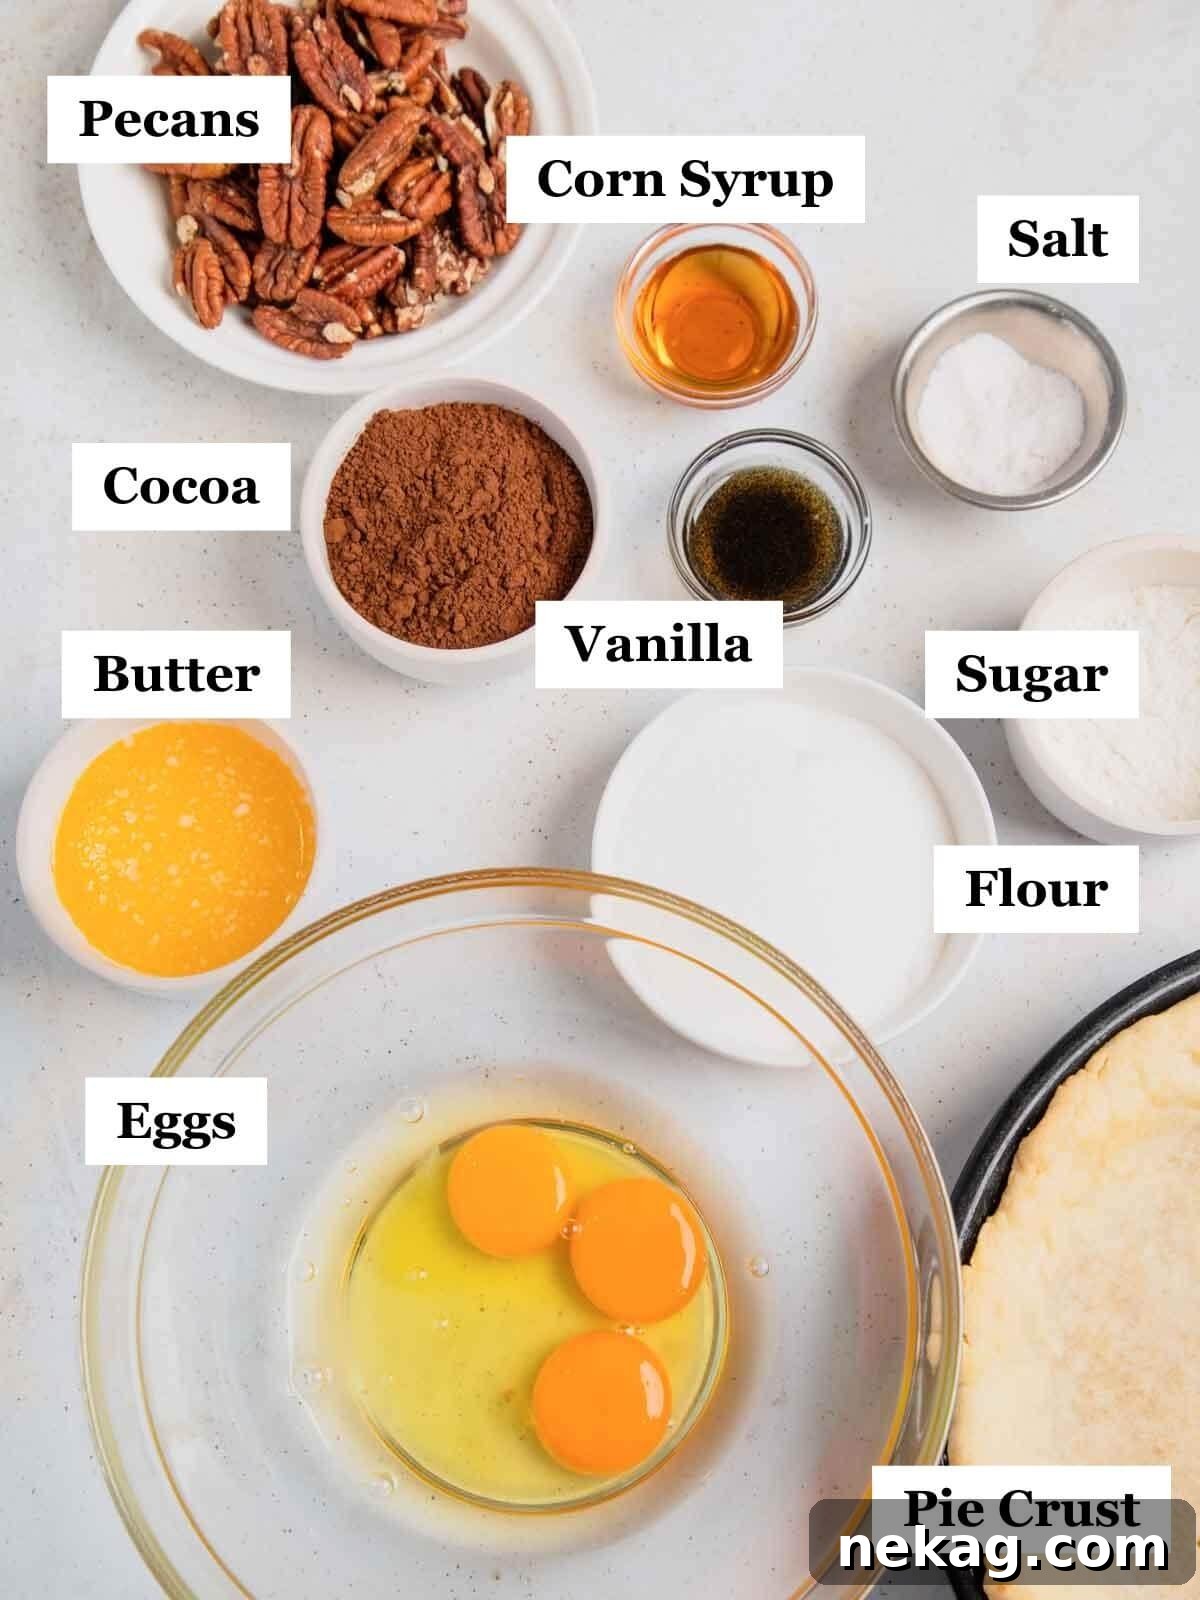
- Unsalted Butter: I exclusively use unsalted butter in all my pie recipes. This allows me, and you, to have precise control over the overall salt content in the finished product, ensuring a perfectly balanced flavor profile in both the tender crust and the rich filling. Butter also contributes significantly to the pie’s luxurious taste and tender, flaky texture.
- Kosher Salt: The addition of Kosher salt is a small but mighty detail that makes a monumental difference. It prevents the chocolate pecan pie from tasting one-dimensionally sweet or “flat,” instead awakening and deepening the intricate notes of both the chocolate and the pecans. Kosher salt expertly dampens the intense sweetness, creating a far more sophisticated and well-rounded flavor experience.
- Unsweetened Cocoa Powder: For this particular recipe, I highly recommend using Hershey’s 100% cacao unsweetened cocoa powder. Its pure, robust, and unsweetened chocolate flavor provides the ideal counterpoint to the inherent sweetness of the filling. This specific cocoa powder brilliantly highlights the natural nuttiness of the pecans without adding additional sugar, which could throw off the delicate balance of the pie.
- Light Corn Syrup: The light corn syrup serves a critical dual purpose in this pie: it acts as a key thickening agent, contributing to the filling’s incredibly smooth, silky, and consistently non-runny consistency. Additionally, it plays a vital role in preventing sugar crystallization, which can lead to a grainy texture. While you can substitute it with glucose or golden syrup, or even technically omit it, be aware that omitting it entirely carries a significantly greater risk of a less stable and potentially runny pecan pie filling.
- All-Purpose Flour: Beyond the corn syrup, all-purpose flour functions as an additional, gentle thickening agent within this pie filling. This intelligent combination of both flour and corn syrup is precisely why this recipe requires such a minimal amount of corn syrup compared to many traditional pecan pie recipes, ultimately yielding a perfectly set yet wonderfully tender and smooth filling.
- Granulated Sugar: Granulated sugar is, of course, fundamental for providing the essential sweetness to the pie. However, it also plays an important structural role, interacting with the eggs and other thickening agents during the baking process to help set the custard. For a subtle yet intriguing depth of flavor in the caramel topping, you could experiment with replacing up to 2 tablespoons of granulated sugar with light brown sugar for a hint of molasses, but I generally advise not exceeding this amount to maintain the caramel’s clarity and classic flavor.
- Whole Eggs: In any baked custard-style pie, such as a comforting sweet potato pie or a classic, rich chocolate pie, the whole eggs are absolutely integral. They provide the primary structure, richness, and binding properties, allowing the filling to transform into a beautifully set, creamy, and impeccably sliceable custard that holds its shape flawlessly once cooled.
- Pecans: I am a strong advocate for using toasted, freshly chopped pecans in all my pecan pies. Toasting them beforehand significantly intensifies their inherent nutty flavor, creating a more robust and aromatic profile that brilliantly balances the sweetness of the chocolate filling. Chopping them (or conveniently purchasing them pre-chopped) ensures they are evenly distributed throughout the pie, resulting in easier slicing and a more harmonious texture in every single bite. Don’t let any leftover pecans go to waste; they’re perfect for delightful treats like Mexican Wedding Cookies!
- Pie Dough: You will require either a high-quality, reliable store-bought pie crust or enough homemade dough to create a single-crust pie. The delicate, soft, and rich filling of this chocolate pecan pie is exquisitely complemented by a perfectly flaky and buttery crust. For unparalleled results, I highly recommend using either my signature all-butter pie crust or my exceptionally crisp vodka pie crust. The contrasting textures of the tender filling, the crisp crust, and the toasted pecan topping create an experience of pure perfection.
- Heavy Cream: An absolutely essential component for the luscious salted caramel topping, heavy cream imparts a rich, creamy texture and body to the sauce. It is crucial in transforming the caramelized sugar into that smooth, pourable, and utterly luxurious sauce consistency.
- Fresh Lemon Juice: A small but important amount of fresh lemon juice in the caramel recipe serves a crucial function: it helps to prevent sugar crystallization, ensuring that your homemade caramel remains wonderfully smooth, glossy, and free from any grainy texture.
- Water: Used in the initial stages of the caramel-making process, water helps to dissolve the granulated sugar evenly and gently before it begins the process of caramelization, ensuring a consistent and controlled cook.
- Fleur de Sel: A final, delicate sprinkling of high-quality Fleur de Sel over the top of the finished pie adds not only a subtle crunch but also a concentrated burst of savory saltiness. This expertly brightens and accentuates the sweetness of both the caramel and the chocolate, adding a sophisticated gourmet touch.
For precise quantities and a detailed step-by-step guide, please refer to the complete recipe card conveniently located further down the page.
Variations & Clever Substitutions to Customize Your Pie
While this chocolate pecan pie recipe is designed for perfection as written, it’s also incredibly adaptable, allowing for delightful experimentation! Feel free to explore these delicious variations and smart substitutions to tailor the pie to your specific preferences, dietary needs, or simply to try something excitingly new:
- Infuse with Bourbon for a Spirited Twist: For an exceptionally delightful and warming adult twist, particularly cherished around the Kentucky Derby season or any special occasion, whisk in 2 tablespoons of your favorite whiskey or bourbon to the chocolate filling mixture. This creates a sophisticated bourbon pecan pie that boasts a subtle, complex depth of flavor and a wonderfully aromatic quality. While the majority of the alcohol evaporates during the baking process, a trace amount typically remains, contributing to the nuanced and rich taste.
- Alternatives for Light Corn Syrup: If you find yourself without light corn syrup or simply prefer an alternative, you can successfully substitute it with either glucose syrup or golden syrup. These can be used at a 1:1 ratio and will provide similar benefits in achieving that desirable smooth, silky texture in the pie filling, while also helping to prevent sugar crystallization. While it is possible to omit corn syrup entirely, be aware that doing so may result in a filling that is less smooth, lacks that signature silky mouthfeel, and carries a higher risk of being runny.
- The Ultimate Fudge Chocolate Pecan Pie: If your chocolate cravings are truly intense and you desire an even more profound chocolate experience, elevate this pie to the next level by replacing the salted caramel topping with a generous dollop (or a full layer!) of the world’s best Hot Fudge Sauce! This decadent swap transforms the dessert into an incredibly rich, dense, and utterly fudgy delight that will be an absolute dream for any chocolate connoisseur.
- Go Mini or Create Bite-Sized Delights: This versatile recipe scales beautifully, making it perfect for various serving sizes! For adorable individual portions, simply halve the entire recipe and bake it in mini pie dishes. Keep in mind that miniature pie dishes are often deeper than standard ones, so you might need to slightly extend the baking time by approximately 5 minutes or until they pass the doneness test. Alternatively, for truly charming, bite-sized treats perfect for parties or dessert platters, you could use the filling to make classic Chocolate Pecan Tassies, complete with their tender cream cheese crusts.
- A Hint of Warming Spices: For a comforting and aromatic twist that beautifully complements the chocolate and pecans, consider adding a pinch (about ¼ teaspoon total) of ground cinnamon, freshly grated nutmeg, or a combination of both to your chocolate filling mixture. These warm spices enhance the complexity of the flavors without overpowering them, adding a cozy dimension to each bite.
- Experiment with Different Nuts: While pecans are the traditional and classic choice for this pie, feel free to explore other nut varieties if you wish to put your own spin on it. Walnuts are a popular and delicious substitute that will yield a wonderfully flavorful pie, albeit with a slightly different flavor profile. Hazelnuts could also be an intriguing and gourmet choice, especially given their natural affinity for chocolate. Regardless of your choice, remember to always toast any nuts you use to significantly enhance their inherent flavor and aroma.
Step-by-Step Guide: How to Make Chocolate Pecan Pie Perfectly Every Time
Follow these meticulously detailed instructions to effortlessly create an easy, yet incredibly impressive, chocolate pecan pie that is guaranteed to delight everyone who tastes it. Further precise measurements and a full list of ingredients can be found in the comprehensive recipe card located below.
Part 1: Toasting Your Pecans – The Secret to Enhanced Flavor
Toasted pecans contribute an unparalleled depth of flavor and aroma to your pie. This crucial preliminary step is essential and should not be skipped for optimal results.
- Preheat Your Oven: Begin by preheating your oven to 350°F (175°C) using the conventional setting. Ensure the oven is fully preheated for even toasting.
- Evenly Spread Pecans: Distribute your pecan halves in a single, even layer across a rimmed baking sheet. An even layer is key to ensuring that all the nuts toast uniformly without burning.
- Bake Until Fragrant and Golden: Place the baking sheet with pecans into the preheated oven and bake for approximately 5 to 10 minutes. The most reliable indicator of perfect doneness is the aroma – you should begin to smell a distinct, rich, nutty pecan fragrance wafting from the oven. Visually, the outsides of the nuts will transform into a slightly darker, golden-brown hue.
Chef’s Alert – Watch Carefully! Pecans, like most nuts, have delicate oils and can go from perfectly toasted to unpleasantly burnt very quickly. After the initial 5 minutes, it is imperative to watch them extremely closely. Their delicate oils can begin to burn in a matter of mere seconds, which will impart a bitter, acrid taste to your otherwise perfect pie. Remove them from the oven immediately once they achieve that fragrant, golden-brown stage.
Part 2: Mastering the Par-Baked Pie Crust – Your Foundation for Success
A flawlessly par-baked crust is the unsung hero of a truly exceptional pie, preventing sogginess and providing a crisp, flaky foundation. This step is absolutely essential for achieving a perfect base.
- Prepare Oven and Dough for Rolling: Begin by preheating your oven to 350°F (175°C). If your oven has a convection setting, I highly recommend using it for more even browning. If you are using homemade pie dough, roll out one portion onto a lightly floured surface until it reaches an approximate thickness of 1/8th inch. For the best results and to prevent excessive shrinkage during baking, it’s beneficial to chill the rolled dough flat on a baking sheet for at least 30 minutes.
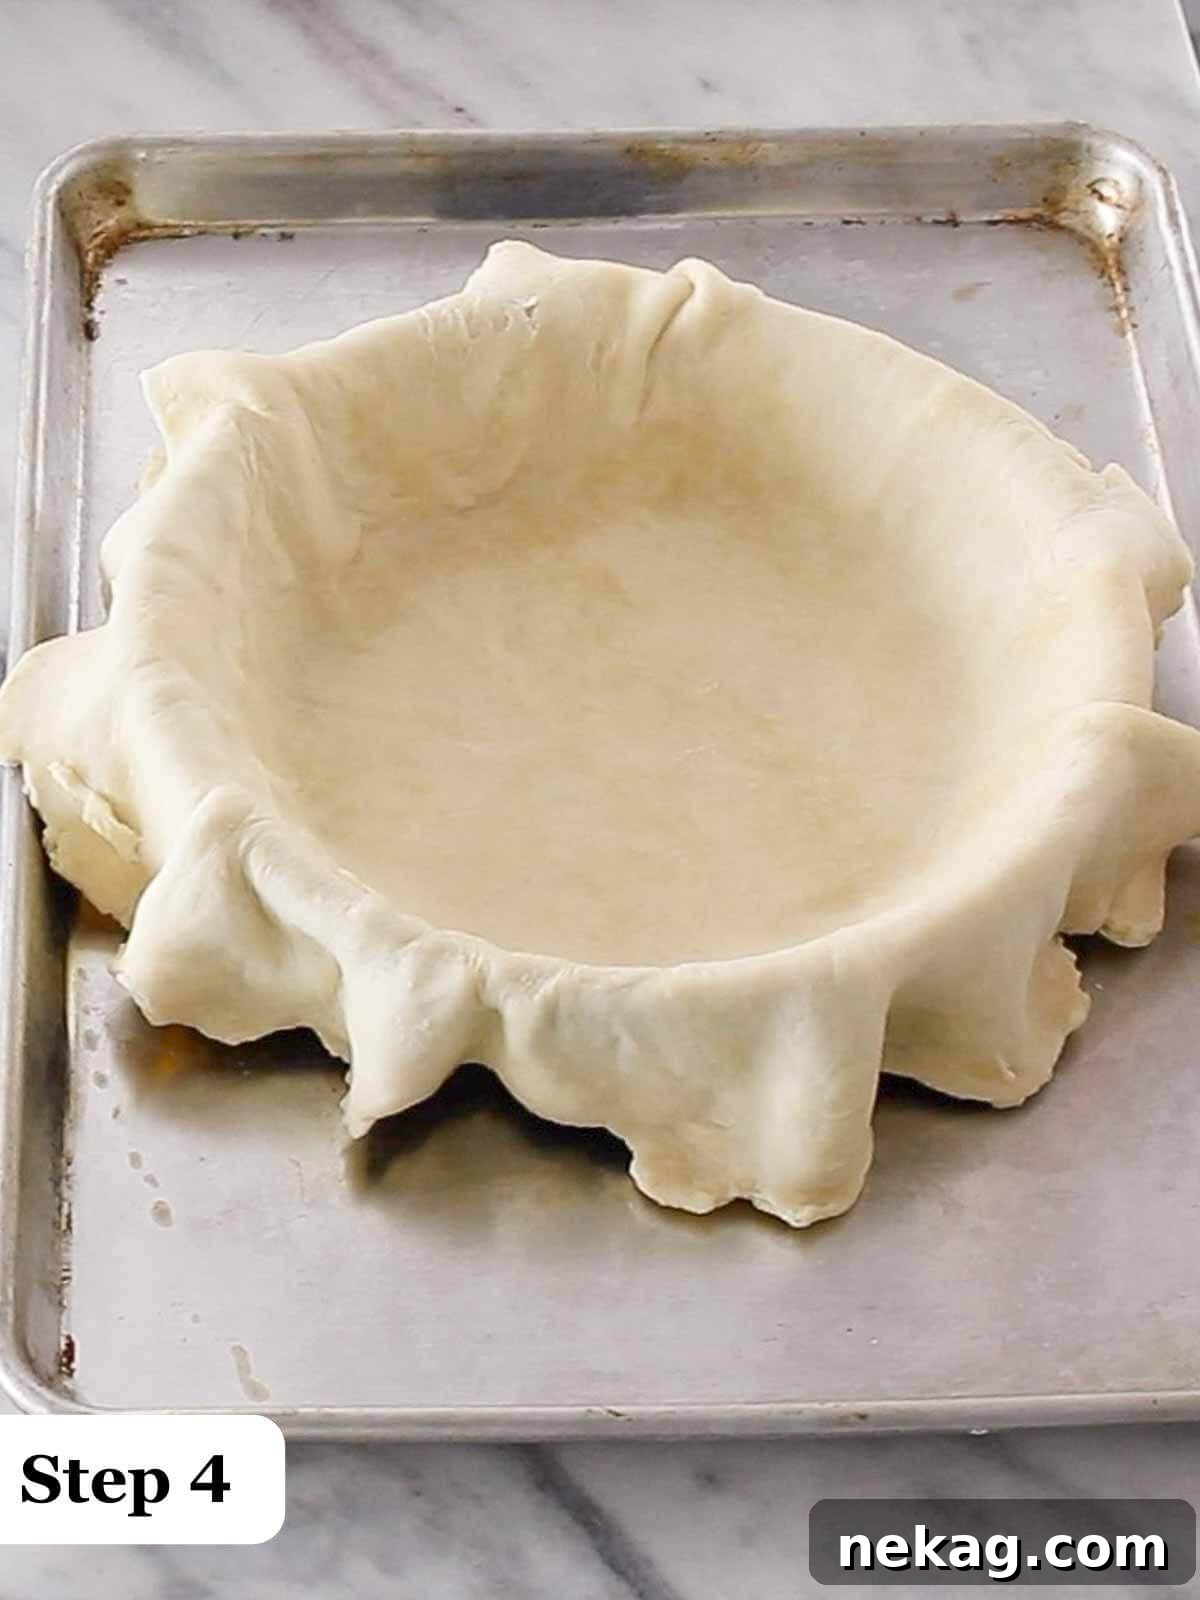
- Fit the Dough to the Pie Dish: Carefully transfer the chilled, rolled dough and gently place it on top of a 9-inch pie dish or tin. Allow the dough to warm up just enough to become pliable and workable, losing its initial stiffness. Gently lift the edges of the dough, allowing it to naturally settle into the bottom and sides of the dish without stretching it. Stretching can lead to shrinkage. Lightly press the dough against the sides of the dish to fit its contours, allowing a slight overhang around the rim.
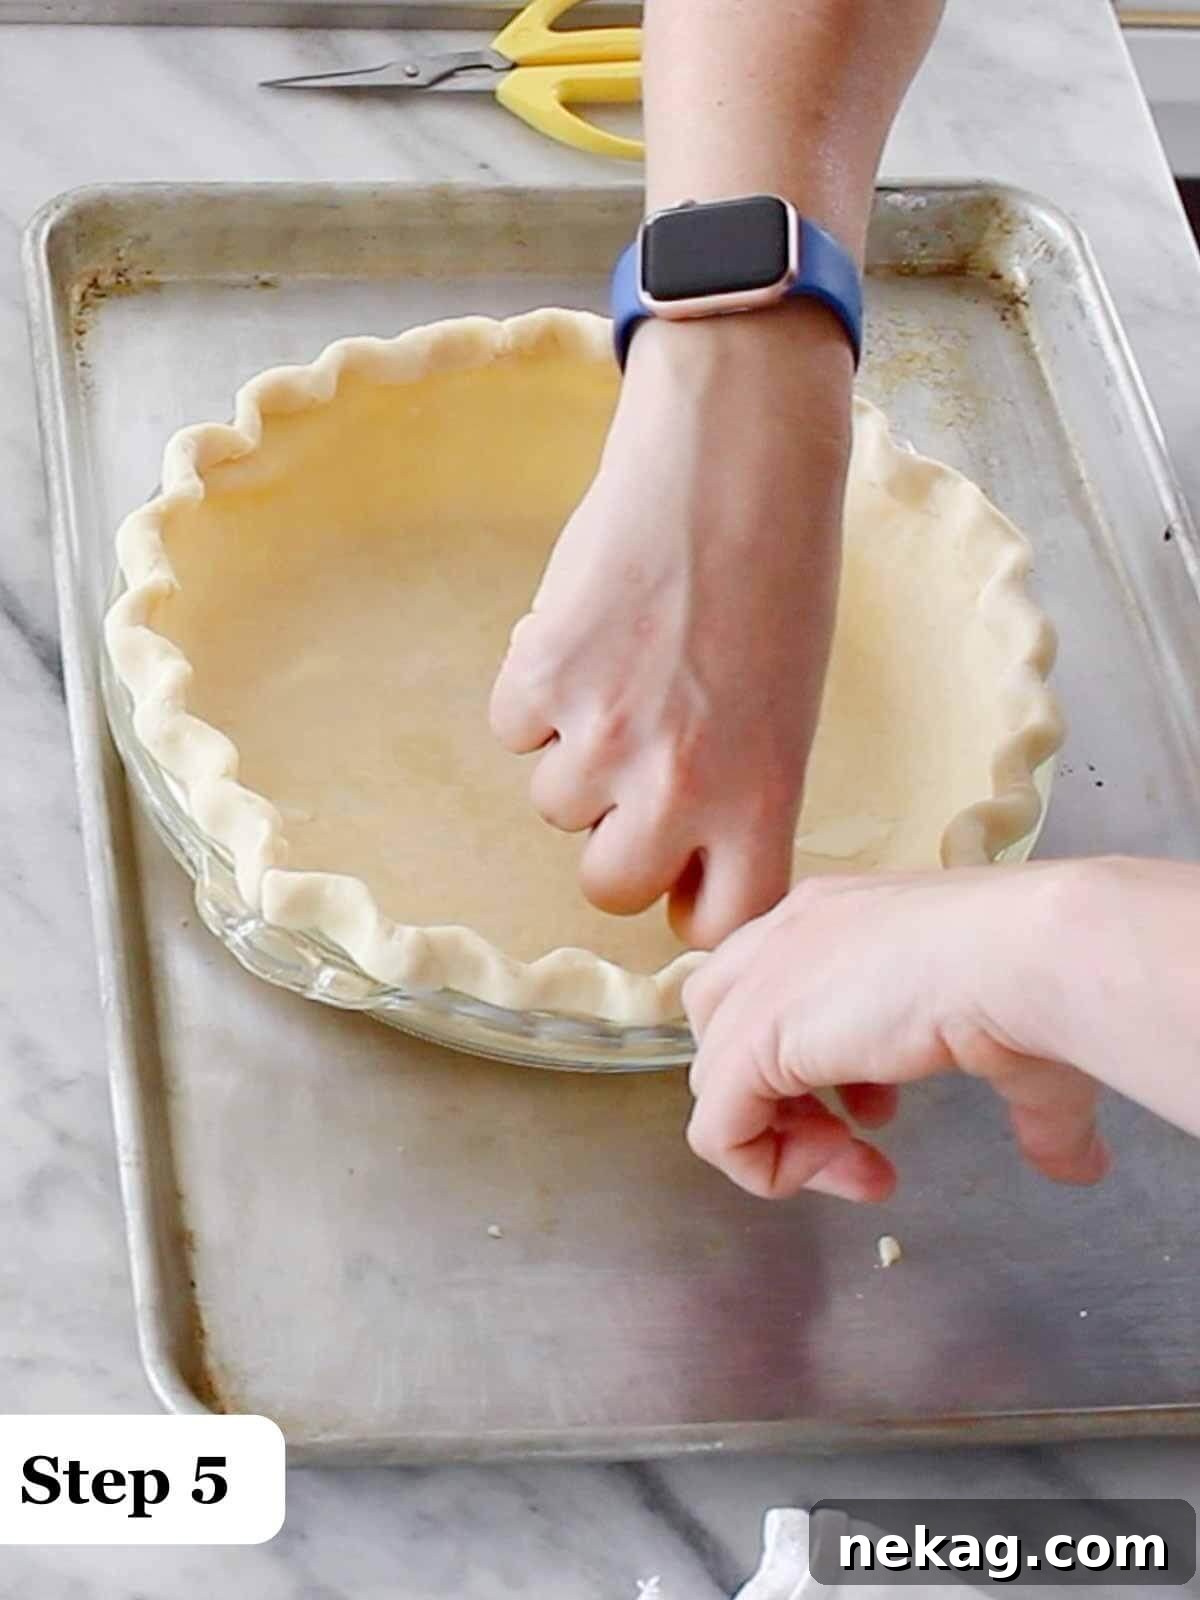
- Roll and Seal the Edges: Starting from one side of the pie dish, take the overhanging edges of the dough and carefully roll them underneath themselves, moving inward towards the dish. Continue this rolling action until you reach the actual rim of the pie dish, then gently press the rolled edge down onto the dish to create a secure seal. Repeat this process methodically around the entire circumference of the crust, ensuring a neat and tidy edge.
- Flute or Crimp for a Beautiful Finish: To create an aesthetically pleasing, decorative edge, you can either flute or crimp the crust. A classic method involves pressing one knuckle on the outside of the crust while simultaneously using two knuckles from the inside of the crust to create a beautiful, wavy pattern. Once your edges are fluted or crimped to your liking, return the pie crust to the refrigerator to chill for an additional 10 to 30 minutes, depending on how warm your kitchen environment or the dough has become. This crucial second chilling phase is vital for preventing the crust from slumping or losing its shape during the initial stages of baking.
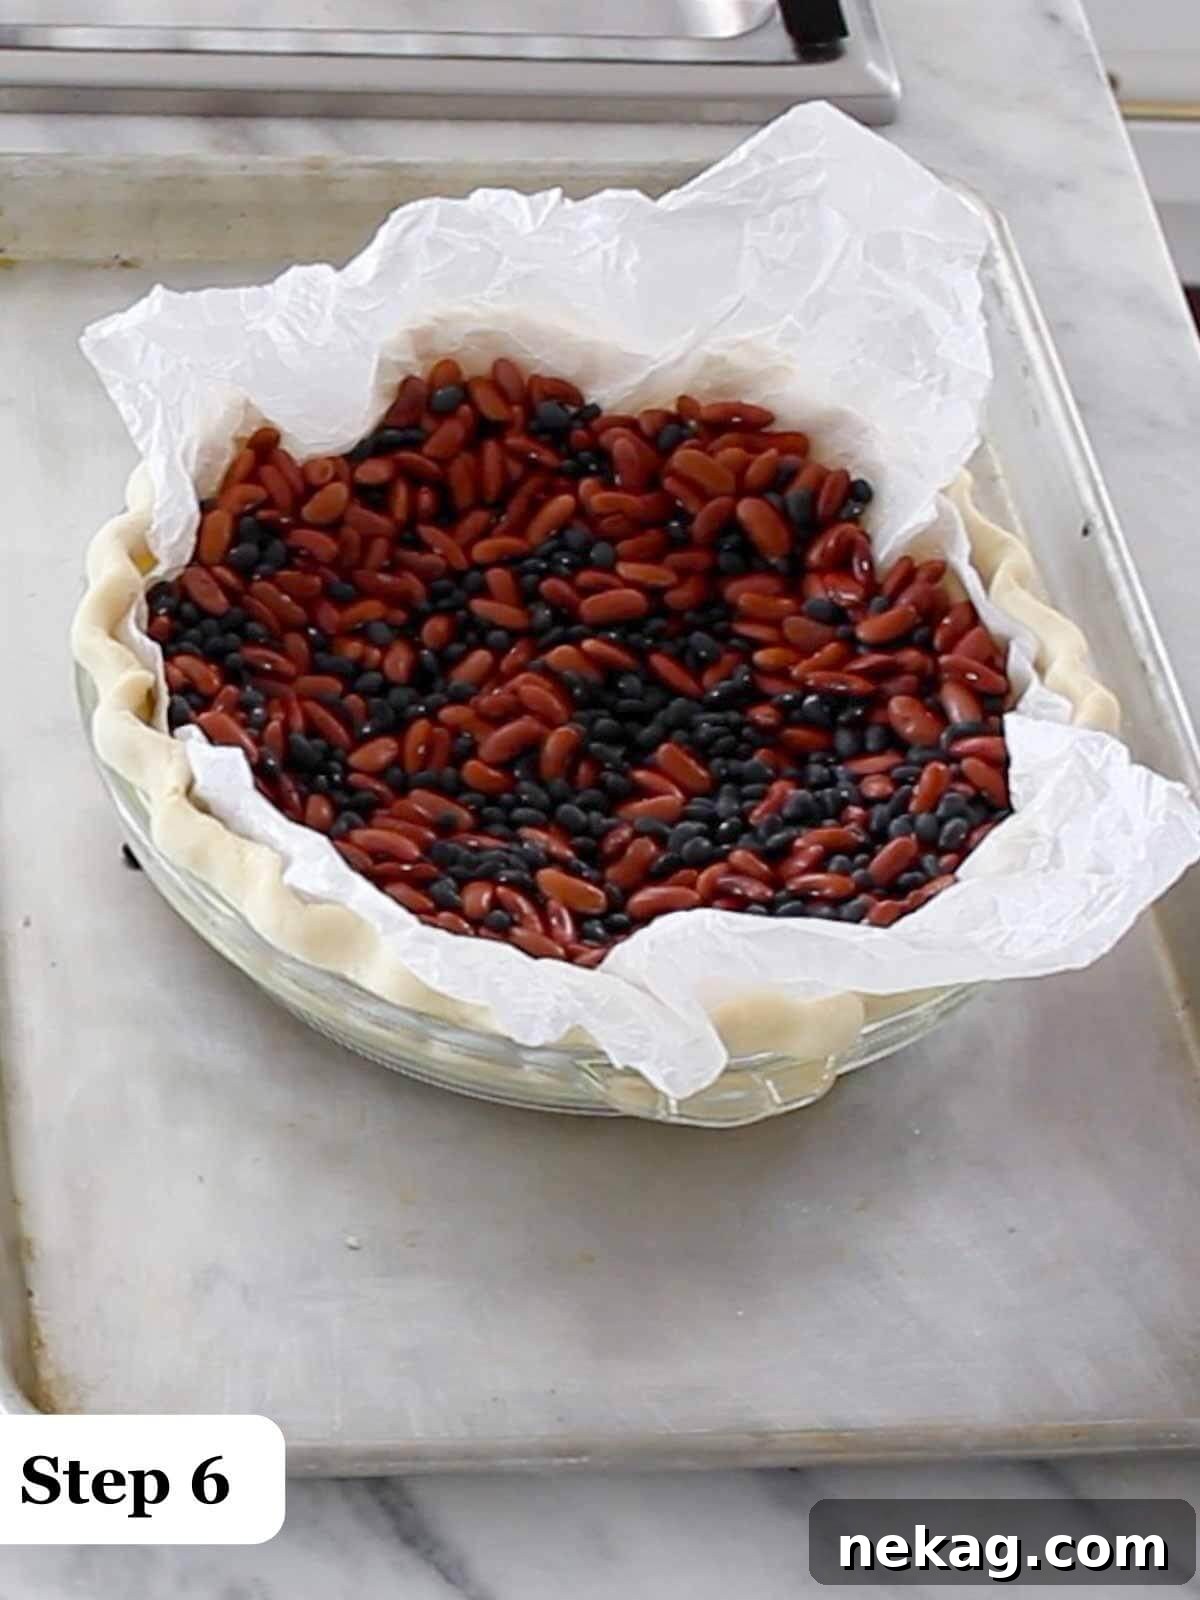
Expert Tip for Flexible Parchment: To ensure your parchment paper molds perfectly and snugly to the contours of your pie crust during the par-baking process, here’s a professional trick: first, crumple the parchment paper into a tight, compact ball, then gently unroll it. This simple action softens the paper, allowing it to conform much more easily to the shape of the crust without creating annoying pokes, tears, or leaving large, uneven gaps that can interfere with even baking.
- Blind Bake with Pie Weights: Once your crust is chilled and fluted, line the inside of it with the crumpled parchment paper. Fill the lined crust completely with pie weights, dried beans, or uncooked rice. I have consistently found that dried beans work exceptionally well for this purpose, as they provide consistent and even pressure across the entire surface of the crust. Bake the crust, filled with weights, for approximately 15-20 minutes.
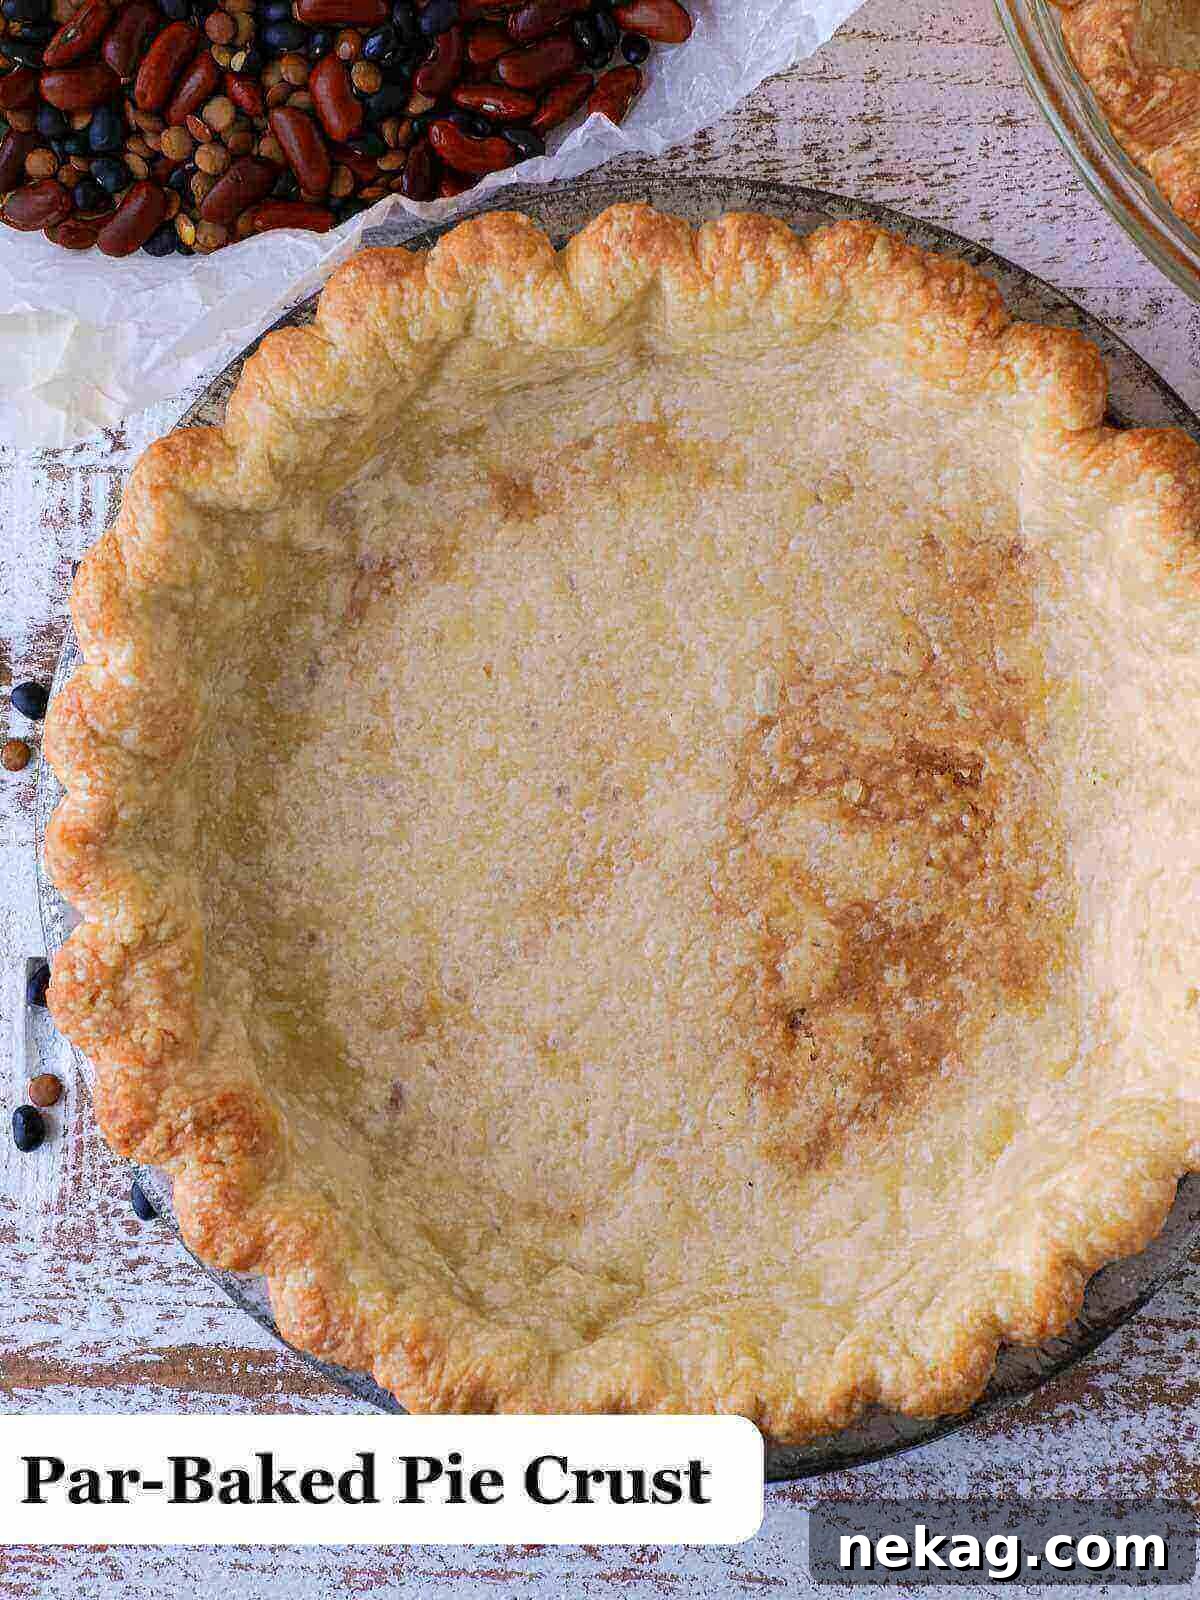
- Remove Weights and Continue Baking: Carefully remove the pie weights and the parchment paper once the crust has just begun to show signs of light browning and no longer appears raw or wet. Return the now empty crust to the oven and continue baking for another 5-10 minutes, or until the bottom is lightly golden brown and fully set. This additional baking time without weights is crucial for ensuring a crisp, thoroughly baked base that will stand up to the moist filling without becoming soggy.
Critical Timing for Weight Removal: It’s important to time the removal of your pie weights correctly. If you remove them too soon, before the crust has partially set and firmed up, the edges of the crust are highly likely to slide down the sides of the dish, particularly if you are using a ceramic dish which retains and distributes heat differently than metal. Wait until you see the edges just starting to firm up and take on a hint of golden color.
Part 3: Crafting and Baking the Irresistible Chocolate Pecan Pie Filling
With your flawless pie crust patiently awaiting, it’s now time to bring the luxurious and intensely flavorful chocolate pecan filling to life. This is where the magic truly happens!
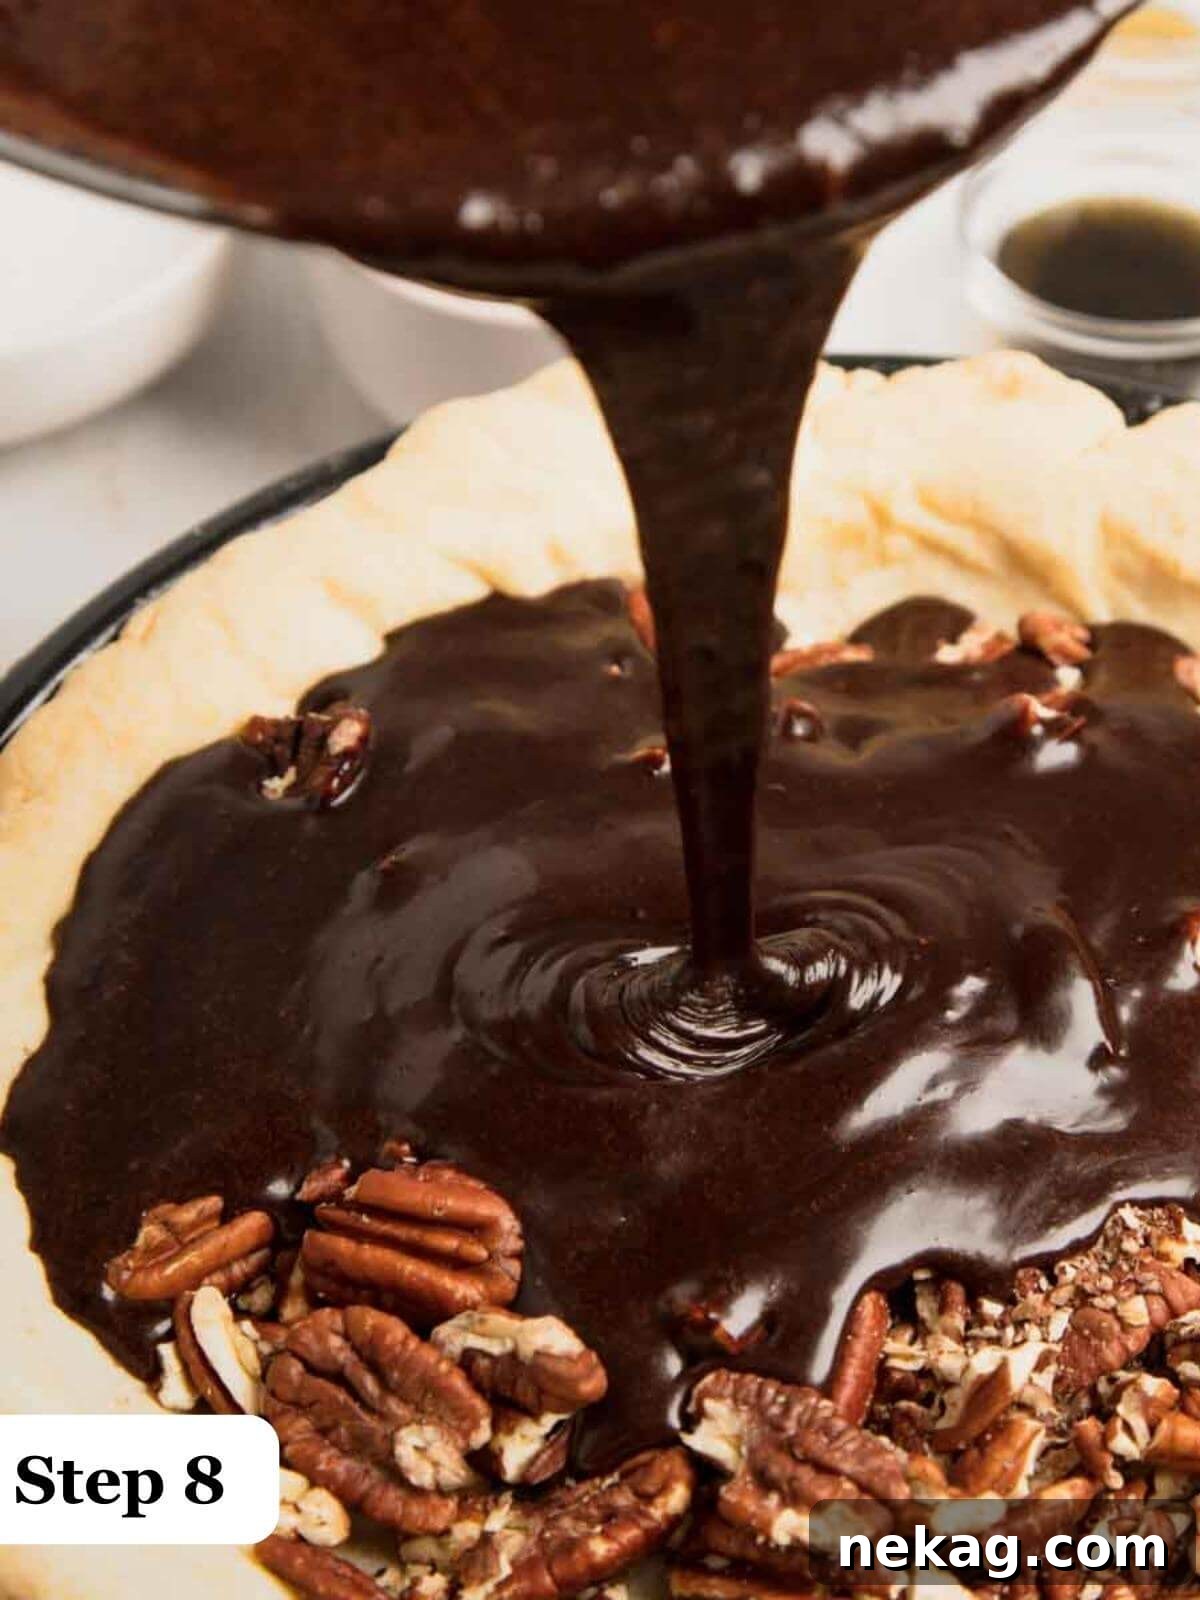
- Combine Dry and Wet Ingredients for Filling Base: In a large, spacious mixing bowl, thoroughly stir together the granulated sugar, freshly melted unsalted butter, all-purpose flour, unsweetened cocoa powder, light corn syrup, and vanilla extract. Whisk or stir vigorously until all the ingredients are seamlessly combined and the mixture appears smooth and consistent. Take your time to ensure no lumps remain.
- Incorporate Eggs and Toasted Pecans: Next, add the large eggs to the prepared mixture, stirring until they are completely integrated and the entire filling is well-blended and exhibits a lovely, glossy sheen. Finally, with a gentle hand, fold in your perfectly toasted and chopped pecans. Be mindful not to overmix at this stage; your goal is simply to ensure the pecans are evenly distributed throughout the rich chocolate base, guaranteeing a nutty bite in every forkful.
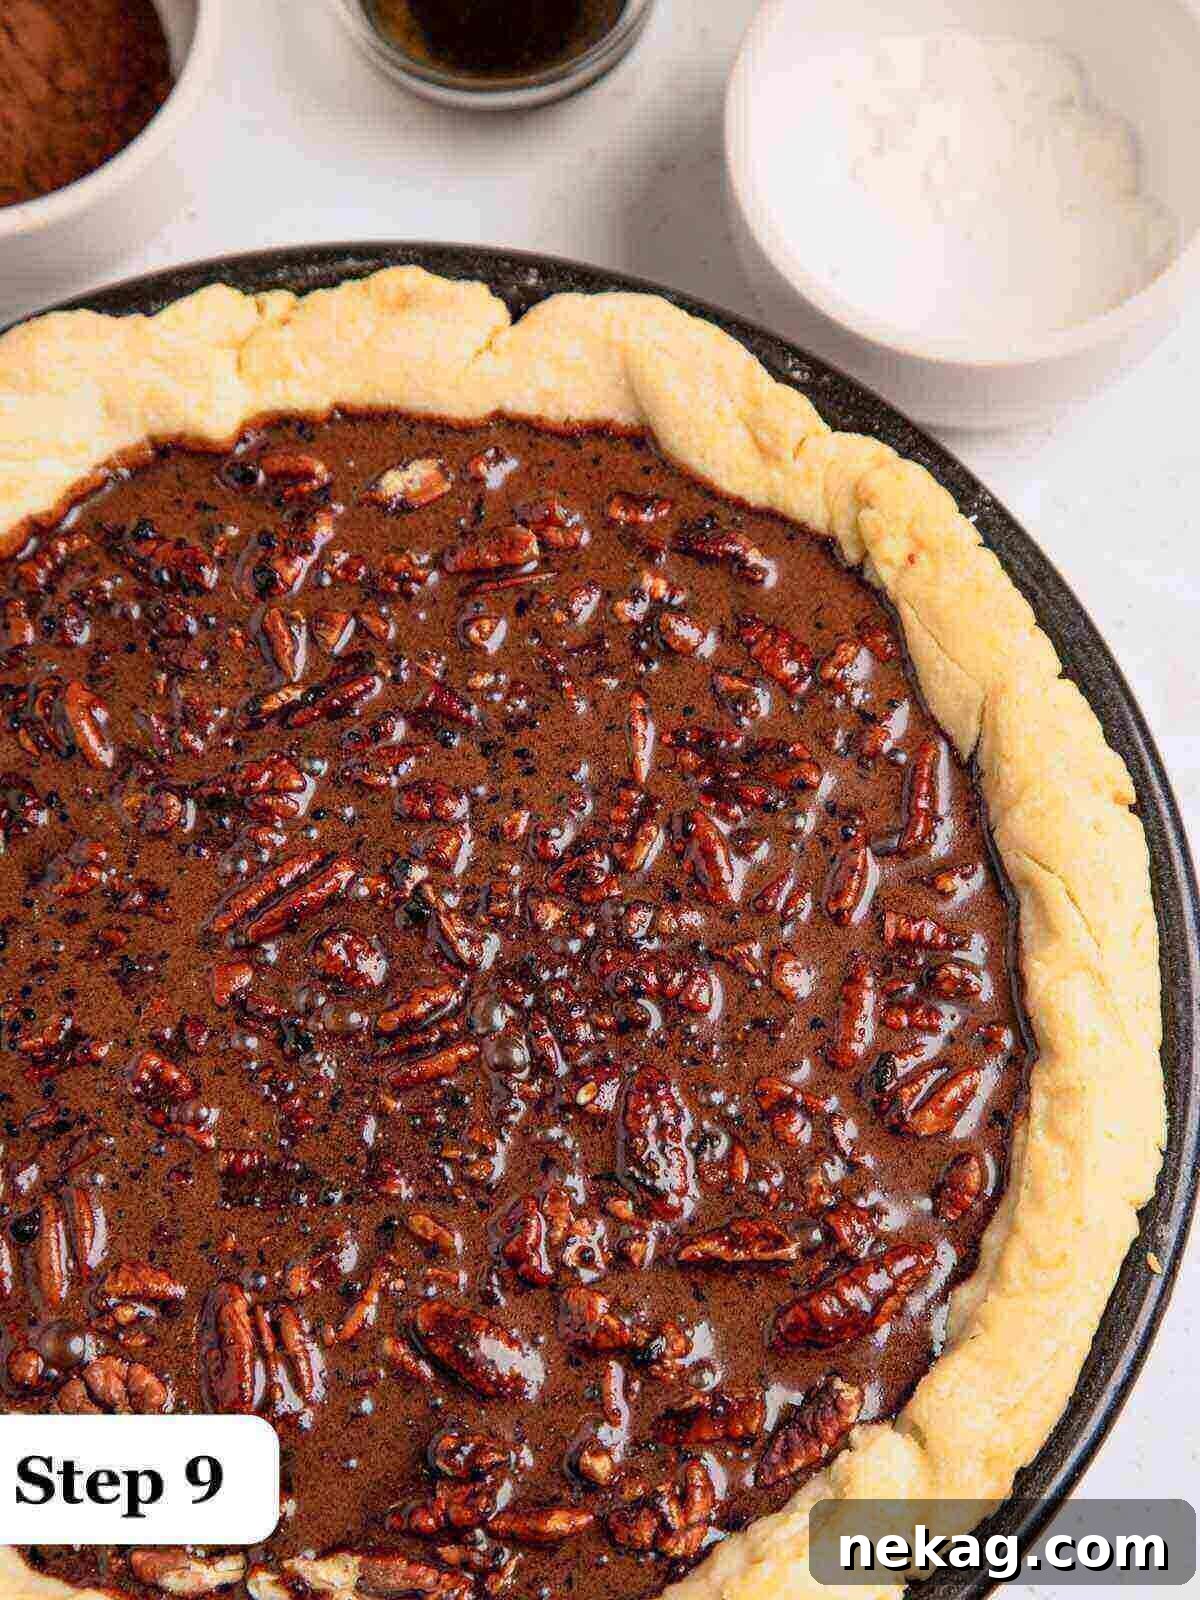
- Fill the Crust and Begin Baking: Carefully pour the luscious chocolate pecan mixture into your warm, par-baked pie shell. The slight warmth of the crust is beneficial as it helps to promote more even baking of the filling. Place the pie into the preheated oven (350°F / 175°C conventional) and bake for approximately 35-40 minutes. It is important to note that the pie filling will likely still appear slightly loose or jiggly in the very center when you first remove it from the oven; this is perfectly normal. It will continue its setting process and firm up significantly as it cools.
Preventing Crust Over-Browning: Baking perfection often requires a little vigilance. If, during the baking process, you observe that the edges of your pie crust are becoming too golden brown before the center of the pie filling has achieved that firm, yet yielding, Jell-O-like consistency (as described in our professional tips), do not fret! Simply and gently cover the exposed, browning crust edges with small strips of aluminum foil. This clever technique will shield them from further browning, allowing the center of the pie to finish baking to perfection without burning the beautiful crust.
- Crucial Cooling Period: Once your pie is perfectly baked, carefully transfer it from the oven to a sturdy wire rack. It is absolutely imperative to allow the pie to cool completely at room temperature for several hours – ideally a minimum of 3-4 hours, or even longer (overnight is often best) – before attempting to slice it. This extended cooling period is critically important for the filling to fully set, ensuring that when you finally cut into it, you achieve clean, elegant, and structurally sound slices that hold their beautiful shape.
Part 4: Crafting the Luxurious Homemade Salted Caramel Topping
This exquisite homemade salted caramel sauce is what truly elevates this pie to a gourmet dessert experience. While the idea of making caramel might seem daunting, rest assured, it’s simpler than you might imagine with a little care and attention!
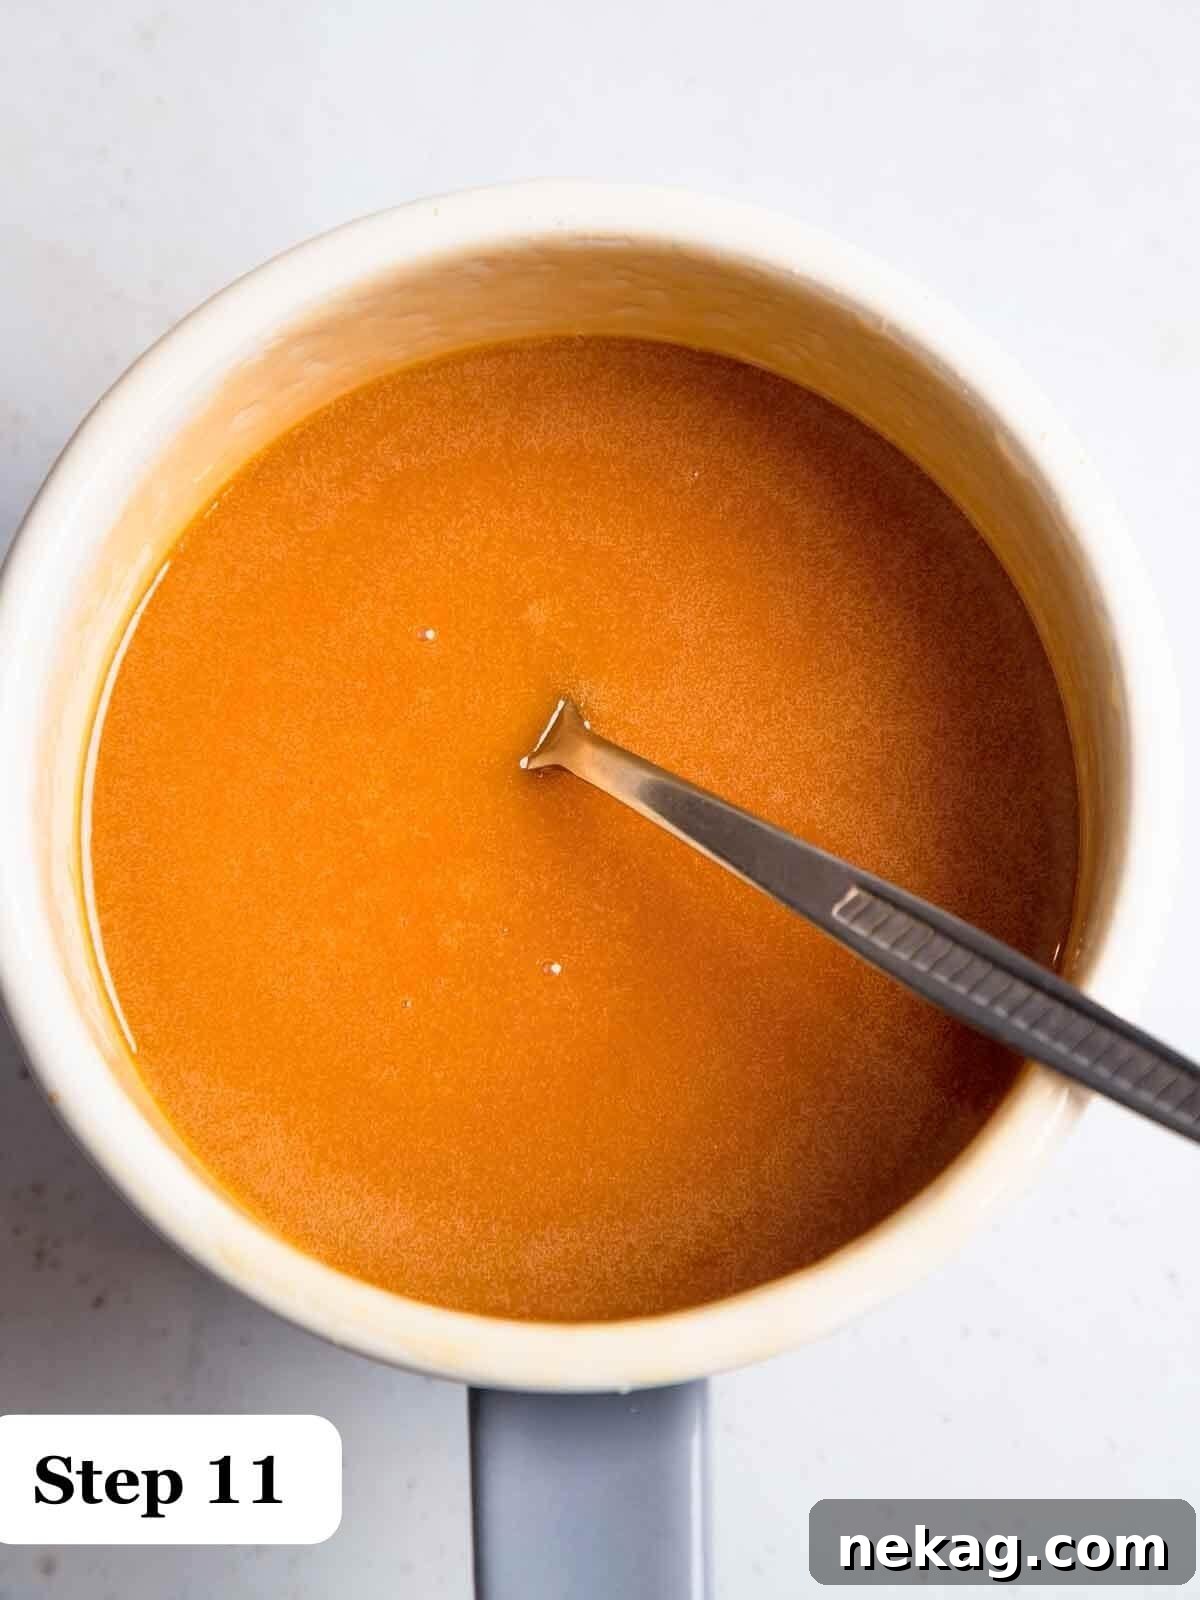
- Begin the Caramel Base: In a small, heavy-bottomed pot (this is crucial for even heat distribution), combine the granulated sugar, fresh lemon juice, and water. Place the pot over medium-high heat and bring the mixture to a boil. Stir gently only until the sugar completely dissolves. Once the sugar has fully dissolved, it is imperative to stop stirring.
- Boil to a Deep Amber Hue: Continue to boil the sugar mixture without stirring. It will first become clear, then begin to color around the edges of the pot. Resist any urge to stir once it starts boiling rapidly; instead, you can gently swirl the pan occasionally to ensure the sugar cooks evenly. Maintain a keen and constant eye on the color, allowing it to cook until it transforms into a rich, deep amber hue. This specific color indicates that the sugar has caramelized perfectly, developing a complex and profound caramel flavor.
- Carefully Add Cream and Butter: As soon as the sugar mixture achieves that beautiful, dark amber color, immediately remove the pot from the heat. With extreme caution (the mixture will bubble up vigorously and steam heavily!), slowly and gradually pour in the heavy cream and add the unsalted butter. Begin to stir or whisk constantly and vigorously until both the cream and butter are thoroughly incorporated, and the caramel sauce becomes wonderfully smooth, glossy, and uniform in consistency.
- Finish with Salt: Finally, stir in the kosher salt until it is completely dissolved. The addition of salt at this stage is absolutely crucial; it provides the perfect balance, cutting through the sweetness and adding that addictive “salted caramel” magic that makes this topping so irresistible. Set the caramel aside to cool slightly to a pourable temperature, but not so cool that it becomes too thick.
Part 5: Final Assembly and Elegant Garnish
The moment of truth has arrived: bringing all the perfectly prepared elements together for a stunning and delectable presentation that is sure to impress.
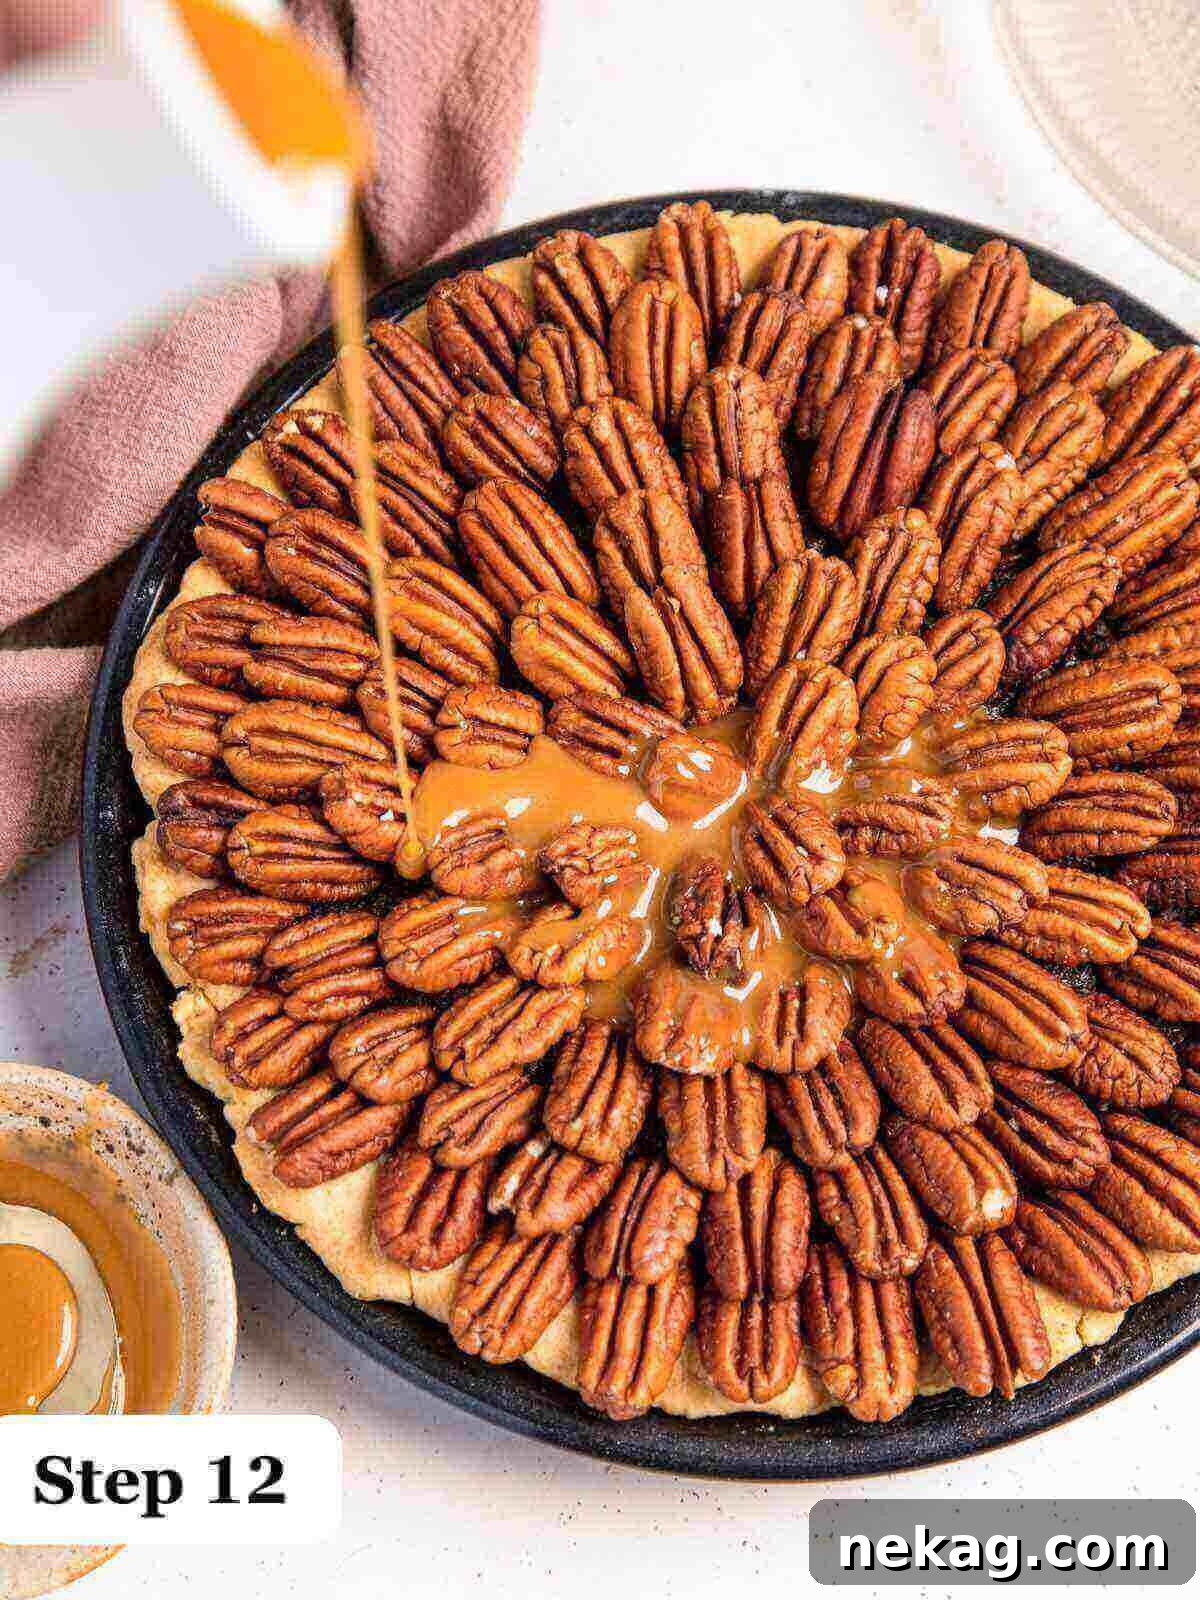
- Artfully Arrange Pecans: Once your chocolate pecan pie has completely cooled and set, take your remaining 2 cups of perfectly toasted pecan halves and arrange them artistically on top of the pie’s surface. You can choose to create a full, even covering, or arrange them in an elegant, decorative pattern to showcase their beauty.
- Generously Pour Caramel: Now, generously pour the slightly cooled (but still easily pourable) salted caramel sauce evenly over the arranged pecans and the entire surface of the pie. The caramel will naturally seep into the crevices and beautifully coat the toasted pecans, adding a luscious sheen.
- The Final Flourish: Allow the assembled pie to rest for at least another 15 minutes to give the caramel a chance to set slightly and adhere. For an extra touch of gourmet appeal and a delightful textural contrast, finish with a delicate sprinkling of additional flaky sea salt or high-quality Fleur de Sel just before serving.
The Golden Rule of Slicing for Perfection: For the most immaculate, clean, and elegant slices of pie, always, always allow your entire pie to cool completely on a wire rack for several hours before you even consider cutting into it. This patience is truly rewarded with beautifully intact, perfectly structured pieces that hold their shape flawlessly, making for a much more enjoyable and impressive serving experience.
Chef Lindsey’s Secret Baking Tip: The Art of Pecan Arrangement
For a truly professional and visually stunning topping using your beautiful pecan halves, the secret lies in a systematic approach. Begin by meticulously placing your pecans along the very outside edge of the pie, then gracefully work your way inwards, creating perfectly concentric circles. Gently layer your pecan halves, allowing them to slightly overlap, until the entire surface of the pie is beautifully and completely covered. This simple yet effective technique will ensure your pie looks just as magnificent, inviting, and expertly crafted as the ones showcased in high-end bakeries or glossy food magazines, making it a feast for the eyes as well as the palate!
Frequently Asked Questions About This Decadent Pecan Pie
To ensure your chocolate pecan pie remains wonderfully fresh and delicious for as long as possible, it should be stored properly. Wrap the cooled pie well in plastic wrap or place it in an airtight container. It can be kept at cool room temperature for up to 5 days. For extended freshness, store it in the refrigerator for up to 10 days, or freeze it for up to 3 months. The pie tastes absolutely delicious whether served at room temperature, chilled from the refrigerator, or even enjoyed as a delightful frozen treat directly from the freezer!
Absolutely! This recipe is incredibly forgiving and highly convenient for make-ahead planning, making it perfect for busy holiday preparations. You can prepare and par-bake the pie crust up to a full week in advance; simply wrap it tightly and store it in the freezer until ready to use. The entire pie, once baked and completely cooled, can also be made up to one week prior to your event. For the absolute best flavor and a vibrant, fresh texture, I strongly recommend adding the luscious salted caramel topping just before you plan to serve, as this keeps the caramel at its peak of freshness and visual appeal.
This recipe is perfectly scaled for one standard 9-inch pie. If you intend to use a deep-dish pie pan or a pie dish that is slightly larger than the standard 9-inch size, I highly recommend increasing the filling ingredients by 1.5 times. This ensures a generously filled pie that looks as good as it tastes. When using a deeper dish, you will also need to carefully adjust the baking time; expect to bake the pie for closer to 45-55 minutes, or until it successfully passes the crucial “press-test” for doneness in the center.
The secret to achieving a perfectly set, consistently non-runny filling lies in a combination of factors: the precise balance of thickening agents in the recipe, accurate oven temperature, and proper baking technique. This recipe expertly utilizes eggs, a small amount of all-purpose flour, and light corn syrup, all working synergistically to create a stable custard. It is crucial to ensure your oven temperature is accurate (a separate oven thermometer can help!) and, most importantly, do not under-bake the pie. Always perform the “press-test” in the center to confirm it yields like a firm Jell-O, and allow the pie to cool completely on a wire rack for several hours. The filling continues to set and firm up significantly during this cooling process.
While pecans are deeply traditional and offer a distinct, buttery flavor that is synonymous with this pie, you are certainly welcome to experiment with other nuts if you wish to personalize the recipe. Walnuts are a very popular and delicious substitute that will yield a wonderful pie, albeit with a slightly different, more robust flavor profile. Hazelnuts could also be an intriguing and gourmet choice, especially given their natural affinity for chocolate, offering a sophisticated twist. Regardless of the nut variety you choose, it is always recommended to toast them beforehand to significantly enhance their inherent flavor and aroma.
If you tried this incredible recipe and absolutely loved it, please take a moment to leave a 🌟 star rating and generously share your thoughts and experiences in the comments section below. Your valuable feedback truly makes my day and helps other aspiring bakers discover the joy of creating this magnificent pie!
Classic Chocolate Pecan Pie
Chef Lindsey
20 mins
35 mins
55 mins
8 people
Comment
Print Recipe
Ingredients
- 1 all-butter pie crust par-baked. Store-bought will also be delicious!
For the Chocolate Filling:
- 1 ½ cups granulated sugar
- ¾ cups unsalted butter melted
- ⅓ cup all-purpose flour
- ⅓ cup 100% cacao unsweetened cocoa I used Hershey’s
- 1 tablespoon light corn syrup
- 1 teaspoon vanilla extract
- 3 large eggs
- 1 cup chopped pecans toasted
For the Salted Caramel Topping:
- ¾ cup granulated sugar
- 1 teaspoon fresh lemon juice
- ¼ cup water
- ⅓ cup heavy cream
- 4 tablespoons unsalted butter
- ¼ teaspoon kosher salt
- 2 cups pecan halves toasted, for garnish
- Fleur de Sel for sprinkling
Instructions
Part 1: Toast Your Pecans
-
Preheat your oven to 350°F (175°C) conventional.
-
Spread the pecan halves in a single layer on a rimmed baking sheet.
-
Bake for 5-10 minutes, or until a nutty fragrance is evident and the nuts are a darker brown. Watch carefully to prevent burning.
Part 2: Par-Bake Your Pie Crust
-
Preheat oven to 350°F (175°C) (use convection if available). If using homemade dough, roll out to 1/8th inch thickness and chill for 30 minutes.
-
Place chilled dough over a 9-inch pie dish. Allow to soften slightly, then gently press to fit, allowing edges to overhang. Roll edges under and crimp or flute. Chill for 10-30 minutes.
-
Line the chilled crust with crumpled parchment paper and fill with pie weights (dried beans work well). Bake for 15-20 minutes.
-
Remove weights and parchment. Continue baking the crust for another 5-10 minutes until lightly golden and fully set.
Part 3: Make & Bake the Pie
-
In a large bowl, stir together sugar, melted butter, all-purpose flour, unsweetened cocoa, light corn syrup, and vanilla extract until well-blended.
-
Add eggs, stirring until fully incorporated. Fold in 1 cup of chopped, toasted pecans.
-
Pour the mixture into the warm, par-baked pie shell. Bake in the preheated oven (350°F / 175°C conventional) for 35-40 minutes. The filling will be slightly loose but will set as it cools.
-
Transfer the baked pie to a wire rack and allow it to cool completely for several hours before proceeding.
Part 4: Prepare the Salted Caramel Topping
-
In a small pot, combine ¾ cup sugar, lemon juice, and ¼ cup water. Bring to a boil, stirring only until sugar dissolves.
-
Boil without stirring (swirling occasionally) until the sugar turns a dark amber color. Remove from heat immediately.
-
Carefully add heavy cream and 4 tablespoons unsalted butter, stirring constantly until smooth and glossy. Stir in ¼ teaspoon kosher salt.
Part 5: Assemble and Serve
-
Once the pie is completely cool, arrange the remaining 2 cups of toasted pecan halves decoratively on top of the chocolate pecan pie.
-
Generously pour the slightly cooled salted caramel sauce over the arranged pecans and the entire pie.
-
Cool for at least 15 minutes to allow the caramel to set slightly. Finish with a sprinkling of Fleur de Sel before serving.
Notes
Doneness Technique: Your chocolate pecan pie is perfectly done when the filling appears set around the edges but yields gently like Jell-O when lightly pressed in the center with the back of a spoon or your fingers. The filling will continue to firm up as it cools completely.
Variations: Explore adding 2 tablespoons of Bourbon to the filling for a spirited twist, or swap the salted caramel topping for a rich hot fudge sauce for a truly decadent experience!
Storage: Store your chocolate pecan pie tightly wrapped for up to 5 days at room temperature, for up to 10 days in the refrigerator, or freeze for up to 3 months.
Recipe originally adapted from Southern Living.
Nutrition
Carbohydrates: 81g |
Protein: 9g |
Fat: 64g |
Saturated Fat: 22g |
Polyunsaturated Fat: 11g |
Monounsaturated Fat: 27g |
Trans Fat: 1g |
Cholesterol: 133mg |
Sodium: 192mg |
Potassium: 290mg |
Fiber: 6g |
Sugar: 60g |
Vitamin A: 965IU |
Vitamin C: 1mg |
Calcium: 62mg |
Iron: 3mg
Dessert
American, Southern
893
Like this? Leave a comment below!
Before You Go! Explore More Chef-Developed Recipes
If you’ve thoroughly enjoyed the journey of mastering this decadent salted caramel chocolate pecan pie, I warmly invite you to delve into more of my carefully crafted, chef-developed recipes. Whether you’re seeking to perfect comforting classics, discover new dessert inspirations, or plan your next memorable meal, there’s a wealth of culinary delights awaiting every home baker:
- Continue your pie-making adventure by exploring other delightful desserts in my extensive collection of pie recipes, including my beloved and consistently popular easy apple pie, a true crowd-pleaser.
- For those meticulously planning a grand festive feast, gather fresh inspiration and expertly curated ideas for a truly magnificent traditional Thanksgiving dinner menu that is guaranteed to impress all your cherished guests.
- Don’t miss out on exploring other rich, nutty, and exquisitely flavored treats like my elegant bourbon chocolate pecan tart for yet another elevated dessert option that promises sophistication and deep flavor.
Happy baking, and may you savor every exquisite, chocolate-pecan-caramel-kissed bite!