
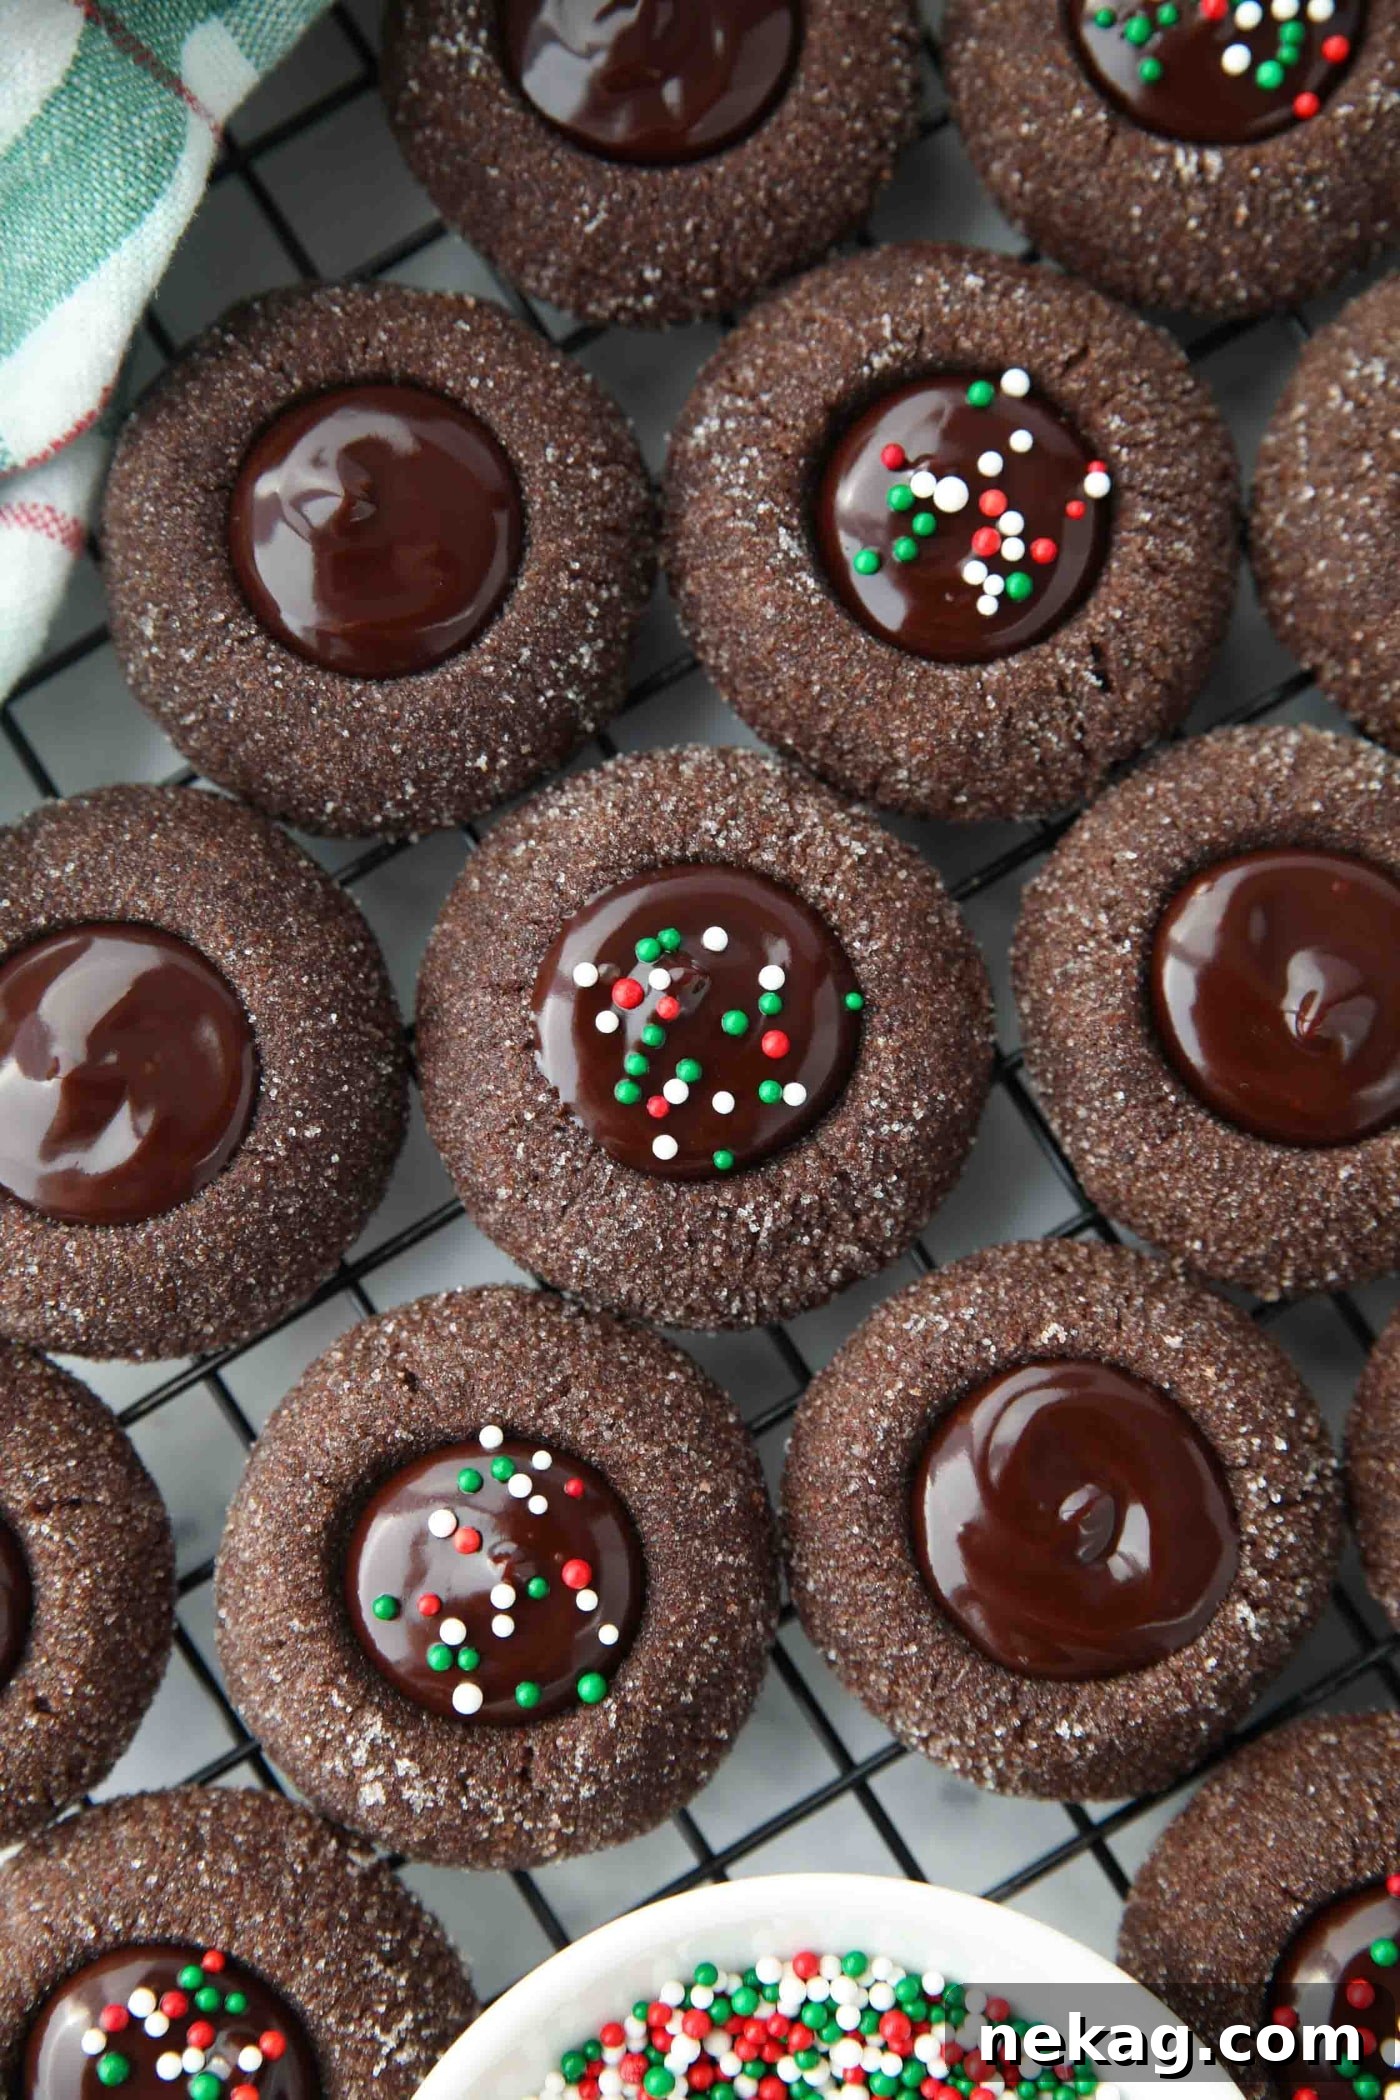
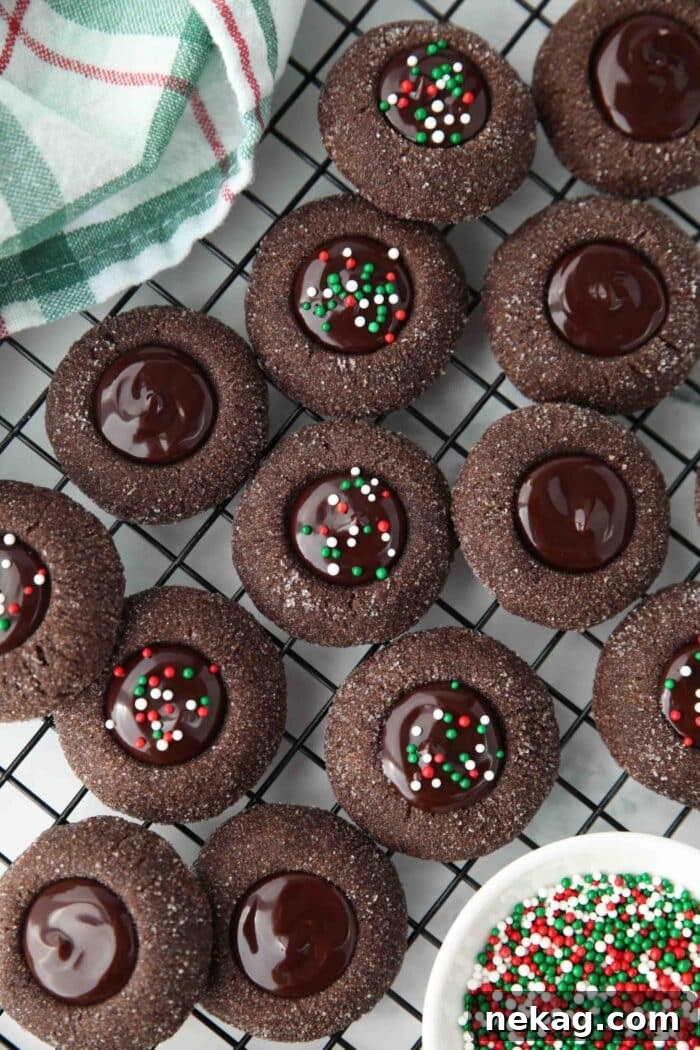
Indulge in the rich, festive flavors of these delightful chocolate thumbprint cookies. Each cookie features a remarkably soft and fudgy chocolate base, generously filled with luscious, silky chocolate ganache, and crowned with optional vibrant holiday sprinkles. This easy-to-follow thumbprint cookie recipe is an absolute essential for holiday gifting, cookie exchanges, and dazzling any festive dessert table.
Love thumbprint cookies? While classic raspberry thumbprint cookies are always a cherished treat, the versatility of these delightful morsels allows for endless creativity. You can easily switch out the jam for any flavor that tickles your fancy, or even embrace the zesty brightness of lemon curd for a delightful twist. Craving something truly unique and decadent? These turtle thumbprint cookies, with their irresistible caramel and pecan topping, and the rich chocolate cream thumbprint cookies, often coated in crunchy nuts, offer a fantastic departure from traditional sugar-dusted varieties. Explore the spectrum of thumbprint possibilities and find your next favorite!
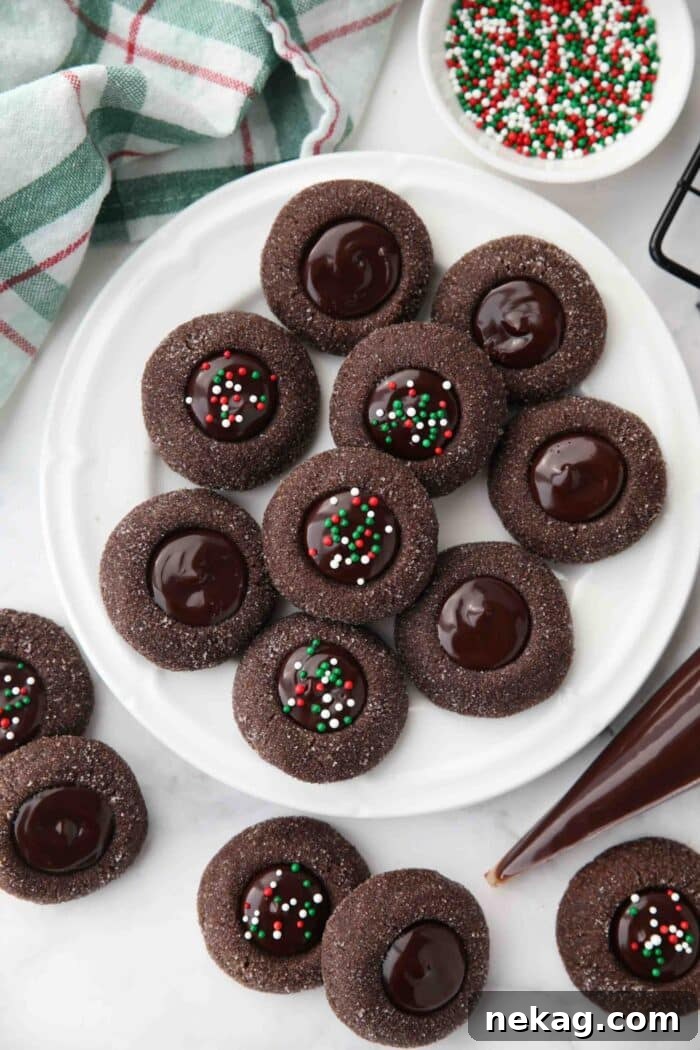
Decadent Chocolate Thumbprint Cookies: A Double Chocolate & Festive Treat
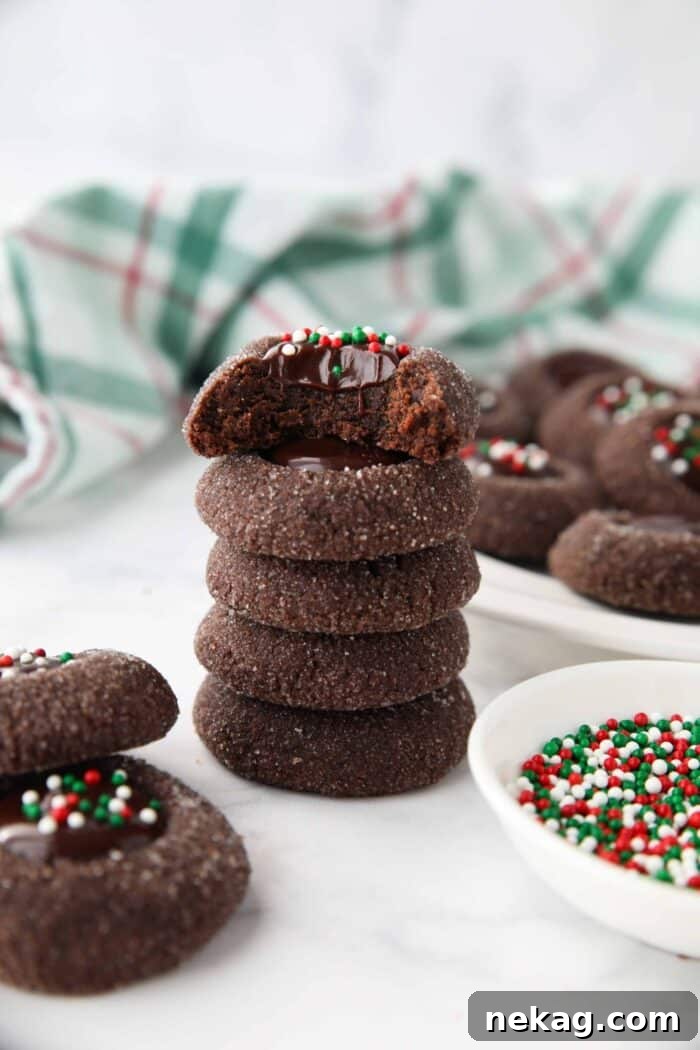
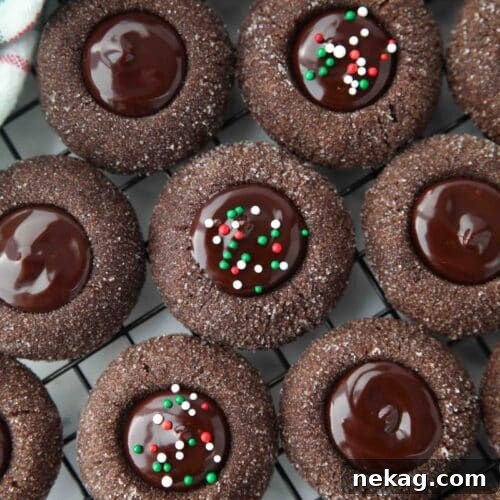
If your holiday baking list calls for a truly decadent holiday treat that effortlessly combines simplicity with stunning presentation and incredible taste, these chocolate thumbprint cookies are your answer. This exceptional recipe presents a harmonious blend: a soft, exquisitely fudgy chocolate cookie base that melts in your mouth, perfectly complemented by a smooth, velvety chocolate ganache filling. For that quintessential festive flourish, complete each cookie with an array of colorful holiday sprinkles or sparkling nonpareils. Their rich, deep chocolate flavor and charming appearance make them an instant favorite.
Whether you’re meticulously preparing for a festive cookie exchange, thoughtfully assembling gifting tins for cherished friends and family, or simply aiming to create a show-stopping display for your holiday dessert tray, this comprehensive thumbprint cookies recipe is absolutely guaranteed to impress even the most discerning palates. These cookies aren’t just a dessert; they’re a celebration in every bite, encapsulating the warmth and joy of the holiday season.
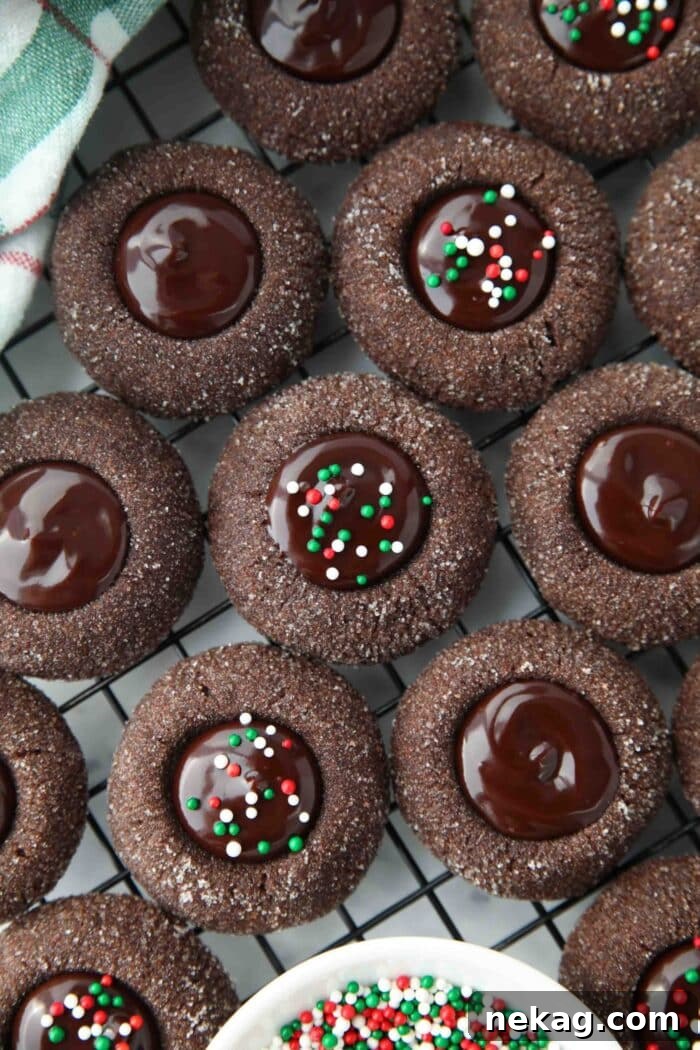
Why You’ll Adore These Chocolate Thumbprint Cookies
These aren’t just any holiday cookies; they’re a luxurious experience designed to delight. Here’s why these chocolate thumbprint cookies will become a cherished part of your baking repertoire:
- Unforgettable Double Chocolate Bliss: Prepare for a cocoa overload! These cookies offer a rich, deep chocolate experience from two distinct elements: a intensely flavored chocolate cookie and a sumptuously smooth chocolate ganache filling. Each bite delivers a harmonious balance of bittersweet and sweet, making them a true chocolate lover’s dream.
- Instant Holiday Cheer: Transform simple cookies into festive masterpieces with minimal effort. The addition of vibrant sprinkles and shimmering nonpareils instantly elevates their appearance, making them perfectly suited for any holiday celebration. They add that irresistible sparkle and color that embodies the spirit of the season.
- Irresistibly Soft & Fudgy Texture: Forget dry or crumbly cookies. This recipe is crafted to deliver an exceptionally soft, almost brownie-like texture that remains moist and chewy for days. The fudgy cookie base pairs beautifully with the creamy ganache, creating a truly melt-in-your-mouth sensation that will have everyone reaching for another.
- Impressive Yet Simple: Despite their elegant appearance, these cookies are surprisingly straightforward to make. The step-by-step instructions ensure a smooth baking process, allowing even novice bakers to achieve professional-looking results. They offer maximum impact with minimum fuss.
- Versatile for Any Occasion: While perfect for holidays, these thumbprint cookies are fantastic year-round. Customize the sprinkles for birthdays, baby showers, or simply as a sophisticated treat to enjoy with a cup of coffee. Their universal appeal makes them suitable for any gathering.
Essential Ingredients for Perfect Chocolate Thumbprint Cookies
NOTE: You’ll find the complete ingredient quantities and detailed instructions conveniently laid out in the printable recipe card located at the very end of this post. This section provides an overview and helpful insights into each component.
Jump to Recipe Card
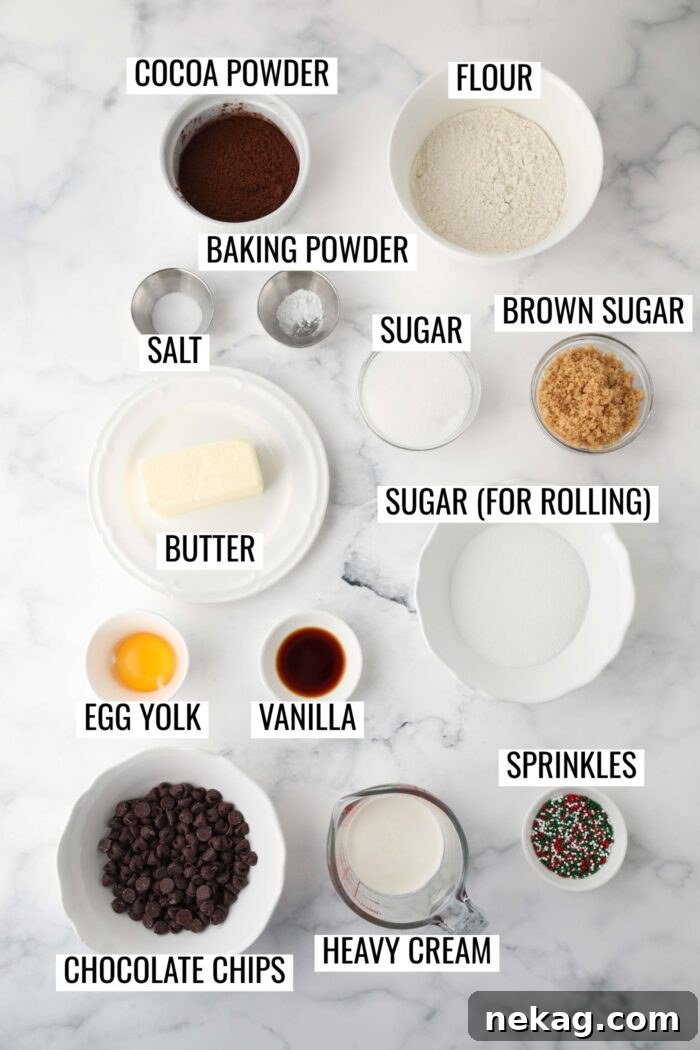
- All-Purpose Flour: The foundational dry ingredient providing structure to our cookies. Ensure you measure it correctly by stirring, spooning, and leveling to avoid a dense or dry cookie.
- Dutch-Process Cocoa Powder: This is key to achieving that rich, deep, dark chocolate color and mellow flavor in your cookies. Dutch-process cocoa has been alkalized, which reduces its acidity, resulting in a less bitter taste and a darker hue compared to natural cocoa.
- Baking Powder: Our leavening agent that helps the cookies rise slightly and contributes to their soft, tender texture.
- Salt: A crucial flavor enhancer that balances the sweetness and deepens the chocolate notes. Don’t skip it!
- Unsalted Butter (Room Temperature): Essential for a tender, flavorful cookie. Using unsalted butter allows you to control the total salt content. Room temperature butter creams beautifully with sugar, creating air pockets for a light texture.
- Granulated Sugar: Provides sweetness and helps create a crisp edge while keeping the interior soft. It also contributes to the desirable spread of the cookie.
- Light Brown Sugar (Gently Packed): Adds moisture, chewiness, and a subtle caramel-like flavor that complements the chocolate wonderfully. Gently packing it ensures you get the right amount without making the dough too dense.
- Egg Yolk (No Whites): This is a secret weapon for richness and fudginess. The egg yolk contributes fat and emulsifying properties, making the cookies incredibly tender and moist without adding excess moisture that egg whites would.
- Vanilla Extract: A classic flavor enhancer that brings out the best in chocolate. Use a good quality pure vanilla extract for the best results.
- Semi-Sweet Chocolate Chips: The star of our ganache filling. Semi-sweet chocolate provides a balanced sweetness that pairs well with the rich chocolate cookie. High-quality chips will yield the best ganache.
- Heavy Cream: Combined with chocolate chips, this creates our luxurious, smooth ganache. The high fat content of heavy cream ensures a stable and glossy ganache.
- Sprinkles (or Nonpareils, Optional): For that essential festive touch! Choose holiday-themed colors or classic nonpareils to elevate the visual appeal of your cookies.
Step 1: Crafting the Perfect Chocolate Cookie Dough
The foundation of these exquisite cookies lies in their rich, fudgy chocolate dough. Follow these steps carefully to ensure a perfectly textured base:
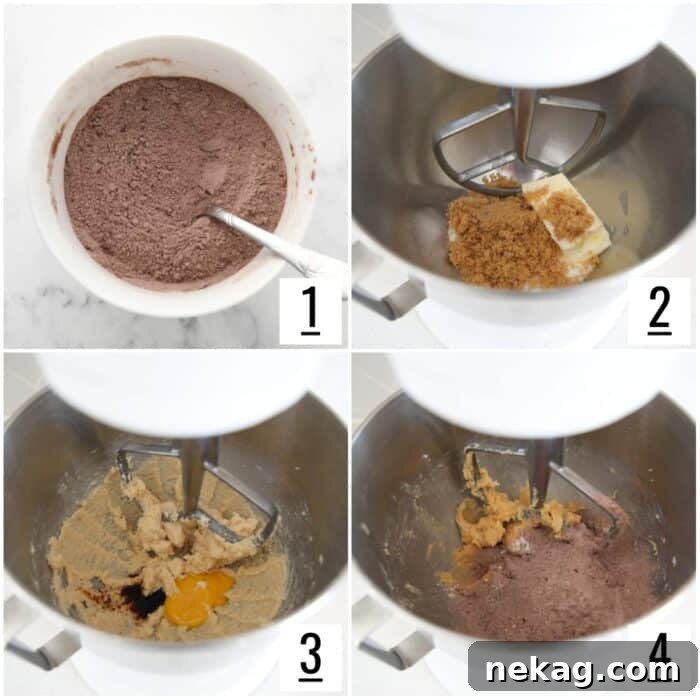
- Prepare Your Dry Ingredients: In a medium-sized bowl, meticulously combine the all-purpose flour, Dutch-process cocoa powder, baking powder, and salt. Use a whisk or fork to thoroughly mix these ingredients, ensuring they are evenly distributed. This step prevents pockets of leavening agents or salt, which can lead to uneven baking. Set this mixture aside for later use.
- Cream the Butter and Sugars: In the bowl of a stand mixer, fitted with the paddle attachment, add the softened unsalted butter, granulated sugar, and gently packed light brown sugar. Cream these together on medium speed for about 2-3 minutes, until the mixture becomes light, fluffy, and visibly pale. This process incorporates air, which is vital for the cookie’s tender texture. Scrape down the sides of the bowl as needed to ensure everything is thoroughly combined.
- Incorporate the Wet Ingredients: To the creamed butter and sugar mixture, add the single egg yolk and the vanilla extract. Mix on low speed until these ingredients are fully incorporated, typically about 30 seconds to 1 minute. The egg yolk adds richness and helps create that desirable fudgy texture, while the vanilla enhances the overall chocolate flavor. Remember to scrape down the bowl once more to ensure uniform mixing.
- Combine Wet and Dry Ingredients: Gradually add the reserved flour mixture to the wet ingredients in two batches. Mix on the lowest speed until just combined. Be careful not to overmix the dough at this stage, as overworking the gluten in the flour can lead to tough, dry cookies. Stop mixing as soon as no dry streaks of flour are visible. The dough will be thick and slightly crumbly, but it should hold together when pressed.
Step 2: Shaping and Chilling Your Chocolate Thumbprint Cookies
Precision in shaping and strategic chilling are crucial for perfect thumbprint cookies. These steps help prevent excessive spreading and cracking during baking.
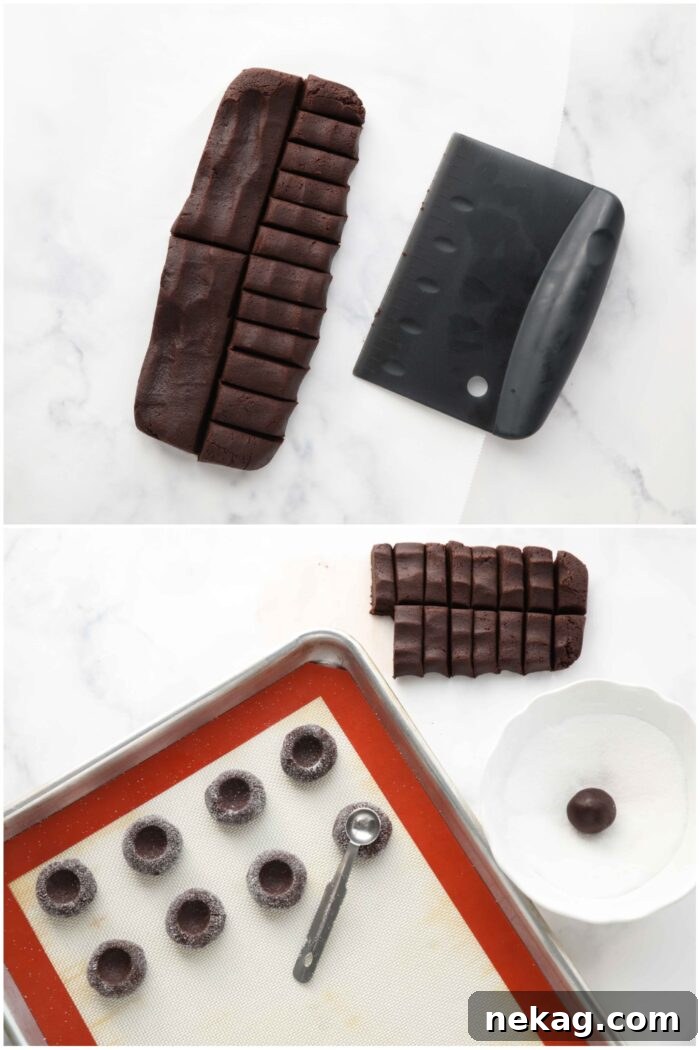
- Evenly Divide the Dough: Carefully empty the prepared chocolate cookie dough onto a clean piece of parchment paper. Gently flatten the dough into a rectangular disk, approximately 1-inch thick. Using a sharp knife or a bench scraper, divide this disk into 24 equal pieces. This method ensures that all your cookies are uniform in size, which is important for consistent baking and an appealing final presentation.
- Roll & Press the Cookies: Take each individual piece of dough and roll it between your palms to form a smooth ball. If desired, lightly coat each dough ball in granulated sugar for an added crunch and sparkle. Place the rolled dough ball onto a baking tray lined with parchment paper or a silicone baking mat. Immediately after rolling and while the dough is still warm from your hands, gently press the center of each ball with the back of a ½ teaspoon. Aim to press down about one-third of the way into the dough. Pressing while warm significantly helps to reduce cracking. Be mindful not to press too far down, as this can cause the cookies to spread more excessively during baking.
- Crucial Chilling Phase: Once all the dough balls are rolled and indented, arrange them somewhat closely together on the same pan, ensuring they are not touching each other. This is crucial for efficient chilling. Transfer the entire pan of chocolate thumbprint cookies to the freezer and chill for a solid 20-30 minutes, or until the dough balls are cold and firm to the touch. This chilling period prevents the cookies from spreading too much in the oven, helping them maintain their shape and the integrity of their thumbprint indentation. Do not skip this step!
Step 3: Baking and Re-Indenting for Perfection
This stage brings your cookies to life, transforming raw dough into tender, fudgy treats. The re-indenting step is key to perfectly formed thumbprints.
- Preheat Your Oven: While your cookie dough is chilling in the freezer, preheat your oven to 350 degrees Fahrenheit (175°C). Line several half-sheet pans with silicone baking mats or fresh parchment paper. Having your pans ready ensures a smooth transition from freezer to oven, maintaining the dough’s chill.
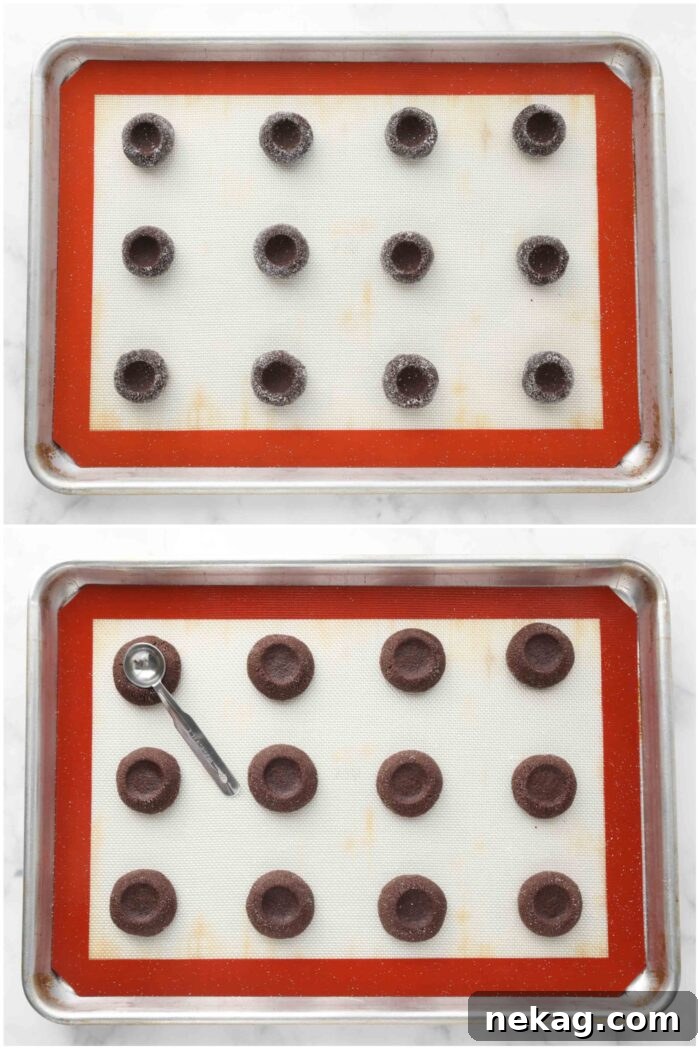
- Arrange and Bake: Retrieve the chilled cookie dough balls from the freezer. Arrange them on the prepared baking pans, spacing them approximately 2 to 3 inches apart. Aim for about 12 cookies per tray to allow for even airflow and baking. Bake at 350°F (175°C) for 9-11 minutes. The cookies are ready when they appear puffed up and have a matte finish in the center. Avoid overbaking, as this can lead to dry cookies.
- Re-Indent Warm Cookies: Immediately after removing the cookies from the oven, while they are still warm and pliable, use the back of a 1 teaspoon to gently re-press the centers. This action refines the indentation, ensuring a perfect well for your ganache filling, as the cookies tend to puff up slightly during baking.
- Cool Completely: Allow the cookies to rest on the baking tray for about 5 minutes. This brief resting period helps them set and firm up, making them less prone to breaking. Afterward, carefully transfer the cookies to a wire rack to cool completely. Ensure they are fully cooled before proceeding to the ganache filling, as warm cookies will cause the ganache to melt. (NOTE: It’s important to keep any unbaked cookie dough chilled in the freezer while you bake each batch. This maintains their structure and prevents spreading.)
Step 4: Crafting and Filling with Silky Ganache
The final touch that elevates these cookies from delicious to truly decadent: a rich, smooth chocolate ganache filling. This step brings all the flavors and textures together.
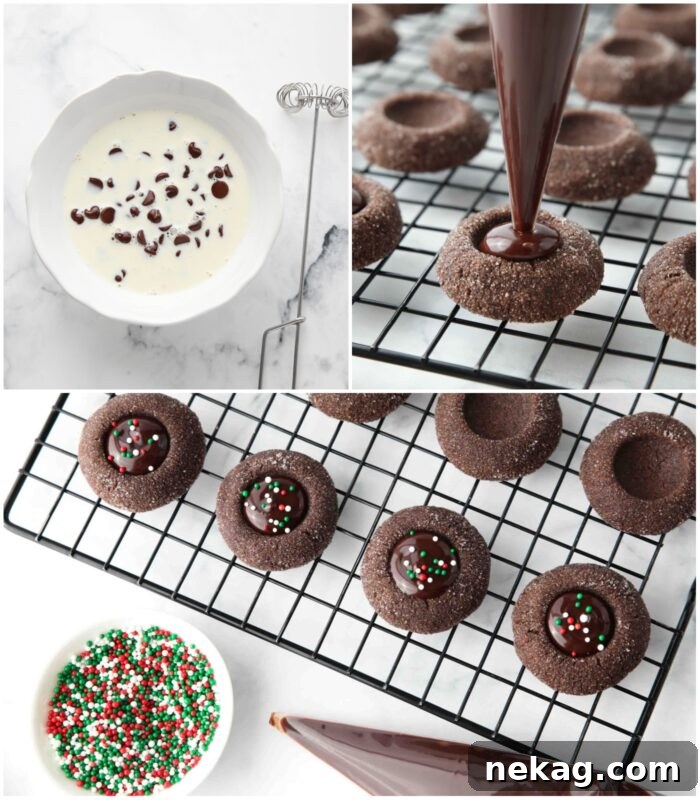
- Prepare the Chocolate Ganache: In a microwave-safe bowl, warm the heavy cream for approximately 30 seconds, or until it just begins to boil and steam. Be careful not to let it boil over. Immediately pour the hot cream over your bowl of semi-sweet chocolate chips. Allow the mixture to sit undisturbed for 1 minute; this allows the residual heat from the cream to melt the chocolate. After 1 minute, gently whisk the mixture together, starting from the center and working your way outwards, until it transforms into a smooth, glossy, and perfectly uniform ganache.
- Fill the Cooled Cookies: Transfer the prepared ganache into a piping bag or, more simply, into a plastic zip-top bag. If using a zip-top bag, snip off a small corner (about ¼ inch) to create an opening. Carefully pipe the ganache into each cooled cookie well. (PRO TIP: Avoid overfilling the cookies. Aim to fill the ganache level with the cookie’s rim or slightly below it. This makes it significantly easier to store the cookies without the ganache spilling or sticking together.)
- Decorate and Set (Optional): For an extra touch of festivity and visual appeal, immediately sprinkle your desired nonpareils or sprinkles over the wet ganache. Work quickly, as the ganache will begin to set. Once decorated, place the cookies in the refrigerator for about 15 minutes, or until the chocolate ganache is completely set and firm. This step ensures the ganache holds its shape and prevents any mess during serving or storage.
Did you Create This Deliciousness?
We’d love to hear about your experience! Please take a moment to leave a review and rating below, sharing how much you enjoyed this recipe. Your valuable feedback not only supports our small business but also enables us to continue offering a wealth of free and delicious recipes to our community.
Storing and Freezing Your Chocolate Thumbprint Cookies
Proper storage is essential to maintain the freshness and deliciousness of your chocolate thumbprint cookies. Here’s how to keep them at their best:
- To Store (Short-Term): For optimal freshness and due to the heavy cream content in the ganache, it’s best to store these cookies in an airtight container at room temperature for up to 2 days. For extended freshness, transfer them to the refrigerator, where they will remain delicious for up to 5 days. Ensure the container is truly airtight to prevent them from drying out or absorbing other odors.
- To Freeze (Long-Term): These cookies freeze beautifully, making them perfect for make-ahead holiday baking!
- First, arrange the baked and ganache-filled cookies in a single layer on a baking sheet. Freeze them for about 1 hour, or until they are firm to the touch. This “flash freezing” prevents them from sticking together.
- Once firm, transfer the frozen cookies to a freezer-safe, airtight container. If you need to stack layers, place a sheet of parchment paper between each layer to prevent sticking.
- Freeze for up to 3 months.
- To Thaw: When ready to enjoy, remove the desired number of cookies from the freezer. Separate them into single layers (if stacked) and place them, covered or in an airtight container, in the refrigerator overnight to thaw. Alternatively, you can let them thaw on the counter at room temperature for a few hours. Always bring them back to room temperature before consuming for the best flavor and texture experience.
Creative & Festive Decorating Ideas
While classic sprinkles are lovely, don’t shy away from getting creative with your holiday decorations! Here are a few ideas to make your chocolate thumbprint cookies truly stand out:
- Classic Red & Green Sprinkles: The timeless choice for Christmas, instantly adding a pop of color and cheer.
- Crushed Peppermint: For a refreshing, candy-cane inspired twist. Sprinkle finely crushed peppermint candies or candy canes over the ganache for a delightful cool minty flavor and vibrant red and white flecks.
- Gold or Silver Sanding Sugar: Instead of regular granulated sugar, roll your cookie dough in sparkling gold or silver sanding sugar before baking for an elegant, glittering effect.
- Elegant White Nonpareils: For a sophisticated, snow-kissed look that is both simple and striking against the dark chocolate.
- Drizzled White Chocolate: After the ganache has set, melt a small amount of white chocolate and drizzle it decoratively over the top of the cookies for an artistic touch.
- Toasted Coconut Flakes: For a tropical twist that adds texture and a subtle nutty flavor.
- Mini Chocolate Curls: Shave some chocolate using a vegetable peeler and gently place the curls on top of the wet ganache for a gourmet touch.
Recipe Notes & Expert Tips
Tips for Crafting the Most Perfect Chocolate Thumbprint Cookies:
- Achieve Uniformity by Evenly Dividing the Dough: For consistently baked cookies that look professionally made, it’s crucial to divide your dough into equal portions. My preferred method is to flatten the dough into a uniform rectangular disk and then use a knife or bench scraper to cut 24 even pieces before rolling. This ensures each cookie bakes at the same rate and maintains a similar size. *Refer to the image in the post for a visual guide.*
- Minimize Cracking with Warm Dough: The key to smooth, crack-free thumbprints is to indent the cookies immediately after you roll the dough balls between your hands. The warmth from your hands keeps the dough pliable, significantly reducing the likelihood of cracks forming. A few tiny hairline cracks are normal, but this technique will prevent major fissures.
- Avoid Overbaking for Ultimate Softness: Keep a close eye on your cookies in the oven. They are designed to be soft and slightly fudgy, almost brownie-like, in texture. Overbaking will result in a dry, crumbly cookie. Pull them from the oven when they are just puffed up and the center looks matte, even if they seem slightly underdone. They will continue to set on the hot baking sheet.
- Precision in Indentation Depth: When creating the thumbprint, press down approximately one-third of the way into the dough. If you press too deeply, the cookies are likely to spread out considerably more during baking, distorting their shape and making them thinner than desired. A shallower press maintains their sturdy structure.
- Sprinkles Adhesion is Key: For sprinkles to adhere beautifully and evenly, add them immediately after you fill the cookie wells with the warm ganache. The slight stickiness of the fresh ganache will act as a perfect adhesive, ensuring your decorations stay put.
- Quality Ingredients Matter: Using good quality Dutch-process cocoa and semi-sweet chocolate chips will significantly impact the depth of flavor in your cookies. Fresh butter and vanilla also make a noticeable difference.
- Don’t Rush the Chill: The chilling steps are not optional. They help solidify the butter in the dough, preventing excessive spreading and ensuring your cookies hold their perfect shape and indentation through the baking process.
Frequently Asked Questions (FAQs)
Excessive cracking in thumbprint cookies is typically a sign that the dough became too cold or dry before it was indented. The best way to prevent this is to indent the cookies immediately after you’ve rolled the dough balls with your hands, while the dough is still warm and pliable. This warmth helps the dough stretch rather than break. While a few small cracks are completely normal and add to their rustic charm, widespread cracking indicates the dough lacked pliability during shaping. If you’re working with a large batch, consider rolling and indenting a few at a time to keep the rest of the dough cool but not overly stiff.
Absolutely, yes! Holiday sprinkles can be added at two key stages. The most common and effective method is to sprinkle them immediately after you’ve filled the cookie wells with the warm chocolate ganache. The slightly wet surface of the ganache acts as a perfect adhesive, ensuring the sprinkles stick firmly as the ganache sets. Alternatively, for a different look, you can roll the raw cookie dough balls in sprinkles (instead of or in addition to granulated sugar) before baking. This gives the cookies a festive, speckled crust. Just be aware that some sprinkles might lose a bit of their vibrant color when baked.
No, rolling thumbprint cookies in sugar is entirely optional, but it offers some lovely benefits. The granulated sugar coating adds a delightful textural crunch to the exterior of the cookie, contrasts beautifully with the soft interior, and contributes an extra layer of sweetness. It also gives the cookies a classic, sparkling appearance. If you choose not to roll them in sugar, your cookies will still be delicious and fudgy. However, you might find it helpful to lightly dust your thumb or the back of your measuring spoon with a tiny bit of sugar or flour to prevent sticking when creating the indents in the dough.
It is completely normal for the centers of thumbprint cookies to puff up slightly during the baking process! This is a common occurrence due to the leavening agents and the dough expanding in the oven. The solution is incredibly simple: as soon as you remove the cookies from the oven, while they are still warm and malleable, gently use the back of a 1 teaspoon measuring spoon (or your thumb, if careful) to re-press the indentation. This will redefine the well, creating a perfect cavity ready to be filled with your rich chocolate ganache once the cookies have cooled.
Yes, absolutely! The cookie dough can be made in advance, which is fantastic for holiday meal prep. After preparing the dough, form it into a disk, wrap it tightly in plastic wrap, and refrigerate it for up to 2-3 days. When you’re ready to bake, allow the dough to sit at room temperature for about 15-20 minutes to soften slightly, making it easier to roll and indent without cracking. You can also form the cookie balls and indent them, then freeze them on a baking sheet until solid before transferring them to an airtight freezer bag for up to 1 month. Bake from frozen, adding a minute or two to the baking time.
For the best results and a truly luxurious ganache, we recommend using high-quality semi-sweet chocolate chips or finely chopped semi-sweet baking chocolate. The quality of your chocolate will directly impact the flavor and texture of your ganache. While milk chocolate can be used for a sweeter, creamier ganache, semi-sweet provides a nice balance that prevents the cookies from being overly sweet. Avoid using chocolate bars specifically for eating, as they often contain stabilizers that can affect the ganache’s consistency.
More Delights You’ll Love
Raspberry Thumbprint Cookies + Video
Turtle Thumbprint Cookies + Video
Chocolate Cream Thumbprints
Lemon Curd Cookies
Chocolate Thumbprint Cookies
Pin
Rate
Save
Saved!
Ingredients
- 1 cup (125 g) all-purpose flour, (stir, spoon & level)
- ⅓ cup (33 g) dutch-process cocoa powder
- ¼ tsp baking powder
- ¼ tsp salt
- ½ cup (113 g) butter, (1 stick) room temperature
- ⅓ cup (68 g) granulated sugar
- ⅓ cup (68 g) light brown sugar, gently packed
- 1 egg yolk, (no whites)
- 1 tsp vanilla extract
Coating and Topping Ingredients
- ⅓ cup (68 g) granulated sugar, for rolling (optional)
- ½ cup (85 g) semi-sweet chocolate chips
- ¼ cup (59 ml) heavy cream
- nonpareils/sprinkles, optional
Equipment
-
Kitchen Scale (Recommended for precise ingredient measurements, especially flour and cocoa powder, for consistent results.)
-
KitchenAid 5-Qt. Stand Mixer (While a hand mixer can work, a stand mixer makes creaming butter and sugars much easier and more efficient.)
-
Half Sheet Pans (2 Pack) (Having two pans allows you to bake in batches efficiently while keeping the remaining dough chilled.)
-
Silicone Baking Mats (These provide a non-stick surface, ensuring even baking and easy removal of cookies without parchment paper curling.)
-
Small Bowls (For mixing dry ingredients and preparing ganache.)
-
Whisk (For mixing dry ingredients and whisking ganache.)
-
Rubber Spatula (For scraping down the mixer bowl and ensuring all ingredients are incorporated.)
-
Piping Bag or Zip-Top Bag (For easily filling the cookie indentations with ganache.)
-
Wire Cooling Rack (Essential for allowing cookies to cool completely and prevent sogginess.)
Instructions
-
In a small bowl, combine the all-purpose flour, Dutch-process cocoa powder, baking powder, and salt. Stir these dry ingredients together thoroughly with a whisk to ensure they are well-mixed and free of lumps. Set this mixture aside.
-
In the bowl of a stand mixer fitted with the paddle attachment, cream together the softened butter with both the granulated sugar and the gently packed light brown sugar. Beat on medium speed for 2-3 minutes until the mixture is light, fluffy, and pale. Add the single egg yolk and the vanilla extract. Mix on low speed until fully incorporated, stopping to scrape down the sides of the bowl as needed to ensure all ingredients are combined. Gradually add the reserved flour mixture to the wet ingredients in two batches, mixing only until just combined and no dry streaks of flour remain. Avoid overmixing.
-
Empty the cookie dough onto a piece of parchment paper. Gently flatten the dough into a rectangular disk, approximately 1-inch thick. Use a knife or bench scraper to divide this disk into 24 even pieces. This helps ensure uniform cookie sizes. (*Refer to the image in the post for visual guidance on dividing the dough.)
-
Take each piece of dough and roll it into a smooth ball between your hands. If desired, lightly coat each dough ball in granulated sugar for a slightly crispier exterior. Place the rolled dough ball onto a baking tray that has been lined with parchment paper or a silicone baking mat. Immediately press the center of each dough ball down about one-third of the way using the back of a ½ teaspoon measuring spoon. Pressing while the dough is warm from your hands helps to minimize cracking. Be careful not to press too far down, as this could cause the cookies to spread more than intended during baking.
-
Repeat the rolling and indenting process with all remaining dough balls. Arrange the cookies somewhat closely together on the same pan, ensuring they are not touching. This allows for efficient chilling. Place the pan of chocolate thumbprint cookies into the freezer and chill for 20-30 minutes, or until the dough is cold and firm to the touch. This crucial step helps prevent the cookies from spreading too much in the oven.
-
While the cookies are chilling, preheat your oven to 350 degrees Fahrenheit (175°C). Line several half-sheet pans with silicone baking mats or parchment paper, preparing them for baking. Set these aside.
-
Remove the chilled cookies from the freezer. Place them onto the prepared baking pans, spacing them 2 to 3 inches apart (aim for approximately 12 cookies per tray). Bake at 350˚F (175°C) for 9-11 minutes, or until the cookies appear puffed up and have a matte finish in the center. Avoid overbaking. Immediately after removing them from the oven, use the back of a 1 teaspoon measuring spoon to gently re-press the centers slightly while they are still warm and pliable; this refines the indentation. Allow the cookies to rest on the baking tray for 5 minutes to set before carefully transferring them to a wire rack to cool completely. (NOTE: It’s important to keep any unbaked cookie dough chilled in the freezer while you bake each subsequent pan to maintain their shape.)
-
To make the ganache, warm the heavy cream in a microwave-safe bowl for about 30 seconds, or until it just begins to boil and steam. Pour the hot cream over a bowl of semi-sweet chocolate chips and let it sit undisturbed for 1 minute. This allows the chocolate to melt from the residual heat. After 1 minute, whisk the mixture together, starting from the center, until it becomes smooth, glossy, and completely uniform.
-
Transfer the finished ganache into a piping bag or a plastic zip-top bag. If using a zip-top bag, snip off a small tip or corner (about ¼ inch). Carefully fill each cooled cookie well with the chocolate ganache. (EXPERT TIP: Aim to fill the ganache level with the cookie’s rim or slightly under it, rather than heaping it. This makes the cookies much easier to store and prevents sticking.) If desired, immediately sprinkle with nonpareils or other festive sprinkles over the wet ganache. Finally, chill the filled and decorated cookies in the refrigerator for about 15 minutes, or until the chocolate ganache is fully set and firm. This ensures a clean finish and prevents any mess.
Notes
- TO STORE: Store the finished chocolate thumbprint cookies in an airtight container or on a plate tightly covered with plastic wrap. They will keep well at room temperature for up to 2 days. Due to the cream in the ganache, for longer freshness, store them in the refrigerator for up to 5 days.
- TO FREEZE: These cookies are excellent for freezing! First, arrange the baked and filled cookies in a single layer on a baking sheet and freeze for 1 hour until completely firm. Then, transfer the frozen cookies to a freezer-safe, airtight container. Separate any layers with parchment paper to prevent them from sticking together. Freeze for up to 3 months. To thaw, simply separate the frozen cookies into single layers, place them covered or in an airtight container, and let them thaw overnight in the refrigerator, or on the counter until they reach room temperature before enjoying.
- SERVING SUGGESTIONS: These exquisite chocolate thumbprint cookies are perfect on their own, but they also pair beautifully with a variety of beverages and other treats. Serve them alongside a warm mug of coffee, a rich hot chocolate, or a cold glass of milk for a comforting snack. They make a stunning addition to any holiday dessert platter, complementing other festive treats like shortbread, gingerbread, or fruit tarts. For a more elegant presentation, arrange them on a tiered dessert stand or in decorative tins for gifting.
- VARIATIONS TO TRY:
- Espresso Kick: Add 1 teaspoon of espresso powder to the cookie dough along with the dry ingredients to deepen the chocolate flavor.
- Nutty Edge: Before baking, roll the cookie dough balls in finely chopped nuts (like pecans or walnuts) instead of or in addition to granulated sugar for an added crunch and flavor dimension.
- Caramel Center: Instead of chocolate ganache, fill the thumbprints with a spoonful of homemade or store-bought caramel sauce, then drizzle with a bit of melted chocolate.
- Minty Fresh: Add a few drops of peppermint extract to your ganache for a refreshing mint-chocolate experience, and top with crushed candy canes.
- Orange Zest: Incorporate 1 teaspoon of finely grated orange zest into the cookie dough for a delightful citrus hint that pairs wonderfully with chocolate.
Nutrition
Serving: 1 cookie
|
Calories: 122kcal
|
Carbohydrates: 15g
|
Protein: 1g
|
Fat: 7g
|
Saturated Fat: 4g
|
Polyunsaturated Fat: 0.3g
|
Monounsaturated Fat: 2g
|
Trans Fat: 0.2g
|
Cholesterol: 21mg
|
Sodium: 62mg
|
Potassium: 54mg
|
Fiber: 1g
|
Sugar: 10g
|
Vitamin A: 167IU
|
Vitamin C: 0.01mg
|
Calcium: 13mg
|
Iron: 1mg
Disclaimer: Nutritional values were calculated using a third-party tool and are provided as an estimation only.
Sharing this recipe with a link is both encouraged and appreciated. Copying/pasting and/or screenshots of full recipes to any social media is strictly prohibited. Content and photographs are copyright protected.
Did you make this?
Don’t forget to leave a rating below and make sure to follow on Pinterest and Instagram for more!