
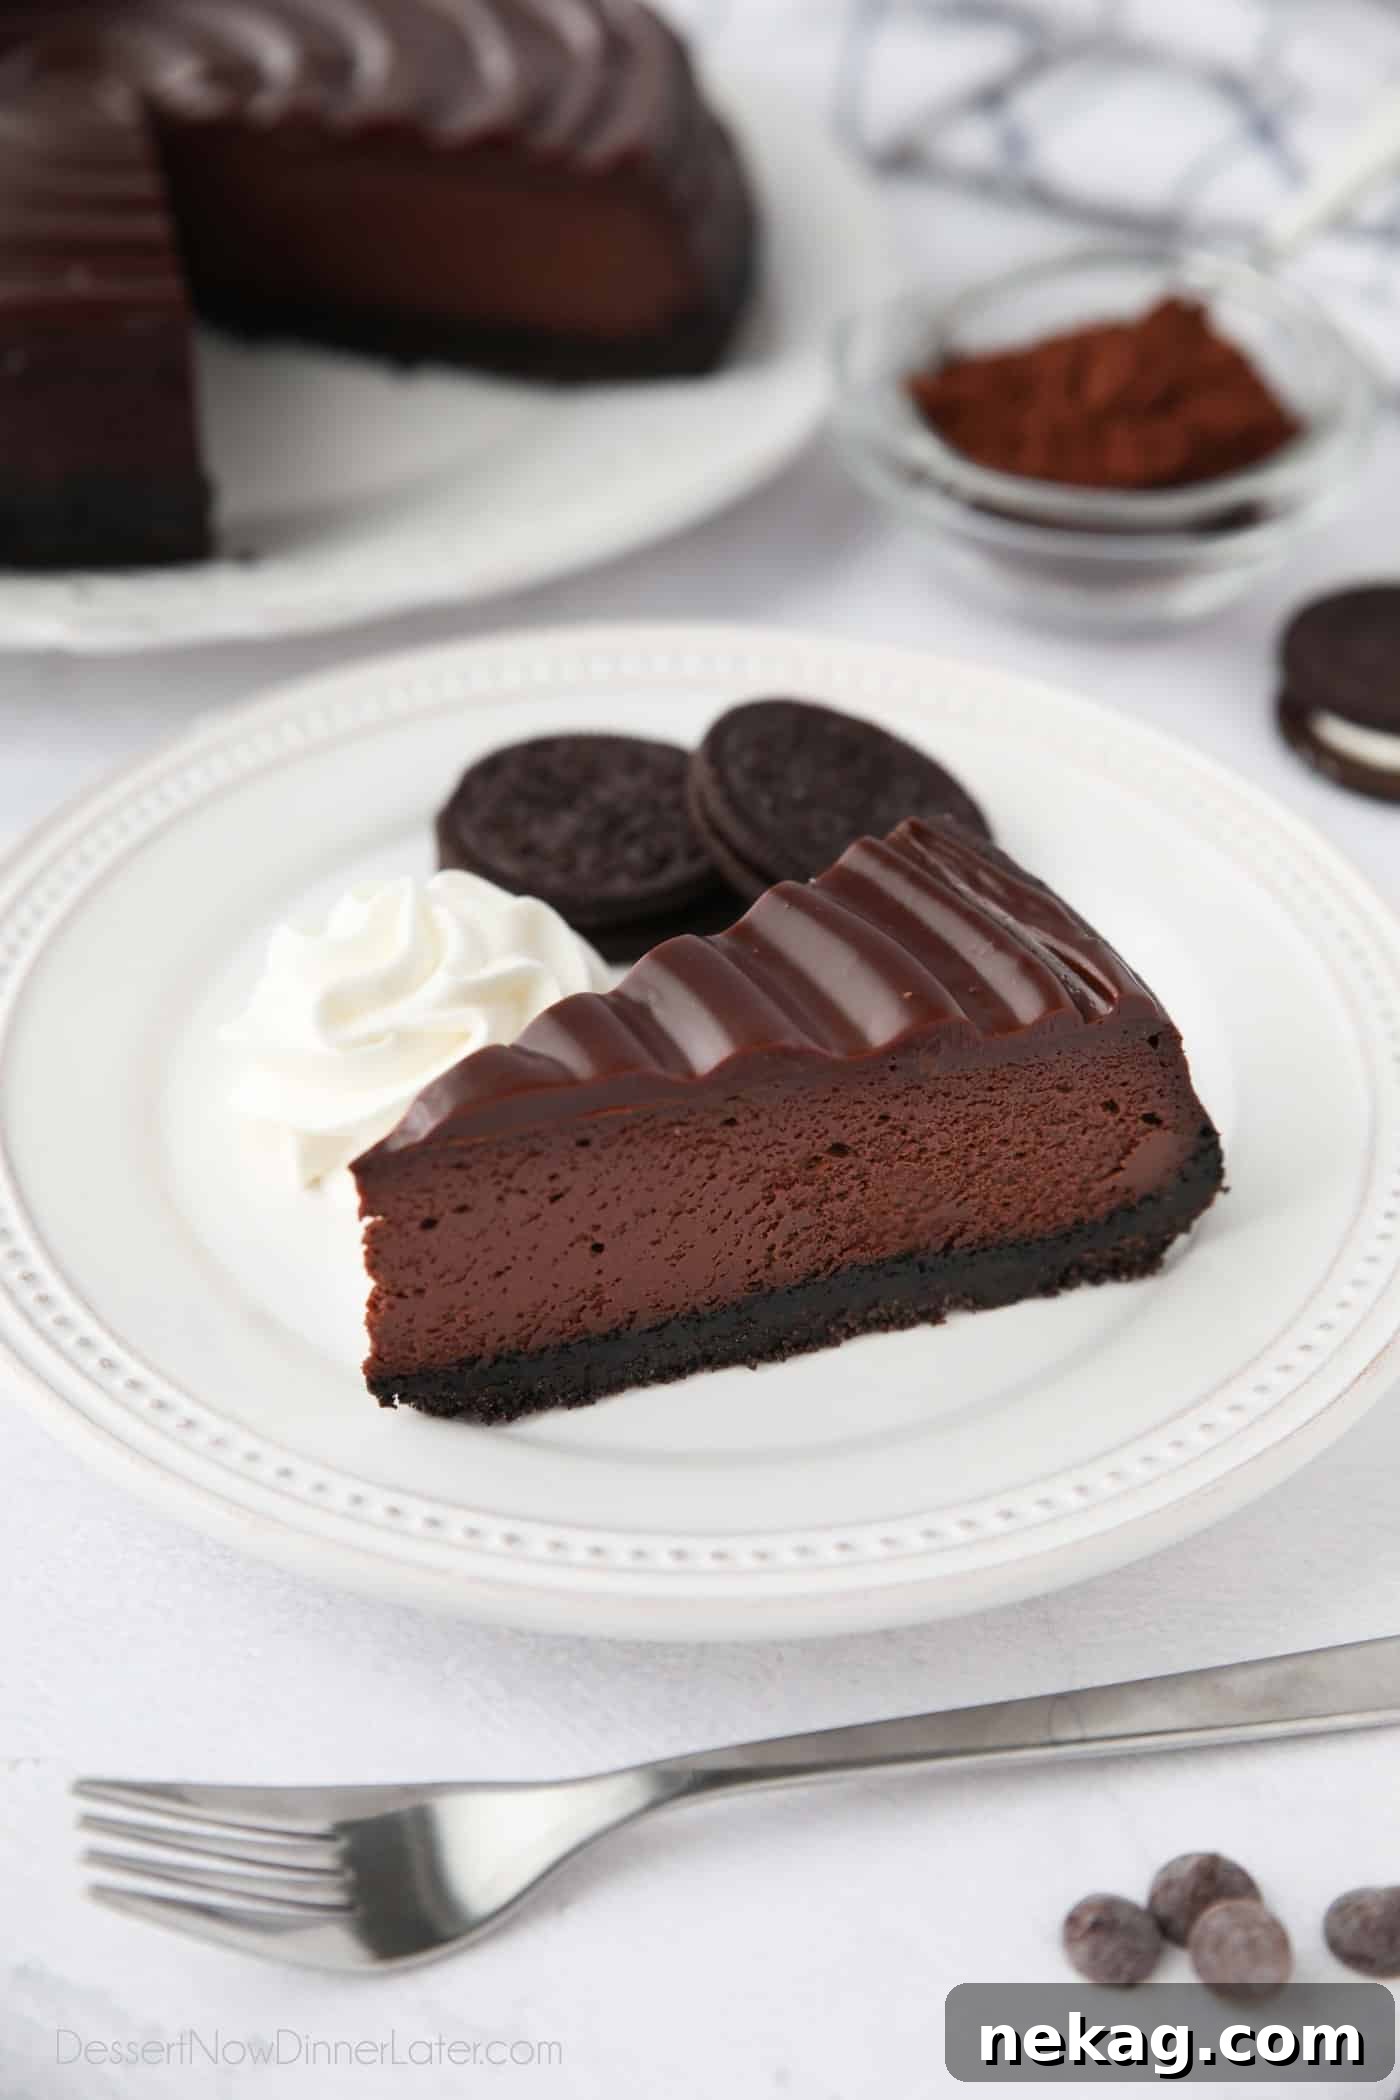
Indulge in the ultimate chocolate experience with this heavenly Triple Chocolate Cheesecake. This recipe is a chocolate lover’s dream, featuring three decadent layers: a rich Oreo cookie crust, a luxuriously smooth cocoa powder and sour cream cheesecake filling, and a glossy, easy-to-make chocolate ganache topping. Crafted in the classic New York style, this cheesecake promises an unbelievably creamy and rich texture that melts in your mouth. It’s truly the best way to satisfy any chocolate craving and makes for an unforgettable make-ahead dessert perfect for any special occasion or celebration. Prepare to impress with every single slice!
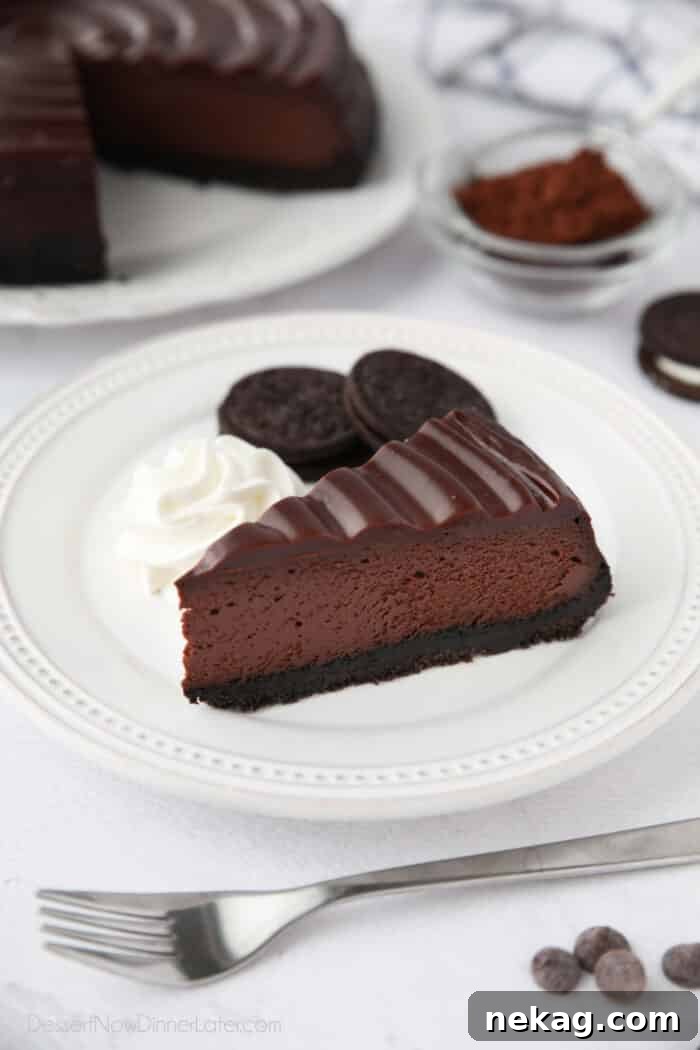
The Ultimate Chocolate Cheesecake Experience
For those who believe there’s no such thing as too much chocolate, this triple chocolate cheesecake is your culinary nirvana. It’s not just a dessert; it’s an experience, meticulously designed to delight your senses with every forkful. Imagine three distinct, yet harmoniously blended, chocolate layers that combine to create a symphony of flavor and texture. This show-stopping dessert is not only incredibly delicious but also practical, as it’s an ideal make-ahead dessert, allowing you to prepare it in advance and simply unveil its magnificence when it’s time to serve. Whether it’s a holiday gathering, a birthday celebration, or just a weekend treat, this cheesecake is guaranteed to be the star of your dessert table. Much like our beloved classic vanilla cheesecake recipe, this chocolate rendition is surprisingly straightforward to prepare, making gourmet baking accessible to everyone.
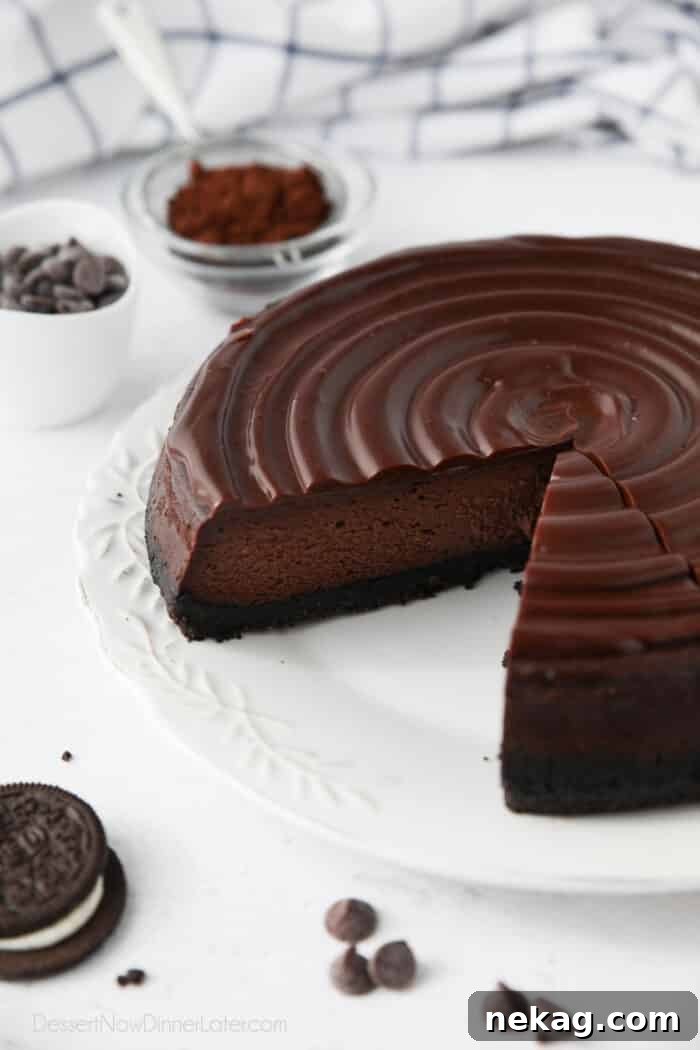
Unveiling the Three Layers of Chocolate Decadence
What truly elevates this dessert to a “triple chocolate” masterpiece are its three distinct, yet complementary, chocolate components. Each layer plays a vital role in creating a complex and deeply satisfying flavor profile. First, we have the crunchy and flavorful Oreo cookie crust, providing a perfect foundation. Next, the star of the show: the rich and velvety chocolate cheesecake filling, infused with the deep notes of cocoa. Finally, a silky, glossy chocolate ganache elegantly drapes the top, adding a final touch of indulgence and visual appeal. This thoughtful layering ensures a balanced chocolate intensity in every bite, proving that when it comes to chocolate, more is always better!
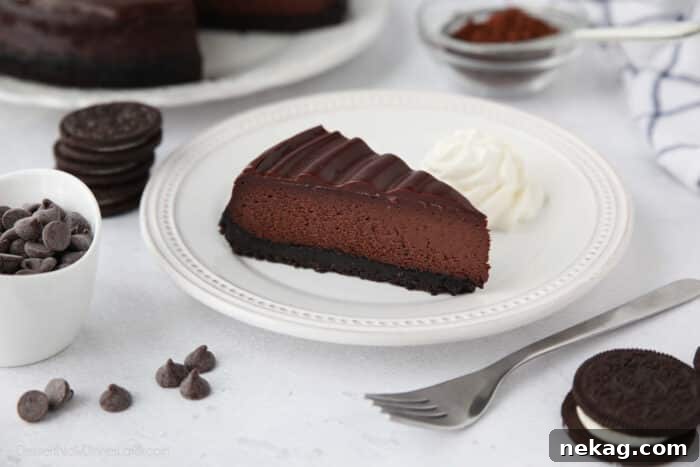
Crafting the Irresistible Oreo Cookie Crust
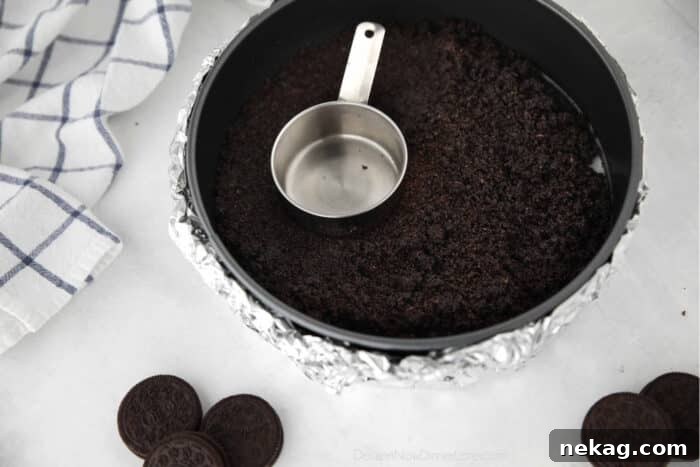
The foundation of any great cheesecake begins with an outstanding crust, and for this triple chocolate marvel, nothing beats the classic Oreo cookie crust. Its distinct chocolate flavor and slight crunch provide the perfect contrast to the creamy filling. You only need two simple ingredients for this incredible base: melted butter and a generous amount of crushed Oreo cookies, cream filling and all! I typically use original Oreos for their iconic flavor, but for an even deeper chocolate note, you could opt for chocolate creme-filled Oreos or even a specialty flavor that complements chocolate, such as mint Oreos for a refreshing twist.
If you prefer a different kind of base or perhaps a more traditional approach, a chocolate graham cracker crust is also a fantastic option. You can find a reliable recipe for that in my Valentine’s Day Cheesecake post. Whichever you choose, the key is to create a sturdy, flavorful base that will hold up to the rich filling.
- **Preparation is Key:** Begin by using a food processor to transform your Oreo cookies into fine, even crumbs. This ensures a uniform crust texture. If you don’t have a food processor, place the cookies in a large zip-top bag and crush them with a rolling pin until fine. Once crushed, gradually add the melted butter and mix until the crumbs are thoroughly moistened and resemble wet sand. This butter acts as a binder, ensuring your crust holds together beautifully.
- **Forming the Crust:** Firmly press the mixture into the bottom of a 9-inch springform pan. For perfectly clean slices and effortless removal after chilling, line the bottom of your springform pan with parchment paper before adding the crust. This simple step makes a world of difference in presentation!
PRO TIP: Parchment paper isn’t just for easy removal; it also helps prevent the crust from sticking to the pan, ensuring a beautiful, intact base for your cheesecake. Lightly grease the sides of the springform pan as well to prevent the cheesecake from sticking as it bakes and cools.
- **Pre-Baking for Perfection:** Bake the prepared crust at 350˚F (175˚C) for 10 minutes. This crucial step helps to set the crust, making it sturdy and preventing it from becoming soggy once the filling is added. After baking, reduce the oven temperature to 300˚F (150˚C) – this lower temperature is ideal for baking cheesecakes gently. Allow the crust to cool completely while you prepare the decadent chocolate filling. A cool crust prevents the filling from softening too quickly when poured in.
The Velvety Chocolate Cheesecake Filling: A Cocoa Powder Secret
Once your irresistible Oreo crust is cooling, it’s time to move on to the heart of this dessert: the rich and creamy chocolate cheesecake filling. Many chocolate cheesecake recipes call for melting chocolate into the filling, but to simplify the process and achieve a wonderfully smooth, deep chocolate flavor without any fuss, this recipe ingeniously uses cocoa powder. This method not only streamlines preparation but also results in a uniquely rich and less overly sweet chocolate essence that allows the true cheesecake flavor to shine through.
For the best results, I highly recommend using Hershey’s Special Dark Cocoa Powder. Its Dutch-processed nature provides a darker color and a milder, less acidic chocolate flavor that is incredibly satisfying. However, any good quality natural, unsweetened cocoa powder will work beautifully. The key is to use a brand you trust for its flavor depth.
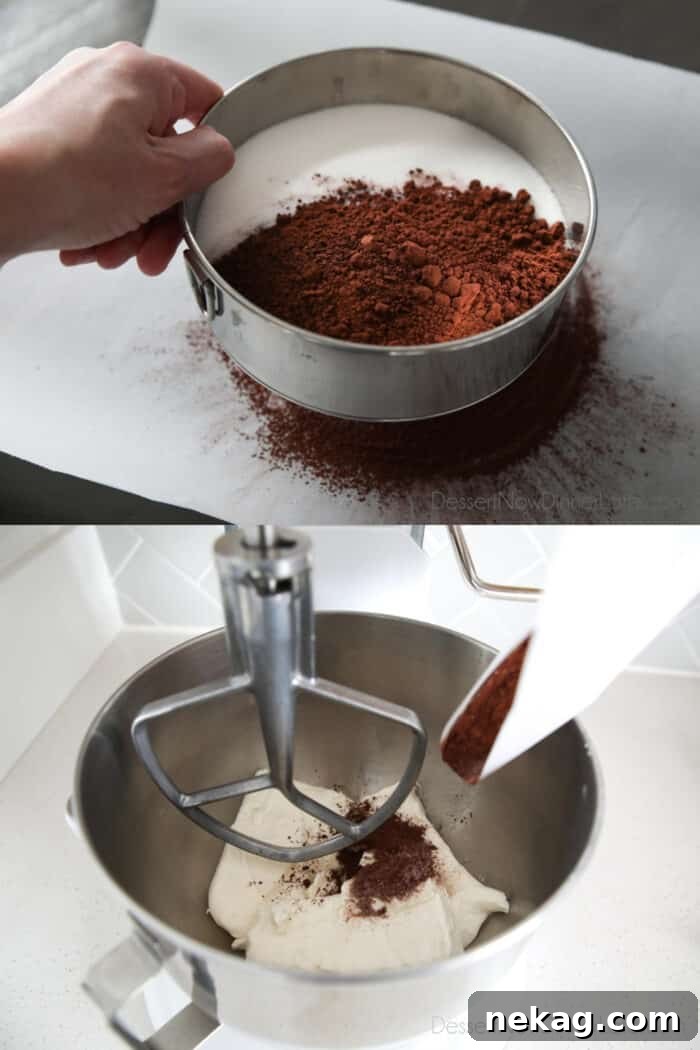
- **Sifting for Smoothness:** Before combining with the softened cream cheese, it’s essential to sift the cocoa powder, granulated sugar, and salt together. Sifting removes any lumps from the cocoa powder, ensuring a perfectly smooth and uniform batter. This step is crucial for achieving that signature velvety cheesecake texture without any grainy bits.
PRO TIP: To make the sifting and pouring process mess-free, sift your dry ingredients onto a large piece of parchment paper. Once sifted, gently fold the ends of the parchment paper together to create a convenient funnel. This allows for easy and precise pouring of the dry mixture directly into your mixer bowl without any spills.
Assembling the Perfect Chocolate Cheesecake Filling
Achieving a perfectly smooth and crack-free cheesecake requires careful attention to ingredient temperature and mixing technique. Follow these steps to create an effortlessly rich chocolate filling:
- **Cream Cheese Base:** In the bowl of a stand mixer fitted with the paddle attachment, or using a large bowl with an electric hand mixer, combine the room temperature cream cheese with the sifted sugar, cocoa powder, and salt. Beat on low speed until the mixture is completely combined and wonderfully smooth. This initial step is vital for preventing lumps. Remember to scrape down the sides and bottom of the bowl frequently to ensure all ingredients are thoroughly incorporated.
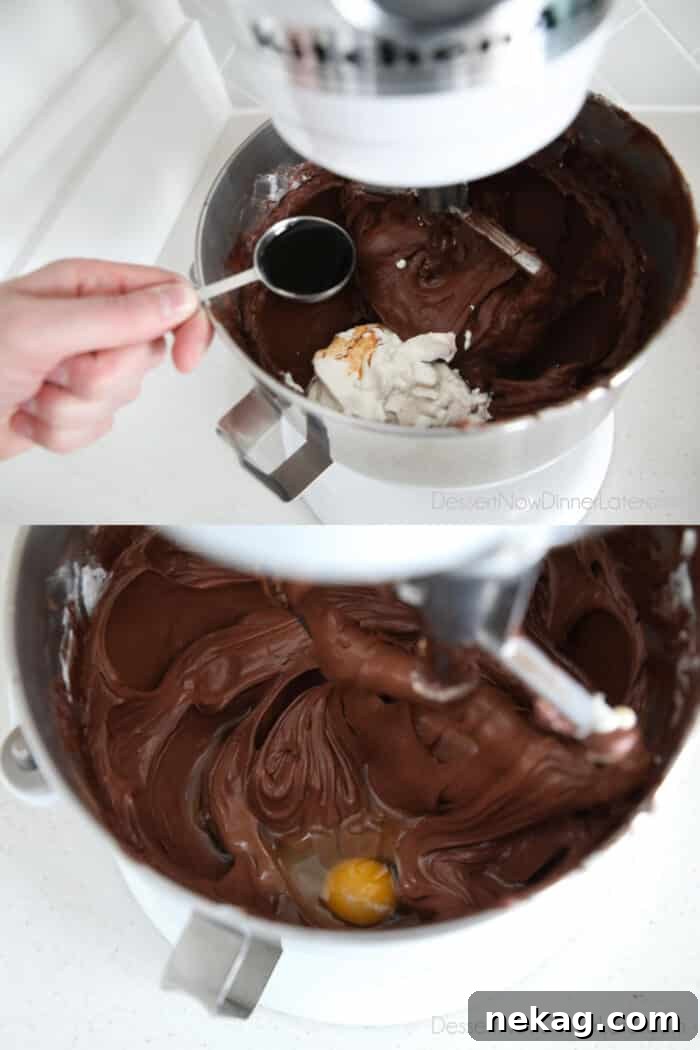
- **Adding Wet Ingredients:** Next, incorporate the room temperature sour cream and vanilla extract. Continue to mix on low speed until these ingredients are just combined. Overmixing at this stage can introduce too much air, which can lead to cracks during baking. The sour cream not only adds a lovely tang that balances the sweetness but also contributes significantly to the cheesecake’s incredibly creamy texture.
- **Incorporating Eggs Gently:** The final addition to the batter is the eggs. Add them one at a time, mixing slowly and just until each egg is fully incorporated before adding the next. This gentle approach is crucial for maintaining the smooth, dense texture of the cheesecake and preventing an airy, crumbly result. Again, scrape the bowl down after each egg addition to ensure uniformity.
- **Pour and Prepare:** Once the filling is perfectly smooth and lump-free, pour it carefully into your cooled, pre-baked Oreo crust. Gently tap the springform pan on the counter a few times to release any large air bubbles that may be trapped within the batter. This helps achieve a denser, more uniform baked cheesecake.
PRO TIP: The secret to a perfectly smooth, crack-free cheesecake lies in two key principles: using room temperature ingredients and mixing on low speed. Cold ingredients don’t emulsify properly, leading to lumps, while beating at a high speed incorporates too much air. This excess air expands rapidly during baking and then collapses during cooling, creating unsightly cracks. By keeping ingredients at room temperature and mixing slowly, you’ll create a dense, luxurious batter that bakes evenly.
NOTE: Cheesecakes are sensitive to sudden temperature changes, which are a major culprit for cracking. To avoid this, plan ahead! Take all refrigerated ingredients (cream cheese, sour cream, eggs) out of the refrigerator and place them on the counter 1-2 hours before you plan to start making the cheesecake. This allows them to come to a uniform room temperature, ensuring a smooth batter and a successful bake.
The Secret Weapon: Using a Water Bath for Perfect Cheesecake
With your delectable chocolate cheesecake filling prepared and nestled in its crust, the next critical step for achieving a truly perfect cheesecake is utilizing a water bath, also known as a bain-marie. This technique is not merely optional; it is an absolute MUST for cheesecakes. Skipping this step often results in a drier cheesecake that can suffer from common issues such as cracks across the surface, a sunken center, or unpleasantly browned, tough edges. Given the effort and anticipation involved in making such a magnificent dessert, why compromise on perfection?
The water bath works by providing a consistently moist and gentle heat environment for your cheesecake. The surrounding water shields the delicate custard-like filling from the direct, harsh heat of the oven. This ensures that the edges of the cheesecake cook at the same slow, even rate as the center, preventing overbaking and curdling. The steam generated by the water also adds crucial moisture to the oven, which keeps the cheesecake from drying out and helps it maintain its signature smooth, creamy, and unblemished surface. While it might seem like an extra step, the minimal effort involved in setting up a water bath is profoundly rewarded with a superior cheesecake texture and appearance that truly justifies the process.
Simple Steps to Set Up Your Cheesecake Water Bath
Setting up a water bath is much simpler than it sounds and is an essential technique for achieving that signature velvety smooth cheesecake. Here’s how to do it effectively:
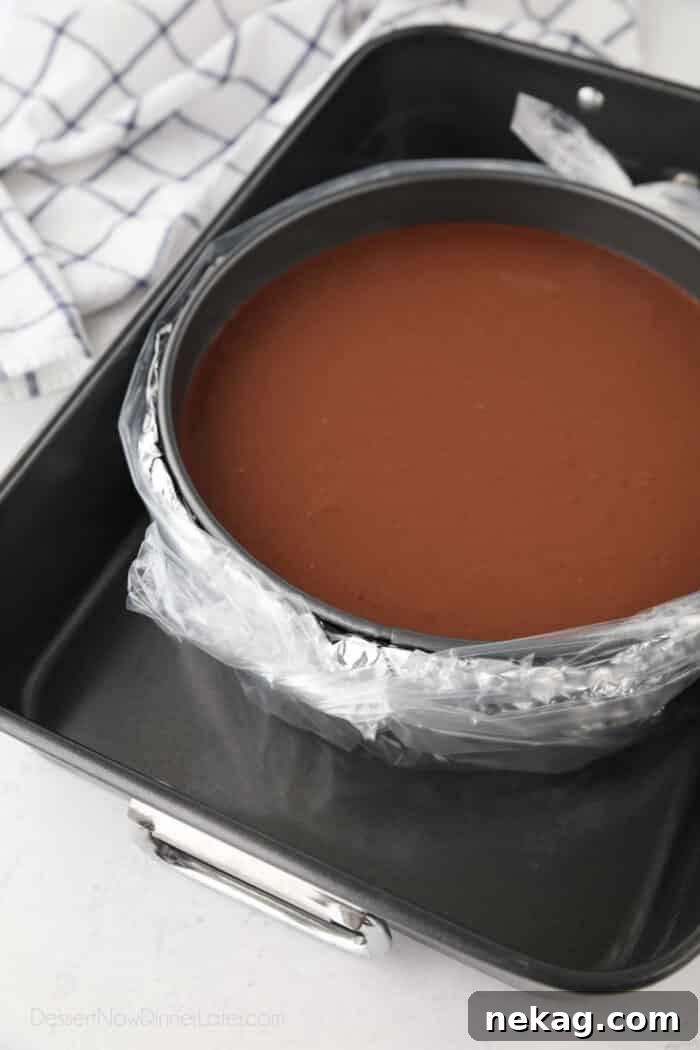
- **Protecting Your Pan:** Before placing your springform pan in the water bath, it’s crucial to protect it from water leakage. Tightly cover the outside of the springform pan with at least one, preferably two, layers of heavy-duty aluminum foil. Ensure the foil extends up the sides of the pan past the level of the cheesecake filling. Heavy-duty foil is highly recommended for its durability and resistance to tearing, which helps prevent water from seeping in and ruining your crust.
- **Assembling the Bath:** Next, carefully place the foil-wrapped springform pan inside a larger, oven-safe cake pan or roasting pan. This outer pan will hold the water for your bain-marie.
- **Adding the Water:** Once the cheesecake is securely nested in the larger pan, use a pitcher to carefully pour warm tap water into the outer pan, surrounding the springform pan. Fill the water to about 1-inch up the sides of the springform pan, or approximately halfway up. Be cautious not to splash water into the cheesecake filling itself.
- **Baking:** With the water bath assembled, gently transfer the entire setup (outer pan with water and inner springform pan) into your preheated oven to bake. The consistent, moist heat will work its magic, ensuring a perfectly baked cheesecake.
Advanced Protection: Ensuring No Water Leaks into Your Cheesecake
While wrapping your springform pan with foil is a good first line of defense, experienced bakers often take an extra precaution to guarantee absolutely no water penetrates the cheesecake. This “insurance layer” is particularly helpful if you’re worried about potential foil tears or leaks:
PRO TIP: To further prevent your water bath from leaking into the cheesecake and compromising your crust, consider using a slow cooker liner (affiliate link) or an oven-safe turkey roasting bag as an additional protective layer.
- **Layering the Protection:** After you’ve wrapped your springform pan with heavy-duty foil, carefully place it inside the plastic bag (slow cooker liner or turkey bag). Pull the bag up around the sides of the pan. Roll down the top edge of the bag and tie any loose ends together to make the bag fit snugly and tightly around the springform pan. Critically, ensure that the plastic bag does not cover the top of the cheesecake itself, as this could affect baking.
- **Final Assembly:** With the pan now doubly protected, place it inside your larger cake or roasting pan. Fill the outer pan with warm water as described above, and then transfer it carefully into the oven to bake. This plastic bag acts as an impenetrable barrier, offering peace of mind and ensuring your cheesecake crust remains perfectly crisp and dry. Think of it as an added layer of culinary insurance – it never hurts to be safe when striving for perfection!
The Art of Baking, Cooling, and Chilling for a Flawless Cheesecake
Baking a cheesecake is only half the battle; the cooling process is equally, if not more, important for achieving a smooth, crack-free surface and a perfectly set texture. After carefully placing your water bath-protected cheesecake into the oven, here’s how to navigate the critical baking and cooling stages:
- **Gentle Baking:** Bake your chocolate cheesecake in the water bath for approximately 65 minutes at 300˚F (150˚C). The cheesecake is done when the edges appear set, but the very center (about a 2-inch circle) still has a slight jiggle when you gently shake the pan. It should not look liquidy or wet. Remember, it will continue to cook slightly as it cools.
- **Crucial Gradual Cooling (Part 1):** Once the baking time is complete, turn off the oven but leave the cheesecake inside with the door completely closed for an additional 30 minutes. This allows the cheesecake to begin its cooling process very gradually, preventing the drastic temperature shock that often causes cracks. The residual heat in the oven provides a gentle transition.
- **Crucial Gradual Cooling (Part 2):** After the initial 30 minutes with the door closed, gently crack the oven door open (using a wooden spoon to prop it open works well) and allow the cheesecake to rest inside the cooling oven for 30 minutes more. This second stage of gradual cooling further eases the cheesecake into room temperature, minimizing thermal stress and ensuring a smooth, unblemished surface.
- **Room Temperature Transition:** Once the second cooling period in the oven is complete, carefully remove the chocolate cheesecake from the oven and its water bath. Place it on a wire rack and allow it to come to complete room temperature. This can take an hour or two, depending on your kitchen’s temperature. Do not rush this step.
- **The Essential Chill:** After it has reached room temperature, loosely cover the chocolate cheesecake. Before placing it in the refrigerator, consider this useful tip:
PRO TIP: When you wrap up the cheesecake for chilling, place a paper towel directly on top of the cheesecake before covering it with plastic wrap or foil. This paper towel will absorb any condensation that forms as the cheesecake chills, preventing water droplets from accumulating on and potentially “ruining” the perfectly smooth top surface. This ensures a pristine canvas for your ganache.
Once covered, place the cheesecake in the refrigerator to CHILL for a minimum of 5-6 hours, or ideally, overnight. This extended chilling period is absolutely crucial. It allows the cheesecake to fully set, firm up, and for its flavors to meld and deepen, resulting in that signature dense and creamy texture that makes a New York-style cheesecake so extraordinary. Do not attempt to slice it before it’s properly chilled!
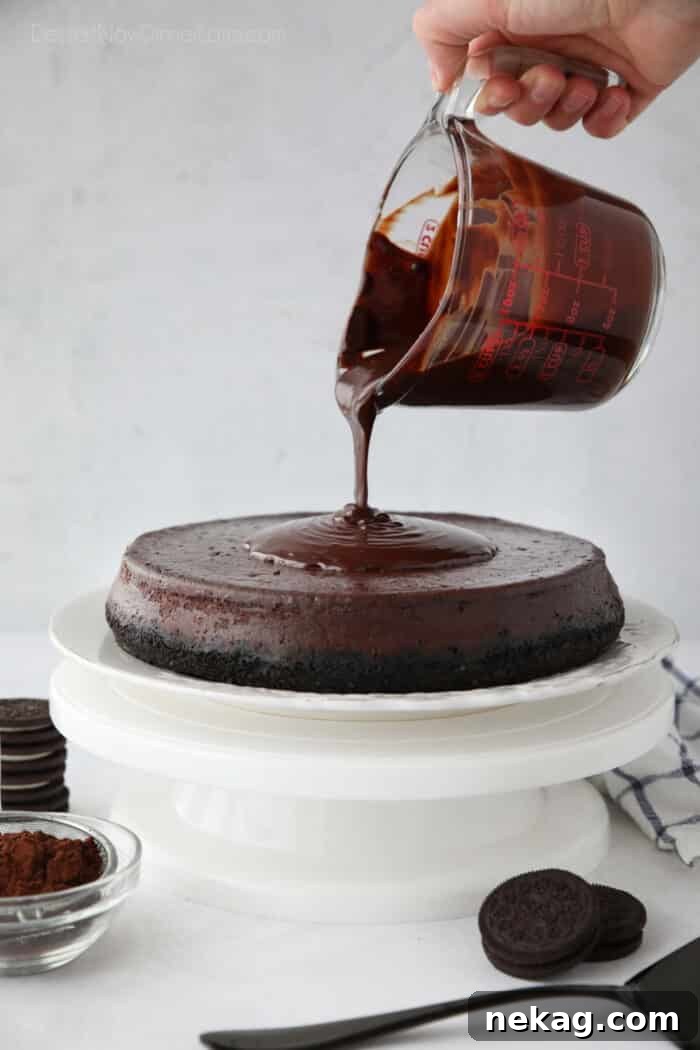
The Decadent Finale: Easy Chocolate Ganache
The third and final layer of our triple chocolate cheesecake is the luxurious and incredibly simple chocolate ganache. This glossy, rich topping adds another dimension of chocolate flavor and a beautiful visual appeal that makes the cheesecake truly irresistible. Ganache is a classic confection made with just two core ingredients: chocolate and heavy cream, a testament to its elegant simplicity.
For convenience and consistent results, I prefer using good quality chocolate chips rather than having to chop up a bar of baking chocolate. The quality of your chocolate truly matters here, as it’s a prominent flavor. Opt for reputable brands like Guittard or Ghirardelli for the best taste and texture. Semi-sweet chocolate chips work wonderfully, providing a balanced sweetness that complements the rich cheesecake without being overly cloying.
- **Prepare Your Cheesecake:** Once your cheesecake has completed its extensive chilling period (at least 5-6 hours or overnight), carefully remove it from the refrigerator and gently release it from its springform pan. Transfer the cheesecake onto your chosen serving dish. If you notice any residual moisture on the surface (despite the paper towel trick!), gently dab it dry with a clean paper towel. This ensures the ganache adheres beautifully.
- **Making the Ganache:** To prepare the ganache, measure your heavy cream into a microwave-safe dish. Heat the cream in the microwave until it is simmering or just about to boil (you should see small bubbles forming around the edges). Be sure to use a large enough dish, as the cream will bubble up. Immediately remove from the microwave, add the chocolate chips to the hot cream, and let it sit undisturbed for 5 minutes. This allows the heat from the cream to melt the chocolate thoroughly.
- **Stir and Pour:** After 5 minutes, gently stir the mixture with a whisk or spatula, starting from the center and working your way outwards, until it is completely smooth, glossy, and uniform. If any chocolate pieces remain, microwave for another 10-15 seconds and stir again. Once perfectly smooth, immediately pour the warm ganache over the cold chocolate cheesecake. Working quickly, use an offset spatula to gently spread the ganache evenly across the top surface of the cheesecake, creating a beautiful, smooth layer.
PRO TIP: For a beautiful swirled design that adds a professional and artistic touch to your cheesecake:
- First, spread the ganache evenly across the entire surface of the cheesecake with an offset spatula, as described above. Allow it to sit for a couple of minutes. The cold temperature of the cheesecake will cause the ganache to thicken slightly, making it perfect for swirling.
- For the easiest swirling, place your serving plate with the cheesecake on a cake decorating turntable. Gently place the very tip of your offset spatula into the ganache near the edge of the cheesecake. While slowly rotating the turntable, gently swirl the spatula from the outside edge of the cheesecake towards the center in a continuous motion. This creates an elegant spiral pattern.
NOTE: You can also swirl from the center towards the edges, but be aware that this method might cause some ganache to drip over the sides of the cheesecake. If a dramatic drip effect is the look you’re aiming for, then this approach can work wonderfully! Experiment to find your preferred aesthetic.
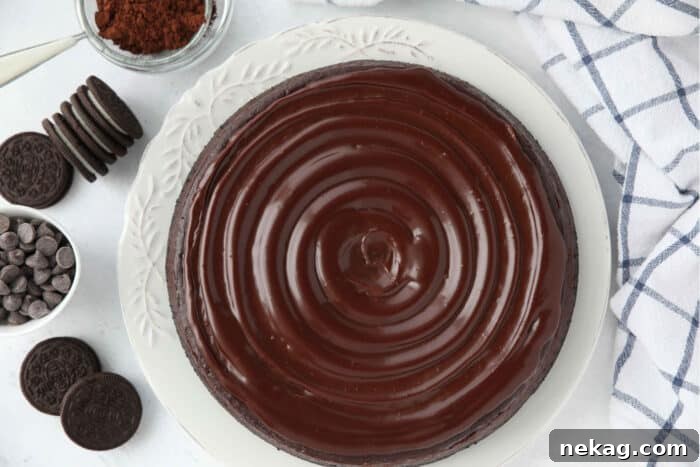
Achieving Picture-Perfect Slices
After all your hard work, you want to ensure each slice of your triple chocolate cheesecake looks as impressive as it tastes. Proper slicing technique is key to achieving clean, smooth, and even portions:
- **Setting the Ganache:** Before you begin slicing, allow the freshly poured ganache to set slightly. You can speed this process along by placing the entire cheesecake back into the refrigerator for 10-30 minutes. The ganache should be firm enough that it won’t smudge or drag when cut.
- **The Hot Knife Method:** For impeccably clean and even slices, this is the golden rule: run a long, sharp, thin-bladed knife under very hot water. Allow the blade to heat up thoroughly, then quickly wipe it completely dry with a clean kitchen towel. The hot, dry blade will glide through the dense cheesecake and ganache without sticking or tearing.
- **Slice and Repeat:** Make your first cut all the way through the cheesecake. After each cut, immediately clean the knife thoroughly under hot water again and wipe it dry before making the next cut. Repeating this step for every slice ensures that no crumbs or ganache residue are transferred, leaving you with beautifully presented individual servings. This meticulous approach guarantees a professional finish every time.
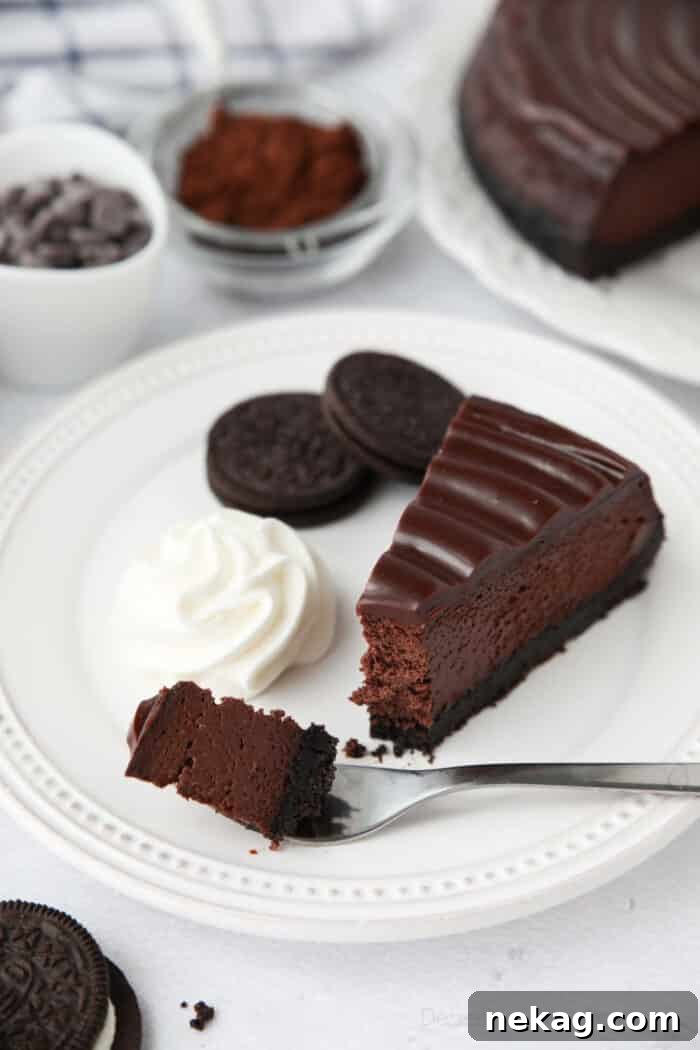
Storing and Freezing Your Decadent Cheesecake
This triple chocolate cheesecake is so delicious, it’s unlikely to last long! However, if you find yourself with leftovers (lucky you!), proper storage is essential to maintain its freshness, flavor, and texture.
To store this cheesecake in the refrigerator:
- For optimal freshness and to prevent the cheesecake from absorbing any refrigerator odors, tightly wrap the cheesecake in plastic wrap. If you have an airtight container large enough, storing it in one is even better. Properly stored, your cheesecake will remain fresh and delicious for up to 3 days in the fridge. Be sure it’s well-sealed to prevent drying out.
To freeze cheesecake for longer enjoyment:
Freezing cheesecake is an excellent way to prepare it in advance or save portions for later. Follow these steps for successful freezing:
- **Initial Freeze:** Place the entire cheesecake (or individual slices, if preferred) on a flat cake pan or baking sheet in the freezer. Allow it to freeze completely solid. This usually takes a few hours, ensuring the cheesecake is firm enough to wrap without damage.
- **Wrapping for Protection:** Once thoroughly frozen, remove the cheesecake from the freezer. Wrap it tightly first in several layers of plastic wrap, ensuring no surface is exposed. Then, for an extra layer of protection against freezer burn and odor absorption, place the plastic-wrapped cheesecake into a large zip-top freezer bag, or wrap it again with a layer of heavy-duty aluminum foil. The double-layer protection is crucial.
- **Freezer Lifespan:** With proper wrapping, your triple chocolate cheesecake can be safely frozen for up to 30 days.
- **Thawing Instructions:** When you’re ready to enjoy, simply transfer the frozen cheesecake (still wrapped) from the freezer to the refrigerator and let it thaw slowly overnight. This gradual thawing helps maintain its creamy texture. Do not thaw at room temperature, as this can affect its quality.
More Decadent Chocolate Desserts to Explore
If this Triple Chocolate Cheesecake has ignited your passion for all things chocolate, you’re in luck! Here are more irresistible chocolate-infused recipes from our collection to satisfy your sweet tooth:
- Double Chocolate Crinkles: Crinkly, fudgy, and intensely chocolatey cookies.
- Chocolate Cupcakes: The quintessential moist and fluffy chocolate cupcake.
- Cream Cheese Chocolate Frosting: The perfect tangy and sweet topping for any chocolate bake.
- Double Chocolate Banana Cake: A rich and moist cake with the delightful combination of chocolate and banana.
- Chocolate Cheesecake Strawberries: Fresh strawberries filled with creamy chocolate cheesecake for an elegant bite.
- Chocolate Caramel Tart: A sophisticated dessert with gooey caramel and rich chocolate.
- Chocolate Frosted Sugar Cookies: Soft sugar cookies with a delightful chocolate twist.
- Chocolate Chip Pudding Pie: An easy and comforting pie, packed with chocolate chips.
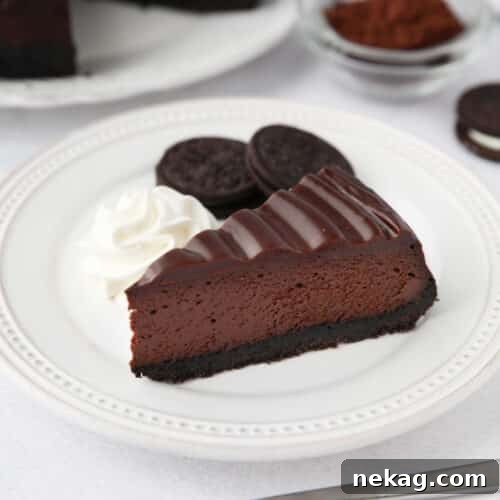
Triple Chocolate Cheesecake
Pin
Ingredients
Chocolate Crust:
- 30 Oreo cookies, crushed (about 2 1/2 cups)
- 6 Tbsp (85 g) unsalted butter, melted
Chocolate Cheesecake Filling:
- 24 oz (678 g) cream cheese, (3-8oz packages) softened to room temperature
- 1 ¼ cups (250 g) granulated sugar
- ¾ cup (60 g) Hershey’s Special Dark Cocoa, (or any natural unsweetened cocoa powder), sifted
- ¼ tsp fine sea salt
- 8 oz (240 g) sour cream, room temperature
- 1 Tbsp pure vanilla extract
- 4 large eggs, room temperature
Chocolate Ganache Topping:
- ¾ cup (128 g) semi-sweet chocolate chips, (use a high-quality brand like Guittard or Ghirardelli)
- 6 Tbsp heavy cream
Equipment
-
9 Inch Springform Pan with parchment paper
-
6-inch round sifter
-
Parchment Paper
-
Silicone Spatula Set
-
KitchenAid 5-Qt. Stand Mixer
-
Wilton 3-Piece Icing Spatula Set
Instructions
-
FOR THE CHOCOLATE CRUST: Preheat your oven to 350 degrees Fahrenheit (175°C). Line the bottom of a 9-inch springform pan with parchment paper and lightly grease the sides with cooking spray for easy release.
-
In a food processor, blend the Oreo cookies until they form fine crumbs. Add the melted butter to the crumbs and pulse until thoroughly combined. Firmly press this mixture evenly into the bottom of your prepared springform pan.
-
Bake the Oreo crust for 10 minutes at 350˚F (175°C). After baking, remove the crust from the oven and immediately reduce the oven temperature to 300˚F (150°C). Allow the crust to cool completely. Once cool, wrap the outside of the springform pan securely with two layers of heavy-duty aluminum foil. For extra protection against water leaks, you may optionally layer a slow cooker liner or oven-safe turkey bag over the foil, tying or rolling down the top to fit tightly around the pan without covering the cheesecake itself.
-
FOR THE CHOCOLATE CHEESECAKE FILLING: Ensure all refrigerated ingredients (cream cheese, sour cream, eggs) are at room temperature. In a stand mixer fitted with the paddle attachment, or using an electric hand mixer, place the softened cream cheese. Sift the granulated sugar, cocoa powder, and salt together in a separate bowl. Gradually add these dry ingredients to the cream cheese, mixing on low speed until the mixture is completely smooth and lump-free. Scrape down the sides and bottom of the bowl as needed.
-
Add the room temperature sour cream and vanilla extract to the mixer. Continue to mix on low speed just until well combined. Be careful not to overmix. Scrape down the bowl again.
-
Add the large eggs one at a time, mixing slowly on low speed until each egg is fully incorporated before adding the next. This gentle incorporation prevents excess air from entering the batter. Pour the silky chocolate cheesecake filling into the cooled, pre-baked Oreo crust in the springform pan.
-
Prepare the water bath: Place the foil-wrapped springform pan inside a larger oven-safe cake or roasting pan. Using a pitcher, carefully pour warm tap water into the larger pan, surrounding the cheesecake, until it reaches about 1-inch to halfway up the sides of the springform pan. Gently place the entire pan setup into your preheated 300˚F (150°C) oven.
-
Bake the chocolate cheesecake in the water bath for approximately 65 minutes. The cheesecake is done when the edges are set, but the center still has a slight wobble when gently shaken.
-
Crucial Cooling Steps: After baking, turn off the oven but leave the cheesecake inside with the door completely closed for 30 minutes. This allows for gradual cooling. Then, crack the oven door open (you can use a wooden spoon to prop it) and let the cheesecake continue to rest inside the cooling oven for another 30 minutes.
-
Remove the chocolate cheesecake from the oven and its water bath. Place it on a wire rack and allow it to come to complete room temperature. This can take 1-2 hours. Once at room temperature, cover the pan with a paper towel directly on top of the cheesecake, then wrap tightly with plastic wrap or foil. Refrigerate the cheesecake to CHILL for at least 5-6 hours, or ideally, overnight, to allow it to fully set and firm up.
-
FOR THE CHOCOLATE GANACHE: Once the cheesecake is thoroughly chilled, carefully remove it from the refrigerator and release it from its springform mold. Transfer the cheesecake onto your desired serving dish. If any moisture has collected on the top, gently dab it with a paper towel.
-
Prepare the ganache: In a microwave-safe dish, heat the heavy cream until it is simmering or just boiling (watch for small bubbles). Use a large dish as it will bubble up. Immediately add the chocolate chips to the hot cream and let sit for 5 minutes. Then, stir until completely smooth and combined. Promptly pour the warm ganache over the cold chocolate cheesecake. Use an offset spatula to gently spread it evenly across the top.
-
Allow the ganache to set slightly before slicing. For faster setting, place the cheesecake in the refrigerator for 10-30 minutes.
-
For clean, even slices, run a sharp knife under hot water, wipe it completely dry with a clean towel, then slice through the cheesecake. Repeat these steps (heat, wipe dry, cut) after each slice for the best results.
Notes
- Room Temperature Ingredients: Always use room temperature cream cheese, sour cream, and eggs. Pull these ingredients from the fridge 1-2 hours before you begin baking. This ensures a smooth, lump-free batter and helps prevent cracking.
For a swirled ganache design:
- Spread the ganache evenly across the cheesecake with an offset spatula. Allow it to sit for a few minutes until the cold cheesecake slightly thickens the ganache.
- For optimal swirling, place the serving plate with the cheesecake on a cake decorating turntable. Gently press the tip of the spatula into the ganache near the edge, then swirl from the outside of the cheesecake towards the center while slowly rotating the turntable.
NOTE: You can swirl from the center towards the edges, but this may cause some ganache to drip over the edges, which is fine if that’s the desired aesthetic.
To store your cheesecake:
- Tightly wrap the cheesecake in plastic wrap or store it in an airtight container for up to 3 days in the refrigerator.
To freeze your cheesecake:
- Place the cheesecake (or individual slices) on a baking sheet and freeze until completely solid (this takes several hours).
- Once frozen, remove from the freezer, wrap tightly in plastic wrap, then place in a large zip-top freezer bag or wrap again with a layer of foil. This double protection helps prevent freezer burn and absorption of freezer odors. Freeze for up to 30 days. Thaw overnight in the refrigerator before serving.
Nutrition
Disclaimer: Nutritional values were calculated using a third-party tool and are provided as an estimation only.
Sharing this recipe with a link is both encouraged and appreciated. Copying/pasting and/or screenshots of full recipes to any social media is strictly prohibited. Content and photographs are copyright protected.
Did you make this?
Don’t forget to leave a rating below and make sure to follow on Pinterest and Instagram for more delicious recipes!