

Indulge in French Elegance: The Ultimate Vanilla Mille Crêpe Cake
Prepare to be enchanted by this truly decadent vanilla mille crêpe cake. Featuring an impressive 50 layers of exquisitely thin, homemade sweet crêpes, each carefully stacked with a cloud-like crème légère filling. Our signature vanilla whipped cream filling is thoughtfully stabilized with rich pastry cream, delivering a flavor profile that is both intensely vanilla and incredibly light – a perfect harmony of indulgence and delicate texture.
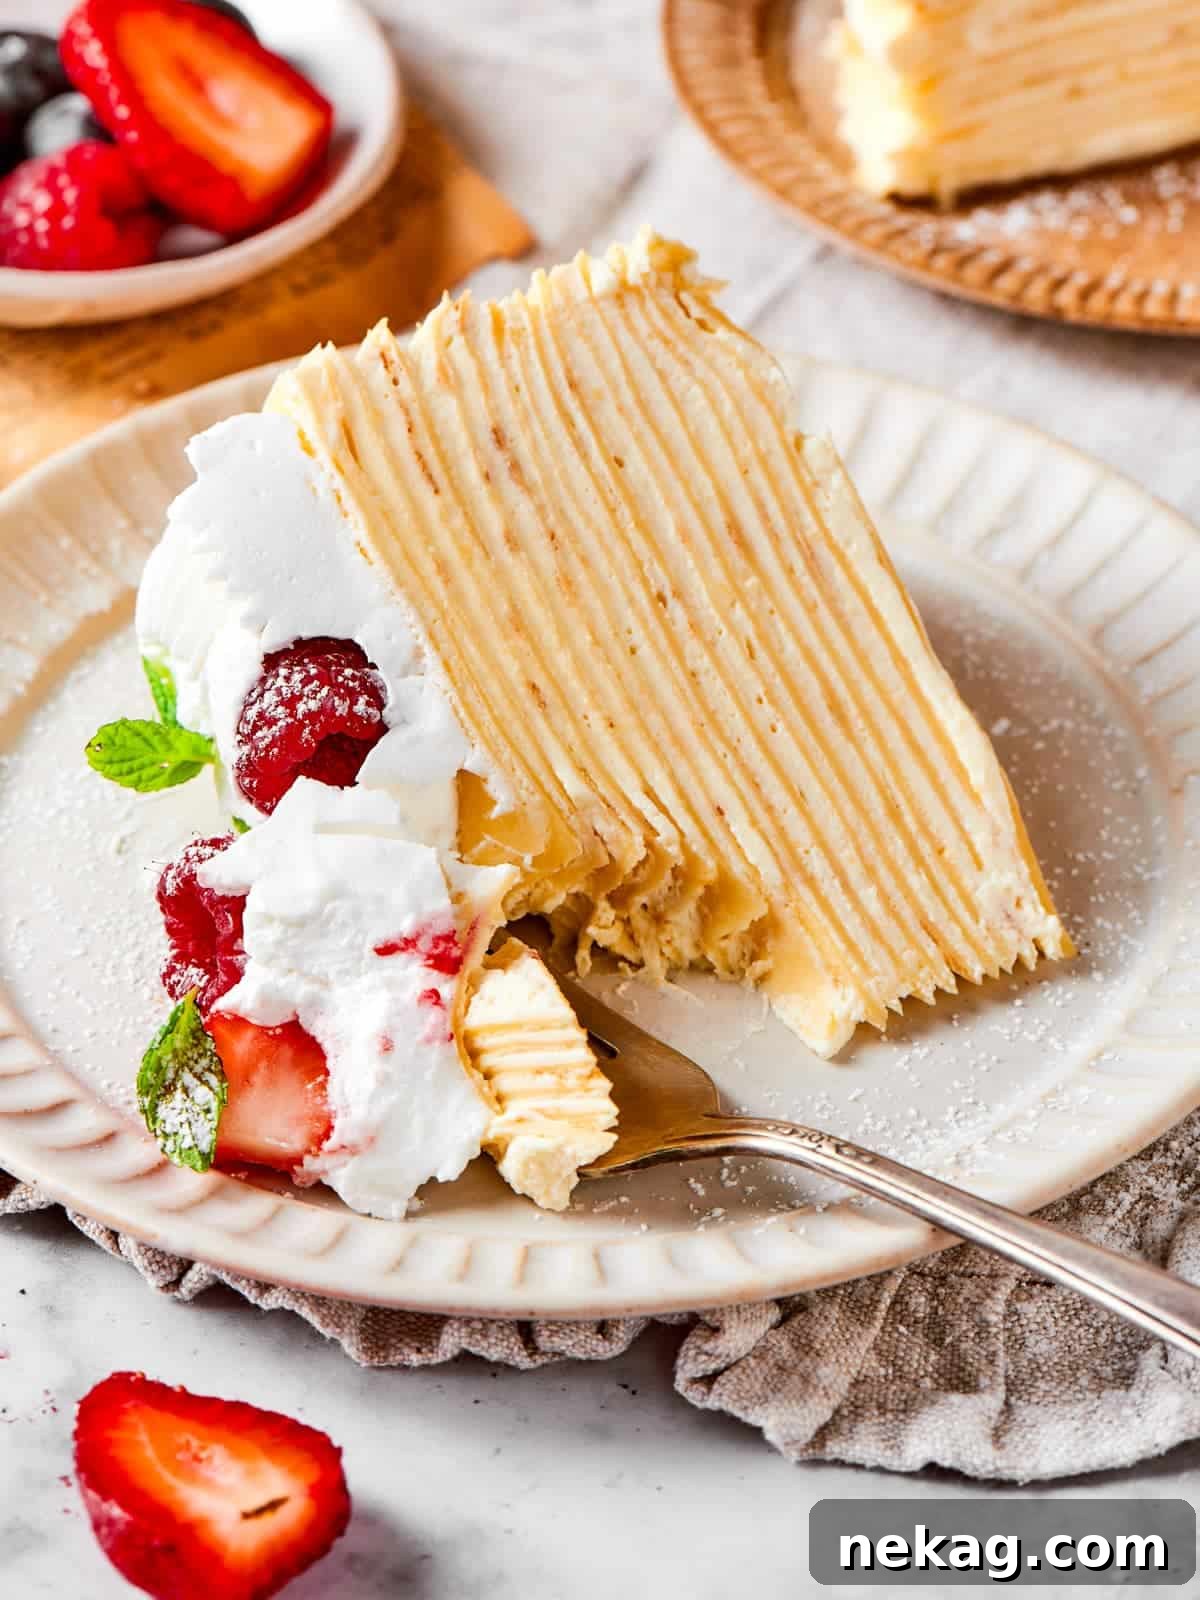

A Quick Look At The Recipe
This is a brief summary of the recipe. Jump to the recipe to get the full details.
Jump to Recipe
Prep Time
20 minutes
Cook Time
1 hour
Chill Time
4 hours
Total Time
5 hours 20 minutes
Servings
12 slices
Difficulty
Intermediate, requiring patience and resting time for best results.
Calories *
478 kcal per serving
Technique
Prepare crêpes and pastry cream, whip cream, fold into crème légère, and carefully layer into a stunning cake.
Flavor Profile
Subtle vanilla with notes of caramelized sugar, delicate crêpes, and a rich, silky cream filling.
* Based on nutrition panel
Why You Will Love This Vanilla Mille Crêpe Cake
This vanilla mille crêpe cake isn’t just a dessert; it’s an experience. Here’s why this recipe will become your new favorite and a cherished part of your culinary repertoire:
- Achieve Delicate, Homemade Crêpes with Ease: Forget tough or rubbery crêpes! Our recipe uniquely combines both cake flour and all-purpose flour to craft crêpes that are incredibly delicate, yet robust enough to hold their shape and structure beautifully under the layers of cream. With expert tips from a seasoned pastry chef, you’ll master the art of making perfectly thin, tender crêpes every single time, ensuring a superior texture that is a hallmark of an authentic mille crêpe cake.
- Experience a Velvety Smooth and Flavorful Crème Légère: The heart of this cake lies in its exquisite crème légère. This carefully developed recipe uses whole eggs and premium vanilla powder, creating a filling that boasts an intense, pure vanilla flavor. The result is a cream that is surprisingly light on the palate, yet wonderfully stable and rich, providing the perfect counterpoint to the delicate crêpes without overwhelming them. It’s the ideal balance of decadence and airiness.
- The Perfect Make-Ahead Dessert for Any Occasion: Planning ahead for a special event? This vanilla mille crêpe cake is your answer! One of its greatest advantages is that it tastes even better when given time to rest. As it chills overnight, the flavors meld, the crêpes soften further, and the cream sets to a perfect consistency, making it an ideal candidate for preparing in advance. Wake up to a stunning, ready-to-serve dessert that impresses with minimal last-minute effort, whether for a sophisticated brunch or an elegant dinner party.
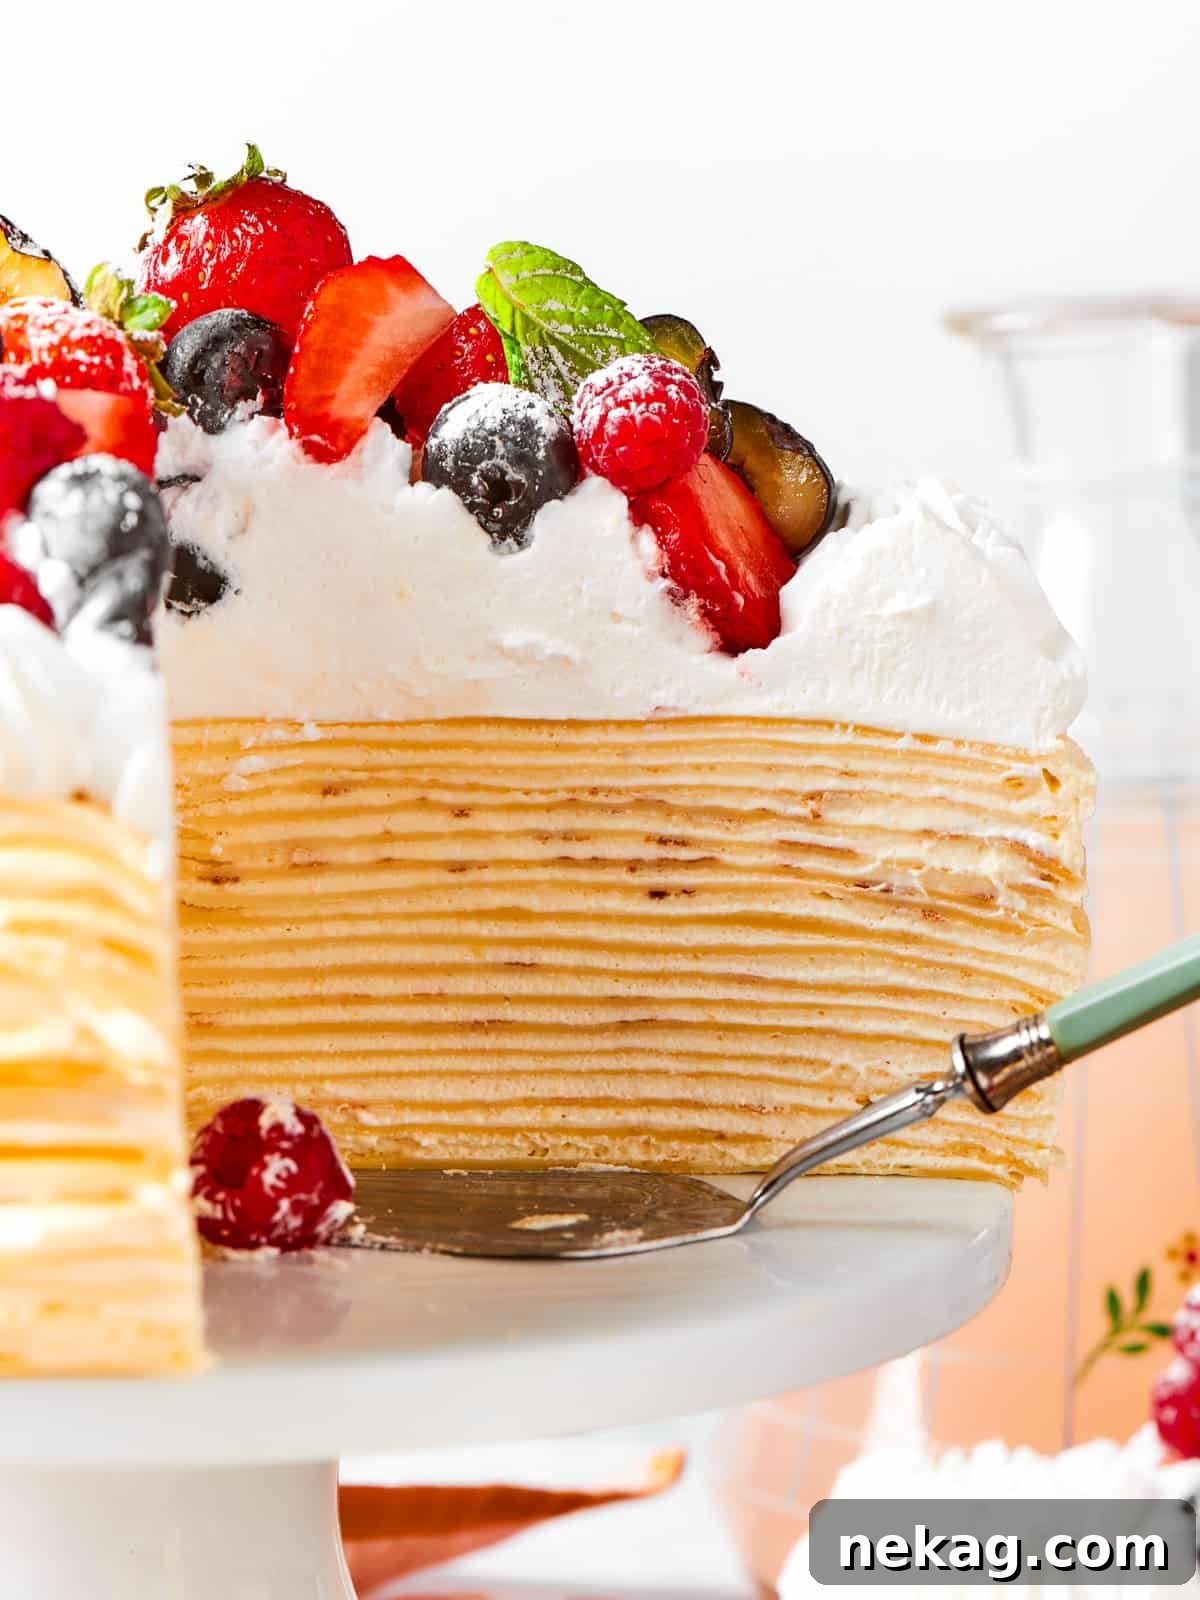
- A Visually Stunning Centerpiece: Beyond its incredible taste, the mille crêpe cake is a true showstopper. Its dozens of visible layers create a dramatic and beautiful presentation that will captivate your guests. Each slice reveals the intricate artistry, making it not just a dessert, but a conversation piece.
Table of Contents
- Why You Will Love This Vanilla Mille Crêpe Cake
- What is a Mille Crêpe Cake?
- Essential Ingredients & Smart Substitutions
- Creative Variations for Your Mille Crêpe Cake
- Professional Tips for Crêpe Cake Perfection
- How to Make a Vanilla Mille Crêpe Cake
- Chef Lindsey’s Recipe Tip
- Recipe FAQs
- Recommended Breakfast & Brunch Recipes
- Vanilla Mille Crêpe Cake Recipe Card
- Before You Go
Allow me to transport your taste buds straight to the heart of France with this exquisite mille crêpe cake. It’s a testament to the beauty of culinary simplicity, where dozens of delicate, paper-thin crêpes are lovingly layered with a light, yet rich, vanilla crème légère filling. The elegance of this dessert speaks volumes, making it a perfect finale to any meal. For an extra touch of seasonal charm, don’t forget to crown your finished cake with your favorite fresh, in-season fruit!
There’s nothing I appreciate more than a dessert that allows its core flavors to truly shine. The French, in particular, have mastered this art, evident in timeless classics like the silky smooth vanilla crème brûlée or the comforting crème caramels. In my home, where vanilla reigns supreme (thanks to two avid vanilla fanatics!), our moist vanilla cake recipe is a constant favorite. This mille crêpe cake continues that tradition, offering a sophisticated twist on classic vanilla indulgence that is sure to become a cherished recipe in your kitchen.
What is a Mille Crêpe Cake?
A “mille crêpe cake” directly translates from French to “thousand crêpes,” and while you won’t literally find a thousand layers, its name perfectly captures the essence of this magnificent dessert. Much like its flaky cousin, the mille-feuille (a classic French pastry made with delicate puff pastry), the mille crêpe cake is defined by its impressive stack of at least 20 to 50 incredibly thin, tender crêpes. Each delicate layer is separated by a luscious, sweet, and creamy filling, most commonly a stabilized whipped cream or a rich pastry cream, or a combination of both to create a crème légère.
Originating in France and popularized globally, particularly in Asia, this cake is celebrated for its unique texture. The delicate balance between the soft, slightly chewy crêpes and the smooth, melt-in-your-mouth cream creates a sensory experience unlike any other cake. It’s a dessert that speaks of patience, precision, and a love for simple, yet profound, flavors.
Essential Ingredients & Smart Substitutions
Crafting the perfect vanilla mille crêpe cake begins with understanding the role of each ingredient. Here’s a closer look at what you’ll need and potential considerations for substitutions:
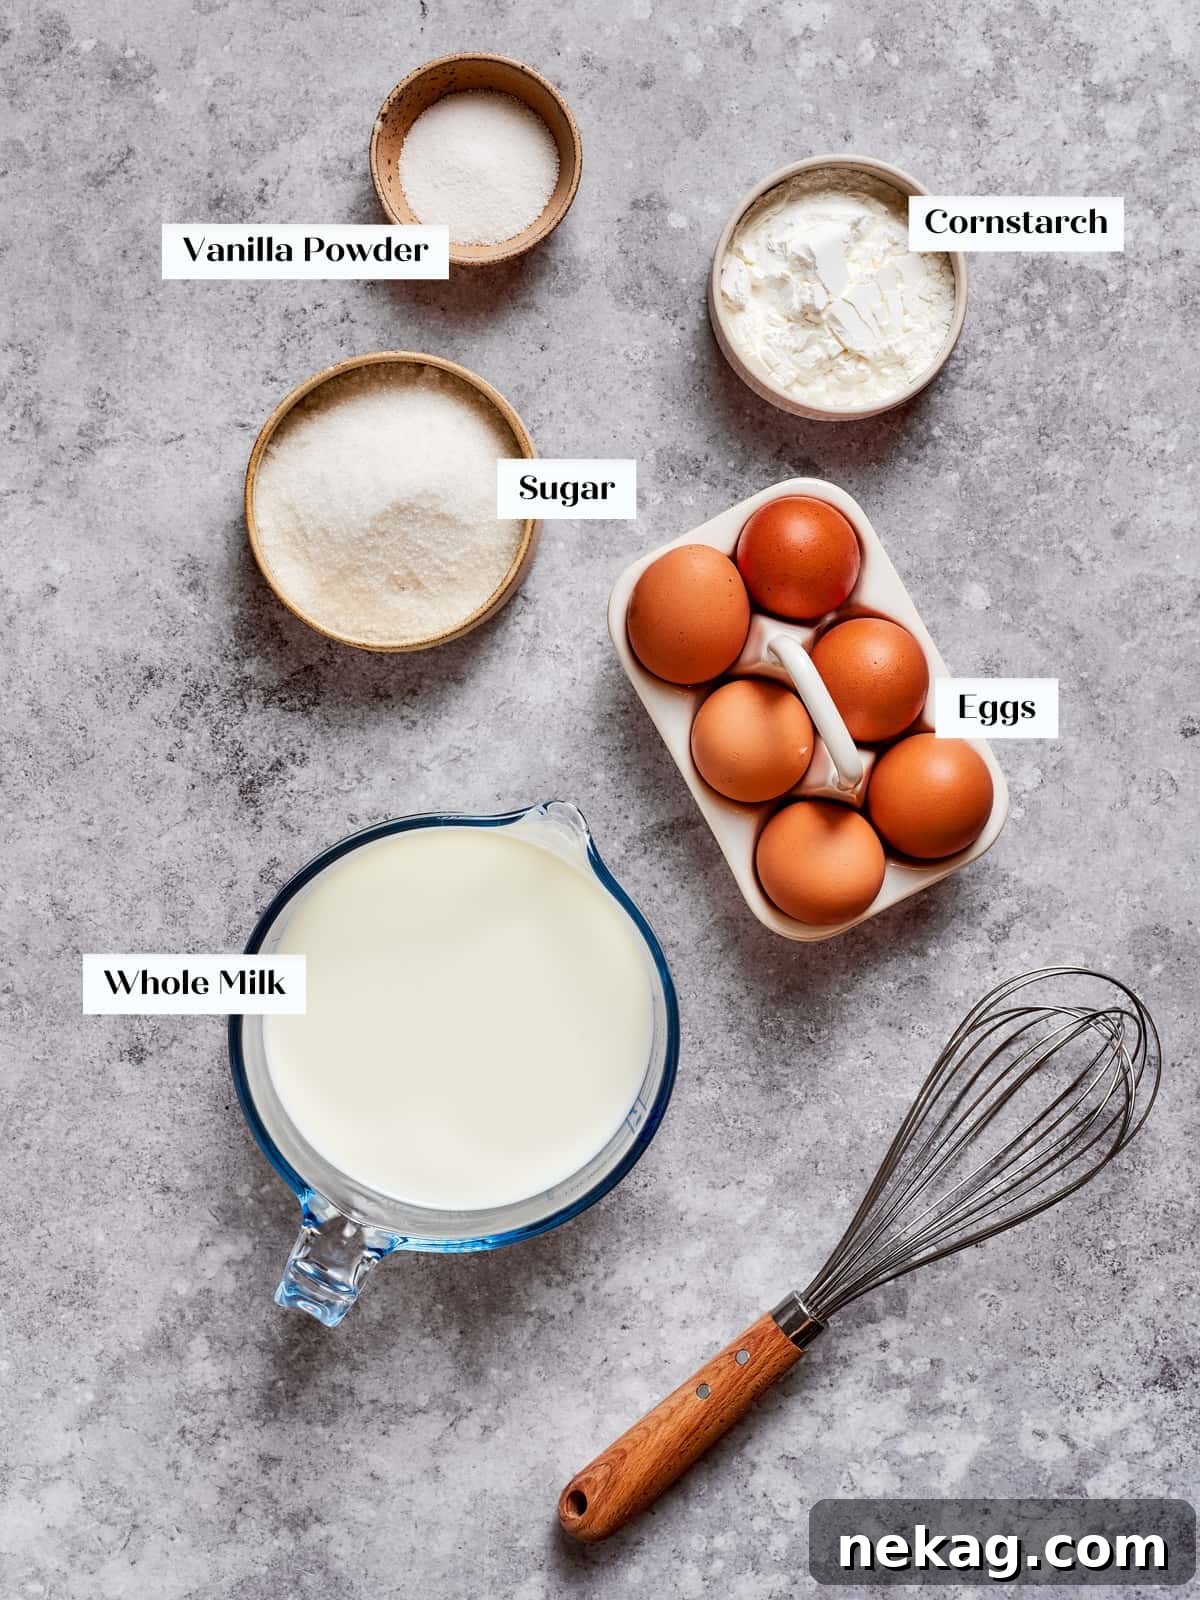
- Whole Milk: The richness of whole milk is paramount for both the crêpes and the pastry cream. Its higher fat content contributes significantly to the creamy texture and decadent flavor. For this specific crème légère recipe, I strongly advise against using milk alternatives, as they lack the necessary fat and protein structure required for the custard to set properly. If dietary restrictions necessitate milk alternatives, I recommend consulting my dedicated vanilla bean pastry cream recipe which may offer suitable adjustments.
- Whole Eggs: Unlike some pastry cream recipes that rely solely on egg yolks for richness, this recipe thoughtfully incorporates whole eggs. This choice is deliberate, as it contributes to a noticeably lighter and more ethereal texture in the crème légère, perfectly complementing the delicate crêpes. To achieve this lighter consistency, it’s crucial to allow the custard to cool completely and set, ideally covered overnight in the refrigerator, ensuring it firms up beautifully.
- Vanilla Powder: My preference for vanilla powder in cooked custards stems from its concentrated potency and ease of integration. It dissolves seamlessly, imparting a deep, pure vanilla flavor without adding excess liquid. However, if vanilla powder isn’t readily available, you have excellent alternatives:
- Vanilla Extract: Use 1.5 to 2 times the amount of vanilla powder for a comparable flavor, adding it after the custard has cooked to preserve its delicate aroma.
- Vanilla Bean: For an unparalleled vanilla experience, split and scrape the seeds from 1-2 vanilla beans and infuse them directly into the milk as it heats. Remove the bean pods before tempering.
- Sweet Crêpes: The foundation of this cake is a generous stack of perfectly executed sweet crêpes. You will need to prepare a double batch of my highly recommended sweet crêpe recipe to ensure you have enough layers for that signature “mille” effect. Following the detailed instructions for the crêpes is key to the cake’s success.
- Heavy Whipping Cream & Confectioner’s Sugar: These form the luscious whipped cream component of our crème légère, providing airiness and sweetness. Ensure your cream is very cold for optimal whipping.
- Strawberries, Raspberries, Blueberries: Fresh berries are a fantastic, classic topping. Choose ripe, vibrant fruits that offer a lovely contrast in color and a hint of tartness.
See the recipe card for full information on ingredients and quantities.
Creative Variations for Your Mille Crêpe Cake
While the classic vanilla mille crêpe cake is undeniably exquisite, it also serves as a fantastic canvas for culinary creativity. Don’t hesitate to explore these delightful variations to customize your cake and surprise your guests:
- Transform the Filling: The crème légère is wonderfully versatile. Experiment with different flavor profiles to match your mood or the occasion:
- Caramel Dream: Swap the vanilla pastry cream for a luscious caramel pastry cream recipe. The rich, buttery notes of caramel will create a sophisticated and deeply satisfying dessert.
- Zesty Lemon Indulgence: Introduce a bright, tangy twist by layering your crêpes with my vibrant lemon curd whipped cream recipe. The citrusy zing provides a refreshing contrast to the sweet crêpes.
- Chocolate or Butterscotch Bliss: For true dessert lovers, alternate layers with my intensely rich chocolate pudding recipe or the comforting sweetness of my butterscotch pudding. These variations offer a truly decadent experience.
- Infuse with Your Favorite Jam or Spread: Add bursts of fruity flavor or nutty indulgence between layers:
- Berry Burst: Swirl in dollops of homemade mixed berry jam or my easy strawberry jam recipe between cream layers for a delightful fruit explosion.
- Nutella or Peanut Butter Pockets: Create pockets of rich Nutella or creamy peanut butter for a comforting and universally loved flavor combination. Just warm them slightly to make them easier to spread thinly.
- Embrace Seasonal Flavors: Pumpkin Crêpe Cake: Get festive with a seasonal twist! Incorporate my aromatic pumpkin spice recipe directly into your crêpe batter. Then, layer these spiced crêpes with the irresistible no-bake pumpkin cheesecake filling from my delightful maple pumpkin trifle. It’s a cozy and unique dessert perfect for autumn gatherings.
- Tropical Flair: Add a tropical touch by layering with finely diced mango or passion fruit curd in between cream layers. A sprinkle of toasted coconut flakes on top would be a perfect finish.
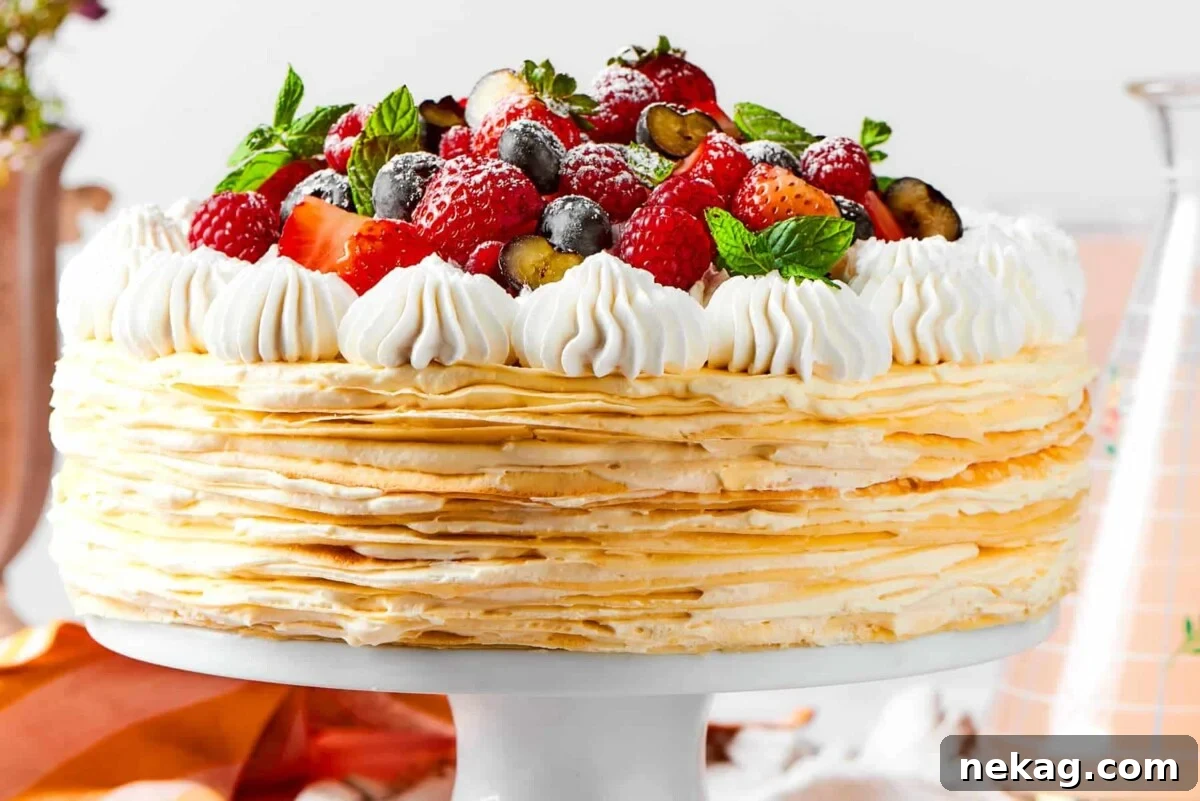
Professional Tips for Crêpe Cake Perfection
Achieving a truly professional-looking and tasting mille crêpe cake is within your reach with these insider tips:
- Master the 4-oz Ladle Technique: This is a game-changer for uniform crêpes. I’ve found that a ladle measuring just shy of 4 ounces is the absolute sweet spot for making perfectly sized crêpes. It allows for a quick, confident pour and an even swirl, distributing the batter consistently across the pan without requiring extensive practice in spreading. This method guarantees perfectly circular crêpes of the ideal thickness every single time. When I attempted to make thinner crêpes with less batter (closer to 3 ounces), I often ended up with irregularly shaped crêpes or tears in the delicate batter while trying to spread it too thin. Stick to the 4-oz rule for consistency!
- Embrace the Make-Ahead Advantage: To significantly streamline your baking process and reduce stress, plan to make your crêpes and pastry cream a day in advance of assembly. This allows ample time for the crêpes to cool completely, preventing them from melting the delicate crème légère during stacking. More importantly, it gives the pastry cream crucial time to fully set and firm up in the refrigerator, ensuring a stable and well-structured filling. This two-day approach makes the assembly process far more enjoyable and successful.
- Allow for Overnight Setting: Once your beautiful mille crêpe cake is assembled, the waiting game begins. It is imperative to let the cake chill in the refrigerator for a minimum of 4 hours, but ideally overnight. This extended chilling period is not merely for setting the cream; it’s a vital step that allows the flavors from the crêpes and the crème légère to truly meld and deepen, much like how the flavors in my traditional raspberry linzer cookies improve with time. The result is a more cohesive, flavorful, and structurally sound cake that slices beautifully.
- Don’t Fear the Golden Spots: Many recipes might instruct you to aim for “blonde” or spot-free crêpes, especially for a crêpe cake. However, I’m here to tell you to embrace those beautiful golden-brown spots! These aren’t imperfections; they are glorious signs of caramelization – the sugars in your crêpe batter reacting to the heat. This caramelization adds a wonderful depth of flavor, a subtle nuttiness, and visual appeal to each layer of your cake, contributing significantly to its overall complexity and deliciousness.
- Use the Right Pan: A good quality nonstick crêpe pan or a well-seasoned nonstick skillet is crucial. This will prevent sticking and ensure easy flipping, which is essential when making so many thin layers.
- Keep Batter Consistent: Stir your crêpe batter occasionally as you cook. Sediment can settle at the bottom, leading to inconsistent crêpe thickness. A quick whisk every few crêpes will keep it homogenous.
How to Make a Vanilla Mille Crêpe Cake
Embark on the journey of creating this elegant vanilla mille crêpe cake with these detailed, step-by-step instructions. For precise measurements and a full ingredient list, please refer to the recipe card below.
Prepare the Crêpe Batter:
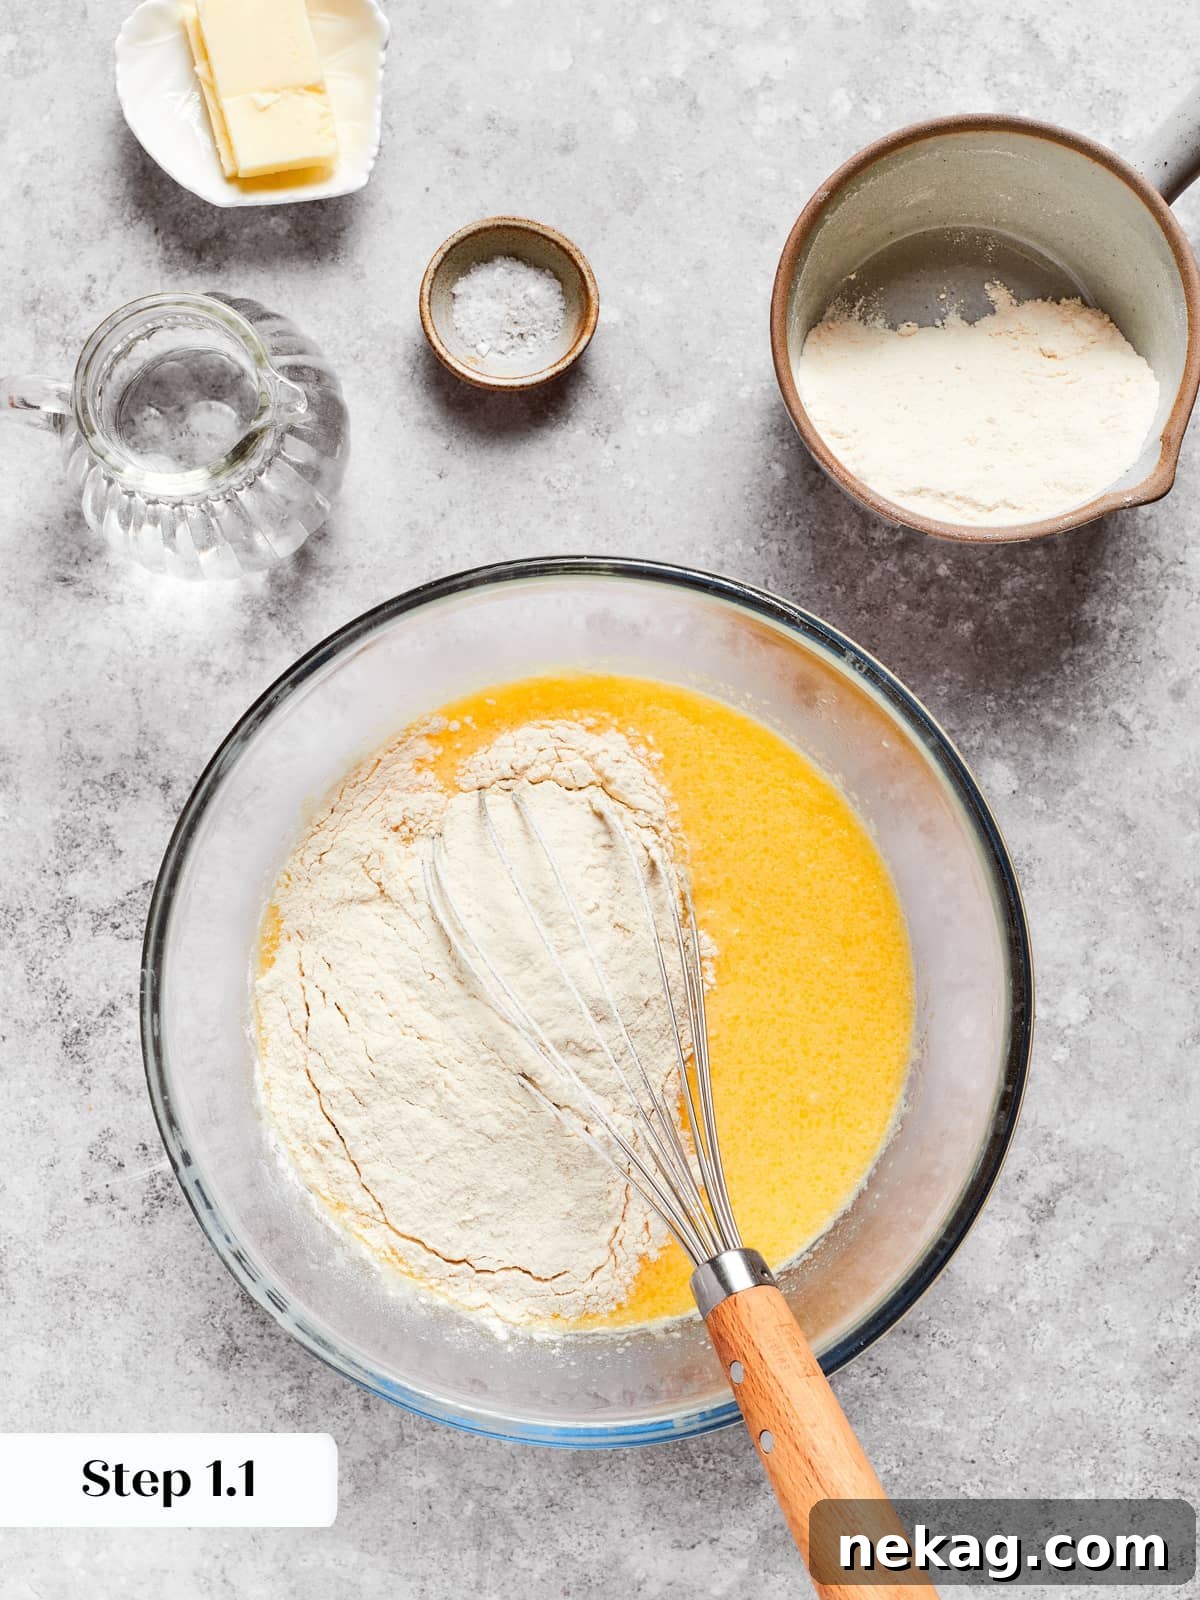
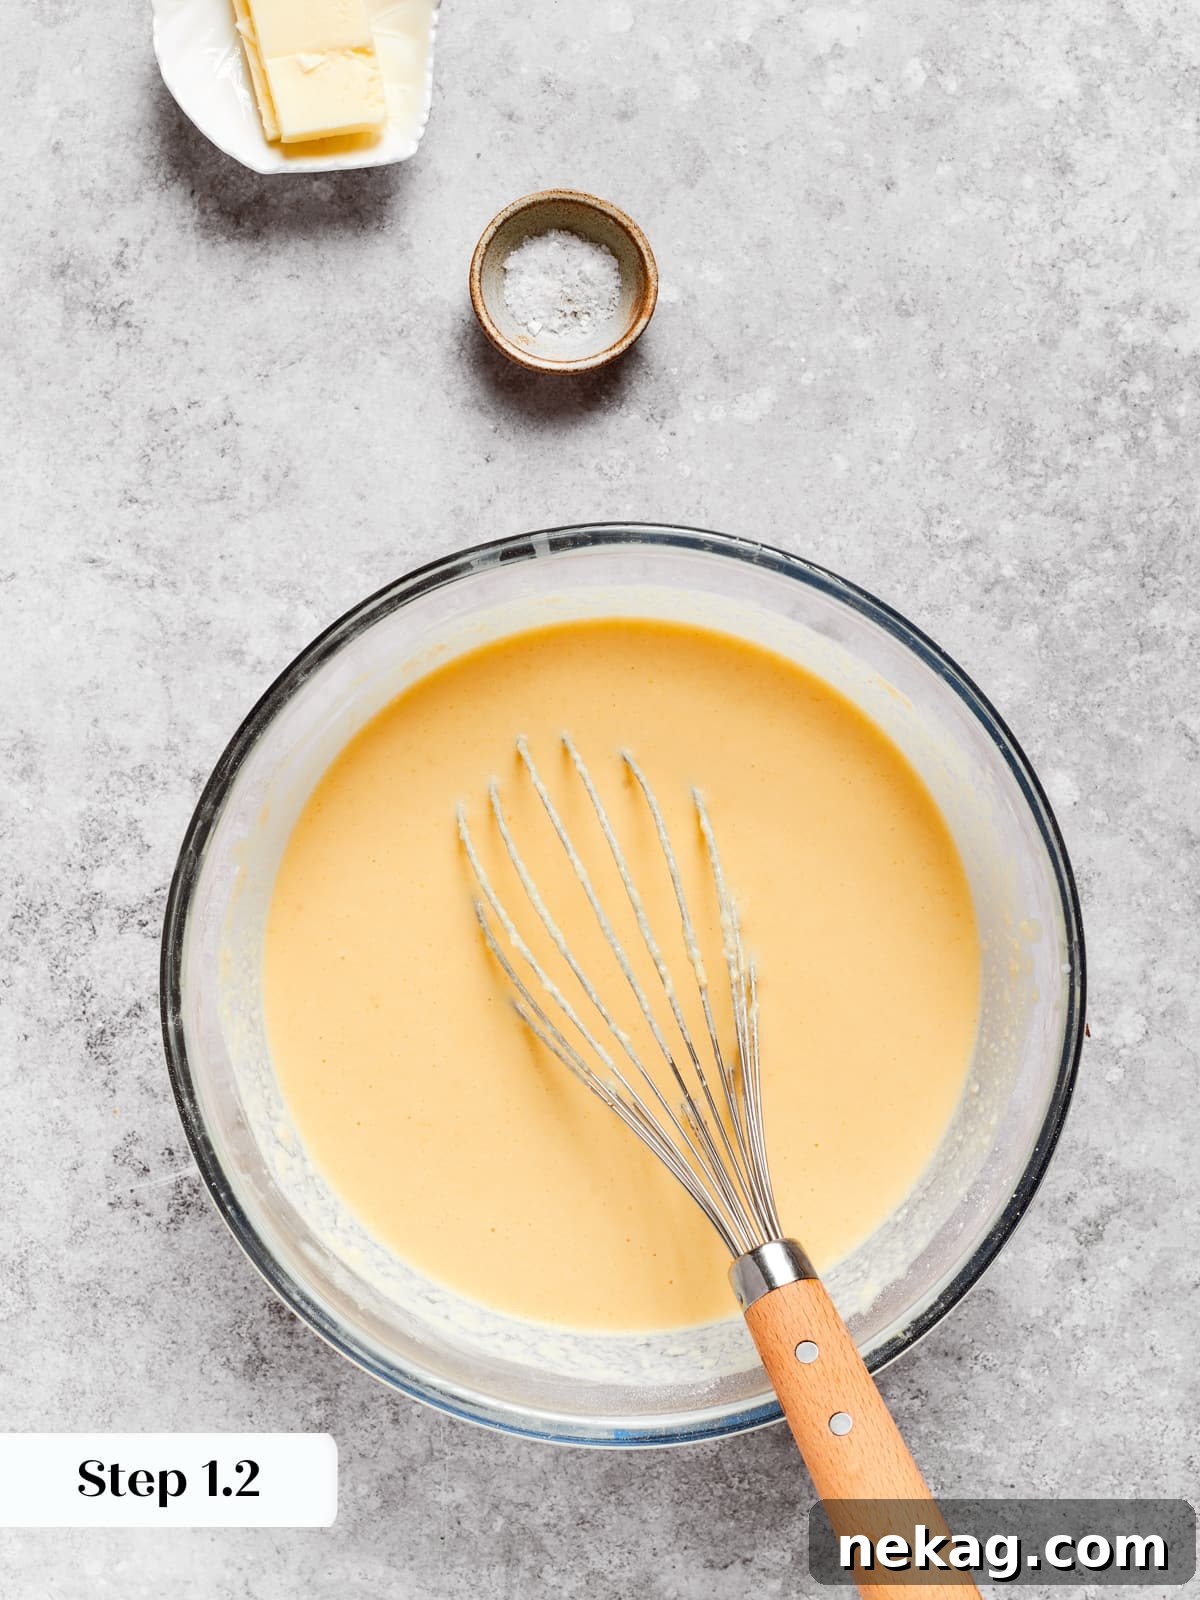
- Combine Wet Ingredients: In a large mixing bowl, thoroughly whisk together the eggs, a pinch of salt, the whole milk, and the melted butter until well combined and smooth.
- Gradually Add Flours: Slowly, and in small increments, whisk in both the cake flour and all-purpose flour. This gradual addition, similar to preparing popovers, helps prevent lumps and ensures a smooth batter. Continue whisking until just combined.
- Incorporate Water: Finally, whisk in the water until the batter is completely smooth. You’ll notice the batter is very liquidy; this is essential for producing thin, delicate crêpes. A thick batter will result in crêpes that are too heavy for layering.
- Allow Batter to Rest: Cover the bowl and let the crêpe batter rest in the refrigerator overnight, or for a minimum of 1 hour at room temperature. This crucial step allows the flour to fully hydrate, resulting in a more tender crêpe, and permits any gluten that may have formed during mixing to relax, preventing rubbery crêpes. A well-rested batter is key to a smooth cooking process and superior texture.
How to Cook Crêpes:
Tip: If your batter was refrigerated, remove it from the fridge about an hour before cooking to bring it closer to room temperature for easier spreading.
- Preheat Your Pan: Place a crêpe pan or a nonstick skillet over medium heat. Patience is vital here; a slow, steady heat ensures even cooking without burning.
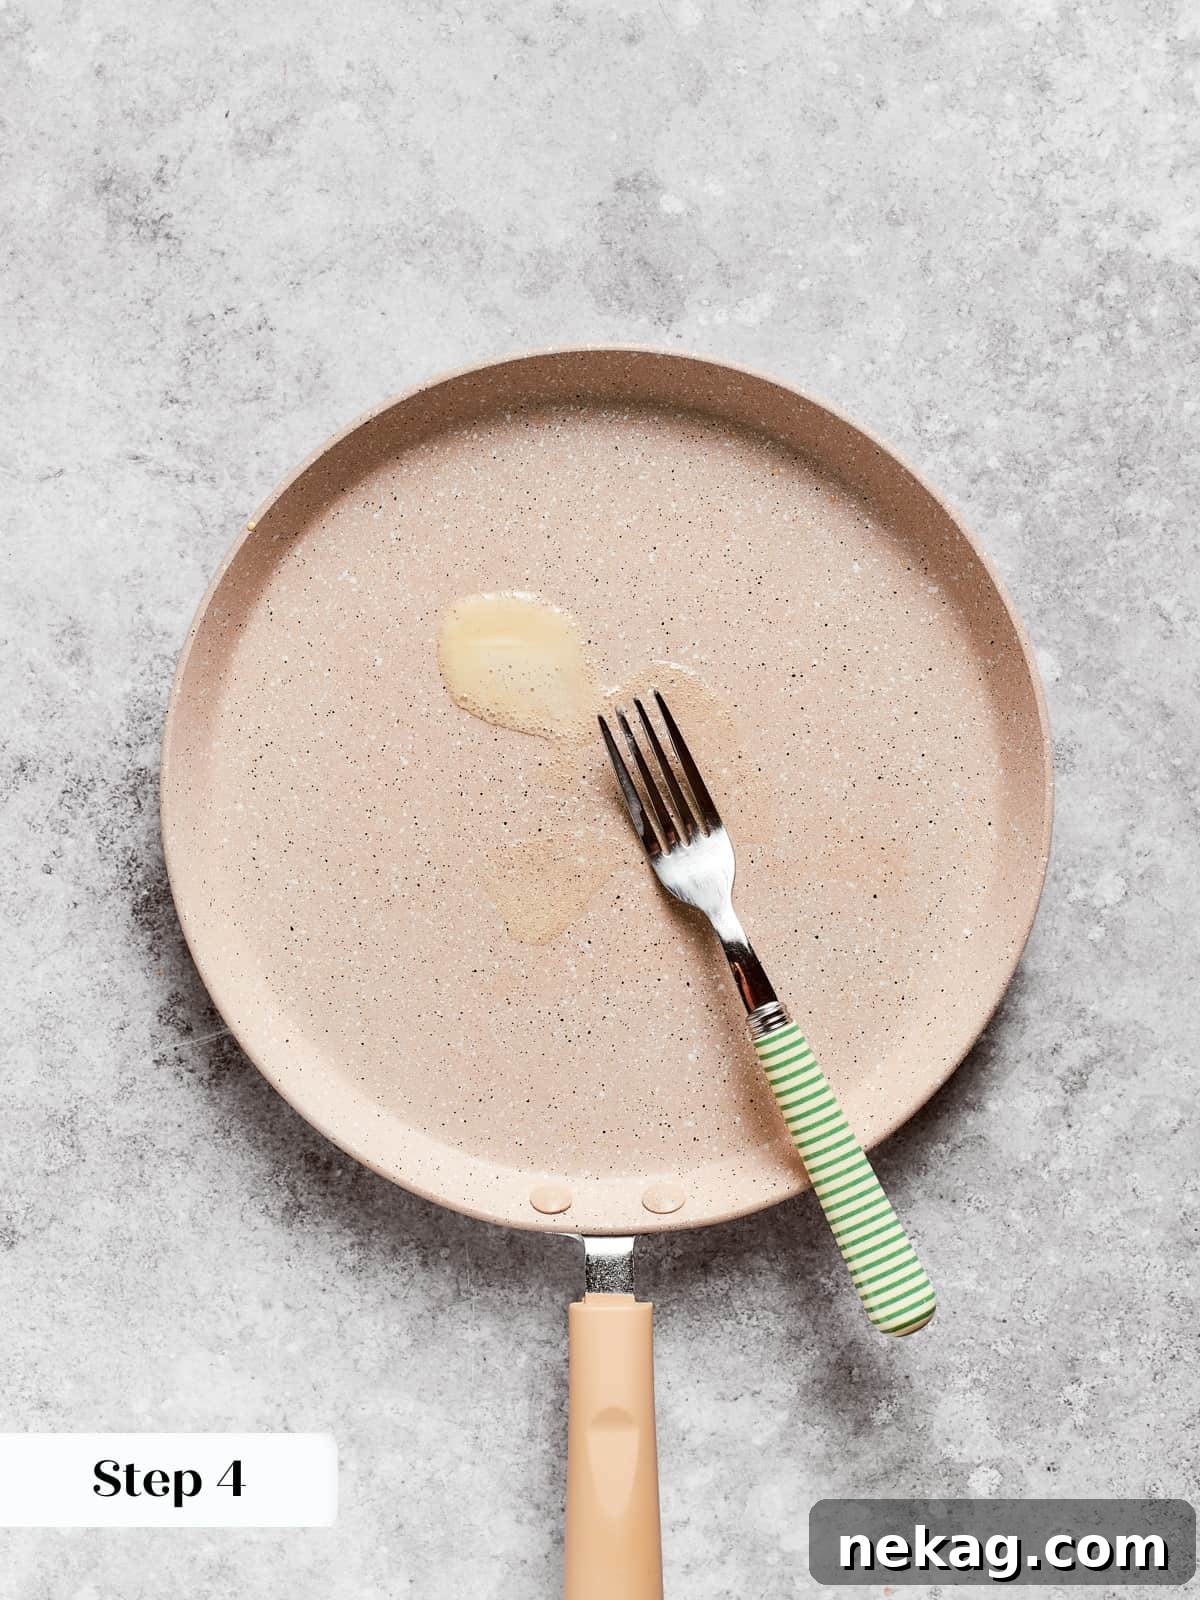
- Lightly Butter the Pan: For the very first crêpe, lightly coat the pan. A simple trick is to stab a small piece of butter with a fork and quickly rub it around the pan’s surface (photo 3). You generally only need to do this for the initial crêpe, or if subsequent crêpes start to stick.
- Pour and Swirl Batter: Hold a ladle (just shy of 4 ounces) in one hand and your pan in the other. Pour the ladleful of batter directly into the center of the preheated pan, then immediately tilt and swirl the pan to quickly and evenly distribute the batter into a thin, circular layer. This swirling technique is ideal for crêpe cakes, as it ensures uniform, perfectly round crêpes.
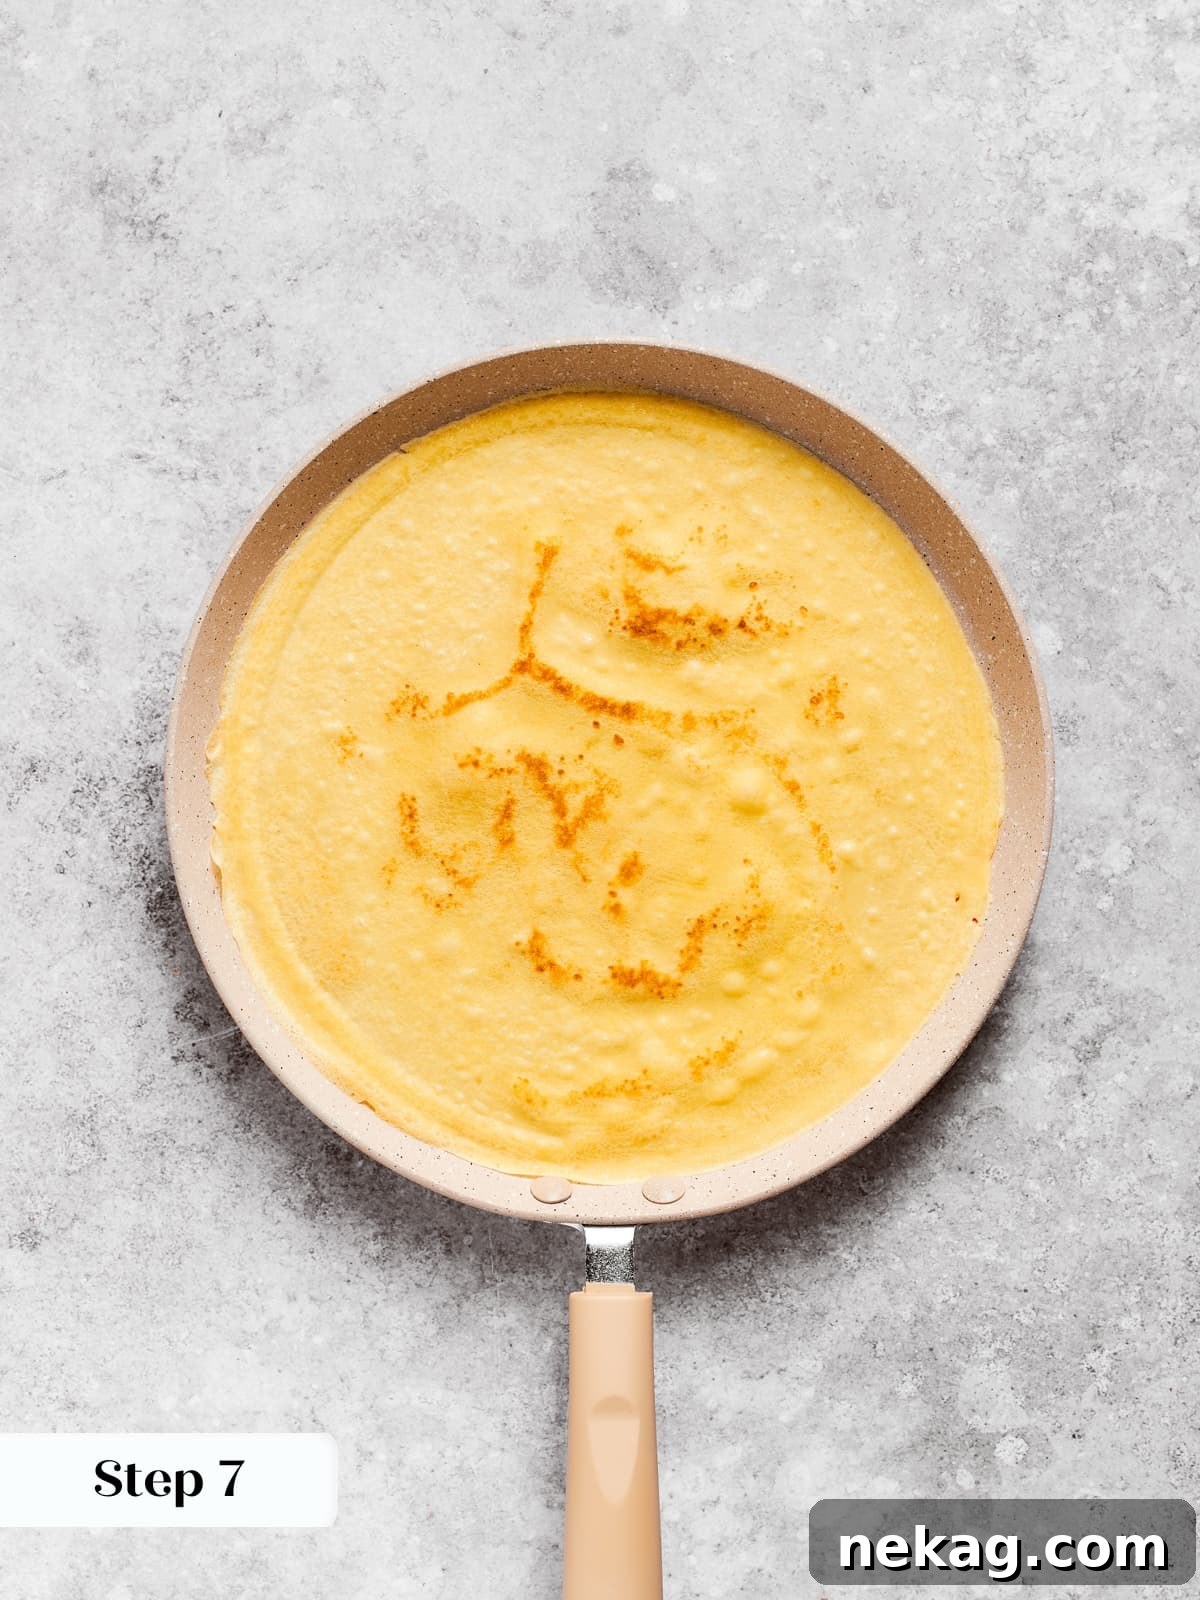
- Cook the First Side: Allow the crêpe to cook over medium-low heat. You’ll know it’s ready to flip when the edges begin to turn golden brown and you can see slight darker spots forming near the center (photo 4). The outer edge is an excellent indicator of readiness. On my 12-inch pan with my stove, this typically takes about 6 minutes.
- Flip the Crêpe: Gently slide a thin, flexible spatula underneath the center of the crêpe and, with a confident motion, flip it over, much like you would a pancake. Don’t worry if it folds slightly; simply unfold it with your spatula. If you flip it too early and it appears too blonde, just flip it back and continue cooking. There’s no need to stress; crêpes are forgiving!
- Cook the Second Side: Continue cooking the crêpe on the second side for an additional 1-2 minutes, or until lightly golden.
- Cool and Stack: Carefully remove the cooked crêpe from the pan and transfer it to a wire rack to cool completely. As they cool, you can gently stack them.
- Repeat and Refrigerate: Continue this process with the remaining batter until all crêpes are cooked. Once cooled, you can stack and refrigerate the crêpes overnight, or until you are ready to assemble your cake. This step aids in the cake’s final structure.
Prepare the Vanilla Pastry Cream:
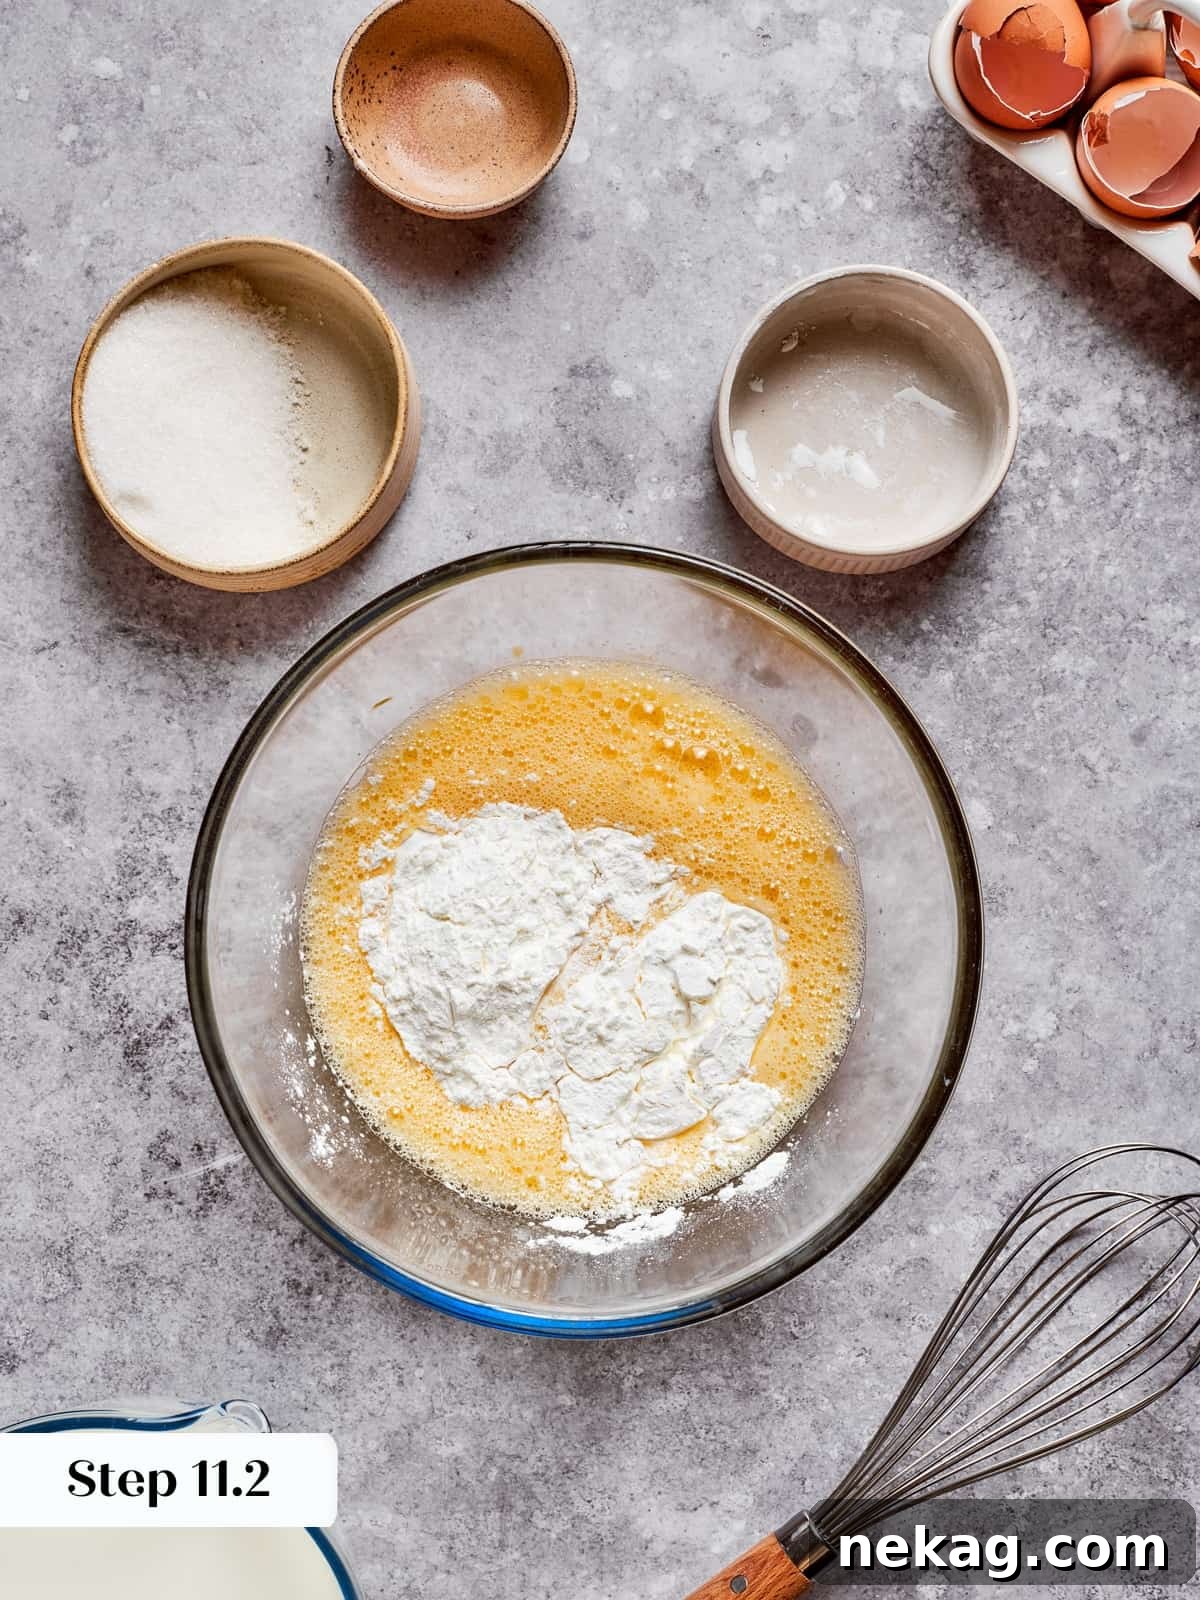
- Prepare for Chilling: Line a clean baking sheet with parchment paper or plastic wrap, ensuring it extends over the edges. This will make it easy to remove the chilled pastry cream.
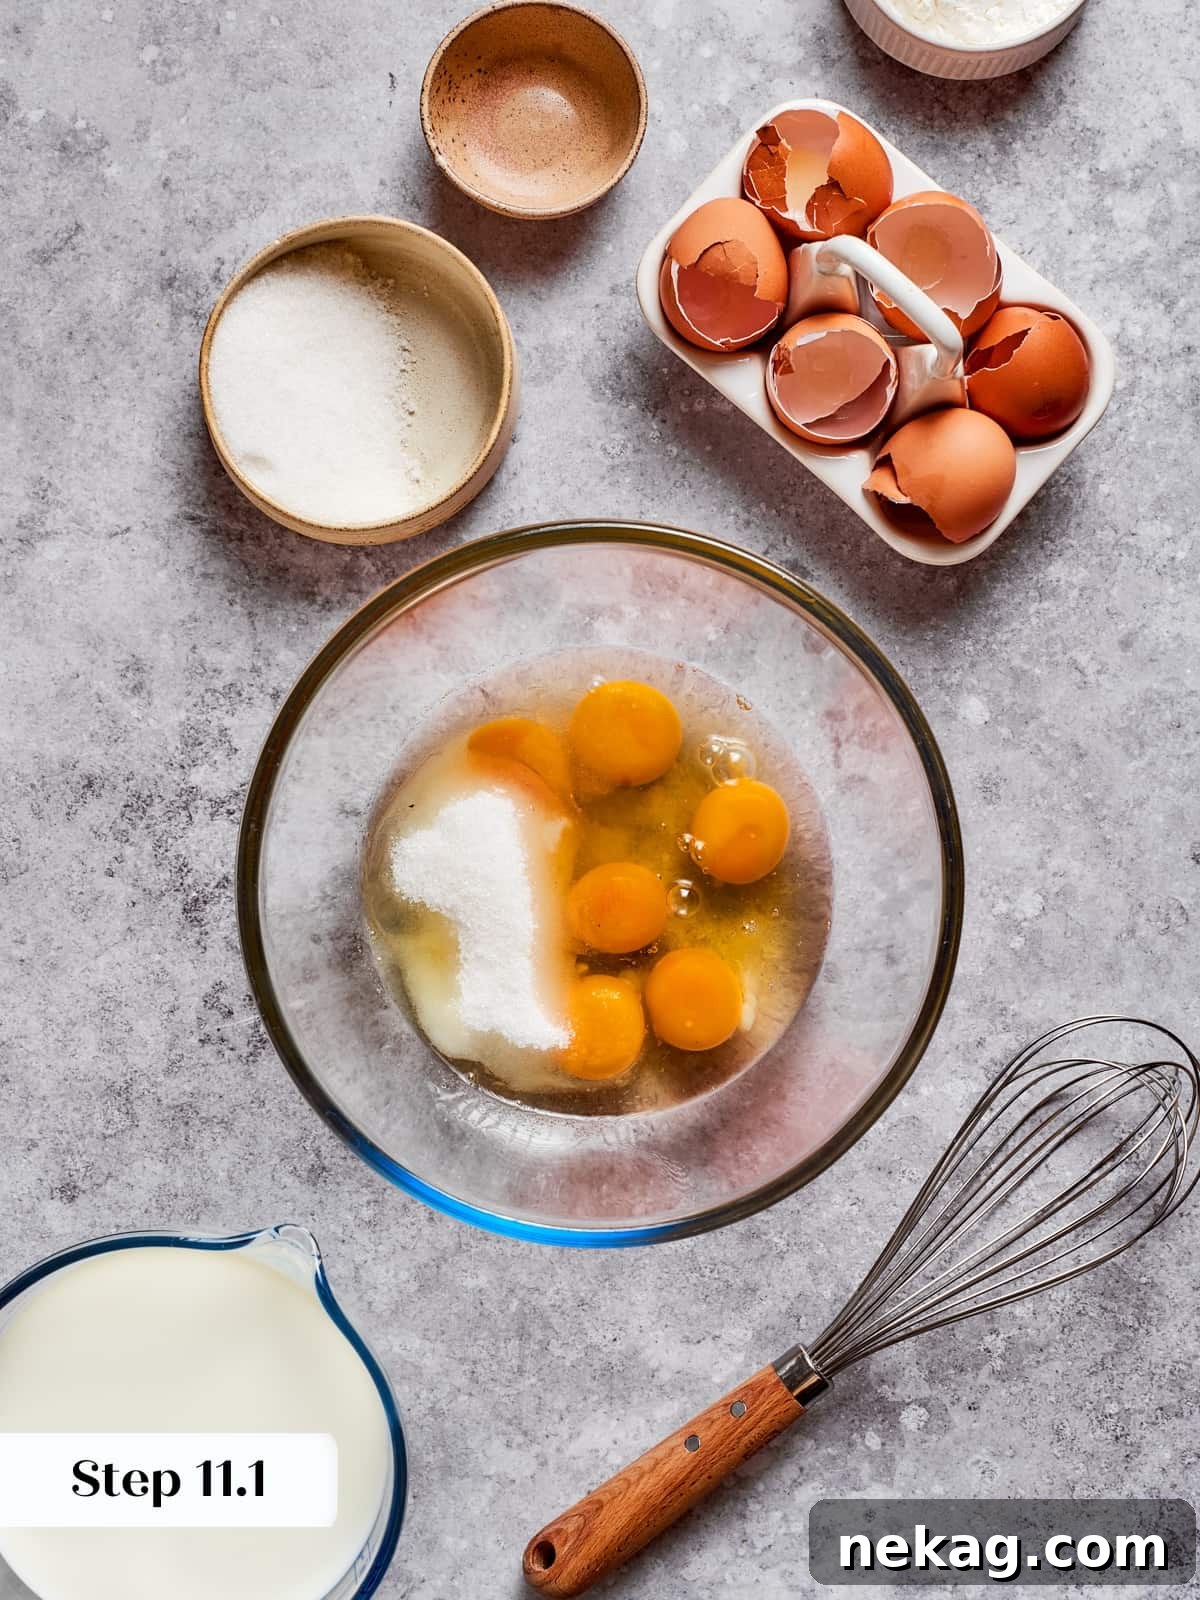
- Whisk Dry & Wet: In a large heatproof bowl, vigorously whisk together the whole eggs, vanilla sugar, half of the granulated sugar, the vanilla powder, and the cornstarch. Continue whisking until the mixture is completely smooth and homogenous, with no lumps (photos 5-6).
- Heat Milk & Sugar: In a medium-sized saucepot, whisk together the whole milk and the remaining half of the granulated sugar. This helps prevent the milk from scorching on the bottom of the pot.
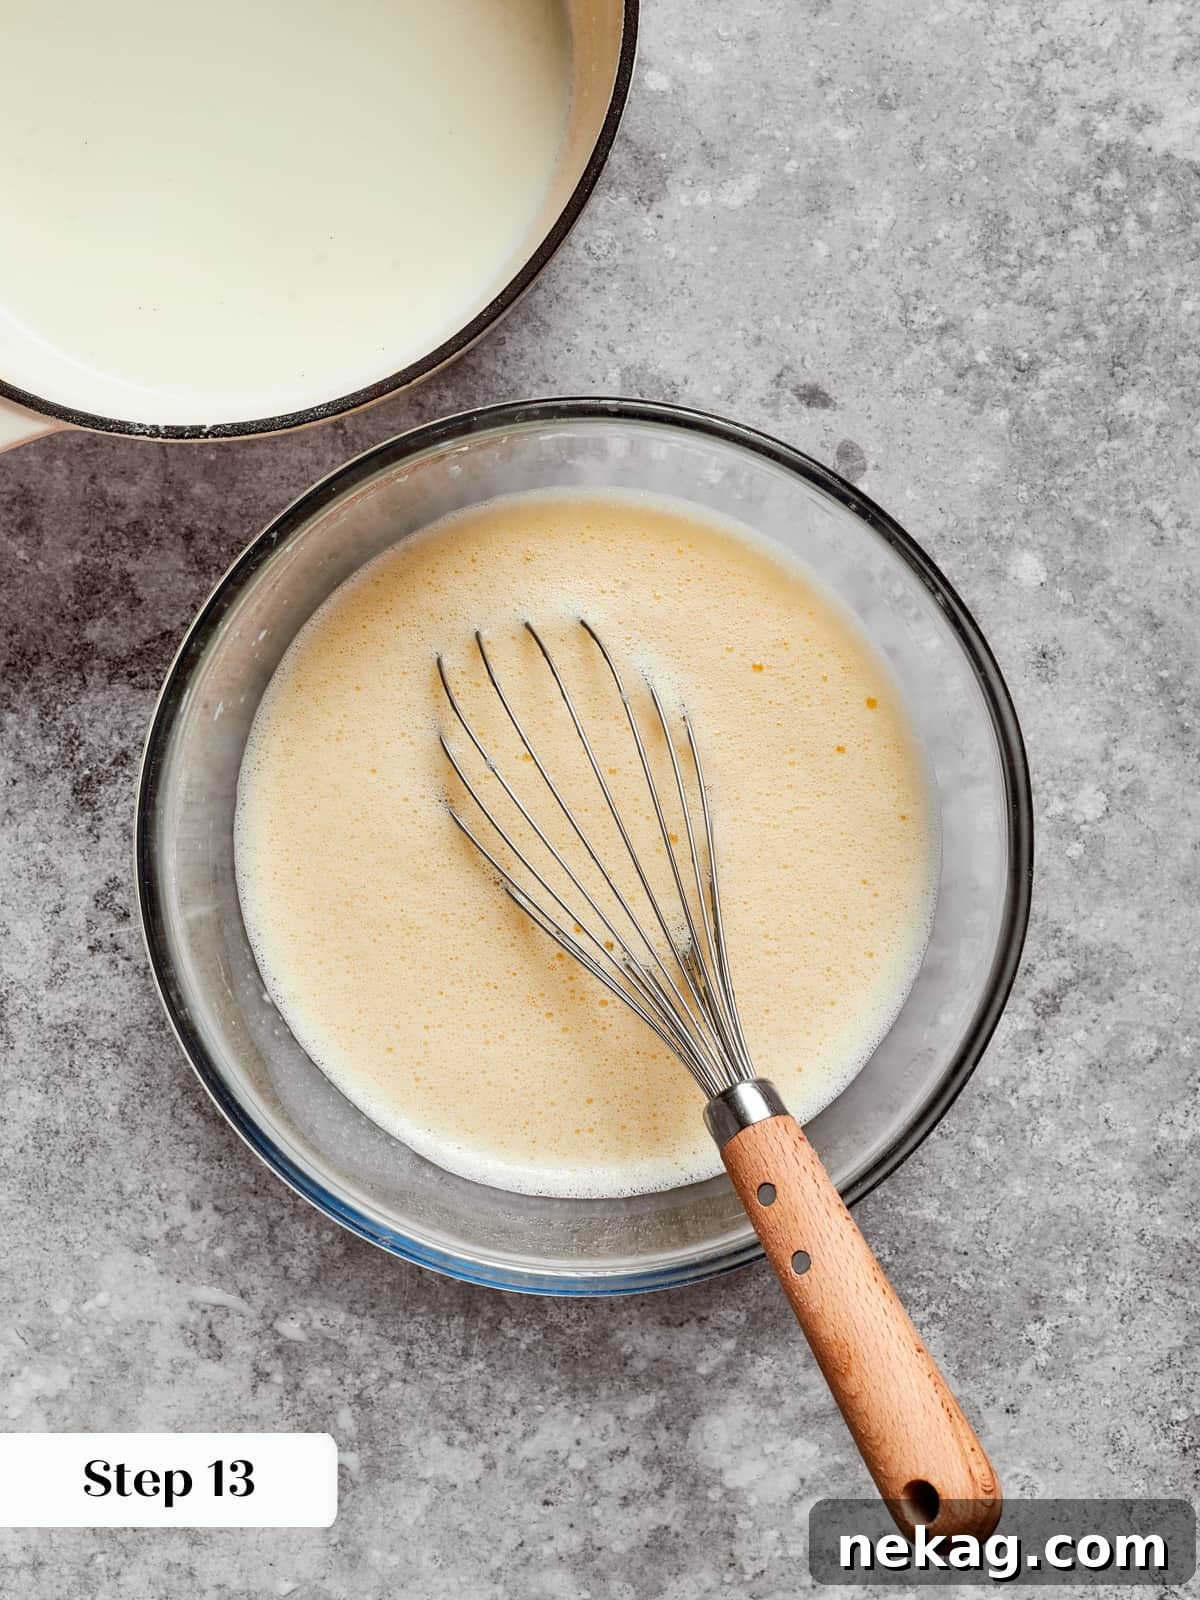
- Temper the Egg Mixture: Bring the milk mixture to a gentle boil over medium-high heat. Once boiling, carefully temper the hot milk into the egg mixture. To do this, slowly pour a small amount of the hot milk into the egg mixture while continuously whisking. Gradually add more milk, whisking constantly, until all the milk has been incorporated (photo 7). This step slowly raises the temperature of the eggs, preventing them from scrambling.
- Return to Heat: Pour the entire tempered milk and egg mixture back into the same saucepot.
- Cook the Custard: Return the pot to medium heat. While whisking constantly and vigorously, cook the custard until it comes to a full boil. Be meticulous and ensure your whisk reaches into all the corners of the pot to prevent any lumps from forming or the bottom from sticking.
- Boil for Stability: Once the pastry cream comes to a boil, continue boiling and whisking for precisely 1 minute. This ensures the cornstarch is fully activated and the custard will set properly. If at any point the pastry cream starts to clump, immediately remove the pot from the heat and whisk vigorously until it becomes smooth again before returning it to the burner.
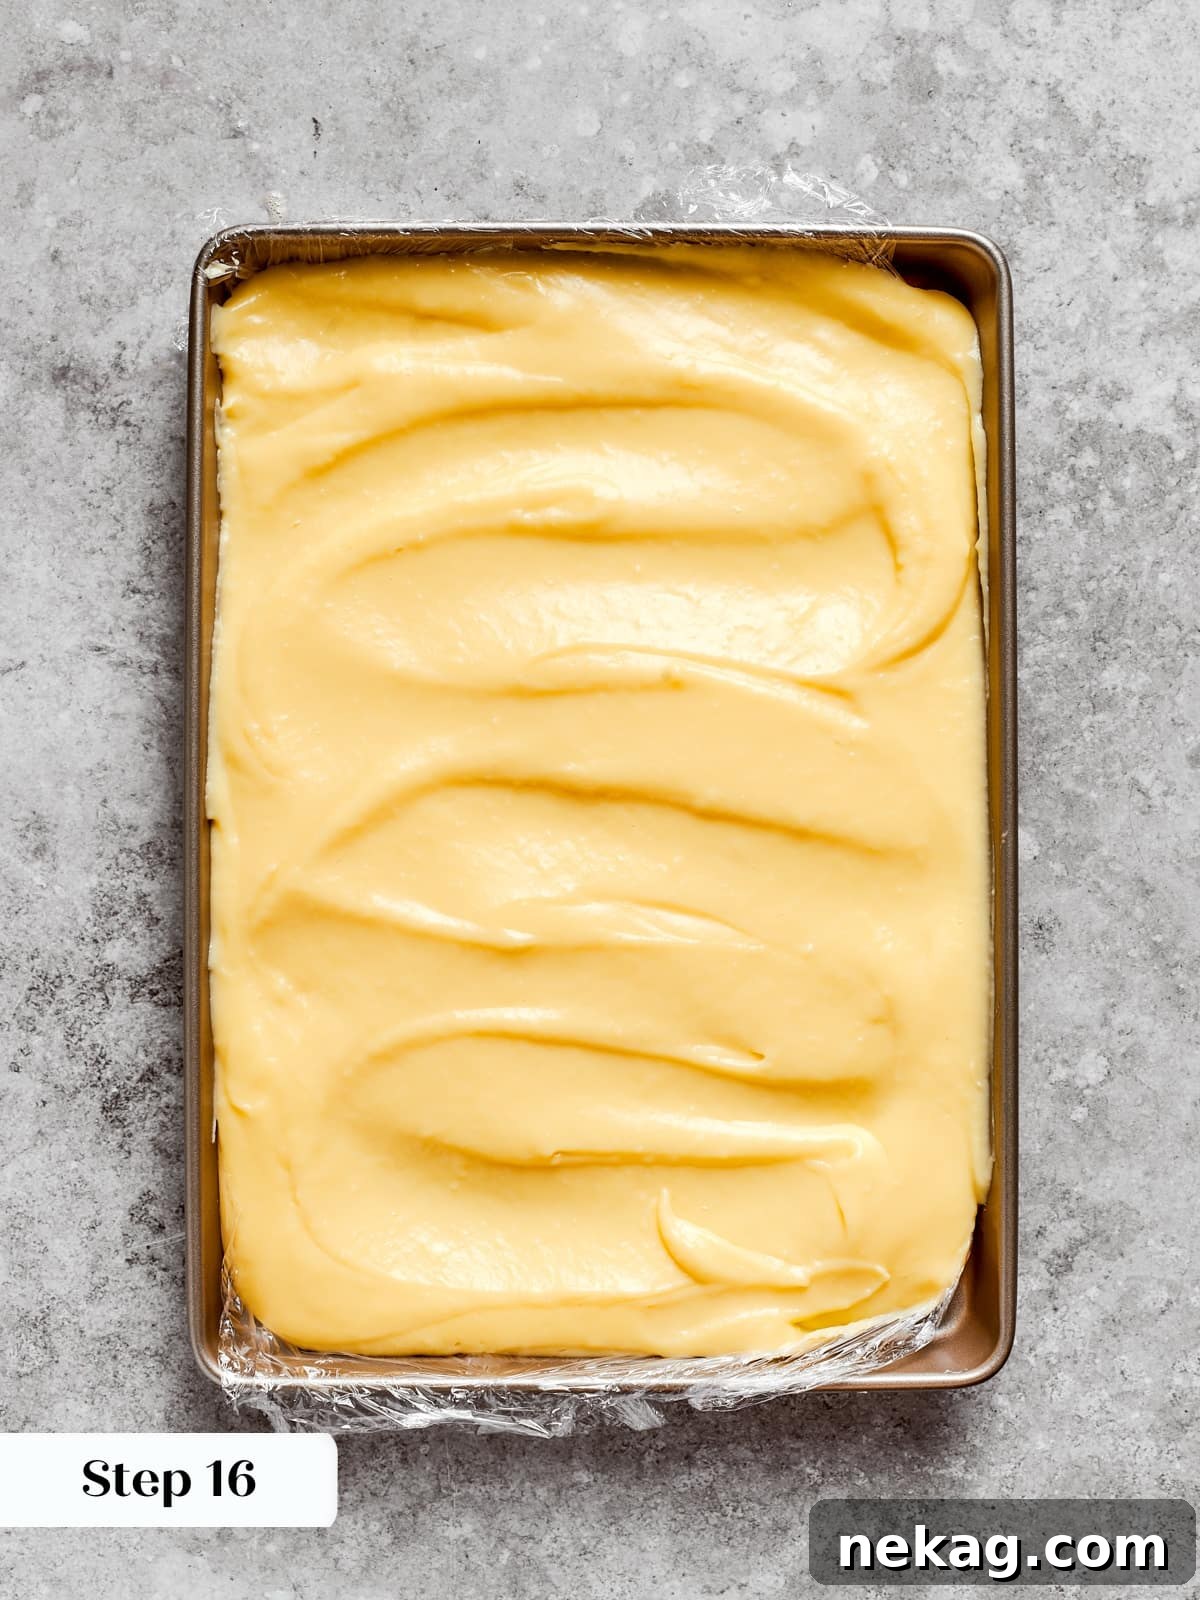
- Chill in a Thin Layer: Promptly pour the hot pastry cream onto your lined baking sheet and spread it into a thin, even layer. Cover the surface directly with plastic wrap, pressing it down to prevent a skin from forming. Poke a few small holes in the plastic wrap to allow steam to escape (photo 8).
- Refrigerate Overnight: Refrigerate the pastry cream until it is completely set and thoroughly cold. For the best results and stability, I highly recommend doing this overnight in your home refrigerator.
Assemble the Mille Crêpe Cake:

- Whip the Heavy Cream: Pour the cold heavy cream into the bowl of a stand mixer fitted with the whisk attachment, or a large mixing bowl for hand whisking. Whisk on medium speed (or by hand) until soft peaks form. Transfer this whipped cream to a separate bowl and set aside.
- Loosen the Pastry Cream: Scrape the completely chilled pastry cream from your baking sheet into the bowl of a stand mixer fitted with the paddle attachment. Alternatively, this can be done by hand with a stiff silicone spatula. Beat the pastry cream on medium-high speed for 30 seconds to 1 minute, just until it loosens up and becomes smooth. This step breaks up any firmness from chilling. If your pastry cream has any stubborn lumps, consider straining it through a fine-mesh sieve at this stage for an ultra-smooth finish.
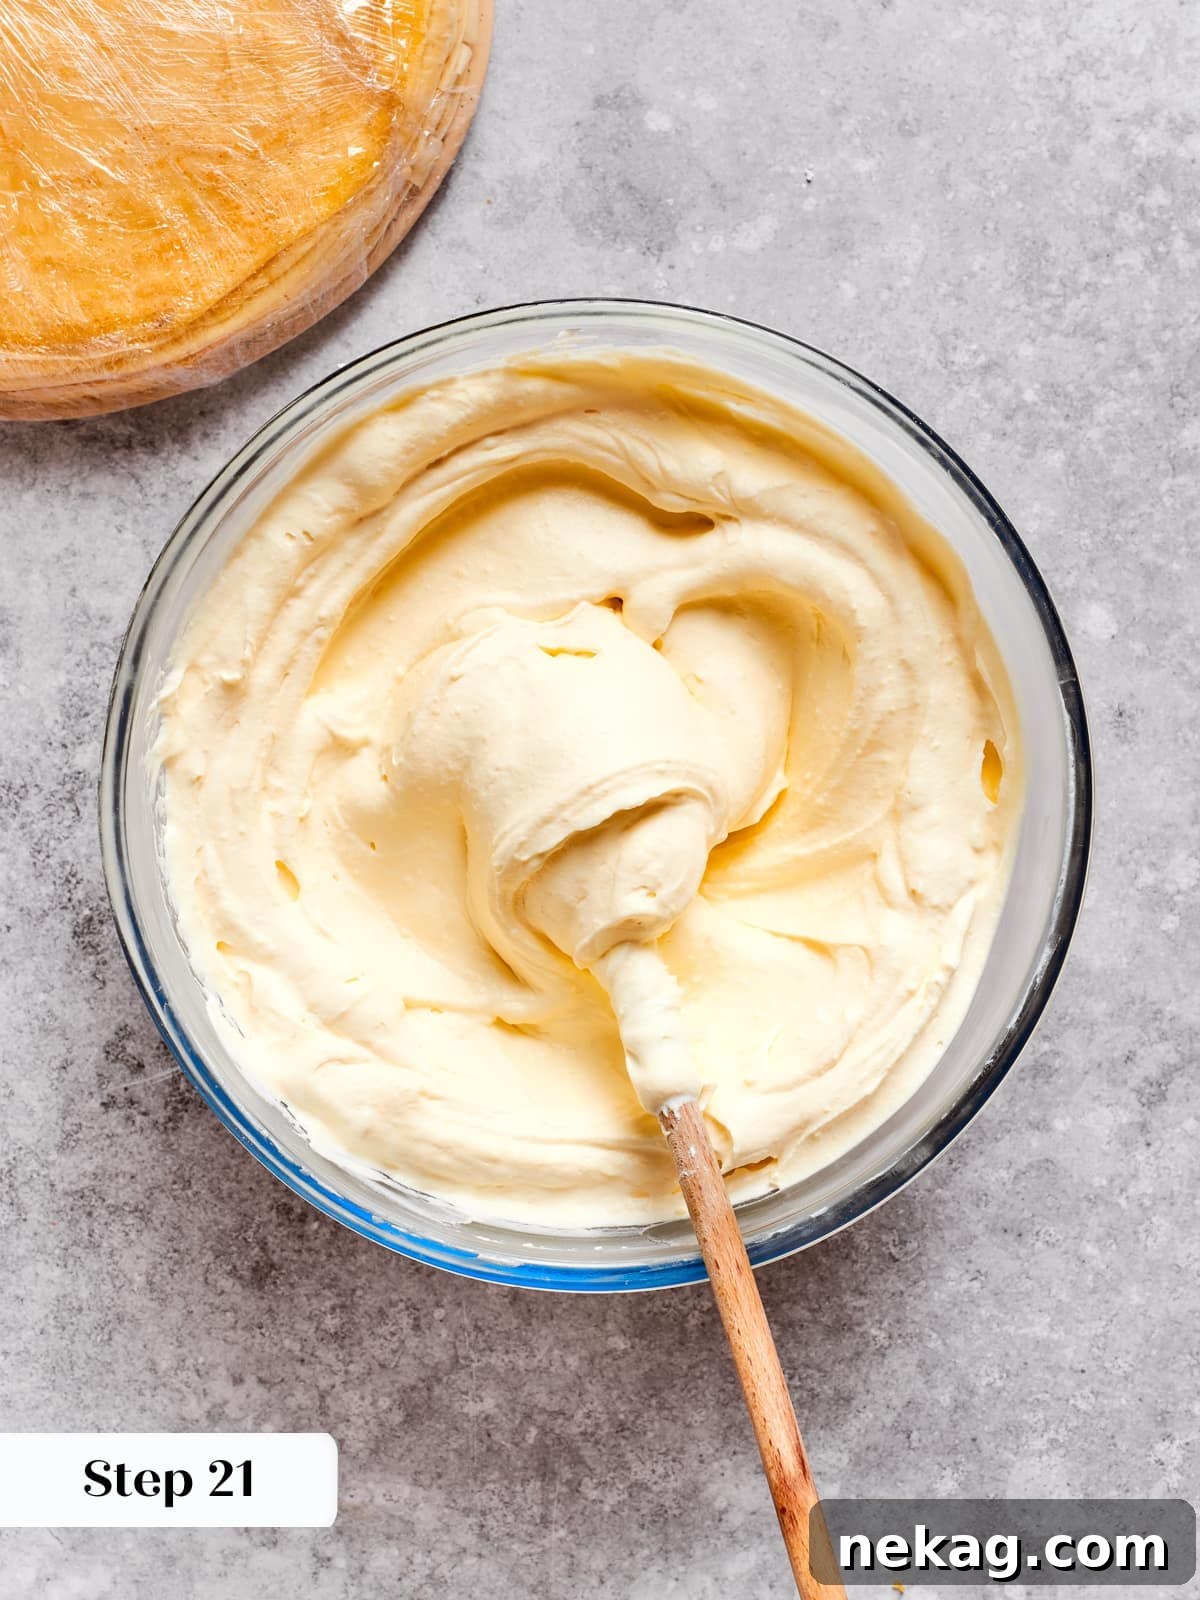
- Prepare the Crème Légère (Sacrificing): Take approximately half a cup of the whipped cream you prepared earlier and fold it aggressively into the loosened pastry cream (photo 9). This technique is known as “sacrificing” in professional kitchens. It’s a crucial step that brings the denser pastry cream closer to the lighter consistency of the whipped cream, making it much easier to combine them fully without deflating the remaining whipped cream and preserving maximum volume.
- Gently Fold in Remaining Cream: Delicately fold the remaining whipped cream into the pastry cream mixture until it is completely combined and uniformly light and airy. Be gentle to maintain the volume of the whipped cream.
- Begin Layering: Place one crêpe neatly in the center of a flat cake plate or serving platter. Dollop about ½ cup of the prepared crème légère onto the center of the crêpe. Using a large offset spatula, gently spread the cream evenly across the surface of the crêpe, extending almost to the edges. Your goal is to cover most of the crêpe, understanding that perfect, paper-thin layers of cream aren’t always achievable due to the natural slight bubbling of the crêpes.
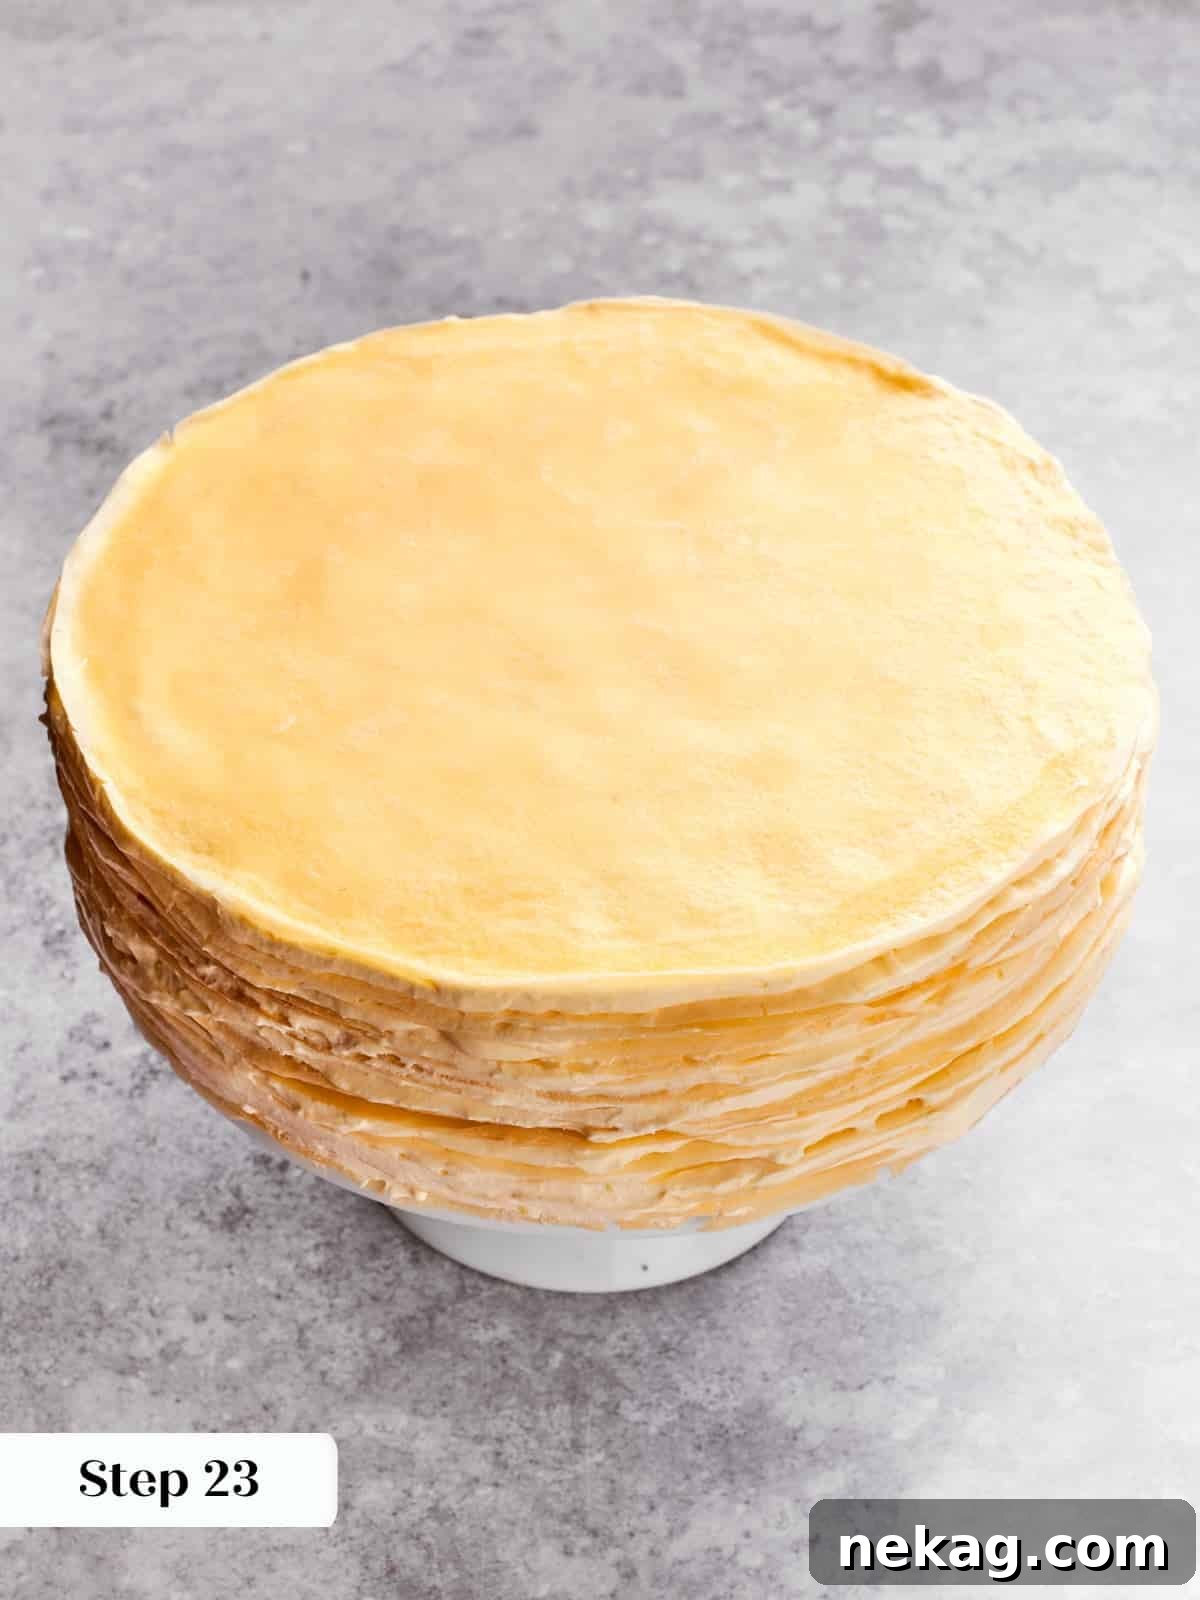
- Repeat Layers: Continue layering, placing another crêpe on top of the cream, followed by another ½ cup of crème légère, and repeating until all but one crêpe has been used (photo 10). Place the very last crêpe on top of the final layer of cream.
- Chill the Cake: Carefully wrap the entire assembled cake tightly with plastic wrap to prevent it from drying out or absorbing refrigerator odors. Refrigerate for at least 4 hours, or ideally, overnight. This chilling time is absolutely essential for the crème légère to set completely, ensuring clean, beautiful slices.
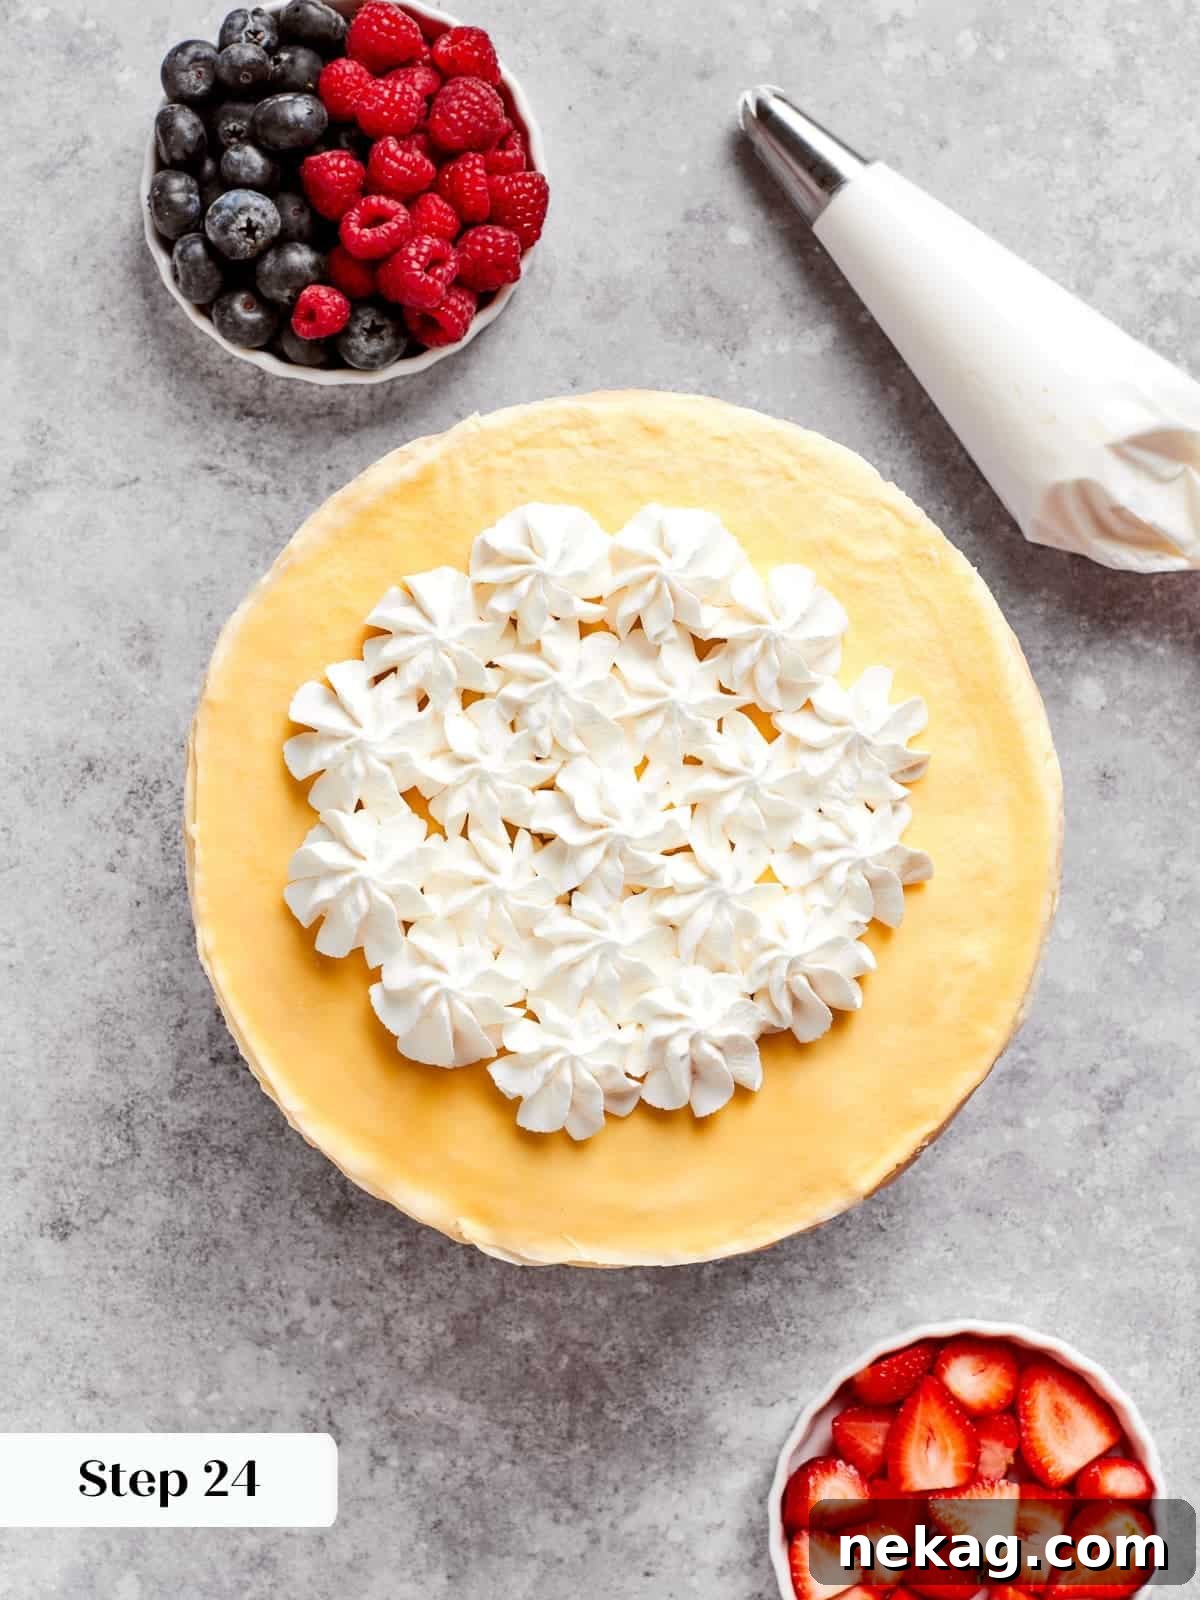
- Decorate and Serve: When you are ready to serve your masterpiece, unwrap the cake. For an exquisite finish, spread a thin layer of lightly sweetened whipped cream over the top crêpe. Then, adorn it with an arrangement of sliced fresh fruits (like strawberries, raspberries, or blueberries) and a sprinkle of chopped candied nuts, if desired (photo 11).
Chef Lindsey’s Recipe Tip: The Secret to Perfect Slices
To achieve those picture-perfect slices that reveal all the beautiful layers of your mille crêpe cake, here’s a professional secret: dip a sharp, thin knife into very hot water, then wipe the blade completely clean and dry before each cut. The heated blade will glide effortlessly through the delicate crêpes and melt the cream ever so slightly, creating a clean, crisp cross-section. Repeat this process for every slice, and you’ll present a stunning display of your culinary artistry!
Recipe FAQs
Once assembled, your vanilla mille crêpe cake should be stored, well wrapped in plastic or in an airtight container, in the refrigerator. It will remain fresh and delicious for up to a week. I do not recommend freezing an assembled crêpe cake, as the delicate crème légère tends to separate and lose its ideal texture upon defrosting. However, you can prepare components in advance: cooked crêpes can be frozen for up to a month (thaw overnight in the fridge), and the pastry cream can be stored in the fridge for up to 5 days, making future assembly much quicker.
A leaning or sliding crêpe cake is a common issue with layered desserts, and it usually boils down to two main culprits. First, ensuring your crêpes are completely cool before assembly is paramount. Warm crêpes will immediately start to melt the crème légère, causing the layers to slip and slide. Second, the consistency of your pastry cream is crucial. If your pastry cream was not cooked long enough, it might be too thin or not sturdy enough to provide the necessary structural support for stacking dozens of layers. Ensure your pastry cream is thick and firm after chilling to provide a solid foundation for your cake.
This elegant cake is fantastic on its own, but it can be beautifully complemented by a variety of accompaniments. For an added layer of indulgence, drizzle it with a rich salted caramel sauce or a decadent hot fudge sauce recipe. To elevate the experience even further, consider serving it alongside a tender red wine poached pear, which adds a sophisticated fruit element. A simple dusting of confectioner’s sugar or a scattering of fresh berries also makes for a delightful and visually appealing presentation.
Absolutely! Preparing the crêpes in advance is a fantastic time-saver. Once cooked and cooled, stack them with parchment paper in between each crêpe to prevent sticking. Wrap the stack tightly in plastic wrap and store them in the refrigerator for up to 2-3 days, or freeze them for up to a month. Thaw frozen crêpes in the refrigerator overnight before assembling.
The key to thin, even crêpes lies in the batter’s consistency and your technique. First, ensure your batter has rested adequately (as per Step 2) to allow the flour to fully hydrate and gluten to relax. Second, use a consistent amount of batter for each crêpe – our 4-oz ladle tip is crucial here. Finally, practice the swift pour and swirl motion described in Step 5. The faster you swirl the batter to coat the pan, the thinner and more even your crêpes will be. Don’t be afraid to discard the first few crêpes; they are often “practice runs” as you dial in your pan temperature and technique.
More Recommended Breakfast & Brunch Recipes
Dessert Recipes
French Crullers
Cake Recipes
Gooey Butter Cake
Easy Scone Recipes
Chocolate Chip Scones
Muffin Recipes
Jumbo Blueberry Muffins
If you tried this recipe and loved it, please leave a 🌟 star rating and let me know how it goes in the comments below. I love hearing from you; your comments make my day!

Vanilla Mille Crêpe Cake Recipe
Comment
Print Recipe
Ingredients
For the vanilla pastry cream:
- 4 cups whole milk
- 2 teaspoons vanilla powder more potent and easier to combine in cooked custards (or 2-3 tsp vanilla extract, added after cooking)
- 1 cup granulated sugar divided
- 6 large eggs
- ½ cup cornstarch
For crepe cake assembly:
- 2 ½ cups heavy whipping cream
- 2 tablespoons confectioner’s sugar
- 25 10-inch crêpes [2x the sweet crepe batter recipe]
- ½ cup heavy cream whipped to soft peaks for topping (optional)
- fresh berries sliced strawberries, raspberries, or blueberries for garnish (optional)
Instructions
Prepare the crêpe batter:
-
Whisk together the eggs, salt, milk, and melted butter. Slowly whisk in the flours, adding a little at a time like popovers. Whisk in the water last. The batter will be very liquidy.
-
Let the batter sit in the refrigerator overnight or for at least 1 hour at room temperature. This allows the flour to hydrate properly and any gluten to relax.
How to cook crêpes:
-
If you refrigerated your batter, remove it from the fridge about an hour before you plan to start cooking. Preheat a crêpe pan or nonstick skillet over medium heat.
-
Using a fork, stab a piece of butter and quickly butter the pan. You only need to do this for the first crepe, or as needed.
-
Pour in a ladleful (just shy of 4 ounces) into the center of the pan with one hand, and swirl the pan with the other to evenly distribute the batter around the pan.
-
Cook over medium-low heat on the first side until the edges begin to brown and you can see some darker spots forming near the center. The outer edge is an excellent barometer for readiness. For a 12-inch crepe, this usually takes about 6 minutes.
-
Flip by sliding the spatula underneath the center of the crepe and flipping it over like a pancake. If it folds, gently unfold it. If you flip it too early and it’s blonde, flip it back.
-
Continue to cook on the second side for an additional 1-2 minutes. Remove the crepe to a wire rack to cool before stacking.
-
Repeat with the remaining batter and cool all crêpes. At this point, you can refrigerate the crêpes overnight before assembling.
Prepare the pastry cream:
-
Line a baking sheet with parchment paper or plastic wrap.
-
In a large bowl, whisk together the eggs, vanilla sugar, half the granulated sugar, the vanilla powder, and the cornstarch until smooth and homogenous.
-
In a medium saucepot, whisk together the milk and the remaining half of the sugar.
-
Bring to a boil over medium-high heat, then temper into the egg mixture by pouring a little of the hot milk into the mixture at a time while whisking constantly. Continue until all the milk has been added.
-
Add the milk mixture back into the pot and return to the burner over medium heat.
-
While whisking constantly, cook the custard until it comes to a boil, ensuring to reach into the corners of the pot.
-
Once the pastry cream boils, continue boiling and whisking for 1 minute. Pour onto the lined baking sheet, spread out the pastry cream, and cover with plastic wrap.
-
Poke a few holes in the plastic and refrigerate until completely set and cold, ideally overnight.
Assemble the mille crêpe cake:
-
Add heavy cream to the bowl of a stand mixer fitted with the whisk attachment or a large mixing bowl. Whisk by hand or on medium speed until soft peaks form. Transfer it to another bowl.
-
Scrape the chilled pastry cream into the bowl of a stand mixer fitted with the paddle attachment (or use a stiff silicone spatula by hand). Beat on medium-high speed for 30 seconds to 1 minute to loosen it.
-
Prepare the crème légère: Take about a half cup of the whipped cream and aggressively fold it into the loosened pastry cream. This “sacrificing” step helps bring the pastry cream to a similar consistency as whipped cream.
-
Delicately fold the remaining whipped cream into the pastry cream until completely combined and smooth.
-
Place one crêpe in the center of a flat cake plate. Place about ½ cup of the crème légère in the center and spread it out using a large offset spatula, covering most of the crêpe.
-
Repeat with all the crêpes except one for the top. Place the final crêpe on the top. Wrap the entire cake and refrigerate for at least 4 hours to overnight.
-
When ready to serve, cover the top with lightly sweetened whipped cream, sliced fruits, and chopped candied nuts (optional).
Notes
Presentation – The chilling time is crucial for achieving beautiful slices. Allow the crêpe cake to set for at least 4 hours to overnight. Rushing this step will result in messy slices.
Technique – Each crêpe takes approximately 8 minutes to cook. To speed up the process, consider using multiple crêpe pans simultaneously if available.
Variation – For a delightful twist, create a banana pudding crêpe cake! Follow the delicious filling recipe from my banana pudding recipe, and layer the cake with alternating crêpes, banana slices, and the pudding filling.
Storage – Once assembled, wrap the cake tightly or place it in an airtight container and refrigerate for up to one week.
Nutrition
Enjoyed this recipe? Share your thoughts!
Before You Go: Explore More Delights
I hope you thoroughly enjoyed creating and savoring this classic French vanilla mille crêpe cake. It’s a dessert that truly embodies elegance and delicate flavor. If you’re looking to expand your repertoire of delightful morning treats or elegant brunch dishes, be sure to explore our other easy breakfast and brunch recipes. You might fall in love with these comforting cinnamon chip scones with cream cheese glaze or the irresistible aroma of this cinnamon raisin French toast! Happy baking, and bon appétit!