
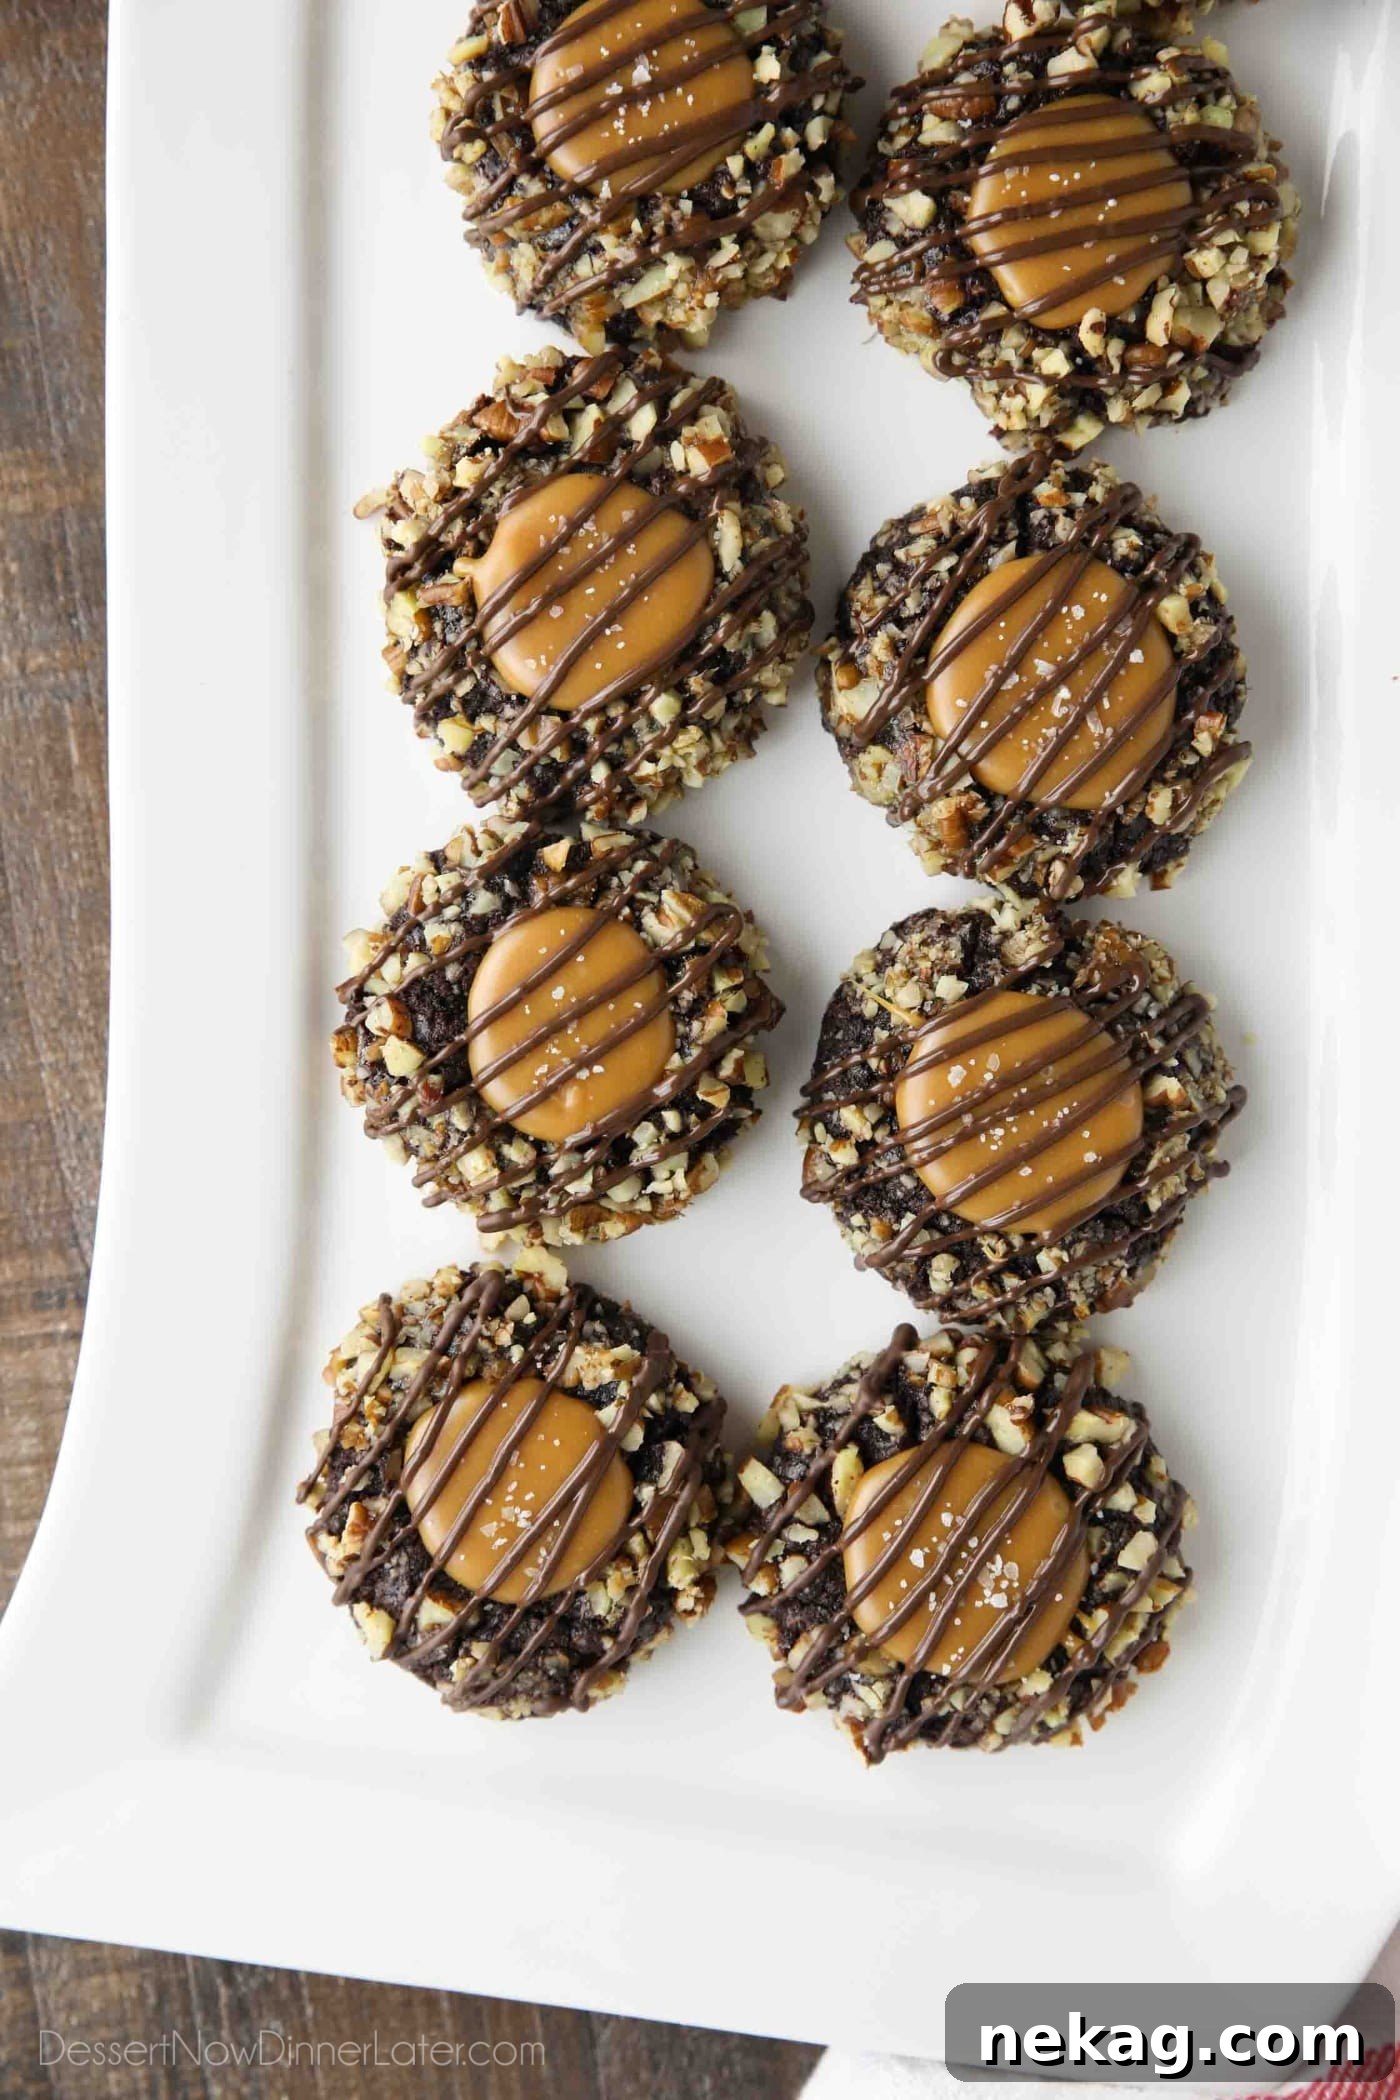
Turtle Thumbprint Cookies are an exquisite blend of rich chocolate, crunchy pecans, and gooey caramel, finished with a delicate sprinkle of sea salt and a decadent chocolate drizzle. These irresistible treats are not just cookies; they’re tiny masterpieces, perfect for adding a touch of elegance and flavor to your holiday cookie platter or any special occasion.
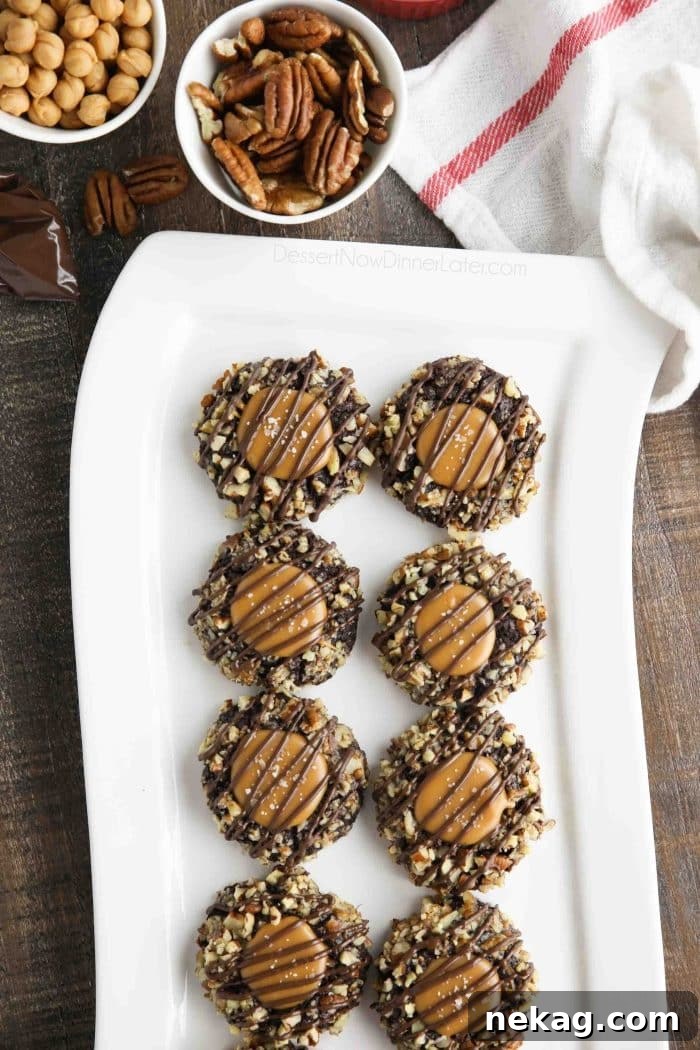
There’s a special magic in holiday baking, and these Turtle Thumbprint Cookies perfectly capture that spirit. Imagine the delight on faces as loved ones bite into a cookie that looks professionally crafted yet is surprisingly simple to make at home. These aren’t just a seasonal delight; they are a testament to the power of classic flavor combinations brought together in a charming, bite-sized form. They combine the comforting taste of homemade treats with the sophisticated appeal of a gourmet dessert.
My husband, upon seeing these beauties, remarked how professional they looked. And while I do spend a fair bit of time in the kitchen, the truth is, anyone with a love for baking and a desire for delicious results can create these show-stopping cookies. Don’t let their elegant appearance fool you; the process is straightforward, yielding results that will impress even the most discerning palates. Whether you’re a seasoned baker or just starting out, this recipe for easy turtle cookies will guide you to success.
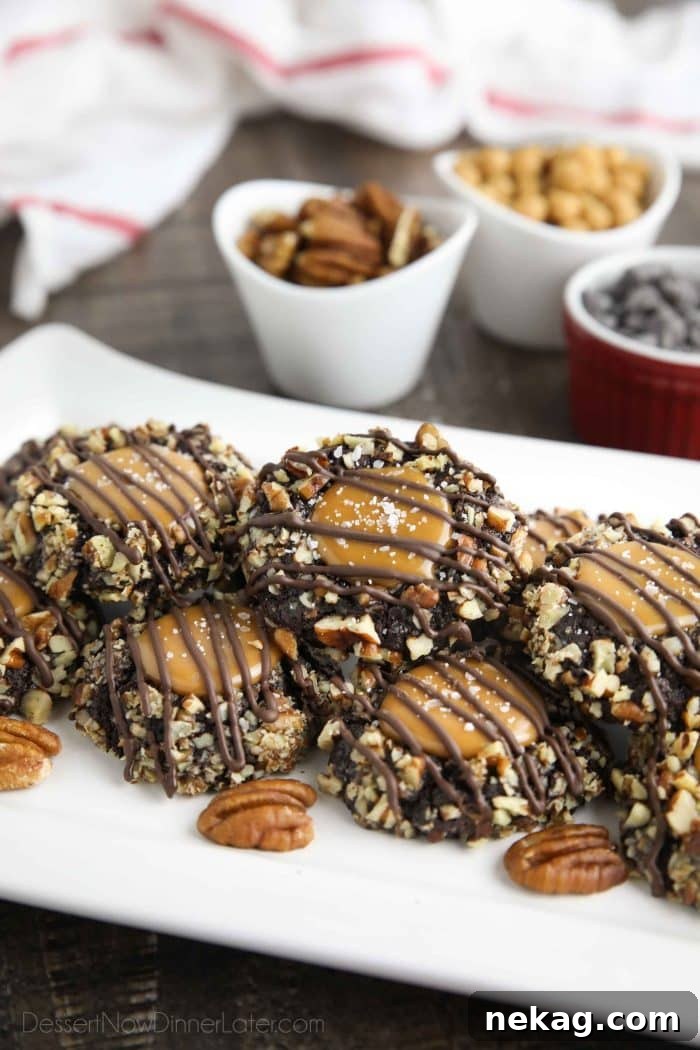
Unlock the Secret to Irresistible Turtle Thumbprint Cookies
The iconic “turtle” flavor profile — a harmonious trinity of chocolate, pecans, and caramel — is elevated to new heights in these delectable thumbprint cookies. Each component plays a vital role in creating a truly memorable treat, making them a standout among Christmas cookie recipes. The base is a soft, deeply chocolatey cookie, almost brownie-like in its texture and richness, providing the perfect foundation for the other layers of flavor and crunch. This rich chocolate base ensures a satisfying chew with every bite.
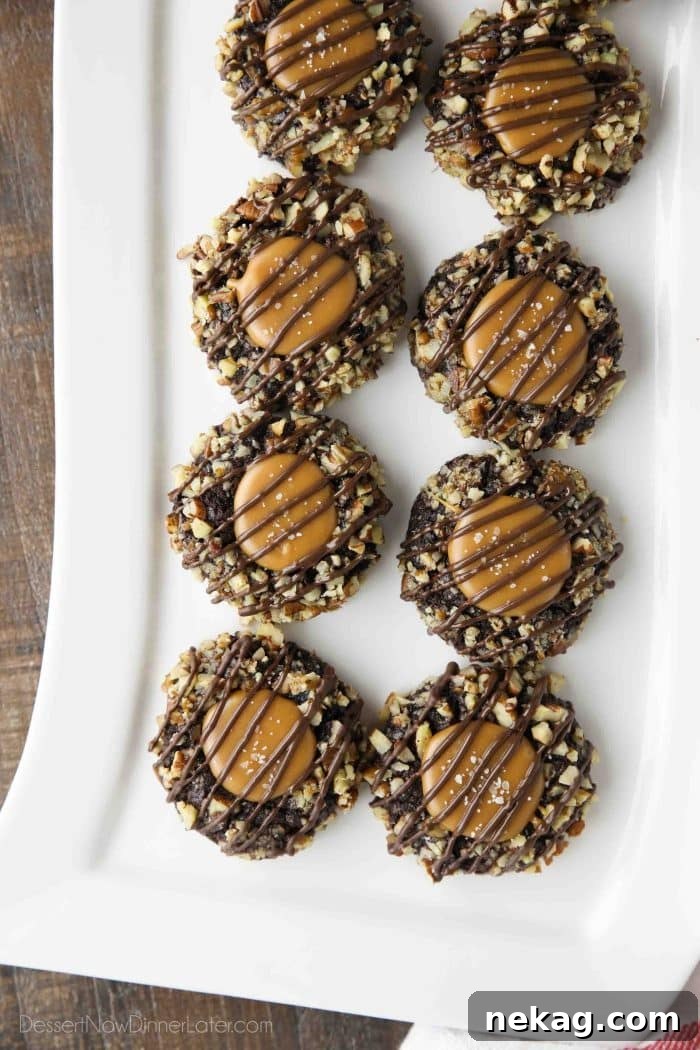
Nestled within this chocolatey base is a luscious, gooey caramel center. This sweet, buttery core provides a delightful contrast to the subtle bitterness of the chocolate, creating a symphony of flavors. But the magic doesn’t stop there. A whisper of sea salt sprinkled over the caramel cuts through the sweetness, adding a sophisticated counterpoint that enhances every bite. This touch of saltiness is what truly distinguishes these from ordinary sweets. Finally, a delicate drizzle of melted chocolate not only adds visual appeal but also reinforces the rich chocolate notes, making these chocolate caramel pecan cookies utterly irresistible. You’ll find yourself reaching for more than just one, captivated by their complex yet balanced taste.
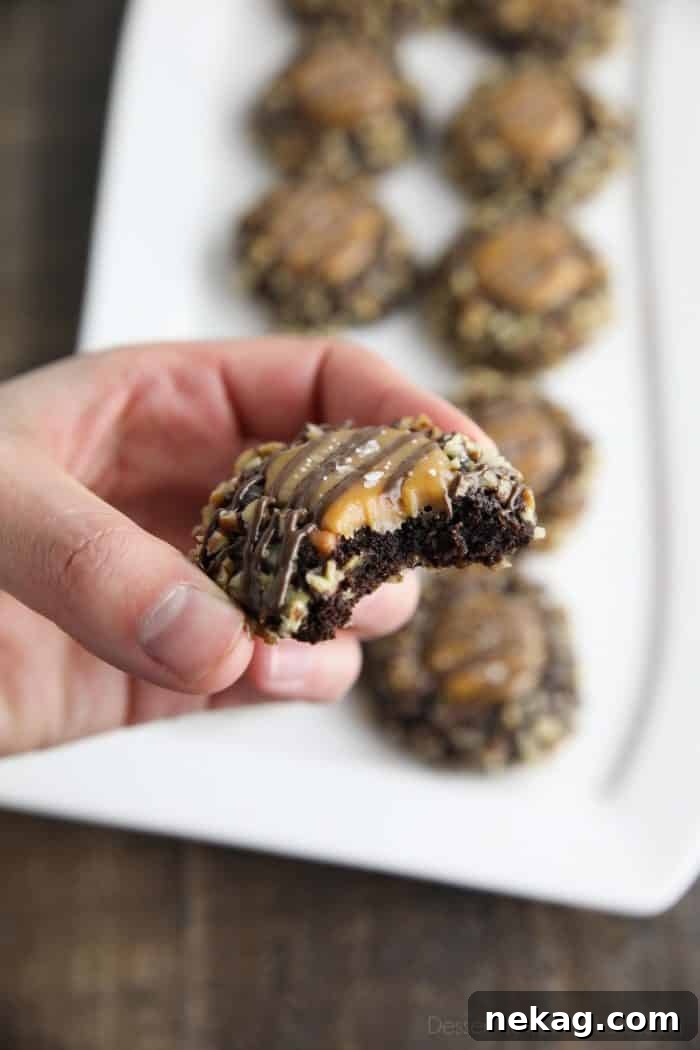
Don’t let the seemingly numerous steps in this recipe deter you. While these turtle cookies boast a gourmet appearance, they are remarkably straightforward to prepare. Each stage is designed to be manageable, ensuring that even novice bakers can achieve stunning results. The satisfaction of presenting a platter of these beautiful turtle treats, knowing you made them yourself, is truly rewarding. They are a delightful addition to any dessert table, offering both visual appeal and an explosion of flavor. Let’s dive into the simple process of crafting these magnificent chocolate caramel pecan cookies!
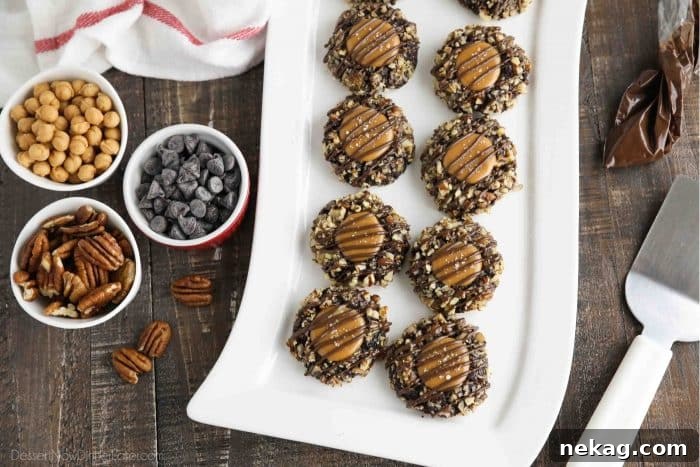
Crafting Your Own Turtle Thumbprint Cookies: A Step-by-Step Guide
Creating these delightful cookies is a fun and rewarding process that brings together classic flavors in a festive package. Follow these detailed steps to ensure perfect results every time, making your homemade turtle cookies a true success.
1. Prepare the Decadent Chocolate Cookie Dough
Begin by making the rich chocolate cookie dough. The key to a soft, brownie-like texture is to follow the ingredient ratios carefully, ensuring your butter is at room temperature for optimal creaming. Once your dough is ready, use a small #50 cookie scoop or a rounded tablespoon to portion out uniform balls. This ensures even baking and consistent cookie size, which is crucial for a professional look. If the dough feels a little sticky, lightly flour your hands or briefly chill the dough in the refrigerator for 15-20 minutes to make it easier to roll into smooth, perfect spheres. Uniformity is key for the next step!
2. The Pecan Coating: Adding Crunch and Flavor
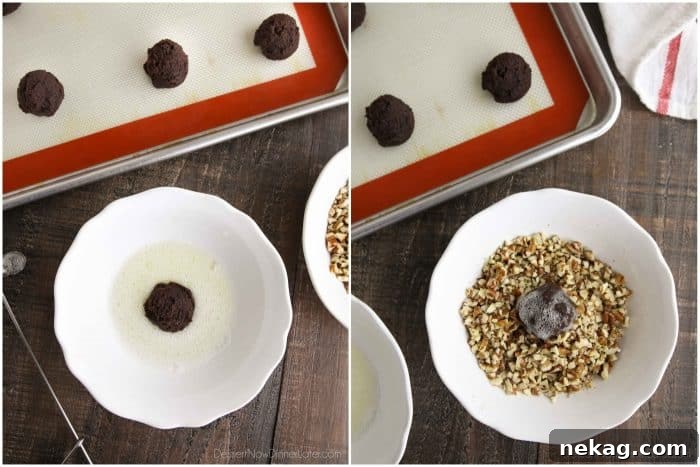
For that signature turtle crunch and an extra layer of flavor, we’ll coat the cookie dough balls in finely chopped pecans. First, whisk an egg white until it’s light and frothy. This acts as a natural adhesive for the pecans, ensuring they stick beautifully to the dough. Gently roll each chocolate cookie dough ball, first in the frothy egg white, ensuring it’s evenly coated all around. Immediately after, transfer it to the bowl of finely chopped pecans. Roll thoroughly until each cookie is beautifully and completely covered. This step not only adds a wonderful textural contrast but also infuses every bite with a deep, nutty flavor. Arrange the coated dough balls a few inches apart on your prepared baking sheet to allow for proper air circulation and even baking, preventing them from sticking together.
3. Creating the Perfect Indentation
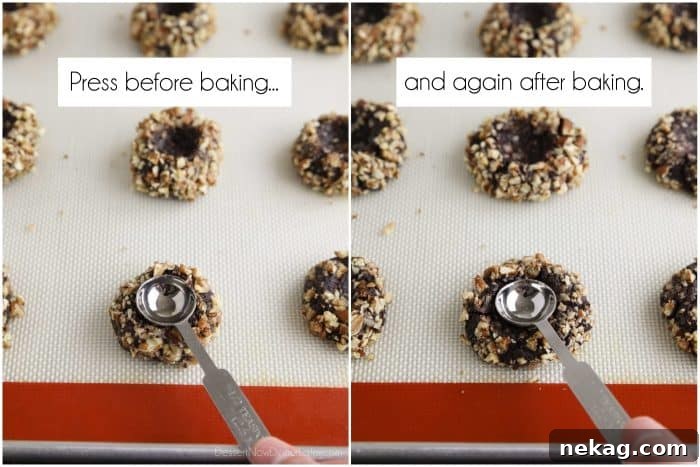
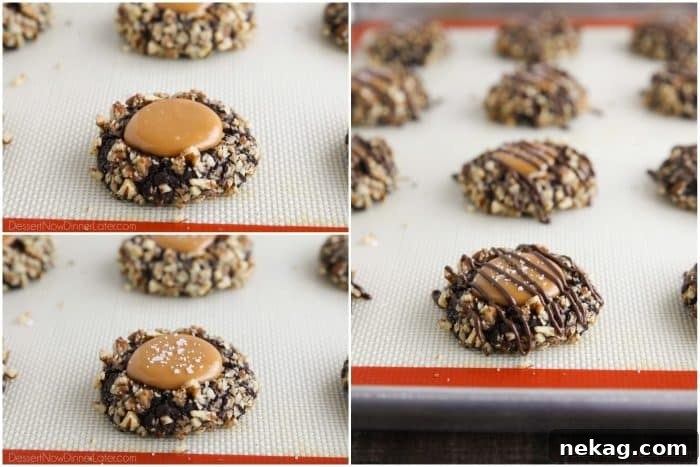
The “thumbprint” is crucial for holding the gooey caramel center securely. Using a ½ teaspoon measuring spoon, gently press an indentation into the center of each dough ball *before* baking. This initial press helps shape the cookie and provides a starter well. Then, and this is a key tip for a well-defined and deep well, gently re-press the indentations immediately *after* baking, while the cookies are still warm and pliable. This second press creates a deeper, cleaner pocket ready for filling, ensuring your caramel stays perfectly in place and doesn’t overflow.
4. Preparing the Caramel and Chocolate Fillings
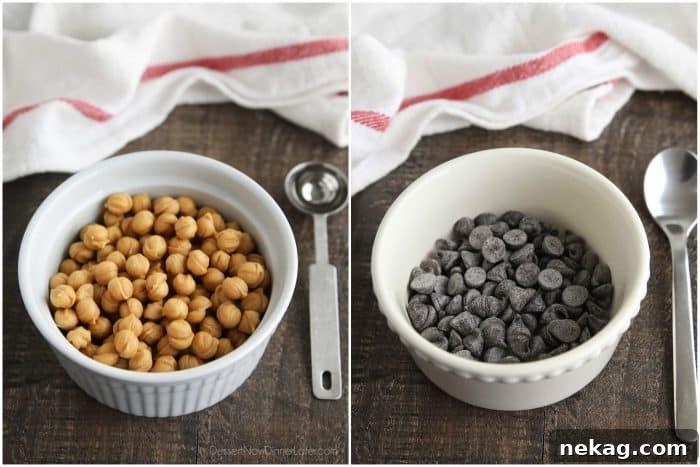
The star of the show, the caramel, and its perfect counterpart, the chocolate drizzle, need careful preparation. Melt the caramel bits and chocolate chips separately in the microwave. For best results, use short bursts (e.g., 30 seconds at half power) and stir in between each interval to prevent overheating and ensure a smooth, creamy consistency. Caramel can seize or burn easily, so gentle heating is essential for that perfect gooey texture. For the chocolate, if it appears too thick for drizzling, a tiny bit of coconut oil or shortening (about ½ teaspoon) can be stirred in to achieve a perfect, flowing consistency, allowing for an elegant, smooth drizzle without clumps.
5. Filling and Finishing with Flair
Once your cookies are baked, indented, and slightly cooled, it’s time for the delicious filling. Scoop about ½ teaspoon of the warm, melted caramel into the center of each cookie’s indentation. Work efficiently, as the caramel will begin to set quickly. Immediately after filling, sprinkle a small pinch of flaky sea salt over the caramel. This salted caramel element is a game-changer, enhancing the flavors significantly by providing a delightful savory contrast to the sweetness.
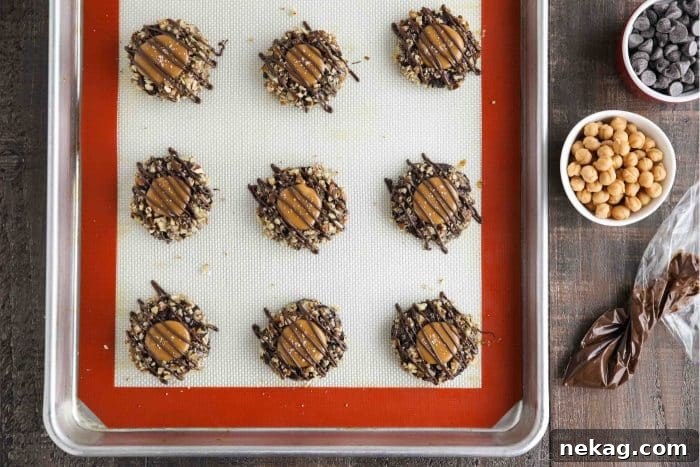
For the chocolate drizzle, transfer the melted chocolate into a zip-top bag. Snip a very small corner off the bag to create a fine piping tool. Drizzle the chocolate artfully over the tops of the caramel-filled cookies in a zig-zag or swirl pattern. Allow the cookies to rest at room temperature until both the caramel and chocolate have fully set. This setting time is crucial for preventing a sticky mess and ensuring the beautiful presentation holds firm. Once set, your magnificent Turtle Thumbprint Cookies are ready to be savored!
Pro Tips for Perfect Turtle Thumbprint Cookies
Achieving bakery-quality chocolate caramel pecan cookies is easier with a few expert tricks. These tips will help you master every aspect of this delicious recipe:
-
Caramel Consistency is Key
Caramel Bits, like those from Kraft, are designed to melt smoothly and are a fantastic shortcut. When melting with a bit of water, you can precisely control the thickness. For a thicker, more substantial caramel center that holds its shape well, stick to the recommended amount of water. If you prefer a slightly thinner, more pourable caramel that spreads elegantly, add a tiny bit more water, a half teaspoon at a time, until you reach your desired consistency. Be careful not to over-thin it, or it might spill out of the cookie indentation.
- Caramel Square Alternative: If caramel bits are unavailable, you can substitute approximately 16 unwrapped caramel squares. Melt these in a saucepan over low heat with about 3 tablespoons of heavy cream, stirring constantly until smooth and fully melted. This homemade caramel will be incredibly rich and luxurious, perfect for your caramel thumbprint cookies.
-
The Magic of Flaky Salt
While optional, the addition of salt truly elevates these turtle cookies from good to extraordinary. The saltiness provides a beautiful balance to the intense sweetness of the caramel and chocolate, creating a more complex and satisfying flavor profile that keeps you coming back for more. I wholeheartedly recommend it! Any flaky salt will work wonderfully, such as high-quality sea salt flakes, kosher salt, or the delicate Fleur de Sel. Sprinkle it immediately after filling with caramel for best adherence and visual appeal.
-
Chocolate Drizzle Perfection
For the chocolate drizzle, both semi-sweet chocolate chips or melting wafers work excellently. The goal is a smooth, free-flowing chocolate. If you find your melted chocolate is too thick to drizzle smoothly, don’t fret! Simply stir in about ½ teaspoon of coconut oil or shortening. This will thin out the chocolate, giving you a beautiful, flowing consistency perfect for an elegant finish without compromising flavor. Ensure the chocolate is not too hot when mixing, as this can affect its texture and make it seize.
-
Dough Handling: The Sticky Situation
If your cookie dough feels excessively sticky and challenging to roll into neat balls, don’t hesitate to refrigerate it. Chilling the dough for 30-60 minutes will firm it up considerably, making it much easier to handle and shape into perfect, uniform balls. This also has the added benefit of helping to prevent the cookies from spreading too much during baking, ensuring they retain their classic thumbprint shape and thick edges.
-
Baking Precision
Keep a close eye on your cookies while they bake. They are ready when the edges are just set, and the centers still look slightly soft. Overbaking can lead to dry, crumbly cookies, detracting from that desirable brownie-like texture that makes these so special. Remember to re-press the indentations as soon as they come out of the oven for the neatest caramel wells; this is a critical step for a professional finish.
Freezing and Storing Your Turtle Thumbprint Cookies
These delicious caramel thumbprint cookies are perfect for making ahead, especially during busy holiday seasons, allowing you to enjoy fresh-tasting treats with minimal effort on the day of your event. You have a couple of excellent options for freezing:
-
Freezing the Cookie Dough
You can prepare the chocolate cookie dough up to the point of forming the balls (before coating in egg white and pecans). Wrap the dough tightly in plastic wrap or place the unbaked dough balls on a baking sheet and freeze until solid. Once solid, transfer them to a freezer-safe, airtight bag or container. When you’re ready to bake, thaw the dough slightly in the refrigerator until pliable, then proceed with the egg white and pecan coating, indentation, baking, and decorating steps as usual. This is a fantastic time-saver for future baking!
-
Freezing Baked and Decorated Cookies
If you prefer to have fully finished cookies ready to go, you can freeze them after baking and decorating. Ensure the cookies have cooled completely and the caramel and chocolate have fully set and hardened. Arrange the cookies in a single layer on a baking sheet and freeze until solid. Once frozen, transfer them to an airtight freezer bag or container, placing parchment paper between layers to prevent sticking and maintain their beautiful appearance. They can be stored this way for up to 2-3 months without losing much quality.
To enjoy frozen cookies, simply allow them to come to room temperature for about 30-60 minutes before serving. This ensures the caramel softens to its gooey best and the cookie regains its tender texture. Stored at room temperature in an airtight container, these cookies will remain fresh and delightful for 3-5 days. Keep them away from direct sunlight or heat sources to maintain their quality.
More Festive Holiday Cookie Recipes to Explore
If you love baking for the holidays and are looking for more delicious treats to share with family and friends, here are some other fantastic Christmas and holiday recipes to add to your repertoire. These recipes are sure to bring joy and festive cheer to your kitchen:
- Christmas Crack (Cracker Toffee) – An addictive, easy-to-make brittle-like candy.
- Soft Homemade Caramels – Rich, chewy, and melt-in-your-mouth caramels.
- Peanut Butter Pretzel Balls – A sweet and salty no-bake treat.
- Meltaway Cookies – Delicate, buttery cookies that truly melt in your mouth.
- Soft Gingersnap Cookies – Spicy and chewy, a holiday classic.
- Pretzel Hugs – Simple, delightful chocolate and pretzel bites.
- Florentine Lace Cookies – Elegant, crispy, and caramel-laced cookies.
- Butter Pecan Cookies – Nutty and buttery, a truly comforting cookie.
- Cookie Dough Pretzel Bites – A creative no-bake combination of flavors.
- Decadent Chocolate Truffles – Rich, luxurious, and perfect for gifting.
- How to Make Peppermint Bark – A festive and refreshing holiday staple.
FOLLOW ME on PINTEREST, FACEBOOK, OR INSTAGRAM for more great recipes and baking inspiration! Share your creations with #TurtleThumbprintCookies!
Turtle Thumbprint Cookies
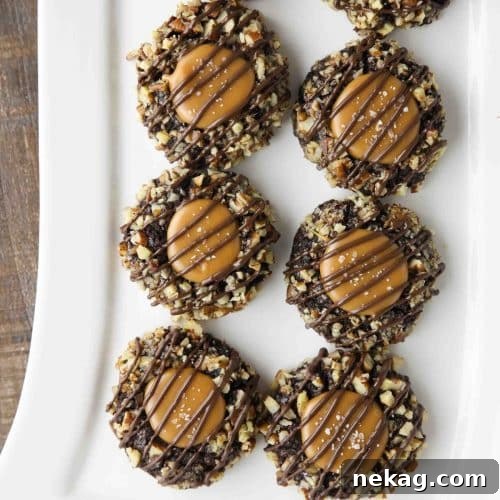
Turtle Thumbprint Cookies are made with a soft chocolate cookie, coated in pecans, filled with caramel, sprinkled with salt, and drizzled with chocolate. The perfect Christmas cookie!
Pin Recipe
Rate This Recipe
Save Recipe
Yields: 20 cookies
Ingredients
Cookie:
- 1 cup (120 g) all-purpose flour
- ⅓ cup (27 g) cocoa powder
- ¼ tsp salt
- ½ cup (113 g) butter, (1 stick) room temperature
- ⅔ cup (134 g) granulated sugar
- 1 large egg, SEPARATED (you’ll use the yolk in the dough, white for coating)
- 2 Tbsp milk
- 1 tsp vanilla extract
- 1 cup (112 g) pecans, finely chopped
Caramel:
- ¾ cup (144 g) caramel bits
- 1 ½ tsp water
- ½ tsp flaky sea salt, (kosher salt, or Fleur de Sel)
Chocolate:
- ¼ cup (43 g) semi-sweet chocolate chips
- ½ tsp coconut oil or shortening, optional for thinning chocolate
Equipment
- #50 Cookie Scoop
- Silicone Baking Mat
- Aluminum Half Sheet Tray (2 Pack)
- Stand Mixer (with paddle attachment)
- Mixing Bowls
- Whisk
- Measuring Spoons & Cups
Instructions
- Preheat oven to 350 degrees Fahrenheit. Line cookie sheet(s) with parchment paper or a silicone baking mat.
- FOR THE COOKIE DOUGH: In a medium bowl, combine flour, cocoa powder, and salt. Whisk briefly to combine, then set aside.
- In the bowl of a stand mixer fitted with the paddle attachment, cream together the softened butter and granulated sugar until the mixture is light and fluffy, about 2-3 minutes.
- Add the egg yolk (reserving the egg white for coating), milk, and vanilla extract to the creamed mixture. Beat until well incorporated, scraping down the sides of the bowl as needed.
- Gradually add the dry flour mixture to the wet ingredients, mixing on low speed until just combined. Be careful not to overmix, as this can result in tough cookies.
- In a separate small bowl, whisk the reserved egg white until it becomes frothy. Place the finely chopped pecans in another shallow bowl.
- Using a #50 scoop (about 1.5 tablespoons) or a rounded tablespoon, portion out the cookie dough into balls. Roll each ball in the palms of your hands to make it smooth.
- Dip each dough ball first into the frothy egg white, ensuring it’s fully coated, then roll it generously in the chopped pecans until completely covered.
- Place the coated dough balls onto the prepared baking sheets, spacing them a couple of inches apart to allow for spreading.
- Using a ½ teaspoon measuring spoon, gently press an indentation into the center of each dough ball. This will be the well for the caramel.
- Bake for 12-14 minutes, or until the edges are just set and the centers still look slightly soft.
- Immediately after removing the cookies from the oven, gently re-press the indentations with the ½ teaspoon measuring spoon while the cookies are still warm. This helps maintain a clear well for the caramel. Allow cookies to cool completely on the baking sheet for a few minutes before transferring to a wire rack.
- FOR THE CARAMEL FILLING: In a microwave-safe bowl, combine the caramel bits with water. Microwave on HALF POWER in short 30-second bursts, stirring thoroughly between each interval, until the caramel is completely melted and smooth.
- Scoop approximately ½ teaspoon of the melted caramel into the center of each indented cookie.
- Immediately sprinkle a small pinch of flaky sea salt (or kosher salt/Fleur de Sel) over the caramel in each cookie. This adds a delightful salty-sweet contrast.
- FOR THE CHOCOLATE DRIZZLE: In another microwave-safe bowl, melt the semi-sweet chocolate chips on HALF POWER in short 30-second bursts, stirring between each interval, until smooth. If the chocolate is too thick for drizzling, stir in ½ teaspoon of coconut oil or shortening until well combined and smooth.
- Transfer the melted chocolate to a small zip-top plastic bag. Snip a tiny corner off the bag to create a fine opening. Drizzle the chocolate decoratively over the tops of the caramel-filled cookies.
- Allow the cookies to rest at room temperature until the chocolate and caramel have fully set. This may take 30 minutes to an hour, or you can speed it up by chilling them briefly in the refrigerator.
Recipe Video
Watch this quick video to see how easily these delightful Turtle Thumbprint Cookies come together, from dough to dazzling finish!
Notes
- If the cookie dough seems too sticky to handle and roll easily, refrigerate it for 30-60 minutes. This will firm it up, making it much easier to work with and prevent excessive spreading.
- Store these decorated Turtle Thumbprint Cookies in an airtight container at room temperature for up to 3-5 days to maintain their freshness and soft texture. For longer storage, refer to the freezing instructions above.
Nutrition Information
Serving: 1 cookie | Calories: 139 kcal | Carbohydrates: 22g | Protein: 2g | Fat: 6g | Saturated Fat: 1g | Polyunsaturated Fat: 4g | Cholesterol: 10mg | Sodium: 163mg | Fiber: 1g | Sugar: 15g
Disclaimer: Nutritional values were calculated using a third-party tool and are provided as an estimation only. Individual results may vary based on ingredients and preparation methods.
Sharing this recipe with a link is both encouraged and appreciated. Copying/pasting and/or screenshots of full recipes to any social media is strictly prohibited. Content and photographs are copyright protected.
Did you make these delicious cookies?
We’d love to hear about your baking success! Don’t forget to leave a rating below and share your photos. Make sure to follow on Pinterest and Instagram for more baking inspiration and delightful dessert ideas!
*Originally published 12/14/12. Updated 11/29/20. This content has been further revised and expanded for clarity, SEO, and an enhanced reader experience, ensuring you have all the tips for perfect holiday baking.