
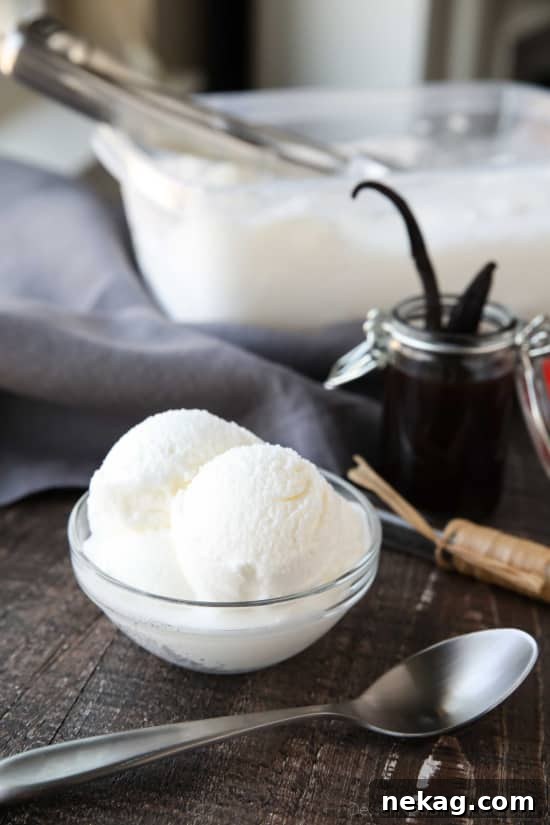
Easy Homemade Vanilla Ice Cream: No Eggs, No Cooking, Just Pure Delight
Experience the pure joy of homemade vanilla ice cream with this incredibly simple recipe. Crafted with or without cream – using just milk – this delightful dessert requires no eggs and absolutely no cooking. Perfect for beating the summer heat or simply satisfying a sweet craving, this recipe promises a smooth, refreshing treat for everyone.
As the temperatures soar and summer graces us with its warmth, there’s nothing quite as satisfying as a scoop of cool, refreshing ice cream. This year, we’ve found the ultimate solution to stay chill: our new ice cream maker attachment for the Bosch Mixer. It integrates seamlessly with the mixer, making the ice cream-making process not just easy, but an absolute breeze. With just ice and rock salt, you’re all set to churn your way to frosty perfection.
The Undeniable Appeal of Homemade Ice Cream
There’s a unique charm to homemade ice cream that store-bought varieties simply can’t replicate. It’s the fresh ingredients, the customizable flavors, and the sheer joy of creating something delicious from scratch. Beyond the delicious taste, making your own ice cream offers several benefits:
- **Control Over Ingredients:** You know exactly what goes into your ice cream, allowing you to choose high-quality milk, natural sweeteners, and pure vanilla extract. This is especially great for those with dietary preferences or allergies.
- **Customization Galore:** From classic vanilla to adventurous flavor combinations, homemade ice cream is your canvas. Add fruits, chocolates, nuts, or swirls to make it uniquely yours.
- **A Fun Family Activity:** Making ice cream can be a wonderful activity for all ages. Kids love to help with mixing ingredients and watching the machine churn, making it a memorable experience.
- **Freshness You Can Taste:** Enjoy ice cream at its peak freshness, right after it’s churned. The flavors are more vibrant, and the texture is incomparably smooth.
- **Cost-Effective:** Often, making ice cream at home can be more economical than regularly buying premium tubs from the store, especially if you enjoy it frequently.
Introducing Our Simple, No-Fuss Vanilla Ice Cream
Our quest was to develop an ice cream recipe that could be whipped up with ingredients almost always found in any pantry. The result? A fantastic vanilla ice cream made purely from milk, granulated sugar, and vanilla extract. This recipe stands out because it cleverly bypasses the need for eggs and any stovetop cooking, making it incredibly accessible and quick.
The beauty of this recipe lies in its simplicity. You just combine the milk, sugar, and vanilla extract, whisking until the sugar has completely dissolved. Once your base is ready, pour it into your ice cream maker, and let the machine work its magic. In approximately 30 minutes (though this can vary depending on your specific machine), you’ll have delicious, freshly churned vanilla ice cream. This method eliminates complex tempering of eggs or chilling custards overnight, giving you more time to enjoy your dessert.
The secret to achieving delicious ice cream with your maker lies in the ice and rock salt. The salt lowers the freezing point of the ice, creating an intensely cold environment that freezes your liquid ice cream base quickly and efficiently. This rapid freezing process helps create smaller ice crystals, contributing to a smoother texture. Ensure you have a good supply of both to get the best results from your machine.
Mastering the Texture: Milk vs. Cream (and Other Options)
When it comes to ice cream, fat content plays a crucial role in determining the final texture. Traditional creamy ice cream often relies on a significant amount of dairy fat, typically from heavy cream or a custard base made with egg yolks. This recipe offers a unique alternative by focusing on milk, which results in a distinct, delightful texture.
Important Note on Texture: When using milk alone, the ice cream will not have the same rich, dense creaminess of a heavy cream-based or custard-style ice cream. Instead, the texture is more akin to a fine Italian ice or a light, powdery snow that dissolves beautifully in your mouth. While it delivers the sweet, familiar taste of vanilla, expect a refreshing, slightly icy mouthfeel rather than a heavy, custardy one. It’s a fantastic choice for those who prefer a lighter dessert or are looking to reduce dairy fat.
Exploring Milk Options
For this recipe, we prefer whole milk for its slightly higher fat content compared to skim or 2% milk. While any type of milk will work, it’s important to understand the impact: the lower the fat content, the more icy the texture will be. For instance, skim milk will yield a very icy, almost sorbet-like consistency, whereas whole milk provides a bit more body and a slightly softer chew.
The Half & Half Experiment
To bridge the gap between pure milk and heavy cream, we experimented with Half & Half (a blend of half whole milk and half heavy cream). This yielded an ice cream that was noticeably creamier than the pure milk version, offering a delightful compromise. However, it still didn’t achieve the ultra-rich, dense texture found in a custard-based ice cream. If you desire a slightly creamier result without committing to full heavy cream, Half & Half is an excellent choice.
A Non-Fat Alternative: Frozen Yogurt
For those seeking a truly creamy texture in a non-fat dessert, our Triple Berry Frozen Yogurt recipe offers an exceptional solution. Made with half skim milk and half non-fat Greek yogurt, this recipe surprisingly achieves a texture that closely mimics a custard-based ice cream. The Greek yogurt contributes significantly to its body and creaminess, making it a fantastic, healthier alternative for satisfying your ice cream cravings without the added fat.
Elevating Your Easy Vanilla Ice Cream
This simple vanilla base is a fantastic foundation for endless creativity. My kids absolutely adore this ice cream, and we’ve already made three batches – with many more to come! To make it extra special, we often customize it with various toppings and mix-ins:
- **Fresh Fruit:** Sliced strawberries, blueberries, raspberries, or peaches add a burst of natural sweetness and a refreshing tang.
- **Crushed Cookies:** Crushed Oreos, graham crackers, or shortbread cookies introduce wonderful texture and flavor contrasts.
- **Chocolate Goodness:** Chocolate chips, chocolate syrup, or a sprinkle of cocoa powder are always a hit.
- **Caramel or Fudge:** A drizzle of warm caramel or hot fudge sauce takes this simple treat to a decadent level.
- **Nuts and Sprinkles:** Chopped pecans, walnuts, or colorful sprinkles add a fun crunch and visual appeal.
- **Flavor Extracts:** While vanilla is classic, consider adding a touch of almond, peppermint, or even coffee extract for different flavor profiles.
The versatility of this base recipe means you can constantly experiment and discover new favorite combinations, making every batch a unique experience.
Tips for Ice Cream Making Success
Even with an easy recipe, a few tips can ensure your homemade ice cream turns out perfectly every time:
- **Chill Your Base:** While this recipe doesn’t require cooking, chilling the milk mixture for at least 30 minutes (or even an hour) in the refrigerator before churning can help it freeze faster and result in a smoother consistency.
- **Pre-freeze Your Bowl:** If your ice cream maker has a freezer bowl, make sure it’s thoroughly frozen – ideally for 12-24 hours – before you begin. A properly chilled bowl is key to efficient churning.
- **Don’t Overfill:** Only fill your ice cream maker’s bowl to the recommended capacity. The mixture will expand as it freezes and churns.
- **Rock Salt is Key:** Don’t skimp on the rock salt! It’s essential for creating the super-cold brine that freezes the ice cream base. More salt typically means faster freezing.
- **Monitor Churning:** Keep an eye on your ice cream during churning. It’s ready when it reaches a soft-serve consistency. For a firmer ice cream, transfer it to an airtight container and freeze for an additional 2-4 hours.
- **Airtight Storage:** Store leftover ice cream in a freezer-safe, airtight container to prevent ice crystals from forming and maintain its texture. Press a piece of parchment paper directly onto the surface of the ice cream before sealing for added protection.
Frequently Asked Questions
Can I make this ice cream without an ice cream machine?
Yes, you can! Pour the mixture into a shallow freezer-safe dish. Place it in the freezer and stir thoroughly every 2-4 hours, especially once ice crystals begin to form around the edges. A fork or potato masher can be useful for scraping and fluffing the mixture as it solidifies, helping to break up larger ice crystals for a smoother result. This method requires more manual effort but yields a surprisingly good outcome.
Why is my ice cream icy instead of creamy?
The primary reason for an icy texture is the fat content. This recipe, particularly when made with just milk, naturally produces a lighter, icier texture closer to Italian ice due to milk’s lower fat percentage. For a creamier result, consider using Half & Half or even a blend of milk and heavy cream (though this deviates from the “just milk” premise). Ensuring your ice cream maker bowl is very cold and the churning process is efficient also helps minimize large ice crystal formation.
How long does homemade ice cream last in the freezer?
When stored in an airtight, freezer-safe container, homemade ice cream typically lasts about 1-2 weeks. After that, its texture might degrade, and it can start to develop freezer burn, though it will remain safe to eat for longer.
Can I add different flavors?
Absolutely! This vanilla base is perfect for experimentation. Instead of (or in addition to) vanilla extract, you could try almond extract, peppermint extract, or even instant coffee granules dissolved in a small amount of milk. You can also mix in fruit purées, cocoa powder, or finely chopped nuts after the ice cream has partially churned.
Easy Vanilla Ice Cream
Pin
Rate
SaveSaved!
Ingredients
- 4 cups (946 ml) milk, (whole milk is preferred)
- 1 cup (200 g) granulated sugar
- 1 tsp vanilla extract
Other Items:
- 5 lbs (11.02 kg) ice cubes
- ½ cup (137 g) rock salt
Instructions
-
In a large bowl, whisk the milk, sugar, and vanilla together until the sugar dissolves. Pour into the bowl of an ice cream maker.
-
Layer cubed ice and rock salt around the ice cream bowl. (More salt will help the ice cream freeze faster.)
-
Secure lid on top of the ice cream bowl. Process for 20-30 minutes or as instructed for your specific ice cream maker, adding more ice and salt as needed.
-
Enjoy immediately as soft-serve ice cream, or place in a freezer-safe container and freeze 2-3 hours for a stiffer ice cream.
Video
Notes
NOTE: Since this is not a custard-based ice cream, the texture is more like Italian ice. Think of it like powdery snow that melts in your mouth with the creamy taste of sweetened milk.
NO ICE CREAM MACHINE: Pour the mixture into a shallow freezer-safe dish and put it in the freezer. Stir every 2-4 hours once ice crystals form. Tip: Use a fork or potato masher to scrape and fluff the ice cream mixture once it starts to solidify.
*Half & Half (or half milk and half heavy cream) works well too.
Sharing this recipe with a link is both encouraged and appreciated. Copying/pasting and/or screenshots of full recipes to any social media is strictly prohibited. Content and photographs are copyright protected.
Did you make this?
Don’t forget to leave a rating below and make sure to follow on Pinterest and Instagram for more!
Conclusion: Your Easiest Path to Homemade Bliss
In a world where elaborate recipes often deter us from culinary adventures, this easy vanilla ice cream stands out as a beacon of simplicity and pure delight. Whether you’re a seasoned dessert maker or a complete novice, this no-egg, no-cook, milk-based recipe empowers you to create a refreshing treat that perfectly embodies the spirit of summer. It’s a testament to how three basic ingredients can transform into something truly magical with minimal effort.
So, grab your milk, sugar, and vanilla, fire up your ice cream maker (or prepare for the no-machine method!), and get ready to indulge in a bowl of homemade happiness. This versatile base invites you to experiment with your favorite toppings and mix-ins, ensuring every serving is a personalized masterpiece. Enjoy the simple pleasures, one scoop at a time!