
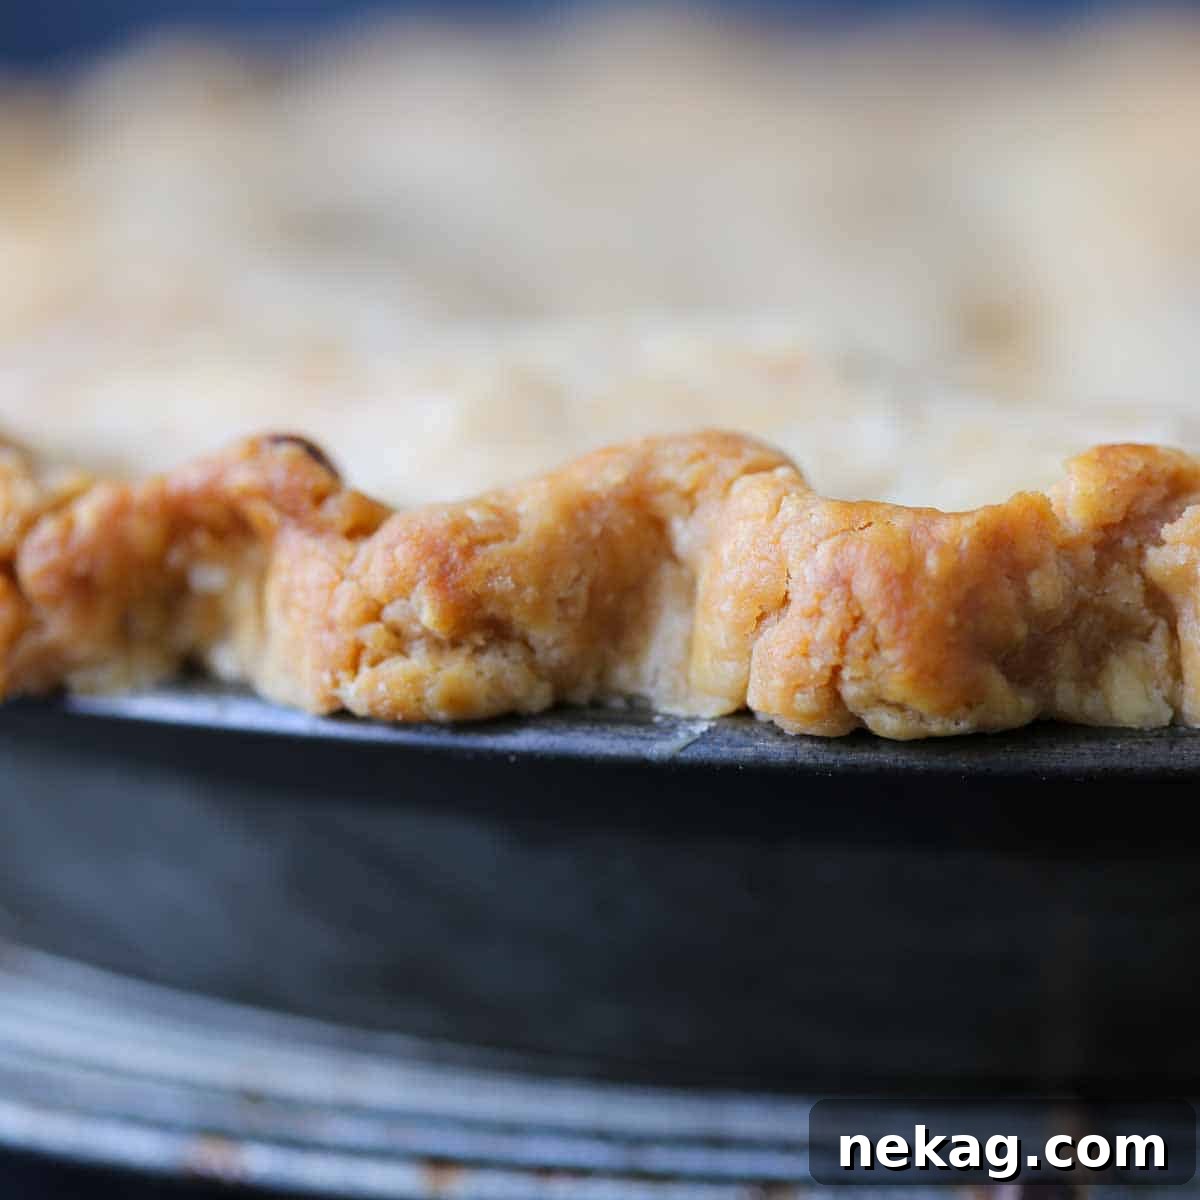
Welcome to the definitive guide for crafting the most **tender, flaky, and incredibly easy Crisco Pie Crust Recipe**! This isn’t just any pie crust; it’s a professional pastry chef’s foolproof, 3-ingredient wonder designed to eliminate all your pie-making woes. Say goodbye to tough, shrunken crusts and hello to a golden, melt-in-your-mouth foundation for your favorite pies.
A Quick Look At The Recipe
This is a brief summary of the recipe. Jump to the recipe to get the full details and step-by-step instructions.
Jump to Recipe
Prep Time
15 minutes
Total Time
15 minutes
Servings
12 Slices
Difficulty
Easy
Calories *
217 kcal per serving
Technique
Mix dry ingredients, cut in frozen shortening, add cold water, chill, roll, and use for your pie!
Flavor Profile
Tender, crumbly, and flaky shortening pie crust with a neutral flavor.
* Based on nutrition panel for one slice.
Thank you Chef Lindsey. With your recipe & tips my apple pie was perfect. I also bought a kitchen scale & weighed my ingredients. Best pie crust I’ve ever made in 60 years. Yay me!
⭐⭐⭐⭐⭐Linda Adam
This exceptional Crisco pie crust recipe first gained acclaim back in 2013, gracing our Old-Fashioned Peach Pie, and has since rightfully earned its place as one of my all-time favorite pie crusts. Its remarkable tenderness, delicate crumbliness, and signature flakiness make it truly stand out. The unique properties of shortening ensure this crust is incredibly easy to work with, making it the perfect choice for both seasoned bakers and eager novices looking to master the art of pie making.
The versatility of this shortening pie crust is one of its greatest assets. You can effortlessly substitute it for a traditional vodka all-butter pie crust in classic desserts like a luscious Mixed Berry Pie, a vibrant Amazing Blueberry Pie, or an Easy Foolproof Pumpkin Pie. It would also be a delightful alternative to the almond flour pie crust featured in my popular Strawberry Rhubarb Pie, offering a different texture profile. For ultimate convenience, consider making a large batch of this dough. Store it securely in your freezer, and you’ll always be just a few steps away from baking that truly is **easy as pie**! This makes impromptu baking or holiday preparations a breeze.
Table of Contents
- Why You Will Love This Crisco Pie Crust Recipe
- Professional Tips for Crafting the Perfect Crisco Pie Crust
- Essential Ingredients for Your Crisco Pie Crust
- How to Make a Flawless Crisco Pie Crust: Step-by-Step Guide
- Chef Lindsey’s Recipe Tip: Understanding Shortening Crusts
- Frequently Asked Questions About Crisco Pie Crust
- Crisco Pie Crust Recipe Card
- Before You Go: Explore More Pie Creations
Why You Will Love This Crisco Pie Crust Recipe
This Crisco pie crust isn’t just a recipe; it’s an invitation to rediscover the joy of baking with confidence. Here’s why it will become your go-to:
- Achieve a Truly Tender, Flaky Pie Crust. Prepare for a pie crust that literally melts in your mouth! While butter crusts offer distinct layers of flakiness, shortening creates a different, yet equally delightful, texture. Its unique fat structure distributes more evenly throughout the flour, inhibiting excessive gluten development. This results in a crust that is remarkably tender, exquisitely crumbly, and still wonderfully crisp – a true testament to the magic of Crisco.
- An Easy, No-Shrink Shortening Crust for Everyone. If you’ve ever battled a pie crust that stubbornly shrinks in the oven, this recipe is your savior. Shortening’s higher melting point and 100% fat content (compared to butter’s approximately 80% fat and 20% water) make it inherently more stable. This stability translates into a dough that’s easier to handle, less prone to shrinking, and incredibly forgiving for beginner bakers. With just three core ingredients plus water, you’re set for success every single time, making pie fails a thing of the past!
- Delicate Flavor That Lets Your Pie Filling Shine. One of the often-underestimated benefits of a shortening crust is its neutral flavor profile. Unlike butter, which imparts a rich, distinct taste, Crisco allows the vibrant flavors of your pie filling to take center stage. This is particularly crucial when baking delicate fruit pies like a succulent peach pie or a tart cherry pie, where the natural fruit flavors are paramount. The crust provides the perfect textural contrast and a subtle richness without competing for attention, ensuring your pie is a harmonious symphony of tastes.
Professional Tips for Crafting the Perfect Crisco Pie Crust
Achieving a truly exceptional pie crust involves a few insider tricks. As a professional pastry chef, I’ve honed these techniques to guarantee outstanding results every time:
- Always Keep Your Crisco Frozen. This is perhaps the most critical tip for shortening-based crusts. I make it a practice to store my Crisco vegetable shortening in the freezer at all times. Even when frozen solid, shortening remains surprisingly soft and pliable, which makes both measuring and cutting it into your flour mixture significantly easier. The extreme cold helps prevent the shortening from melting too quickly as you work, ensuring it stays in distinct pieces until it hits the hot oven. This controlled melting process is key to preventing overmixing and achieving that tender, flaky texture.
- Precision in Measuring Crisco (Two Ways). Whether you’re using a large tub or convenient sticks of Crisco, accurate measurement is vital. If you have a tub, simply use a silicone spatula to firmly press the shortening into your measuring cup, ensuring no air pockets, then level it off. Scoop it out directly onto your pre-measured flour mixture. For Crisco sticks, they’re often pre-marked, making cubing them straightforward. While precise cubing is helpful, remember that the goal is to break up the fat, so absolute uniformity isn’t as critical as ensuring the shortening is thoroughly chilled and incorporated into small pieces.
- Embrace Delicacy: Avoid Overworking the Dough. While shortening crusts are famously more forgiving and less prone to shrinking compared to an all-butter pie crust, a light hand is still your best friend. Overworking the dough develops gluten excessively, which is the primary culprit behind tough, chewy crusts. The less you handle the dough, the more delicate and tender your final pie crust will be. Mix just until the ingredients are combined and the dough comes together. Think of it as gently coaxing the ingredients into submission, rather than aggressively kneading them.
Essential Ingredients for Your Crisco Pie Crust
This recipe shines with its simplicity, requiring just a few high-quality ingredients to create a truly spectacular pie crust. Here’s a closer look at what you’ll need and why each component is vital:
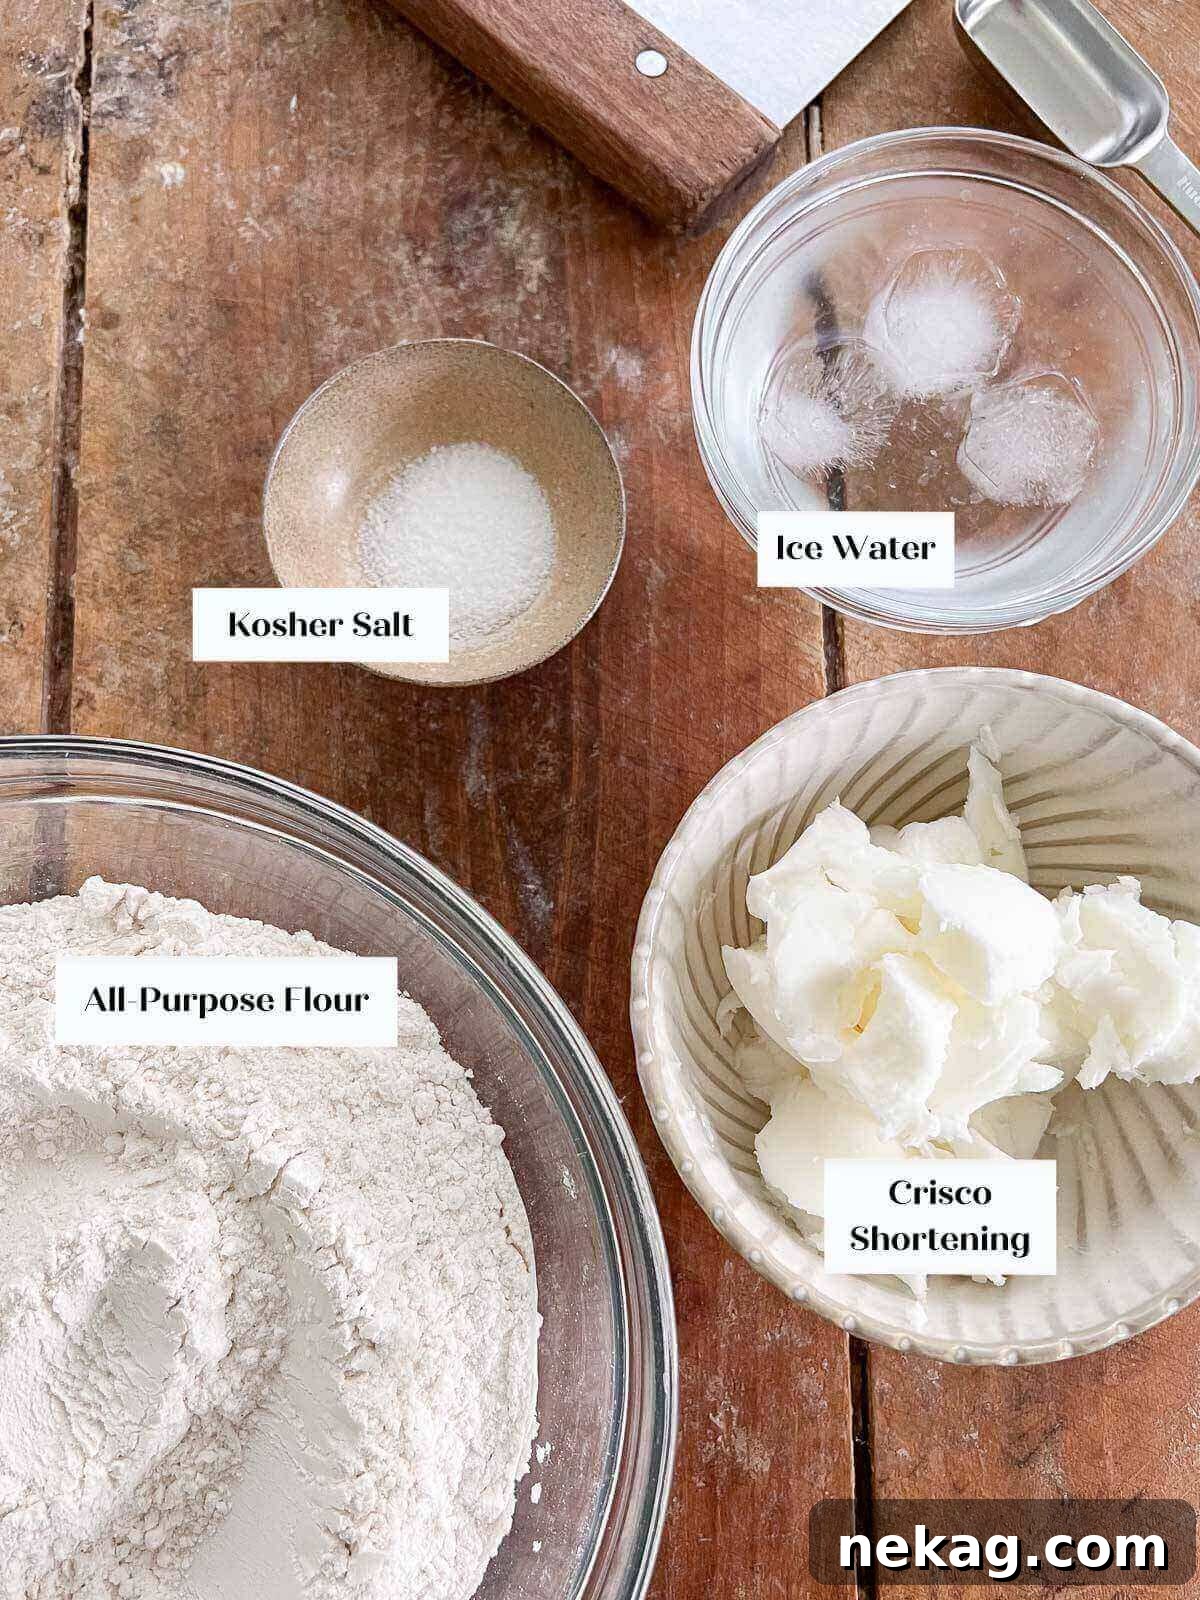
- All-purpose Flour: The foundation of our crust. I consistently use standard all-purpose flour, which provides a balanced gluten structure for tenderness and strength. For an even more delicate, melt-in-your-mouth pie crust, you could experiment with pastry flour, which has a lower protein content. Always remember to measure your flour accurately, ideally by weight for the most consistent results, or by lightly spooning it into a measuring cup and leveling it off.
- Kosher Salt: This isn’t just for seasoning; it’s a flavor enhancer and structural aid. I exclusively use kosher salt in my baking. Its coarser texture and pure flavor heighten the overall taste of the crust, preventing it from tasting bland or “flat.” It also subtly strengthens the gluten network, contributing to a desirable texture.
- Shortening: The star of this tender pie crust. My top recommendation is to freeze your Crisco vegetable shortening before use. Shortening, unlike butter, remains pliable even when frozen, making it incredibly easy to cut into the flour mixture. Its higher melting point and pure fat composition create a uniquely tender and crumbly crust texture, and it warms up faster than butter, making it quicker to work with from the freezer.
- Ice-Cold Water: The crucial binding agent. I always measure out a little extra water than needed, add several ice cubes, and then chill it in the refrigerator until I’m ready to incorporate it into the dough. The cold temperature is vital; it prevents the shortening from melting prematurely and inhibits gluten development, which ensures your crust remains tender and doesn’t become tough.
Refer to the detailed recipe card below for the precise measurements and quantities of these essential ingredients.
How to Make a Flawless Crisco Pie Crust: Step-by-Step Guide
Follow these meticulously crafted instructions to create the perfect Crisco Pie Crust every single time. Detailed measurements and additional tips can be found in the comprehensive recipe card below.
Step 1: Combine Dry Ingredients and Prepare Shortening. In a medium-sized mixing bowl, thoroughly whisk together your all-purpose flour and kosher salt. Meanwhile, take your frozen Crisco shortening and cut it into small cubes, or simply spoon it into rough chunks. Add these cold shortening pieces directly into your dry flour mixture.
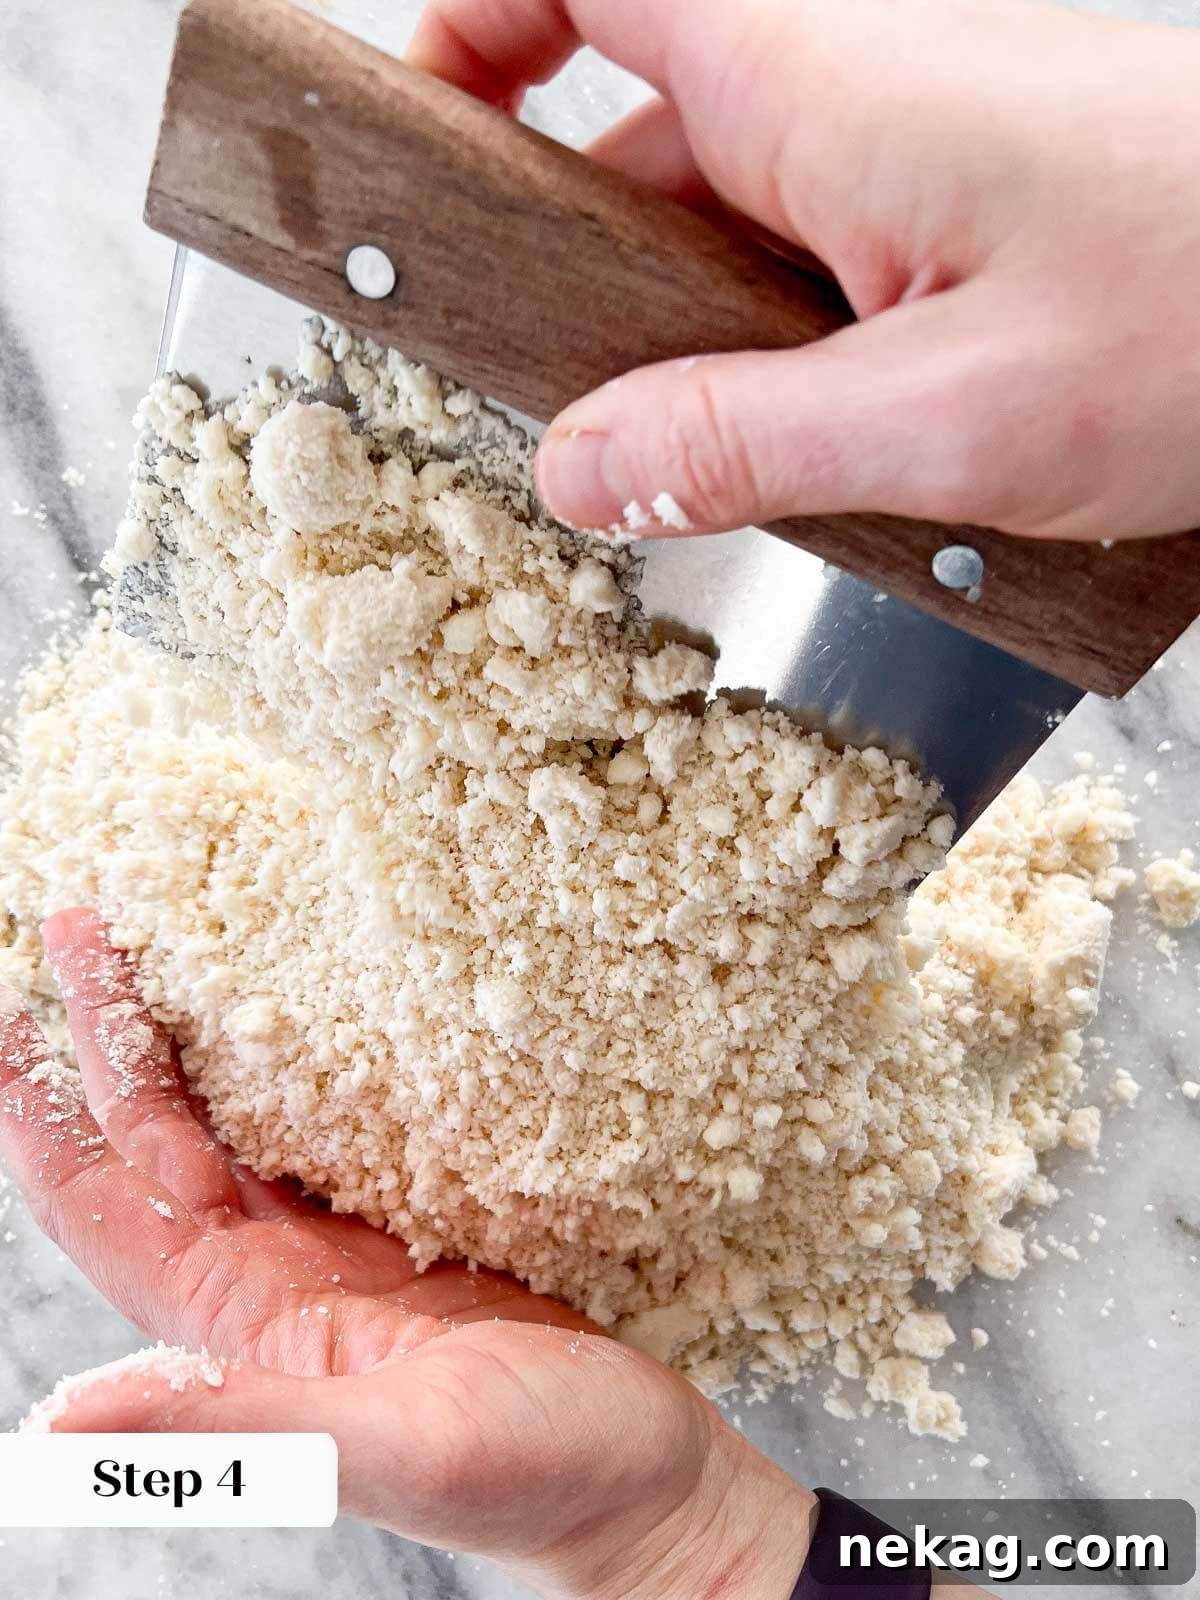
Step 2: Cut the Shortening into the Flour. Using your preferred tool – whether it’s a pastry blender, a bench scraper, or the paddle attachment of a stand mixer set to a low speed – begin to cut the shortening into the flour. Continue this process until the mixture transforms into a texture resembling coarse crumbs. Unlike butter crusts, where you might leave pea-sized chunks of butter, for a Crisco crust, you want to ensure there are no visible pieces of shortening remaining. The goal is a uniform, crumbly texture, which ensures maximum tenderness.
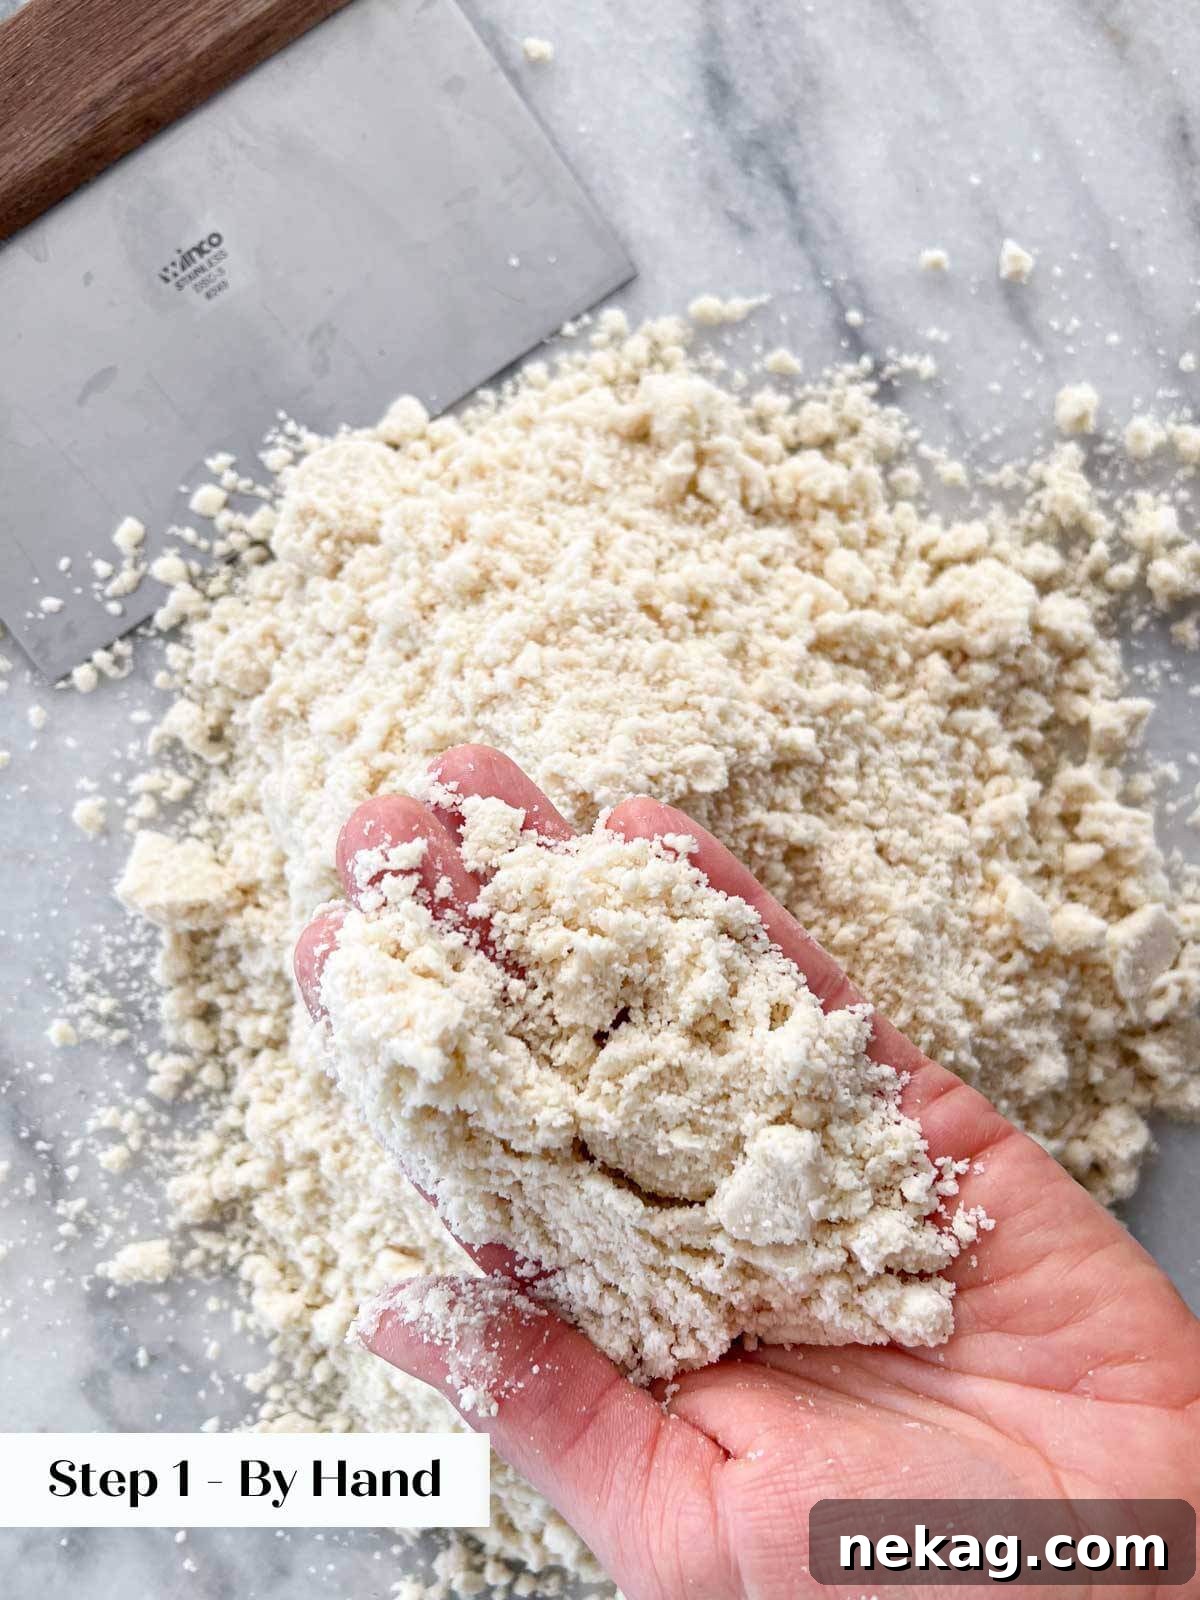
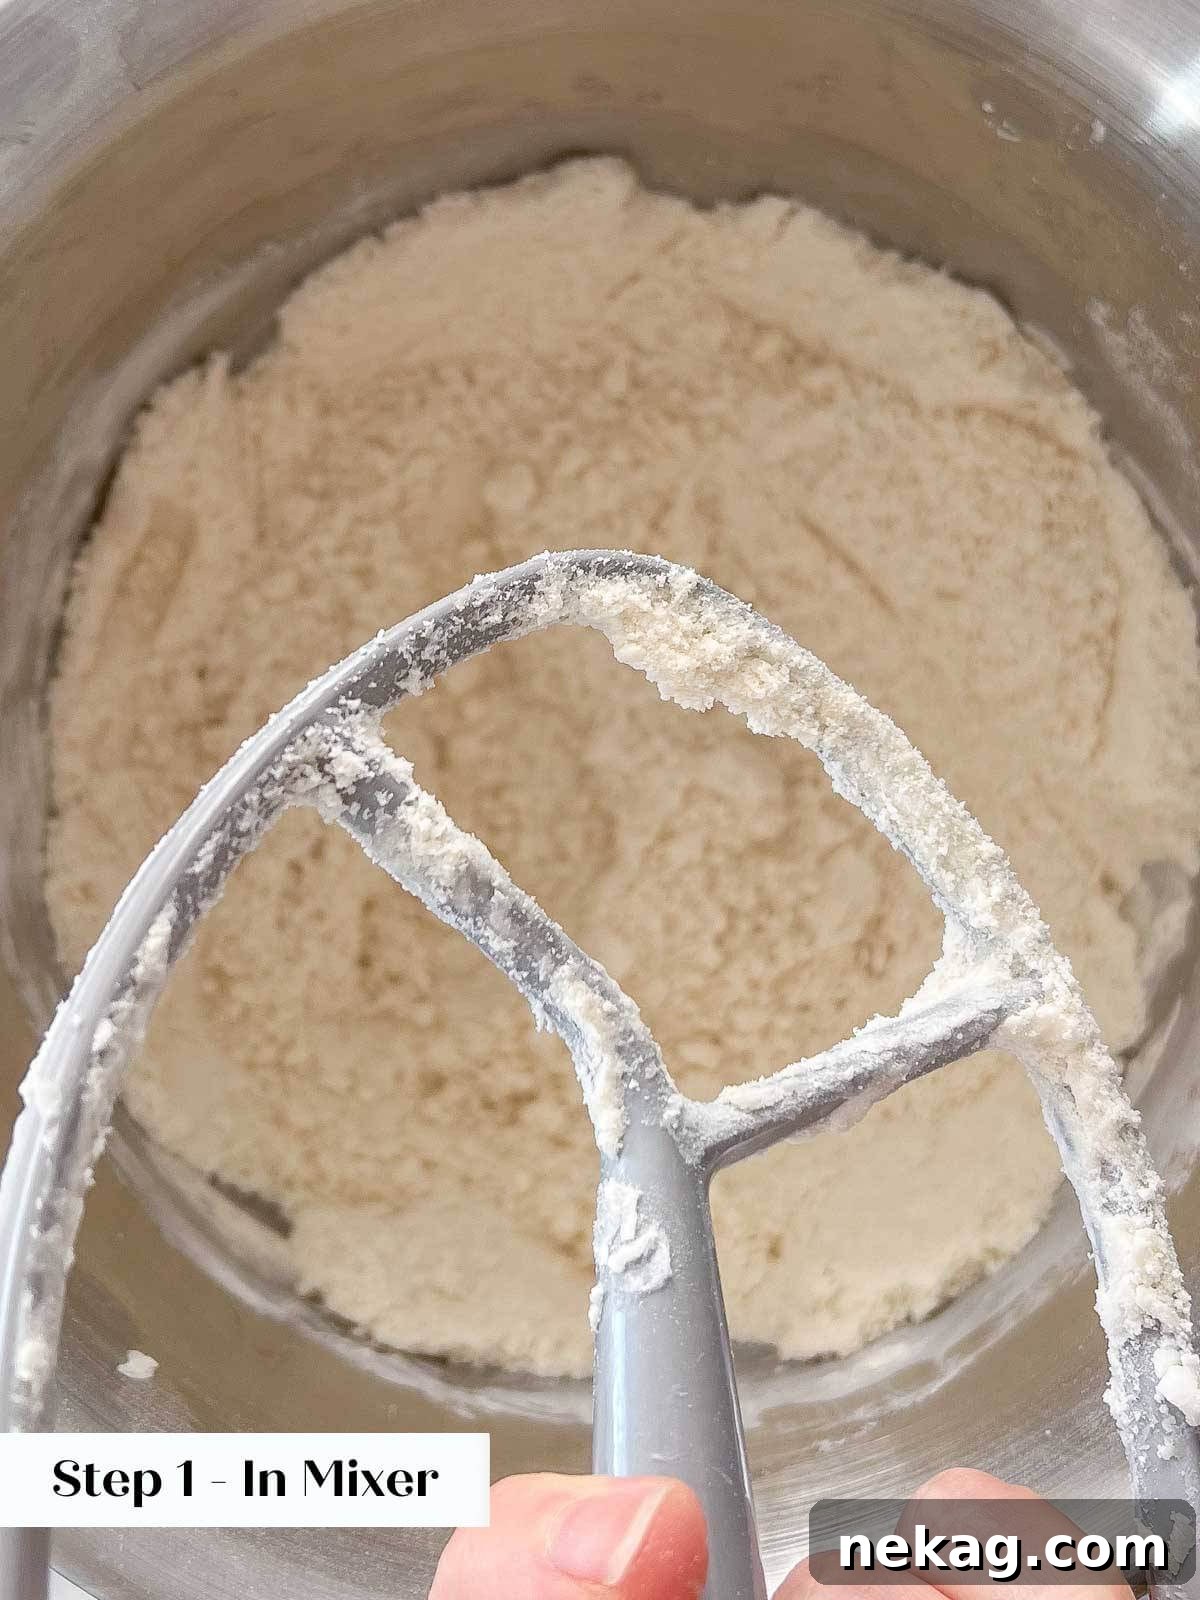
It’s important to understand a key distinction here: unlike with butter pie crusts, where leaving some unincorporated chunks of butter is desired for flakiness, with shortening, you don’t want visible pieces. Shortening behaves differently in the hot oven; it doesn’t evaporate in the same way as the water content in butter. For the most consistently tender and crumbly crust, ensure your shortening is thoroughly cut in.
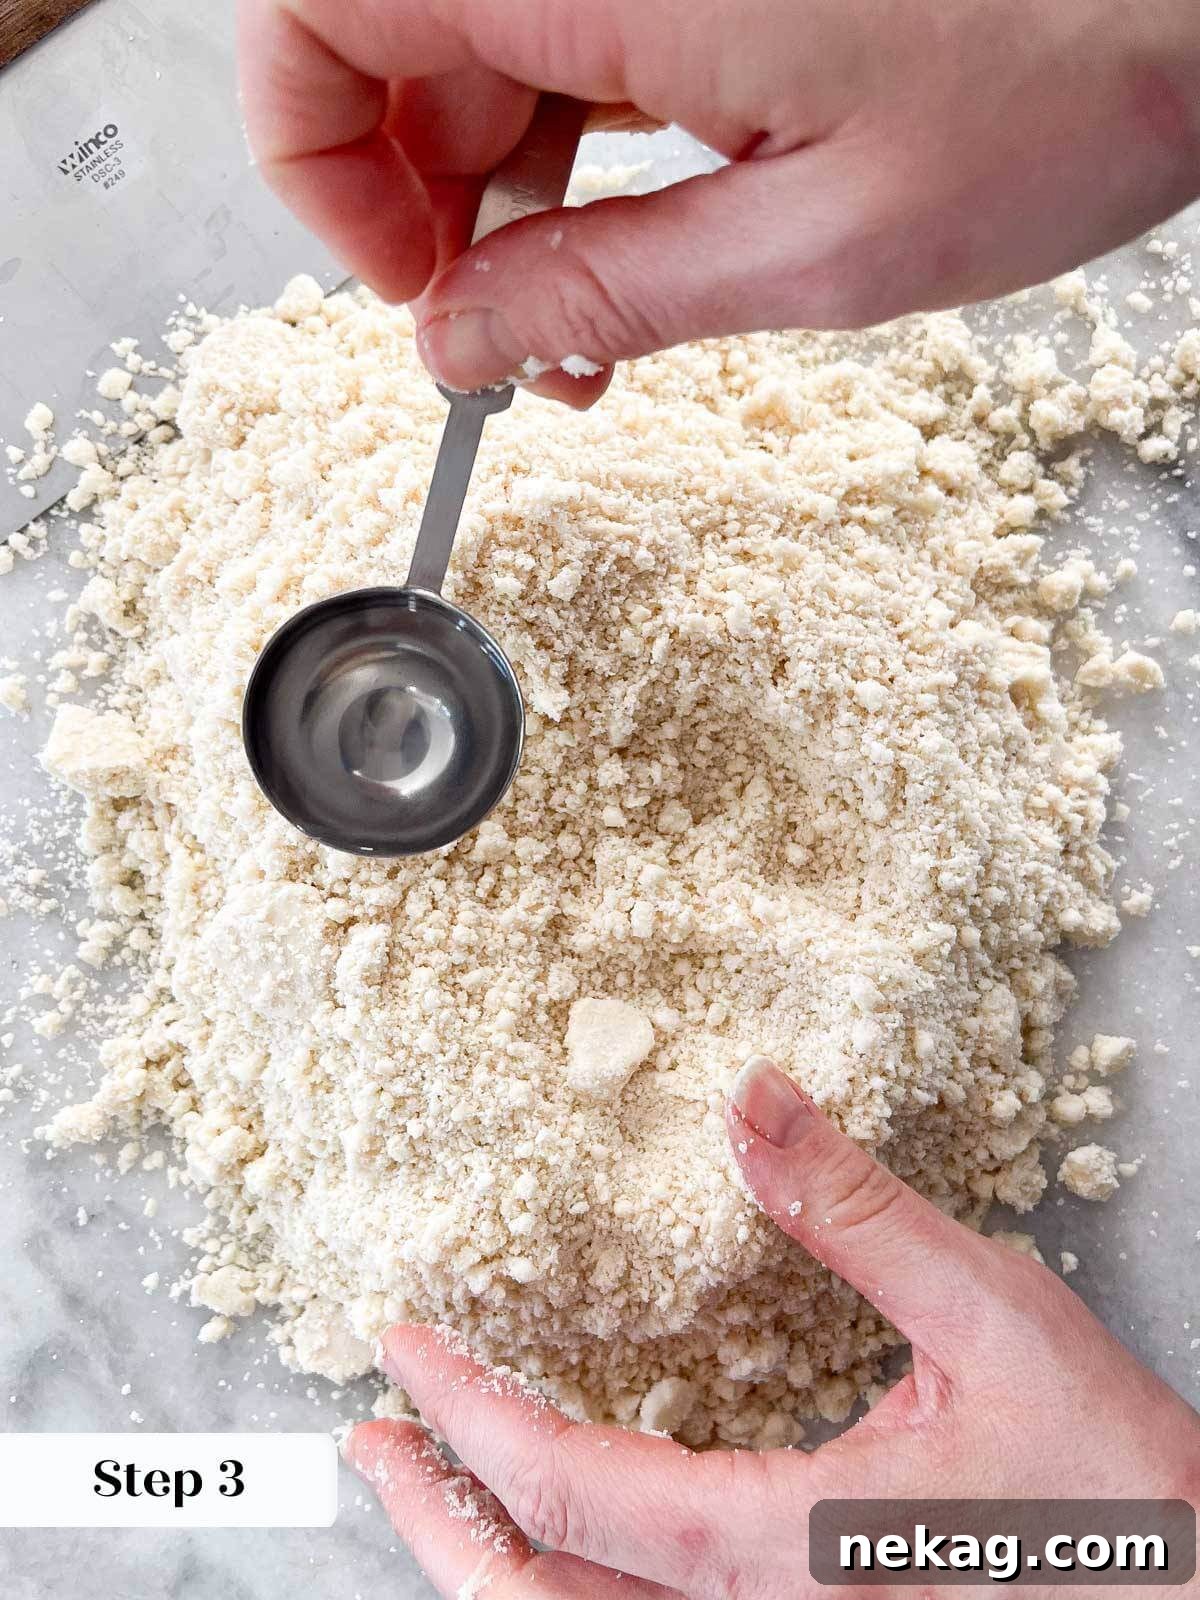
Step 3: Gradually Add Ice-Cold Water. If you’ve used a stand mixer, carefully transfer the crumbly mixture into a clean bowl or onto a smooth, lightly floured surface. Now, begin to add your ice-cold water, one tablespoon at a time. The key is to introduce the water slowly and incrementally, allowing the flour to absorb it without becoming oversaturated.
Step 4: Gently Toss Until Just Combined. With a bench scraper or a sturdy fork, gently toss the mixture. The goal is for the dough to just barely hold together. You’re looking for a consistency where it’s no longer dry and crumbly, but also not sticky or wet. Avoid kneading or pressing the dough excessively. Stop as soon as it forms a cohesive mass, as overmixing at this stage can lead to a tough crust.
Step 5: Divide, Shape, and Chill the Dough. If your recipe calls for two single-crust pies, divide the dough neatly in half. For double-crust pies (especially those without a lattice top), I often find it beneficial to split the dough into a 2/3 portion for the bottom crust and a 1/3 portion for the top, allowing for a slightly thicker, more robust base. Gently press each portion into a flat disc – this shape makes rolling easier later. Wrap each disc tightly in plastic wrap, ensuring no air exposure, and refrigerate the dough for at least 30 minutes. This chilling period is crucial for hydrating the flour, firming up the shortening, and allowing the gluten to relax, which prevents shrinkage.
For double crust pies (where a solid top crust is used, not latticed) I like to split the dough 2/3 for the bottom and 1/3 for the top. This provides a sturdy base and a lighter top.
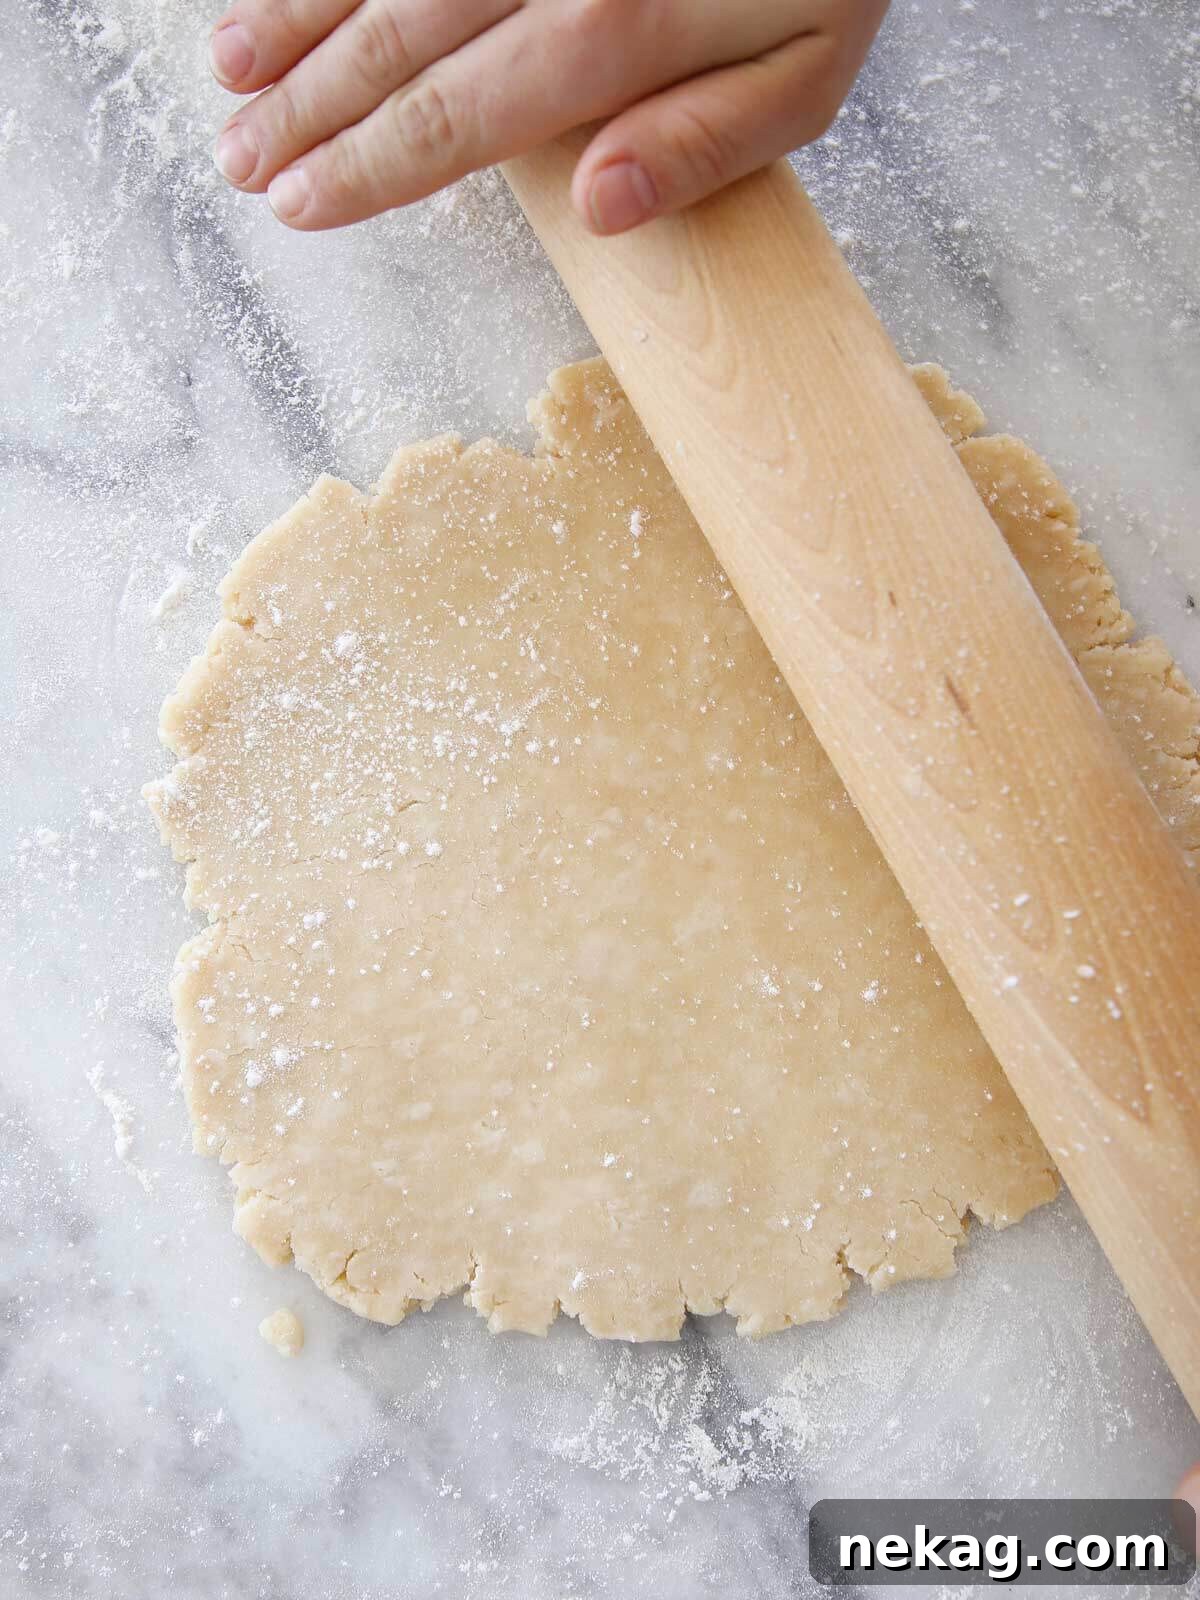
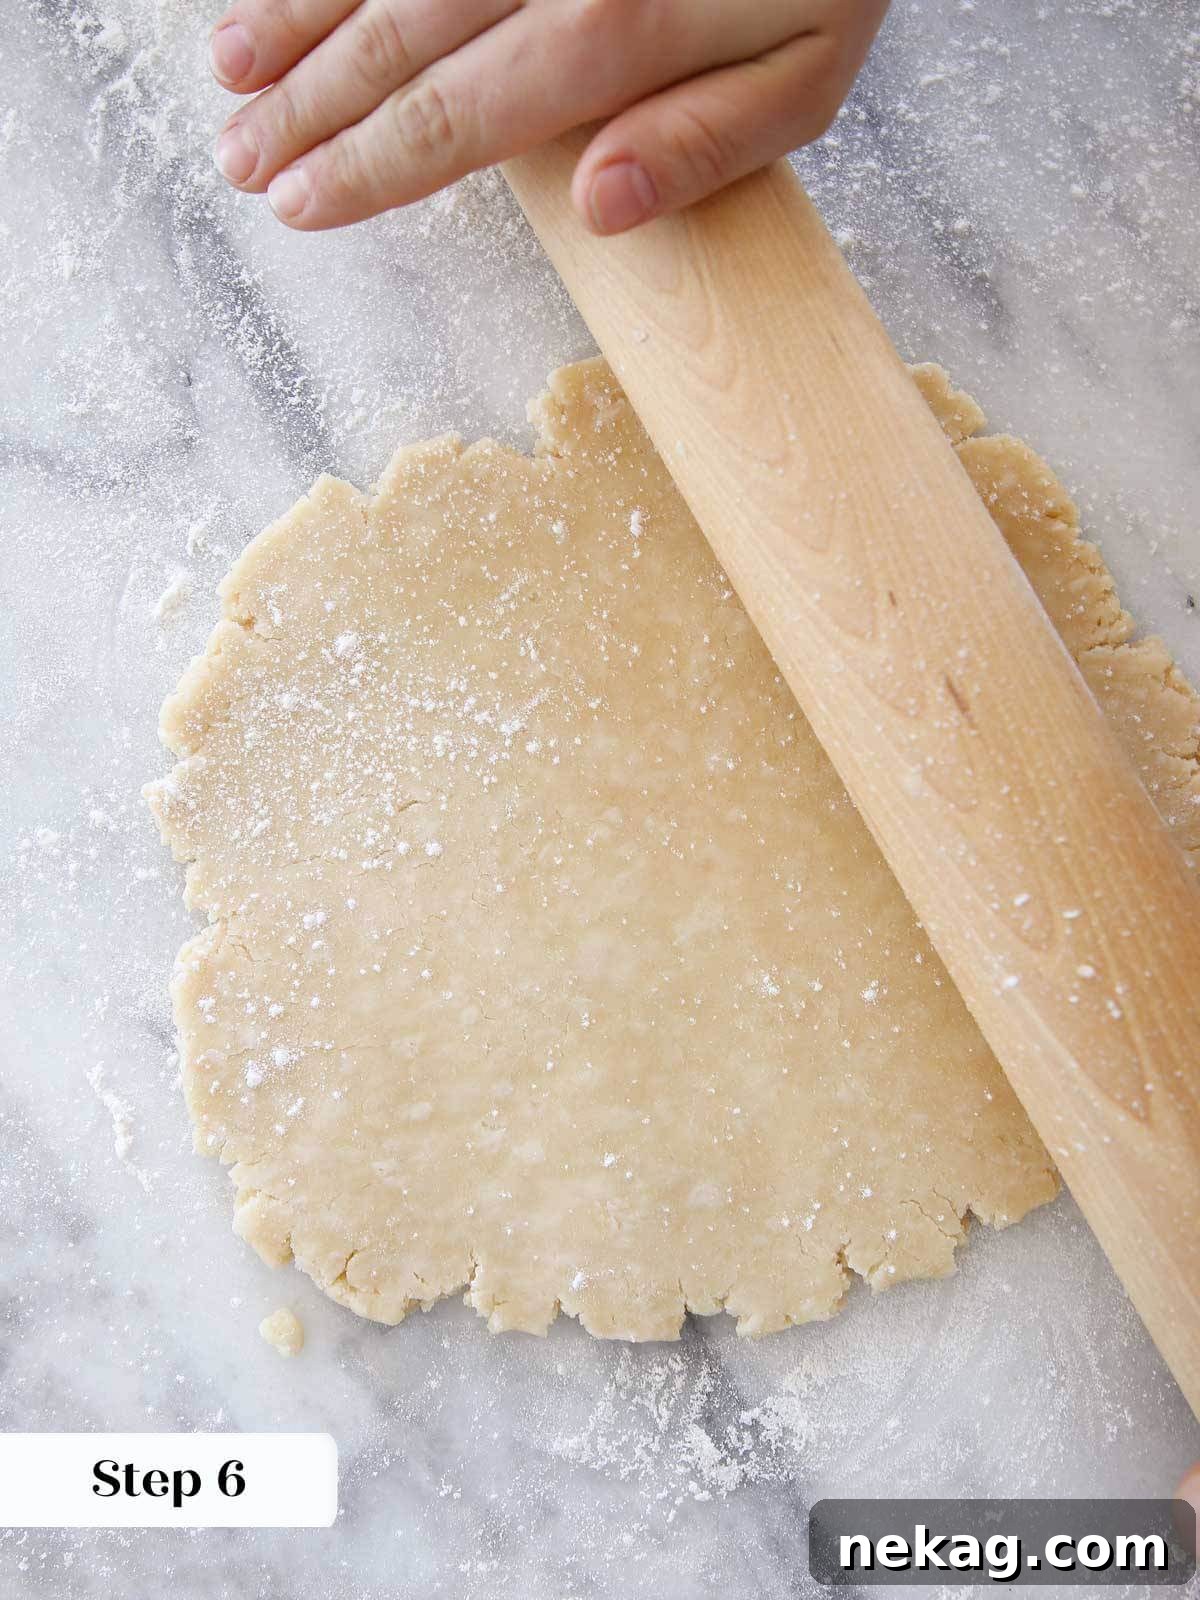
Step 6: Roll Out the Chilled Dough and Line Your Pie Dish. On a lightly floured surface, take one chilled dough disc and roll it out evenly to an approximate thickness of 1/8th inch. Aim for a circle that is about 2 inches larger than your pie dish diameter. Carefully transfer the rolled dough into your pie dish. I’ve found that with Crisco crusts, it’s often easier and more effective to line the pie dish immediately after rolling, rather than chilling the dough again in the disc form, as I might with some all-butter crusts. This helps maintain its tender structure.
Step 7: Prepare for Baking or Finishing Touches. At this point, you have two options depending on your pie recipe. If you’re making a double-crust pie, chill the lined pie tin while you prepare your filling and top crust. If you’re making a single-crust pie, or if the pie calls for a decorative edge, roll the excess dough under the edges and crimp decoratively. For an added touch of elegance, you can follow my comprehensive how to lattice pie crust tutorial for several creative methods to craft stunning latticed pie crusts!

Chef Lindsey’s Recipe Tip: Understanding Shortening Crusts
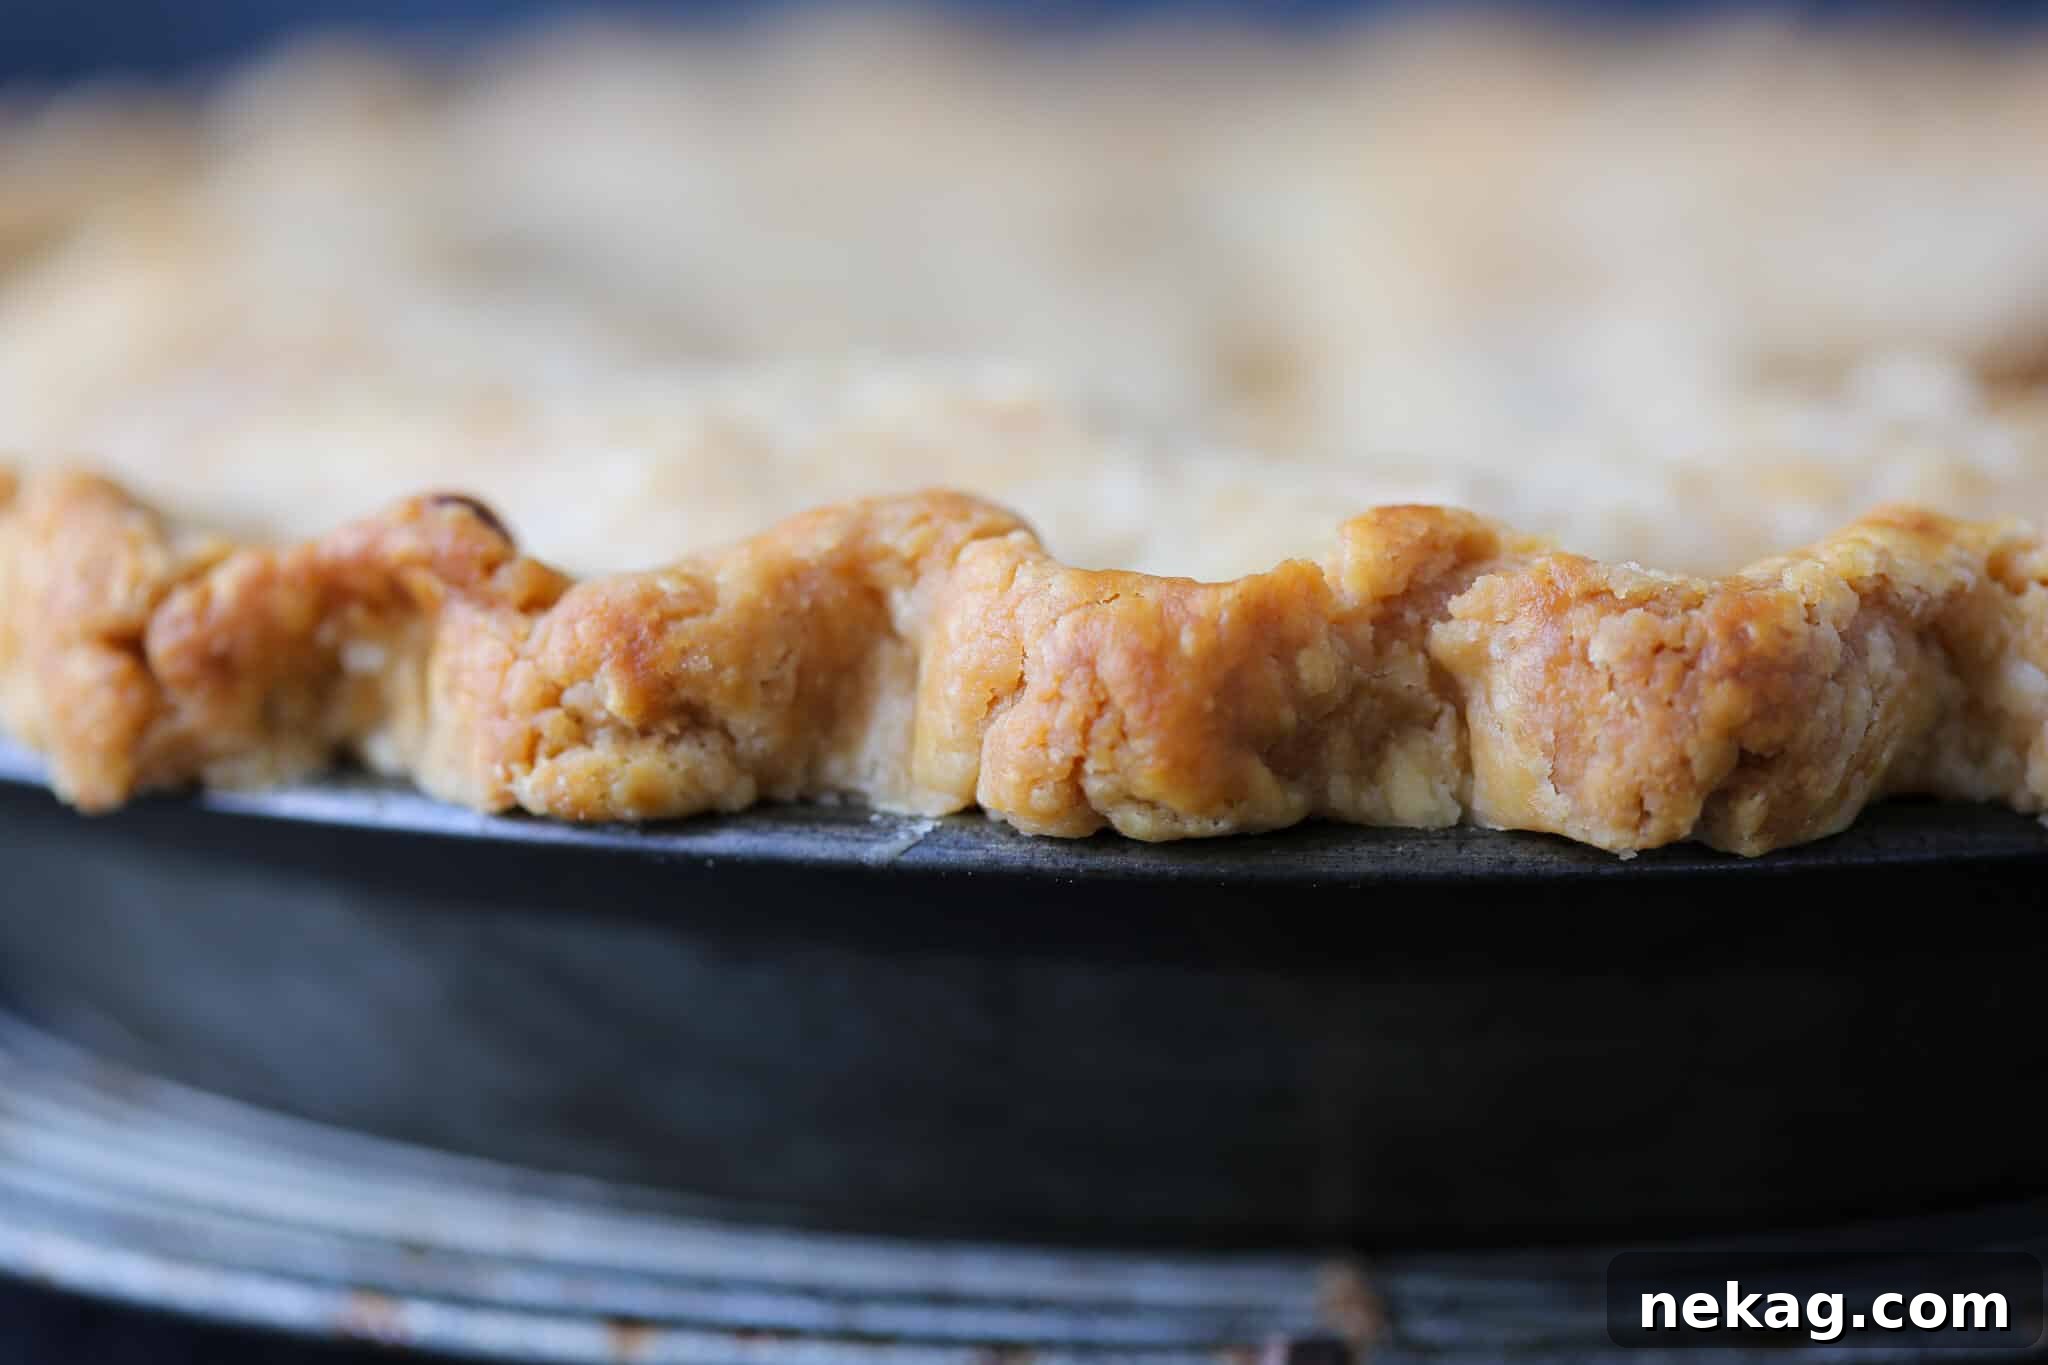
It’s crucial to understand the textural difference between shortening and butter crusts. Shortening crusts don’t develop the distinct, separated layers or “flakes” in the same way butter crusts do. Instead, they are characterized by their exceptional crumbly tenderness and a delicate crispness. To achieve this desirable texture, it’s still essential to bake them at a sufficiently hot temperature. The high heat helps crisp up the shortening and create that signature melt-in-your-mouth quality.
Frequently Asked Questions About Crisco Pie Crust
For optimal freshness and convenience, prepared, unbaked pie crust dough can be stored tightly wrapped in plastic in the refrigerator for up to 3 days. For longer storage, freeze the wrapped dough for up to 2 months. Make sure it’s double-wrapped to prevent freezer burn. Once baked, a pie crust can be stored at room temperature (covered) for up to a week, or wrapped and frozen for up to 2 months. Thaw frozen baked crusts at room temperature before filling or serving.
Neither is definitively “better” as they offer distinct characteristics suited for different preferences and pie types. A well-executed butter pie crust will be wonderfully flaky, rich, and deeply buttery in flavor, with a more structured bite. In contrast, a Crisco pie crust delivers a supremely tender, crumbly, and melt-in-your-mouth texture with a more neutral flavor profile. Crisco crusts are also generally easier to handle and less prone to shrinking due to shortening’s higher melting point and 100% fat content. The choice depends on the desired texture and whether you want the crust to contribute a strong buttery flavor or let the filling shine.
It is not recommended to directly substitute shortening for butter (or vice-versa) in a pie crust recipe on a 1:1 basis without adjustments. Butter contains about 80-82% fat and 18-20% water, while shortening is 100% fat. This difference in composition significantly impacts the dough’s hydration, elasticity, and final texture. Changing the fat type without modifying the liquid content and mixing technique will likely lead to an undesirable outcome. Instead, it’s best to find a recipe specifically formulated for the fat you intend to use, such as this dedicated Crisco pie crust recipe, or my popular all-butter pie crust recipe.
While the raw ingredients of a Crisco pie crust won’t typically spoil in the refrigerator for several weeks, the quality and flavor of the dough will diminish significantly after about 3 days. Beyond this period, you might notice the flour starting to grey or spot, and the texture can become less ideal for rolling. For any storage longer than 3 days, I strongly advise storing your Crisco pie crust dough in the freezer, where it will maintain its quality for up to 2 months, ready for your next baking adventure.
If you tried this recipe and loved it, please leave a 🌟 star rating and let me know how it goes in the comments below. I cherish hearing from you; your comments truly make my day!
Crisco Pie Crust
Comment
Print Recipe
Ingredients
- 2 ¼ cup all-purpose flour or pastry flour
- 1 teaspoon kosher salt
- 14 tablespoons Crisco vegetable shortening frozen (14 T = ¾ cup + 2 Tbsp)
- ⅓ cup water Ice cold
Instructions
-
In a medium bowl, thoroughly mix the flour and salt. Cut frozen shortening into cubes or spoon into chunks, and add to the flour mixture.
-
Cut the shortening into the flour using a pastry blender, bench scraper, or in the bowl of a stand mixer fitted with the paddle attachment. Continue until the mixture resembles coarse crumbs with no visible shortening pieces.
-
Gradually add the ice-cold water, 1 tablespoon at a time, blending with a fork until the dough just holds together and is no longer crumbly. Avoid overmixing.
-
If making two single-crust pies, split the dough in half. For double-crust pies, I prefer to split the dough into a 2/3 portion for the bottom crust and 1/3 for the top. Press each portion flat into a disc and wrap tightly with plastic wrap. Refrigerate the dough for at least 30 minutes before rolling.
-
On a lightly floured surface, roll the chilled dough to an even 1/8th inch thickness and carefully line your pie dish. For Crisco crusts, I find it easier to line immediately rather than chilling again as with all-butter crusts.
-
Either chill the lined pie tin if making a double-crust pie, or roll the edges under and crimp decoratively if preparing a single-crust pie or an open-faced pie.
Notes
Technique: For the most tender and crumbly crust, always use frozen Crisco shortening. Its cold temperature is crucial for proper fat distribution and preventing excessive gluten development.
Variations: Experiment with adding ½ teaspoon of cinnamon or a teaspoon of citrus zest (lemon or orange) to the flour mixture for an easy and delicious flavor variation that complements many fruit fillings.
Storage: Store prepared, unbaked pie crust dough tightly wrapped in plastic in the refrigerator for up to 3 days, or in the freezer for up to 2 months. Baked pie crusts can be stored at room temperature (covered) for up to a week, or wrapped and frozen for up to 2 months. Always ensure proper wrapping to prevent drying out or absorbing odors.
Nutrition
Carbohydrates: 18g |
Protein: 2g |
Fat: 15g |
Saturated Fat: 4g |
Polyunsaturated Fat: 4g |
Monounsaturated Fat: 6g |
Trans Fat: 2g |
Sodium: 195mg |
Potassium: 25mg |
Fiber: 1g |
Sugar: 0.1g |
Calcium: 4mg |
Iron: 1mg
Like this? Leave a comment below!
Before You Go: Explore More Pie Creations
Thank you for diving into this professional chef-tested recipe for a truly unforgettable Crisco pie crust. I hope you found these tips and instructions helpful and that your pies are now more tender and flaky than ever before. Don’t stop your baking journey here! I invite you to explore my other delicious, chef-developed pie crust recipes, perfect for every preference and occasion. Or, if you’re ready to fill your newfound crusts, browse my extensive collection of pie recipes, ranging from classic fruit pies to decadent cream pies. Happy baking!