

Welcome to the ultimate guide for creating flawless **Royal Icing with Meringue Powder**, a professional-grade recipe designed for stunning, durable, and delicious decorations. This highly sought-after recipe incorporates a refreshing hint of lemon juice, masterfully balancing the sweetness of powdered sugar for a less cloying, brighter flavor profile. Crafted with just four essential ingredients, this easy-to-follow method yields perfect royal icing every time, ideal for embellishing everything from intricate cookies and elegant cakes to charming gingerbread houses and delightful brownies and bars.

This isn’t just any royal icing recipe; it’s the very foundation of my successful bakery business. Years of experience have refined it into a consistent, fast-setting, and beautifully shiny icing that retains a delightful softness, preventing that brittle, hard-to-bite texture often associated with royal icing. The inclusion of meringue powder is a game-changer, rendering the icing shelf-stable and completely safe for all consumers, including pregnant women and young children, a significant advantage over recipes using raw egg whites. Should you have dried egg whites on hand, they make an excellent substitute for meringue powder, ensuring flexibility without compromising quality.
I’ve personally used this versatile recipe to create beautifully decorated confections, such as Grandma’s Old-Fashioned Soft Cut Out Sugar Cookies and charming Valentine’s Day Cookies. For an intriguing flavor twist, consider swapping the lemon juice for orange juice to complement treats like chocolate sugar cookies, offering a delicious alternative to a standard sugar cookie icing. This adaptability makes it an indispensable tool in any baker’s repertoire.
Table of Contents
- Why This is the Ultimate Royal Icing Recipe
- The Science Behind Meringue Powder
- Professional Tips for Perfect Royal Icing
- Essential Ingredients for Royal Icing
- Creative Variations & Smart Substitutions
- Royal Icing vs. Traditional Icing: A Comparison
- Step-by-Step Guide to Making Royal Icing with Meringue Powder
- Chef Lindsey’s Expert Decorating Tip
- Advanced Icing Techniques and Tips
- Storing Your Royal Icing Creations
- Frequently Asked Questions About Royal Icing
- Royal Icing Recipe Card
- Concluding Thoughts & More Baking Inspiration
Why This is the Ultimate Royal Icing Recipe
This royal icing stands out from the rest, earning its reputation as the ultimate choice for both professional bakers and passionate home decorators. Here’s why it deserves a permanent spot in your recipe collection:
- Enhanced Safety and Shelf-Stability with Meringue Powder: Unlike traditional recipes that rely on raw egg whites, this formula uses meringue powder. This crucial ingredient eliminates any concerns about consuming uncooked eggs, making the icing perfectly safe for everyone, including expectant mothers, young children, and individuals with compromised immune systems. Furthermore, it significantly extends the icing’s shelf life, allowing you to prepare it in advance and store it without worry.
- Unrivaled Versatility for All Your Baking Projects: Whether you’re decorating intricate gingerbread cookies for the holidays, adding elegant touches to a multi-tiered cake, or simply glazing lemon blondies, this royal icing performs beautifully. Its consistent texture and vibrant coloring capabilities make it suitable for a vast array of decorative applications, adapting seamlessly to your creative vision.
- Rapid Setting Time for Efficient Decorating, Yet Remarkably Soft: One of the most frustrating aspects of cookie decorating can be waiting for layers of icing to dry. This recipe sets quickly, typically within 30 minutes, allowing for faster layering and detail work without colors bleeding into one another. Crucially, even after fully setting, the icing remains wonderfully soft, rather than becoming rock-hard. This unique characteristic not only enhances the eating experience but also helps seal in the moisture of your baked goods, keeping them fresh and tender for longer.
- A Balanced, Less Sweet Flavor Profile with a Citrus Twist: Many royal icing recipes are overwhelmingly sweet, detracting from the flavor of the baked item. This recipe is ingeniously crafted with fresh lemon juice instead of water, introducing a bright, tangy note that beautifully cuts through the richness of the powdered sugar. This creates a more sophisticated and enjoyable flavor that complements, rather than overwhelms, cookies like classic cut-out sugar cookies.
- Conveniently Scaled to a Standard Powdered Sugar Box: As a professional pastry chef, I understand the value of efficiency. This recipe is specifically developed to utilize a standard 1-pound box of confectioner’s sugar, eliminating the need for precise measurements of the sugar itself. This small detail can be a significant time-saver, streamlining your preparation process and allowing you to focus more on the art of decorating.

The Science Behind Meringue Powder
Meringue powder is a staple in professional bakeries for good reason. It’s primarily made from dried egg whites, cornstarch, and various gums, all of which contribute to its superior performance in royal icing. When hydrated with liquid and whipped, the proteins in the dried egg whites create a stable foam, forming the backbone of your icing. The cornstarch helps prevent clumping and adds to the smooth texture, while gums enhance stability and provide flexibility once the icing dries. This combination ensures a consistent, predictable outcome every time, allowing for intricate piping and a reliable dry finish.
Professional Tips for Perfect Royal Icing
Achieving bakery-quality royal icing requires a few insider tricks. These professional tips will ensure your decorating projects are a resounding success:
- Strategic Food Coloring for Larger Batches: When preparing a substantial quantity of royal icing, always incorporate your gel food coloring before thinning the icing with milk. The process should be: mix the base icing, divide it into separate bowls for each desired color, add the concentrated gel coloring, and then gradually thin each colored portion to its appropriate consistency (outlining or flooding). This method prevents over-thinning due to the liquid in food coloring and ensures more vibrant, consistent hues. While small batches can be mixed by hand with a whisk, larger quantities benefit greatly from a stand mixer to thoroughly incorporate ingredients and develop the meringue properly.
- Patience is Key: Allow Icing Layers to Set (30 Minutes): For truly professional, clean lines and distinct layers, allow each layer or section of royal icing to set for at least 30 minutes before applying another color or intricate detail. For instance, if you’re adding decorative dots to a Santa’s coat or piping two different colors adjacent to each other, this waiting period is crucial. It prevents the fresh icing from bleeding into or sinking into the previous layer, ensuring sharp, defined edges and preventing any “cratering” effects.
- Ensure Complete Drying Before Stacking (Overnight): While the icing sets quickly enough for layering, it requires a full 24 hours to completely harden and cure for stacking. After approximately 4 hours, once the surface is dry to the touch, you may loosely cover your decorated cookies with plastic wrap, ensuring it doesn’t make contact with the icing. Then, let them rest uncovered overnight. Attempting to stack cookies before this time risks smudging, denting, or sticking, ruining your hard work.
- Opt for Gel Food Coloring for Vibrant Hues: While liquid food dyes from the supermarket are convenient, they are best reserved for subtle pastel shades. For bright, deep, and truly vibrant colors—think rich reds, emerald greens, or sunny yellows—gel food coloring is indispensable. Liquid dyes are dilute, requiring a large volume to achieve intense color, which inevitably thins the icing to an unworkable, runny consistency, making it unsuitable for both outlining and flooding. Gel colors are highly concentrated, allowing you to achieve intense shades with minimal impact on the icing’s texture.
Essential Ingredients for Royal Icing
Creating perfect royal icing starts with quality ingredients. Here’s a detailed look at each component and why it’s vital:
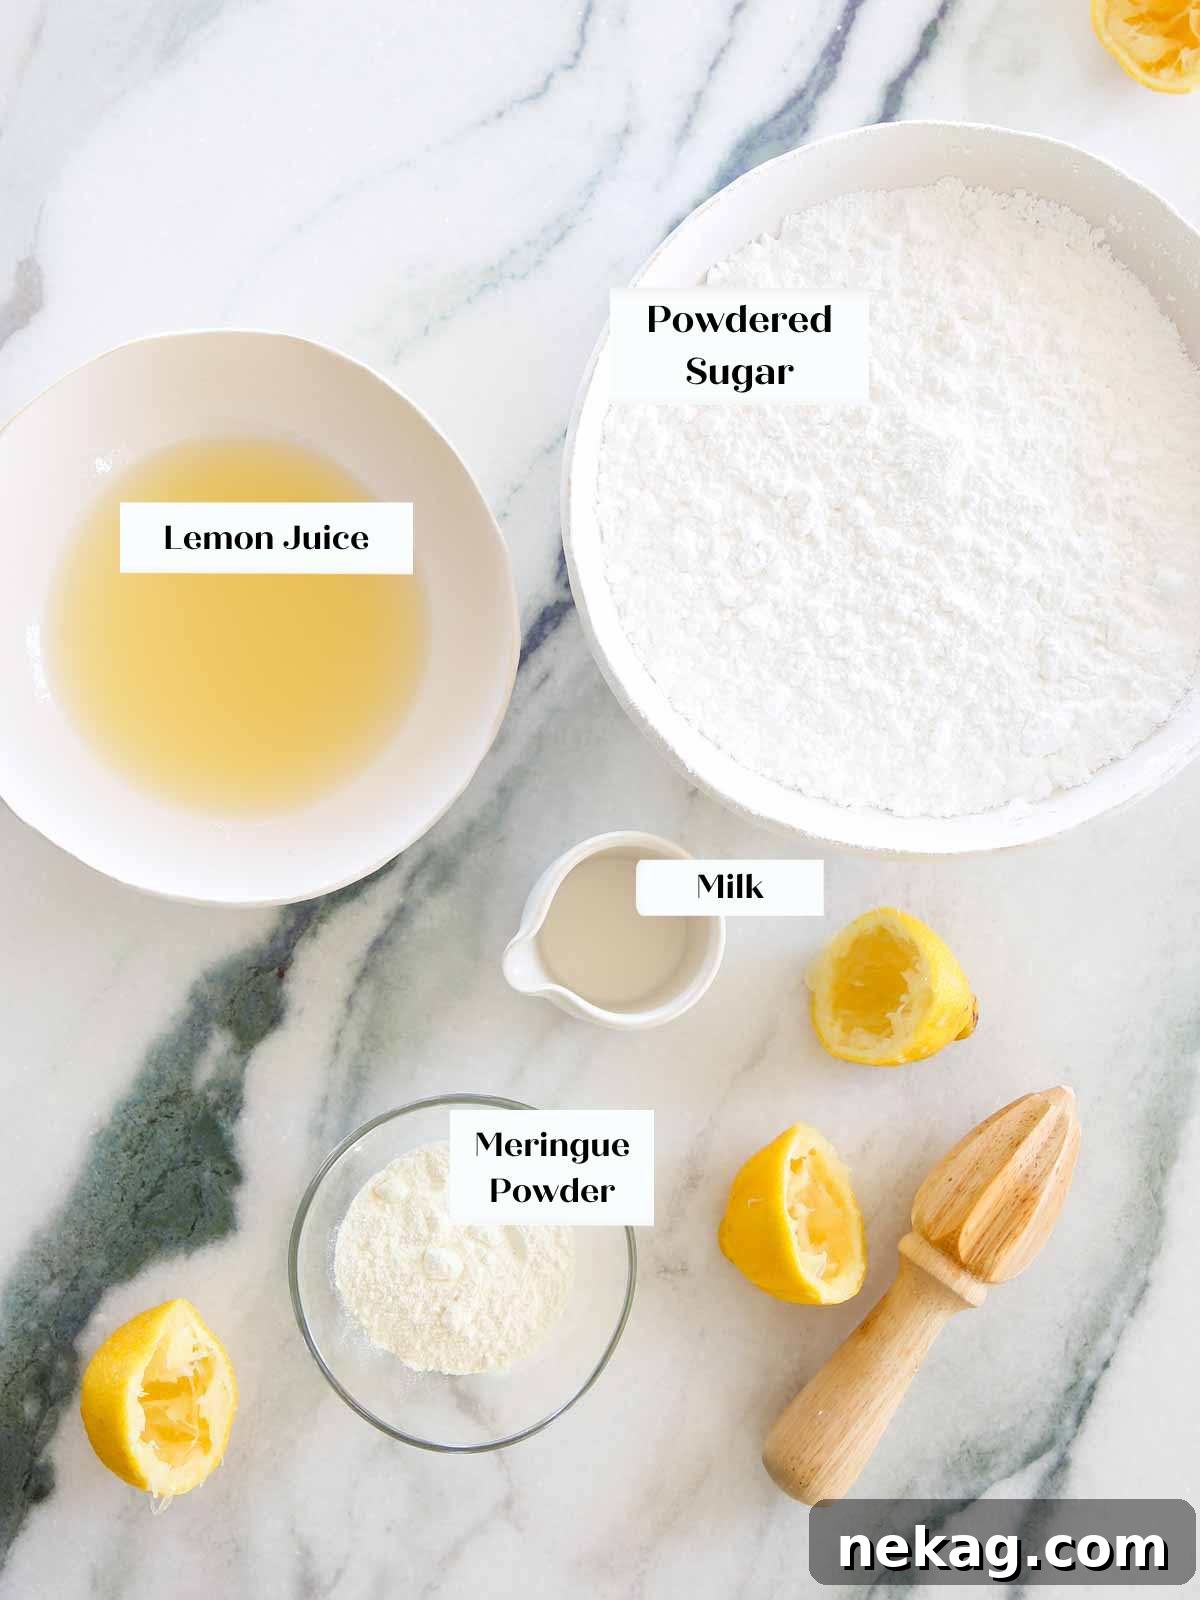
- Meringue Powder: This is the cornerstone of our safe and shelf-stable royal icing. I consistently use meringue powder, but dried egg white powder works equally well. For those seeking a hint of vanilla without altering the pristine white color of the icing, vanilla-flavored meringue powder is an excellent option. It provides the necessary structure and stability, allowing the icing to dry firm but soft, without the risks associated with raw egg whites.
- Fresh Lemon Juice: This ingredient is what truly sets this recipe apart. I cannot overemphasize the importance of using fresh lemon juice. Its bright, zesty flavor is dominant in the finished icing, elegantly cutting through the sweetness of the powdered sugar. Freshly squeezed or even high-quality frozen lemon juice will infuse your icing with a vibrant, authentic citrus note that bottled concentrates simply cannot replicate.
- Powdered Sugar (Confectioner’s Sugar): Also known as confectioner’s sugar, this finely milled sugar is essential for a smooth, lump-free royal icing. Its 10x fineness is crucial for achieving the perfect consistency for both outlining and flooding. This recipe is conveniently scaled to a standard 1-pound box of powdered sugar for ease, eliminating the need for measuring. Alternatively, you can measure out 4 cups from a larger bag. Ensure your powdered sugar is sifted if it appears clumpy to prevent blockages in your piping bags.
- Whole Milk: Used to adjust the icing to your desired consistency, milk adds a subtle richness and helps maintain the purity of both flavor and color. While any alternative milk can be used, whole cow’s milk is my preference as it contributes to a more opaque and vibrant base. When thinning, add milk sparingly, drop by drop, as it’s much easier to add more liquid than to correct an overly thin consistency.
- Gel Food Coloring: For truly striking and vivid colors, gel food coloring is the superior choice. Unlike the liquid food colorings typically found in grocery store baking aisles, gel colors are highly concentrated, allowing you to achieve intense hues with minimal additions, thus preserving the icing’s ideal consistency. I prefer brands like AmeriColor, but ChefMaster offers an excellent, more affordable alternative with equally vibrant results. If you must use liquid food coloring, reserve it for pastel shades only and omit the milk when adding the coloring, as the liquid in the dye will provide sufficient thinning. When using liquid coloring for pastels, I often use a single consistency for both outlining and flooding, as it naturally tends to be looser.
To illustrate the dramatic difference, observe the comparison below. On the left, cookies decorated with royal icing using liquid food coloring show a somewhat muted yellow that struggled to hold its shape, lacking the vibrancy seen on the right. The green achieved with liquid coloring was the darkest possible without making the icing too loose for effective decorating. The cookies on the right, decorated with the same royal icing recipe but using gel food coloring, exhibit significantly brighter, more saturated colors and crisper lines, demonstrating the advantage of concentrated gel dyes.


For precise measurements and a detailed list of ingredients, please refer to the comprehensive recipe card below.
Creative Variations & Smart Substitutions
While this recipe is perfect as written, it’s also incredibly adaptable to suit different tastes and dietary needs:
- Explore Different Citrus Juices: The lemon juice provides a wonderful tang, but don’t hesitate to experiment! Substitute it with freshly squeezed orange juice for a sweeter, more mellow citrus note, lime juice for an exotic twist, or even grapefruit juice for a sophisticated bitterness. For a completely neutral flavor, simply use water instead of fruit juice.
- Infuse with Flavoring Extracts: If you opt for water instead of lemon juice, this is the perfect opportunity to introduce other flavor extracts. Clear vanilla extract is a classic choice that won’t tint your white icing. A hint of almond extract can elevate the flavor to a traditional bakery classic, while peppermint or rum extracts can add seasonal or gourmet touches. Always use clear extracts to maintain pure white colors.
- Meringue Powder Alternatives: If meringue powder isn’t available, an equal amount of dried egg white powder can be used with the same excellent results. For those who prefer fresh ingredients and are comfortable with the food safety aspects (or using pasteurized eggs), you can substitute the meringue powder and lemon juice with 3 large egg whites (approximately 90 grams of pasteurized boxed egg whites). Be aware that fresh egg whites may result in a slightly shinier finish, but the shelf stability will be reduced, and the preparation method will differ slightly.
Royal Icing vs. Traditional Icing: A Comprehensive Comparison
Choosing the right icing can make all the difference in your baked goods. While many recipes exist for “plain” or “easy cookie icing,” royal icing offers distinct advantages, particularly when it comes to decoration and presentation. Here’s why royal icing, especially this meringue powder version, is often the superior choice:
- Superior Opaque Finish: Royal icing creates a remarkably thick, opaque layer that completely covers your cookies or cakes. This gives your decorations a clean, professional look, hiding any imperfections in the underlying baked good and creating a perfect canvas for intricate designs. Traditional buttercreams or simple glaze icings often appear more translucent.
- Pristine White Color: Thanks to the meringue powder, this royal icing achieves a pure, brilliant white without the need for additional white gel coloring. This is a significant advantage over many easy cookie icings, which often require a drop of white food dye to achieve that perfectly opaque, un-yellowed white base. This natural brilliance allows your added colors to truly pop.
- Distinctive Flavor Profile: As discussed, this royal icing recipe is intentionally crafted to be less sweet than typical plain icings. The fresh lemon juice provides a wonderful zesty flavor that complements cookies beautifully, offering a refreshing contrast to the sugary base. Many basic icings can be overwhelmingly sweet, masking the flavor of the cookie itself.
- Hard-Setting Durability (with a Soft Bite): Royal icing is known for its ability to dry hard, creating a protective shell that prevents smudging and allows for easy stacking and packaging of decorated treats. This is crucial for transporting cookies or for elaborate displays. However, this specific recipe is formulated to maintain a pleasant softness underneath its firm exterior, avoiding the brittle, teeth-chipping hardness often associated with traditional royal icing.
- Detailed Decorating Capabilities: The precise consistency and quick-setting nature of royal icing make it unparalleled for intricate piping, fine lines, delicate patterns, and dimensional decorations. It holds its shape perfectly, allowing for a level of detail that is simply impossible with softer, slower-drying icings.
- Shelf Stability: With meringue powder, royal icing becomes shelf-stable, meaning decorated items can be stored at room temperature for an extended period without refrigeration. This is a huge benefit for gifting, selling, or simply enjoying your creations over several days. Many plain icings, especially those with dairy, require refrigeration, which can affect the texture and appearance of decorated items.
In summary, while plain icing might be quicker for a simple glaze, royal icing with meringue powder offers unmatched decorative potential, durability, food safety, and a superior eating experience with its balanced flavor and soft bite. It truly is the professional choice for serious cookie artists and home bakers alike.
Step-by-Step Guide to Making Royal Icing with Meringue Powder
Follow these detailed instructions to craft perfect royal icing using meringue powder. Precise measurements are available in the recipe card below, but these steps provide the essential technique for success:
Step 1: Create the Meringue Base
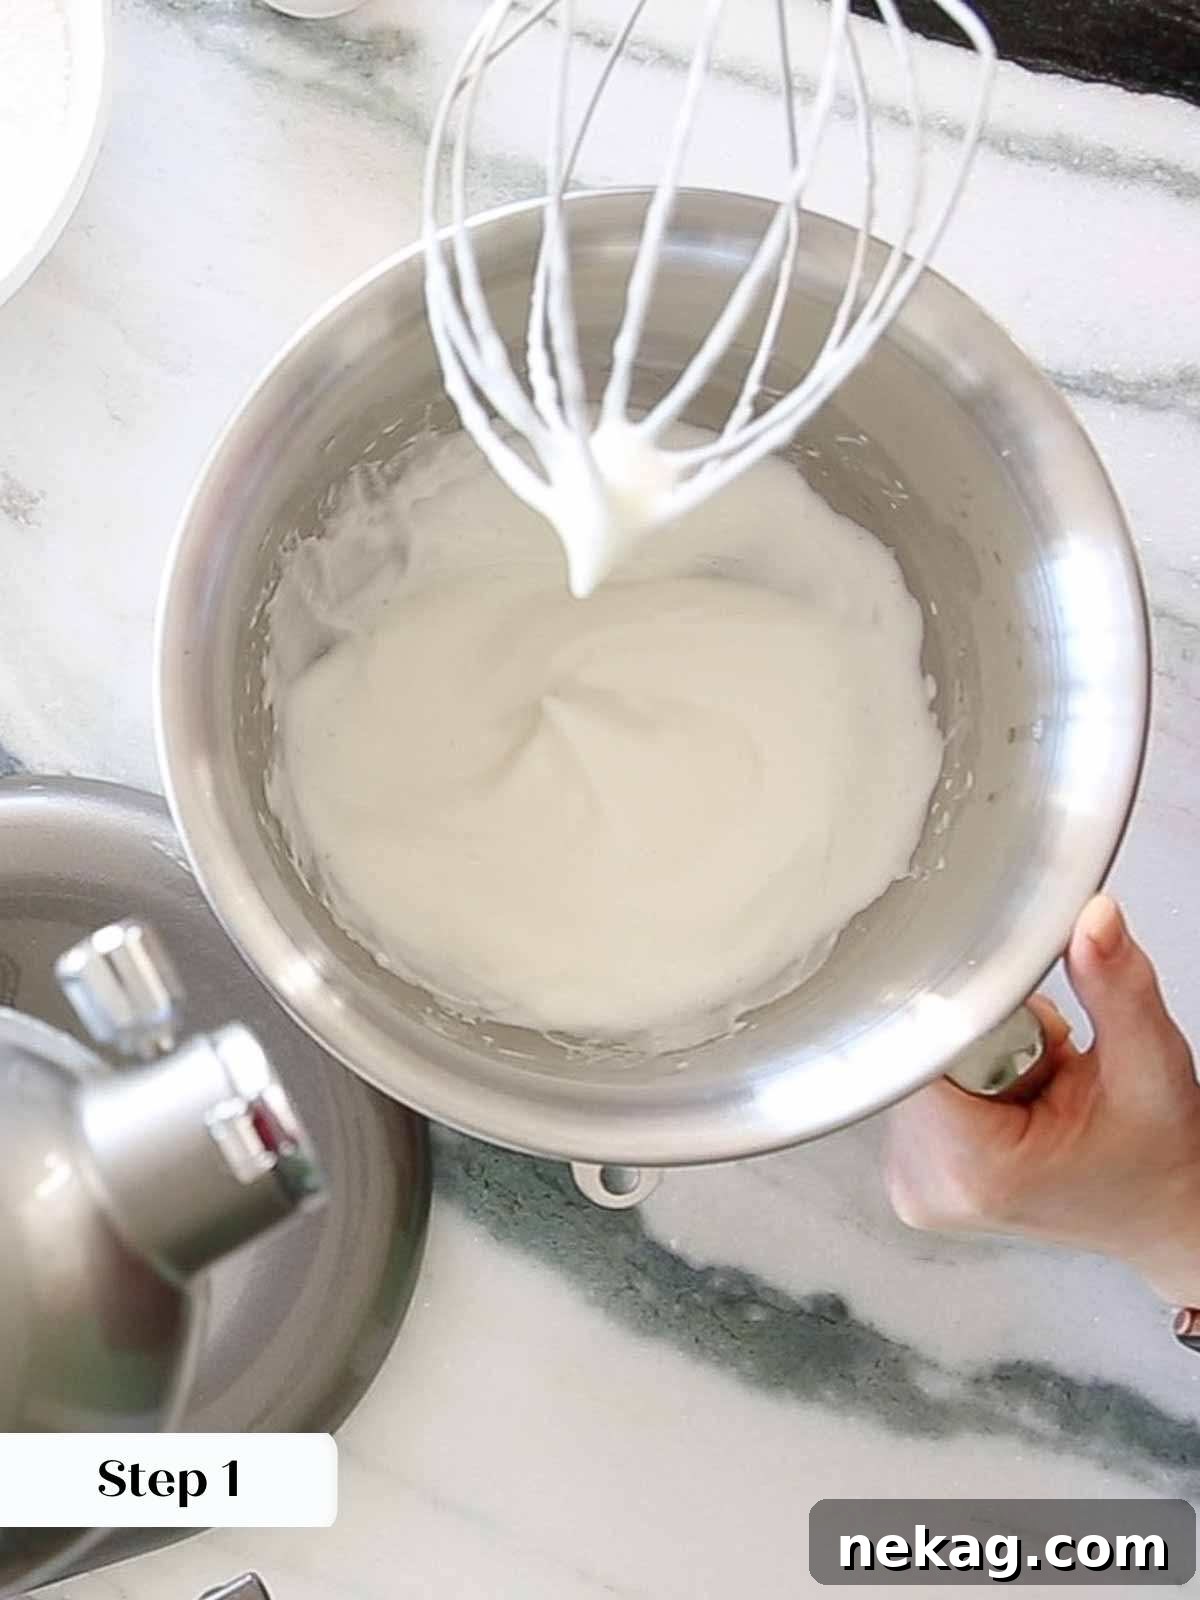
In a generously sized mixing bowl, or in the bowl of a stand mixer fitted with the whisk attachment, combine the meringue powder and fresh lemon juice. Begin whisking on medium-high speed. Continue to whisk until soft peaks form. This stage is crucial for incorporating enough air to create a stable, voluminous icing.
Understanding Soft Peaks: Soft peaks are achieved when you lift the whisk from the meringue mixture, and a peak forms on the tip, but gently curves over and falls to one side, much like the tip of Santa’s hat. Don’t worry if you accidentally whisk it a little longer to stiff peaks; this recipe is forgiving, and the icing will still work beautifully, though it might be slightly thicker initially.
Step 2: Incorporate Powdered Sugar
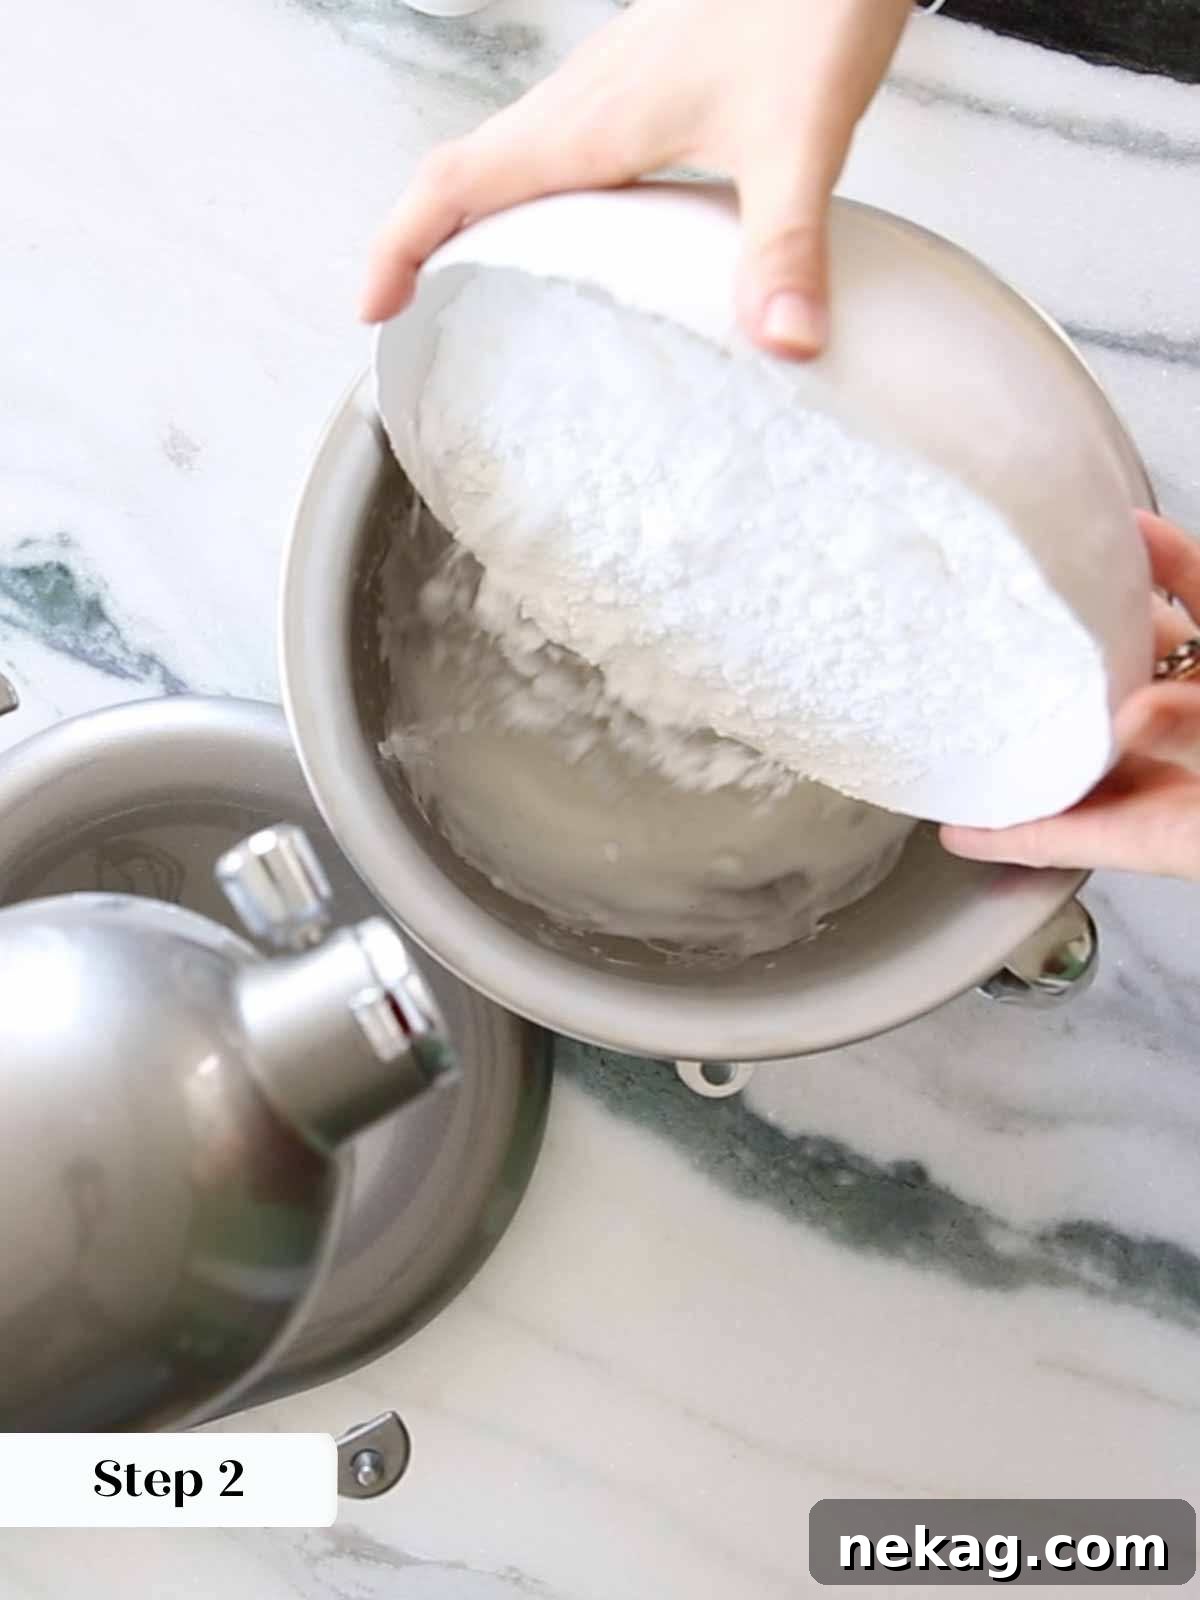
Once soft peaks have formed, add all of the powdered sugar to the bowl. Mix on low speed just until thoroughly combined. Overmixing at this stage can introduce too many air bubbles, which can lead to a less smooth finish and craters in your dried icing. For subsequent steps like adding food coloring and thinning, I recommend using a spatula to gently fold and stir, further minimizing air incorporation.
Step 3: Color and Prepare for Consistency Adjustment
If your decorating plans involve multiple colors, now is the time to divide the un-thinned icing into separate bowls. Once divided, add your gel food dye to each portion, starting with a small amount and gradually adding more until you achieve your desired hue. Stir gently with a spatula to mix in the color. Remember, it’s easier to deepen a color than to lighten it.
Chef’s Secret: Reserve Some Original Icing: I always recommend reserving a small portion of the original, un-dyed, thicker icing. This serves as a valuable backup; if you accidentally make a color too dark or an icing consistency too thin, you can use this reserved portion to lighten the color or thicken the icing without having to add more powdered sugar, which can alter the balance of the recipe. Thickening royal icing with thicker icing is always preferable to adding pure powdered sugar, which can introduce grittiness if not dissolved properly.
Step 4: Achieve Perfect Icing Consistencies
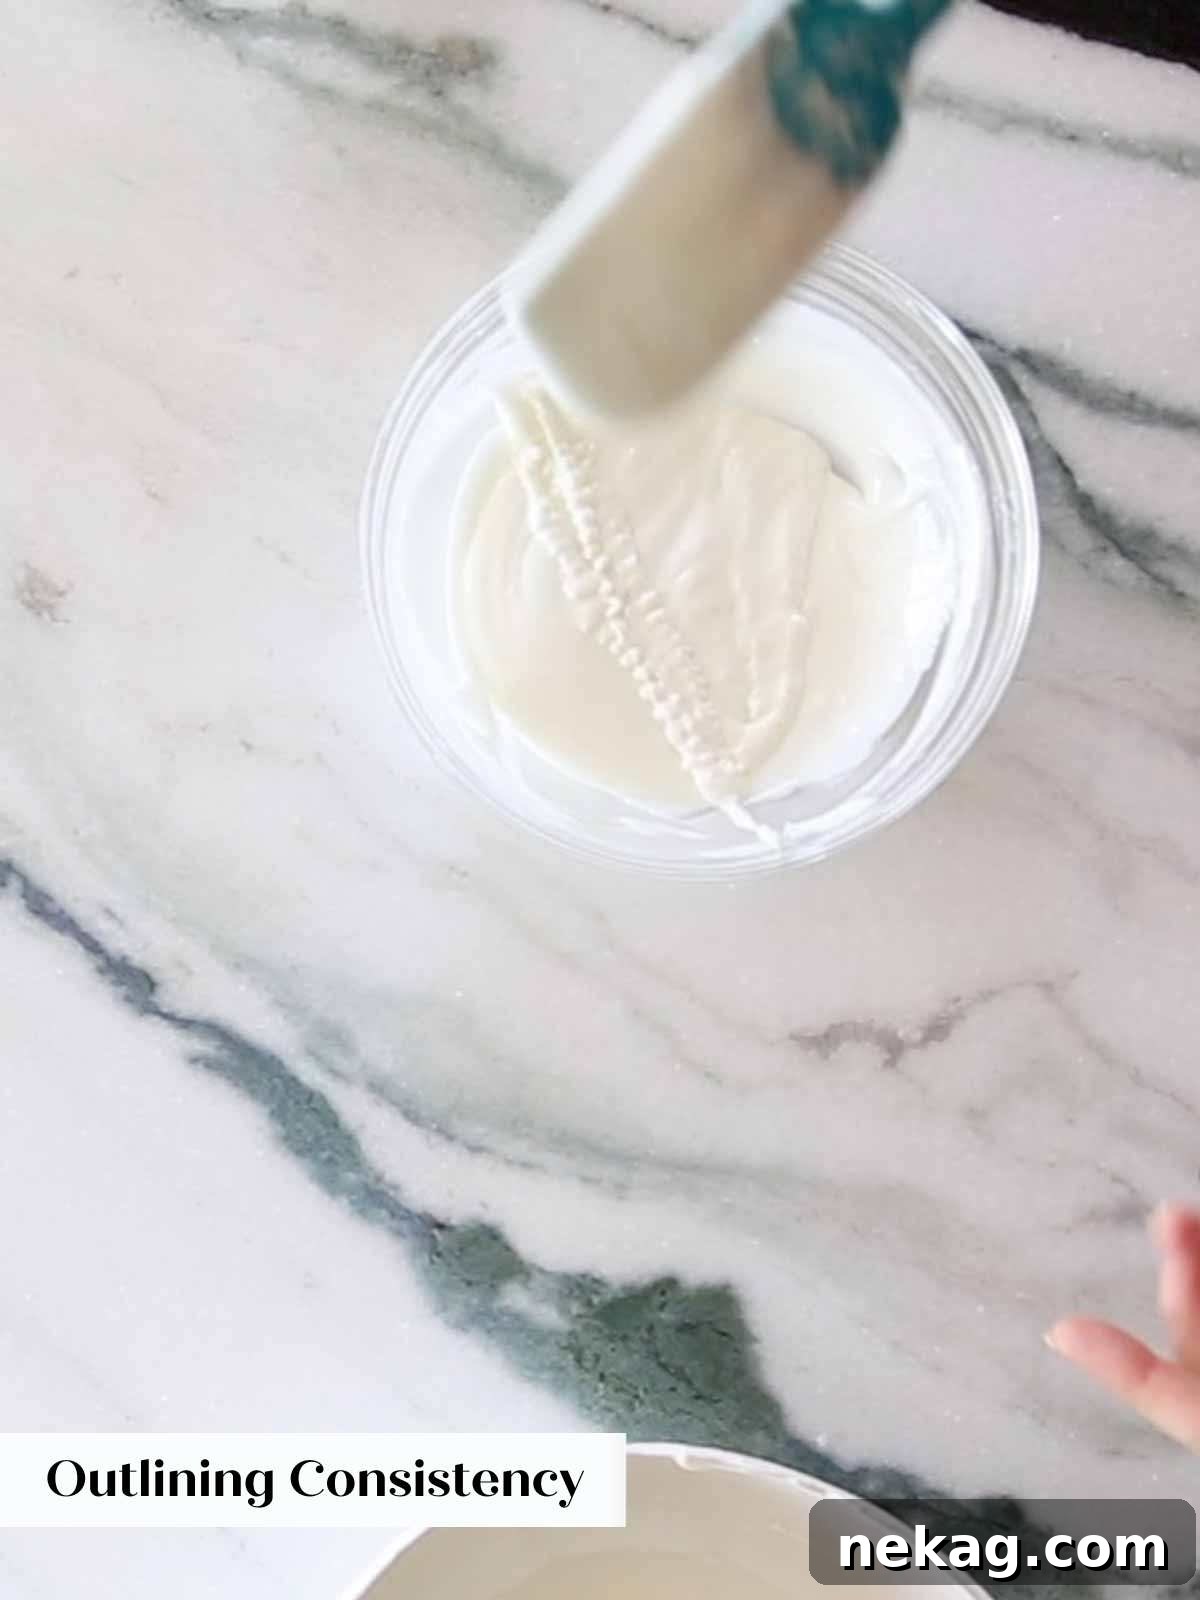
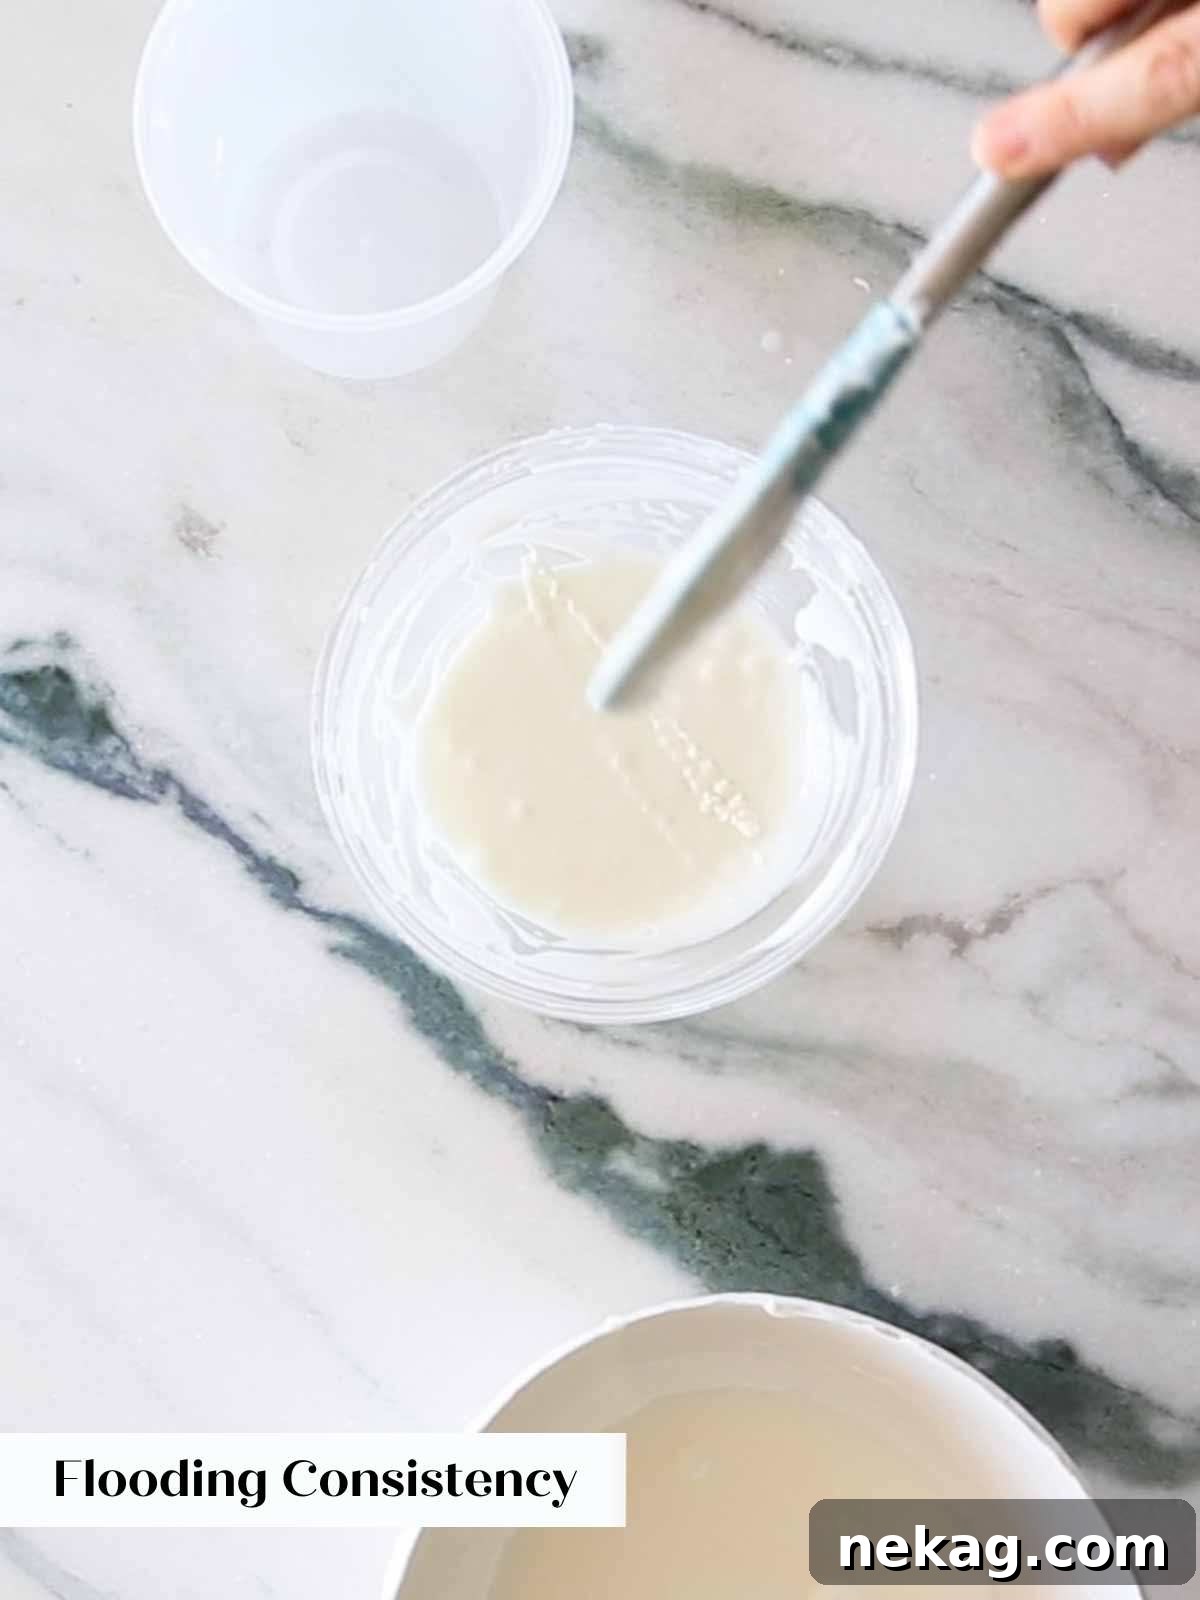
Once you’ve achieved your desired color, it’s time to adjust the consistency for outlining and flooding. This is where precision pays off. To test the consistency, drag your spatula through the icing and then pull it out of the bowl. Observe how the icing falls off the spatula and reincorporates into the mixture in the bowl. It is highly recommended to work with two distinct consistencies for each color: an outlining consistency and a flooding consistency. This ensures crisp edges and fine details while allowing for smooth, even filling.
Mastering Icing Consistencies: Using the correct consistency is vital for professional results. An outlining consistency provides the structural integrity for borders, while a flooding consistency smoothly fills the design. Using outlining consistency for flooding will result in a very thick, heavy layer, whereas using flooding consistency for outlining will lead to weak borders that spread and spill off the cookie.
- Outlining Consistency (5-6 Second Rule): The icing should slowly cascade off your spatula, creating a ribbon that remains clearly visible on the surface of the icing for approximately 5 to 6 seconds before gradually smoothing back into the rest of the mixture. This “5-6 second rule” indicates it’s thick enough to hold a crisp line, yet fluid enough to pipe smoothly.
- Flooding Consistency (Instant Disappearance): The icing should cascade off your spatula and almost immediately (within 1-2 seconds) melt back into the surface of the icing, leaving no visible lines. This thinner consistency is perfect for creating a smooth, even base layer.
Step 5: Separate and Bag Your Icing
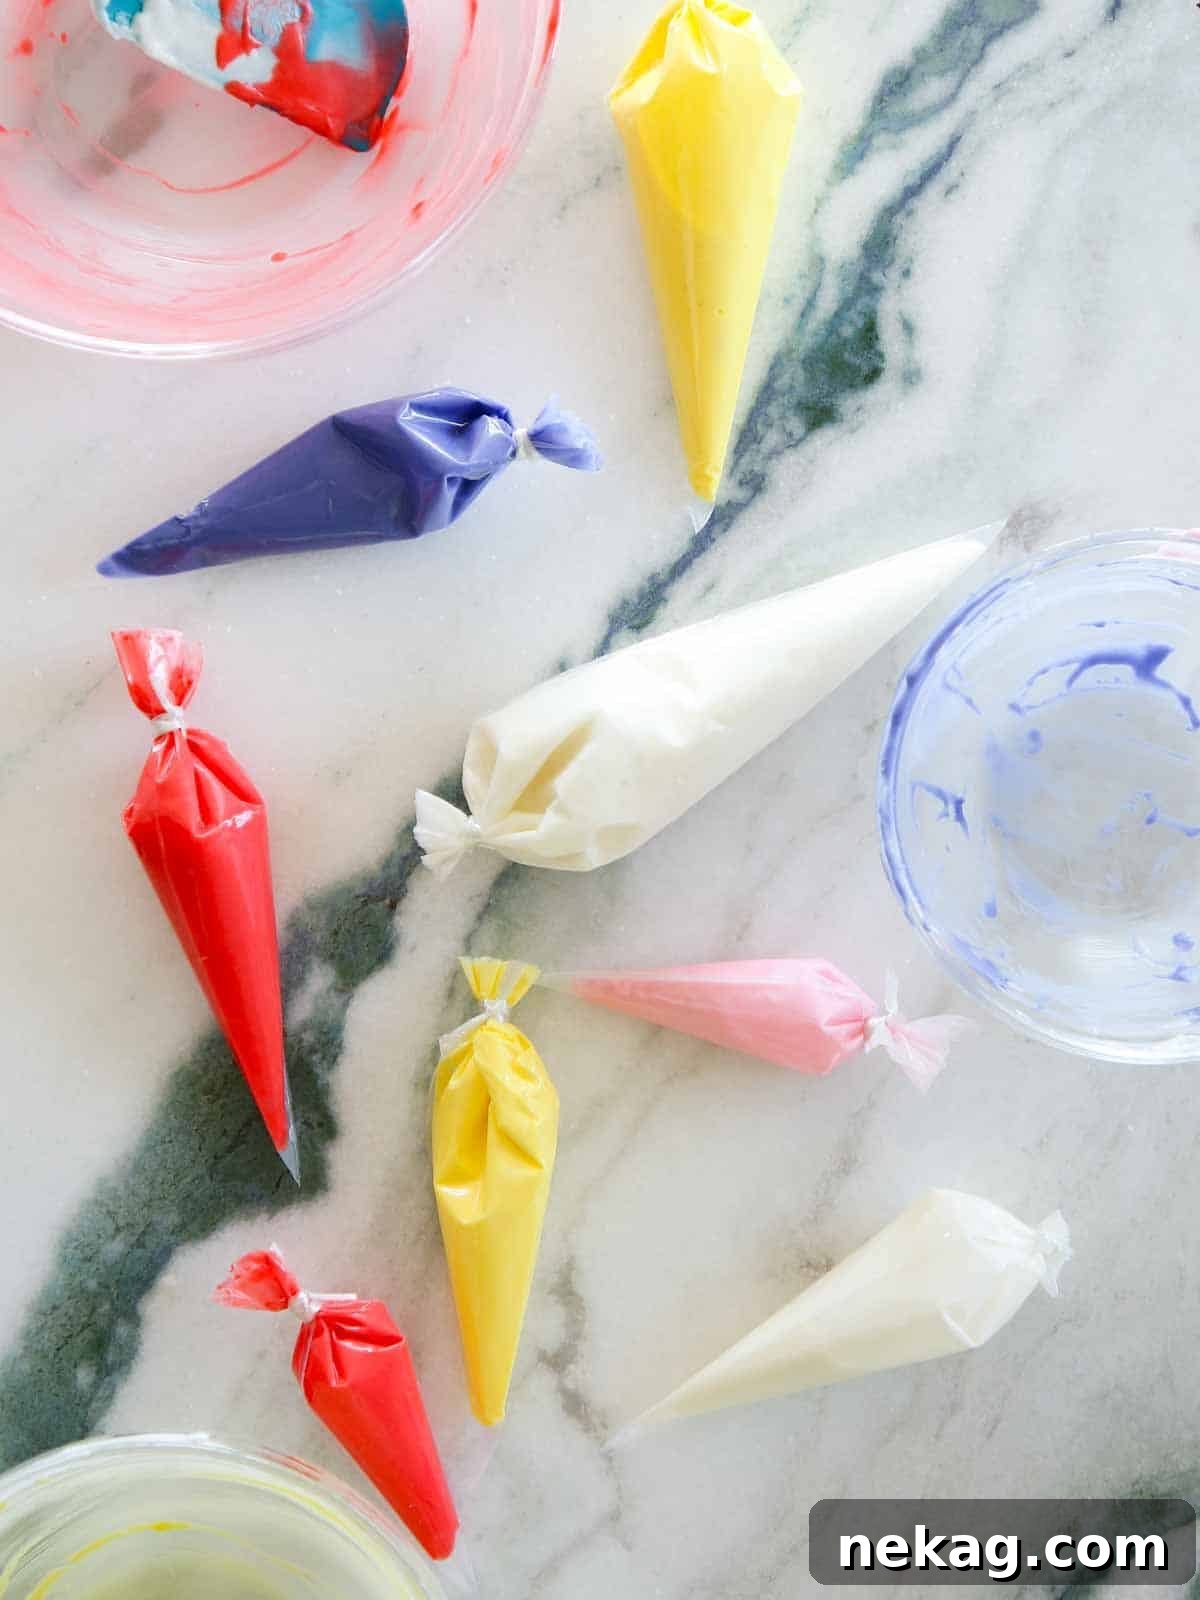
Once you’ve achieved the perfect outlining consistency for a particular color, transfer a portion of it to a piping bag. Leave the majority of that colored icing in the bowl, as you will further thin this remaining portion to your desired flooding consistency. Once the flooding consistency is achieved, transfer it to a separate piping bag. Label your bags to avoid confusion.
The Golden Rule of Thinning: When adjusting consistency, always add milk by the drop, not by the teaspoon. Royal icing that is too thin will not set properly, leading to a messy, uneven finish. Taking a little extra time at this stage to slowly adjust the consistency will save you significant frustration and wasted icing later.
Step 6: Prepare for Storage or Immediate Use
At this point, your colored and consistency-adjusted royal icing is ready for use or can be stored. Transfer all your prepared icing into airtight piping bags. You can store these bags at room temperature for up to a week. If you notice any separation within the bag (where the liquid separates from the solids), simply knead and shake the bag vigorously until the icing comes back together into a smooth, homogeneous consistency.
Important Note on Color Intensification: The colors of your royal icing will often deepen and intensify slightly while stored in the piping bags overnight. This is a natural chemical process as the pigments settle. However, it is crucial to understand that once the icing is piped onto a cookie and begins to dry, its color will stabilize and will not intensify further. Plan your colors accordingly, allowing for this slight darkening if preparing ahead, but don’t expect further color changes on your finished decorations.
Chef Lindsey’s Expert Decorating Tip
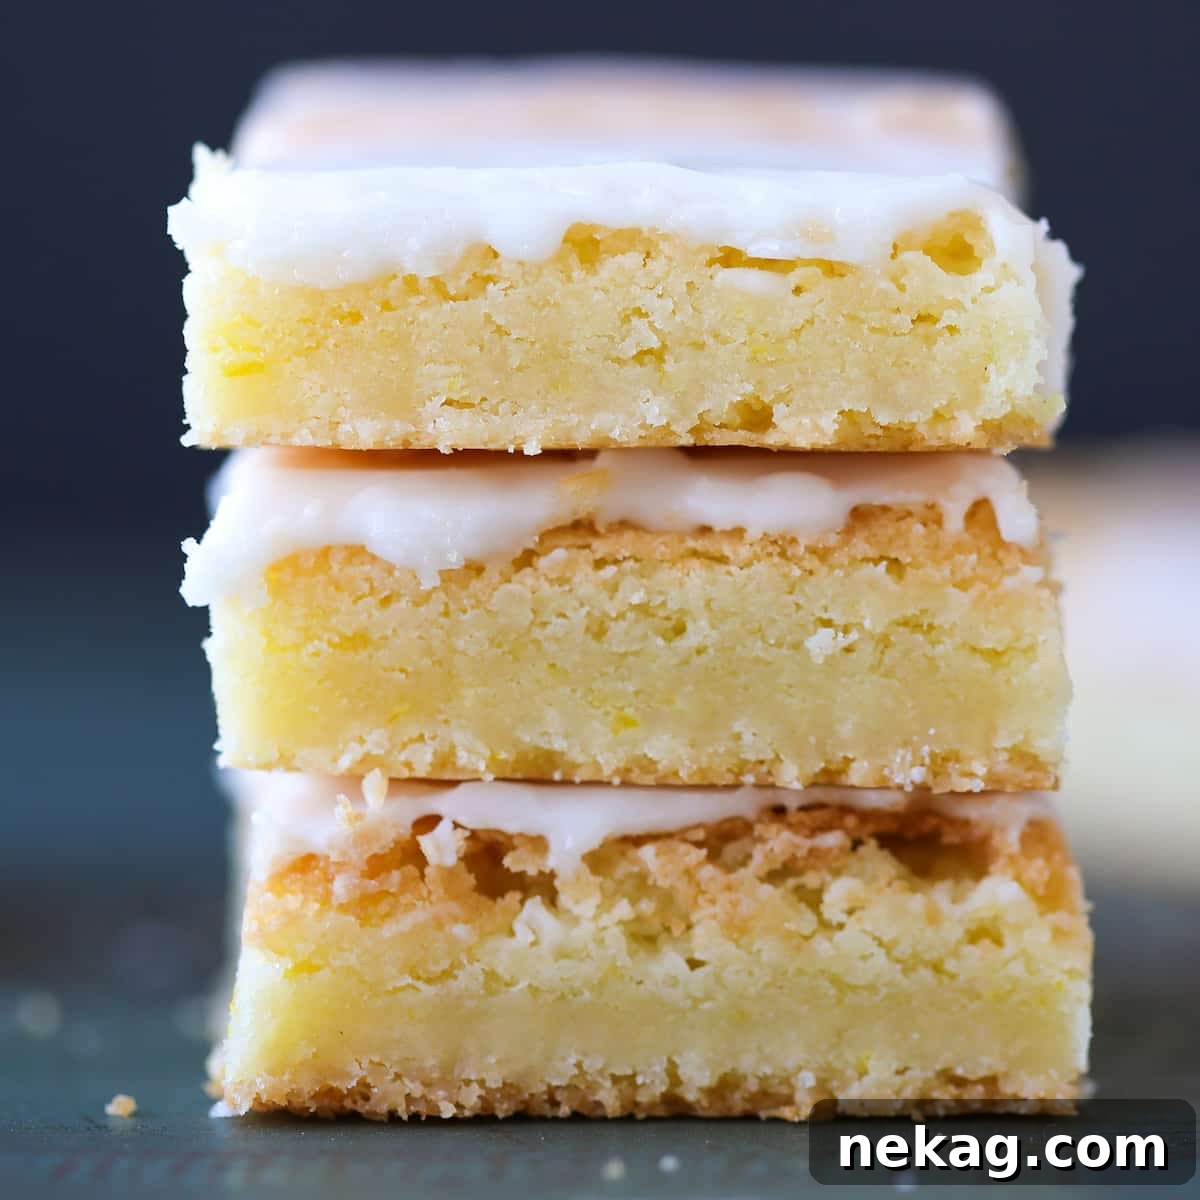
When decorating brownies or blondies, rather than intricately designed sugar cookies, I highly recommend utilizing only the “flooding” consistency of this royal icing. You can apply it directly to the surface to create a beautiful, smooth glaze. For perfectly clean cuts, allow the icing to set completely (overnight is ideal) before slicing your treats. Alternatively, if you prefer a more rustic, “poured” effect with slightly less defined edges, slice your brownies or blondies after the icing has set for just about an hour. This creates a charmingly organic look as the icing settles into the cuts.
Advanced Icing Techniques and Tips
Elevate your cookie decorating skills with these invaluable techniques honed over years of professional baking:
- Embrace the “No Piping Tip” Method: Forget the hassle of constantly cleaning and changing piping tips and couplers. My preferred, and highly efficient, method is to simply snip a small hole in the corner of a sturdy plastic piping bag. The size of the hole will determine the thickness of your line. This technique allows for rapid switching between many colors and consistencies, significantly speeding up your decorating process. Trust me, after icing tens of thousands of cookies, this method is a game-changer for speed and convenience without sacrificing precision.
- Avoid Forced Drying with Fans: While it might be tempting to use a fan to accelerate the drying process, I strongly advise against it. Using a fan won’t significantly reduce the overall 24-hour curing time needed for full hardness, but it *will* dry out your precious cookies, making them stale prematurely. Furthermore, forced air can lead to a “crunchy” or brittle icing texture, which diminishes the pleasant soft bite this royal icing is designed to offer. Natural air drying is always best for both the icing and the cookie’s quality.
- The “Outline-Three-Flood-Three” Rule: For seamless royal icing decorations where your flood icing melts perfectly into your outline, avoid outlining all your cookies before flooding. The outline can set too much, creating an obvious, raised ridge between the outline and the flooded area. Instead, outline approximately three cookies, then immediately proceed to flood those same three cookies. This ensures the outline is still wet enough to meld beautifully with the flood icing, creating a smooth, unified surface. You can, of course, work one cookie at a time, but for efficiency, the “three-cookie” method is much faster. This simple trick is essential for professional-looking, smooth, and integrated icing designs, a lesson learned from countless hours of decorating.
Storing Your Royal Icing Creations for Optimal Freshness
Proper storage is essential to maintain the quality and beauty of your royal icing, both before and after it’s applied to your treats. Here’s everything you need to know:
- Storing Un-Used or Leftover Royal Icing (Before Piping): To prevent royal icing from drying out and setting prematurely, store any un-used or leftover portions in airtight containers or, ideally, directly in closed piping bags. For bowls, place plastic wrap directly onto the surface of the icing, pressing it down to eliminate any air pockets, or cover with a damp paper towel before sealing the container. Store at cool room temperature for up to one week. While it might technically keep longer, the icing’s texture and integrity will gradually degrade, making it less ideal for detailed work.
- Storing Cookies Decorated with Royal Icing: After decorating, allow your cookies to sit uncovered at room temperature for a minimum of 4 hours. This initial air exposure helps the surface of the royal icing harden. After this period, they can be loosely covered with plastic wrap, ensuring the wrap does not touch the icing surface. For optimal setting and to allow the icing to fully cure, let them dry completely overnight (ideally 24 hours) before attempting to stack them. This patience ensures your beautiful decorations remain pristine.
- Refrigerating or Freezing Decorated Cookies (Generally NOT Recommended): Based on extensive professional experience in a commercial kitchen, I strongly advise against refrigerating or freezing cookies decorated with royal icing. When these decorated treats are brought back to room temperature, the royal icing is highly prone to “blooming.” This phenomenon causes moisture condensation to develop on the icing’s surface, resulting in a dull, crackled, or blotchy appearance with inconsistent coloring. While some sources suggest it’s possible, those recommendations often come without the context of decorating tens of thousands of cookies. For best results, avoid cold storage.
- Storing Brownies or Bars Decorated with Royal Icing: The same principles regarding storage apply to other baked goods adorned with royal icing. However, the stakes for brownies and bars are generally lower, as they typically don’t involve the same level of intricate, time-consuming decoration as cookies. For this reason, I am less hesitant to store royal-iced brownies or bars in the freezer for longer-term storage, understanding that a slight change in the icing’s appearance might occur upon thawing.
Frequently Asked Questions About Royal Icing
The initial surface of royal icing typically sets within 30 minutes, allowing you to add subsequent layers of detail (like dots or intricate designs on a base layer) without smudging or colors blending. This quick set time helps keep your details crisp and prevents them from sinking into lower layers. For safe handling and wrapping, allow cookies to dry for at least 4 hours. For complete hardness and trouble-free stacking, a full 24 hours of air drying at room temperature is recommended.
Both fresh egg whites and meringue powder can produce beautiful royal icing. Royal icing made with fresh egg whites often boasts a slightly shinier, almost glass-like finish when dry. However, meringue powder offers significant advantages: it is pasteurized, making it completely safe for consumption by everyone, eliminating any raw egg concerns. It also contributes to a more stable, consistent, and shelf-stable icing. While meringue powder icing is still shiny, its primary benefits lie in food safety, convenience, and extended storage.
Yes, royal icing made with meringue powder is indeed shelf-stable. This stability is particularly enhanced if you thin the icing with water instead of milk, as dairy products can reduce shelf life. For the best consistency and ease of use, it’s ideal to use the icing within 10 days of preparation. If you observe any separation of liquid from the solids during storage, simply shake the bag or stir the bowl vigorously until the icing returns to its smooth, homogeneous state.
No, this specific recipe cannot be made vegan as meringue powder is derived from egg whites. For a vegan alternative, you would need to explore recipes that use aquafaba (the liquid from canned chickpeas) as a meringue substitute, which requires a different formulation and technique.
If your royal icing is too thick, gradually add milk (or water/lemon juice, depending on your desired flavor intensity) drop by drop, stirring gently with a spatula, until you reach the desired consistency. If your icing is too thin, you can carefully add more sifted powdered sugar, a tablespoon at a time, mixing thoroughly. Alternatively, you can use a portion of the reserved un-dyed, thicker icing (from Step 3) to thicken a too-thin batch. Always adjust slowly to avoid overcorrection.
If you tried this recipe and loved it, please consider leaving a 🌟 star rating and sharing your experience in the comments below. Your feedback truly makes my day!

Royal Icing
Chef Lindsey
10 minutes
10 minutes
40 Cookies
Comment
Print Recipe
Ingredients
- 4 cups powdered sugar (1, 1 pound box)
- 6 ½ tablespoons lemon juice (juice from approximately 3 medium lemons)
- ¼ cup meringue powder
- 1 tablespoon whole milk (as needed)
Instructions
-
In a large bowl or in the bowl of a stand mixer fitted with the whisk attachment, combine the meringue powder and lemon juice. Whisk until soft peaks form.
-
Add all the powdered sugar and whisk to combine.
-
If making more than one color, separate the icing into different bowls before adding gel food dye.
-
Once you have created the desired color, test the consistency by dragging your spatula through the icing and then pulling it out. Watch how the icing falls off the spatula and back into the bowl. It is best to work with two consistencies for the same color: a flooding consistency and an outlining consistency. This will ensure you have perfect edges and details but the icing is the right thickness and also is easy to pipe and spread.
-
Outlining Consistency: The icing should cascade slowly off your spatula and remaining clearly visible on the surface for a few moments (about 5-6 seconds) before slowly disappearing.
-
Flooding Consistency: The icing should cascade off your spatula and almost disappear instantly into the rest of the icing.
-
I thin to the perfect outlining consistency, transfer some to a piping bag but I leave the majority in the bowl to be thinned further into flooding consistency. Transfer the flooding consistency to a separate piping bag.
-
You can get to this stage in the recipe and then store the colored icing in bags up to a week. If they separate, simply shake the icing in the bag to get it to come together.
Notes
Presentation: Let it set at least 30 minutes before adding layers of detail on top of a royal icing base.
Variations: Substitute orange juice or water for the lemon juice. Add flavorings like clear vanilla extract or almond extract. You can also use egg white powder in place of the meringue powder or substitute 3 egg whites from large eggs (90g) for both the powder and lemon juice.
Storage: Allow cookies to dry 4 hours before wrapping and 24 hours before stacking.
Nutrition
Like this? Leave a comment below!
Concluding Thoughts & More Baking Inspiration
I sincerely hope you’ve found this professional royal icing recipe both insightful and inspiring. Mastering royal icing opens up a world of creative possibilities for your baking, allowing you to transform simple cookies and cakes into edible works of art. Remember, practice makes perfect, and with this reliable recipe, you’re well on your way to decorating success.
Don’t stop here! Continue your culinary journey by exploring our other delicious icing and buttercream recipes, each designed to elevate your desserts. Or, dive into creative ways to utilize your newly mastered royal icing on our diverse range of cookie recipes and these tempting brownies & bars recipes. Happy baking and decorating!