
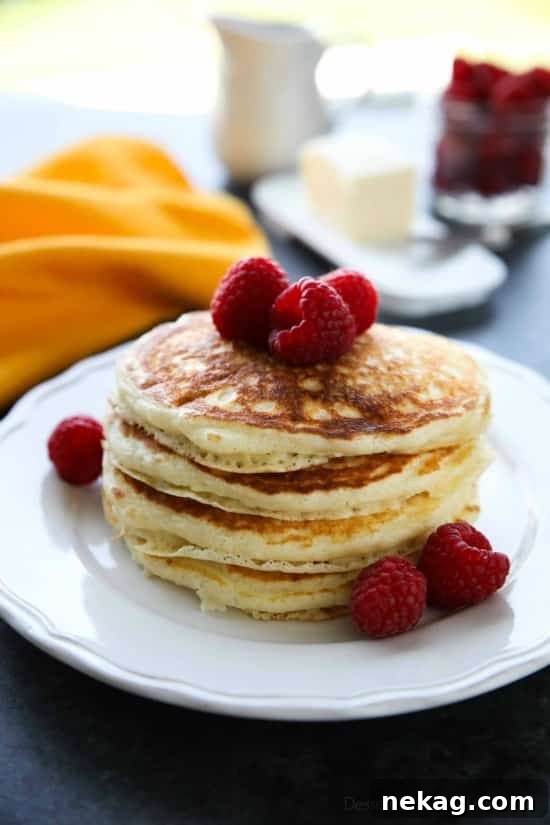
Fluffy, Easy, and Irresistible Homemade Buttermilk Pancakes
There’s nothing quite like waking up to the aroma of freshly made pancakes. While store-bought mixes offer convenience, mastering the art of homemade buttermilk pancakes elevates your breakfast experience to a whole new level. These aren’t just any pancakes; they’re incredibly fluffy, delightfully tender, and boast a subtle tang that sets them apart. Forget your old mixes – this easy buttermilk pancake recipe will quickly become your new go-to for a perfect breakfast or an indulgent weekend brunch.
The Journey to Pancake Perfection: Why Homemade is Always Best
For too long, I, like many others, relied on pre-packaged pancake mixes, believing that making pancakes from scratch was a tedious task reserved for seasoned bakers. I’ll admit, as a busy parent, convenience often wins. However, a recent revelation – this incredible recipe from my friend Carrian – completely transformed my breakfast routine. The truth is, these homemade buttermilk pancakes are surprisingly simple to whip up, taking only marginally more time than a boxed mix, but delivering exponentially better results.
The difference is palpable. The batter is thick and rich, transforming into pancakes that are not just visually appealing with their golden-brown edges, but also incredibly light and airy. When you gently press your fork into one of these beauties, it bounces right back, a testament to their perfect fluffiness and tender crumb. This recipe isn’t just “good”; it’s legitimately fantastic, yielding melt-in-your-mouth pancakes that will have everyone asking for seconds.
The Magic of Buttermilk: Unlocking Unbeatable Flavor and Texture
What makes buttermilk pancakes so special? It all comes down to the star ingredient: buttermilk. This fermented dairy product introduces a slight tang that beautifully complements the sweetness of the pancakes. More importantly, buttermilk is acidic. When it reacts with baking soda (a leavening agent), it creates carbon dioxide bubbles. These bubbles are trapped within the batter as it cooks, resulting in that signature airy, cloud-like texture we all crave in a good pancake.
Beyond the chemical reaction, buttermilk also contributes to a more tender pancake. The acidity breaks down gluten in the flour, preventing the pancakes from becoming tough. The result is a soft, moist interior that practically dissolves in your mouth. If you’ve ever wondered why homemade buttermilk pancakes often surpass those made with regular milk, the answer lies in this powerful ingredient combination.
Essential Ingredients for Your Fluffy Buttermilk Pancakes
Creating these delightful pancakes requires only a few pantry staples. The quality of your ingredients, even in a simple recipe, can make a noticeable difference in the final taste and texture. Here’s a breakdown of what you’ll need and why each component is important:
- All-Purpose Flour: The foundation of our pancakes. Make sure to stir, spoon, and level the flour for accurate measurement, preventing dense pancakes.
- Salt: A pinch of salt enhances all the other flavors, balancing the sweetness.
- Baking Powder & Baking Soda: These are the leavening agents that work together to give our pancakes their incredible rise and fluffiness. Baking soda reacts with the buttermilk’s acidity, while baking powder provides an extra lift.
- Granulated Sugar: Adds a touch of sweetness and helps with browning, giving the pancakes a beautiful golden crust.
- Large Eggs: Bind the ingredients together, add richness, and contribute to the structure and moisture of the pancakes.
- Low-Fat Buttermilk: As discussed, this is the magic ingredient for tenderness, tang, and epic fluff.
- Unsalted Butter (Melted): Adds a rich, buttery flavor and helps keep the pancakes moist. Using unsalted butter allows you to control the overall salt content in the recipe.
No Buttermilk? No Problem!
If you don’t have buttermilk on hand, you can easily make a homemade substitute. For every 1 cup of buttermilk needed, simply add 1 tablespoon of white vinegar or lemon juice to a measuring cup, then fill the rest of the cup with regular milk (dairy or non-dairy) up to the 1-cup line. Stir gently and let it sit for 5-10 minutes until it slightly curdles. Voila! You have a workable buttermilk substitute for this recipe.
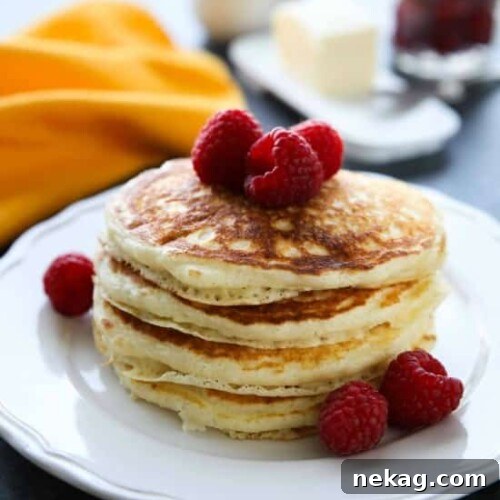
Buttermilk Pancakes
Pin
Rate
SaveSaved!
Ingredients
- 2 cups (240 g) all purpose flour, (stir, spoon, & level)
- 1 tsp salt
- 2 tsp baking powder
- 1 tsp baking soda
- 2 Tbsp granulated sugar
- 2 large eggs
- 2 cups (473 ml) low-fat buttermilk
- 2 Tbsp (28 g) unsalted butter, melted
Instructions
-
Prepare Dry Ingredients: In a large mixing bowl, combine the all-purpose flour, salt, baking powder, baking soda, and granulated sugar. Whisk these dry ingredients together thoroughly to ensure they are well-mixed and evenly distributed. This step is crucial for consistent rising.
-
Combine Wet Ingredients: In a separate bowl, whisk together the large eggs and low-fat buttermilk until well combined. Gradually stream in the melted unsalted butter while continuing to whisk. Ensure the butter is not too hot, as it could scramble the eggs.
-
Gentle Mixing is Key: Create a shallow well in the center of the dry ingredient mixture. Pour the wet ingredients into this well. Using a spoon or rubber spatula, gently stir the wet and dry ingredients together until they are just incorporated. A few lumps are perfectly fine, and even desirable; avoid overmixing at all costs! Overmixing develops the gluten in the flour, leading to tough, chewy pancakes rather than light, fluffy ones. A little flour showing through the batter is okay.
-
Cook to Golden Perfection: Heat a griddle or large frying pan over medium-high heat. If using an electric griddle, aim for a temperature between 325-350 degrees Fahrenheit. Lightly grease the cooking surface with cooking spray or a small amount of butter. For each pancake, spoon approximately 1/3 cup of batter onto the hot pan, leaving space between them. Cook for 1-2 minutes, or until the bottom is golden brown and bubbles begin to form and pop on the surface of the pancakes. Carefully flip the pancakes and cook for another 1-2 minutes, or until the second side is golden brown and the pancake is cooked through and no longer doughy in the middle.
-
Serve and Enjoy: Transfer cooked pancakes to a plate and serve immediately with your favorite toppings and syrups. For best results, consider keeping finished pancakes warm on a baking sheet in a low oven (around 200°F / 95°C) while you finish cooking the rest of the batter.
Notes
Sharing this recipe with a link is both encouraged and appreciated. Copying/pasting and/or screenshots of full recipes to any social media is strictly prohibited. Content and photographs are copyright protected.
Did you make this?
Don’t forget to leave a rating below and make sure to follow on Pinterest and Instagram for more!
Expert Tips for Perfectly Fluffy Pancakes Every Time
Achieving pancake perfection is within reach! Follow these simple tips to ensure your buttermilk pancakes are consistently light, airy, and golden brown:
- Don’t Overmix the Batter: This is arguably the most crucial tip. Mix only until the wet and dry ingredients are just combined. A few lumps are perfectly normal and actually indicate you haven’t overmixed. Overmixing develops gluten, leading to tough pancakes.
- Rest the Batter (Optional but Recommended): If you have 10-15 minutes, let the batter rest after mixing. This allows the flour to fully hydrate and the leavening agents to begin their work, resulting in an even fluffier texture.
- Use the Right Griddle Temperature: Medium-high heat is ideal. If your griddle is too hot, the pancakes will burn on the outside before cooking through on the inside. Too low, and they’ll be dense and greasy. Test the temperature by dropping a small amount of water on the surface; it should sizzle and evaporate quickly.
- Measure Accurately: Especially for flour and leavening agents, precise measurements are important. Use a spoon to gently scoop flour into a measuring cup, then level it off with a straight edge.
- Fresh Leavening Agents: Baking powder and baking soda lose their potency over time. Ensure yours are fresh for optimal lift. You can test baking soda by adding a pinch to vinegar (it should fizz) and baking powder by adding a pinch to hot water (it should bubble).
- Don’t Flatten Them: Once you’ve poured the batter onto the griddle, resist the urge to press down on the pancakes with your spatula. This deflates the air bubbles and results in flat pancakes.
Serving Suggestions & Creative Toppings
These buttermilk pancakes are delicious on their own, but they truly shine when adorned with your favorite toppings. While a classic drizzle of maple syrup is always a winner, don’t be afraid to get creative:
- Fresh Fruits: Berries (raspberries, blueberries, sliced strawberries), banana slices, or sliced peaches add freshness and a burst of flavor.
- Classic Syrups: Pure maple syrup, honey, or even my Blonde Butter Syrup (which is truly bomb on these!) are timeless choices.
- Whipped Cream: A dollop of homemade whipped cream adds a luxurious touch.
- Nut Butters: Peanut butter, almond butter, or cashew butter can add protein and a creamy texture.
- Chocolate: Chocolate chips (added to the batter or sprinkled on top), chocolate syrup, or a dusting of cocoa powder for a decadent treat.
- Nuts: Toasted pecans, walnuts, or sliced almonds for crunch.
- Fruit Compotes or Jams: Homemade berry compote or a spoonful of your favorite fruit preserves.
Storing and Reheating Your Buttermilk Pancakes
Have leftovers? Lucky you! These homemade buttermilk pancakes store and reheat beautifully, making them perfect for meal prep or quick weekday breakfasts. Allow them to cool completely before storing.
- Refrigeration: Store cooked pancakes in an airtight container or a resealable bag in the refrigerator for up to 3-4 days.
- Freezing: For longer storage, stack cooled pancakes with parchment paper between each one to prevent sticking. Place the stack in a freezer-safe bag or container. They can be frozen for up to 2 months.
- Reheating from Refrigerator: Reheat in a toaster oven, microwave (for softer pancakes), or on a lightly greased griddle over medium heat until warmed through.
- Reheating from Freezer: Reheat frozen pancakes directly in a toaster, toaster oven, or on a griddle. Microwaving is also an option, but they might be less crispy.
Frequently Asked Questions About Buttermilk Pancakes
Here are answers to some common questions about making homemade buttermilk pancakes:
Can I prepare the pancake batter ahead of time?
While fresh batter is always best for maximum fluffiness, you can prepare the dry ingredients and wet ingredients separately and combine them just before cooking. If you must mix the full batter ahead, store it in an airtight container in the refrigerator for up to 12-24 hours. The pancakes might be slightly less fluffy due to the baking soda reacting, but they will still be delicious.
Why are my pancakes flat?
Flat pancakes are usually a result of overmixing the batter, using old or inactive leavening agents (baking powder/soda), or not having your griddle hot enough. Ensure your leavening agents are fresh and avoid overworking the batter!
How do I know when to flip the pancakes?
Look for several clear signs: the edges will start to look set, and bubbles will appear on the surface, with some of them popping. This usually takes 1-2 minutes on medium-high heat. Don’t flip too early, or they won’t be cooked through; don’t flip too late, or they might burn.
Can I add mix-ins to the batter?
Absolutely! Chocolate chips, blueberries, diced apples, or sprinkles are all fantastic additions. Stir them in gently at the very end, just before pouring the batter onto the griddle.
How can I keep pancakes warm while I’m cooking the rest?
Preheat your oven to its lowest setting (around 200°F or 95°C). As pancakes finish cooking, transfer them to a baking sheet in a single layer and place them in the warm oven. This keeps them warm without drying them out.
Making homemade buttermilk pancakes is a rewarding culinary experience that promises a truly exceptional breakfast. With a few simple ingredients and these straightforward steps, you can create fluffy, flavorful pancakes that will rival any diner’s offering. So, ditch the box mix, embrace the joy of scratch cooking, and get ready to indulge in the best buttermilk pancakes you’ve ever tasted. Enjoy every delicious bite!