
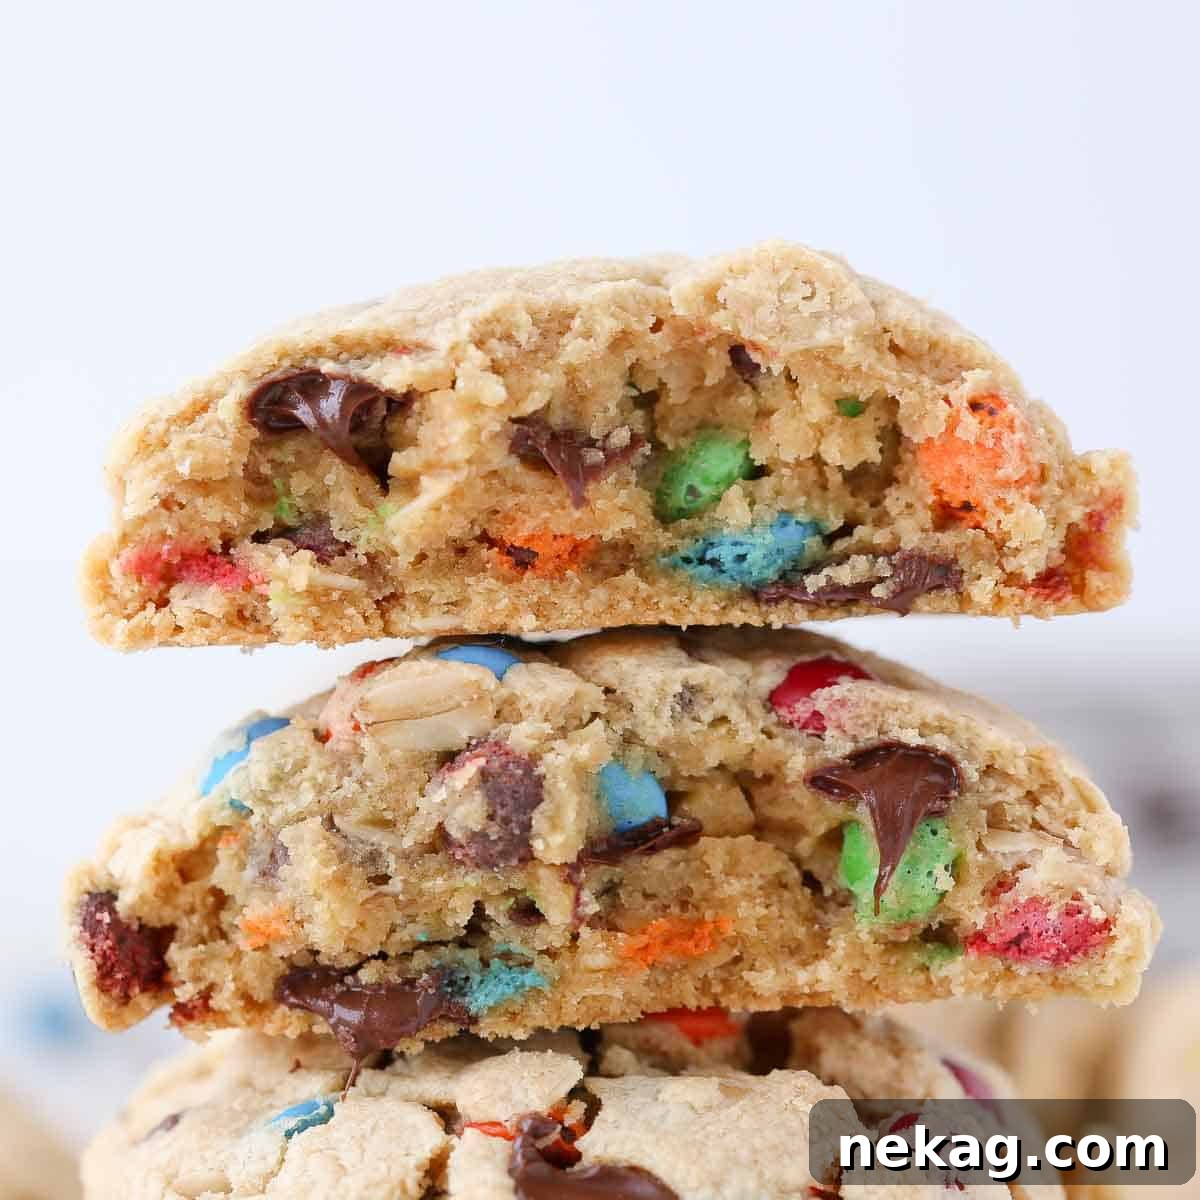
The Ultimate Monster Cookie Recipe: Thick, Chewy & Irresistibly Delicious
Get ready for the most incredible cookie experience! This monster cookie recipe delivers spectacularly thick, wonderfully chewy, and intensely flavorful peanut butter cookies. These aren’t just any cookies; they’re big, bold, and absolutely bursting with mix-ins, almost outnumbering the dough itself! Prepare to satisfy your deepest cravings with every delightful bite.

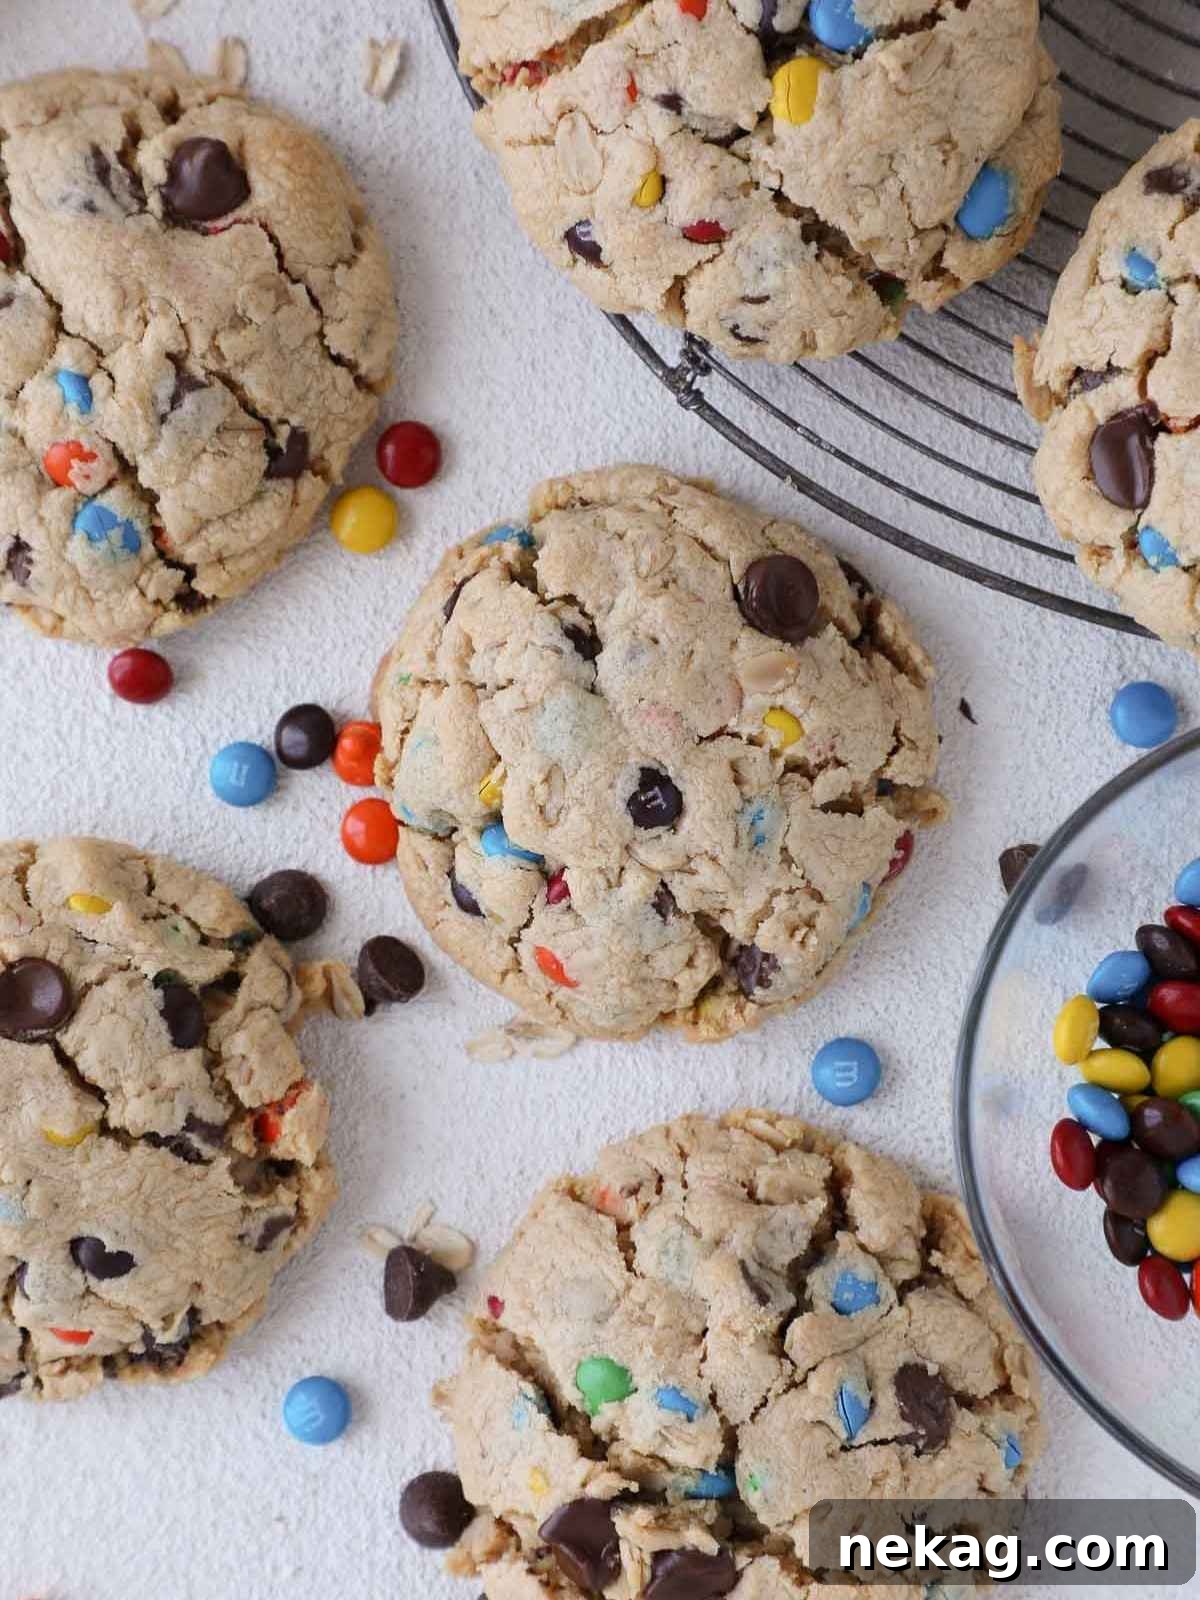
This remarkably easy monster cookie recipe masterfully combines some of life’s greatest pleasures: rich thick peanut butter cookies, classic chocolate chips, vibrant M&Ms, and wholesome oatmeal cookies. The result? Giant, chewy, and gooey masterpieces that are sure to impress. Whether you’re a devoted peanut butter enthusiast, a chocolate lover, or simply a cookie connoisseur, these monster cookies are guaranteed to be a hit with everyone!
Once you’ve experienced the joy of these cookies, you’ll want to explore more peanut butter delights. Don’t miss out on other peanut butter flavor wins like indulgent Reese’s Peanut Butter Blondies, festive Peanut Butter Blossoms, and wholesome Peanut Butter Banana Muffins!
Table of Contents
- Why You Will Absolutely Love This Monster Cookie Recipe
- What Exactly Are Monster Cookies?
- Professional Baking Tips for Perfect Monster Cookies
- Essential Ingredients for the Best Monster Cookies
- Exciting Variations to Customize Your Monster Cookies
- How to Serve Monster Cookies for Maximum Enjoyment
- Step-by-Step Guide: How to Make Monster Cookies
- Chef Lindsey’s Secret to Cookie Perfection
- Frequently Asked Questions About Monster Cookies
- Monster Cookies: Full Recipe
- Before You Go
Why You Will Absolutely Love This Monster Cookie Recipe
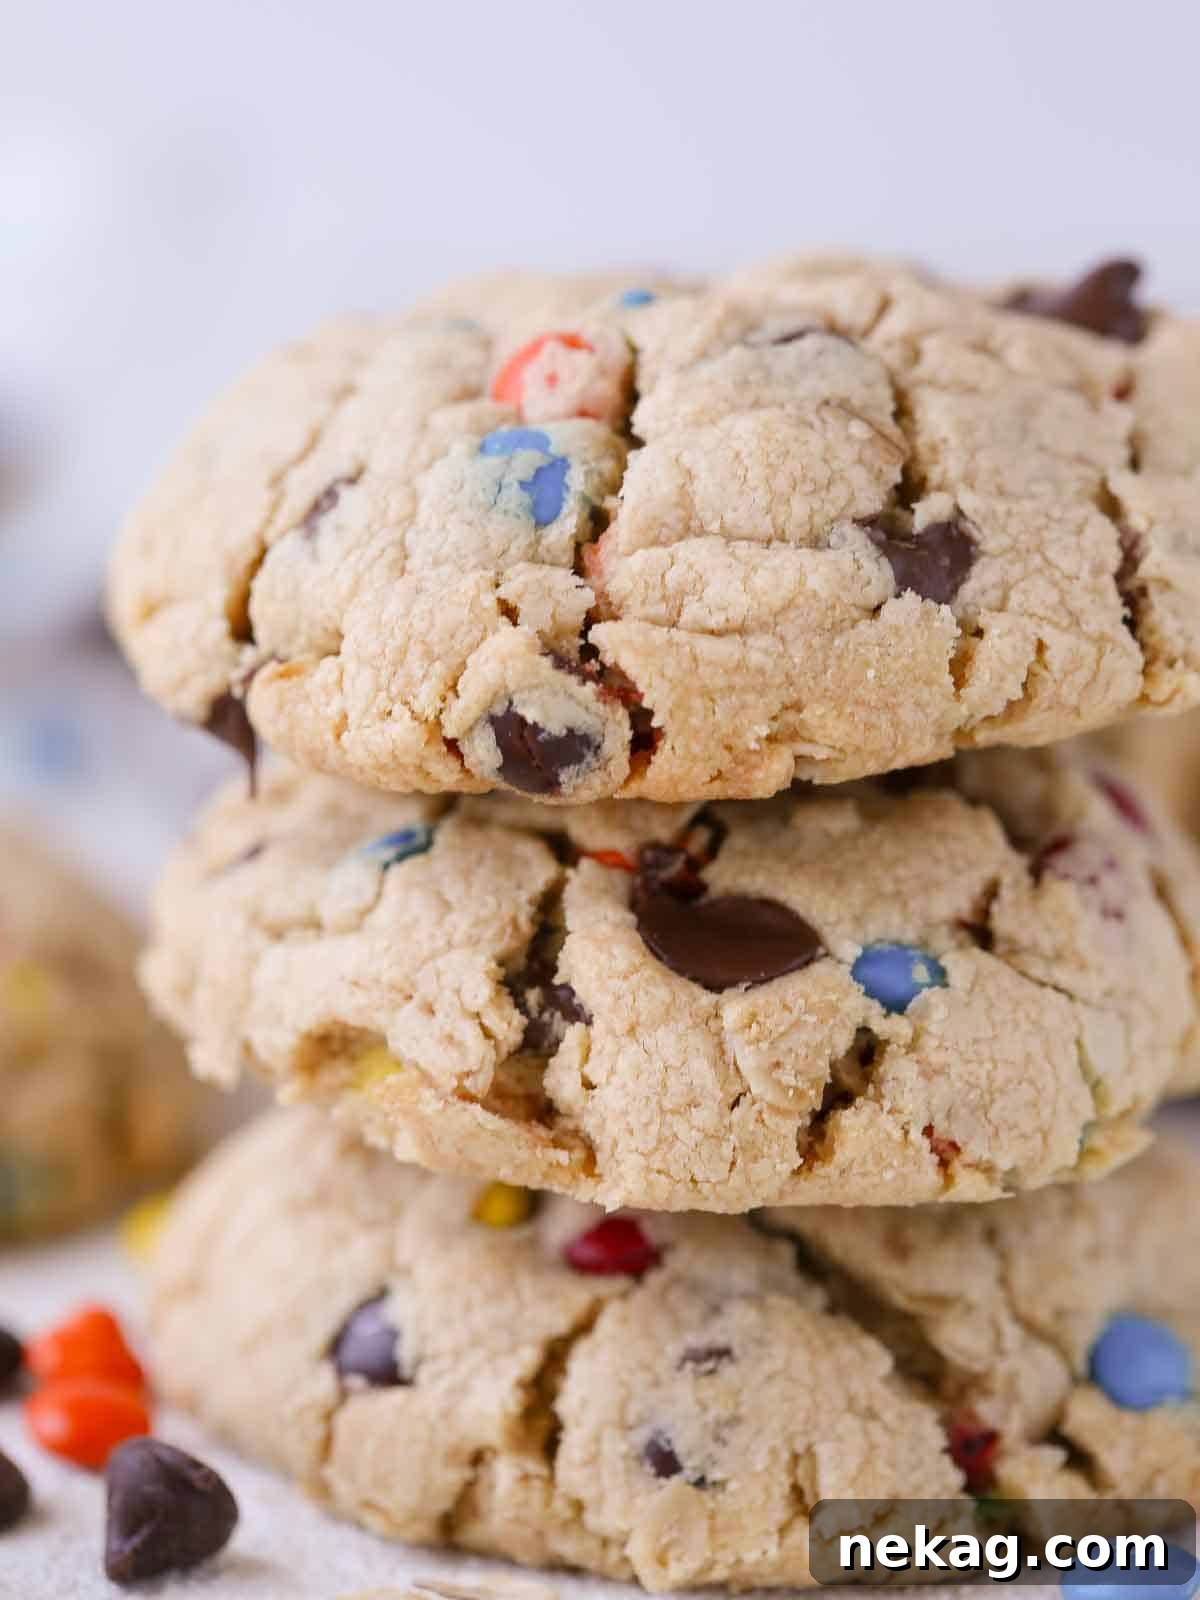
- Unbeatable Texture: Soft, Chewy, and Wonderfully Thick! These cookies have been meticulously perfected, from the precise mixing method to the ideal ingredient ratios, ensuring the most delectable, melt-in-your-mouth texture every single time. You won’t find a thin, crispy cookie here – only robust, satisfying chewiness.
- Infinitely Customizable to Your Taste. While my recipe features the classic creamy peanut butter, vibrant M&M’s, and wholesome oats, the possibilities for personalization are endless! Feel free to experiment with peanut butter chips, rich butterscotch chips, a delightful blend of milk and dark chocolate chips, or even chopped nuts for extra crunch. Make them truly your own!
- Perfect for Sharing (or Savoring Solo!). This recipe yields a baker’s dozen of truly giant, bakery-sized cookies – ideal for sharing with cherished friends, loving family, or simply enjoying one (or more!) yourself throughout the week. Their substantial size makes them a memorable treat for any occasion.
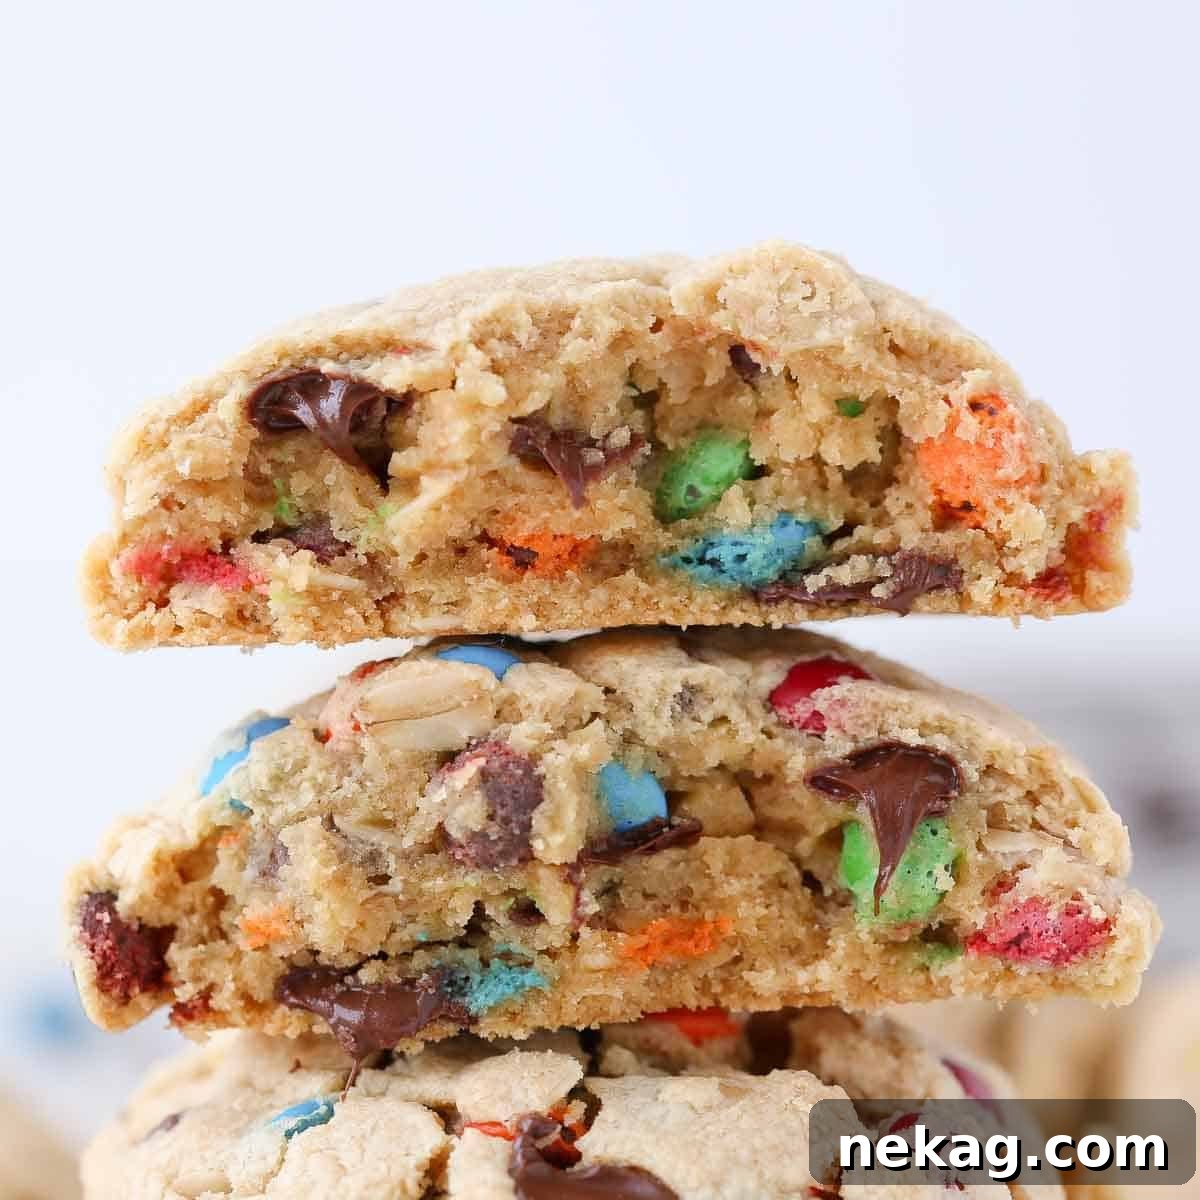
What Exactly Are Monster Cookies?
You asked, and I’m thrilled to tell you! Monster cookies are an iconic American treat, beloved for their colossal size, incredible thickness, and wonderfully chewy texture. They earn their “monster” moniker not from any spooky association, but from being an over-the-top, overflowing delight packed with a seemingly endless array of delicious mix-ins. Think of them as the ultimate mash-up of several classic cookie types: peanut butter, chocolate chip, M&M, and oatmeal cookies all rolled into one magnificent creation.
While their exact origin is debated, many sources point to the Midwest, particularly Iowa, in the 1970s. It makes perfect sense that such a hearty, comforting, and generously portioned recipe would gain popularity in a region known for its wholesome and satisfying dishes. These cookies are a celebration of indulgence, offering a rich tapestry of flavors and textures in every single bite. They are, without a doubt, a monstrously good treat!
Professional Baking Tips for Perfect Monster Cookies
- Mastering Butter and Sugar Creaming: The most crucial secret to achieving thick, chewy cookies like these (and my triple chocolate chip cookies) is using *cold yet pliable butter*. It should be softened just enough that you can press your finger into it, leaving a slight indent, but still feel cool to the touch. When you add the sugars, mix them on medium-high speed *just* until they are combined into a cohesive, somewhat sandy paste. Over-creaming butter and sugar incorporates too much air, leading to cookies that spread excessively thin.
- Choosing the Right Peanut Butter: I’m a staunch advocate for Jif creamy peanut butter – it’s my go-to, always and forever! While you should use your preferred brand, I highly recommend smooth peanut butter for the best texture and flavor distribution. Natural peanut butter can also work, but be sure to stir it thoroughly to re-incorporate any separated oil before measuring, as its consistency can vary and affect the dough.
- Gradual Addition of Dry Ingredients: For the absolute thickest and chewiest monster cookies, it’s essential to gradually incorporate the dry ingredients into the wet mixture. This technique prevents over-developing the gluten in the flour, which can result in tough cookies. I typically add the flour mixture in about 4-5 additions, stopping the mixer and scraping down the sides of the bowl after each addition, only adding the next batch once the previous one is *just* incorporated.
- Don’t Skimp on the Mix-Ins: These are “monster” cookies for a reason – they’re meant to be loaded! Ensure your chocolate chips, M&Ms, and oats are evenly distributed throughout the dough. Don’t be shy; a generous amount contributes to that signature hearty texture and flavor explosion.
Essential Ingredients for the Best Monster Cookies
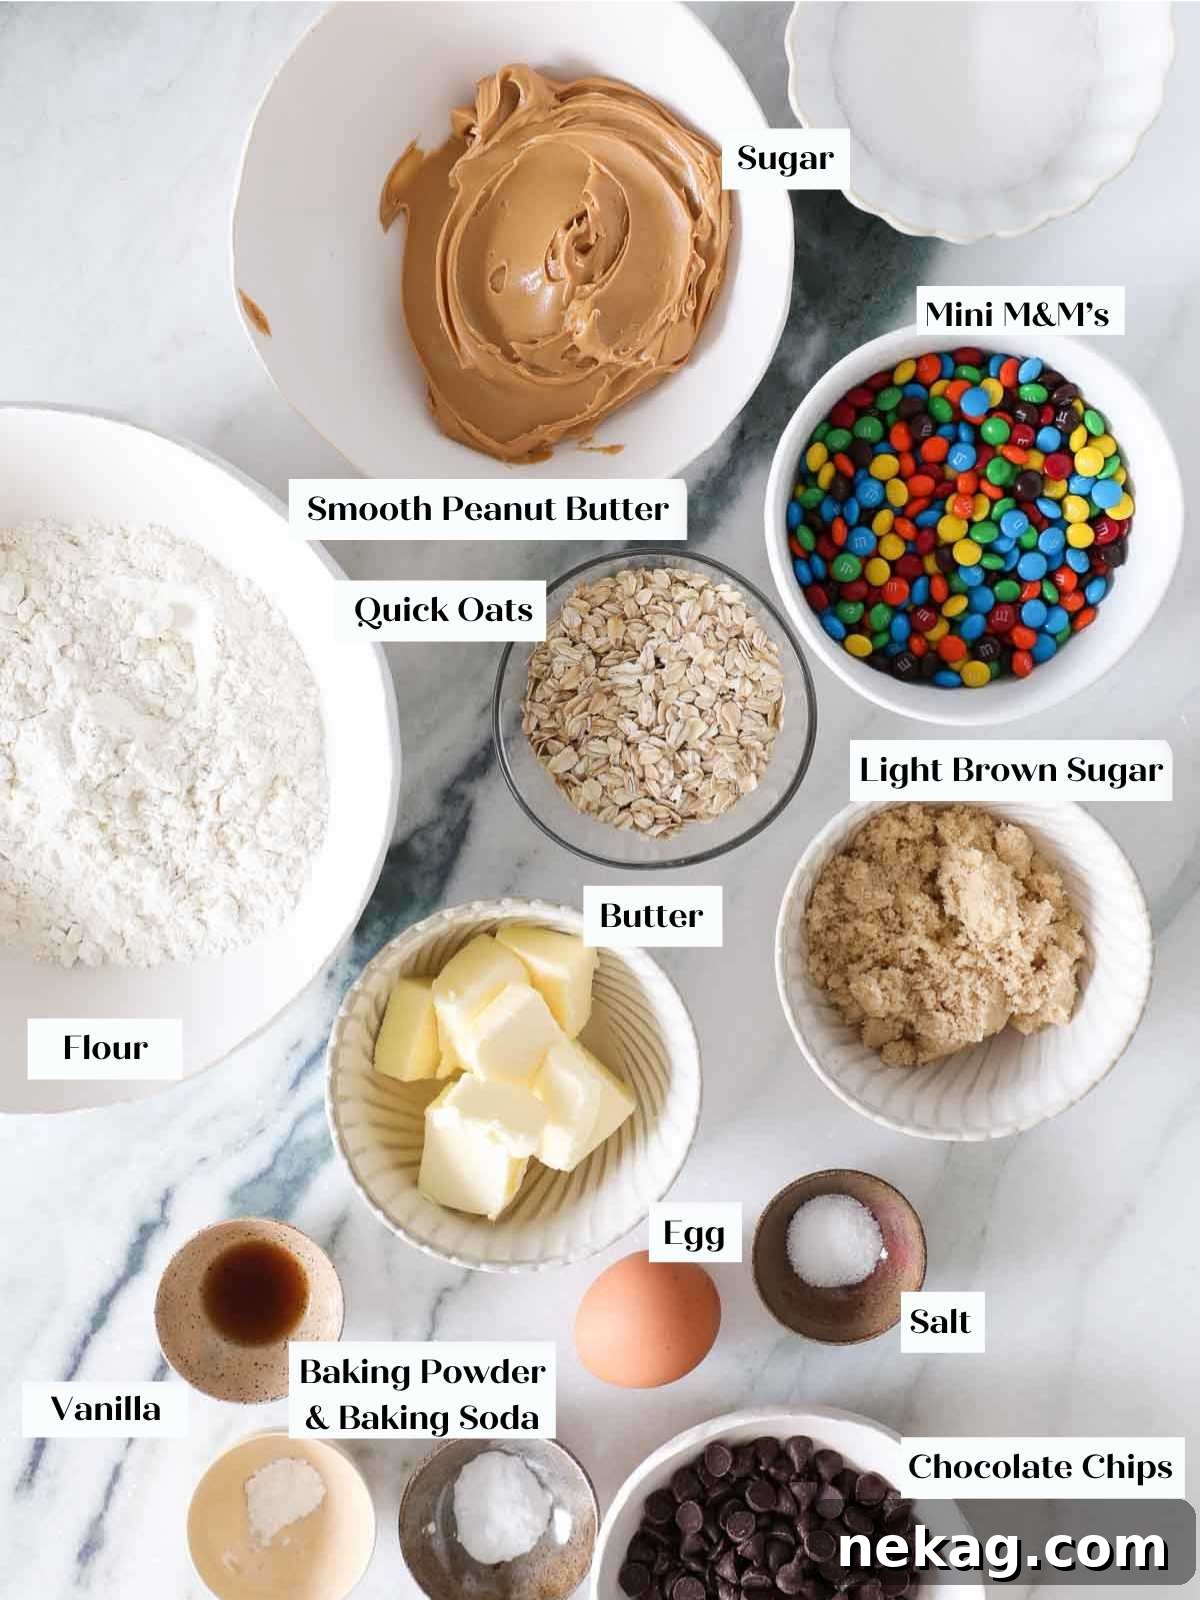
- Light Brown Sugar: The inclusion of light brown sugar is pivotal. It not only provides sweetness but also a significant amount of moisture, which is key to keeping these cookies wonderfully soft and chewy. Additionally, it imparts a beautiful, rich molasses flavor that complements the peanut butter beautifully.
- Unsalted Butter: This recipe calls for a combination of softened unsalted butter and peanut butter. The butter contributes to the overall fat content, ensuring a tender crumb. If you’re looking for a cookie without peanut butter, I highly recommend trying my thick chocolate chip cookie recipe instead.
- Smooth Peanut Butter: As mentioned in my professional tips, smooth peanut butter is essential here. Its creamy texture helps bind the dough and delivers that unmistakable, intense peanut butter flavor that defines a monster cookie.
- Whole Egg: Eggs play multiple vital roles in this recipe. They add fat from the yolk for richness, contribute moisture, and act as a leavening agent. The egg also serves as an emulsifier, expertly binding the ingredients and ensuring a perfect, consistent texture throughout the cookie dough.
- Chocolate Chips: I typically opt for semi-sweet chocolate chips for a balanced sweetness. However, feel free to use your favorite variety – milk chocolate, dark chocolate, or even a blend would be delicious additions!
- Quick Oats: Quick oats are preferred over old-fashioned rolled oats in this recipe as they provide a softer, chewier texture without the need for additional liquid or extended baking time. They also add a subtle, wholesome chewiness.
- Mini M&M’s: These colorful candies are a signature ingredient of monster cookies, adding not only bursts of chocolate flavor but also a delightful crunch and visual appeal. The mini size ensures they are well distributed.
- Kosher Salt: A touch of kosher salt is crucial for balancing the sweetness and enhancing all the other flavors, particularly the peanut butter and chocolate.
- Granulated Sugar: Granulated sugar provides essential sweetness and contributes to the cookie’s structure. However, it’s important to use it in the correct proportion; too much can cause the cookies to spread excessively thin rather than maintain their desirable tall and chewy profile.
- Vanilla Extract: Vanilla extract offers its own delightful aromatic notes, but its primary function in baking is to boost and harmonize the flavors of other ingredients, like chocolate, peanut butter, and brown sugar, making the overall profile more complex and delicious.
- All-Purpose Flour: All-purpose flour contains just the right amount of gluten to create a perfectly soft, chewy, and robust bakery-style cookie that holds its shape beautifully.
- Baking Soda: Baking soda acts as a leavening agent. In this recipe, it reacts with the acidic molasses present in the light brown sugar, creating carbon dioxide bubbles that help the cookies rise and become tender.
- Baking Powder: Working in conjunction with baking soda, baking powder provides additional lift, ensuring these monster cookies achieve their impressive thickness and soft texture.
Refer to the comprehensive recipe card below for precise measurements and detailed ingredient information.
Exciting Variations to Customize Your Monster Cookies
- Experiment with Different Mix-ins: Unleash your creativity! Instead of (or in addition to) the classic chocolate chips and M&Ms, try adding butterscotch chips for a sweet, caramelly note, creamy peanut butter chips, luxurious white chocolate chips, crushed Oreo’s for an extra layer of texture, or your favorite chopped candies like Reese’s Peanut Butter Cups or Reese’s Pieces for a vibrant twist. For an exceptionally decadent treat, swirl in some homemade salted caramel sauce just before baking.
- Transform Them into a Skillet Cookie Delight! For an impressive and shareable dessert, press the room-temperature cookie dough evenly into an 8 or 10-inch cast iron skillet. Bake until the edges are beautifully golden brown and the center is set and completely matte. To truly make your skillet cookie dreams come true, serve it warm with generous scoops of my luscious vanilla bean ice cream, a drizzle of rich chocolate fudge sauce, and a sprinkle of flaky sea salt on top!
- Add a Salty Crunch. For a delightful contrast in flavor and texture, crush up some pretzels or finely chop roasted peanuts and sprinkle them generously over the portioned dough balls just before placing them in the oven. The salty crunch will elevate your monster cookies to a whole new level of deliciousness.
How to Serve Monster Cookies for Maximum Enjoyment
- These magnificent monster cookies are undeniably indulgent on their own, offering a complete dessert experience. However, for an extra touch of elegance and decadence, they pair exquisitely with a silky crème anglaise or a scoop of creamy vanilla bean ice cream! You can even create gourmet ice cream sandwiches by gently pressing softened ice cream between two room-temperature cookies for the best texture and ease of eating.
- Elevate your cookie experience by topping them with a warm, gooey hot fudge sauce, a rich and buttery salted caramel sauce, or a scoop of velvety chocolate ice cream! The combination of warm cookie and cold topping is simply divine.
- Sometimes, simplicity is key. For the ultimate comforting treat, simply pour yourself a tall, frosty glass of cold milk, find a cozy spot, and savor every glorious bite of these homemade monster cookies. Pure bliss!
Step-by-Step Guide: How to Make Monster Cookies
For even more precise details and exact measurements, please refer to the comprehensive recipe card located further down on this page!
Step 1: Prepare Your Dry Ingredients. In a spacious mixing bowl, combine the all-purpose flour, baking soda, baking powder, and kosher salt. Use a whisk to thoroughly combine these ingredients, ensuring that the leavening agents are evenly distributed and there are no lumps. Set this bowl aside for later.
Step 2: Cream Butter and Sugars. Begin the creaming process by placing the cold but pliable unsalted butter in the bowl of a stand mixer fitted with a paddle attachment (or use an electric hand mixer). Beat the butter on medium-high speed until it reaches that ideal state: still cold, but soft enough to leave an indent when pressed. Next, add both the granulated sugar and light brown sugar. Continue mixing on medium-high until the sugars are just combined with the butter, forming a thick, uniform paste. This step is particularly critical if your butter happens to be at room temperature, as it helps prevent over-aeration.
Remember to frequently scrape the bottom and sides of the bowl with a rubber spatula. Butter has a tendency to stick to the bottom and might not fully incorporate into the sugar mixture if not scraped down.
Step 3: Incorporate Wet Ingredients. Add the whole egg and vanilla extract to the butter and sugar mixture. Beat until just combined, stopping to scrape down the sides of the bowl as needed to ensure everything is fully incorporated. Finally, add the smooth peanut butter and continue beating until the mixture is completely smooth and homogeneous, with no streaks of peanut butter visible.
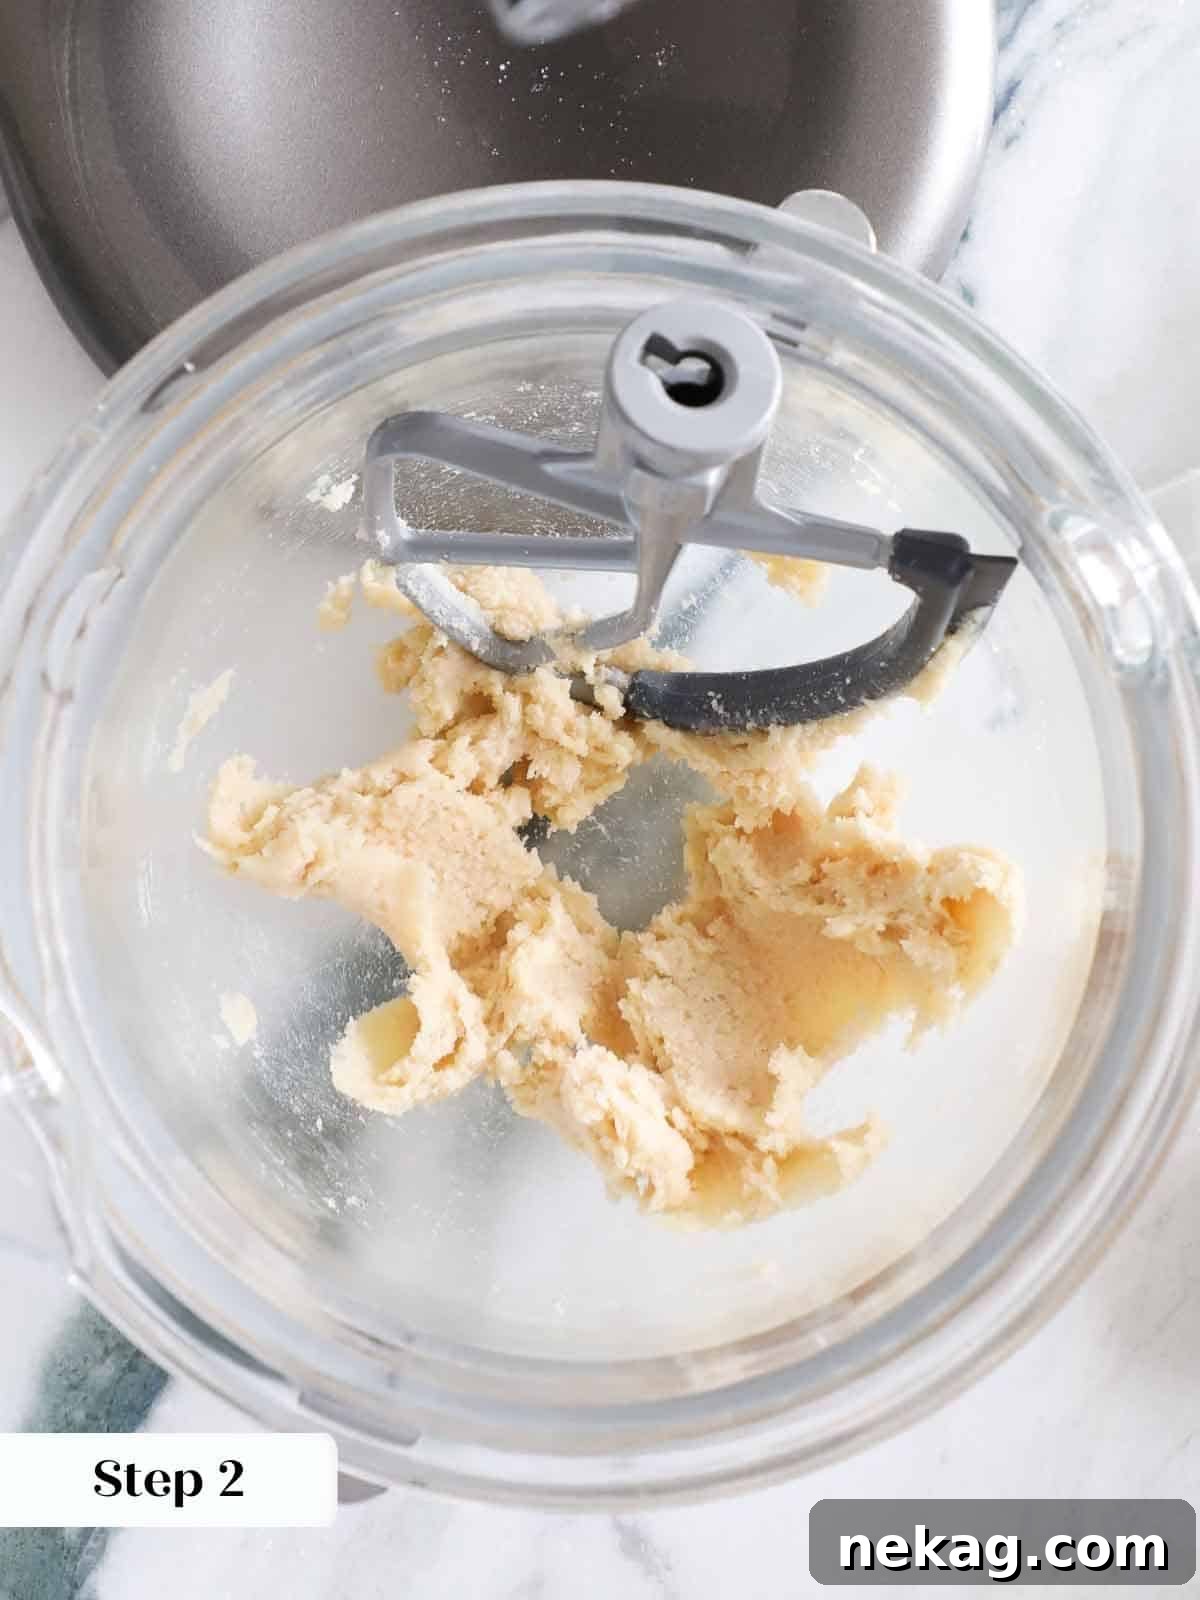
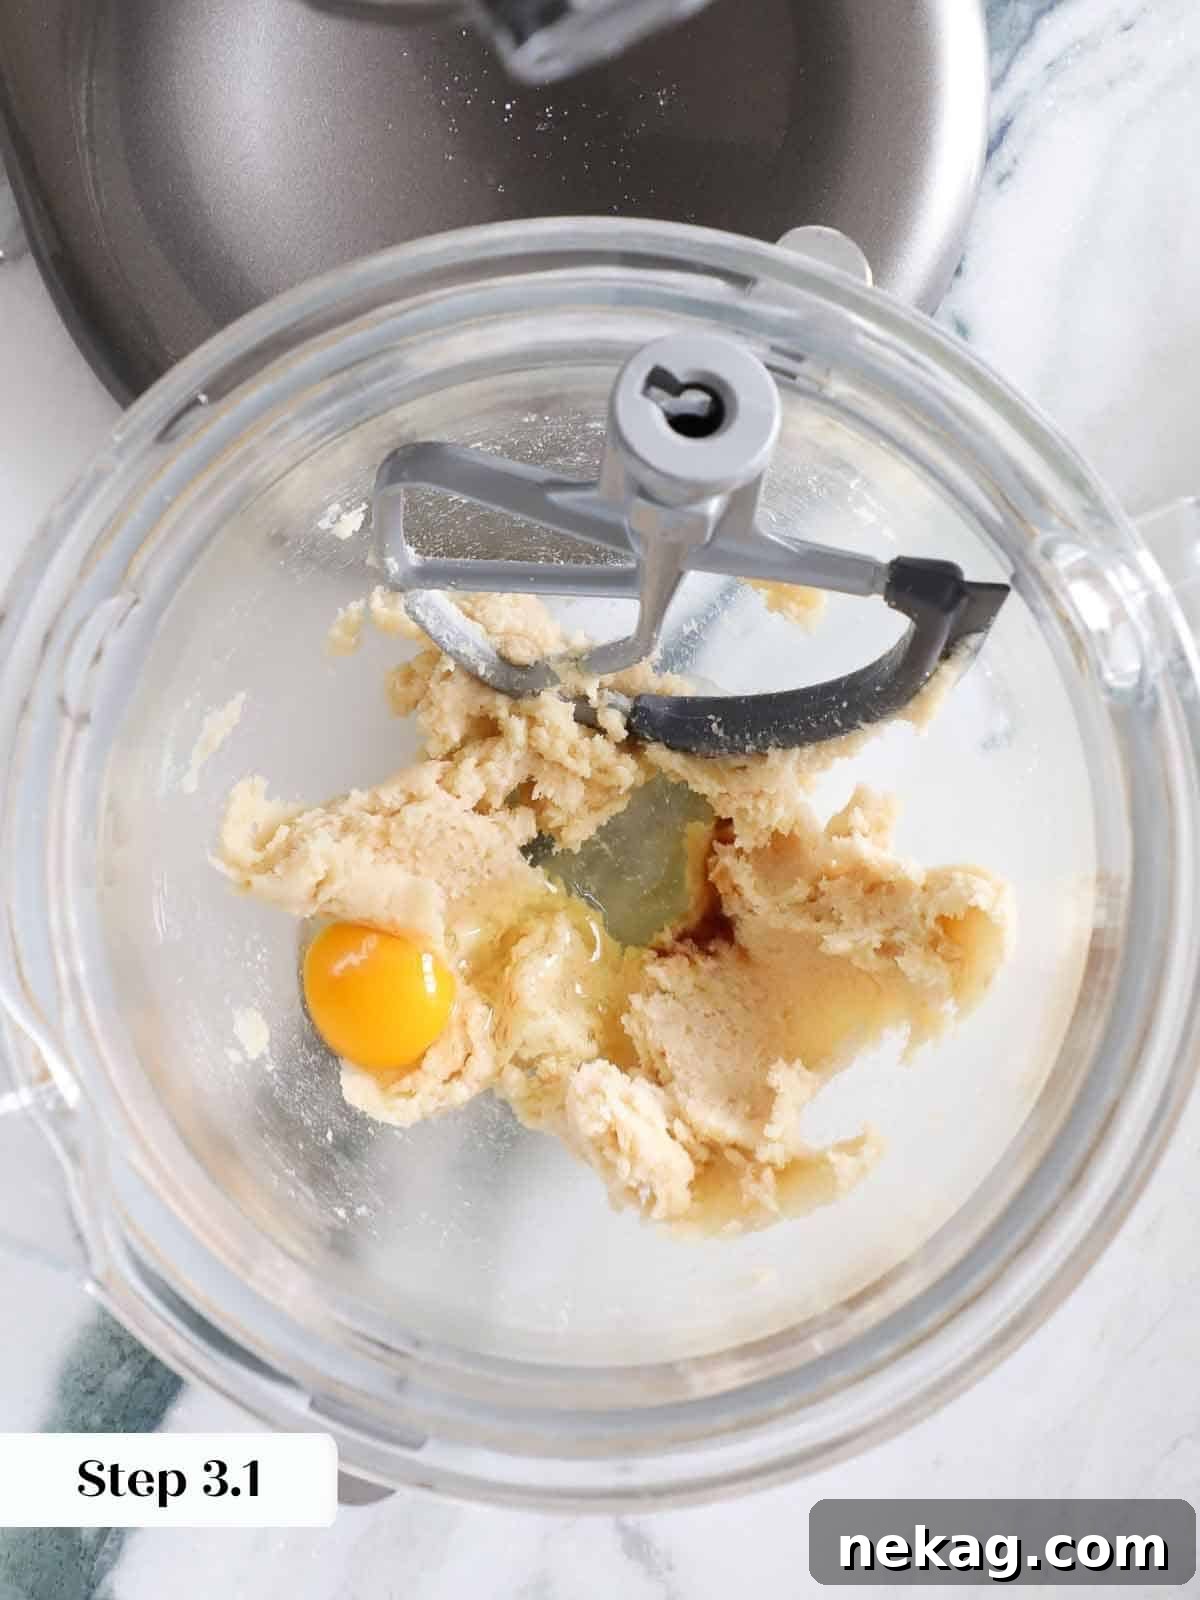
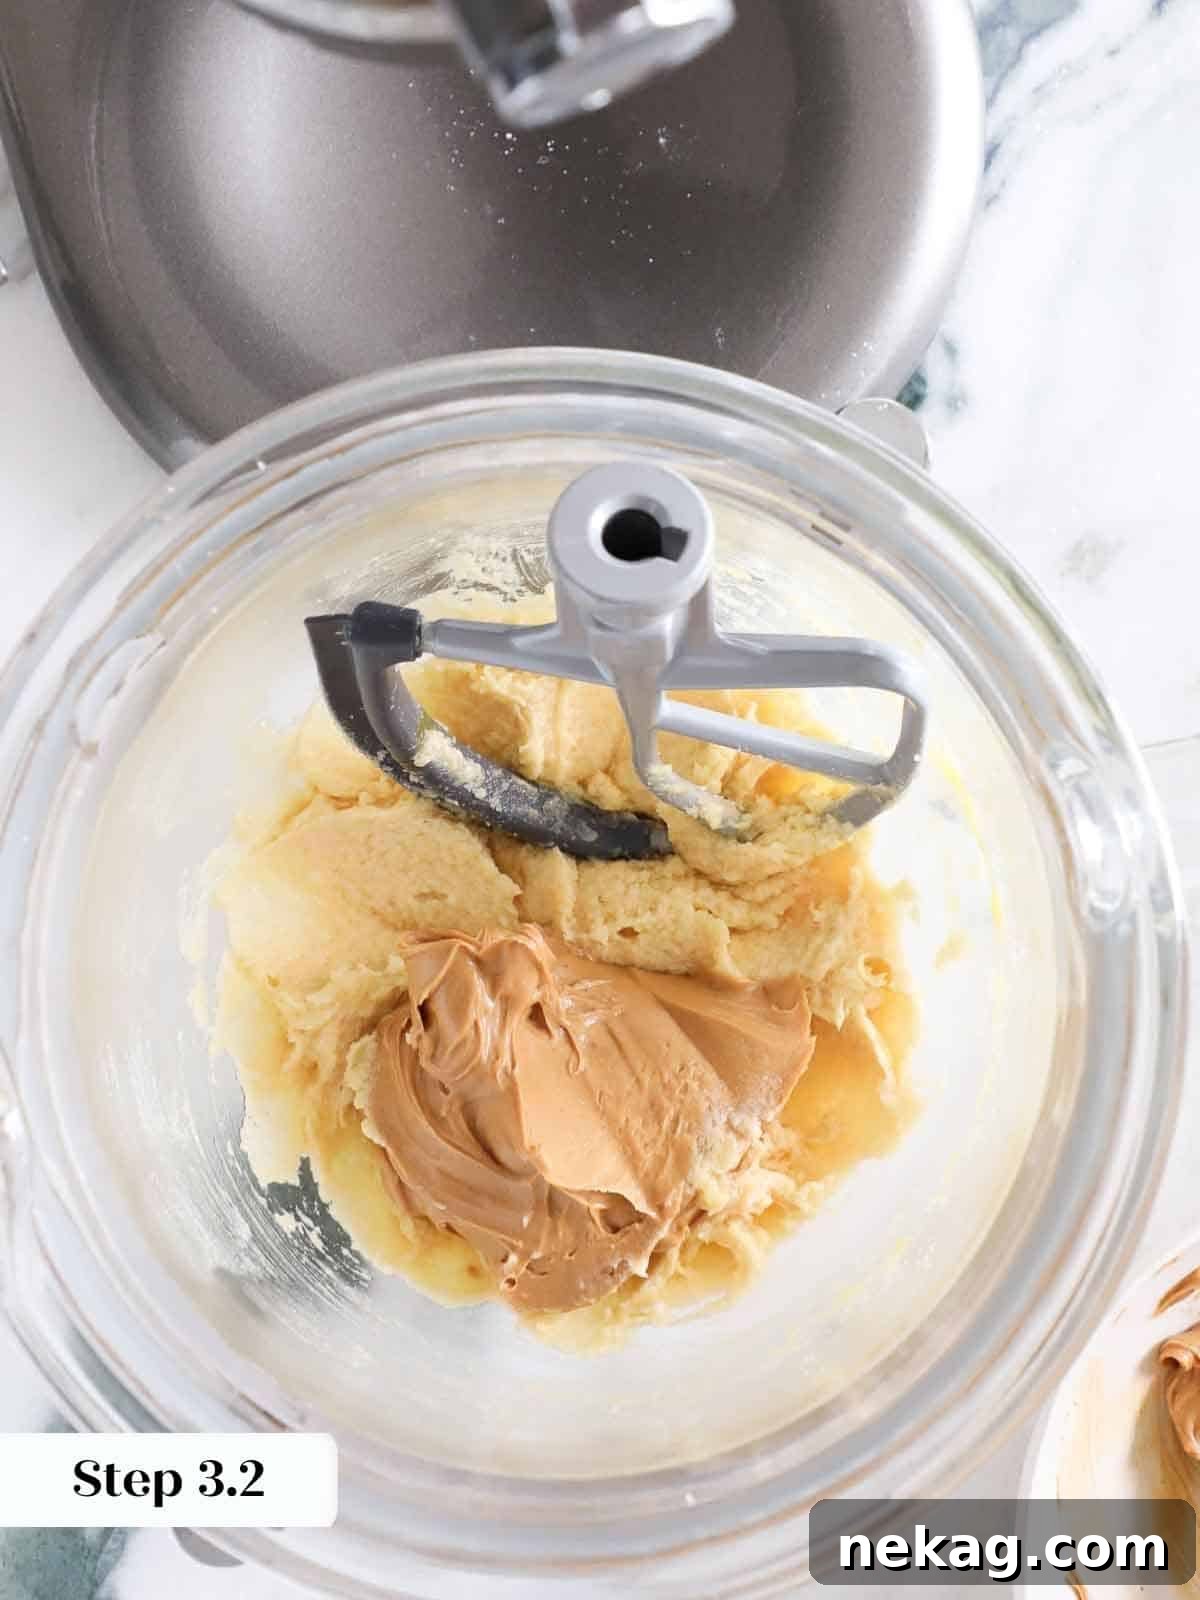
Step 4: Gradually Add Dry Ingredients. Reduce the mixer speed to low. Begin gradually adding the whisked dry ingredients to the wet mixture. To prevent overdevelopment of the gluten and ensure a tender cookie, I recommend adding the flour mixture in approximately 4-5 small additions. Wait until the previous addition of flour is *just* about incorporated before adding the next batch.
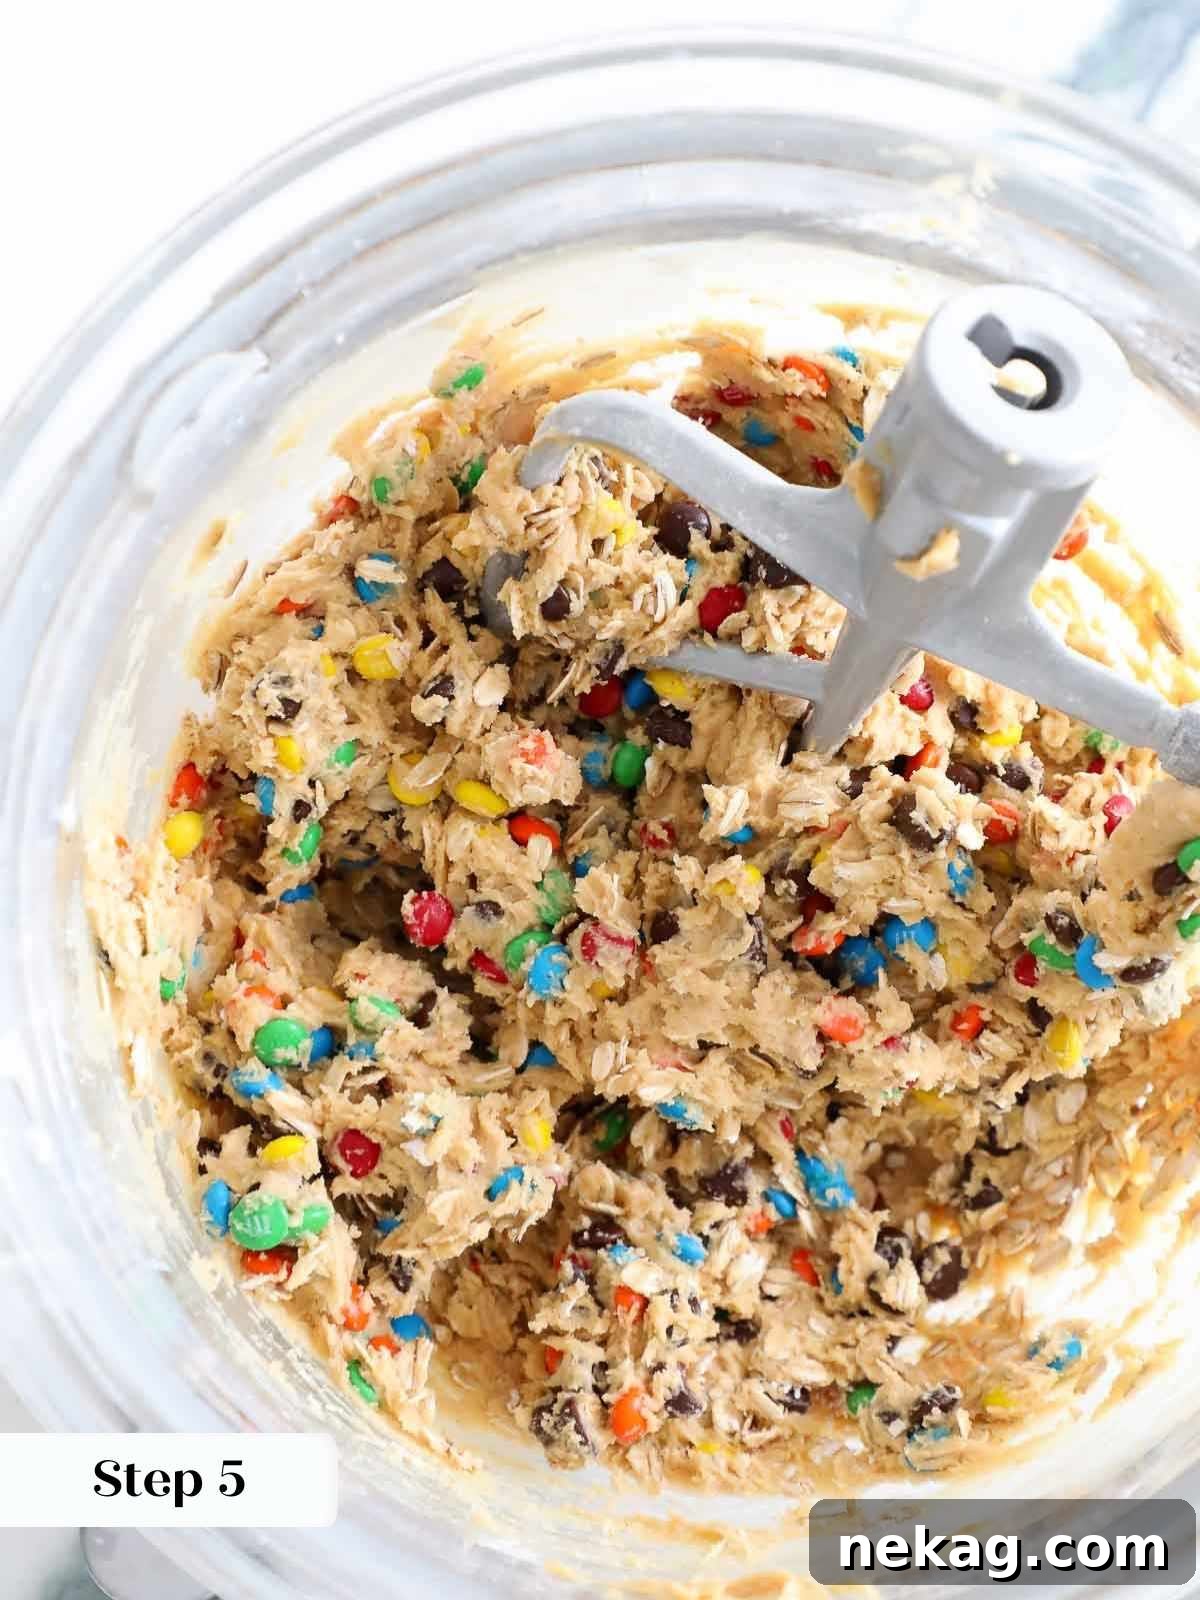
Step 5: Incorporate the Mix-Ins. Once the flour is fully incorporated into the dough, it’s time for the stars of the show! Add the chocolate chips, quick oats, and mini M&Ms to the dough. Mix on low speed, or by hand with a sturdy spatula, until all the mix-ins are evenly combined and thoroughly distributed throughout the dough. Be careful not to overmix at this stage.
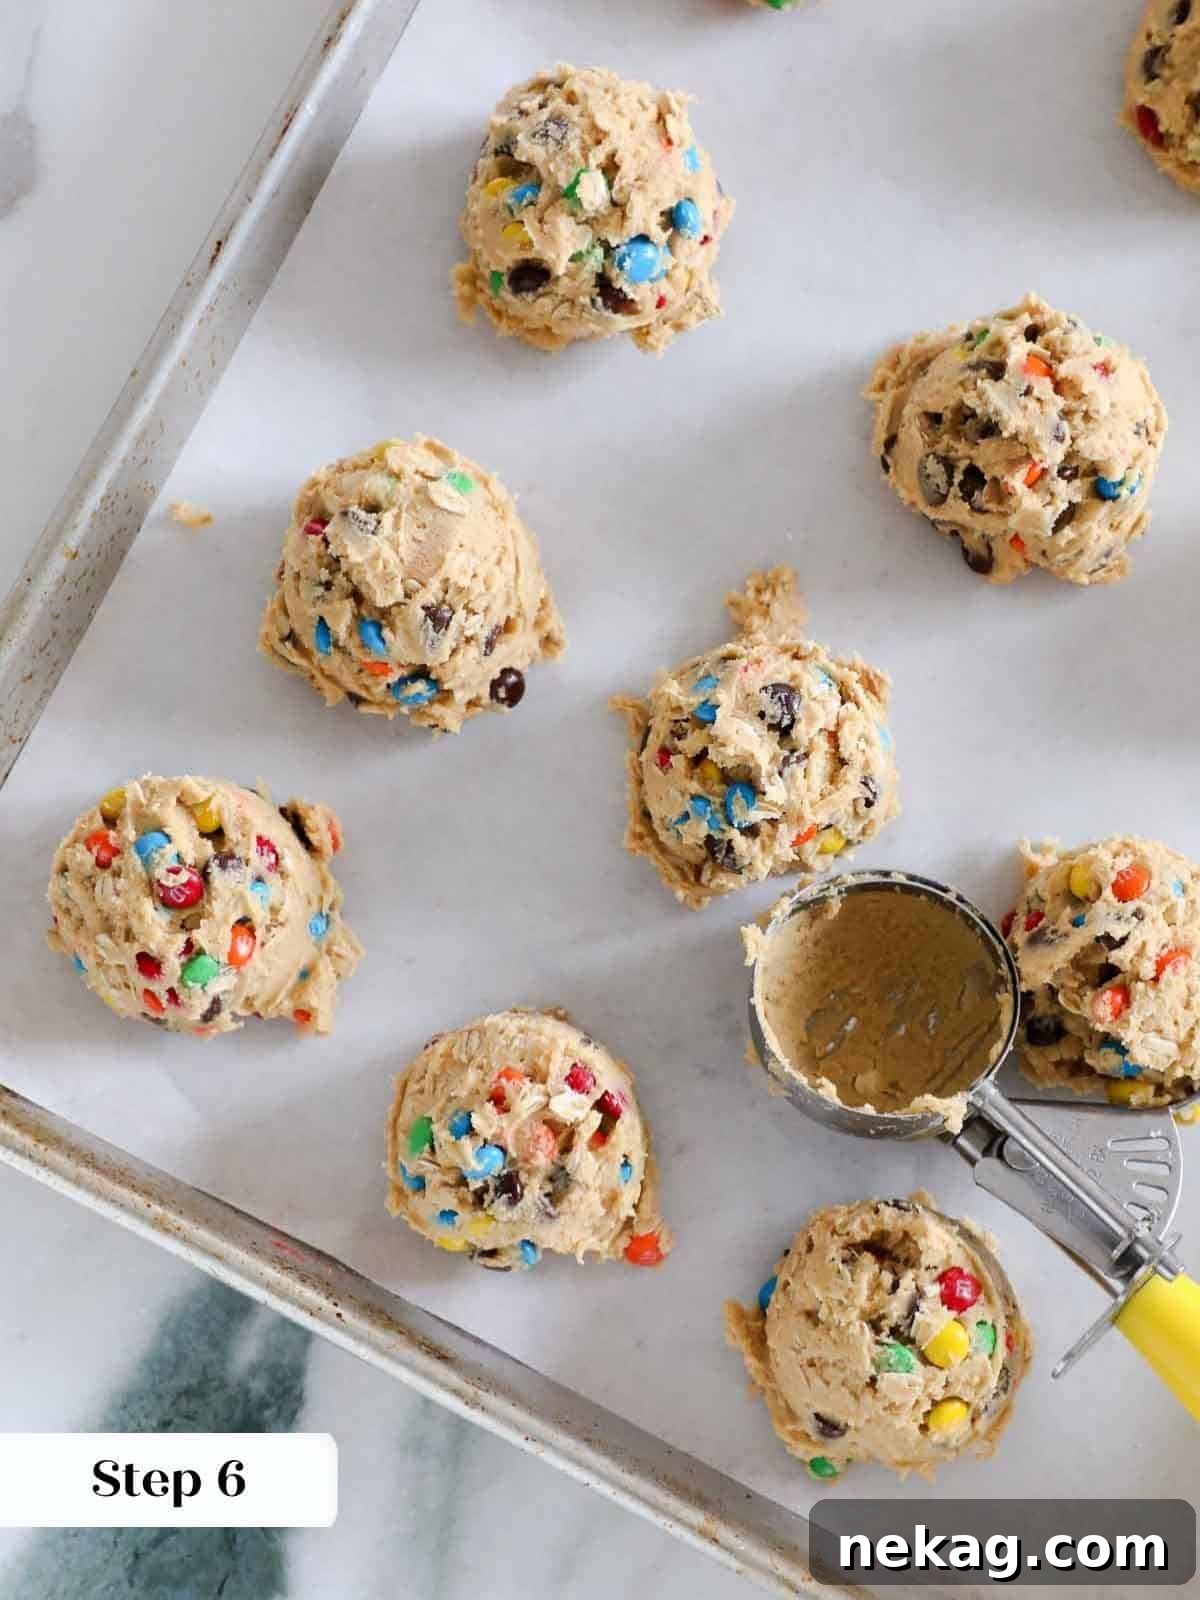
Step 6: Portion and Prepare for Baking. Roll the cookie dough into generous 1 ½ inch balls, which should weigh approximately 70 grams each, or roughly half the size of a tennis ball. For consistency, a 2 oz cookie scoop works perfectly here. Yes, they are meant to be truly huge! At this point, you have two options: chill the dough balls completely (which is highly recommended for optimal texture) or bake them immediately. The beauty of this recipe is its flexibility! They bake like a dream from frozen, but if that irresistible chocolate-peanut butter craving hits hard, feel free to preheat your ovens and pop them right in!
It’s crucial that the cookie dough is rolled into balls while it’s at room temperature. Attempting to pre-chill the dough before rolling can cause it to dry out, making it very difficult to portion and potentially impacting the final texture of your baked cookies.
Step 7: Preheat Oven and Prepare Baking Sheets. Preheat your oven to 350°F (175°C) for conventional baking, or 325°F (160°C) for a convection oven. Line your baking sheets with parchment paper to prevent sticking and ensure even baking.
Step 8: Bake to Golden Perfection. Place the chilled or frozen cookie dough balls about 2 inches apart on the prepared baking sheets. Bake for 10-12 minutes, or until the edges are golden brown and the centers appear matte and set. In my convection oven at 325°F, cookies baked directly from the refrigerator took about 13 minutes, with a rotation of the baking sheet after 8 minutes. If baking from frozen, expect them to take a solid 15 minutes or slightly longer. The key is to watch for the matte finish and slightly golden edges, as they will continue to set as they cool.
Step 9: Cool and Enjoy! Allow the freshly baked monster cookies to cool on the baking sheet for at least 5 minutes. This crucial step allows them to firm up and prevents them from breaking. After 5 minutes, carefully transfer them to a wire rack to cool completely. Or, if you simply can’t wait, enjoy them warm! No judgment here – they’re delicious either way!
Chef Lindsey’s Secret to Cookie Perfection
For the absolute best texture – truly thick, perfectly chewy, and with minimal spreading – I implore you to bake these cookies from frozen dough. I know, the wait when you’re craving a warm cookie can feel interminable! But trust me, this simple step makes all the difference in achieving that ideal bakery-style result you crave. The colder dough prevents rapid spreading, allowing the cookies to bake up tall and robust.
Frequently Asked Questions About Monster Cookies
Once fully cooled, store your baked monster cookies in an airtight container at room temperature for up to 3 days. For longer storage, they can be frozen for up to 2 months. Even better, you can freeze the cookie dough balls before baking! This means you’ll have a ready supply of freshly baked cookies for any day of the week, whenever a craving strikes.
Absolutely! Freezing monster cookie dough is an excellent way to prepare ahead. Once you’ve rolled the dough into balls, place them on a parchment-lined baking sheet and freeze until solid (about 1-2 hours). Then, transfer the frozen dough balls to an airtight freezer-safe bag or container. They can be stored in the freezer for up to 2 months. When you’re ready to bake, simply place them on a prepared baking sheet (no need to thaw!) and add a few extra minutes to the baking time.
Several factors can lead to crumbly monster cookies. The most common culprit is often an inaccurate measurement of flour. Baking by weight is always more precise, but if you’re measuring by volume, remember to fluff your flour in the bag, then spoon it gently into your measuring cup, mounding it slightly. Use a straight edge (like the back of a knife) to level off the excess, being careful not to tap or compress the flour. Compacting flour can add too much to the recipe. Other reasons for crumbly cookies include overmixing the dough, which overdevelops gluten, or not adding enough butter or peanut butter, which provide essential fat and moisture for a tender, chewy crumb.
While a stand mixer with a paddle attachment makes the process incredibly easy and efficient, it’s not strictly necessary. You can absolutely make these monster cookies using a good quality electric hand mixer. Just be sure to use a large, sturdy mixing bowl and be diligent about scraping down the sides and bottom of the bowl frequently to ensure all ingredients are fully incorporated.
If you tried this recipe and loved it, please leave a 🌟 star rating and let me know how it goes in the comments below. I love hearing from you; your comments truly make my day!
Monster Cookies
Chef Lindsey
15 mins
10 mins
30 mins
55 mins
13 cookies
Comment
Print Recipe
Ingredients
- 1 ⅔ cup All-Purpose Flour
- ½ teaspoon Baking Soda
- ¼ teaspoon Baking Powder
- ½ teaspoon Kosher Salt
- ⅓ cup Granulated Sugar
- ⅓ cup Light Brown Sugar
- ½ cup Unsalted Butter, softened but still cold
- ¾ cup Smooth Peanut Butter (I prefer Jif)
- 1 Large Egg
- ¼ teaspoon Vanilla Extract
- ½ cup Chocolate Chips (semi-sweet recommended)
- ½ cup Quick Oats
- 1 cup Mini M&Ms
Instructions
-
In a large bowl, combine flour, baking soda, baking powder, and salt. Whisk well to ensure all ingredients, especially leavening agents, are evenly distributed and lump-free. Set aside.
-
In the bowl of a stand mixer fitted with a paddle attachment (or using an electric mixer), beat the unsalted butter on medium-high speed until it is still cold but pliable. Add both granulated sugar and light brown sugar, then mix on medium-high until just combined and a uniform paste forms. Scrape down the bowl as needed.
-
Add the egg and vanilla extract to the creamed mixture, beating until incorporated. Scrape down the sides of the bowl. Add the smooth peanut butter and beat until the mixture is smooth and fully combined.
-
Reduce the mixer speed to low. Gradually add the prepared dry ingredients to the wet mixture in 4-5 additions. Add the next portion of flour only when the previous one is almost fully incorporated, being careful not to overmix the dough.
-
Once the flour is completely incorporated, stir in the chocolate chips, quick oats, and mini M&Ms. Mix on low speed until all mix-ins are evenly combined and distributed throughout the dough.
-
Roll the cookie dough into 1 ½ inch balls, weighing approximately 70g each (or use a 2 oz cookie scoop). Chill the dough balls completely for at least 30 minutes, or you can bake them immediately if preferred. For best results, baking from frozen dough is recommended.
-
Preheat your oven to 350°F (175°C) for conventional baking, or 325°F (160°C) for convection. Line your baking sheets with parchment paper.
-
Place the chilled or frozen cookie dough balls 2 inches apart on the prepared baking sheets. Bake for 10-12 minutes (conventional) or 13-15 minutes (convection from refrigerator/frozen), until golden brown around the edges and the center looks matte and set. Rotate the baking sheets halfway through for even baking.
-
Allow the cookies to cool on the baking sheet for 5 minutes before carefully transferring them to a wire rack to cool completely. Enjoy!
Notes
Variations – This recipe can easily be adapted into a Monster Skillet Cookie! Simply press the entire batch of room-temperature dough into an 8-inch cast iron skillet and bake for 20-22 minutes at 325°F (160°C) until the edges are golden and the center is set.
Technique – For the thickest, chewiest cookies, ensure you only *just* cream the butter and sugars together to avoid incorporating too much air.
Storage – Store baked cookies wrapped tightly or in an airtight container at room temperature for up to 3 days. For longer freshness, freeze baked cookies for up to 2 months. Unbaked cookie dough balls can also be frozen for up to 2 months.
Nutrition Information (per cookie)
Carbohydrates: 44g |
Protein: 7g |
Fat: 21g |
Saturated Fat: 10g |
Polyunsaturated Fat: 2g |
Monounsaturated Fat: 6g |
Trans Fat: 0.3g |
Cholesterol: 34mg |
Sodium: 222mg |
Potassium: 147mg |
Fiber: 2g |
Sugar: 26g |
Vitamin A: 272IU |
Vitamin C: 0.1mg |
Calcium: 48mg |
Iron: 1mg
Dessert
American
383
Before You Go
I sincerely hope you enjoyed creating and devouring this professional chef-tested recipe for monster cookies. It’s a true classic for a reason! Be sure to explore our other equally delicious and chef-developed cookie recipes for more sweet inspiration. Happy baking!