
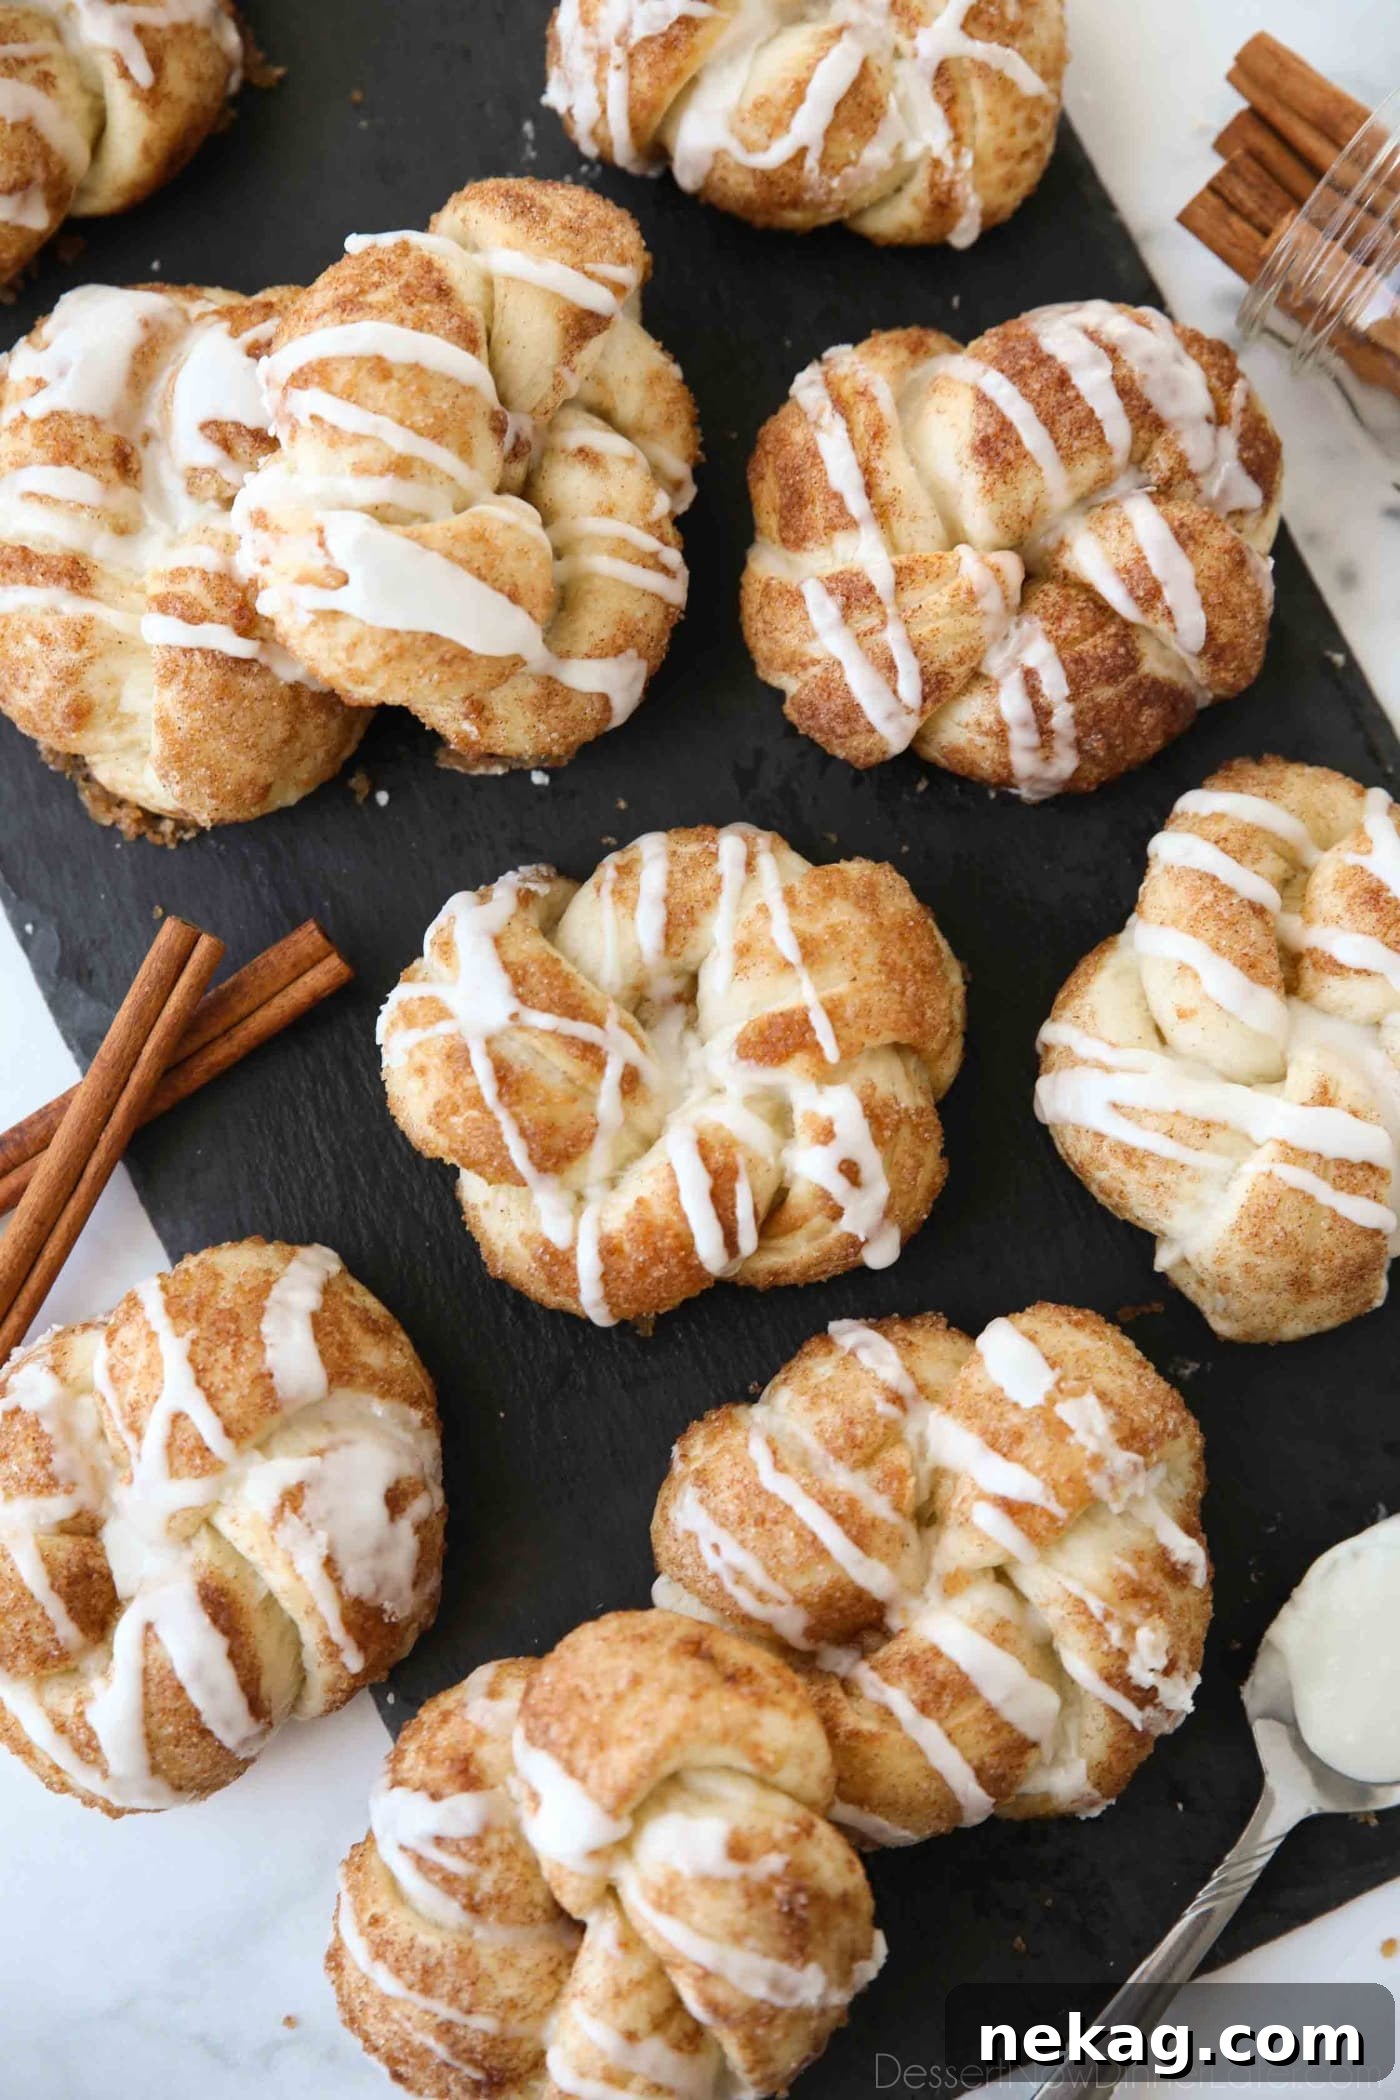
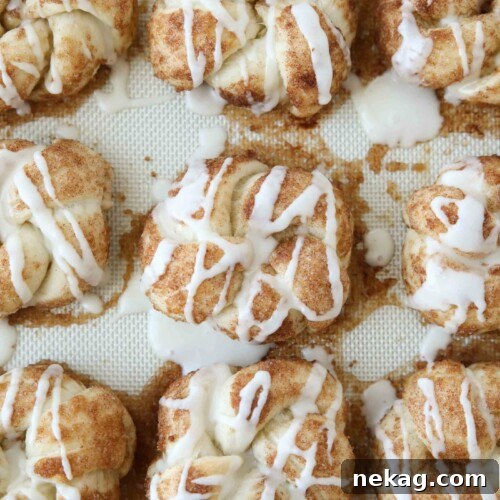
Cinnamon Knots offer a delightful twist on classic cinnamon rolls, delivering all the comforting flavors and soft, pillowy texture you love in a charming, easy-to-make knot shape. Coated generously with rich butter and a sweet cinnamon-sugar mixture, then finished with a luscious drizzle of quick icing, these pastries are perfect for a special breakfast, a cozy brunch, or a comforting dessert. They’re a simple yet impressive treat that tastes wonderfully homemade, without the extensive effort usually associated with yeast doughs.
*This post is proudly brought to you by Rhodes Bake-N-Serv. We appreciate the brands that help make delicious recipes like this possible.
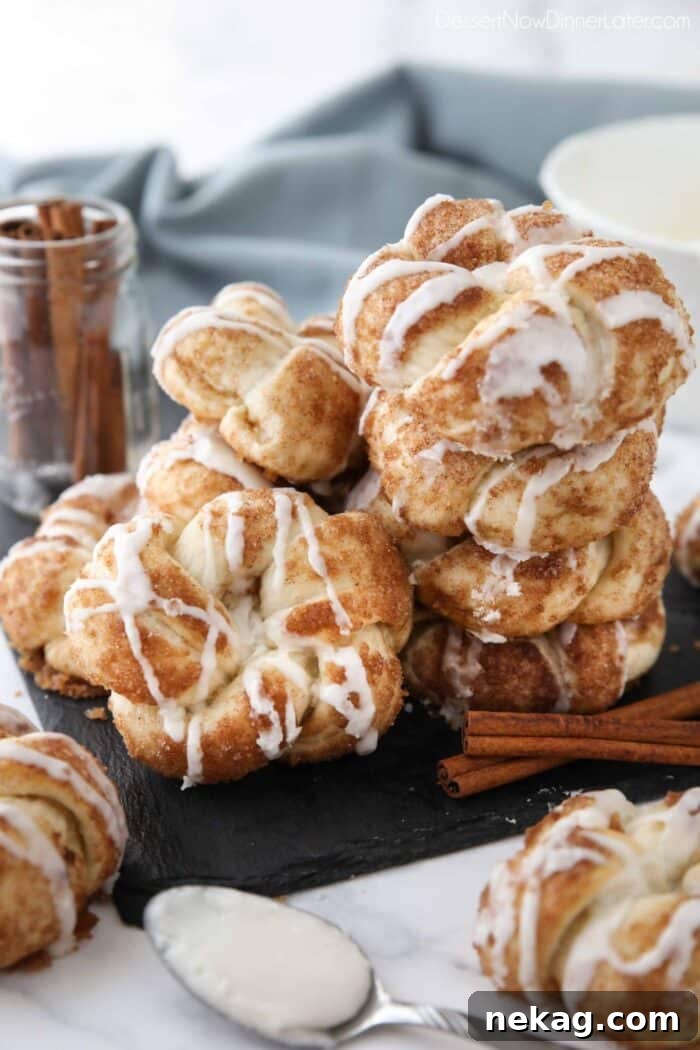
Embracing the Irresistible Cinnamon Swirl
There’s an undeniable magic in the heart of a good cinnamon roll, isn’t there? That moment when you bite into a soft, fluffy pastry and encounter the rich, aromatic swirl of cinnamon-sugar filling is pure bliss. It’s the reason we collectively adore these sweet treats, often paired with a decadent cream cheese frosting that takes them straight to dessert heaven.
My culinary journey has often been inspired by this very obsession with the perfect cinnamon swirl. It has led me to create various comforting recipes, from a delightful cinnamon roll cake that captures the essence of the classic roll in cake form, to a simple yet elegant cinnamon loaf cake, perfect for an afternoon pick-me-up. Each creation aims to deliver that beloved spice and sugar combination in exciting new ways.
These Cinnamon Knots are no exception. They embody the soulful warmth of cinnamon and sugar, wrapped in a convenient and charming package. Imagine sinking your teeth into a tender, buttery knot, bursting with that familiar spice – it’s a taste that brings comfort and joy with every bite, making them an instant favorite for any occasion.
The Enduring Appeal of Cinnamon Breads
While cakes are undeniably delicious, there’s something uniquely satisfying about fluffy yeast bread generously infused with sweet cinnamon-sugar. It’s a combination that speaks to the soul, evoking feelings of warmth and nostalgia. This love for yeast-based cinnamon creations is what fuels recipes like my comforting cinnamon swirl bread, perfect for toasting, and my playful cinnamon twists recipe, which offers a delightful textural experience.
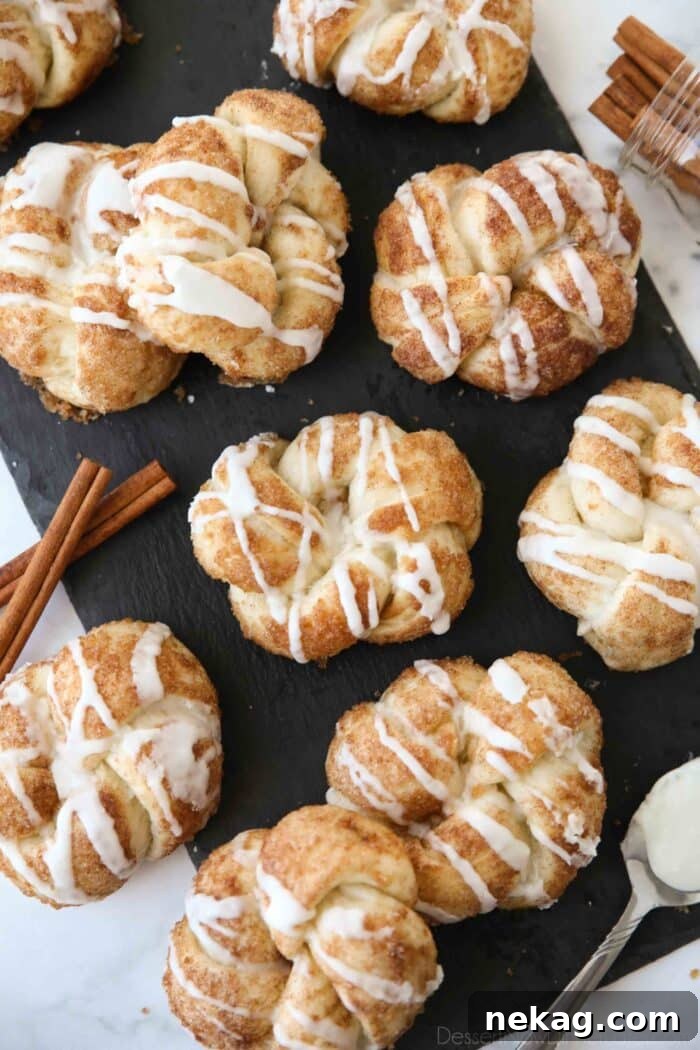
These Cinnamon Knots are another cherished iteration of that beloved classic, the cinnamon roll. They take the familiar, comforting flavors and textures and present them in a fun, distinctive shape. The knot design isn’t just aesthetically pleasing; it creates more nooks and crannies for that glorious butter and cinnamon-sugar coating to cling to, ensuring every bite is packed with flavor.
The beauty of these knots lies in their versatility. They’re sophisticated enough for a holiday brunch yet simple enough for a casual weekend morning. Their individual portion size makes them easy to serve and enjoy, whether you’re sharing them with family or indulging in a personal sweet moment. Plus, the act of shaping them into knots adds an element of fun to the baking process, making it an enjoyable activity for bakers of all skill levels.
The Shortcut to Perfection: Using Rhodes Bake-N-Serv Dough
While the taste of homemade yeast breads is truly unparalleled, the reality is that they often demand a significant investment of time and effort – kneading, proofing, and waiting. As much as I adore the process of traditional baking, I’m always on the lookout for a smart shortcut that doesn’t compromise on flavor or quality. And that’s precisely where Rhodes Bake-N-Serv rolls come into play.
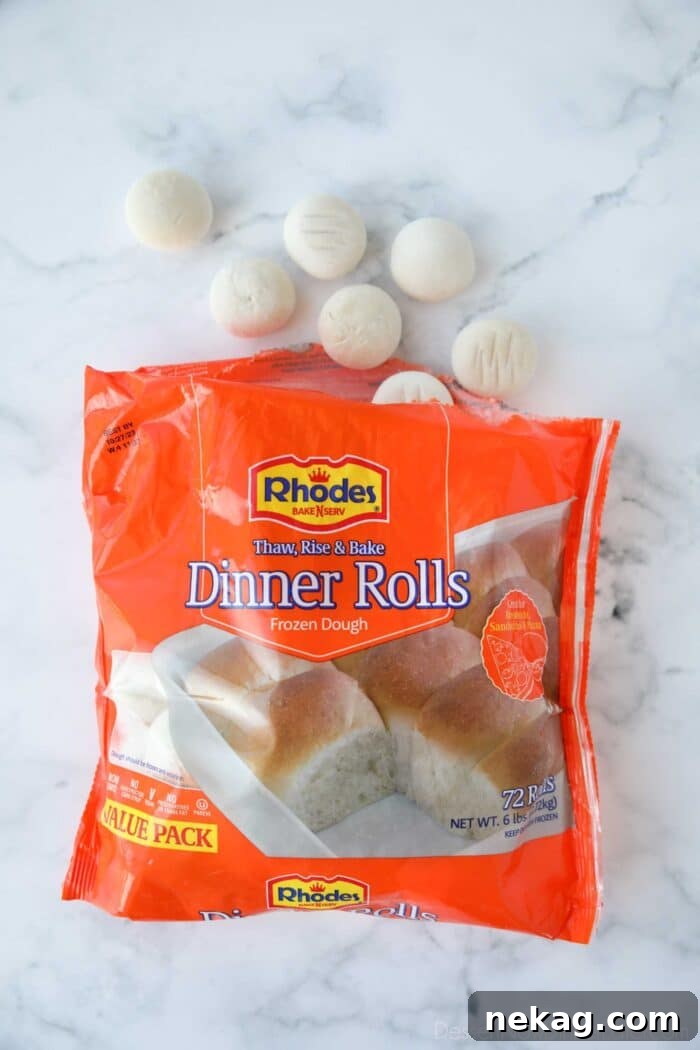
These incredible frozen dough balls are a game-changer for homemade bread desserts. They deliver an authentic, freshly baked taste that rivals anything made from scratch, all while dramatically cutting down on prep time. The beauty of Rhodes rolls lies in their simplicity: you just thaw, let them rise, and then bake. It’s a foolproof method that ensures a warm, soft, and delicious pastry every time, right from your own oven. This convenience allows you to enjoy the delightful aroma of baking bread without the fuss.
For these delectable cinnamon knots, the standard Rhodes Dinner Rolls are the perfect size, providing a consistent and manageable portion for shaping. If you’re craving a more substantial, Texas-sized cinnamon knot, simply opt for the Rhodes Texas Size Rolls. No matter which you choose, the result will be a tender, flavorful base for your sweet creation. Using this pre-made dough is not just a shortcut; it’s a smart way to bring delicious, bakery-quality pastries into your home with minimal stress.
Simple Ingredients for Irresistible Flavor
One of the best aspects of this recipe is how it simplifies the ingredient list, thanks to the convenience of pre-made dough. You’ll be surprised at how few items you need to create such a spectacular treat. To make these mouth-watering cinnamon knots, you will need:
- Rhodes Rolls: The star of our recipe, providing that perfect soft and fluffy base. Ensure they are thawed but still slightly cold for easier handling.
- Butter: Melted and used for coating. I highly recommend using salted butter here, as its subtle saltiness beautifully balances the sweetness of the sugars and cinnamon, enhancing the overall flavor profile.
- Brown Sugar: Adds a deeper, molasses-rich sweetness and a wonderfully moist texture to the cinnamon-sugar coating. Make sure it’s gently packed for accurate measurement.
- Granulated Sugar: Provides crisp sweetness and helps create that desirable sugary crust on the knots.
- Ground Cinnamon: The essential spice that gives these knots their signature warmth, aroma, and beloved flavor. Fresh cinnamon will make a noticeable difference.
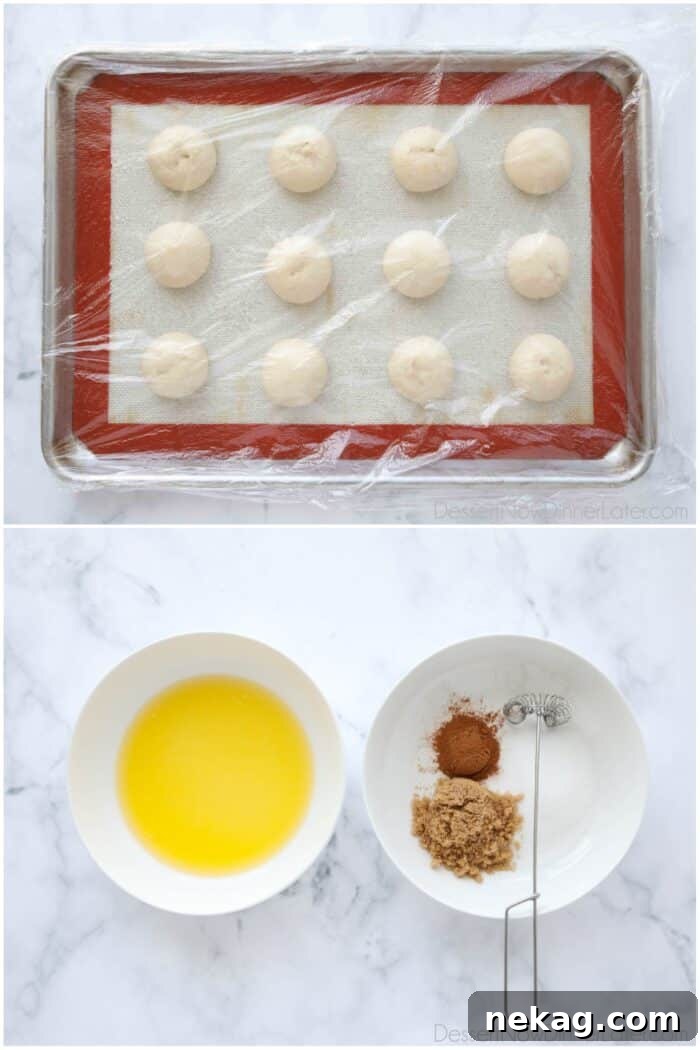
Before you dive into shaping, a little prep work makes all the difference:
- Thaw the Rhodes rolls: Arrange your frozen Rhodes rolls on a silicone-lined sheet tray (or a greased baking sheet to prevent sticking). Lightly spray a piece of plastic wrap with cooking spray and loosely cover the rolls. Allow them to thaw at room temperature for 1-2 hours, or for a more gradual thaw, place them in the refrigerator overnight. The key is for them to be pliable and thawed, but still cool enough to handle without becoming sticky or overly soft.
- Melt butter: In a small, microwave-safe bowl, melt the butter until completely liquid. Set this aside for coating.
- Prepare cinnamon-sugar mixture: In a separate bowl, whisk together the brown sugar, granulated sugar, and ground cinnamon until well combined. This mixture is your flavor powerhouse, so ensure it’s evenly mixed. Set this aside as well.
Mastering the Art of Rolling and Tying the Knots
The knot shape might appear intricate, giving these cinnamon pastries a gourmet look, but I assure you, shaping these cinnamon knots is incredibly straightforward and surprisingly simple. There’s no need for any complex braiding or elaborate techniques; with a few easy steps, you’ll have beautifully formed knots that look like they came straight from a bakery.
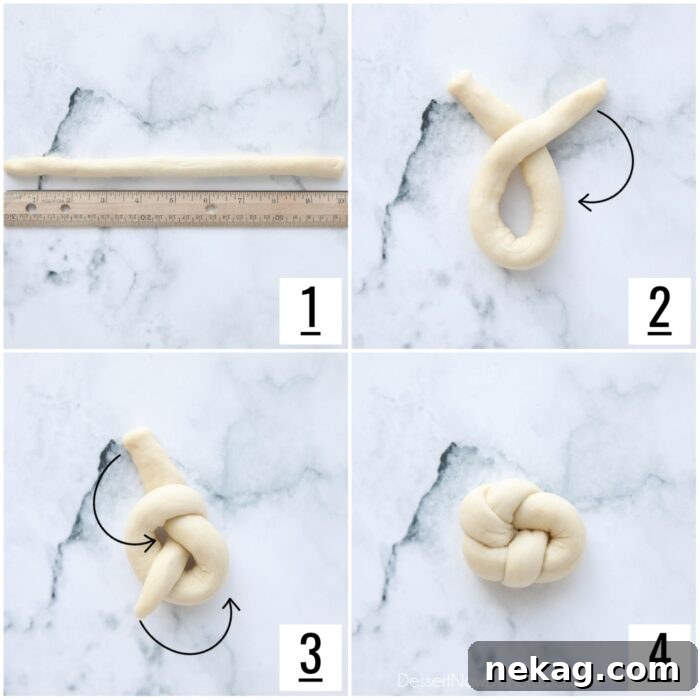
Here’s a detailed guide on how to achieve that perfect knot shape, ensuring the ends are neatly tucked away for a polished finish:
- Prepare the dough: Take one thawed Rhodes dough ball and gently roll it out on a lightly floured surface into a rope approximately 10 inches long. Aim for an even thickness throughout the rope to ensure consistent baking.
- Form the initial loop: Lay the dough rope flat. Take one end and cross it over the other end, creating a simple loop, much like you would when starting to tie a shoelace.
- Create the first knot: Take the top piece of dough from your criss-cross. Wrap it underneath and around the back of the loop you just made, then bring it up and through the center of that loop. Pull gently to form a snug, single knot. You’ll notice two “tails” extending from this knot.
- Tuck the ends for a neat finish: Now, take the end of the dough piece that just came through the center. Wrap it around the back of the knot, tucking it into a small opening or fold. Then, take the other tail, bring it up and over the front of the knot, and tuck its end into the remaining hole in the center. This action hides the tails, creating a smooth, rounded, and elegant knot. Don’t worry if it’s not perfect; a little rustic charm is part of the appeal!
Repeat this process with all the remaining Rhodes rolls. You’ll find that with each knot you tie, your technique will become smoother and faster. This simple shaping method is what gives these cinnamon knots their distinctive appearance and makes them so enjoyable to eat.
The Flavorful Layer: Coating the Knots with Butter and Cinnamon-Sugar
Once your cinnamon knots are beautifully shaped, it’s time to infuse them with the irresistible flavors that make them truly special. This dual-coating process ensures maximum flavor penetration and a delightful texture, transforming simple dough into a sweet, aromatic pastry. This step is crucial for achieving that characteristic cinnamon roll taste and appearance.
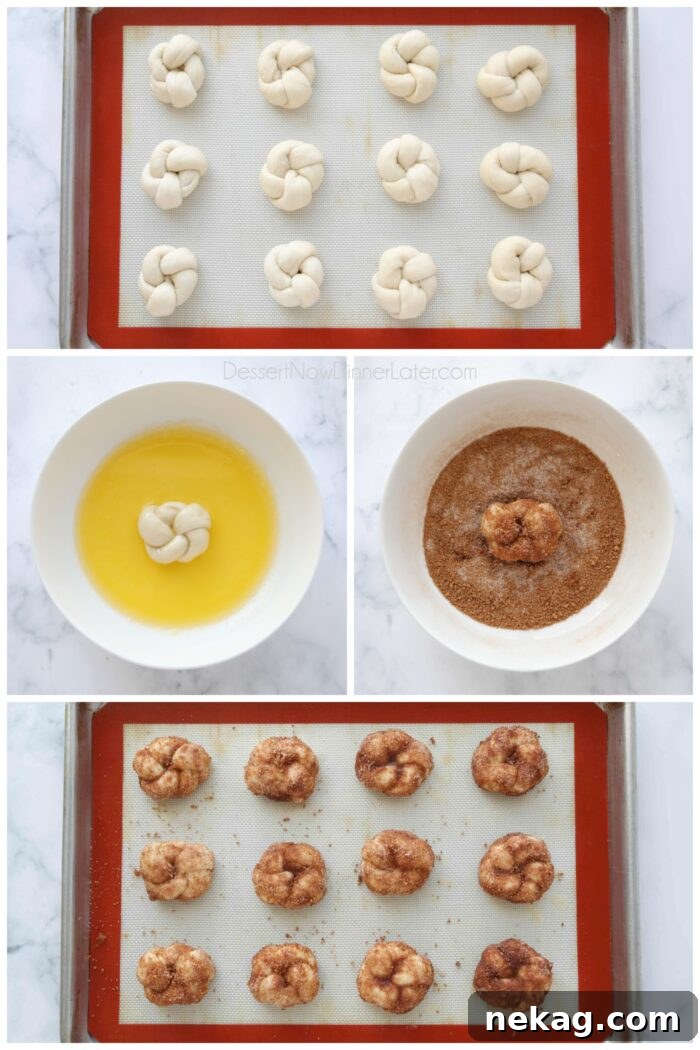
Follow these steps carefully to ensure each knot is perfectly coated:
- Butter bath: Take each shaped knot and fully immerse it in the bowl of melted butter. Make sure to turn it a few times to ensure all sides are thoroughly coated. The butter acts as a crucial adhesive for the cinnamon-sugar mixture and adds incredible richness and moisture to the dough as it bakes. Don’t be shy with the butter; it’s key to a tender and flavorful knot.
- Cinnamon-sugar dredge: Immediately after dipping in butter, transfer the knot to the bowl containing your cinnamon-sugar mixture. Roll and press the knot gently into the mixture, ensuring every surface is generously covered. The butter will help the sugar and spice cling beautifully to the dough, forming a sweet, fragrant crust.
After coating each knot, place them back on your silicone-lined or greased baking tray, making sure to space them a few inches apart. This allows them room to rise without crowding each other. Once all the knots are coated and arranged, loosely cover the tray again with the sprayed plastic wrap. Let the dough rest in a warm spot for an additional 15-20 minutes, or until you see them visibly plump up and rise slightly. This final short rise, known as proofing, is essential for achieving a light and airy texture in the baked knots.
Baking to Golden Perfection and Drizzling with Sweet Icing
The aroma of cinnamon baking in the oven is one of life’s simple pleasures, and soon your kitchen will be filled with this delightful fragrance as your cinnamon knots bake to golden perfection. Proper baking ensures a tender interior and a beautifully caramelized exterior, while the optional icing adds a final touch of sweetness and moisture.
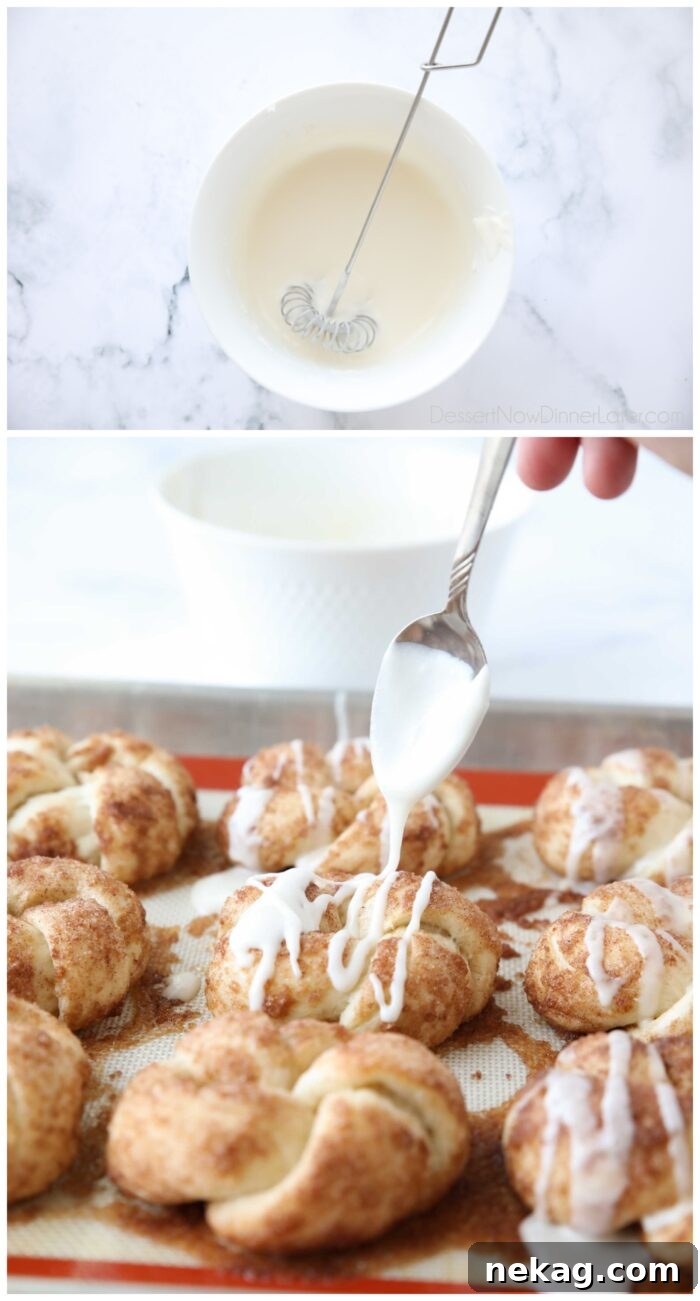
Baking Instructions: Preheat your oven to 350˚F (175˚C). Carefully place the tray of risen, coated cinnamon knots into the preheated oven. Bake for 15-20 minutes, or until the knots are baked through and reach an internal temperature of 190-200˚F (88-93˚C). You might notice that due to the heavy cinnamon-sugar coating, the tops may not brown significantly, and instead, the dough will often brown mostly on the bottom. This is perfectly normal and indicates they are cooked through. Keep an eye on them towards the end of the baking time to prevent over-browning.
The Optional (But Highly Recommended) Icing: While these cinnamon knots are already incredibly flavorful and sweet from their coating, a quick drizzle of icing takes them to an even higher level of deliciousness. It adds a lovely creaminess and a touch more moisture, enhancing the overall experience.
To prepare the simple icing: In a small bowl, whisk together 1 tablespoon of melted butter, 1 cup of powdered sugar, ½ teaspoon of vanilla extract, and 2 tablespoons of milk. Start with 2 tablespoons of milk and add more, a teaspoon at a time, until you achieve your desired consistency – a thick but pourable glaze. For a richer, cream cheese-like frosting, you could also substitute some milk with softened cream cheese.
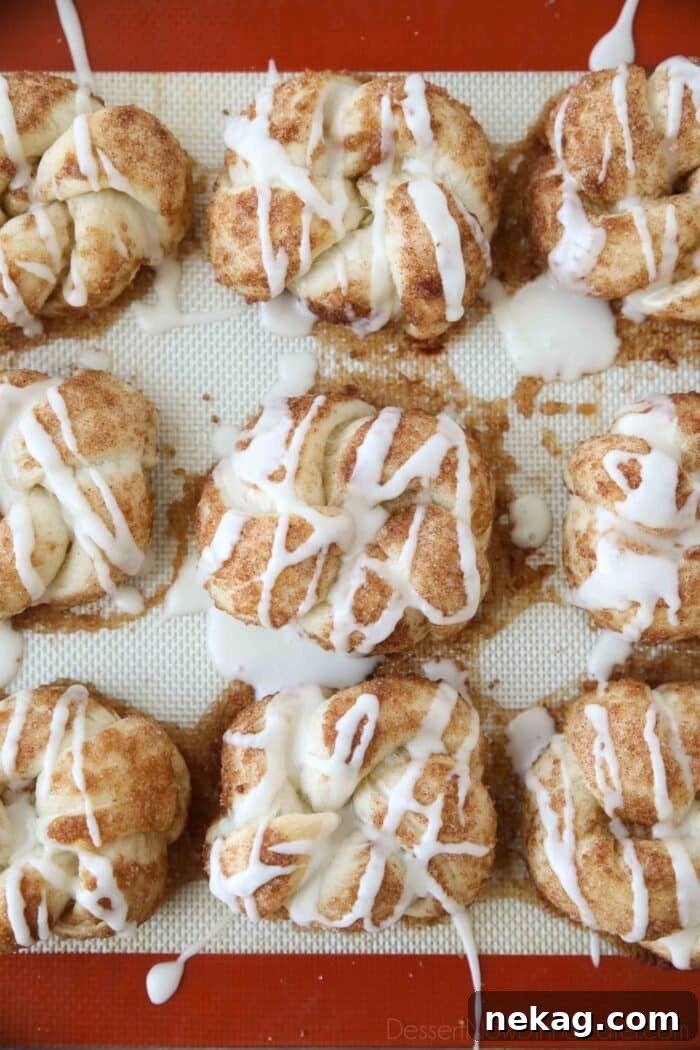
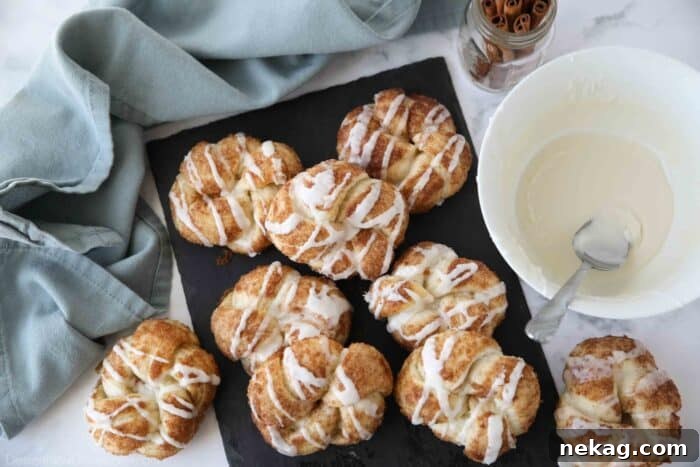
As soon as the cinnamon knots come out of the oven, while they are still warm, drizzle the prepared icing generously over them. The warmth of the knots will slightly melt the icing, allowing it to seep into every crevice, creating a beautiful glaze. These cinnamon knots are absolutely at their best when enjoyed immediately, still warm from the oven, with the fresh icing melting into the soft bread. The combination of warm bread, fragrant cinnamon, and sweet icing is simply divine.
Tips for Storing and Reheating Your Cinnamon Knots
While these cinnamon knots are undoubtedly best enjoyed fresh and warm from the oven, it’s always good to know how to properly store and reheat any leftovers to keep them delicious. With a few simple steps, you can savor these delightful treats for a couple of days beyond their initial bake.
Storing Leftovers: To maintain their freshness and soft texture, allow any leftover cinnamon knots to cool completely to room temperature. Once cooled, transfer them to an airtight container. Store the container at room temperature, away from direct sunlight or heat, for up to 2-3 days. Storing them properly prevents them from drying out and helps preserve their wonderful flavor.
Reheating for Optimal Enjoyment: The best way to revive day-old cinnamon knots and bring them back to their soft, warm glory is by using a microwave. Place a single knot (or a few) on a microwave-safe plate. Heat on high for 10-20 seconds. The exact time will depend on your microwave’s power and the number of knots you are reheating. Be careful not to overheat, as this can make them tough. A quick zap is usually all it takes to soften the bread and make it feel almost freshly baked again.
For a slightly crispier exterior, you can also reheat them in a toaster oven or conventional oven at a low temperature (around 250°F / 120°C) for 5-10 minutes, or until warmed through. This method is especially good if you prefer a slightly toasted texture. No matter how you store or reheat them, these cinnamon knots remain a delightful treat, ready to brighten your day.
Elevate Your Mornings: Make These Cinnamon Knots Today!
As you’ve discovered, creating these incredible cinnamon knots is an incredibly rewarding experience that doesn’t require advanced baking skills or hours in the kitchen. With the clever shortcut of using Rhodes Bake-N-Serv rolls and just a few pantry staples, you can conjure up a batch of these soft, buttery, and utterly irresistible pastries with ease. Each knot is a testament to how simple ingredients, combined with love, can transform into a truly memorable treat.
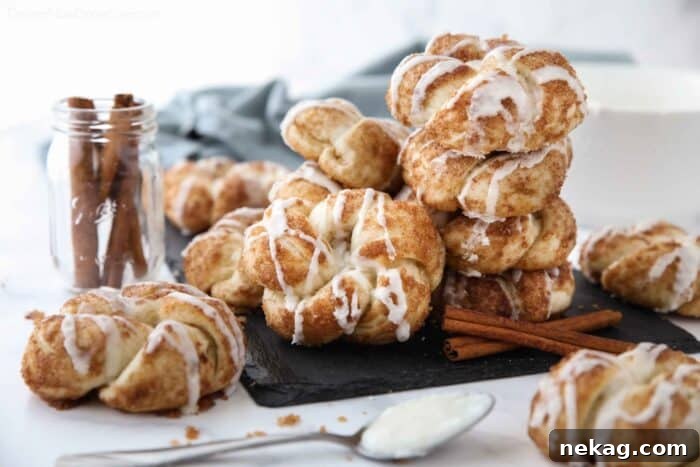
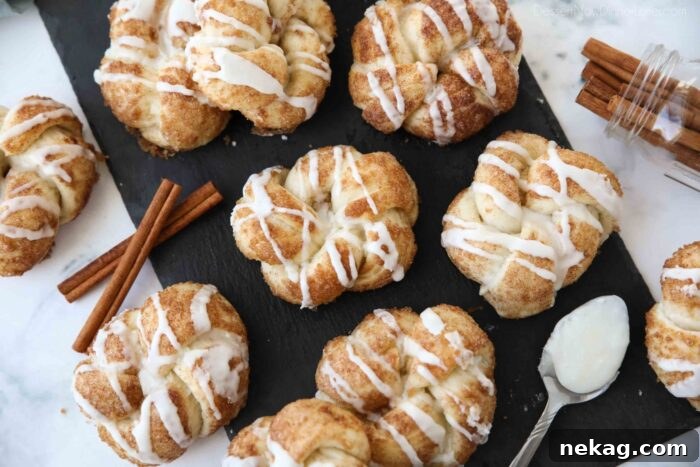
These cinnamon knots are more than just a breakfast item; they are a versatile pastry that shines at any time of day. Serve them warm with a steaming cup of coffee for a luxurious start to your morning, or pair them with a glass of milk for a comforting afternoon snack. They also make a fantastic addition to any brunch spread or a delightful ending to a casual dinner. Their individual size makes them perfect for sharing (or not!), and their charming knot shape adds a touch of homemade elegance to your table.
So, what are you waiting for? Gather your ingredients, and embark on this simple baking adventure. Try making these delightful cinnamon knots today and prepare to impress yourself, your family, and your friends. They’re guaranteed to bring smiles and satisfy any sweet craving, taking your breakfast, brunch, or dessert experience to an entirely new, delicious level!
If You Make This Recipe, Please Rate and Review it in the Comments Below. THANKS!
Cinnamon Knots
Pin
Rate
SaveSaved!
Ingredients
- 12 Rhodes Rolls, thawed but still cold
- 6 Tbsp (100 g) butter, melted
- ¼ cup (50 g) light brown sugar, gently packed
- ¼ cup (50 g) granulated sugar
- 2 tsp ground cinnamon
Icing:
- 1 Tbsp (14 g) butter, melted
- 1 cup (120 g) powdered sugar
- ½ tsp vanilla extract
- 2 Tbsp milk, or more, if needed to reach desired consistency.
Equipment
-
Small Whisk (Mini Whipper)
-
Corelle Bowls
-
Silicone Baking Mats
-
Aluminum Half Sheet Tray (2 Pack)
Instructions
-
THAW ROLLS: Place frozen Rhodes rolls on a silicone-lined sheet tray. Alternately grease pan with cooking spray. Cover the frozen rolls with sprayed plastic wrap. THAW at room temperature for 1-2 hours or in the refrigerator overnight. They should be thawed, but still cold enough to easily handle them.
-
Preheat oven to 350℉ (175°C). Melt butter in a bowl. Whisk together the cinnamon and sugars in a separate bowl. Set aside.
-
TIE KNOTS: Roll a ball of dough into a 10-inch rope. Shape the rope into a knot: Criss-cross the ends creating a loop. Wrap the top piece around the back, and through the center of the loop, creating a single knot. Wrap the end of the piece coming through the center around towards the back. Then pull the end from behind up and over, tucking the tail into the hole in the center. NOTE: See photo tutorial in the blog post for help with shaping. Repeat with all remaining rolls.
-
Dip each knot in the melted butter; coating all sides. Then dip in the cinnamon-sugar mixture; coating all sides. Place the dipped knots back on the tray spacing them a few inches apart. Cover with sprayed plastic wrap and let dough rest for 15-20 minutes until risen slightly.
-
Bake the cinnamon knots at 350℉ (175°C) for 15-20 minutes or until baked through. (To an internal temperature of 190-200℉ / 88-93°C.) NOTE: The dough may only brown on the bottom.
-
FOR THE ICING: Whisk together melted butter, powdered sugar, vanilla, and milk to desired consistency. Drizzle over warm rolls and enjoy! Best eaten immediately, while still warm.
Notes
Nutrition
Disclaimer: Nutritional values were calculated using a third-party tool and are provided as an estimation only.
Sharing this recipe with a link is both encouraged and appreciated. Copying/pasting and/or screenshots of full recipes to any social media is strictly prohibited. Content and photographs are copyright protected.
Did you make this?
Don’t forget to leave a rating below and make sure to follow on Pinterest and Instagram for more!