
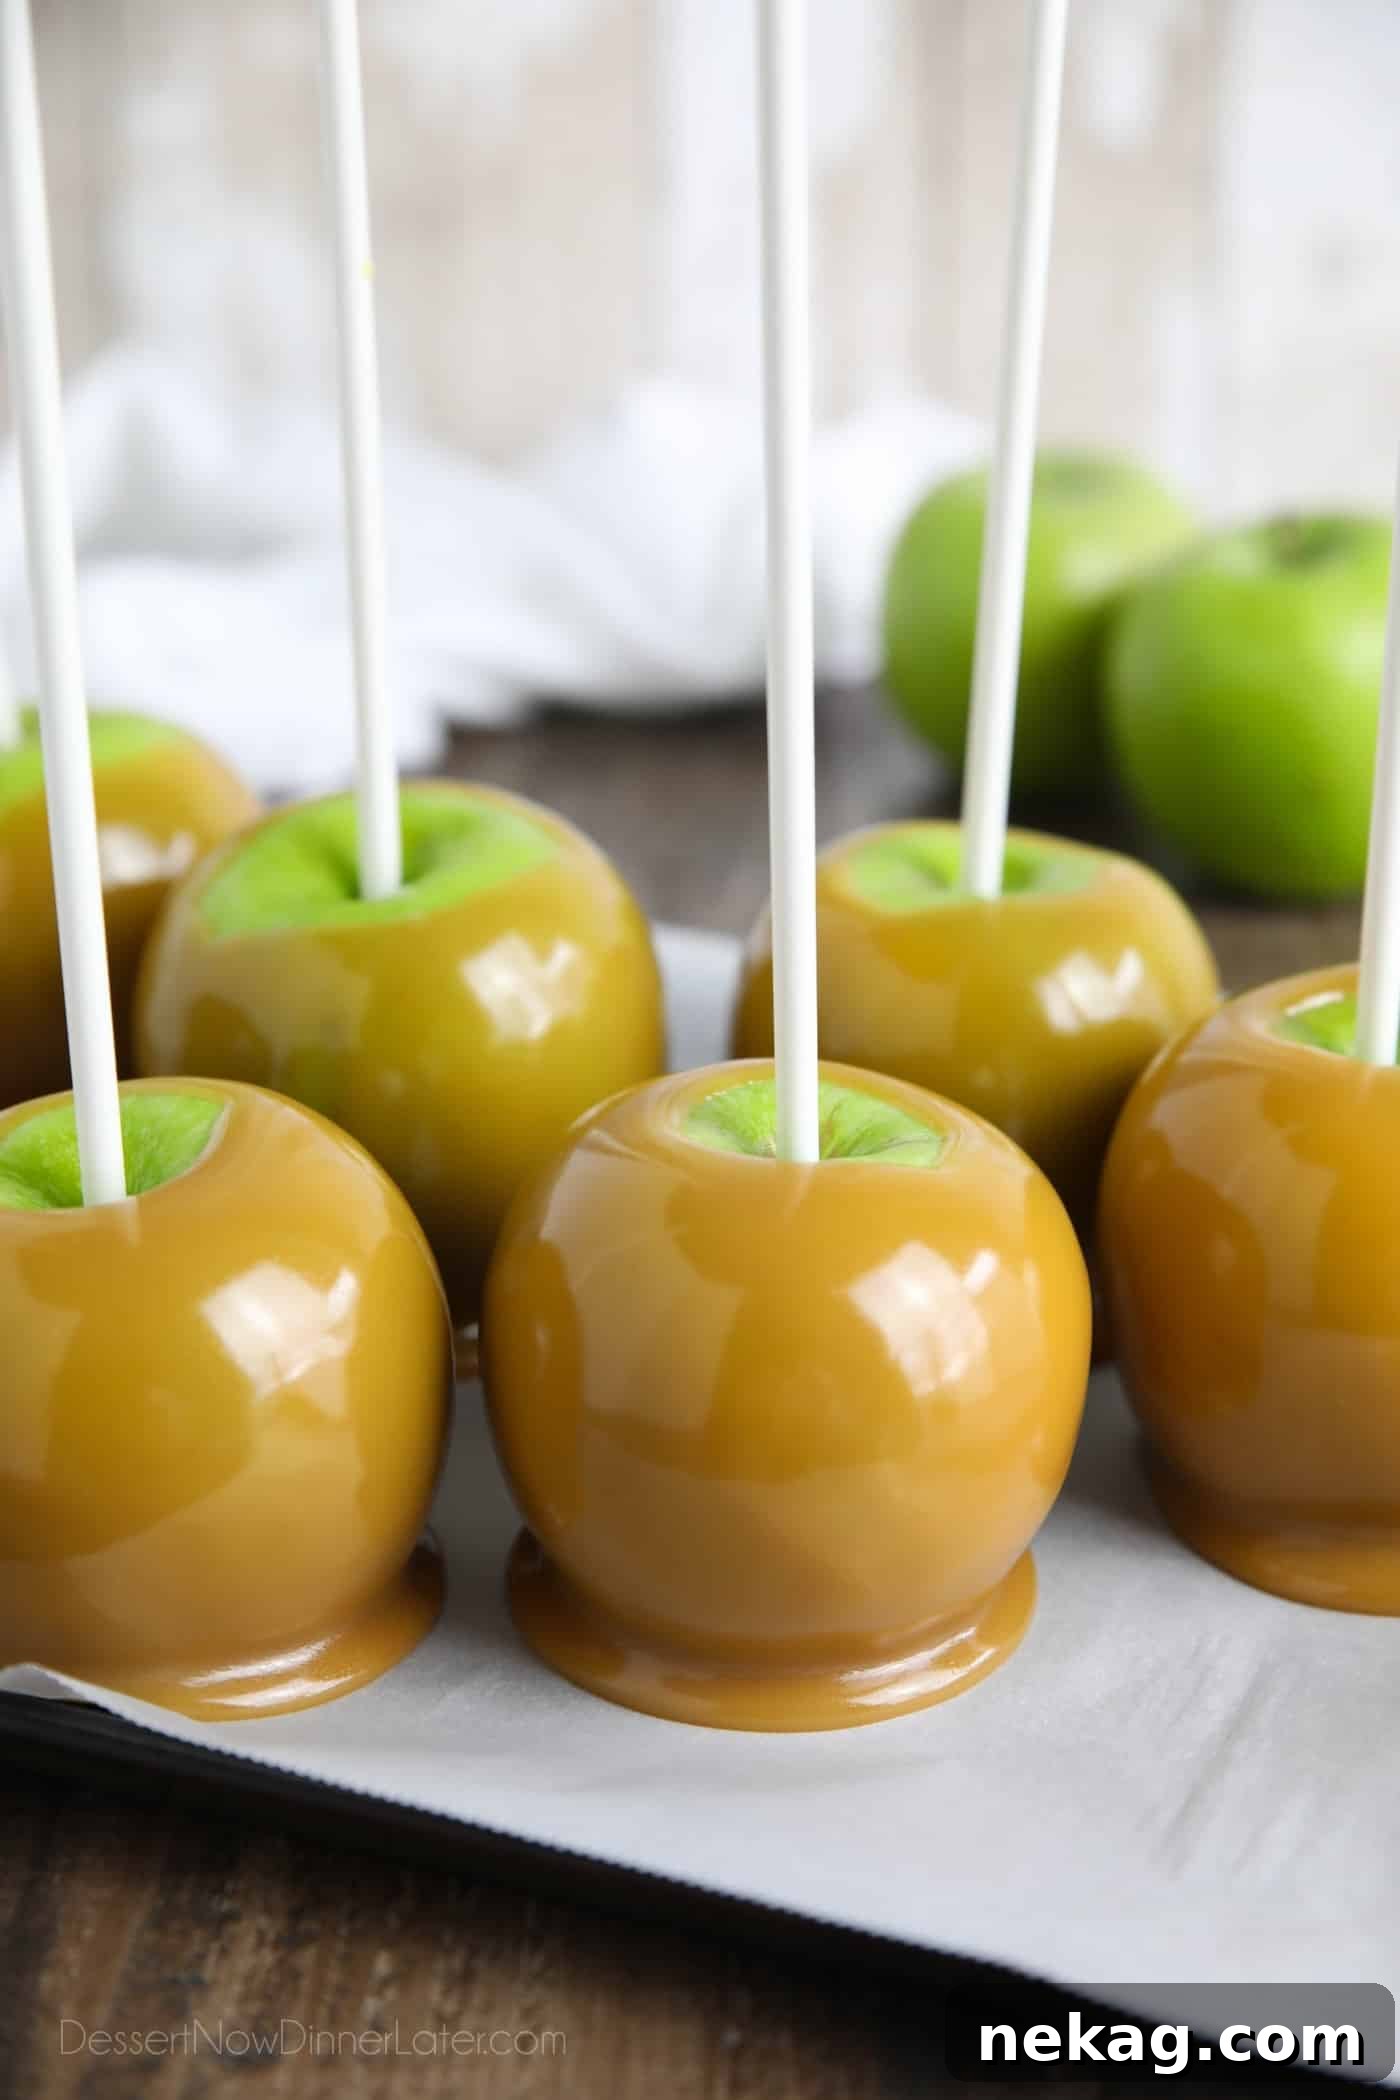
The Ultimate Guide to Making Homemade Caramel Apples
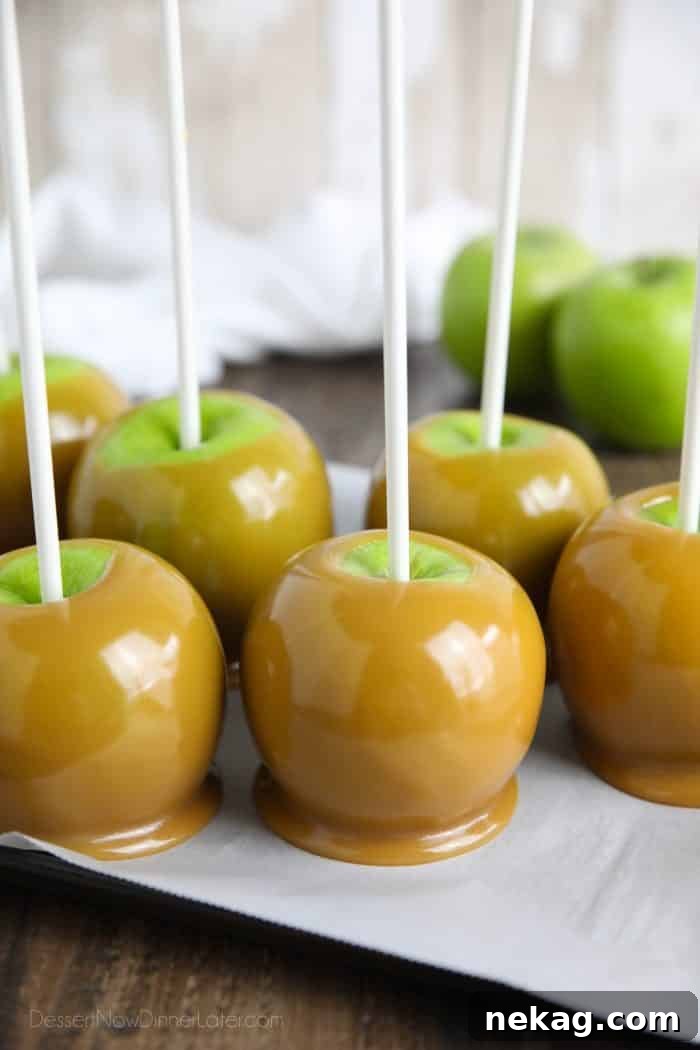
There’s nothing quite like the delightful taste and texture of a perfectly made caramel apple. These classic treats bring a wave of nostalgic joy, especially during the fall season. Crafting homemade caramel apples is a wonderfully fun activity, perfect for engaging both kids and adults. Imagine biting into a crisp, tart apple enveloped in rich, chewy caramel – it’s a sensory experience that’s truly unparalleled.
The beauty of making caramel apples from scratch lies in the endless possibilities for customization. While a plain caramel coating is absolutely delicious on its own, you can easily elevate your creations into gourmet delights. Dip them in luscious chocolate, drizzle them with contrasting white chocolate, or roll them in an assortment of finely chopped nuts, crushed cookies, or colorful candies. With a few simple techniques and tips, you can achieve professional-looking caramel apples right in your own kitchen.
Having made this particular caramel apples recipe with friends multiple times, I’m thrilled to share all the valuable insights and tricks we’ve gathered along the way. Get ready to embark on a sweet adventure that promises delicious results!
Why Your Caramel Slides Off Apples (and How to Fix It)
One of the most common frustrations when making caramel apples is discovering that the delicious caramel simply refuses to stick, sliding right off the apple. The culprit? Wax. Most apples purchased from grocery stores, and even some organic varieties, are coated with a thin layer of protective wax. This natural or applied wax creates a slick surface that caramel struggles to adhere to.
You can easily check for wax by gently scraping the apple skin with your fingernail. If you see a waxy residue accumulate under your nail, it’s a clear sign your apples are waxed. Ignoring this crucial step will almost certainly lead to disappointing results, as your beautiful caramel will pool at the bottom instead of creating that perfect, even coating.
The key to successful caramel apple making is to thoroughly remove this wax layer and prepare the apple surface properly.
Early attempts at wax removal often involved less-than-ideal methods. For instance, I once followed instructions to dip apples in boiling water for a few seconds. While it softened the wax, it also caused the apples to discolor significantly, making them look unappetizing even before the caramel was applied. Thankfully, there’s a much more effective and apple-friendly method to ensure your caramel sticks flawlessly every time.
Step-by-Step: Removing Wax for Perfect Adhesion
Removing the wax from your apples is a simple yet critical process. Follow these steps carefully to ensure optimal caramel adhesion:
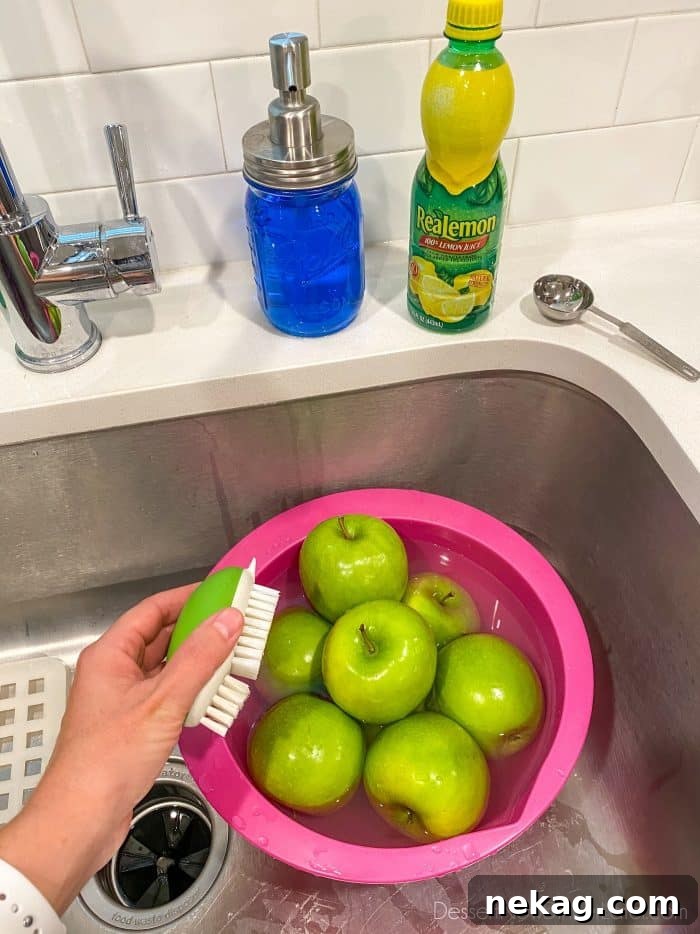
- Soak the Apples: Begin by placing your chosen apples in a large bowl. Fill the bowl with comfortably hot tap water – it doesn’t need to be boiling, as extremely hot water can damage the apple’s skin and cause discoloration. Add 2 tablespoons of lemon juice or white vinegar to the water. The acid in the lemon juice or vinegar helps to break down the wax more effectively while also brightening the apple’s natural color and preserving its freshness. Let the apples soak for about 1 to 2 minutes.
- Scrub Thoroughly: After soaking, remove one apple at a time. Use a dedicated vegetable scrub brush or a slightly abrasive cloth (such as a kitchen towel or microfiber cloth) along with a tiny amount of mild dish soap (like Dawn) or a specialized produce wash. Vigorously scrub the entire surface of each apple, paying close attention to any visible wax or residue. The goal is to create a clean, slightly textured surface for the caramel to cling to. If you notice any scraping or damage to the apple peel, reduce the abrasiveness of your brush or cloth.
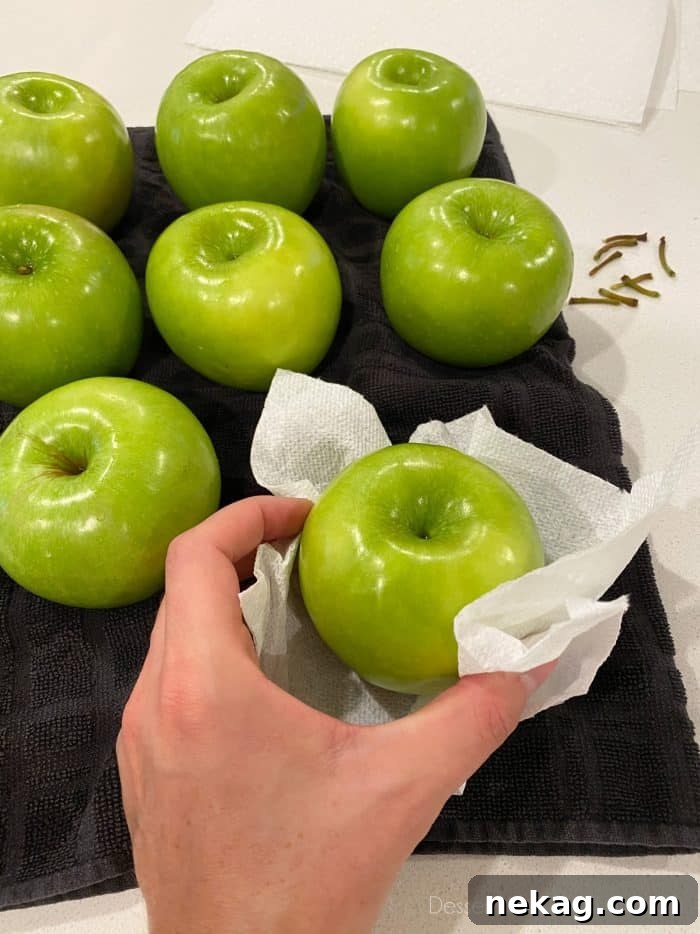
- Rinse and Dry Completely: Rinse each apple thoroughly under cool running water to remove all traces of soap, vinegar, and wax. This step is incredibly important. Any moisture left on the apples will not only prevent the caramel from sticking but can also cause your caramel to become grainy or seize. Use several layers of paper towels or a very clean, dry kitchen towel to dry each apple meticulously. You want them to be absolutely bone-dry before proceeding to the next step.
Preparing Your Apples for Dipping
Once your apples are sparkling clean and thoroughly dry, it’s time to prepare them for their delicious caramel coating. Proper preparation at this stage contributes significantly to the final presentation and ease of handling.
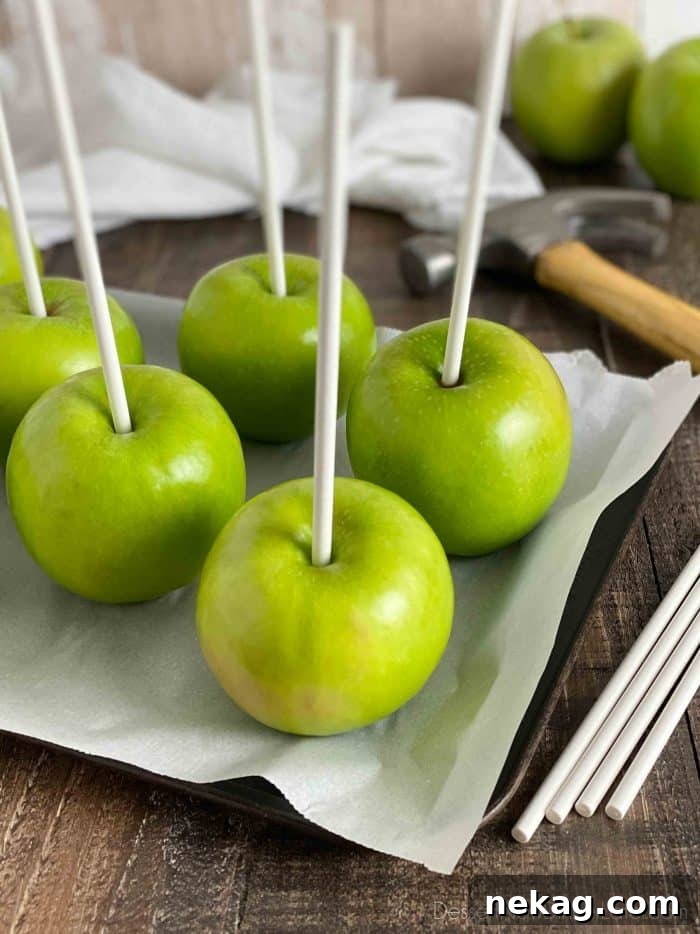
- Remove Stems: Carefully remove the natural stems from each apple. This creates a clear, flat surface for inserting the dipping sticks.
- Insert Handles: Choose sturdy food-grade sticks, such as 6 to 8-inch cookie sticks or similar wooden dowels. Position a stick directly into the center of the stem cavity of each apple. Gently tap the stick about halfway to two-thirds of the way down into the apple using a small hammer or the flat side of a meat mallet. The goal is to secure the stick firmly without piercing through the bottom of the apple.
Food Safety Tip: Always ensure that any tools used to insert the sticks, such as a hammer or mallet, are clean and sanitized before they come into contact with the apples. A quick wash with soap and water or a wipe with a disinfectant is sufficient.
- Chill the Apples: After the handles are securely in place, transfer the apples to a baking sheet lined with parchment paper or a silicone baking mat. Place them in the refrigerator and chill for at least 30 minutes, or until you are ready to dip them. Using cold apples is a professional trick that helps the hot caramel set more quickly and adhere better to the apple’s surface, preventing it from sliding off or creating an overly thick, uneven layer at the bottom. While the apples are chilling, it’s also an excellent time to prepare any desired toppings.
Crafting the Perfect Homemade Caramel
The heart of any truly spectacular caramel apple is, of course, the caramel itself. While store-bought caramel can be convenient, nothing compares to the rich, buttery, and smooth texture of a homemade batch. This particular caramel recipe for apples is known for its incredible flavor and perfect dipping consistency. It’s quite similar to my popular soft caramel recipe, which also works wonderfully for dipping.
Here are the key ingredients that give this caramel its distinctive character:
- Butter: Provides a rich, creamy base and contributes to the overall flavor and tenderness of the caramel.
- Light Brown Sugar: Unlike white granulated sugar, brown sugar introduces subtle molasses notes, adding depth and a warm, complex flavor profile to the caramel.
- Light Corn Syrup: This is a crucial ingredient for preventing crystallization and ensuring a smooth, pliable texture. It acts as an interfering agent, preventing sugar crystals from forming and making the caramel gritty. Light corn syrup is preferred for its neutral flavor, allowing the butter and brown sugar to shine.
- Sweetened Condensed Milk: Instead of heavy cream, sweetened condensed milk simplifies the caramel-making process significantly. It’s already thick and sweet, eliminating the need for extensive reduction and adding a lovely creamy consistency right from the start. This makes for a more foolproof caramel.
- Vanilla Extract: Added at the very end, vanilla extract enhances all the other flavors, providing that classic, irresistible aroma and taste that completes the caramel.
This from-scratch caramel recipe is generally simpler to execute because the sweetened condensed milk is cooked directly into the mixture, rather than being added later, as is often the case with heavy cream-based caramels.
How to Make Caramel Apples from Scratch: The Caramel Process
Creating the perfect caramel requires a bit of attention and the right tools. Here’s how to achieve that golden, smooth, and delicious coating:
- Choose Your Pot Wisely: You’ll need a heavy-duty saucepan, ideally one that is deep and thick-bottomed with straight sides. A heavy bottom helps distribute heat evenly, preventing scorching, while deep sides help contain the mixture as it boils and bubbles.
- A Candy Thermometer is a Must: This specialized tool is non-negotiable for consistent caramel making. It precisely measures the sugar syrup’s temperature, ensuring it reaches the critical “soft-ball stage.” Choose one that conveniently clips to the side of your pot for continuous monitoring.
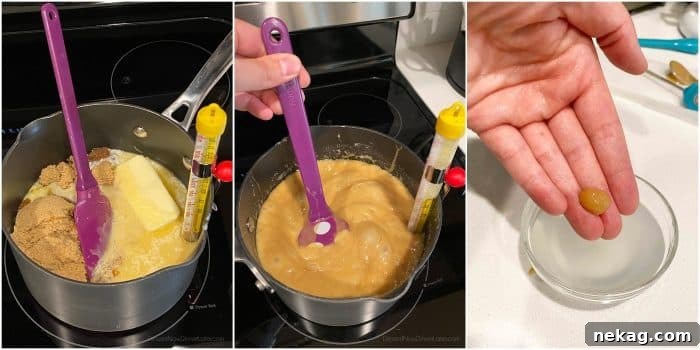
- Combine and Heat Ingredients: In your large, heavy-duty saucepan, combine the butter, light brown sugar, light corn syrup, and sweetened condensed milk. Place the saucepan over medium-high heat. Stir the mixture constantly to ensure all ingredients are well combined and to prevent anything from sticking to the bottom and burning. Continue stirring until the mixture comes to a full boil.
- Cook to Soft-Ball Stage: Once boiling, reduce the heat to medium. Clip your candy thermometer to the side of the pot, ensuring the tip does not touch the bottom. Continue to cook, stirring frequently (or constantly, if you prefer to be extra safe), until the candy thermometer reads between 230°F and 240°F (110°C – 116°C). The specific temperature you aim for will impact the final texture of your caramel: a lower temperature (e.g., 230°F) will result in a softer, chewier caramel, while a higher temperature (e.g., 240°F) will yield a firmer, more robust coating.
Important Considerations:
- Cooking Time Variability: The time it takes to reach the soft-ball stage can vary significantly, typically ranging from 15 to 30 minutes. Factors like your heat source (electric versus gas stove) and the type and thickness of your saucepan will influence this.
- High Altitude Adjustments: If you live at a high altitude, water boils at a lower temperature, and sugar stages are also affected. The soft-ball phase is technically 234°F – 240°F, but at higher altitudes, you may find it reaches this phase at a slightly lower temperature, perhaps starting around 230°F. It’s always best to start checking a little earlier.
- The Cold Water Test: To double-check that your caramel is ready, especially if you’re unsure about your thermometer or altitude, perform the cold water test. Spoon a small amount of the hot caramel into a small bowl of very cold water. Let it sit for a few seconds to cool. Then, try to pick it up and roll it between your fingers. If it forms a soft, pliable ball that holds its shape, your caramel is done. If it’s too soft and dissolves, it needs more cooking. If it’s too hard and brittle, it’s overcooked.
- Add Vanilla: Once the caramel reaches the proper temperature and passes the cold water test, immediately remove the saucepan from the heat. Stir in the vanilla extract. Be cautious, as the addition of vanilla may cause the hot caramel to bubble up or sputter slightly.
Preparing to Dip the Apples
Before you even think about dipping those beautifully prepared apples, make sure your landing zone is ready! Having a non-stick surface ready to receive the freshly coated apples is crucial for preventing them from sticking and making cleanup a breeze.
- Choose Your Surface: A silicone baking mat or a baking sheet lined with parchment paper are excellent choices. Both provide a non-stick surface that allows the caramel to cool and set without adhering.
- Avoid Wax Paper and Cooking Spray: Absolutely DO NOT USE WAX PAPER with hot caramel. The heat from the caramel will melt the wax, causing your apples to fuse irrevocably to the paper, leading to a sticky disaster. Similarly, avoid using cooking spray; while it might seem like a good idea, a coating of grease on your caramel apples is not appealing and is entirely unnecessary if you use parchment or silicone.
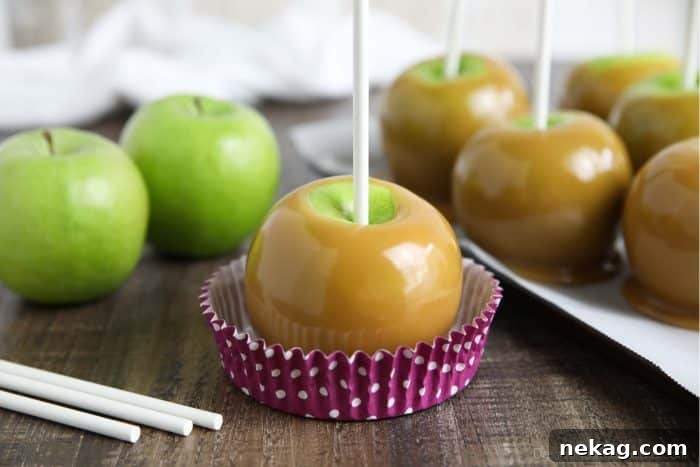
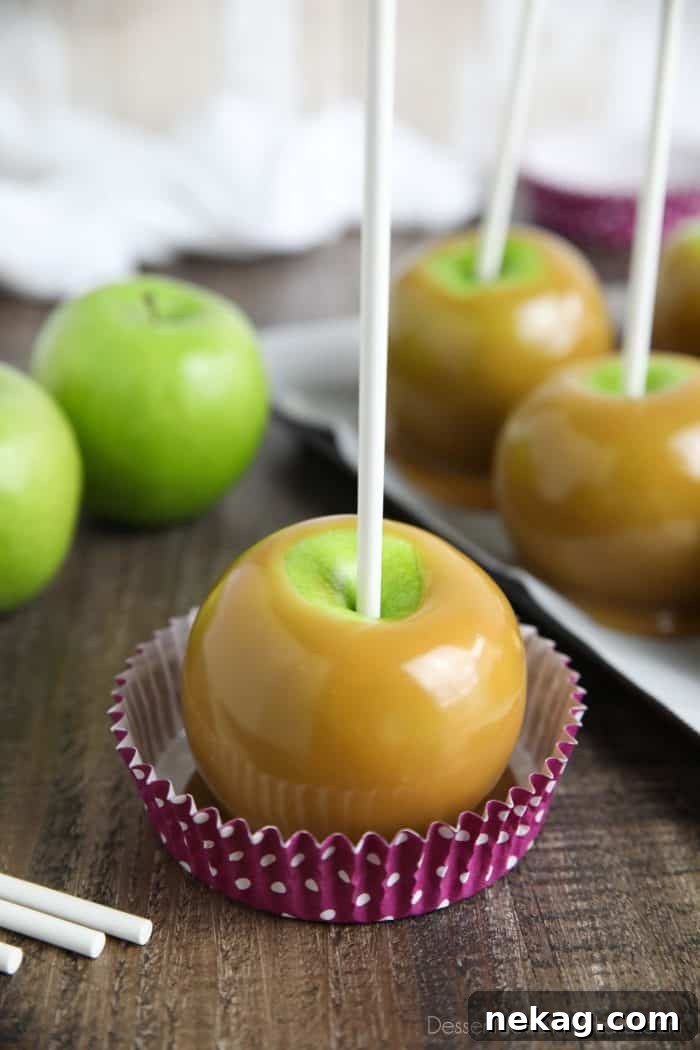
- Consider Baking Cups: For an extra touch of charm, especially if you plan to gift your caramel apples, consider using coated baking cups. These not only provide an individual non-stick base but also make for a lovely presentation when wrapped in clear cellophane bags with a ribbon.
Mastering the Caramel Dipping Technique
Dipping the apples requires a bit of speed and a steady hand. The caramel needs to be at the right temperature for optimal coating.
- Cool the Caramel Slightly: Before you begin dipping, allow the caramel to cool at room temperature to a temperature between 180°F and 190°F (82°C – 88°C). This slightly cooler temperature will help the caramel thicken just enough so that it adheres well to the cold apple and doesn’t run off too quickly, creating a perfect, even layer.
- Work Efficiently: Once the caramel is at the correct temperature, work quickly but carefully. If the caramel starts to cool too much and becomes too thick to work with, simply place the saucepan back on the stovetop over low heat for a minute or two, stirring gently until it reaches the desired consistency again.
- The Dipping Method:
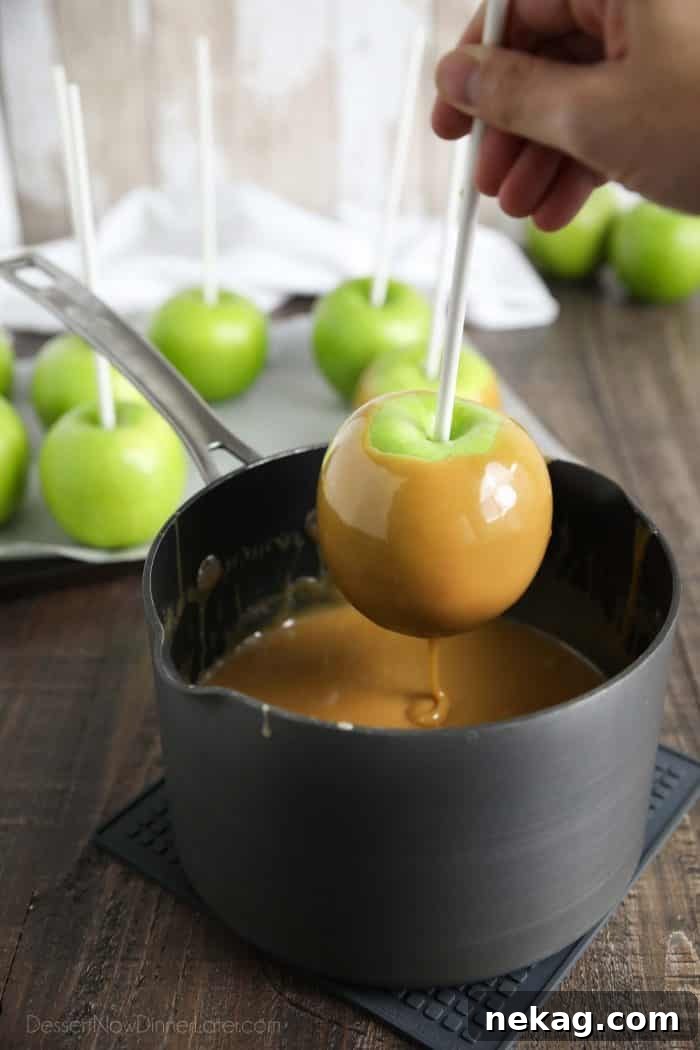
- Tilt the saucepan to gather the caramel into a deeper pool.
- Holding an apple by its stick, insert it into the caramel.
- Slowly swirl and rotate the apple until all sides are generously coated with caramel. Avoid dipping the entire apple; leave a small portion of the top uncovered to serve as a handle for later consumption.
- Lift the apple out of the caramel and allow any excess to drip back into the pan for a few seconds. This helps prevent too much caramel from accumulating at the bottom.
- Gently scrape the very bottom edge of the caramel-coated apple against the rim of the saucepan. This removes the last drips and minimizes pooling when the apple sets.
- Carefully place the dipped apple onto your prepared parchment paper or silicone-lined baking sheet.
- Repeat and Avoid Bubbles: Continue this process with the remaining apples. Be mindful not to stir the caramel excessively while dipping, as this can introduce air bubbles, which will show on the finished apples.
- Set in the Refrigerator: Once all apples are dipped, return the baking sheet to the refrigerator. Allow the caramel apples to set and firm up for at least 20-30 minutes before enjoying. This ensures the caramel is perfectly set and ready to bite into.
Elevate Your Caramel Apples with Delicious Toppings
While plain caramel apples are undeniably delicious, adding toppings transforms them into customizable, gourmet delights. The trick to perfect toppings is timing.
- Immediate Toppings: For crumbly toppings that stick directly to the warm caramel, you’ll need to work quickly. Immediately after dipping an apple in caramel and before it has a chance to set, roll or sprinkle it generously with your chosen toppings. Excellent choices include finely chopped nuts (pecans, walnuts, peanuts), crushed Oreos, Heath bar toffee pieces, mini M&Ms, sprinkles, or even shredded coconut. Finely chopped toppings tend to adhere better and create a more even coating than chunkier options. Feel free to get creative with your favorite combinations!
- Chocolate Dipping/Drizzling: If you plan to add melted chocolate (milk, white, semi-sweet, or dark), this step should be done after the caramel has firmed up slightly. Chill your caramel-coated apples in the refrigerator for about 20-30 minutes until the caramel is firm to the touch. Then, melt your chocolate in a double boiler or microwave, ensuring it’s smooth and not too hot. Dip the caramel apple into the melted chocolate, covering a portion or drizzling it artfully over the surface.
- Combining Toppings with Chocolate: If you want to add additional crumbly toppings over the chocolate, do so immediately after dipping or drizzling with chocolate, while the chocolate is still wet and pliable. The toppings will stick beautifully as the chocolate cools and sets. Allow the chocolate to fully set in the refrigerator before serving or wrapping.
Choosing the Best Apples for Your Caramel Creations
The type of apple you choose plays a significant role in the overall flavor balance and enjoyment of your caramel apple. Since caramel is inherently sweet, pairing it with a tart, crisp apple provides a wonderful contrast that prevents the treat from being overwhelmingly sugary.
Here are some of the top apple varieties highly recommended for caramel apples:
- Granny Smith: This is arguably the most popular and classic choice for caramel apples. Its distinctive tartness cuts through the richness of the caramel, creating a perfectly balanced flavor profile. Granny Smiths are also incredibly crisp and firm, holding up well to the dipping process and offering a satisfying bite.
- Honeycrisp: Known for its exceptional crispness and juicy flesh, the Honeycrisp offers a delightful crunch. While it’s sweeter than a Granny Smith, it still has enough tartness to complement the caramel without being cloying.
- Pink Lady (Cripps Pink): These apples are a fantastic blend of sweet and tart, with a firm, crisp texture. Their vibrant pink blush also makes for a visually appealing treat under the caramel.
When you’re hand-selecting apples at the grocery store or orchard, keep these characteristics in mind:
- Medium Size: Opt for medium-sized apples, as they are easier to handle, dip, and eat. Larger apples can be unwieldy and might require more caramel.
- Round Shape: Look for apples that are as round as possible, with a relatively flat bottom. This ensures they sit evenly on your prepared baking sheet and provide a consistent surface for dipping.
- Firmness and Flawlessness: Choose apples that are firm to the touch, without any soft spots, bruises, or nicks. Any imperfections can compromise the apple’s integrity and potentially allow juices to leak into the caramel, affecting its adhesion and texture.
Storage Tips for Fresh Homemade Caramel Apples
Once your beautiful homemade caramel apples are complete, proper storage is essential to maintain their freshness, texture, and deliciousness. While they are a joy to eat immediately, they can also be prepared ahead of time.
- Refrigeration is Key: Storing caramel apples in the refrigerator is highly recommended and, for many, a personal preference. The cool temperature keeps the apple crisp and firm, offering a refreshing bite that perfectly complements the chewy caramel. More importantly, refrigeration helps the caramel remain firm and securely adhered to the apple, preventing it from becoming too soft or melting off, especially in warmer environments.
- Airtight Storage: Place the caramel apples on a plate or baking sheet, then cover them lightly with plastic wrap or aluminum foil. If you’ve used individual baking cups, they can simply be covered. This prevents the apples from drying out and absorbing odors from other foods in the refrigerator.
- Shelf Life: Properly stored in the refrigerator, homemade caramel apples will typically last for up to one week. After a week, the apple’s freshness might start to diminish, and the caramel could begin to break down slightly.
- Serving Suggestions: To enjoy, you can either bite directly into the apple (holding onto the stick!) or, for a more manageable treat, remove the stick and slice the apple around the core into wedges.
What to Do with Leftover Caramel
It’s not uncommon to have a bit of caramel left over after dipping all your apples. Don’t let this precious golden goodness go to waste!
While still warm and pliable, pour any excess caramel into a shallow dish or baking pan that has been lined with parchment paper. Allow the caramel to cool completely at room temperature until it is firm enough to handle. Once set, you can easily lift the parchment paper and caramel out of the dish. Cut the caramel slab into individual squares using a sharp, oiled knife or kitchen shears. Wrap each piece of homemade caramel candy in small squares of wax paper to prevent sticking. These delicious, chewy caramels make fantastic standalone treats or can be given as thoughtful homemade gifts. If you prefer a firmer candy, you can store the wrapped caramels in the refrigerator. For more detailed instructions on making soft caramels, you can refer to dedicated recipes.
Frequently Asked Questions (FAQs) About Homemade Caramel Apples
Can I use store-bought caramel for dipping?
Yes, you can certainly use store-bought caramel for convenience. Look for caramel bits, blocks, or tubs specifically labeled for dipping or melting. You’ll typically melt it down according to package directions, often with a little cream or milk to achieve a smooth, dippable consistency. However, homemade caramel offers a superior flavor and texture that truly elevates the experience.
Why is my caramel too thin or too thick?
The consistency of your caramel is directly related to the temperature it reaches during cooking. If your caramel is too thin and runny, it likely didn’t reach a high enough temperature (below 230°F/110°C) to thicken properly. If it’s too thick and hard to dip, it was likely cooked to a temperature beyond the soft-ball stage (above 240°F/116°C), moving towards firm-ball or hard-ball stage. A candy thermometer and the cold water test are your best friends for hitting that perfect soft-ball consistency.
How do I prevent air bubbles in my caramel coating?
Air bubbles can sometimes form during the cooking or dipping process. To minimize them, try to avoid stirring the caramel too vigorously, especially once it’s nearing its target temperature and during dipping. Gentle, constant stirring during cooking is fine, but harsh whisking will incorporate air. If bubbles appear on the surface of your caramel after dipping, you can try to gently pop them with the back of a spoon or the tip of a toothpick before the caramel sets completely.
Can I make caramel apples ahead of time?
Absolutely! Caramel apples are a fantastic make-ahead treat. Once dipped and set, they can be stored in the refrigerator for up to a week. This makes them perfect for parties, gatherings, or simply enjoying throughout the week. For best results, chill them for at least 30 minutes after dipping to ensure the caramel is firm before storing.
What kind of sticks should I use for caramel apples?
For best results, use sturdy, food-safe sticks that are long enough to provide a good handle. Wilton cookie sticks (6 to 8 inches long) are a popular choice, as are lollipop sticks or thick wooden skewers. Avoid flimsy skewers that might break or splinter when handling the apple.
Explore More Delicious Homemade Treat Recipes
If you enjoyed making these homemade caramel apples, you’ll love these other fantastic treat recipes perfect for any occasion:
- Sweet & Salty Pretzel Hugs
- Easy Peanut Butter Buckeyes
- Decadent Chocolate Truffles
- Addictive Cracker Toffee
- Cookie Dough Pretzel Bites
- Soft & Gooey Marshmallow Popcorn
- Peanut Butter Pretzel Balls
FOLLOW US on PINTEREST, FACEBOOK, OR INSTAGRAM for more great recipes!
Homemade Caramel Apples Recipe

Classic homemade caramel apples are fun to make from scratch. Any leftover caramel can be cooled, cut, and wrapped for treats. This guide also includes tips and tricks to make professional looking caramel apples at home.
Created by: Amber Brady
Prep Time: 30 mins | Cook Time: 30 mins | Chill Time: 30 mins | Total Time: 1 hr 30 mins
Yields: 12 caramel apples
Ingredients
- 12 medium Granny Smith apples
- 2 Tbsp lemon juice or vinegar
- 12 Wilton cookie sticks (6 to 8-inches long)
- 1 cup (226 g) salted butter (2 sticks)
- 2 cups (400 g) light brown sugar, gently packed
- 1 cup (237 g) light corn syrup
- 14 oz (396 g) can sweetened condensed milk
- 2 tsp vanilla extract
Equipment
- Aluminum Half Sheet Tray (2 Pack)
- Parchment Paper
- Silicone Baking Mat
- Silicone Spatula Set
- Heavy-Duty Saucepan (e.g., Circulon Hard Anodized Nonstick Pots and Pans Set)
- Candy Thermometer
Instructions
- WASH APPLES: Place the apples in a large bowl and fill with comfortably hot tap water. Add 2 Tablespoons of lemon juice or vinegar to the water and let the apples soak for a minute or two. Use a vegetable scrub brush or a slightly abrasive cloth and a little dish soap (like Dawn) or produce spray to scrub each apple well all around. Rinse completely, remove stems, and dry each apple extremely well with cloth or paper towels.
- INSERT HANDLES: Gently tap cookie sticks 1/2 to 2/3 of the way down the center of each apple with a hammer or the flat side of a meat mallet. (Food safety tip: Wash the hammer or clean it with a disinfectant wipe before using it to insert the handles into the apples.)
- PREPARE FOR DIPPING: Line a baking sheet with parchment paper or a silicone baking mat. Place the prepared apples on top and refrigerate until ready to dip. (Also prepare any desired toppings in plates or bowls before proceeding.)
- MAKE CARAMEL: Stir butter, brown sugar, corn syrup, and sweetened condensed milk in a large saucepan over medium-high heat. Bring to a boil, stirring constantly, then reduce heat to medium.
- Cook until a candy thermometer reaches 230˚F – 240˚F, about 20-30 minutes, stirring constantly to prevent burning. Check the caramel by spooning some into a small bowl of very cold water. Let it sit for a few seconds. Then pull it out. If it can hold the shape of a ball, then it’s done. (Check caramel at the lower temperature for those at a high altitude.) Remove from heat and stir in vanilla. Careful, it may bubble up.
- DIP APPLES: Let caramel cool at room temperature to 180˚F – 190˚F. Working quickly, tilt the pan, insert the apple, and slowly swirl it until all sides are coated. Allow excess caramel to drip into the pan for a few seconds, then gently scrape the bottom on the edge of the pan and place the apple onto the parchment paper or silicone lined baking sheet. (If using toppings, immediately dip or sprinkle toppings over the warm caramel coated apple. Then place on prepared pan.)
- Repeat with remaining apples, being careful not to stir the caramel too much or bubbles will form. If the caramel cools too much, warm it slightly over the stovetop and continue dipping. Allow caramel apples to set up in the refrigerator for 20-30 minutes before eating.
- Store apples covered lightly in the refrigerator up to 1 week. To eat, cut slices around the core or hold onto the stick and bite right into the apple.
Notes
- Use parchment paper or a silicone baking mat fitted on a baking sheet for the dipped apples. No cooking spray needed. DO NOT USE WAX PAPER or the hot caramel will stick.
- TOPPINGS: If dipping into toppings, prepare all toppings before dipping apples into caramel. Finely chopped toppings are easier to adhere to the caramel. Crushed nuts, Oreos, candies, etc., work wonderfully.
- If there is leftover caramel after dipping all the apples, simply pour it into a parchment lined dish and allow it to cool completely. Cut the caramel into squares and wrap it with wax paper for individual candies. May need to refrigerate caramels to keep firm.
- For gifting: Place caramel apples in clear cellophane bags and tie shut with a ribbon around the stick.
Nutrition
Serving: 1 apple | Calories: 559kcal | Carbohydrates: 101g | Protein: 3g | Fat: 19g | Saturated Fat: 12g | Polyunsaturated Fat: 1g | Monounsaturated Fat: 5g | Trans Fat: 1g | Cholesterol: 52mg | Sodium: 193mg | Potassium: 375mg | Fiber: 4g | Sugar: 94g | Vitamin A: 659IU | Vitamin C: 10mg | Calcium: 144mg | Iron: 1mg
Disclaimer: Nutritional values were calculated using a third-party tool and are provided as an estimation only.
Sharing this recipe with a link is both encouraged and appreciated. Copying/pasting and/or screenshots of full recipes to any social media is strictly prohibited. Content and photographs are copyright protected.
Did you make this?
Don’t forget to leave a rating below and make sure to follow on Pinterest and Instagram for more!