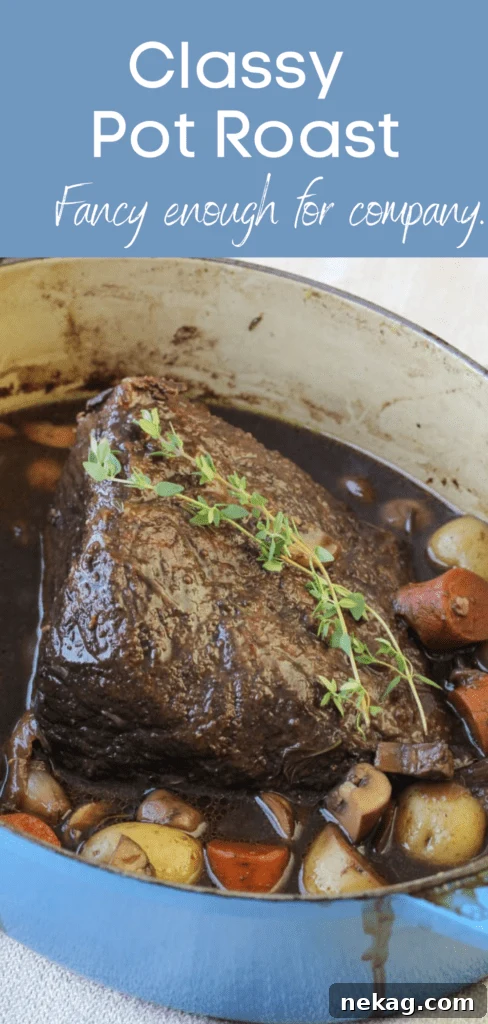
The Ultimate Dutch Oven Pot Roast: A Culinary Journey to Comfort
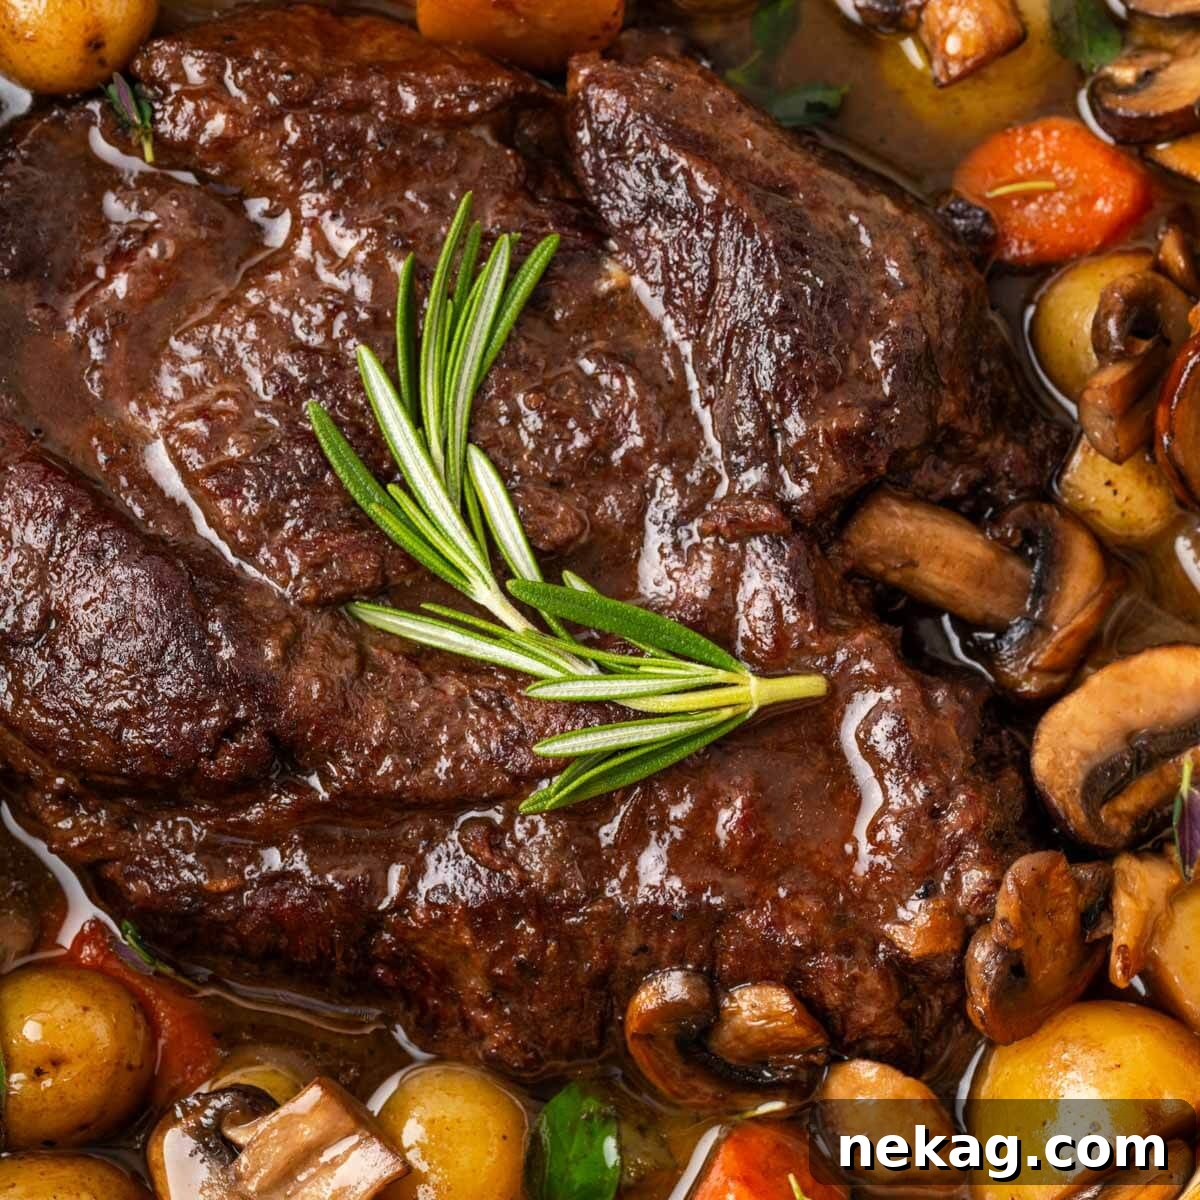
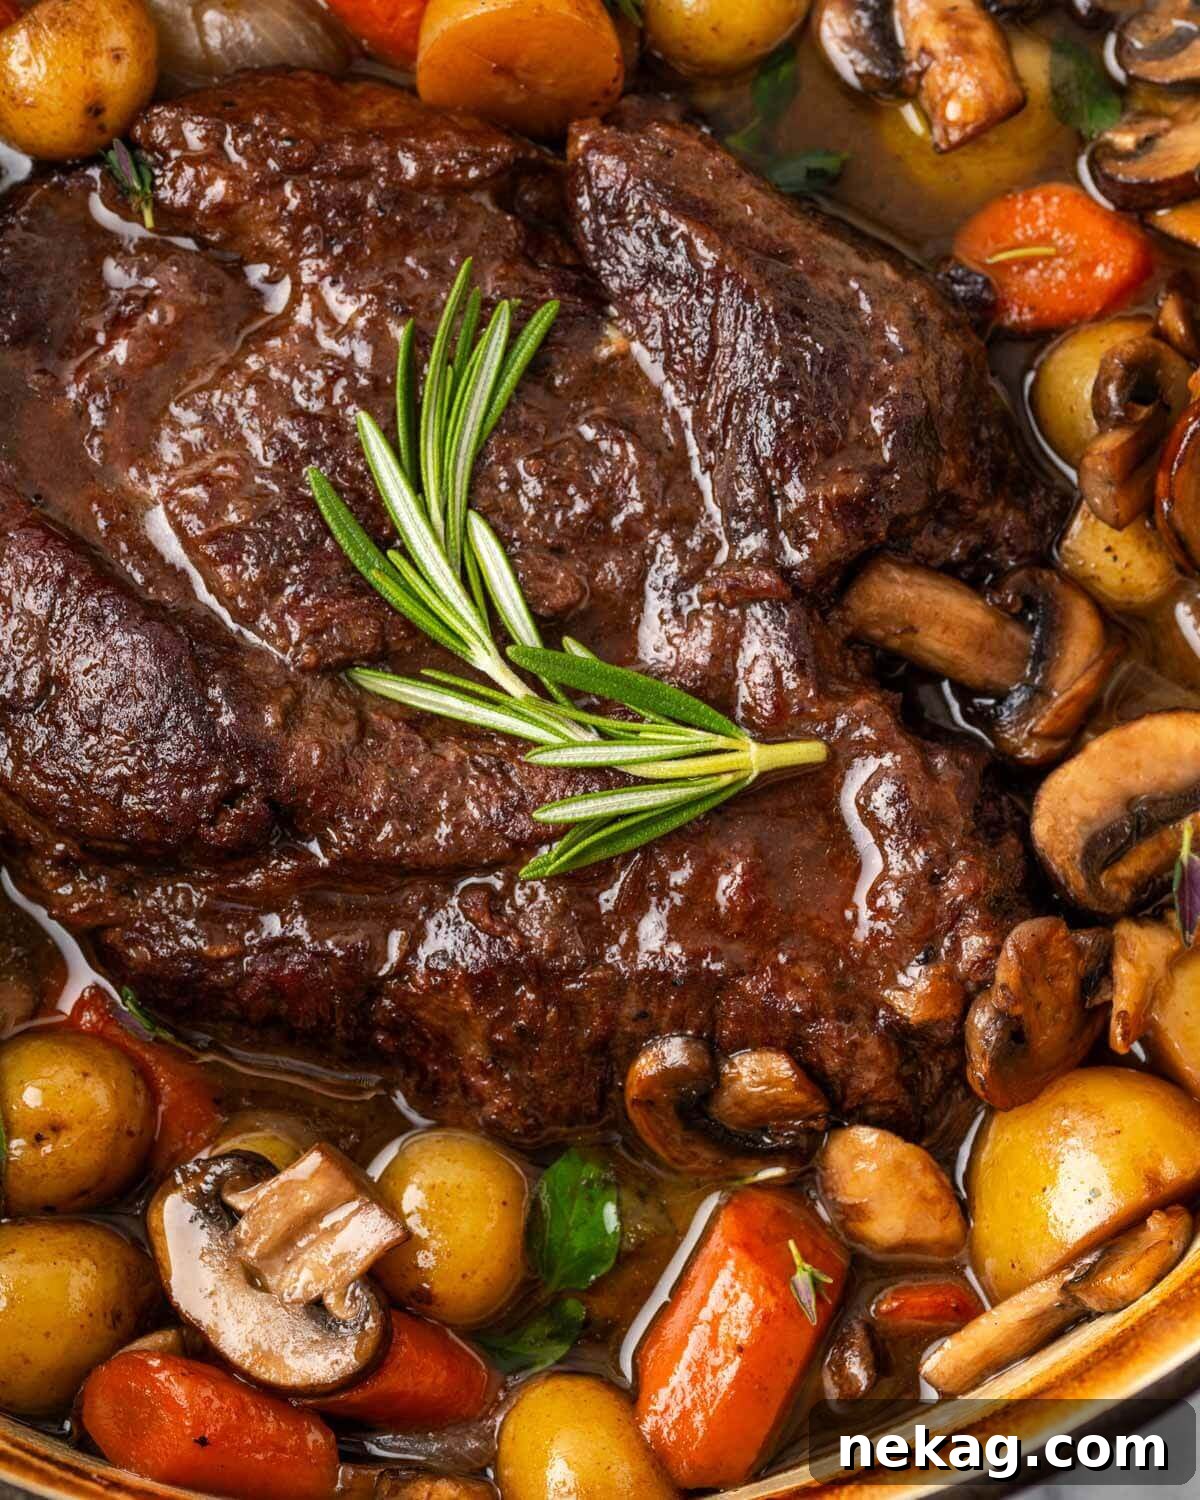
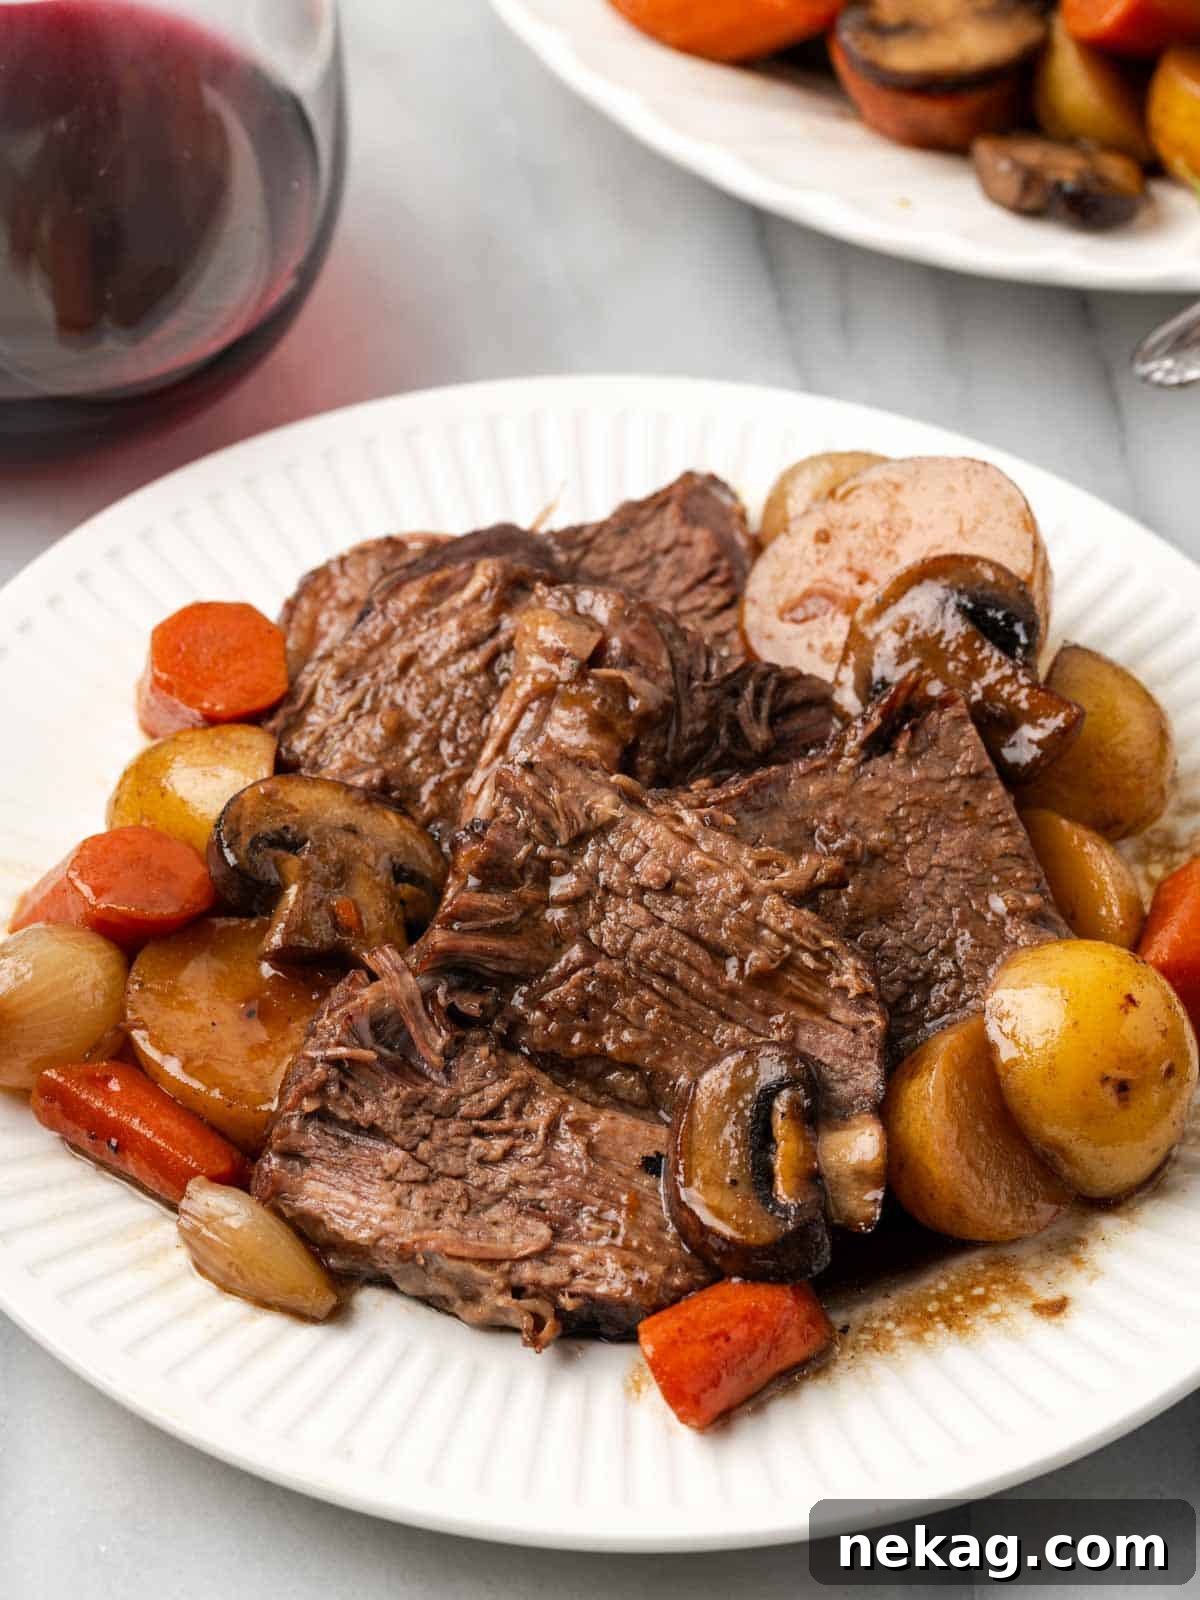
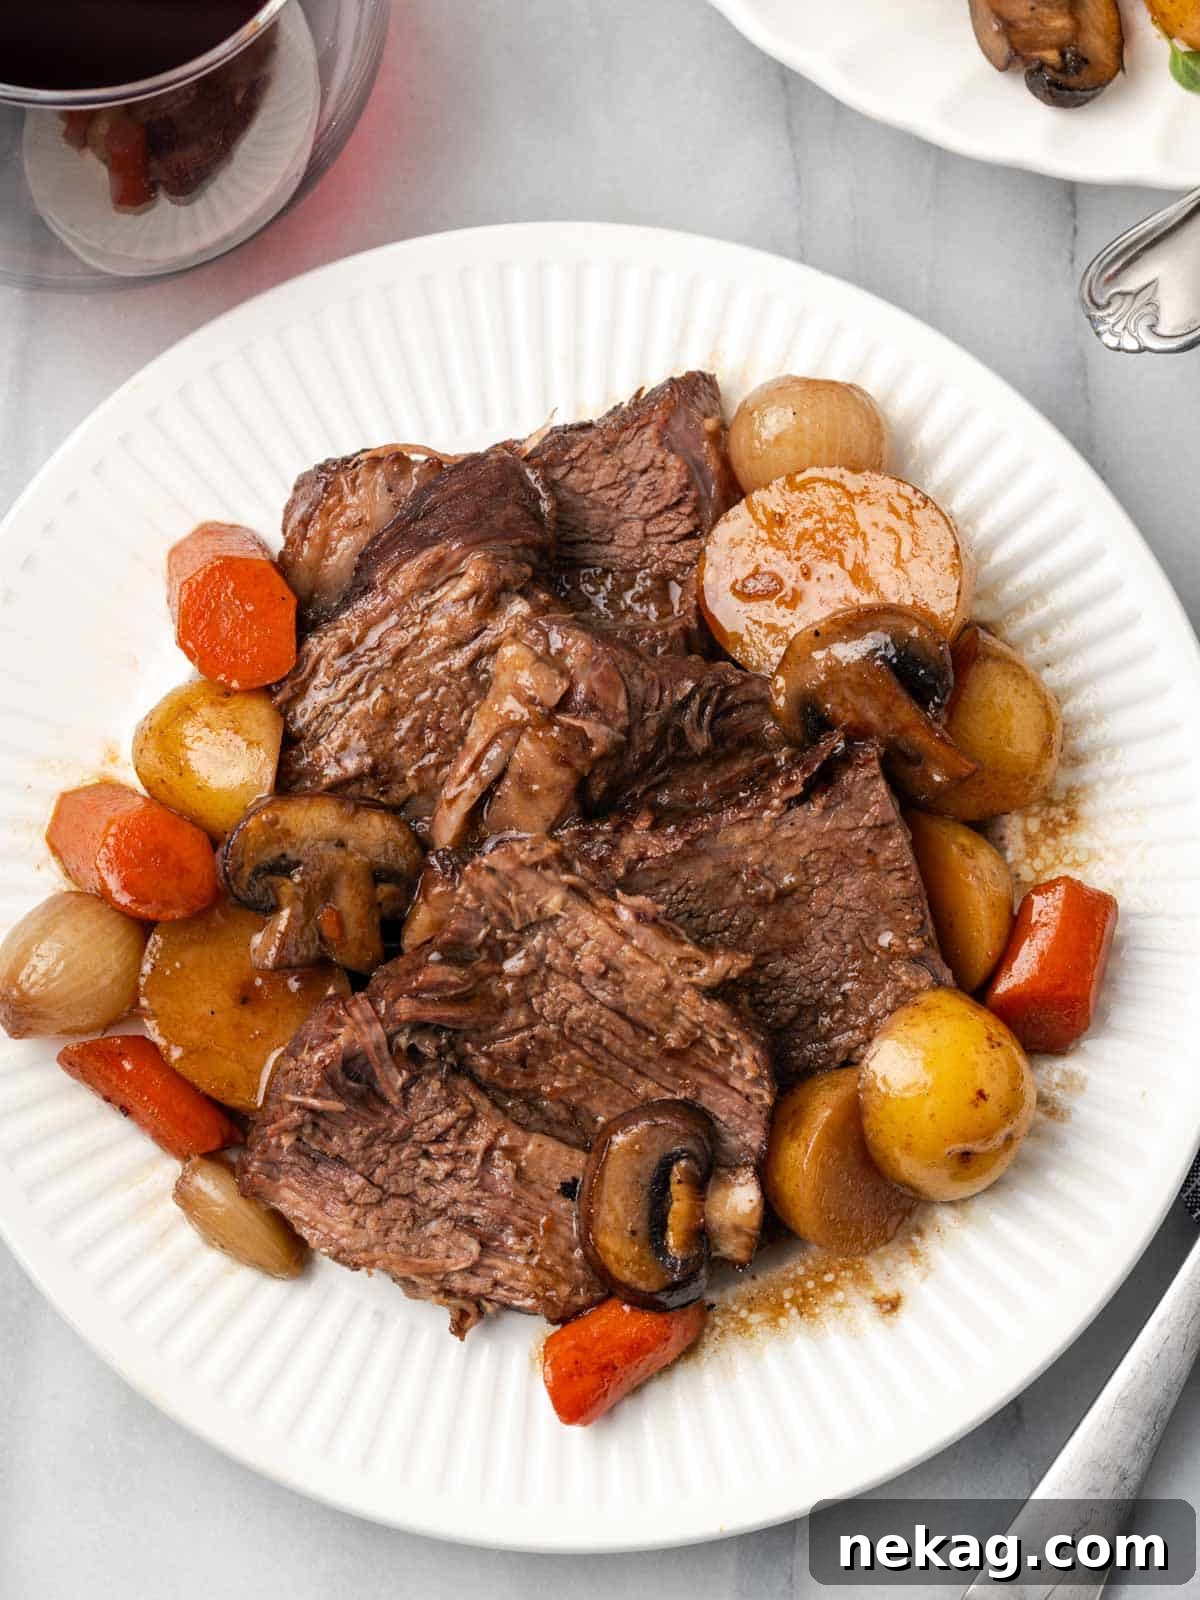
Embark on a culinary journey with this exquisite Dutch oven pot roast recipe. Designed to deliver an unparalleled dining experience, it features melt-in-your-mouth tender beef, an abundance of savory root vegetables like carrots and potatoes, an aromatic medley of fresh herbs, and a rich, velvety gravy that ties every element together. This dish isn’t just a meal; it’s a heartwarming embrace, perfect for a cozy family dinner or a special gathering.
A Quick Glance at the Recipe
This section provides a brief overview of the recipe details. For the complete, detailed instructions, simply jump to the full recipe card below.
Jump to Full Recipe
Prep Time
28 minutes
Cook Time
3 hours
Total Time
3 hours 28 minutes
Servings
8 people
Difficulty
Easy
Calories *
308 kcal per serving
Technique
Sear, braise, simmer for a robust, fall-apart tender result.
Flavor Profile
Rich, savory beef and vegetables with aromatic herbs and a decadent gravy.
* Based on nutrition panel
SO PERFECT! I am in awe at your mad pot roast making skills! ⭐⭐⭐⭐⭐
Kayle
If your heart yearns for a warm, savory, and incredibly comforting one-pot meal that requires minimal fuss but delivers maximum flavor, then this Dutch oven pot roast is precisely what you need. This restaurant-quality recipe will expertly guide you through each step, demonstrating how to transform an ordinary cut of beef into an extraordinary culinary masterpiece. Expect fall-apart tender beef that practically melts on your fork, velvety soft carrots and potatoes infused with rich flavor, and a thick, luscious gravy that will have everyone reaching for seconds. It’s the quintessential comfort food, elevated.
Table of Contents
- Why This Dutch Oven Pot Roast Will Become Your Favorite
- Professional Chef Tips for the Perfect Pot Roast
- Essential Ingredients for a Flavorful Roast
- Delicious Variations and Serving Suggestions
- Step-by-Step Guide: How to Make This Beef Roast
- Chef Lindsey’s Special Tip for Pearl Onions
- Frequently Asked Questions About Pot Roast
- Complete Dutch Oven Pot Roast Recipe Card
- Explore More Delicious Recipes
Why This Dutch Oven Pot Roast Will Become Your Favorite
- A Unique and Flavorful Fresh Herb Blend: Unlike many pot roast recipes that rely on one or two dried herbs, this recipe stands out by incorporating a vibrant trio of fresh thyme, rosemary, and oregano. This thoughtful combination creates a captivating medley of bright, earthy, and aromatic notes, infusing every bite with a depth of flavor that is both delicious and incredibly interesting. Fresh herbs truly elevate this dish from good to unforgettable.
- Deglazing with Red Wine Adds Unparalleled Depth: The technique of deglazing the bottom of your Dutch oven with dry red wine is a game-changer. After searing the beef, those wonderfully browned bits (known as “fond”) stuck to the pot are scraped up by the wine, releasing an explosion of concentrated, savory flavor. This critical step enriches the gravy with complex, deep notes that simply cannot be achieved otherwise, making your pot roast truly exceptional.
- Pearl Onions Impart a Delicate, Sweet Flavor: Opting for pearl onions over standard yellow onions is a subtle but significant detail that sets this recipe apart. Pearl onions offer a delicate, lightly sweet, and milder flavor profile that beautifully complements the robust beef and earthy vegetables. Their small, tender form also adds a distinct textural element, making the dish feel more refined and nuanced than typical pot roasts.
- Achieve Fall-Apart Tender Beef Every Time: The slow, gentle braising method in a Dutch oven ensures that even tougher cuts of beef transform into incredibly tender, succulent pieces that effortlessly pull apart. This long, moist cooking process breaks down connective tissues, leaving you with beef that’s not just cooked, but truly surrendered to tenderness.
- A Complete One-Pot Meal with Easy Cleanup: The beauty of a Dutch oven pot roast lies in its simplicity. Everything, from searing the beef to simmering the vegetables and creating the rich gravy, happens in a single pot. This not only concentrates flavors but also drastically reduces cleanup, making it an ideal choice for busy weeknights or relaxed weekend cooking.
- Impressive Presentation for Any Occasion: Despite its humble origins, a perfectly cooked Dutch oven pot roast, brimming with colorful vegetables and glistening gravy, presents beautifully. It’s a dish that feels special enough for entertaining guests, yet comforting enough for a quiet family dinner, always leaving a lasting impression.
Professional Chef Tips for the Perfect Pot Roast
- Sear the Beef in Batches for a Superior Crust: When browning your beef, resist the urge to overcrowd the Dutch oven. Working in batches, ensuring ample space between each piece, allows the meat to develop a beautiful, deep brown crust. Overcrowding lowers the pan’s temperature, causing the meat to steam rather than sear, which prevents the formation of that crucial flavor-enhancing crust. This caramelization is key to a rich gravy.
- Patience is Key for Unrivaled Tenderness: Pot roast, especially with cuts like shoulder roast or chuck, requires time for the connective tissues to break down and become melt-in-your-mouth tender. Do not rush the cooking process. Allow the meat to slowly braise in the oven for the recommended duration. The reward for your patience will be incredibly succulent, fall-apart beef that’s worth every minute. Plus, any leftovers make fantastic meals like Roast Beef Swiss Melt Sandwiches or a gourmet twist on a Monte Cristo.
- Taste and Adjust Seasoning Throughout: A truly exceptional dish is balanced in flavor. The best habit any home cook can cultivate is to taste for seasoning at various stages of cooking. Before serving, taste the gravy. Does it need more salt? A pinch of pepper? A splash more wine? Adjusting the seasoning ensures every component of your pot roast is perfectly harmonious.
- Choose the Right Cut of Beef: While different cuts can work, a bone-in shoulder roast or a boneless beef chuck roast are ideal for pot roast. These cuts, though initially tough, contain a good amount of marbling and connective tissue that break down beautifully during slow braising, yielding incredibly rich flavor and fork-tender results.
- Don’t Skip Resting the Meat: After removing the pot roast from the oven, allow the meat to rest, tented with foil, for at least 10-15 minutes before slicing. This crucial step allows the muscle fibers to relax and reabsorb their juices, resulting in a more tender, moist, and flavorful roast.
Essential Ingredients for a Flavorful Roast
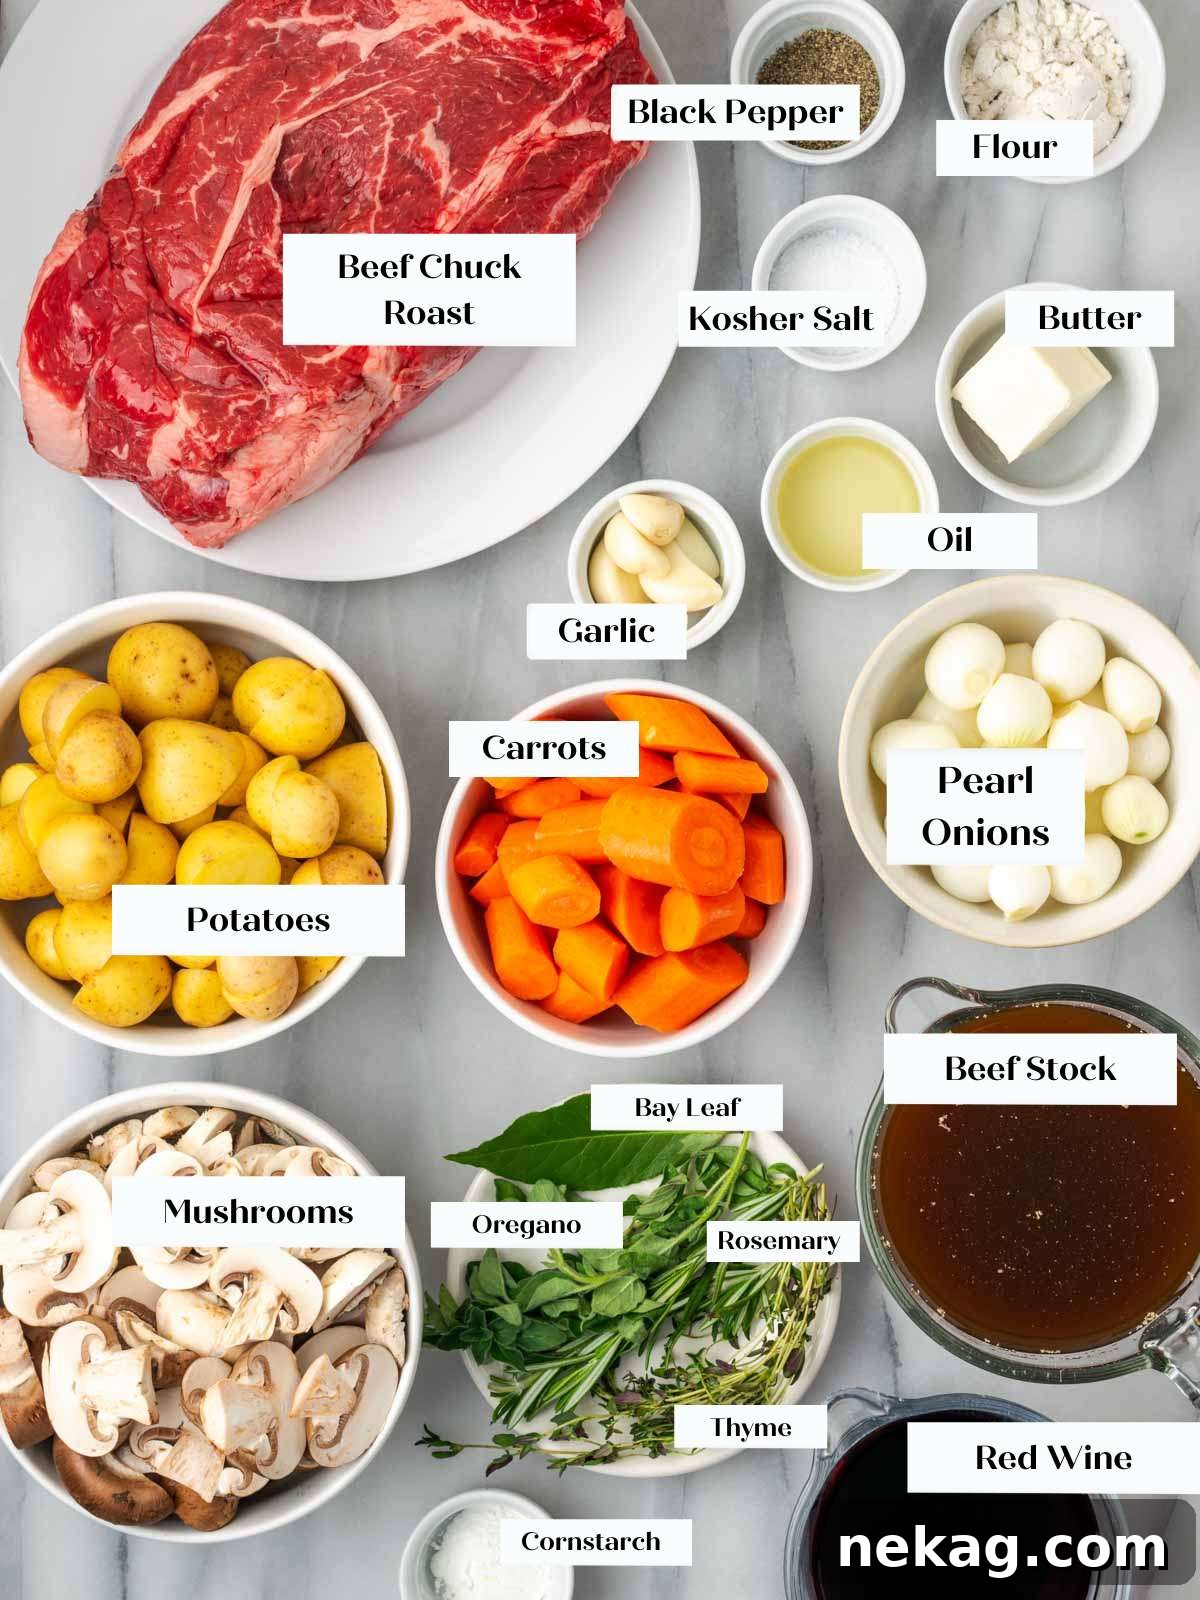
- Roast: I highly recommend a 3-pound bone-in shoulder roast for its incredible flavor and ability to become supremely tender. Alternatively, a top round roast or a boneless beef chuck roast are excellent choices, similar to what I use in my popular Dutch Oven Beef Stew. These cuts are known for their beautiful marbling, which renders down to create a moist and flavorful result when slow-cooked.
- Flour: Standard all-purpose flour works perfectly for coating the beef, helping to create a flavorful crust and slightly thickening the initial braising liquid. For a gluten-free alternative, rice flour or millet flour can be used as a substitute, though textures may vary slightly.
- Kosher Salt & Freshly Ground Pepper: These fundamental seasonings are crucial for enhancing the natural flavors of the beef and vegetables. Season generously, as much of the seasoning will dissolve into the braising liquid. Always taste and adjust later.
- Unsalted Butter & Olive Oil: A combination of butter and olive oil provides the ideal fat for searing the beef. The butter adds a rich, nutty flavor and helps achieve a golden-brown crust, while the olive oil has a higher smoke point, preventing the butter from burning.
- Pearl Onions: These small, delicate onions are a secret weapon in this recipe. They are sweeter and milder than larger onions, and their petite size ensures they cook down to a tender, almost creamy consistency without disintegrating. Their distinct shape also adds visual appeal to the finished dish.
- Garlic: Whole garlic cloves are preferred for this recipe. As they slowly braise, they soften and release their aromatic compounds, infusing the entire dish with a mellow, sweet garlic flavor without the sharpness of minced garlic. If fresh isn’t available, jarred chopped garlic in water can be used in a pinch.
- Carrots: Medium to large carrots, cut into 1-inch pieces, are ideal. Their robust texture allows them to withstand the long cooking time, becoming tender yet still holding their shape. Avoid baby carrots, as they tend to become overly soft and can break apart during extended braising.
- Potatoes: Small yellow or red potatoes, halved, are excellent for this pot roast. Their waxy texture holds up well, absorbing the rich flavors of the gravy while remaining firm. Feel free to add more than the recipe suggests if your Dutch oven allows, as these hearty potatoes, much like those in my Lemon Roasted Chicken Dinner, make the meal extra satisfying.
- Mushrooms: A mix of button mushrooms and baby portobellos is recommended for a wonderful variety in texture and a deeper, earthier flavor. Sautéing them separately and adding them at the end ensures they maintain their texture and contribute a fresh umami note.
- Thyme & Oregano: Fresh sprigs of thyme and oregano provide robust, herbaceous notes that are quintessential to classic pot roast. Their savory, slightly peppery aromas are released beautifully during the slow braising process.
- Rosemary: Fresh rosemary is a star in this herb blend, lending a fragrant, piney aroma and a distinctive woody, almost lemony flavor. It pairs wonderfully with the rich beef and also beautifully complements dishes like rosemary lemon roasted cauliflower, if you’re looking for an additional side.
- Bay Leaf: A single large bay leaf adds a subtle, savory depth to the braising liquid with hints of eucalyptus and a faint bitterness that balances the richness of the dish. Remember to remove it before serving.
- Beef Broth: For the most exceptional flavor, I highly recommend using homemade beef broth. However, a good quality store-bought low-sodium beef broth works perfectly well. Using a low-sodium option allows you to control the overall seasoning of your dish more precisely.
- Dry Red Wine: A dry red wine, such as a Cabernet Sauvignon like Château Ste. Michelle Cabernet Sauvignon, is crucial for deglazing and building complexity. It adds acidity and fruit notes that cut through the richness of the beef and enhance the overall flavor profile of the gravy. Always use a wine you would enjoy drinking! If you prefer white wine-based stews, consider my Hearty Rosemary Lamb Stew Recipe.
- Cornstarch: A small amount of cornstarch, mixed into a slurry with cold liquid, is used to thicken the braising liquid into a luscious, velvety gravy. It transforms the thin broth into a rich sauce that coats the beef and vegetables beautifully, completing the dish.
Please refer to the recipe card below for precise quantities and additional details on these ingredients.
Delicious Variations and Serving Suggestions
- Slow Cooker Pot Roast: For hands-off convenience, this recipe adapts beautifully to a slow cooker. Begin by browning the beef as instructed in the main recipe to build flavor. Deglaze the pan with the red wine and beef broth, capturing all those flavorful browned bits. Then, transfer the seared beef, deglazed liquid, and all remaining ingredients (onions, garlic, carrots, potatoes, herbs) to your slow cooker. Cook on low for 8 hours or on high for 4 to 6 hours, until the beef is incredibly tender. To finish, pour the liquid from the slow cooker into a saucepan and thicken with a cornstarch slurry over medium heat to create a rich gravy.
- Instant Pot Pot Roast: Achieve incredible tenderness in a fraction of the time with an Instant Pot. Use the sauté function to brown the meat on all sides, then remove it. Sauté the vegetables and aromatics for a few minutes until fragrant. Deglaze the pot with the wine and broth, scraping up any fond. Add the browned beef and all remaining ingredients, then cook on the pressure cook function for approximately 60 minutes, followed by a natural release. Thicken the gravy on the sauté function if desired.
- Serve Over Creamy Mashed Potatoes: While this pot roast comes with its own potatoes, serving it over a generous bed of creamy mashed potatoes is a classic and utterly decadent choice. The mashed potatoes soak up the rich gravy, adding another layer of comfort to the meal. Alternatively, potato dinner rolls are perfect for soaking up every last drop of that amazing gravy.
- Add More Vegetables: Feel free to customize your pot roast with other hearty vegetables. Parsnips, celery, or even turnips can be added alongside the carrots and potatoes for extra flavor and nutritional value. Ensure they are cut into similarly sized pieces to ensure even cooking.
- Herb Variations: Experiment with different fresh herbs based on your preference. A sprig of fresh sage can add a lovely, earthy dimension, or a bay leaf can be substituted for dried thyme if fresh is unavailable, though the flavor profile will be slightly different.
Step-by-Step Guide: How to Make This Beef Roast
Follow these detailed instructions to create the most perfect, flavorful Dutch oven pot roast every time. Precise measurements and further details can be found in the comprehensive recipe card below!
Step 1: Prepare the Oven and Seasoning. Preheat your oven to 325°F (160°C). In a small bowl, thoroughly whisk together the all-purpose flour, kosher salt, and freshly ground black pepper. This seasoned flour will create a beautiful crust and help thicken the gravy.
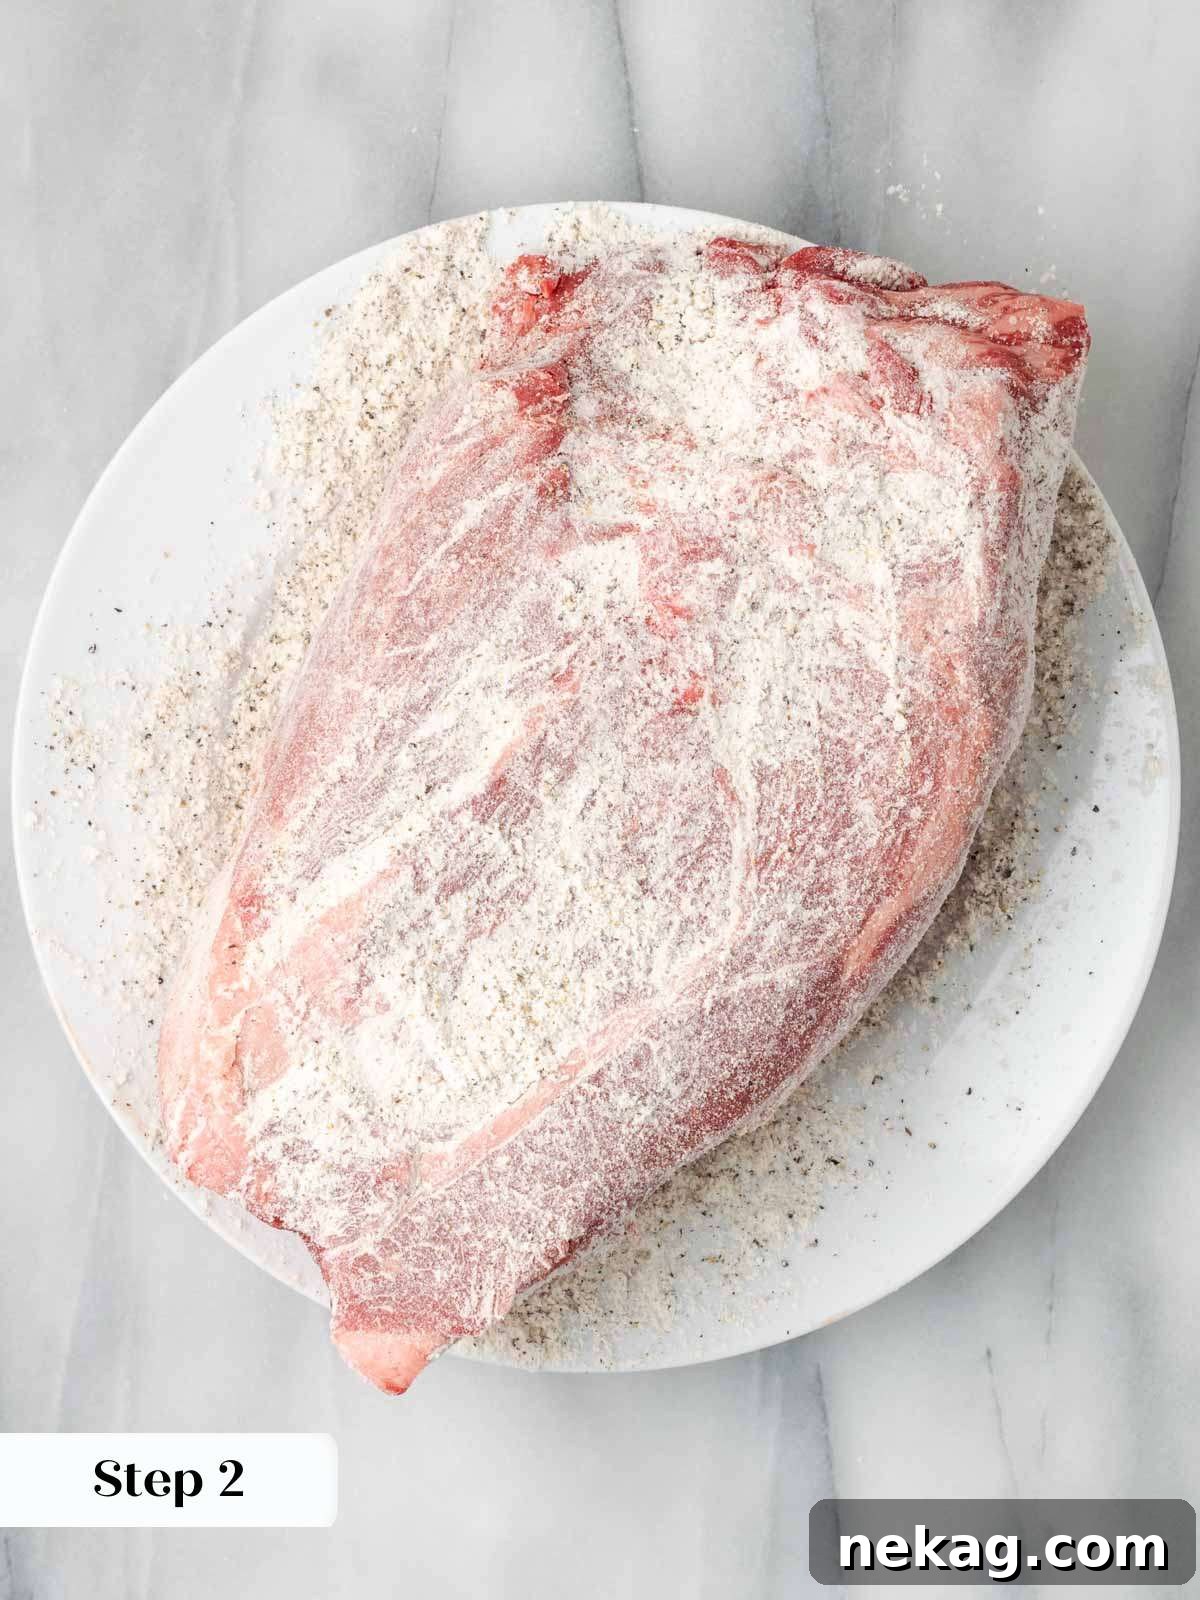
Step 2: Dry and Season the Roast. Using paper towels, pat your beef roast completely dry. This is a critical step, as a dry surface is essential for achieving a good sear. Generously sprinkle the roast with the flour/salt/pepper mixture, rubbing it gently to ensure an even coating on all sides. This coating will contribute significantly to the rich flavor and color of your gravy.
Step 3: Sear the Beef for Deep Flavor. Place your Dutch oven over medium heat on the stovetop and allow it to get hot, but not smoking. Add the unsalted butter and olive oil to the pot, stirring until the butter is fully melted and shimmering. Carefully place the seasoned roast into the hot Dutch oven and brown it thoroughly on all four sides. This searing step is non-negotiable as it develops deep, complex flavors that form the foundation of your pot roast. Work in batches if necessary to avoid overcrowding, ensuring a proper sear rather than steaming.
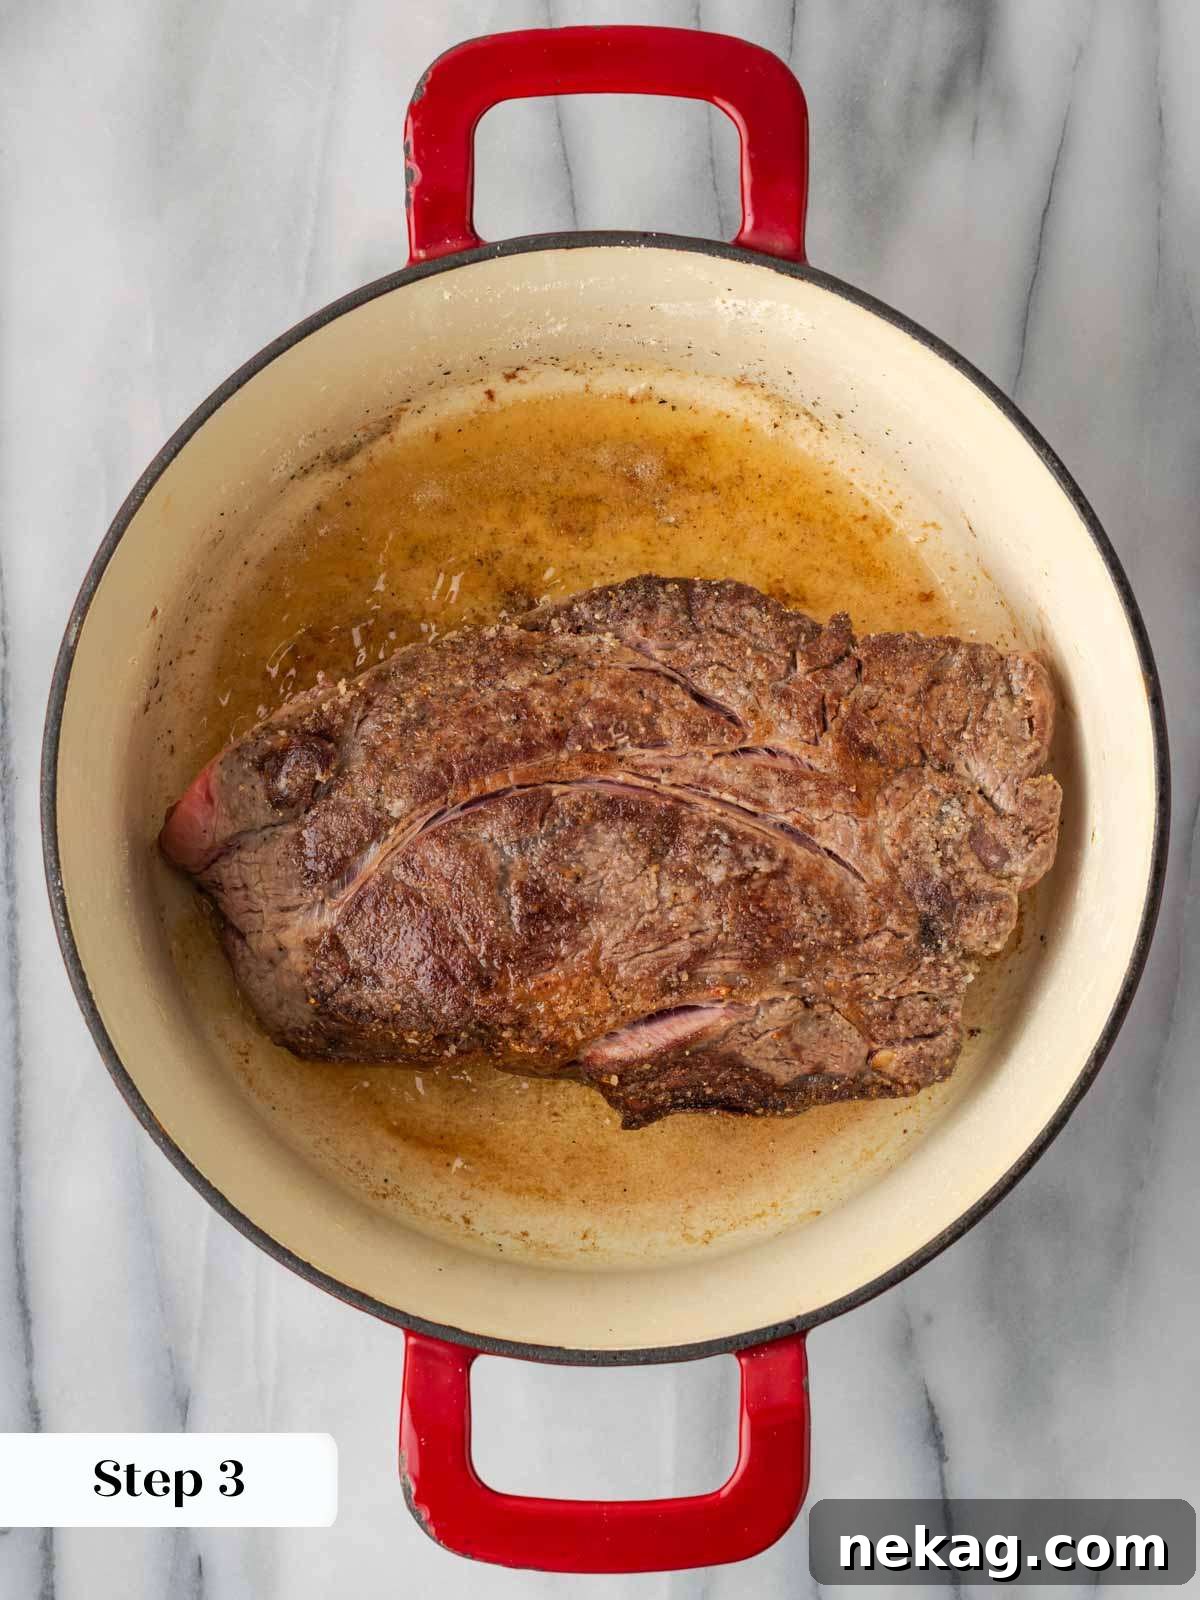
For searing, you can also use avocado oil if you prefer, as it has a high smoke point and neutral flavor.
Step 4: Add Vegetables, Liquids, and Deglaze. Once the roast is beautifully browned on all sides, add the pearl onions, whole garlic cloves, halved potatoes, and 1-inch pieces of carrots directly to the pot, nestling them around the beef. Carefully pour in the dry red wine and beef broth. Immediately use a wooden spoon or spatula to scrape up all the flavorful browned bits (fond) from the bottom of the pot. This deglazing step is crucial for building a deeply flavored gravy. Bring the liquid to a gentle boil on the stovetop.
Step 5: Braise in the Oven. Once the liquid is boiling, carefully cover the Dutch oven with its lid. Transfer the pot to your preheated oven and bake for 3 hours. Midway through the cooking process, specifically after 1 ½ hours, carefully remove the pot from the oven, turn the roast over to ensure even cooking and tenderness, and then return it to the oven to complete the braising.
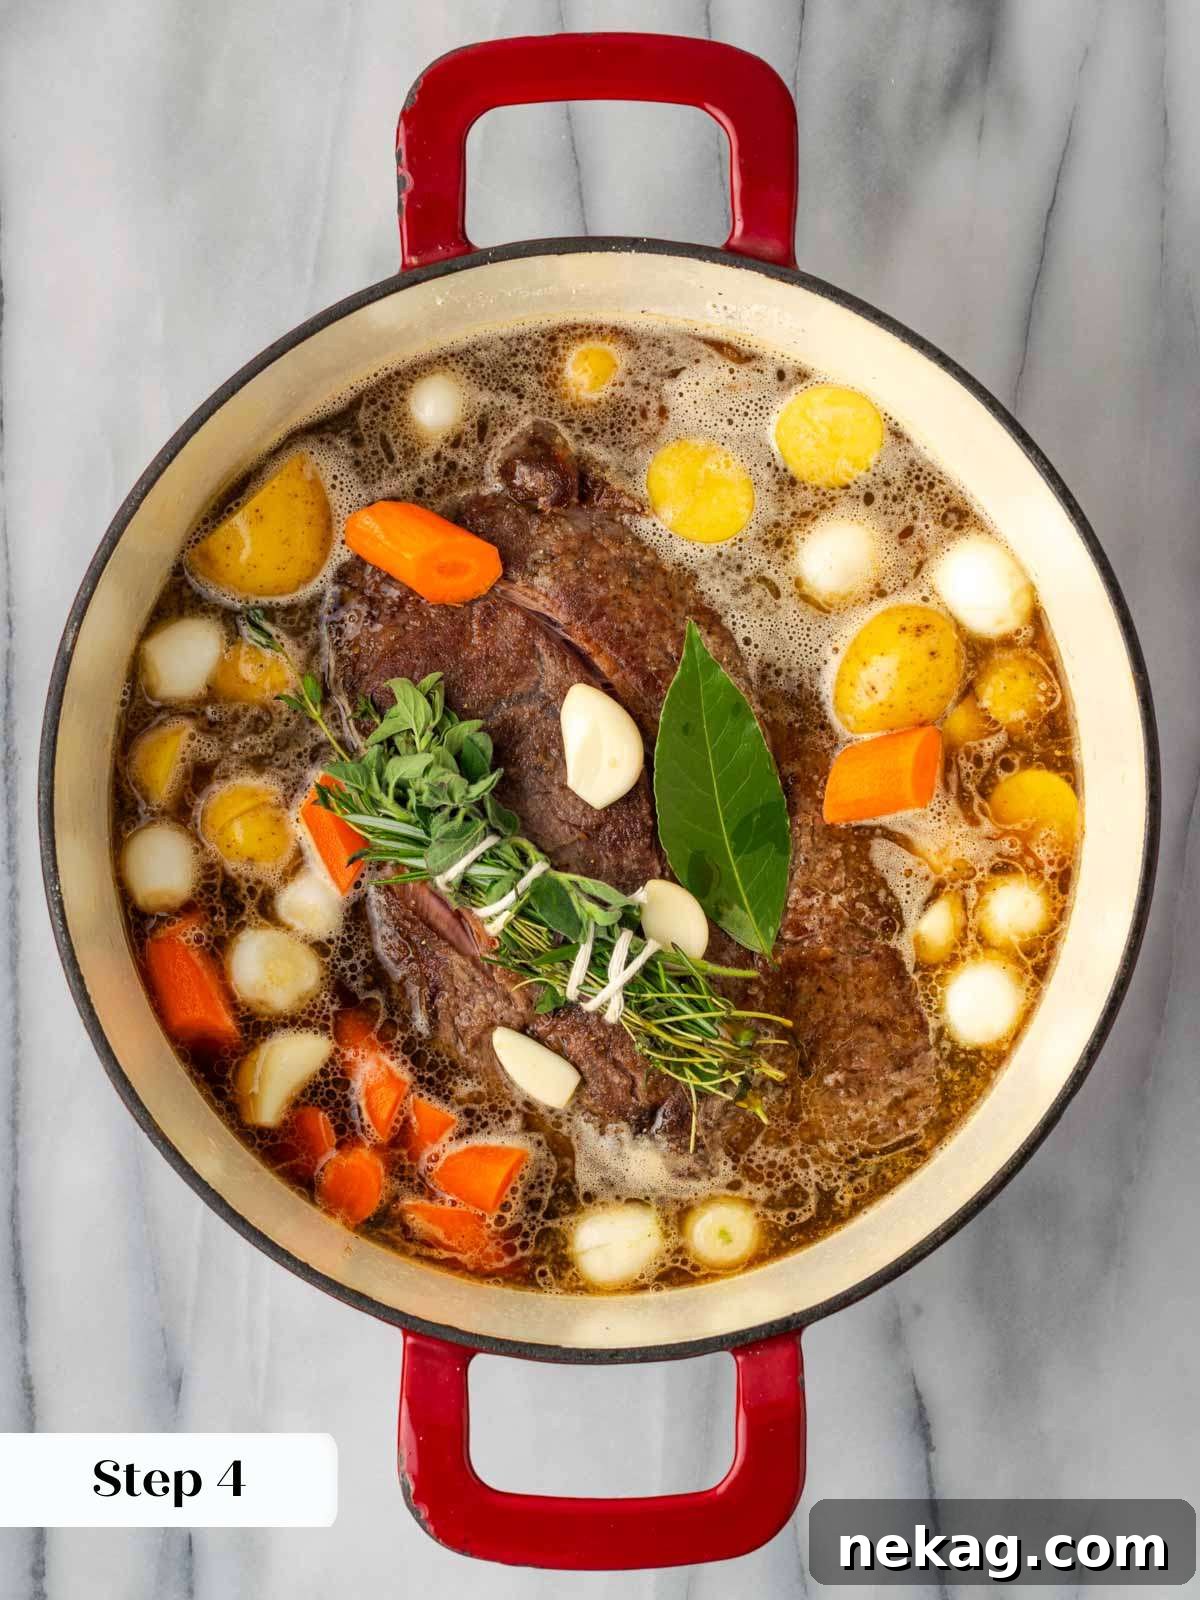
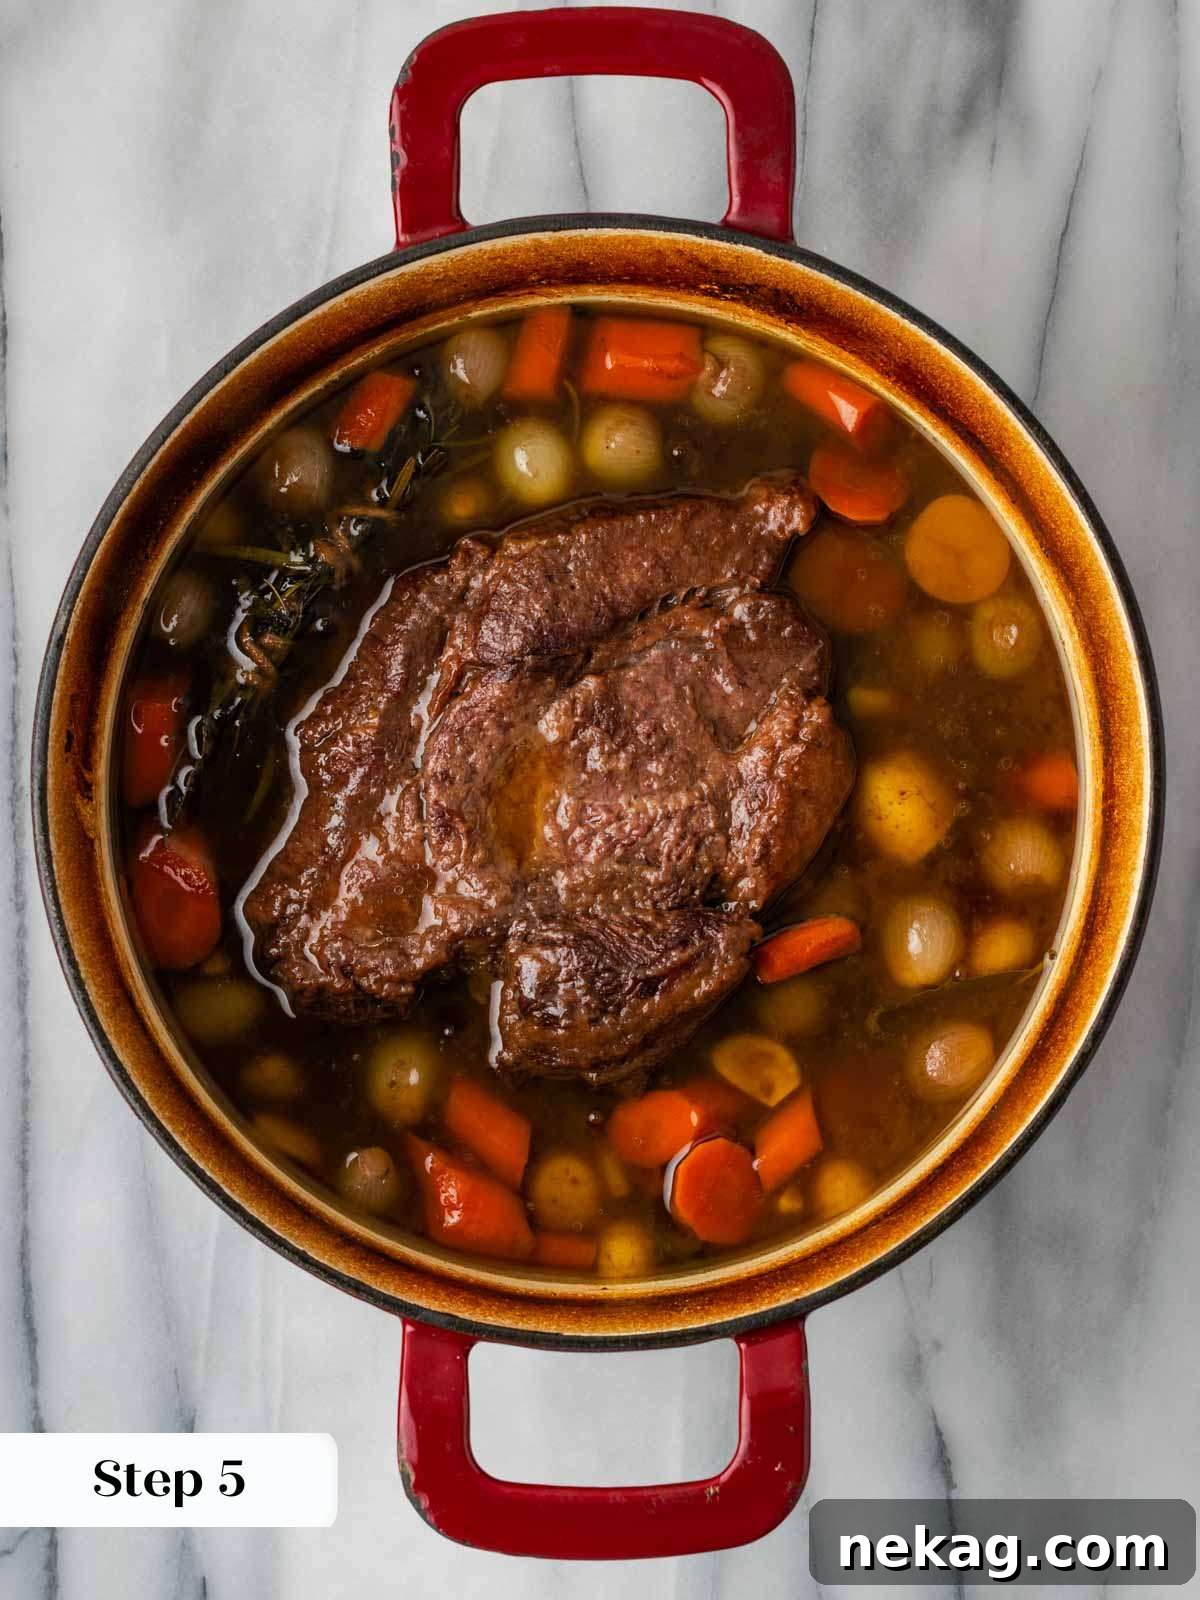
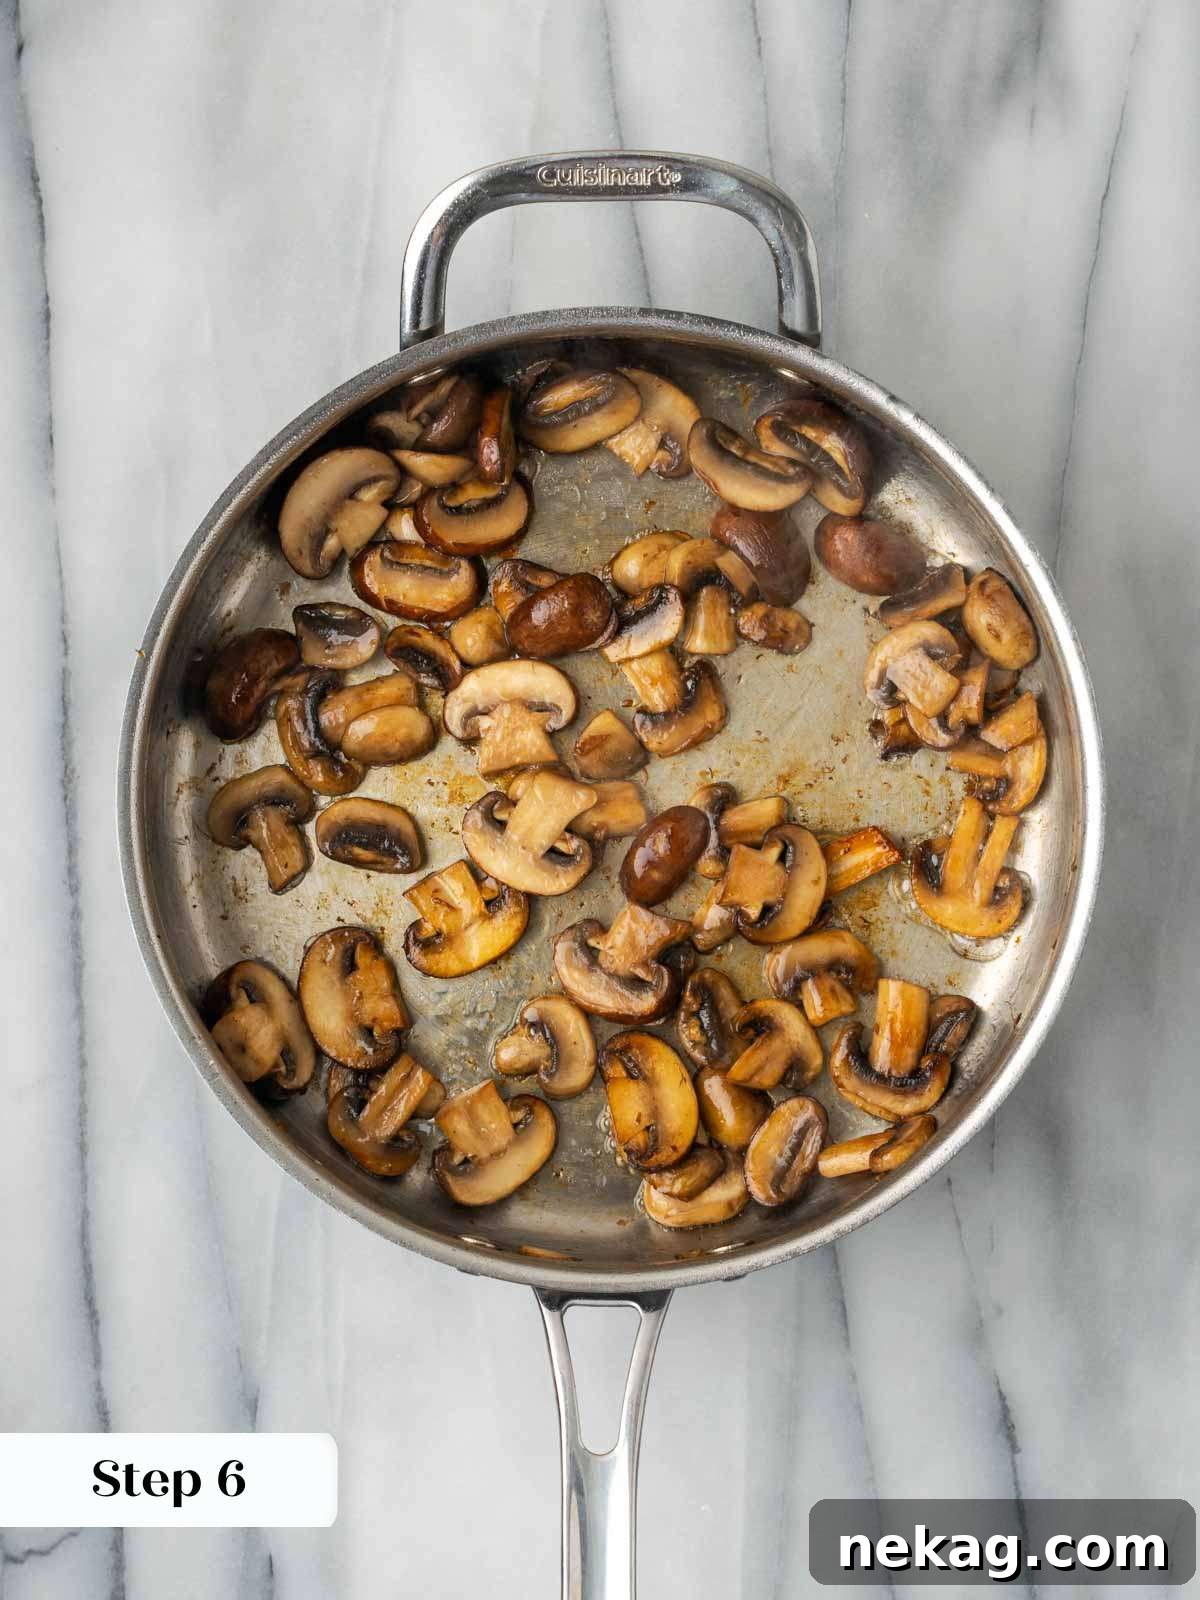
Step 6: Sauté the Mushrooms. Approximately 10 minutes before the pot roast is scheduled to finish cooking in the oven, heat 1 tablespoon of olive oil in a separate oven-safe pan (such as a cast-iron skillet) over medium-high heat. Add the quartered mushrooms and sauté until they are beautifully browned and slightly tender, releasing their moisture and developing a rich, earthy flavor. Remove them from the heat and set aside.
Step 7: Rest the Roast. Carefully remove the Dutch oven from your oven and turn the oven off. Transfer the cooked meat and all the tender vegetables from the Dutch oven to the pan with the sautéed mushrooms. Loosely tent the meat and vegetables with aluminum foil. Place this pan back into the turned-off, still-warm oven to rest. Allowing the meat to rest is paramount; it gives the muscle fibers time to relax and redistribute their flavorful juices throughout, ensuring a moist and tender final result.
Allowing the meat to rest after cooking is a crucial step. It permits the muscle fibers in the meat to relax and reabsorb their flavorful juices, ensuring your pot roast remains incredibly tender and moist. Skipping this step can result in dry, less flavorful meat.
Step 8: Reduce the Braising Liquid. Place the now-empty Dutch oven back onto the stovetop over medium-high heat. Bring the remaining braising liquid (the delicious broth from cooking the roast) to a vigorous boil. Continue to boil, stirring occasionally, until the liquid has reduced by approximately half. This reduction concentrates the flavors, creating a more intense and savory base for your gravy.
Step 9: Thicken the Gravy. While the braising liquid is reducing, prepare a cornstarch slurry. In a small bowl, combine 1 teaspoon of cornstarch with several tablespoons of the hot braising liquid from the Dutch oven (precision isn’t critical here, just enough to dissolve the cornstarch). Whisk vigorously until the cornstarch is completely dissolved and no lumps remain. Add this cornstarch mixture to the reducing liquid in the Dutch oven, whisking constantly. Continue to cook, stirring, until the sauce has thickened to your desired velvety consistency. Taste and adjust seasoning as needed.
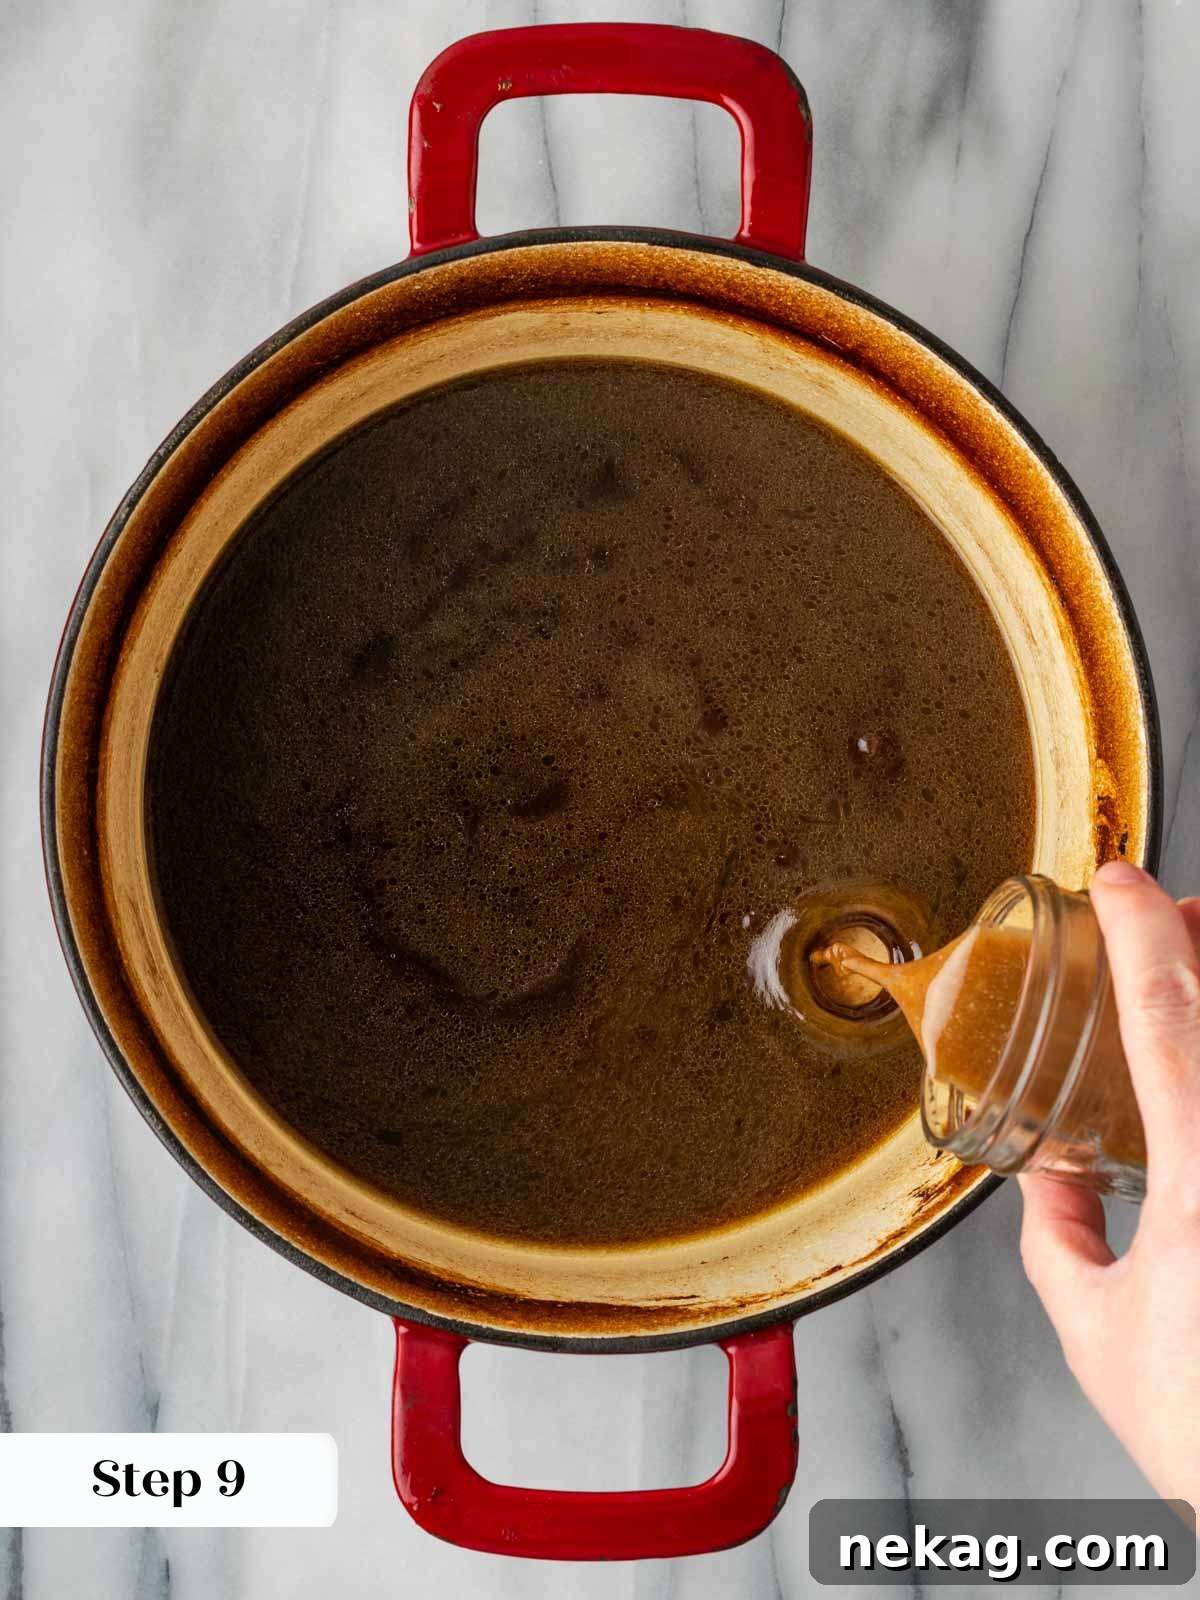
Step 10: Slice and Serve. Once the gravy has reached your preferred thickness, it’s time to enjoy! Carefully slice or shred the rested pot roast. Arrange the tender beef slices, along with the braised carrots, potatoes, and sautéed mushrooms, on individual plates. Ladle a generous amount of the rich, flavorful gravy over the top of each serving. Garnish with a fresh sprig of rosemary or parsley for an elegant finish. Serve hot and savor every comforting bite!
Chef Lindsey’s Special Tip for Pearl Onions
Peeling pearl onions can be a tedious task, but this professional trick makes it incredibly easy! I highly recommend blanching pearl onions prior to peeling. Here’s how: Bring a small pot of water to a rolling boil. While the water heats, prepare a medium mixing bowl filled with ice water. With a sharp knife, carefully cut off the root end of each pearl onion and then make a small “X” incision on the opposite (stem) end. Boil the onions for exactly 1 minute, then immediately transfer them to the ice water bath to stop the cooking process. After a minute in the ice water, the skins should slip off effortlessly when gently squeezed!
Frequently Asked Questions About Pot Roast
To ensure optimal freshness and safety, store any leftover pot roast in an airtight container in the refrigerator for 3-4 days. It’s essential that the pot roast has cooled completely before you transfer it to the fridge to prevent bacterial growth. For longer storage, cooked pot roast freezes exceptionally well. Transfer the cooled leftovers to a freezer-safe container, such as a heavy-duty resealable plastic bag or an airtight freezer-safe container, and freeze for up to 3 months. Thaw overnight in the refrigerator before reheating.
Reheating pot roast properly helps maintain its tenderness and flavor. For stovetop reheating, place the leftovers, including the gravy, in a Dutch oven or a large stock pot. Bring the mixture up to a gentle boil, then immediately reduce the heat to a simmer. Cover the pot and allow it to simmer, stirring occasionally, until the pot roast is thoroughly heated through. You can also reheat individual servings in the microwave in 30-second intervals, stirring between each, until hot. Ensure the beef and vegetables are heated evenly throughout.
Absolutely! Pot roast is an excellent make-ahead meal, often tasting even better the next day as the flavors have more time to meld. You can prepare and fully cook this dish up to 3 days before you plan to serve it. Store it in an airtight container in the refrigerator. When you’re ready to enjoy, simply reheat it using the methods described above. This makes it perfect for meal prepping or entertaining.
A Dutch oven is ideal due to its heavy construction and excellent heat retention and distribution, which are crucial for slow braising. However, if you don’t have one, you can still make this delicious pot roast. You can use any other large, heavy-bottomed, oven-safe pot with a tight-fitting lid. Ensure the pot is not too thin, as even heat distribution is key to preventing scorching and ensuring the roast cooks evenly and tenderly. A large cast-iron pot or an enamel-coated roasting pan with a lid would also work well.
Beyond the included carrots and potatoes, pot roast pairs beautifully with a variety of sides. Creamy mashed potatoes (as mentioned above) are a classic. Other great options include crusty bread for soaking up the gravy, a fresh green salad with a light vinaigrette to cut through the richness, steamed green beans, roasted Brussels sprouts, or even a simple side of buttered egg noodles.
If you tried this recipe and loved it, please leave a 🌟 star rating and let me know how it goes in the comments below. I love hearing from you; your comments make my day!
Classic Dutch Oven Pot Roast
Chef Lindsey
28 minutes
3 hours
3 hours
28 minutes
8
people
Comment
Print Recipe
Ingredients
-
▢
3
pound
shoulder roast -
▢
2
tablespoons
all-purpose flour -
▢
1
teaspoon
freshly ground black pepper -
▢
1
teaspoon
kosher salt
to taste -
▢
2
tablespoons
unsalted butter -
▢
1
tablespoon
olive oil -
▢
1
cup
pearl onions
peeled (see Chef’s Tip) -
▢
6
whole garlic cloves -
▢
4
carrots
cut into 1-inch pieces -
▢
2
cups
small yellow or red potatoes
halved [use more if they fit!] -
▢
10
oz
mushrooms
quartered (mix of button and baby portobellos) -
▢
8
sprigs of fresh thyme -
▢
2
sprigs fresh rosemary
about 4 inches long -
▢
4
sprigs fresh oregano -
▢
1
large bay leaf -
▢
3 ½
cups
beef broth
(preferably homemade or low-sodium store-bought) -
▢
2
cups
dry red wine -
▢
1
teaspoon
cornstarch
Instructions
-
Preheat the oven to 325°F (160°C). In a small bowl, whisk together the flour, 1 teaspoon salt, and 1 teaspoon pepper.
-
Pat your roast completely dry with paper towels. Sprinkle generously with the flour/salt/pepper mixture, rubbing it in to evenly coat all surfaces.
-
Heat a Dutch oven over medium heat until hot. Add the butter and olive oil to the pot and stir until the butter is melted and shimmering.
-
Carefully brown the roast on all four sides until a deep crust forms. Add the pearl onions, garlic cloves, potatoes, carrots, and herb sprigs to the pot around the roast. Pour in the red wine and beef broth, scraping up all the browned bits from the bottom of the pot (deglazing). Bring the liquid to a boil.
-
Cover the Dutch oven with its lid and bake in the preheated oven for 3 hours. After 1 ½ hours, carefully remove the pot, turn the roast over, and return it to the oven.
-
Approximately 10 minutes before the roast is done, sauté the quartered mushrooms in 1 tablespoon of olive oil in a separate oven-safe pan until they are browned. Remove from heat and set aside.
-
Remove the Dutch oven from the oven and turn the oven off. Transfer the cooked meat and braised vegetables to the pan with the sautéed mushrooms. Loosely tent everything with foil and place it back into the warm, turned-off oven to rest for 10-15 minutes.
-
Place the Dutch oven (containing only the braising liquid) over medium-high heat on the stovetop. Bring to a boil and continue to boil until the liquid has reduced by half, concentrating the flavors.
-
In a small bowl, combine the cornstarch with several tablespoons of the hot braising liquid, whisking until the cornstarch is completely dissolved (this is called a slurry). Add the cornstarch slurry to the reducing liquid in the Dutch oven and continue to cook, stirring, until the sauce has thickened to your desired consistency for a rich gravy.
-
Slice or shred the rested roast. Serve hot with the thickened gravy and all the tender vegetables!
Notes
Variations – Instant Pot: To make an Instant Pot pot roast, brown the meat using the sauté function, cook the vegetables and aromatics for a few minutes, deglaze with the wine and broth, then add all of the remaining ingredients and cook on the pressure cook function for approximately 60 minutes.
Storage – Store leftover pot roast in an airtight container in the fridge for 3-4 days. Be sure the roast has cooled completely before transferring it to the fridge. You can also freeze cooked pot roast for up to 3 months in a freezer-safe container.
Nutrition
Calories:
308
kcal
|
Carbohydrates:
14
g
|
Protein:
24
g
|
Fat:
13
g
|
Saturated Fat:
5
g
|
Polyunsaturated Fat:
1
g
|
Monounsaturated Fat:
5
g
|
Trans Fat:
1
g
|
Cholesterol:
77
mg
|
Sodium:
520
mg
|
Potassium:
761
mg
|
Fiber:
2
g
|
Sugar:
4
g
|
Vitamin A:
5191
IU
|
Vitamin C:
8
mg
|
Calcium:
46
mg
|
Iron:
2
mg
Dinner
American
308
Like this? Leave a comment below!
Explore More Delicious Recipes from Chef Lindsey Farr
Thank you for joining me on this culinary adventure! I sincerely hope you enjoyed preparing and savoring this professional chef-tested Dutch oven pot roast recipe. Its comforting flavors and tender textures are sure to become a cherished part of your family’s meal rotation.
If this recipe inspired your inner chef, I invite you to delve into our extensive collection of other delicious, chef-developed beef recipes. From hearty stews to elegant roasts, there’s always something new and exciting to discover.
Or, if you’re in the mood to explore another impressive beef dish for your next special occasion, consider trying one of these fantastic prime rib recipes. They offer a different, yet equally rewarding, experience in crafting a show-stopping beef centerpiece. Happy cooking!