
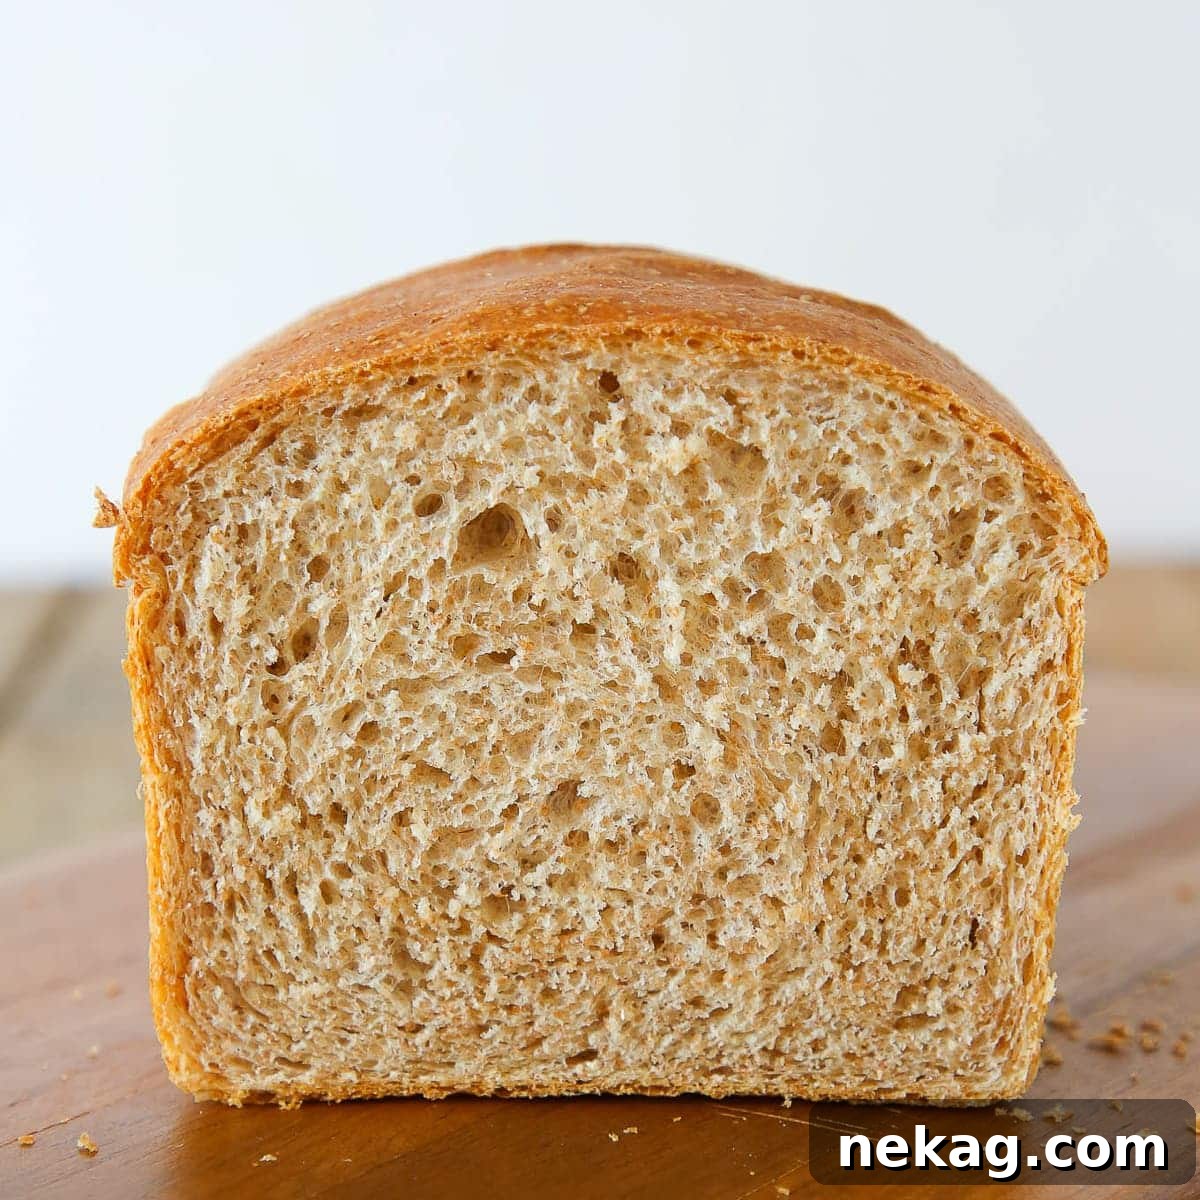
Homemade Whole Wheat Sandwich Bread: Soft, Fluffy & Irresistibly Easy!
Tired of bland, store-bought bread? Craving the wholesome goodness and incredible aroma of freshly baked bread right in your own kitchen? Look no further! This comprehensive guide provides an easy-to-follow whole wheat sandwich bread recipe that yields a loaf so soft, so chewy, and so incredibly flavorful, it will revolutionize your sandwich game. Designed with home bakers in mind, even beginners will achieve a perfect, golden-crusted loaf that slices beautifully and tastes absolutely divine, far surpassing anything you can buy from a grocery store. Get ready to impress your family and friends with this homemade staple.
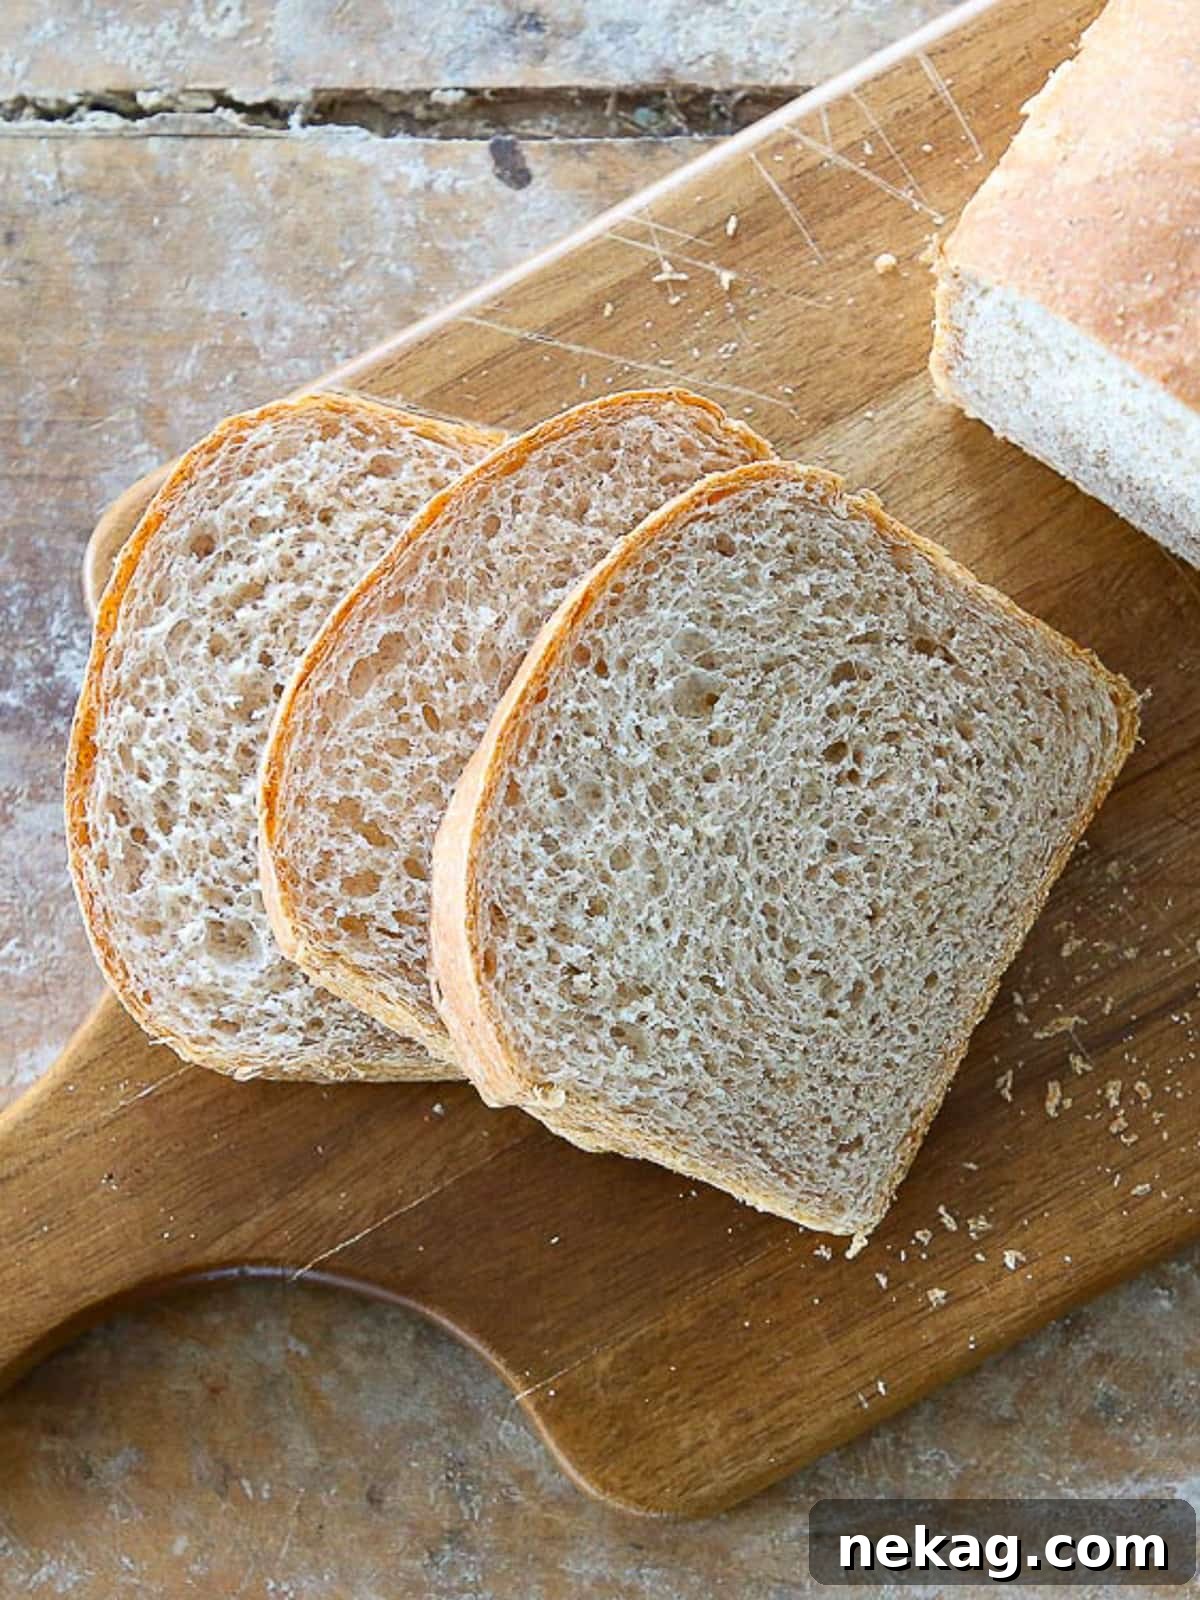
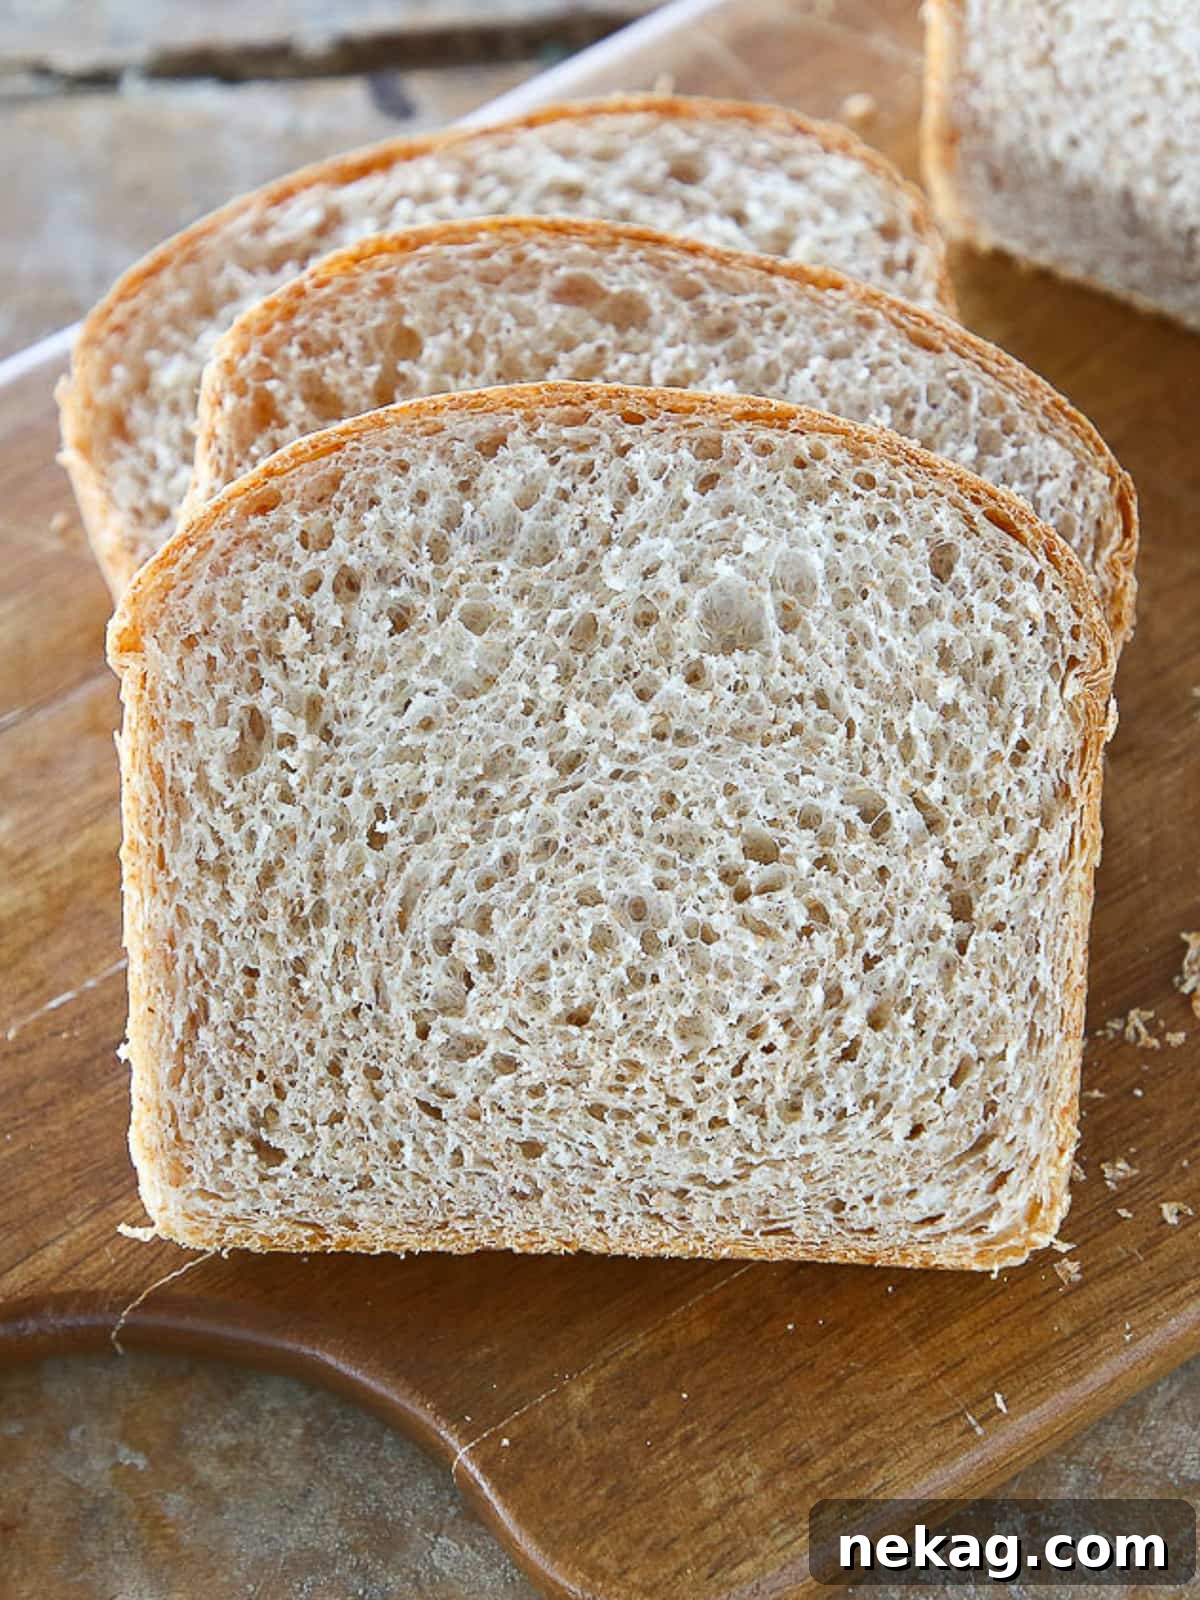
Our signature 50% whole wheat sandwich bread strikes a delightful balance: a perfectly chewy, golden crust encasing a soft, pillowy interior that melts in your mouth. This isn’t just another bread recipe; it’s a doorway to a world of culinary possibilities, bringing warmth and homemade charm to your table. If you’re a purist seeking a robust, full-bodied whole wheat experience, our dedicated 100% whole wheat bread recipe offers a distinct approach tailored for maximum whole-grain impact.
Beyond its primary role as an exceptional sandwich foundation, this versatile loaf can be transformed into countless delicious dishes. Imagine tearing it up for a rich, savory bread pudding, using it as the comforting base for a hearty apple sausage stuffing, or whipping up a quick batch of indulgent cinnamon raisin French toast for a weekend brunch. It’s also the secret ingredient for crafting the best tuna melt you’ll ever taste, adding a wholesome texture to every bite. Get ready to elevate your home baking and cooking with this fantastic, adaptable staple!
Why This Homemade Whole Wheat Sandwich Bread Will Become Your Go-To Recipe
Baking bread at home might seem daunting at first, but this particular recipe is meticulously designed to be approachable, incredibly rewarding, and utterly delicious. Here’s why you’ll quickly fall in love with making your own whole wheat sandwich bread:
- Unrivaled Balanced Flavor Profile: Many whole wheat breads can often taste dense, overly earthy, or even slightly bitter. This recipe, however, achieves a truly harmonious flavor profile. The clever inclusion of powdered milk, a touch of heavy cream, and rich, unsalted butter introduces a subtle sweetness, incredible richness, and a depth of flavor that perfectly balances the robust intensity of the whole wheat flour. The result is a nuanced, appealing taste that appeals to everyone, even those who typically shy away from whole grain breads.
- Incredibly Soft, Tender, and Perfectly Fluffy Texture: The magic behind this bread’s exceptional texture lies in its unique flour blend. By combining fine whole wheat flour with all-purpose flour, we create a strong yet flexible gluten network. This network is crucial for trapping the carbon dioxide gases produced by the active yeast, which in turn leads to a beautifully aerated, taller, and incredibly light loaf. You’ll be delighted by the tender, pillowy crumb that’s a joy to bite into, offering a perfect contrast to the slight chew of the crust. Say goodbye to crumbly, heavy whole wheat bread and hello to pure, fluffy perfection.
- Easy and Rewarding for Every Home Baker: Whether you’re a seasoned baker looking for a reliable recipe or just starting your journey into the wonderful world of homemade bread, this recipe is your ideal companion. It’s crafted to be straightforward and forgiving, making it an excellent choice for beginners. We provide clear, step-by-step instructions and invaluable tips that guide you through each stage of the process, ensuring a perfect loaf every single time. Prepare to be amazed by your own baking prowess and perhaps, just perhaps, discover a lifelong passion for crafting your own delicious bread right in your kitchen!
- A Healthier and More Nutritious Choice: Baking your own bread offers the invaluable benefit of complete control over the ingredients. This means you can confidently avoid the artificial preservatives, high fructose corn syrup, and unnecessary additives often found in commercially produced breads. Whole wheat flour is a nutritional powerhouse, providing essential dietary fiber, B vitamins, and various minerals that contribute significantly to your overall health and well-being, making this a truly wholesome option for your family.
- Cost-Effective and Deeply Satisfying: Beyond the health benefits, baking bread at home is not only a deeply satisfying and meditative experience but also a surprisingly budget-friendly one. The simple ingredients required are inexpensive, and the recipe yields two generous loaves. This means you’ll have delicious, fresh bread for days, or even weeks if you choose to freeze one. The incomparable aroma filling your home and the immense pride of serving homemade bread are truly priceless rewards.
Table of Contents
- Why This Homemade Whole Wheat Sandwich Bread Will Become Your Go-To Recipe
- Essential Ingredients & Smart Substitutions for Your Whole Wheat Bread
- Creative Variations to Customize Your Whole Wheat Loaf
- Professional Tips for Baking Your Best Whole Wheat Sandwich Bread
- Step-by-Step: How to Make This Irresistible Whole Wheat Sandwich Bread
- Chef’s Insights: Mastering Gluten Development for Whole Wheat Bread
- Frequently Asked Questions (FAQs) About Whole Wheat Sandwich Bread
- More Delicious Sandwich & Bread Recipes You’ll Love
- Whole Wheat Sandwich Bread Recipe Card
- Before You Go: Continue Your Baking Adventure!
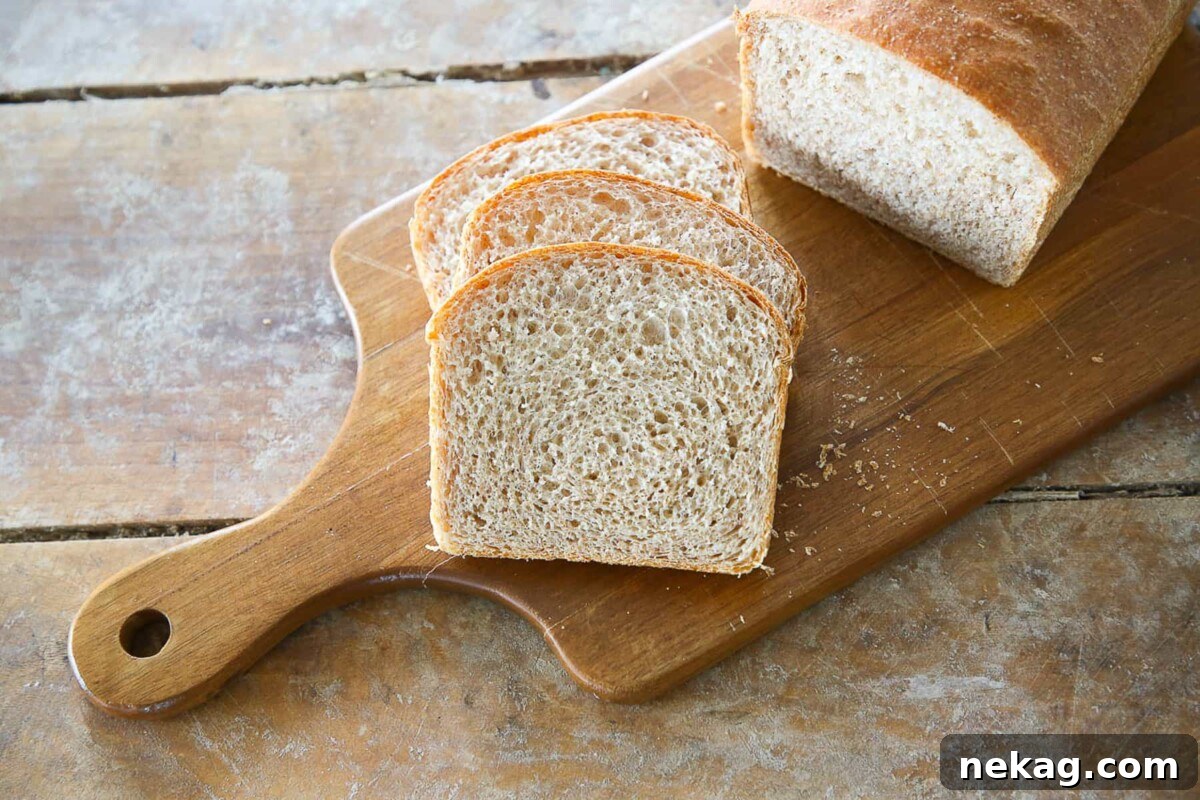
Essential Ingredients & Smart Substitutions for Your Whole Wheat Bread
Crafting the perfect loaf begins with understanding the role of each ingredient in the baking process. Here’s a detailed look at what you’ll need and how to make thoughtful and effective substitutions, ensuring your bread turns out fantastic every time:
- All-Purpose Flour: This flour is fundamental to achieving the desired soft, fluffy texture in our 50% whole wheat recipe. All-purpose flour has a balanced protein content, which is crucial for adequate gluten formation, resulting in a lighter, more tender crumb. You can substitute bread flour 1:1 for the all-purpose flour if you prefer a slightly chewier texture and an even stronger gluten network. However, it’s generally not recommended to use 100% whole wheat flour in this particular recipe, as whole wheat flours absorb moisture differently and require specific adjustments to achieve optimal results. For a purely whole wheat loaf, please refer to our dedicated 100% whole wheat bread recipe.
- Fine Whole Wheat Flour: The quality and grind of your whole wheat flour significantly impact the final taste and texture of your bread. I highly recommend either King Arthur or Bob’s Red Mill Whole Wheat Flour. These brands are renowned for their fine grind, which produces a less coarse and more integrated texture in the finished bread, avoiding a gritty mouthfeel. Different brands can have subtle variations in flavor and absorption rates due to their unique milling processes, so don’t be afraid to experiment to find your personal favorite.
- Water: Lukewarm water, ideally around 100°F (38°C) or just warm to the touch, is absolutely essential for activating the yeast. Water provides the necessary hydration for the flour to form gluten, and it also creates the optimal environment for the yeast to thrive and produce carbon dioxide, which gives the bread its beautiful rise. Always ensure your water isn’t too hot (above 115°F / 46°C), as this can kill the delicate yeast organisms.
- Kosher Salt: Salt is far more than just a seasoning in bread baking; it plays a critical and multifaceted role. It significantly enhances the bread’s overall flavor, strengthens the gluten structure, and controls the yeast’s activity, preventing it from rising too quickly and resulting in a more even texture. Always measure accurately, as too little can result in bland bread, and too much can inhibit yeast activity, leading to a poor rise.
- Dry Active Yeast: Our recipe calls for dry active yeast, which requires an initial step of hydration in warm water to “bloom” or activate. This “blooming” step allows for a more controllable rise and serves as an excellent test to ensure your yeast is viable before you commit all your ingredients. If you prefer to use fresh yeast, you’ll need to use double the weight of dry active yeast. For instant yeast, use half the weight; instant yeast can typically be added directly to the dry ingredients without prior hydration, simplifying the process slightly.
- Powdered Milk: This is a fantastic and often overlooked secret ingredient in many successful bread recipes! Powdered milk contributes to a richer, more complex flavor profile and significantly boosts the bread’s nutritional value. Its high protein content aids in robust gluten formation, leading to a more tender crumb and a better, more consistent rise. Furthermore, it helps to extend the bread’s shelf life, keeping it fresh and soft for longer. If you don’t have powdered milk, you can omit it, but be sure to substitute some of the water with an equivalent weight of liquid milk to maintain proper moisture balance.
- Unsalted Butter: Butter adds incredible richness, a delightful flavor, and a tenderizing effect to the bread, contributing to its melt-in-your-mouth texture. Using unsalted butter allows you to precisely control the overall salt content in your dough, which is essential for consistent results. Unlike some highly enriched doughs like brioche bread where butter is incorporated in stages, here, it’s mixed in at the beginning without significantly hindering gluten development, thanks to its balanced quantity. For a dairy-free alternative, coconut oil or a neutral-flavored vegetable oil can be substituted 1:1 by weight.
- Heavy Cream: Just a tablespoon of heavy cream significantly enhances the bread’s moisture, tenderness, and contributes to a richer, more luxurious flavor. The added fat works wonders for the crumb structure, making it even more delectable. While highly recommended for achieving the best possible results, you can omit this ingredient if necessary, though the resulting texture and flavor may be slightly less rich and moist.
For precise measurements and detailed quantities of all ingredients, always refer to the full recipe card below.
Creative Variations to Customize Your Whole Wheat Loaf
One of the greatest joys of homemade bread is the freedom to experiment and personalize your loaf to suit your taste preferences or the occasion. Here are some delightful variations to try once you’ve mastered the basic recipe:
- Infuse Sweetness and Spice: For a touch of sweetness and added complexity, consider incorporating honey, light brown sugar, or maple syrup into your dough. These natural sweeteners add subtle flavor notes. Honey and maple syrup will also introduce a bit more moisture, so you might need to slightly reduce the amount of water or heavy cream in the recipe to maintain the right dough consistency. For a burst of fruity sweetness, fold in a cup of plump raisins or dried cranberries during the final stages of the kneading process, similar to our delicious raisin bread recipe. A pinch of cinnamon or nutmeg can further enhance these sweet variations.
- Add a Hearty Seed & Oat Topping (or Mix-Ins!): Enhance both the nutrition and textural appeal of your bread by adding a flavorful seed and oat mixture. Before the final proofing, brush the shaped loaf with a beaten egg white (which acts as an excellent adhesive) and then roll it in your favorite blend of seeds (such as sesame, poppy, flax, sunflower, or pumpkin seeds) and rolled oats. Alternatively, for an internal texture boost, you can mix up to 1 ½ cups of these seeds and oats directly into the dough after the gluten has been sufficiently developed during kneading. This adds a lovely crunch and boosts fiber content.
- Bake Mini Loaves or Dinner Rolls: This versatile dough is perfectly suited for creating smaller, individual servings, which are excellent for portion control or entertaining. If you have mini loaf pans, you can easily make delightful mini loaves that are perfect for gifts or smaller families. For elegant dinner rolls, divide the dough into smaller portions (around 50-70g each) and bake them on a baking sheet, akin to our savory rosemary sourdough rolls, or arrange them snugly in a baking dish for a soft, pull-apart style. Alternatively, you can proof and bake individual rolls in a standard muffin pan for a beautiful presentation, much like our popular honey whole wheat buttermilk rolls. Remember to adjust baking times accordingly for these smaller sizes.
- Herb & Savory Additions: For a savory twist that complements various meals, knead in a tablespoon of finely chopped fresh herbs like rosemary, thyme, or oregano after the initial mixing phase. You can also add 1/4 cup of finely grated Parmesan cheese or nutritional yeast for a delightful umami boost, making it perfect for serving with soups, stews, or alongside a pasta dish. A tablespoon of dried onion flakes or garlic powder can also be a wonderful addition.
- Multigrain Boost: For an even more complex flavor and texture, substitute a quarter cup of the whole wheat flour with other finely ground grains like oat flour, rye flour, or cornmeal. Be mindful that these flours absorb moisture differently, so you might need minor adjustments to water content.
Professional Tips for Baking Your Best Whole Wheat Sandwich Bread
Achieving consistently bakery-quality bread at home is entirely within reach, especially with these expert insights and techniques from the kitchen:
- Select the Right Whole Wheat Flour: The type and quality of your whole wheat flour make a significant difference in the final taste and texture of your bread. Opt for a fine-ground, stone-ground whole wheat flour whenever possible. Smaller, artisanal millers, such as King Arthur or Bob’s Red Mill, often carefully control the temperature during their grinding processes. This meticulous approach helps preserve the natural flavors, delicate antioxidants, and vital nutrients that can be diminished or destroyed by the higher temperatures of conventional, high-speed milling. A finer grind also results in a less “gritty” and more palatable texture in your finished bread, which is often a common complaint with whole wheat.
- Always Check the Freshness of Your Whole Wheat Flour! This is a critical step often overlooked. Whole grain flours, unlike all-purpose white flour, contain all three parts of the wheat kernel: the bran, germ, and endosperm. While packed with nutrition, the germ contains natural oils that can go rancid over time. This means whole wheat flour has a significantly shorter shelf life than white flour. Even if there’s no visible mold, stale or rancid whole wheat flour will impart an “off,” bitter, or unpleasant metallic flavor to your bread, ruining all your hard work. To extend its freshness significantly, always store whole wheat flour in an airtight container in the refrigerator or, for longer periods, in the freezer. This simple habit preserves its flavor and nutritional integrity.
- Invest in a Digital Kitchen Scale: Precision is paramount in baking, and nowhere is this more true than with bread making. Using a digital kitchen scale to measure your ingredients, particularly flour and water, will ensure accurate ratios and consistent results every single time. Flour, especially, can compact differently in measuring cups, leading to wide variations in actual quantity, but a scale eliminates this inconsistency entirely. As you become accustomed to weighing, you’ll discover it’s often faster, cleaner, and far more reliable than volumetric cup measurements, quickly becoming an indispensable tool for serious home bakers.
- Mind Your Water Temperature: Yeast is a living microorganism, and its activity is highly dependent on temperature. Water that is too cold (below 95°F / 35°C) will cause slow or no activation of the yeast, leading to a sluggish or failed rise. Conversely, water that is too hot (above 115°F / 46°C) can kill the yeast, completely preventing any rise. The ideal temperature range for activating dry active yeast is warm-to-the-touch, typically between 100°F and 110°F (38°C-43°C). Use an instant-read thermometer for accuracy to gently awaken and activate your dry active yeast.
- Don’t Skip the Bench Rest: The 15-minute bench rest after preshaping is not a step to rush or skip. It allows the gluten in the dough to relax after the initial handling, making the dough much more pliable and easier to work with during the final shaping. Trying to shape dough without this rest period often results in a dough that fights back, tears, and doesn’t hold its shape as well.
Step-by-Step: How to Make This Irresistible Whole Wheat Sandwich Bread
Follow these detailed instructions carefully to bake a consistently perfect loaf of soft, wholesome whole wheat bread every single time. Full ingredient measurements and additional tips can be found in the comprehensive recipe card below.
Step 1: Activate the Yeast. In the clean bowl of your stand mixer, add the precisely measured warm water, ensuring it is within the ideal temperature range of 100°F to 110°F (38°C-43°C). Evenly sprinkle the dry active yeast over the surface of the water; do not stir it in just yet. Allow the mixture to sit undisturbed for approximately 10 minutes, or until the surface is visibly foamy, bubbly, and fragrant. This bubbling indicates that your yeast is alive, active, and ready to work its magic in rising your bread.
Step 2: Combine Initial Ingredients. Add all the remaining ingredients—this includes both the all-purpose flour and fine whole wheat flour, kosher salt, powdered milk, the softened unsalted butter, and the heavy cream—to the stand mixer bowl containing the activated yeast mixture. Attach the PADDLE attachment to your mixer (not the dough hook yet). Mix on low speed, just until all the ingredients are thoroughly incorporated and a shaggy, somewhat sticky dough forms. The paddle attachment is often more efficient at initially mixing and hydrating the flour uniformly in most home stand mixers before the intensive kneading process begins.
Step 3: Knead for Gluten Development. Once the ingredients are well mixed and the flour is fully hydrated, switch from the paddle attachment to the DOUGH HOOK attachment. Increase the mixer speed to medium and continue mixing and kneading until a smooth, elastic, and supple dough forms. This crucial kneading process typically takes about 8-10 minutes with a stand mixer. You can accurately test if the dough is properly kneaded and its gluten sufficiently developed using the windowpane test:
The Windowpane Test: Your Guide to Perfect Dough
To perform the windowpane test, gently take a small, golf ball-sized portion of dough from the mixer. Slowly and carefully stretch it between your fingers, trying to form a thin membrane. If the dough is ready, you should be able to stretch it thin enough to allow light to pass through without tearing, much like looking through a translucent “windowpane.” If it tears quickly, the gluten network isn’t fully developed, and you should continue kneading for another 1-2 minutes before re-testing. Alternatively, you can knead the bread by hand on a lightly floured surface for approximately 10-12 minutes; the dough should feel smooth, elastic, and spring back when gently poked.
Step 4: First Rise (Bulk Proof). Lightly oil a large, clean bowl with a neutral cooking oil. Carefully transfer the kneaded dough to the oiled bowl, turning it once to coat all sides with a thin layer of oil. This prevents the dough from sticking to the bowl and from drying out during its rise. Cover the bowl tightly with plastic wrap or a clean, damp kitchen towel. Place the covered bowl in a warm, draft-free spot, or in your oven set to a proofing function (if your oven has one). Allow the dough to bulk proof until it has visibly doubled in size. This usually takes approximately one hour, but the exact time can vary depending on the ambient temperature of your kitchen. Patience is key during this stage for optimal flavor development and a light texture.
Step 5: Divide the Dough. Once the dough has doubled, gently turn it out onto a lightly floured work surface. Using a bench scraper or a sharp knife, carefully divide the dough exactly in half. This recipe is designed to yield two perfectly sized loaves, with each piece weighing approximately 500g. For effortless and precise division, a professional tip is to place your lightly oiled bowl directly onto your digital kitchen scale and zero it before adding the dough, then dividing it by weight.
Step 6: Preshape and Bench Rest. Take one half of the divided dough and preshape it into a round. To do this, gently pull the edges of the dough into the center, forming a rough ball. Then, flip the dough over so the seam is underneath and the smooth side is facing up. Using your hands, gently cup the dough and pull it towards you across the work surface, creating tension on the surface and tightening it into a smooth, even ball. Repeat this preshaping process with the second piece of dough. Cover both preshaped rounds loosely with plastic wrap or a damp towel and allow them to rest on the counter for 15 minutes. This “bench rest” period is crucial as it allows the gluten to relax after handling, making the dough much more pliable and easier to shape in the next step.
Step 7: Prepare Loaf Pans. While your dough is relaxing during its bench rest, take this opportunity to prepare your loaf pans. I typically use standard 9-inch metal loaf pans for this recipe, as metal conducts heat efficiently for even baking. Lightly spray the entire inside surface of each pan with cooking spray, or grease them thoroughly with butter and dust with a light coating of all-purpose flour to prevent sticking. This simple yet vital step ensures your beautiful loaves will release easily and cleanly after baking.
Step 8: Final Shaping – The Log/Bâtard Method. Now for the exciting final shape! This method creates a uniform log shape, also known as a “bâtard” if you enjoy fancy French baking terms. Take one of the preshaped dough rounds and flip it over. Gently stretch it into a small rectangle by pulling the top and bottom edges. Place it on your counter with a long side facing you. Fold the top edge of the rectangle down about two-thirds of the way towards you and firmly press it into the dough to create a seal. Rotate the dough 180 degrees so the unfolded edge is now away from you. Fold that edge down towards you to meet the bottom edge, pressing firmly to seal. Now, we’ll perform two “thumb folds” to create tension and structure. Starting from one end, take the top edge of the dough with your right hand and fold it over your thumb, about halfway down the dough’s length, pressing firmly to seal as you go. Repeat this motion along the entire length of the dough. You will notice the dough becoming progressively tighter and longer as you go. It’s important to keep an eye on the length, ensuring it doesn’t exceed the length of your loaf pan.
Pro Tip for Perfect Pan Fit:
To accurately gauge the correct length during the final shaping process, a helpful visual cue is to place your empty loaf pan directly on the counter just above your dough. This readily available reference will assist you in ensuring your dough log is perfectly sized to fit snugly into your pan without being too short or too long, contributing to a beautifully shaped finished loaf.
Step 9: Refine and Seal the Shape. Repeat the thumb fold technique one more time, making sure all seams are well sealed at the bottom of the log. At this point, you should have a neatly formed log shape that is consistent in width along its entire length, matches the length of your pan precisely, and feels tight and resilient, not slack or prone to spreading onto the counter. The surface tension created is key for a good rise and crumb. If the dough still feels too loose or lacks sufficient surface tension after two rounds of thumb folds, you can repeat the thumb fold one additional time until it achieves the desired firmness and tautness. The tighter the surface tension, the better the oven spring.
Step 10: Second Rise (Final Proof). Carefully place each shaped dough log into its prepared pan, ensuring the seam is facing down. Cover the pans loosely with plastic wrap or a light kitchen towel to prevent drying. Return them to your warm, draft-free spot (or oven with proofing function) to undergo their final proof. This crucial proofing stage is complete when the dough has risen significantly and just begins to crest over the top of the pan, indicating it’s fully proofed and ready for baking. This typically takes approximately 2 to 2.5 hours, but watch the dough, not just the clock. As soon as you observe this cresting, immediately preheat your oven to 350°F (175°C).
Proofing in the Oven:
If you are utilizing a proofing setting on your oven, this final proof might occur more rapidly due to the controlled warmth. It’s imperative to keep a watchful eye on the dough, checking its progress every 30 minutes to prevent over-proofing. Once the loaves have reached their optimal proofing stage, remove them from the oven *before* initiating the preheating cycle to ensure they don’t begin to bake prematurely or collapse from too much heat.
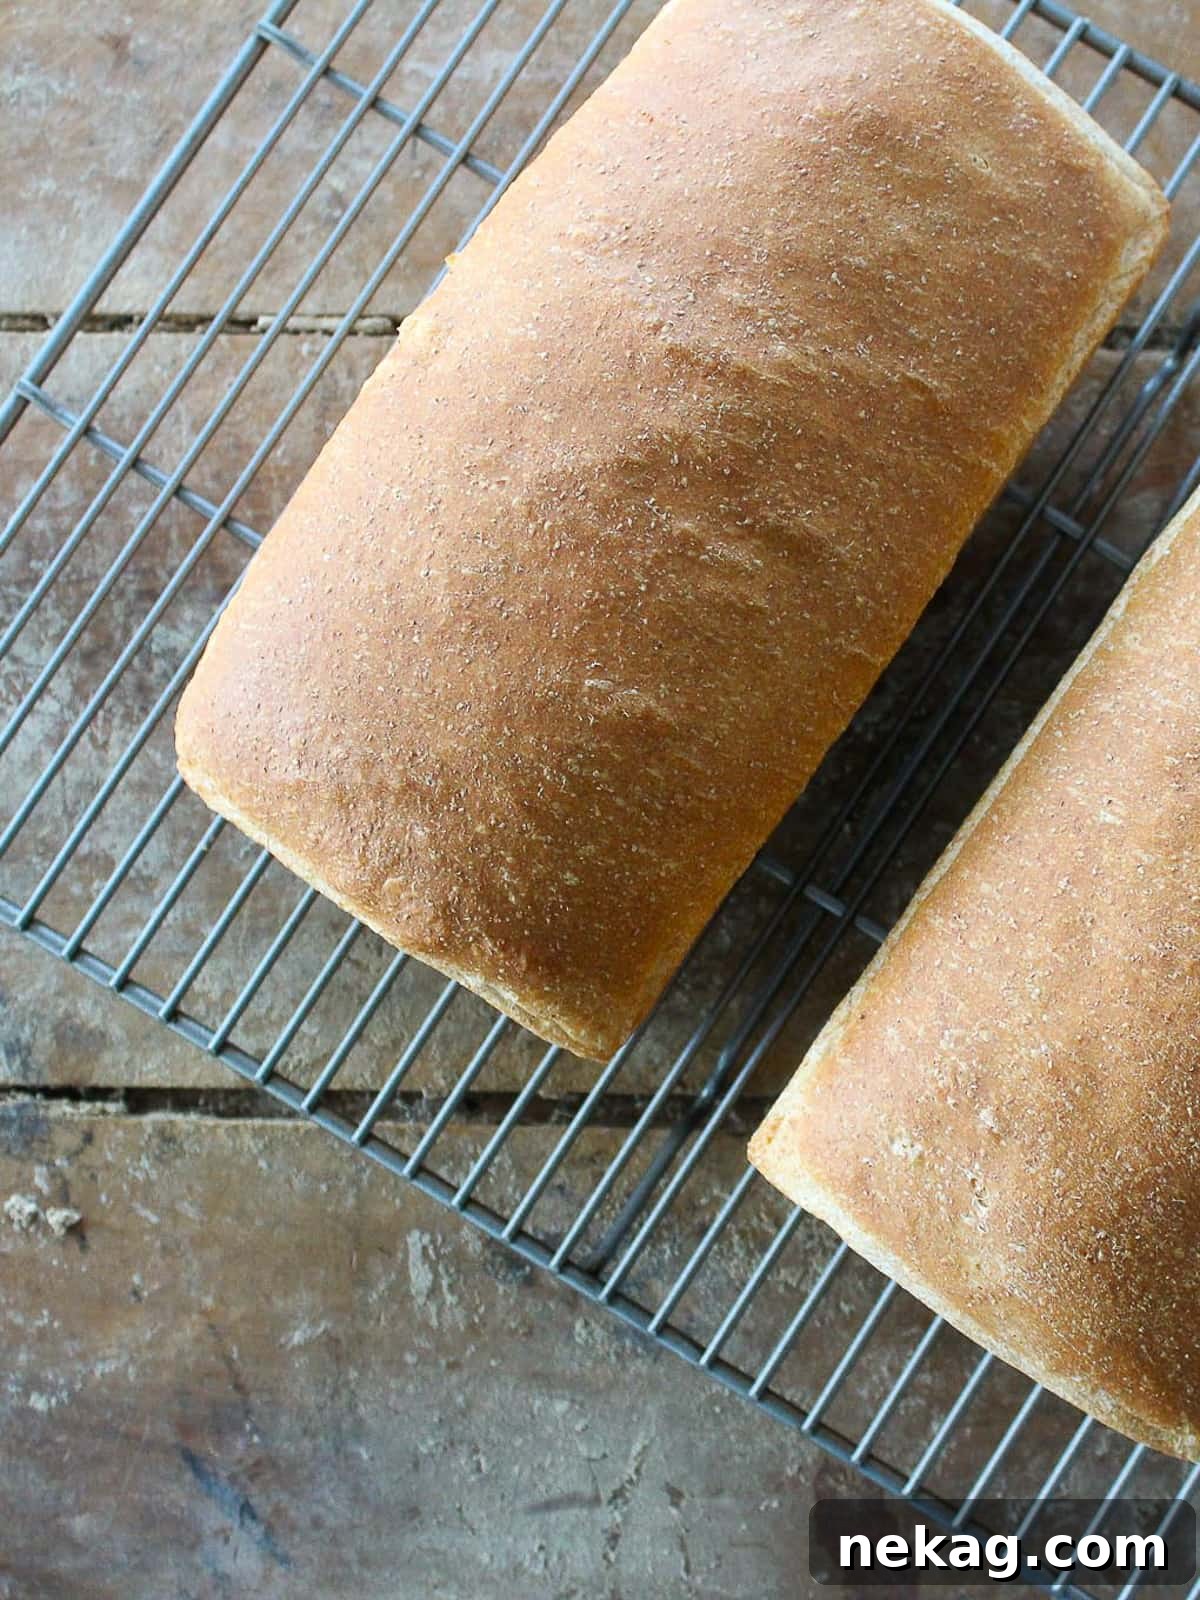
Step 11: Bake to Golden Perfection! Once your oven has fully preheated to the specified temperature of 350°F (175°C), immediately transfer the proofed loaves into the hot oven. Bake for approximately 35-40 minutes. The bread is perfectly done when its internal temperature reaches 185°F (85°C) as measured with an instant-read thermometer inserted into the center of the loaf. Additionally, the crust should have developed a beautiful, rich golden-brown color, and the bottom of the loaf should sound hollow when gently tapped.
Step 12: Cool Completely and Enjoy. After baking, carefully remove the pans from the oven. Allow the bread to cool in their pans for just 5 minutes. This brief cooling period helps the loaves firm up slightly and makes them easier to handle. Then, carefully remove the loaves from the pans and immediately transfer them to a wire cooling rack to cool completely, without any obstruction. It is absolutely crucial for the bread to cool entirely on a rack; if left in the pan or on a solid surface for too long, trapped steam will make the sides and bottom soggy, compromising the beautiful, crisp crust you’ve worked so hard to achieve. Once thoroughly cooled, slice with a sharp serrated knife and savor every bite of your incredible homemade whole wheat sandwich bread!
Chef’s Insights: Mastering Gluten Development for Whole Wheat Bread
Understanding and controlling gluten development is a fundamental aspect of successful bread baking, especially when working with whole wheat flour. While our primary aim is to build a strong, elastic gluten network for a light and airy crumb, it’s equally important to maintain the integrity of the whole wheat flour’s inherent nutrients and beneficial properties. Excessive mixing or overworking the dough, particularly in a stand mixer, generates heat, which can inadvertently degrade some of these delicate compounds. The ultimate goal is to develop just enough gluten to achieve optimal elasticity, strength, and structure for a beautiful rise, without overworking the dough. This ensures your loaf is both perfectly textured and maximally nutritionally rich. Therefore, always pay close attention to visual cues like the windowpane test as your primary guide, rather than blindly adhering to a timer alone.
Frequently Asked Questions (FAQs) About Whole Wheat Sandwich Bread
To maintain maximum freshness and prevent your bread from staling, ensure your loaves are completely cooled to room temperature before wrapping them. Once cool, wrap each loaf tightly in plastic wrap, place it in an airtight container, or seal it in a large zip-top bag, expelling as much air as possible. At room temperature, your bread will stay fresh and soft for up to 3 days. For extended storage, refrigerate for up to a week. For the best long-term preservation of texture and flavor, storing uncut loaves, well-wrapped, in the freezer for up to 2 months is ideal. Thaw frozen loaves at room temperature or gently toast individual slices as needed.
Absolutely! One of the primary and most significant advantages of baking bread at home is gaining complete control over every single ingredient that goes into your loaf. This empowers you to confidently avoid the artificial preservatives, high amounts of added sugars (like high-fructose corn syrup), and unnecessary additives commonly found in commercially produced breads. Furthermore, incorporating whole wheat flour significantly boosts the nutritional profile of your bread, providing essential dietary fiber, B vitamins, and various minerals that contribute significantly to overall health and digestive well-being. It’s a truly wholesome and nutritious choice you can feel great about serving your family.
For optimal results in bread baking, metal loaf pans are highly recommended. Their superior heat conductivity ensures even distribution of heat throughout the entire baking process. This consistent and uniform heat helps the bread to rise evenly, preventing sunken centers or overly dense spots, and promotes the development of a beautifully consistent, golden-brown crust on all sides of the loaf. Avoid using glass pans, which can heat unevenly and may result in a darker, tougher bottom crust due that can sometimes bake too quickly.
This versatile whole wheat bread is truly a blank canvas for countless delicious meals and snacks! It makes an exceptional and sturdy base for savory sandwiches like a classic deviled egg salad sandwich, a hearty roast beef melt, or even a simple grilled cheese. For breakfast or a satisfying snack, it’s perfect toasted and generously slathered with butter and your favorite homemade mixed berry jam or a spread of peanut butter. It also pairs wonderfully with sophisticated cheese boards, especially when topped with sweet and savory caramelized onions or a tangy chutney. Don’t forget to cube stale bread to make crunchy croutons for salads or process it into wholesome homemade breadcrumbs for various recipes!
Several factors can contribute to a dense loaf or a failed rise. The most common reasons include using inactive or expired yeast (always check its freshness and activate it in warm water), insufficient kneading (the gluten wasn’t developed enough to trap the gases produced by the yeast), or under-proofing (the dough didn’t have enough time to rise adequately). Ensure your yeast is active before adding other ingredients, knead until the dough passes the windowpane test, and allow ample time for both the bulk proof and final proofing in a consistently warm, draft-free environment. Conversely, over-proofing can also lead to a collapse during baking, so observe your dough carefully for the signs of readiness rather than strictly following a timer.
More Delicious Sandwich & Bread Recipes You’ll Love
Dinner Roll Recipes
Irresistible Brioche Bun Recipe
Sandwich Recipes
The Best Tuna Melt Recipe
Dinner Roll Recipes
Savory Pumpkin Herb Dinner Rolls
Sandwich Recipes
Quick & Easy Turkey Sloppy Joes
If you tried this wonderful homemade whole wheat sandwich bread recipe and absolutely loved it, please take a moment to leave a ⭐ star rating and share your experience in the comments section below. Your valuable feedback truly makes my day and helps other aspiring bakers discover and enjoy this recipe too!
Whole Wheat Sandwich Bread Recipe Card
Whole Wheat Sandwich Bread
Search no further for the perfect homemade Whole Wheat Sandwich Bread. This recipe delivers soft, thick bread that slices easily, perfect for sandwiches, toast, and various culinary creations.
Print Recipe
Ingredients
- 2 ¼ cups all-purpose flour
- 2 ⅓ cups fine whole wheat flour
- 1 ¾ cups water (about 100°F / 38°C or warm to the touch)
- 2 ¼ teaspoons kosher salt
- 1 ½ teaspoons dry active yeast
- 3 tablespoons powdered milk
- 2 tablespoons unsalted butter, softened
- 1 tablespoon heavy cream
Instructions
- Activate Yeast: In the bowl of a stand mixer, add warm water and sprinkle dry active yeast on top. Allow it to sit undisturbed for approximately 10 minutes until bubbly and foamy, indicating activity.
- Combine Initial Ingredients: Add all remaining ingredients (all-purpose flour, whole wheat flour, kosher salt, powdered milk, softened unsalted butter, and heavy cream) to the bowl. Use the PADDLE attachment to mix on low speed until all ingredients are thoroughly incorporated and the flour is fully hydrated, forming a shaggy dough.
- Knead Dough for Gluten Development: Switch to the DOUGH HOOK attachment. Knead the dough on medium speed for 8-10 minutes until it becomes smooth, elastic, and passes the windowpane test. If kneading by hand, this will take about 10-12 minutes on a lightly floured surface.
- First Rise (Bulk Proof): Place the kneaded dough in a lightly oiled large bowl, turning once to coat. Cover the bowl tightly with plastic wrap or a damp kitchen towel. Allow to proof in a warm, draft-free spot until the dough has doubled in size, approximately 1 hour (time varies with temperature).
- Divide Dough: Gently turn the proofed dough out onto a lightly floured surface. Using a bench scraper or knife, divide the dough equally in half. Each piece should weigh approximately 500g, yielding two loaves.
- Preshaping & Bench Rest: Take one half of the dough and preshape it into a round by gently pulling the edges into the center, flipping it, and tightening it into a ball by pulling it across the work surface towards you. Repeat with the second piece of dough. Cover both preshaped rounds loosely with plastic wrap and let them rest on the counter for 15 minutes to relax the gluten.
- Prepare Loaf Pans: While the dough rests, prepare two standard 9-inch metal loaf pans by spraying them generously with cooking spray, or greasing with butter and dusting with flour.
- Final Shaping (Log/Bâtard Method): Take one dough round and flip it over. Gently pull it into a small rectangle. Fold the top edge down about two-thirds of the way and press to seal. Rotate the dough. Fold the new top edge down towards you to meet the bottom edge, pressing firmly to seal. Perform two “thumb folds” along the entire length of the dough, gently folding the top edge over your thumb and pressing to seal, creating a tight log shape that matches the length of your pan.
- Refine Shape: Repeat the thumb fold one more time, ensuring the bottom seam is well sealed. The log should be even in width, match the length of your pan, and feel taut and firm. If the dough still feels too loose, repeat the thumb fold once more.
- Second Rise (Final Proof): Carefully place each shaped dough log into its prepared pan, seam-side down. Cover loosely with plastic wrap. Allow to proof in a warm spot for 2-2.5 hours, or until the dough just begins to crest over the top of the pan. Once this stage is reached, preheat your oven to 350°F (175°C).
- Bake to Perfection: As soon as the oven is preheated, transfer the proofed loaves into the hot oven. Bake for approximately 35-40 minutes, or until the internal temperature of the bread reaches 185°F (85°C) and the outside crust is a beautiful golden brown.
- Cool and Enjoy: Remove the pans from the oven and allow the bread to cool in the pans for 5 minutes. Then, carefully remove the loaves from the pans and transfer them to a wire cooling rack to cool completely. Cooling completely is crucial to prevent sogginess and to ensure clean, even slices. Once fully cooled, slice with a serrated knife and savor your incredible homemade whole wheat sandwich bread!
Video Tutorial
Notes
- Yield: This recipe is designed to yield 2 generous loaves. It is generally recommended to make two loaves at a time for optimal mixing and gluten development in most home stand mixers. While you can halve this recipe to make one loaf, you might find it more challenging to achieve full gluten development in a smaller quantity of dough within certain stand mixers.
- For Best Slices: For the cleanest, most perfect slices, ensure the bread is completely cool to room temperature before attempting to cut it. This allows the internal crumb structure to fully set and firm up, making it much easier to slice cleanly with a serrated knife without tearing, squashing, or distorting the shape of the loaf.
- Flavor Tips for Proofing: Do not rush the bulk proofing process. Underproofed bread will not only result in a dense and heavy texture but can also cause an unpleasant, overly yeasty or alcoholic flavor. Allow the dough ample time to rise fully and develop its characteristic flavor and texture in a warm, consistent environment.
- Storage Guidelines: Once your whole wheat loaves are completely cool, wrap them tightly in plastic wrap, place them in an airtight container, or seal them in a zip-top bag to prevent them from drying out. Store at room temperature for up to 3 days for immediate enjoyment. For slightly longer storage, you can refrigerate them for up to a week. For the best long-term preservation of freshness and texture, storing uncut loaves, well-wrapped, in the freezer for up to 2 months is highly recommended. Thaw at room temperature as needed.
Nutrition Facts (per serving)
Approximate values based on 2 loaves, yielding 24 slices per recipe:
- Serving Size: 83g
- Calories: 97 kcal
- Carbohydrates: 18g
- Protein: 3g
- Fat: 2g
- Saturated Fat: 1g
- Polyunsaturated Fat: 0.2g
- Monounsaturated Fat: 0.4g
- Trans Fat: 0.04g
- Cholesterol: 4mg
- Sodium: 238mg
- Potassium: 69mg
- Fiber: 2g
- Sugar: 0.5g
- Vitamin A: 49 IU
- Vitamin C: 0.1mg
- Calcium: 15mg
- Iron: 1mg
Course: Bread, Breakfast, Lunch, Side Dish
Cuisine: American
Calories per serving: 97
Before You Go: Continue Your Delicious Baking Adventure!
We truly hope you’ve thoroughly enjoyed mastering this recipe for soft, wholesome, and incredibly flavorful whole wheat sandwich bread. There’s an immense sense of satisfaction and joy that comes from baking your own bread, and this delightful loaf is just the beginning of your wonderful culinary journey. Don’t stop here! We warmly invite you to explore all our other delightful yeasted bread recipes, each promising a new and rewarding baking experience. Alternatively, you might wish to dive even deeper into the extensive world of diverse sandwich bread recipes to discover new family favorites and expand your baking repertoire. Happy baking, and we can’t wait to see what incredible creations you whip up next!