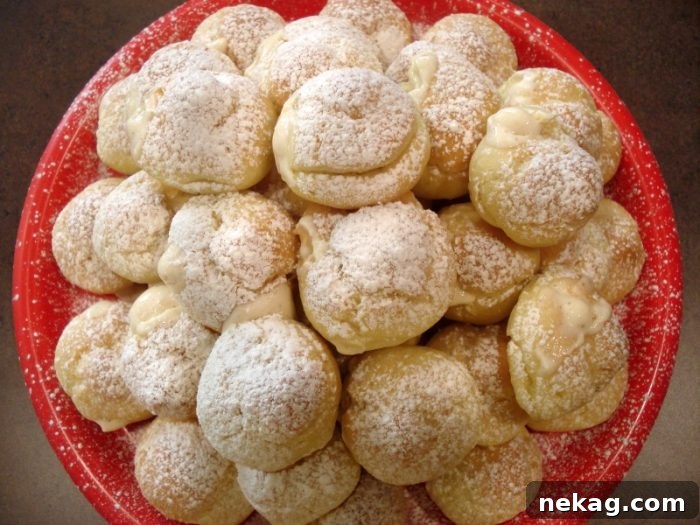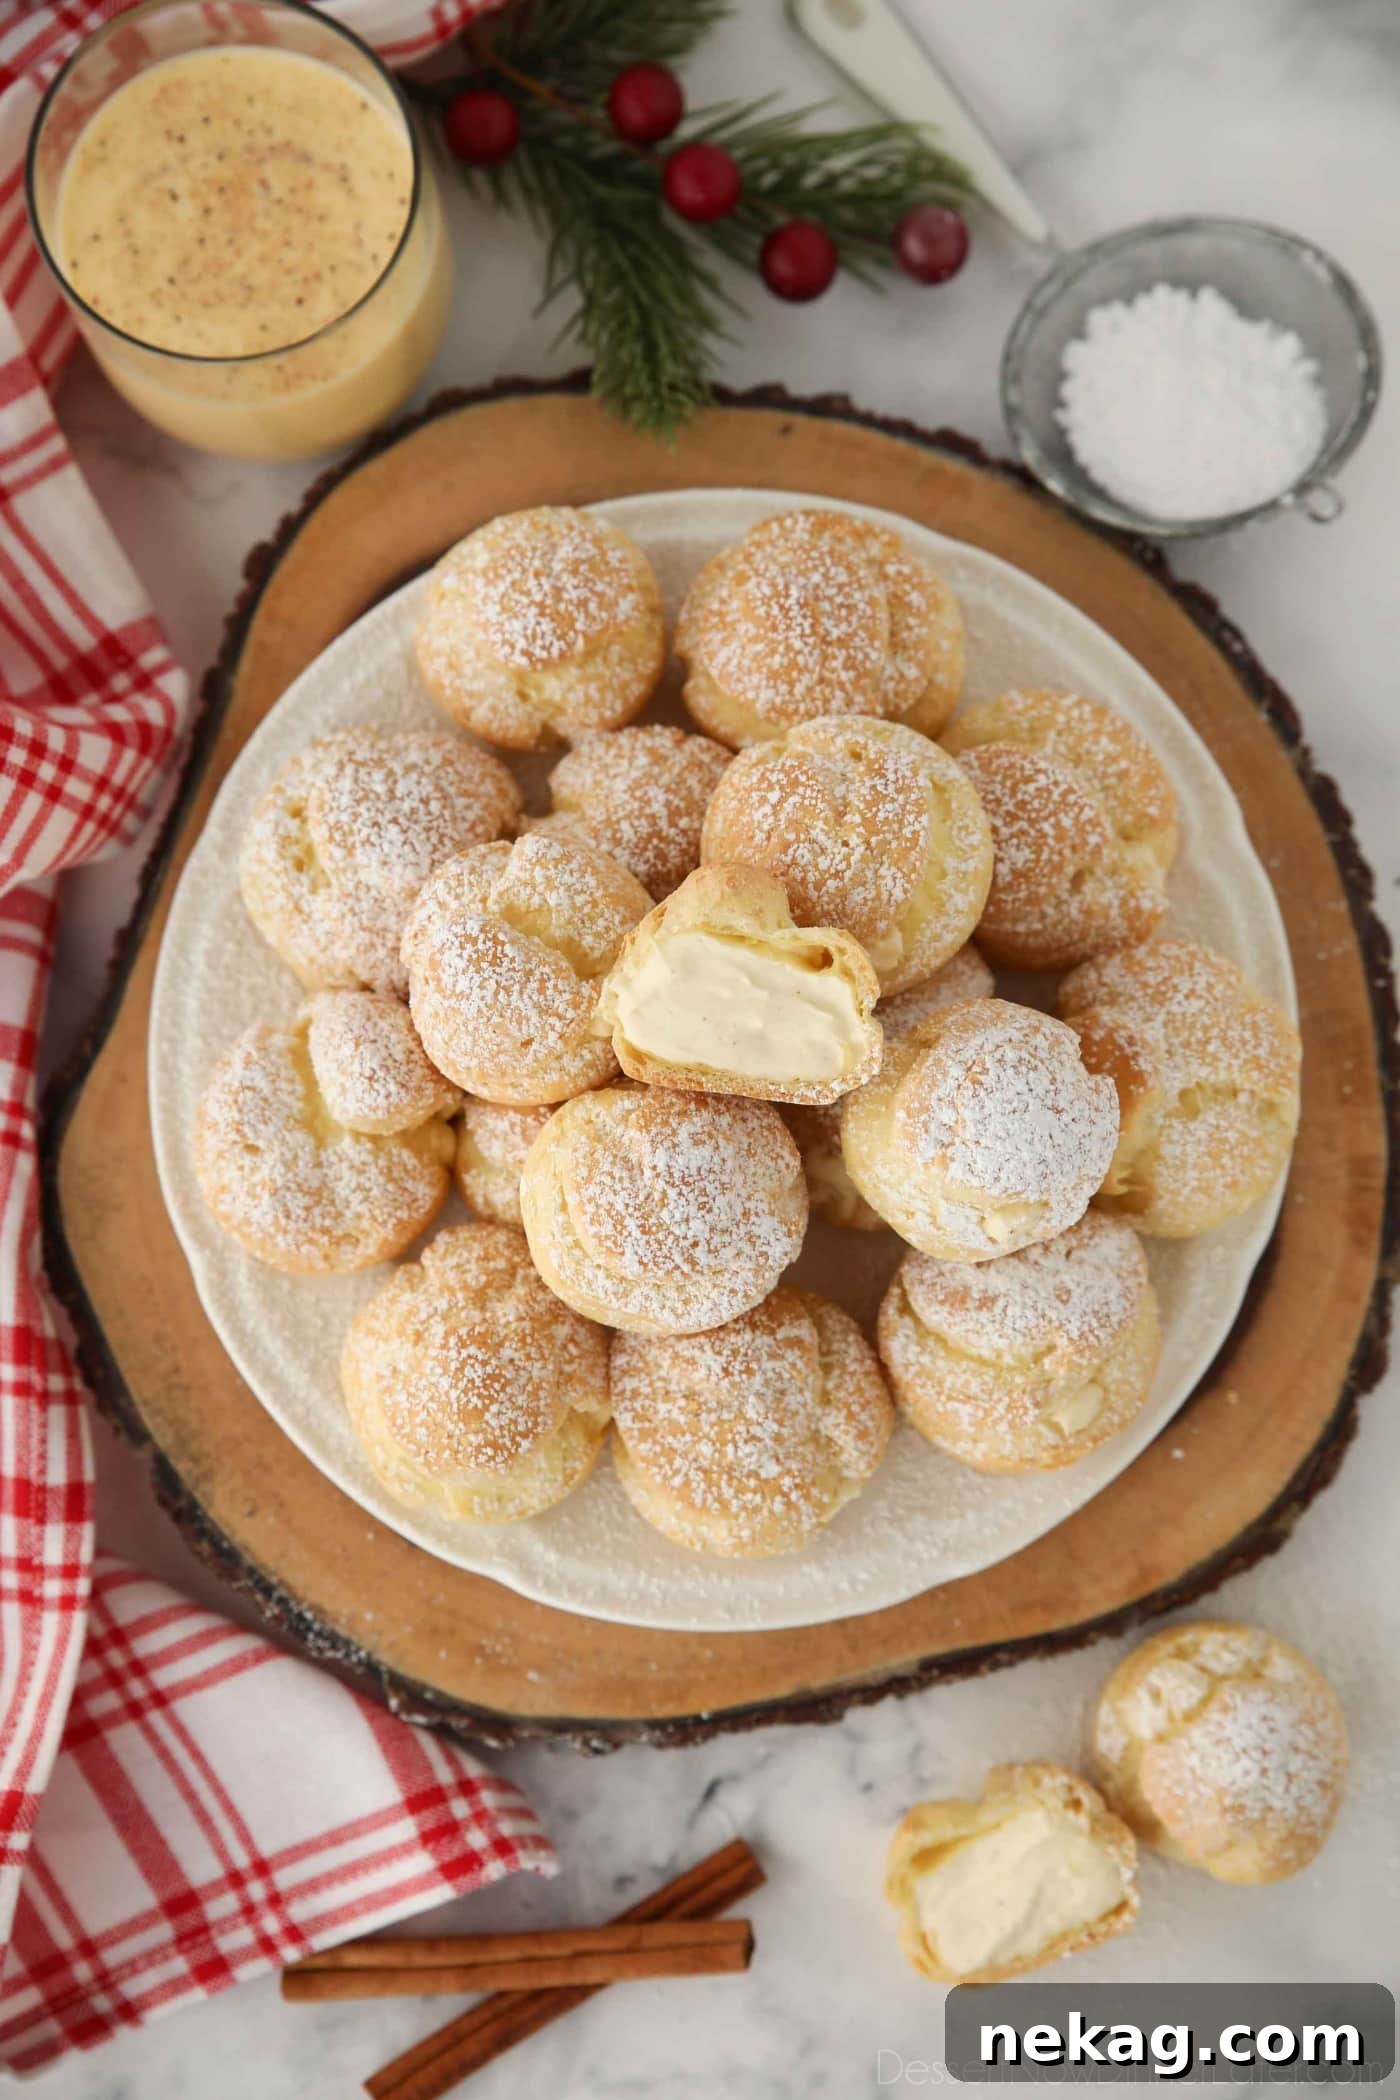
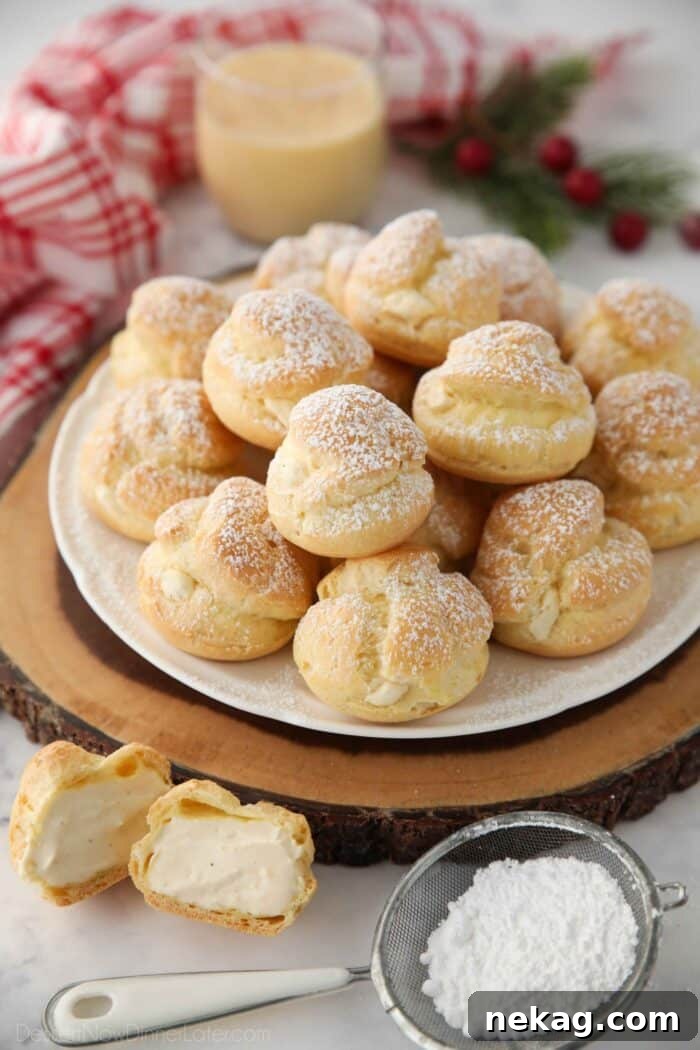
Indulge in the festive spirit with these delightful Eggnog Cream Puffs, a perfect blend of classic elegance and holiday cheer. Imagine transforming rich, creamy eggnog into a luscious whipped pastry cream, nestled within delicate, airy choux pastry shells. These bite-sized wonders are not just a dessert; they are an experience, offering a touch of sophisticated sweetness ideal for entertaining guests throughout the holiday season, from intimate Christmas gatherings to lively New Year’s Eve celebrations.
Looking for more captivating mini desserts to complete your holiday spread? Be sure to explore these incredibly easy 3-ingredient Pretzel Hugs or decadent Rolo Pretzels. For a touch of nostalgic charm, whip up some classic Oreo Balls, or add a vibrant splash of color with festive Red Velvet Truffles. Each recipe promises to add a special touch to your dessert table!
Why These Eggnog Cream Puffs Are Your Next Holiday Favorite
The holiday season is synonymous with warmth, joy, and of course, delicious treats. Our Eggnog Cream Puffs perfectly embody this spirit, offering several compelling reasons why they should be at the top of your festive baking list. Beyond their irresistible flavor, they bring convenience and charm to any gathering.
- Effortless Finger Food: Everyone appreciates a dessert that can be savored without the need for utensils. These cream puffs are perfectly portioned, making them ideal for mingling at parties. Just like a gourmet cookie, you can simply pick one up and enjoy its delightful textures and festive flavors, making them a fantastic addition to any buffet or dessert platter.
- Uniquely Festive Flavor: While traditional vanilla cream puffs are undeniably delicious, the infusion of rich, spiced eggnog elevates this classic treat to an entirely new level. The warm notes of nutmeg and creamy eggnog transform these pastries into a truly seasonal indulgence, capturing the essence of holiday traditions in every bite. You might even find yourself preferring this festive rendition over the original!
- Conveniently Freezer Friendly: Planning ahead during the busy holiday season is a game-changer, and these cream puffs make it incredibly easy. You can prepare them in advance and freeze them without compromising their quality. Simply remove them from the freezer about 30 minutes before serving to allow them to thaw beautifully. (Note: While the flavor remains superb, the pastry shell might become slightly softer when frozen and thawed.) This make-ahead option is perfect for busy hosts who want to impress without the last-minute rush.
If you’re a true eggnog enthusiast, you might also enjoy exploring this creamy eggnog dip, another fantastic way to incorporate the beloved holiday beverage into your culinary repertoire.
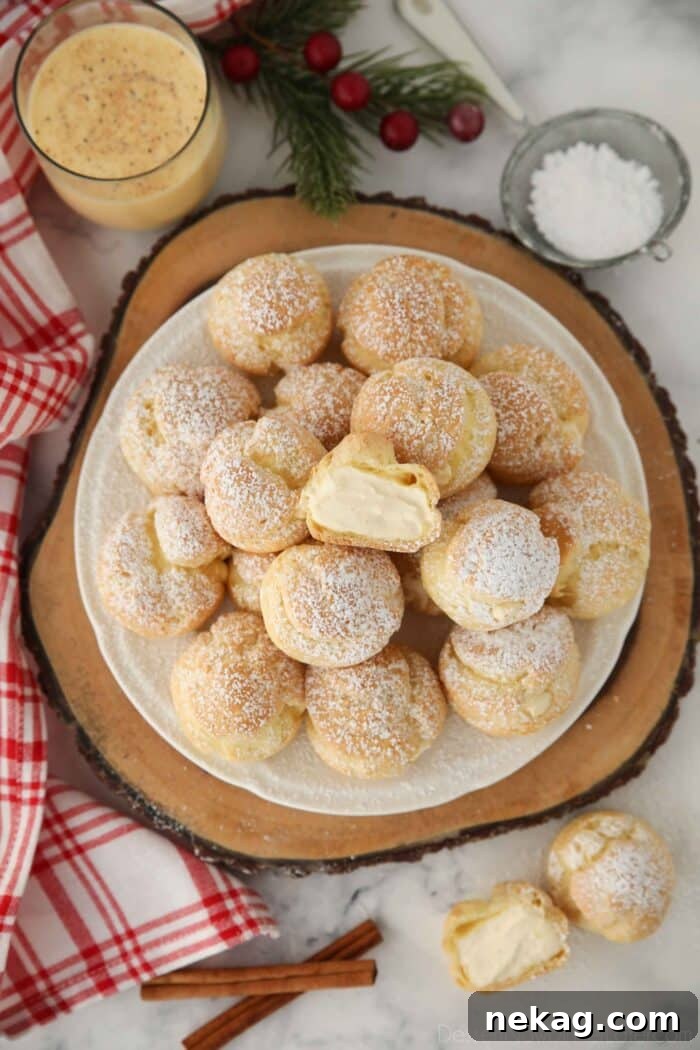
Crafting the Perfect Eggnog Cream Puffs: A Culinary Adventure
Creating these exquisite Eggnog Cream Puffs is a rewarding baking project that combines classic pastry techniques with a festive twist. While it might seem a bit more involved than your average cookie recipe, the process is a satisfying culinary challenge, culminating in truly delicious rewards that will impress everyone who tastes them. Each component, from the delicate choux pastry to the rich eggnog filling, is designed to deliver a harmonious symphony of flavors and textures.
The Art of Choux Pastry: Building the Foundation
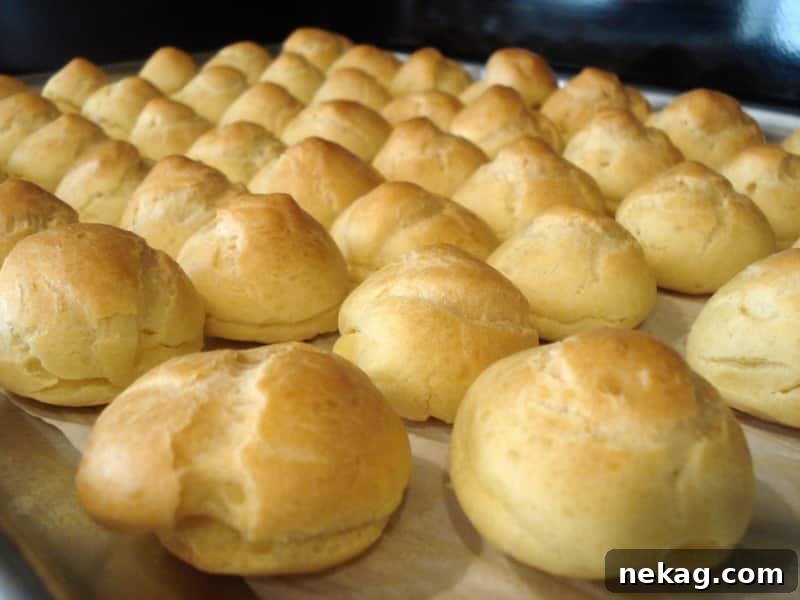
The foundation of any great cream puff is the choux pastry, also known as pâte à choux. This light, airy dough is unique because it’s cooked twice – first on the stovetop, then baked in the oven. When baked, the steam trapped inside causes the pastry to puff up dramatically, creating a hollow center perfect for filling. For these eggnog cream puffs, the choux pastry is piped into elegant profiteroles, baked to a beautiful golden perfection, and allowed to cool, creating the ideal crisp shell for our festive filling.
The Decadence of Eggnog Pastry Cream
The star of this holiday dessert is undoubtedly the whipped eggnog pastry cream. This rich, smooth custard is infused with the unmistakable flavor of eggnog, creating a luxurious filling that perfectly complements the light choux pastry. The process involves tempering eggs, gently cooking the mixture until it thickens, and then chilling it to achieve the perfect consistency. Once fully cooled, it’s carefully folded together with freshly whipped cream, resulting in a light, airy, yet deeply satisfying filling that’s bursting with holiday flavor.
These meticulously crafted eggnog cream puffs are guaranteed to be the talk of your holiday gathering. Their delicate appearance and exquisite taste mean they’ll disappear quickly! Below, I’ll guide you through each step, ensuring your success in creating these irresistible treats.
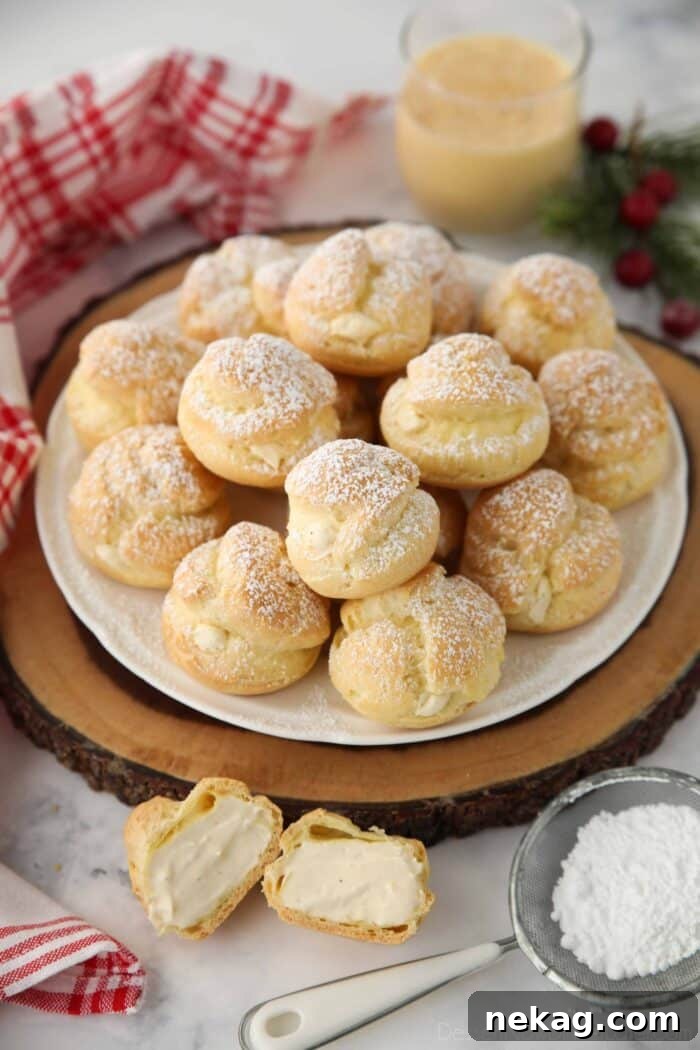
Mastering the Choux Pastry: Step-by-Step
Creating perfect choux pastry shells, or pâte à choux, is an essential first step for your eggnog cream puffs. While it may seem daunting, by following these detailed instructions, you’ll achieve light, hollow, and perfectly crisp shells every time. Precision is key in choux pastry, so pay close attention to the consistency at each stage.
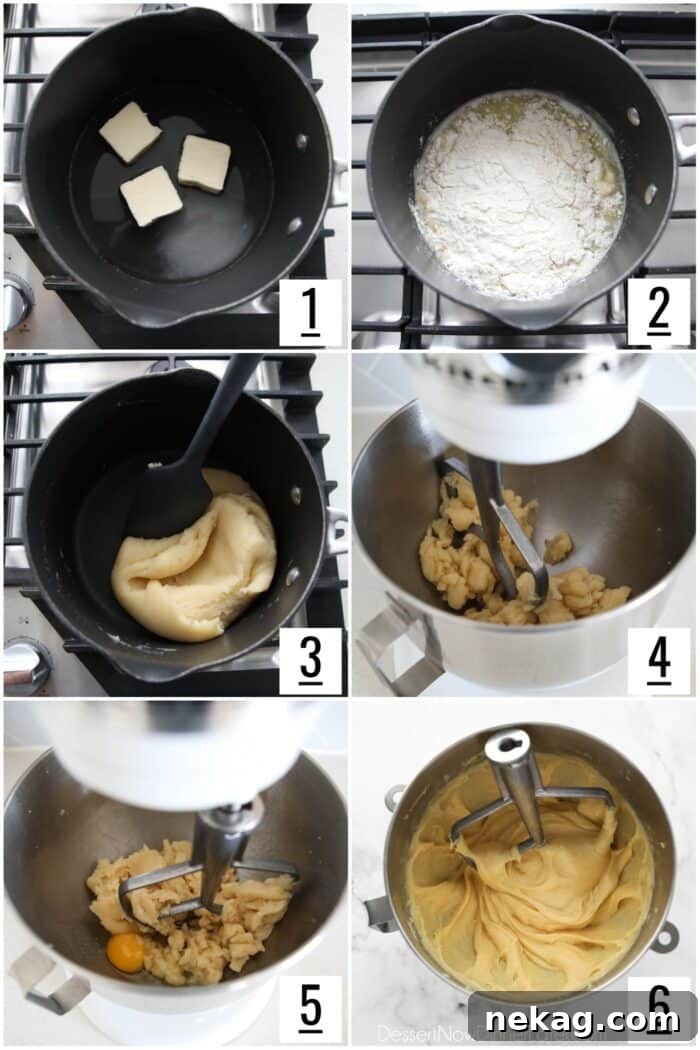
- In a medium-sized heavy-bottomed saucepan, combine the water, butter (cut into pieces for faster melting), granulated sugar, and salt. Heat this mixture over medium-high heat, stirring occasionally, until it reaches a vigorous, rolling boil. Ensure all the butter is completely melted.
- Once boiling, immediately remove the saucepan from the heat. Add all of the all-purpose flour at once. Stir vigorously and continuously with a wooden spoon or a heat-resistant spatula until the mixture comes together and forms a cohesive ball, pulling away cleanly from the sides of the pan. There should be no dry streaks of flour remaining.
- Return the saucepan to medium heat. Continue stirring and cooking the dough for 2-3 minutes, pressing it against the sides of the pan. This step, often called “drying out the dough,” is crucial. It evaporates excess moisture, which helps create a crisper puff and allows the eggs to be incorporated properly. The dough will become less steamy and a thin film might form on the bottom of the pan.
- Transfer the hot dough mixture to the bowl of a stand mixer fitted with a paddle attachment. Mix on medium speed for 2-3 minutes to allow the dough to cool down slightly. It should be cool enough to touch without being too hot, as adding eggs to excessively hot dough can scramble them.
- With the mixer on medium speed, add the eggs one at a time. It’s vital to wait until each egg is fully incorporated into the dough before adding the next. The mixture will initially look clumpy or separated after each egg addition, but it will come together and become cohesive as you continue to mix. The dough should be shiny and stringy, slowly falling from the paddle attachment in a “V” shape or ribbon.
Piping and Baking Your Perfect Profiteroles
Once your choux pastry is prepared, the next exciting step is to shape and bake these delicate shells. Proper piping technique and precise baking temperatures are essential for achieving the signature light and airy texture of cream puffs.
- Transfer the freshly made choux pastry mixture into a piping bag fitted with a round tip (a Wilton 2A or similar size is ideal for 1.5-inch puffs). Prepare a baking sheet by lining it with parchment paper or a silicone baking mat.
- Pipe uniform 1.5-inch diameter cream puffs (profiteroles) onto the prepared baking sheet, leaving about 2 inches between each as they will expand. To pipe, squeeze the bag steadily to create a mound of dough, then lift straight up to release. Do NOT swirl the dough like you would with frosting; a straight squeeze and lift is the key to creating a good shape.
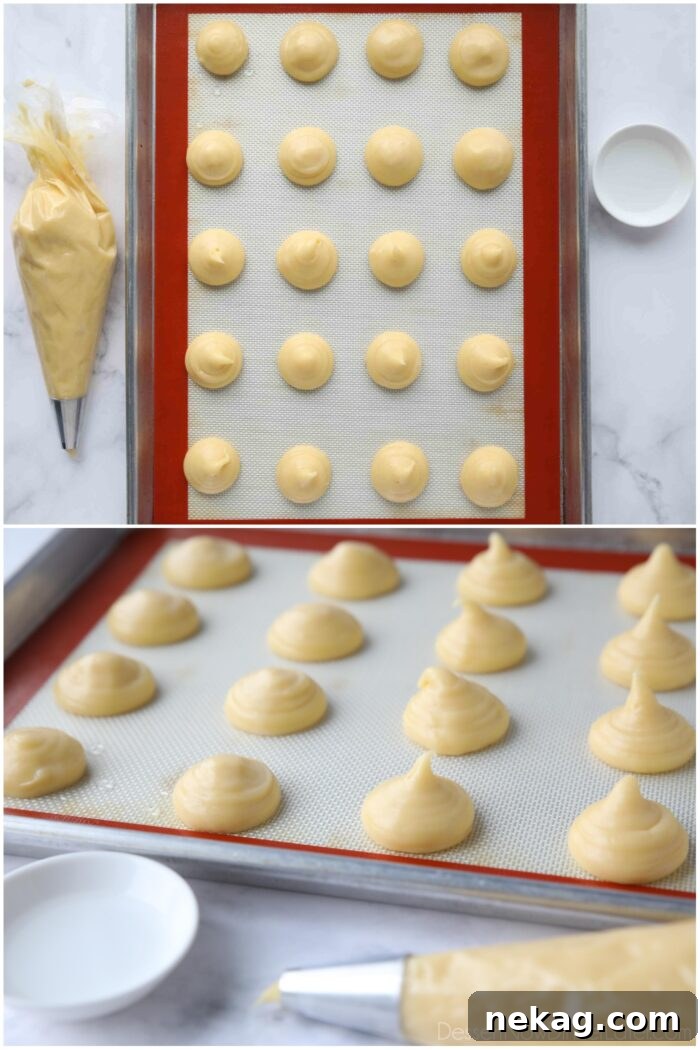
- Lightly dip your finger in water and gently smooth down any pointed peaks on top of the piped dough. This helps ensure an even bake and a beautifully rounded shape.
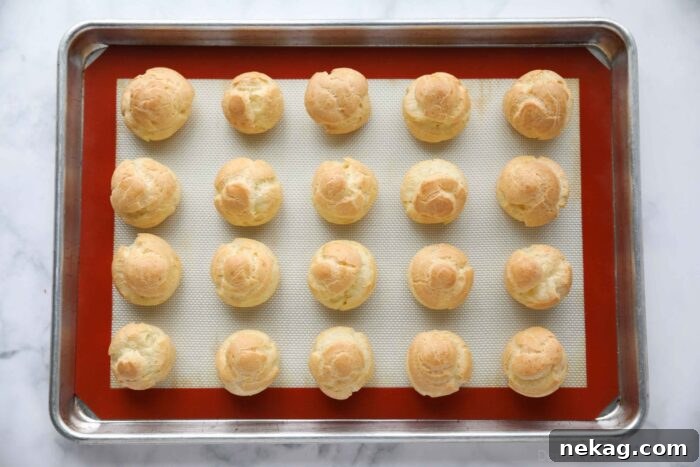
- Bake the cream puffs in a preheated oven at 425˚F (220˚C) for 10-12 minutes. During this initial high-heat phase, the steam inside the dough will rapidly expand, causing the cream puffs to rise significantly and achieve a nice height.
- After 10-12 minutes, reduce the oven temperature to 350˚F (175˚C) and continue baking for an additional 18-20 minutes, or until the cream puffs are a deep golden brown color and feel light when lifted. This lower temperature allows the interior to dry out and crisp up without burning the exterior.
PRO TIP for Perfect Puffs: Achieving perfectly baked cream puffs requires careful attention. It is crucial that the cream puffs are thoroughly cooked on the inside to prevent them from collapsing when removed from the oven. To test for doneness, quickly pull one cream puff out of the oven. If it holds its shape and feels light and airy when picked up, they are likely ready. If it still feels dense or heavy, return it to the oven immediately. An underbaked cream puff will inevitably fall and cannot be salvaged once cooled. Maintain oven temperature by keeping the door shut as much as possible; utilize the oven light and glass door to monitor their progress. Consistency in baking is what will give you those coveted hollow, crispy shells.
Crafting the Luxurious Eggnog Pastry Cream
While your perfectly baked choux pastry shells are cooling, it’s the ideal time to prepare the star of this dessert: the rich, fragrant eggnog pastry cream. This custard will bring the distinctive holiday flavor to your cream puffs, making them truly special.
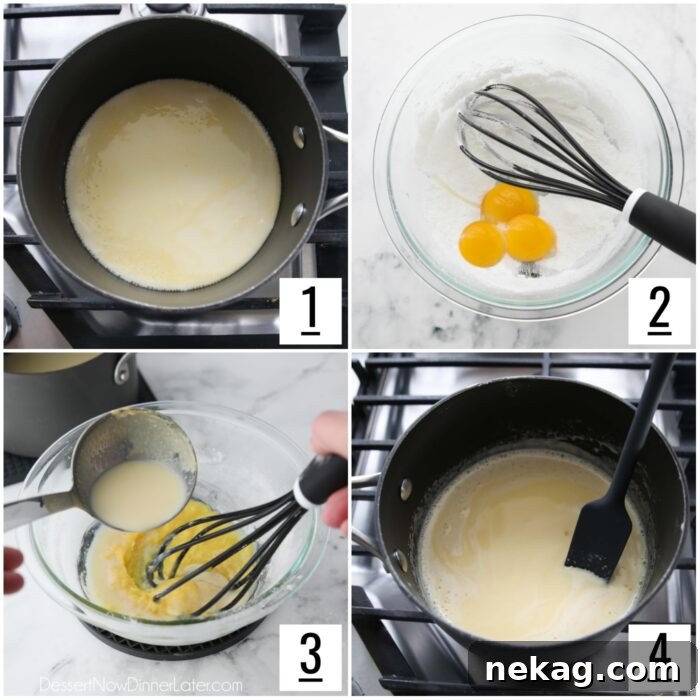
- In a medium-sized saucepan, combine the full-fat eggnog and whole milk. Heat this mixture over medium-low heat, stirring occasionally, until it just barely reaches a boil. You’ll see small bubbles forming around the edges of the pan. Remove from heat immediately.
- In a separate medium-sized heatproof bowl, whisk together the granulated sugar and cornstarch until thoroughly combined and lump-free. Then, add the egg yolks and whisk vigorously until the mixture is pale yellow and smooth. The cornstarch prevents the eggs from scrambling when hot liquid is added.
- This next step is called “tempering” and is crucial for a smooth pastry cream. Using a ladle, slowly pour about half of the hot eggnog mixture into the egg yolk mixture while whisking constantly and briskly. This gradually raises the temperature of the egg yolks, preventing them from cooking too quickly and scrambling.
- Once half of the hot eggnog mixture has been incorporated into the eggs, pour the entire tempered egg mixture back into the saucepan with the remaining hot eggnog. Return the pan to medium-low heat and cook, stirring constantly with a whisk or spatula, until the mixture thickens considerably and comes to a gentle boil. It should be thick enough to coat the back of a spoon.
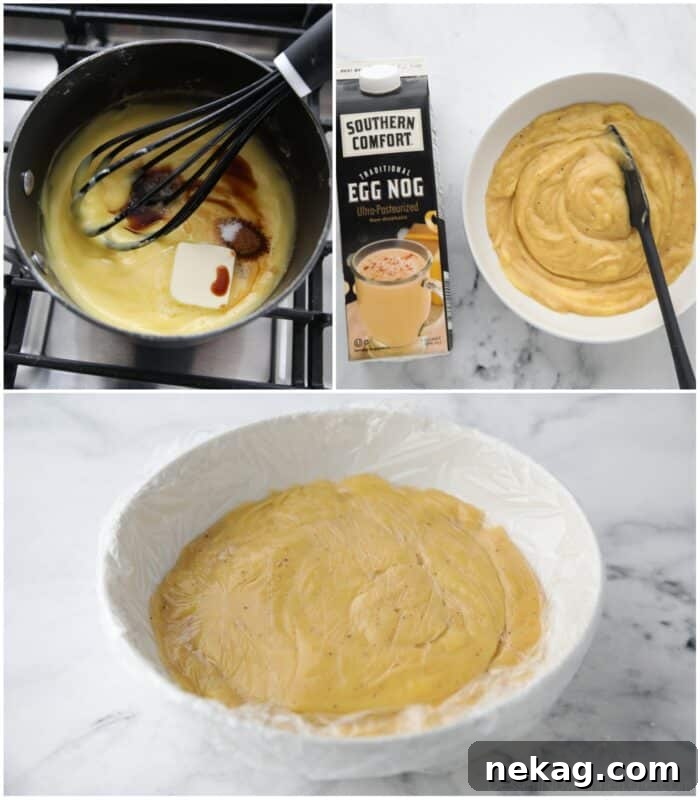
- Once the pastry cream has reached the desired thickness, remove it from the heat. Stir in the unsalted butter, vanilla extract, ground nutmeg, and a pinch of salt. Whisk until the butter is completely melted and all ingredients are smoothly incorporated, enhancing both flavor and texture.
- To cool the pastry cream quickly and prevent a skin from forming, transfer it into a shallow dish or baking pan. Cover the surface directly with plastic wrap, pressing it down so it touches the entire surface of the cream. This creates an airtight seal. For even faster chilling, place this dish inside a larger bowl filled with ice water. Refrigerate until completely cool and firm, typically 2-3 hours.
Enhancing with Whipped Cream: The Perfect Lightness
Once your eggnog pastry cream is thoroughly chilled, you’ll notice it’s quite thick and rich. This consistency is absolutely perfect, as it sets the stage for blending with freshly whipped cream, which will lighten its texture and make it irresistibly fluffy. While an 8oz tub of Cool Whip can offer a quick shortcut, I highly recommend making your own homemade whipped cream for a superior flavor and texture that truly elevates these cream puffs.
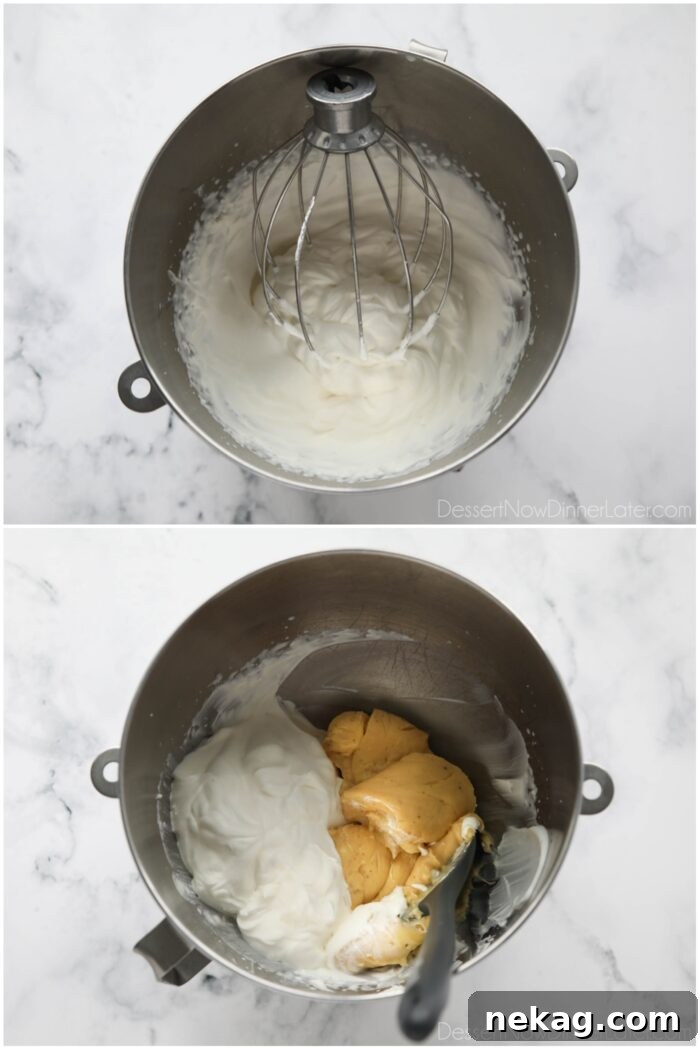
- In the bowl of a stand mixer fitted with a whisk attachment (or using a hand mixer), combine the cold heavy cream and powdered sugar. Whip on high speed until stiff peaks form. The cream should hold its shape firmly when the whisk is lifted. Be careful not to over-whip, as it can turn granular.
- Gently add the thoroughly chilled eggnog pastry cream to the bowl with the whipped cream. Using a spatula, carefully fold the two mixtures together until they are just combined and streak-free. The goal is to maintain the airy texture of the whipped cream while fully incorporating the rich pastry cream.
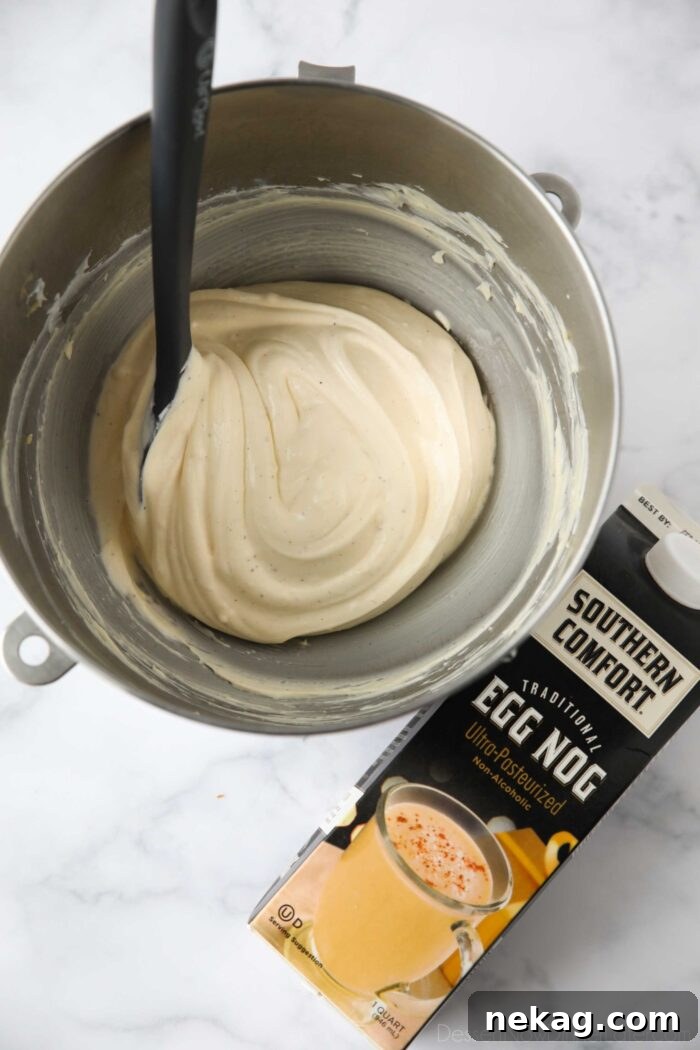
Assembling Your Eggnog Cream Puffs: The Grand Finale
With your golden-baked choux pastry shells and your exquisitely lightened eggnog pastry cream ready, it’s time for the most satisfying step: filling your cream puffs. This final stage brings all your hard work together, transforming individual components into a cohesive, irresistible holiday dessert. This luscious filling would also be absolutely delicious in these charming cream horns, offering another delightful way to enjoy its festive flavor.
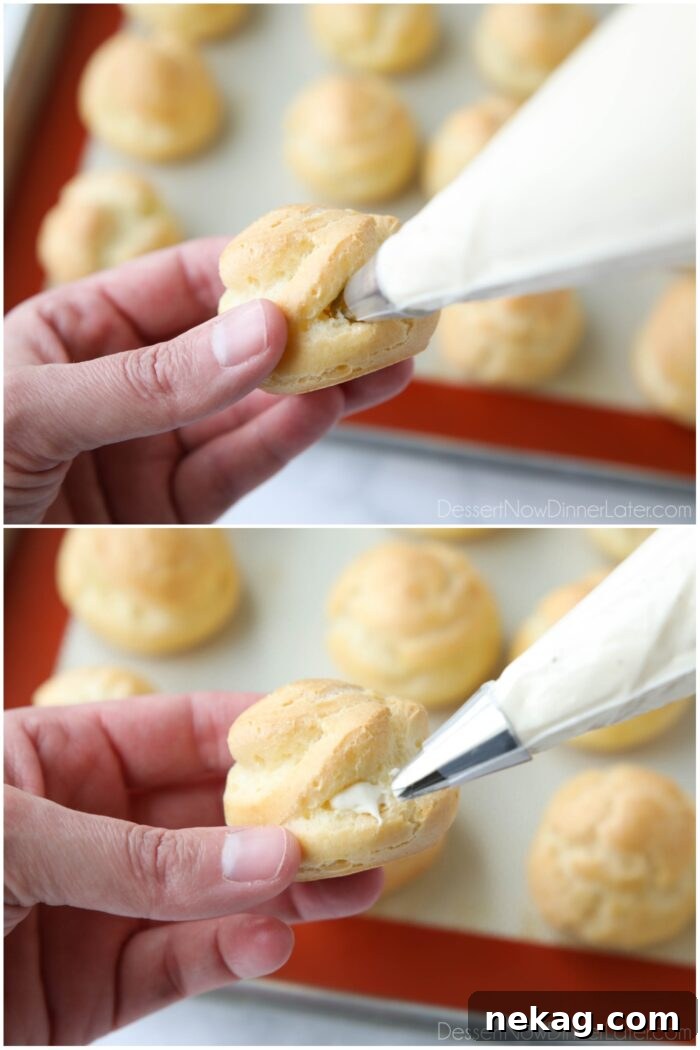
- Transfer the prepared whipped eggnog pastry cream into a piping bag fitted with a small star tip (a Wilton 18 is an excellent choice for a decorative touch).
- Take each cooled cream puff and gently poke a small hole into its side using the tip of the piping bag. Once the tip is inserted, steadily squeeze the piping bag until you feel the cream puff gently expand and become full. Continue this process for all the pastry shells.
- Once filled, artfully dust the tops of your eggnog cream puffs with a light coating of powdered sugar. Serve immediately for the best possible experience, enjoying their fresh, crisp exterior and creamy, flavorful interior.
PRO TIP for Clean Filling: To ensure a neat and efficient filling process, I recommend selecting a spot where the cream puff has a natural crack or a slightly thinner area to insert your piping tip. This often makes the entry point less noticeable and the filling process smoother. Alternatively, if no suitable crack is present, you can use a sharp paring knife to make a small, discreet slit on the side or bottom of each puff before piping.
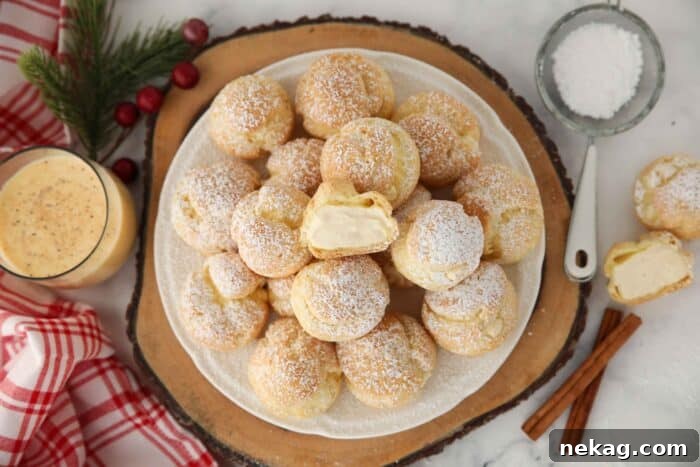
Serving, Storing, and Making Ahead: Your Ultimate Guide
Maximizing the enjoyment and convenience of your Eggnog Cream Puffs involves understanding the best practices for serving, storage, and preparation ahead of time. These delicate pastries truly shine when fresh, but with a few tips, you can extend their deliciousness.
- Optimal Serving: For the ultimate experience, these eggnog cream puffs are best served immediately after they have been filled. The delicate choux pastry shells are at their crispiest when fresh. As time passes, the filling’s moisture will gradually be absorbed by the pastry, causing the shells to soften and become less crisp.
- Storage Guidelines: If you have leftover filled cream puffs, or if you prepare them a short time in advance, store them in an airtight container in the refrigerator. They will maintain their deliciousness and a decent texture for up to 2-3 days, though the shells may soften slightly.
- Make Ahead Strategies: To prepare these delectable treats without the last-minute rush, consider making the components separately.
- Pastry Cream: The eggnog pastry cream can be prepared up to 3 days in advance and stored in an airtight container in the refrigerator. Ensure it’s covered with plastic wrap pressed directly onto its surface to prevent a skin from forming.
- Pâte à Choux Shells: The empty choux pastry shells can be stored at room temperature in an airtight container for 1 day. For longer storage, they can be frozen for up to 1 month. When you’re ready to serve, re-crisp the frozen or room-temperature shells in a 350°F (175°C) oven for about 5 minutes, then let them cool completely before filling.
Combine the chilled pastry cream with freshly whipped cream (if using) and fill the re-crisped shells just before serving for the best results.
- Freezing Filled Cream Puffs: While optimal crispiness is achieved with fresh filling, you can freeze filled cream puffs if you don’t mind a slightly softer texture after thawing. To freeze, arrange the filled cream puffs in a single layer on a baking sheet and freeze until solid. Once frozen, transfer them to a freezer-safe airtight container or a large zip-top bag to prevent freezer burn. They can be stored for up to 3 months. To thaw, remove the desired number of cream puffs from the freezer and place them on a platter. Allow them to thaw at room temperature for about 30 minutes, or in the refrigerator for 1 hour, before serving.
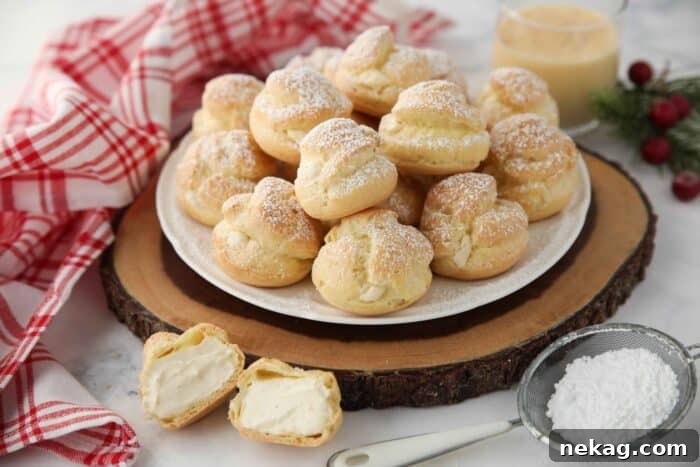
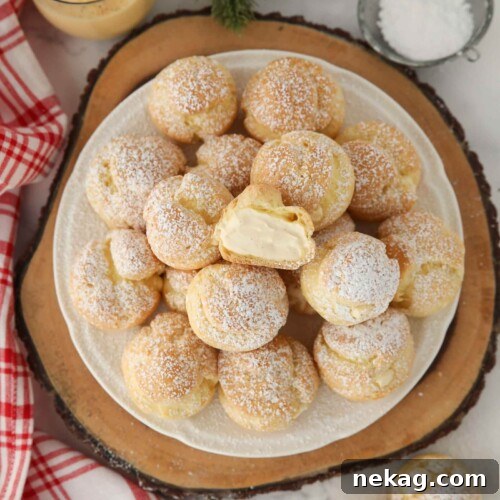
Eggnog Cream Puffs
Pin
Ingredients
Pate a Choux (Cream Puff Shell)
- 1 cup (237 ml) water
- 6 Tbsp (85 g) unsalted butter, cut into pieces
- 1 Tbsp granulated sugar
- ¼ tsp salt
- 5.75 oz (163 g) all-purpose flour, about 1 ⅓ cups
- 1 cup (237 ml) eggs, (approx. 4 large eggs + 1 egg white = 8 ounces)
Eggnog Pastry Cream
- ¾ cup (177 ml) full fat eggnog
- ¾ cup (177 ml) whole milk
- 6 Tbsp (75 g) granulated sugar
- 3 Tbsp cornstarch
- 3 egg yolks
- 1 ½ Tbsp (21 g) unsalted butter
- 1 ½ tsp vanilla extract
- ¼ tsp ground nutmeg
- ⅛ tsp salt
Whipped Cream
- 1 ¼ cups (296 ml) heavy cream
- ⅓ cup (40 g) powdered sugar
Equipment
-
Wilton Disposable Piping Bags
-
Silicone Baking Mats
-
Half Sheet Pans
-
Silicone Spatula Set
-
KitchenAid 5-Qt. Stand Mixer
Instructions
-
Preheat oven to 425℉ (220°C). Line two sheet trays with parchment paper or a silicone baking mat. Set aside.
-
PATE A CHOUX (CREAM PUFF SHELLS): In a medium-sized saucepan, heat water, butter, sugar, and salt until a rolling boil. Remove from heat, add flour and stir vigorously.
-
Return to medium heat and continue stirring for 2-3 minutes until the mixture forms a ball, no dry spots remain, and it appears less steamy, drying out the dough.
-
Transfer the mixture to a stand mixer bowl. With a paddle attachment, mix on medium speed until it has cooled down slightly (you should be able to touch it comfortably).
-
Add eggs, one at a time, ensuring each egg is fully incorporated before adding the next. (The mixture will initially look clumpy but will become cohesive. Once all eggs are incorporated, the mixture will be shiny and stringy.)
-
Place the choux pastry into a piping bag with a round tip (Wilton 2A recommended). Pipe 1.5-inch cream puffs (profiteroles) onto the lined baking pans. (Squeeze and lift; do NOT swirl.) Dip your finger in water to smooth any peaks and round the tops.
-
Bake at 425˚F (220°C) for 10-12 minutes, until the cream puffs have achieved significant height.
-
Lower the oven to 350˚F (175°C) and bake for an additional 18-20 minutes, or until deeply golden brown and light when lifted. (Ensure they are fully cooked to prevent collapsing. Check doneness by briefly removing one; it should hold its shape and feel airy.)
-
EGGNOG PASTRY CREAM: In a medium-sized saucepan, bring eggnog and milk just to a boil over medium-low heat. Remove from heat.
-
Whisk together sugar and cornstarch in a medium-sized bowl. Add egg yolks and whisk to combine until smooth.
-
Slowly ladle about half of the hot eggnog mixture into the egg yolk mixture while whisking constantly (this is “tempering”).
-
Pour the tempered egg mixture back into the saucepan. Cook over medium-low heat, stirring constantly, until the mixture boils and thickens considerably.
-
Once thickened, remove from heat. Stir in butter, vanilla, nutmeg, and salt until combined and smooth.
-
Transfer eggnog pastry cream to a shallow dish. Cover with plastic wrap pressed directly onto the surface (to prevent a skin). Chill quickly by refrigerating immediately or by placing the dish in an ice water bath until completely cool.
-
WHIPPED CREAM: Using a stand mixer with a whisk attachment, whip heavy cream and powdered sugar to stiff peaks.
-
Gently add the chilled eggnog pastry cream to the whipped cream and fold together until just combined.
-
ASSEMBLY: Place the whipped eggnog cream into a piping bag fitted with a small star tip (Wilton 18 recommended).
-
Poke a small hole into the side of each cooled cream puff with the piping tip. Squeeze the cream in until the puff expands. Dust the tops with powdered sugar and serve immediately.
Notes
- Serve: For the best crisp texture, serve these eggnog cream puffs immediately after filling. The shells will naturally soften over time as they absorb moisture from the cream.
- Store: Filled cream puffs can be refrigerated in an airtight container for up to 2-3 days, though the pastry shells may become softer.
- Make Ahead: Prepare the pâte à choux shells and the pastry cream separately. Pastry cream can be refrigerated for up to 3 days. Baked choux pastry shells can be stored at room temperature for 1 day, or frozen for up to 1 month. To re-crisp shells, bake at 350°F (175°C) for about 5 minutes, then cool before filling. Assemble just before serving.
- Freeze: Filled cream puffs can be frozen for up to 3 months if you don’t mind a softer shell texture upon thawing. Freeze in a single layer, then transfer to an airtight container or zip-top bag. Thaw at room temperature for 30 minutes or in the refrigerator for 1 hour before serving.
Nutrition
| Calories: 90kcal
| Carbohydrates: 7g
| Protein: 2g
| Fat: 6g
| Saturated Fat: 4g
| Polyunsaturated Fat: 2g
| Cholesterol: 54mg
| Sodium: 38mg
| Sugar: 4g
Disclaimer: Nutritional values were calculated using a third-party tool and are provided as an estimation only.
Sharing this recipe with a link is both encouraged and appreciated. Copying/pasting and/or screenshots of full recipes to any social media is strictly prohibited. Content and photographs are copyright protected.
Did you make this?
Don’t forget to leave a rating below and make sure to follow on Pinterest and Instagram for more!
These Eggnog Cream Puffs are more than just a dessert; they are a celebration of holiday flavors and the joy of baking. Whether you’re a seasoned baker or new to choux pastry, the rewarding process and delicious outcome make this recipe a must-try for your festive season. Enjoy creating and sharing these delightful, airy, and creamy treats with your loved ones.
*Originally published 12/23/2011. Post updated December 2023.