
Perfectly Tender Strawberry Scones with Lemon Zest: Your Guide to British Baking Excellence
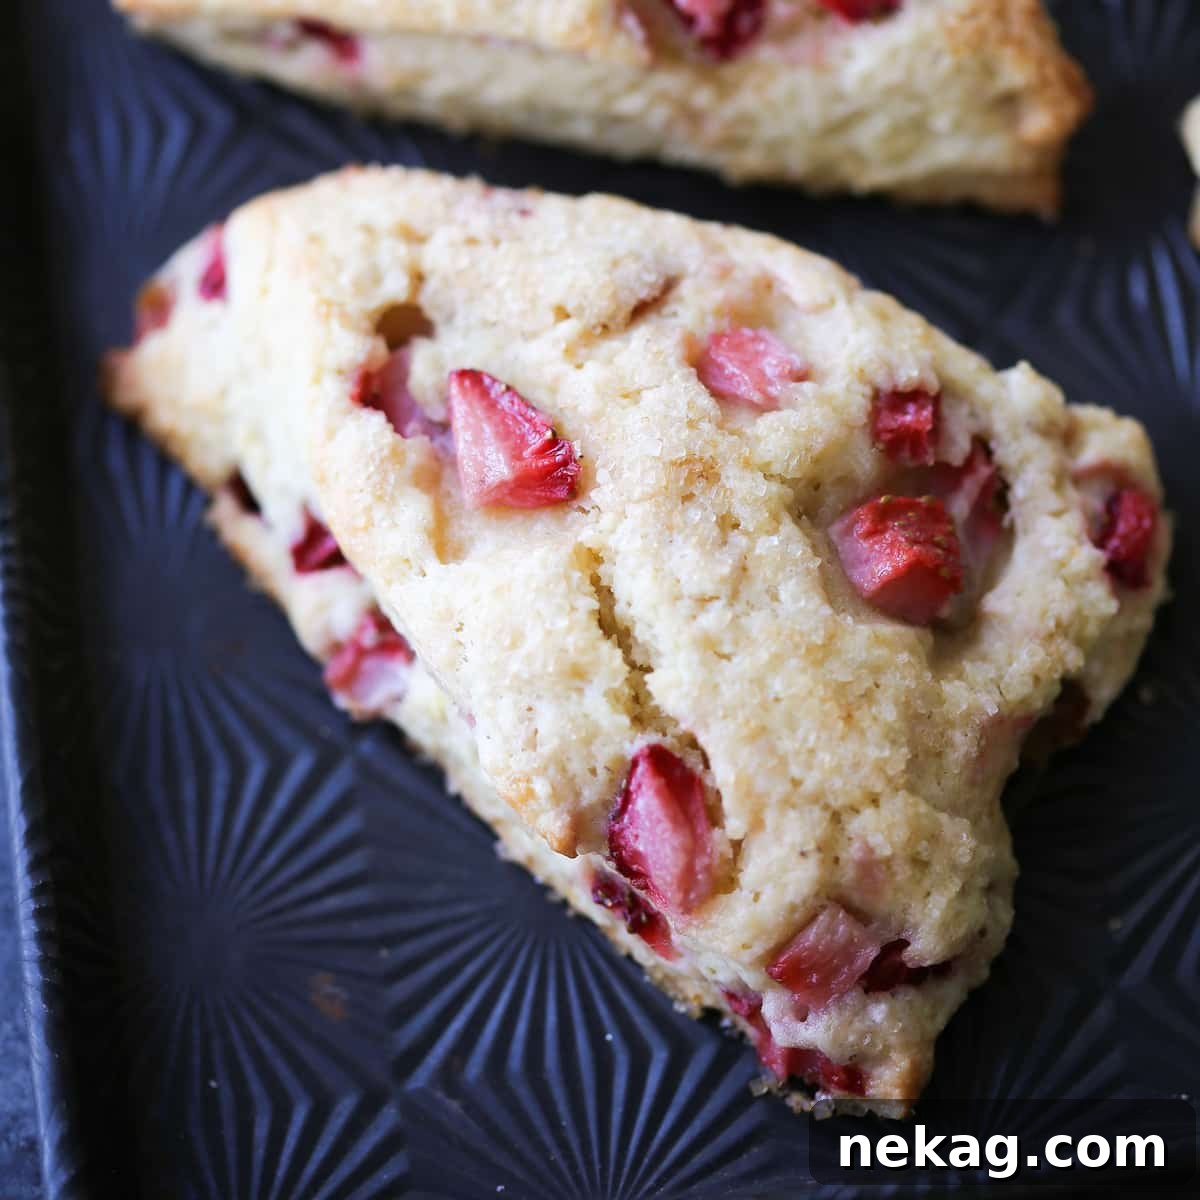
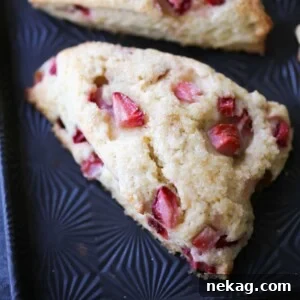
Indulge in the simple pleasure of an easy-to-follow **Strawberry Scones** recipe, crafted to perfection using the freshest, ripest strawberries. These delightful pastries promise a wonderfully tender and moist texture, crowned with a generous sprinkle of turbinado sugar that bakes into a delightful, sweet crunch. Far from dry or crumbly, these scones are a testament to classic British baking, reimagined for your home kitchen.
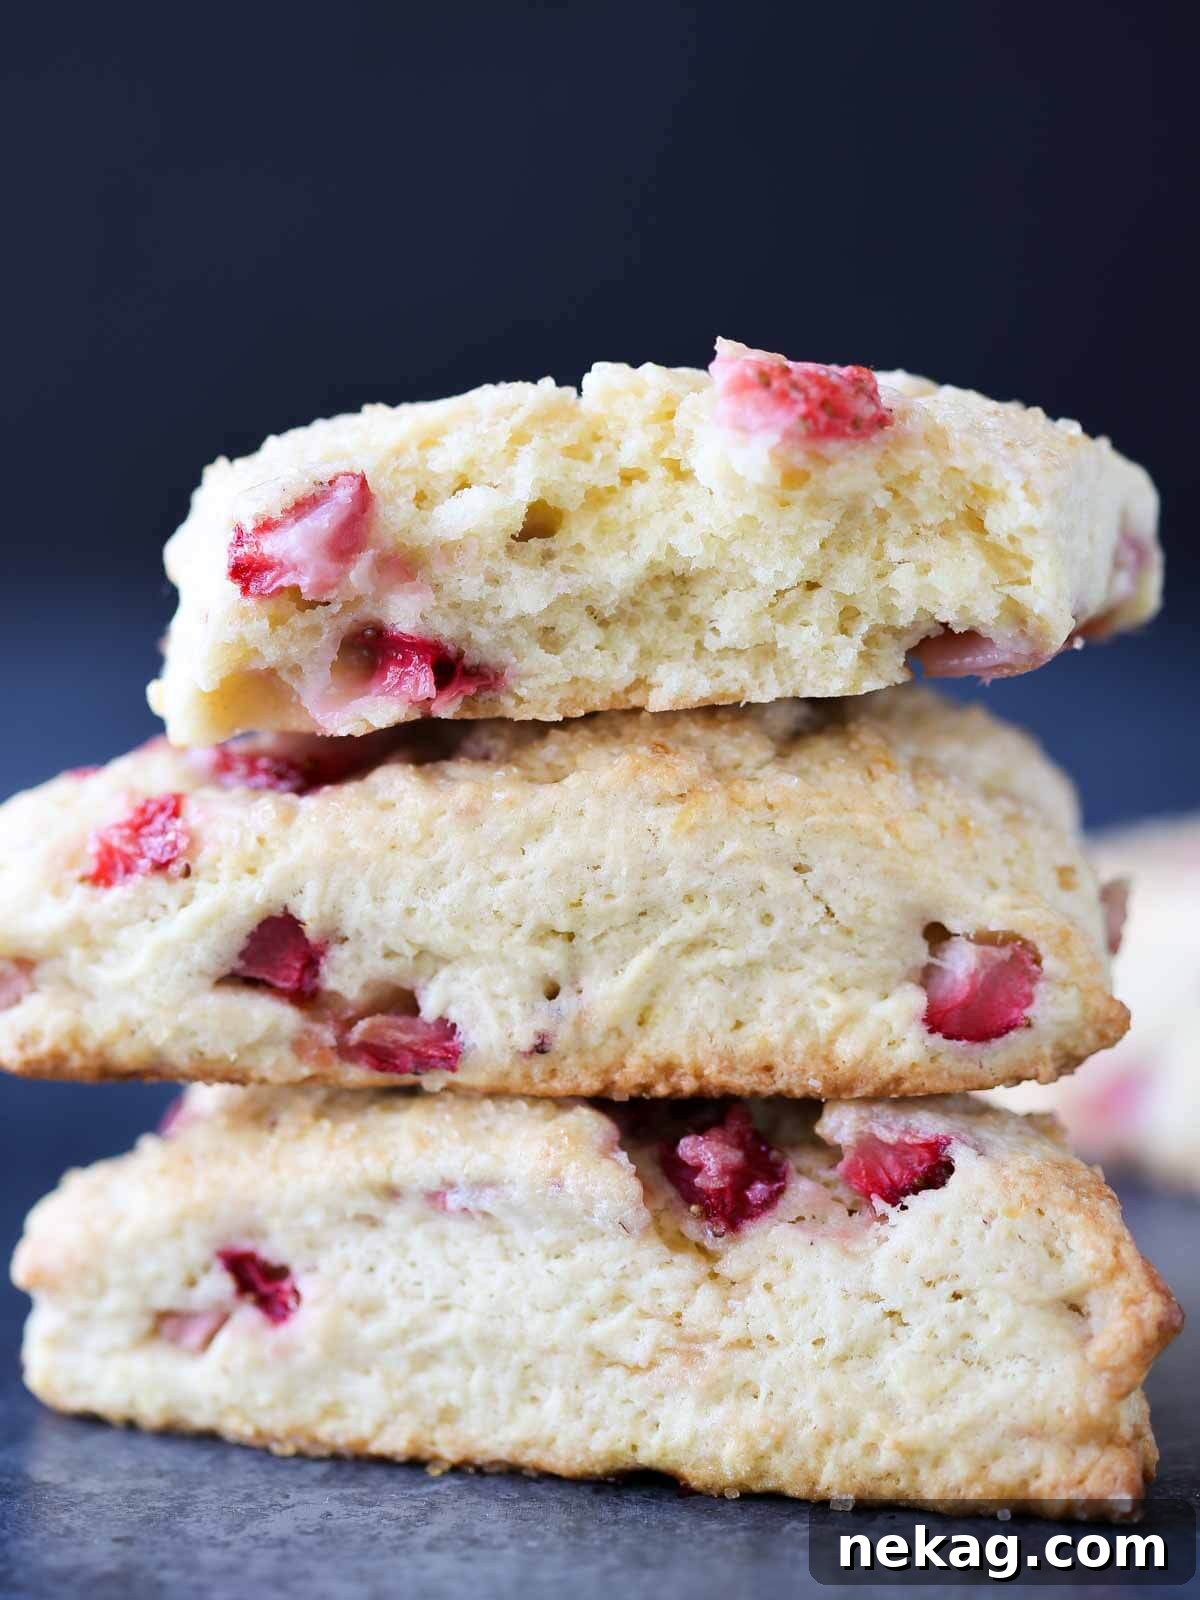
Inspired by the quintessential **soft British scones** I cherished in my youth, this recipe delivers an authentic taste and texture that sets it apart. Imagine sinking your teeth into a rich, buttery scone with a perfectly moist, yet subtly crumbly interior. Each bite offers a harmonious blend of sweet, succulent strawberries and a bright, refreshing hint of lemon. The secret to their decadent nature lies in the combination of sugar, heavy cream, and a dash of pure vanilla extract, transforming a simple breakfast treat into an extraordinary indulgence. The golden-brown tops, crisp from the generous application of turbinado sugar, provide the perfect textural contrast. Pure perfection!
A sweet, rich scone is truly the best way to start your day, effortlessly elevating any breakfast spread. But don’t limit these beauties to just mornings; they can easily double as a sophisticated dessert, especially when paired with some creamy homemade ice cream or a dollop of clotted cream. While I often rotate between this recipe and other beloved classics like my fluffy sourdough cinnamon rolls, comforting carrot cake scones, and another strawberry favorite: Classic Strawberry Shortcake with Whipped Cream, these Strawberry Scones hold a special place for their vibrant flavor and unparalleled texture.
Table of Contents
- Why You Will Love These Strawberry Scones
- The Secret to Making Exceptional Scones
- Essential Ingredients for Strawberry Scones
- Creative Variations
- How to Bake the Perfect Strawberry Scones
- Chef Lindsey’s Pro Tip: Kneading for Perfection
- Frequently Asked Questions
- Strawberry Scones Recipe
- Before You Go
Why You Will Love These Strawberry Scones:
- Achieve the Perfect British Scone Texture. Say goodbye to dry, cakey, or overly puffy scones. This recipe guarantees light, airy, and moist scones with a rich, melt-in-your-mouth texture that perfectly complements their sublime taste. Each scone is designed to be tender and crumbly without being dry, a hallmark of true British baking.
- Experience Refreshing, Vibrant Flavor. The natural sweetness of sun-ripened strawberries, combined with the bright, zesty notes of fresh lemon, creates a refreshing flavor profile that sings of spring and summer. It’s a delightful burst of fruity goodness that will awaken your palate.
- Rely on a Professional, Tested Recipe. Developed and rigorously tested by a pastry professional, this recipe provides incredibly detailed instructions, ensuring consistent and flawless results every time. You can trust this guide to help you bake scones that look and taste like they came straight from a gourmet bakery.
- Versatile for Any Occasion. Whether it’s a cozy breakfast, an elegant brunch, or a traditional afternoon tea, these strawberry scones are always a welcome addition. They’re impressive enough for guests yet simple enough for a casual weekend treat.
The Secret to Making Exceptional Scones
Crafting truly tender and delicious scones involves a few key techniques that prevent them from becoming tough or dry. These professional tips are essential for achieving that sought-after light, flaky texture:
- Thoroughly Blot Your Strawberries Dry. Fresh strawberries, while delicious, release moisture during baking, which can make the surrounding dough slightly gooey. To mitigate this, it’s crucial to dice your strawberries and then obsessively blot them dry with a paper towel. This simple step helps control moisture in the dough, ensuring an even bake. If you prefer a completely dry fruit experience, consider using blueberries or even dried fruit as an alternative.
- Completely Cut Cold Butter into Dry Ingredients. The secret to incredibly tender and flaky scones lies in the butter. Using very cold butter, cut into small cubes, and fully incorporating it into your dry ingredients until it resembles coarse crumbs (with some pea-sized pieces remaining) is paramount. Years of baking large batches in professional kitchens have proven this method creates the most delicate, moist scones. This technique coats the flour particles, shortening gluten strands and preventing excessive gluten development, which is what leads to tough scones.
- Whisk Together All Wet Ingredients Separately. Before introducing any liquid to your dry mixture, ensure all wet ingredients—heavy cream, eggs, and vanilla—are thoroughly whisked together until smooth. In larger professional settings, an immersion blender might be used, but a simple whisk works perfectly at home. This pre-mixing step ensures quick incorporation into the dry ingredients, minimizing the time you need to mix the dough. Less mixing means less gluten development, which directly translates to more tender scones.
- Don’t Skip Brushing with Heavy Cream Before Baking. For a beautiful golden finish and to help lock in moisture, brush your scones generously with heavy cream just prior to baking. This creates a lovely, slightly crisper crust. For an added layer of sweetness and a delightful crunch, I always recommend sprinkling a bit of turbinado sugar on top. This creates a truly professional bakery-quality appearance and texture.

Essential Ingredients for Strawberry Scones
Each ingredient in this recipe plays a crucial role in achieving the perfect balance of flavor and texture. Here’s a closer look at what you’ll need and why:
- Strawberries: Opt for fragrant, deep red, in-season strawberries for the best flavor and texture. These are ideal not just for scones but also for recipes like my strawberry rhubarb crumble. Out-of-season strawberries tend to be less flavorful and contain more water, which can affect the dough. If fresh berries aren’t at their peak, freeze-dried strawberries make an excellent substitute, offering concentrated flavor without excess moisture.
- Heavy Cream: This rich dairy product is key to creating a moist, tender scone. It provides just the right amount of liquid and fat for a luxurious texture. If heavy cream isn’t available, a blend of ⅓ cup Greek yogurt and 2 tablespoons of milk can be used as a reasonable substitute, though the texture might be slightly different.
- Whole Eggs: Eggs act as a binder, helping to hold the dough together, while also adding richness and contributing to the scone’s golden-brown color during baking.
- Vanilla Extract: Pure vanilla extract provides a beautiful foundational flavor that complements the strawberries and lemon. It also works as a flavor enhancer, boosting the aromatic qualities of the other ingredients.
- All-purpose Flour: This type of flour contains just the right amount of gluten to create a flaky, tender texture without making the scones tough. For an even more delicate crumb, you could experiment with pastry flour, which has a lower protein content, providing extra insurance against toughness.
- Granulated Sugar: Beyond simply adding sweetness, sugar also contributes to the scone’s tenderness and helps with browning, giving them that appealing golden crust.
- Baking Powder: We use double-acting baking powder, which provides leavening in two stages: once when mixed with wet ingredients (acid) and again when heated in the oven. This ensures a stable and consistent rise, resulting in light and fluffy scones. The double-acting nature also means you can prepare the dough ahead of time and even freeze it without losing leavening power.
- Kosher Salt: A small amount of kosher salt is essential for balancing the sweetness and enhancing the overall flavor profile of the scones. It brings out the best in the strawberries and lemon.
- Unsalted Butter: Always use very cold, unsalted butter for baking, as it allows you to control the exact amount of salt in your recipe. Cold butter, when cut into the flour, creates pockets of steam during baking, which are responsible for the scone’s desirable flaky layers. It also coats gluten strands, shortening them and preventing the dough from becoming tough.
- Lemon Zest: The zest of a fresh lemon adds a bright, aromatic counterpoint to the sweet strawberries. Remember to zest only the vibrant yellow part of the peel, as the white pith underneath can be bitter. This concentrated flavor truly elevates the scone.
- Turbinado Sugar: This coarse sugar is perfect for sprinkling on top of the scones before baking. It adds a beautiful sparkle, a pleasant crunch, and a delicate caramelization to the crust, enhancing both texture and flavor.
Refer to the complete recipe card below for precise measurements and quantities.
Creative Variations
While these Strawberry Scones are perfect as they are, don’t hesitate to experiment with different flavors and toppings to suit your taste or the season:
- Cinnamon or Chocolate Chips: For a completely different but equally delicious direction, substitute the fresh strawberries with either decadent chocolate chips or warm, comforting cinnamon chips. These variations are just as popular as demonstrated in my chocolate chip scones or cinnamon scones with cream cheese glaze. You could even create a delightful mixture of flavors! Let me know in the comments how your unique combinations turn out!
- Add a Luscious Glaze: Elevate your scones with a quick and easy glaze. A simple lemon glaze, made by whisking together powdered sugar and a touch of lemon juice, would perfectly complement the strawberry and lemon flavors. For an even more indulgent treat, I wholeheartedly recommend drizzling these scones with a strawberry glaze crafted from homemade strawberry jam, similar to the one featured in my recipe for Strawberry Lemon Cake Donuts!
- Embrace Seasonal Fruit: Adapt this versatile scone recipe throughout the year by swapping strawberries for other in-season fruits. In autumn, try warming Spiced Apple Scones, and for a summer delight, prepare a batch of my vibrant Blueberry Scones. The possibilities are endless for year-round scone enjoyment!
How to Bake the Perfect Strawberry Scones
Creating these delightful strawberry scones is a rewarding experience. Follow these detailed steps to ensure perfectly tender, flavorful results every time.
Further details and precise measurements are provided in the comprehensive recipe card below!
Make the Scone Dough:
Step 1: Prepare the Strawberries. Begin by dicing your fresh strawberries into small, uniform pieces. After dicing, spread them out on a few layers of paper towel and gently blot them dry. This crucial step helps remove excess moisture, preventing the dough from becoming soggy and ensuring the strawberries bake beautifully into the scones.
Step 2: Combine Wet Ingredients. In a separate medium bowl, combine the heavy cream, lightly beaten whole eggs, and vanilla extract. Use a whisk or a fork to mix these ingredients until they are completely smooth and well-incorporated. Set this mixture aside; having your wet ingredients ready ensures you can add them quickly to the dry ingredients, preventing overmixing later.
Step 3: Mix Dry Ingredients. In the bowl of a stand mixer fitted with the paddle attachment (or a large mixing bowl if mixing by hand), add the all-purpose flour, granulated sugar, kosher salt, and baking powder. Mix these dry ingredients on low speed, or stir by hand, just enough to ensure they are evenly distributed. This prevents pockets of leavening agents or salt in the final scone.
Pro Tip for Enhanced Lemon Flavor: For an even more pronounced and fragrant lemon essence, zest your lemon directly into the granulated sugar. Then, use your fingertips to rub the lemon zest into the sugar. This action releases the essential oils from the zest, infusing the sugar with intense lemon flavor. If you choose this method, add this lemon-infused sugar during Step 5 instead of Step 3!
Step 4: Incorporate Cold Butter. Add the small, cold cubes of unsalted butter to the dry ingredient mixture. Mix on low speed, or cut in by hand using a pastry blender or your fingertips, until the butter is no longer visible as distinct cubes. The mixture should resemble coarse crumbs, with the largest chunks of butter being about the size of a small pea. This step is critical for creating flaky layers and a tender crumb, as the cold butter will create steam pockets during baking.
TIP: If mixing by hand, a pastry blender is an invaluable tool for perfectly cutting in the butter, much like demonstrated in this helpful pie crust tutorial!
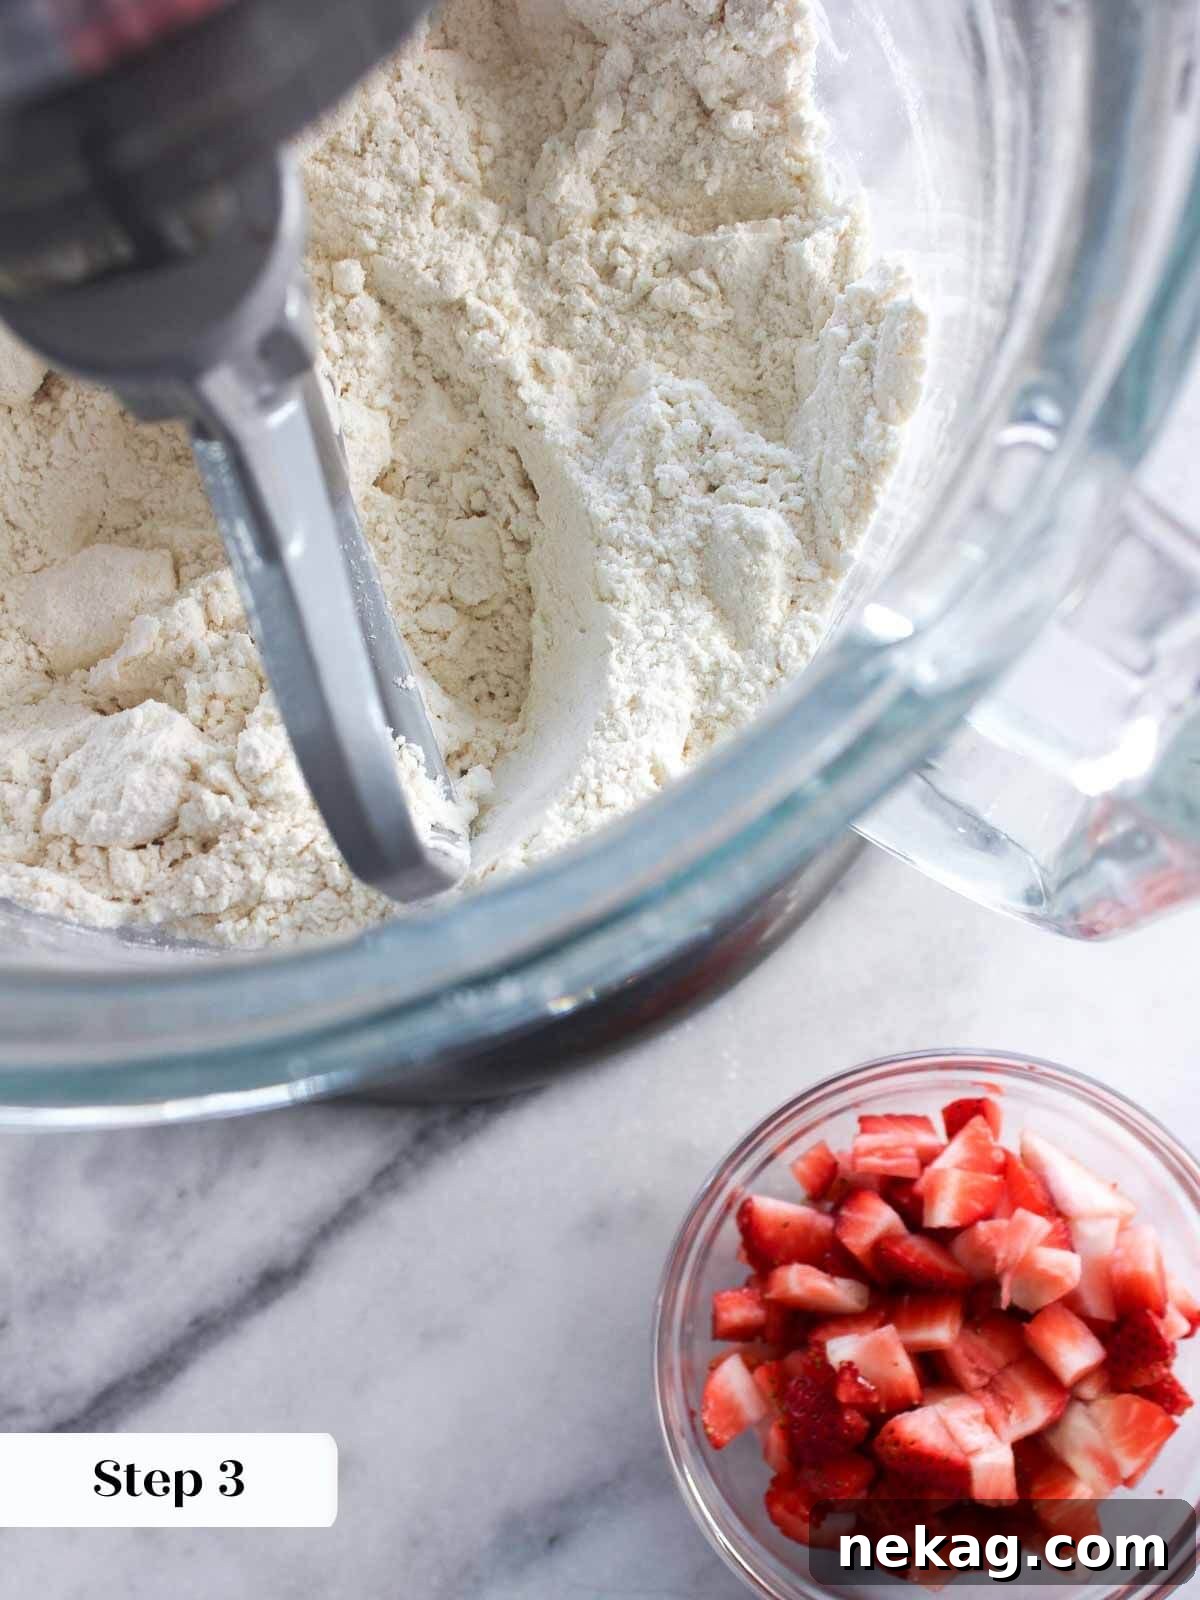
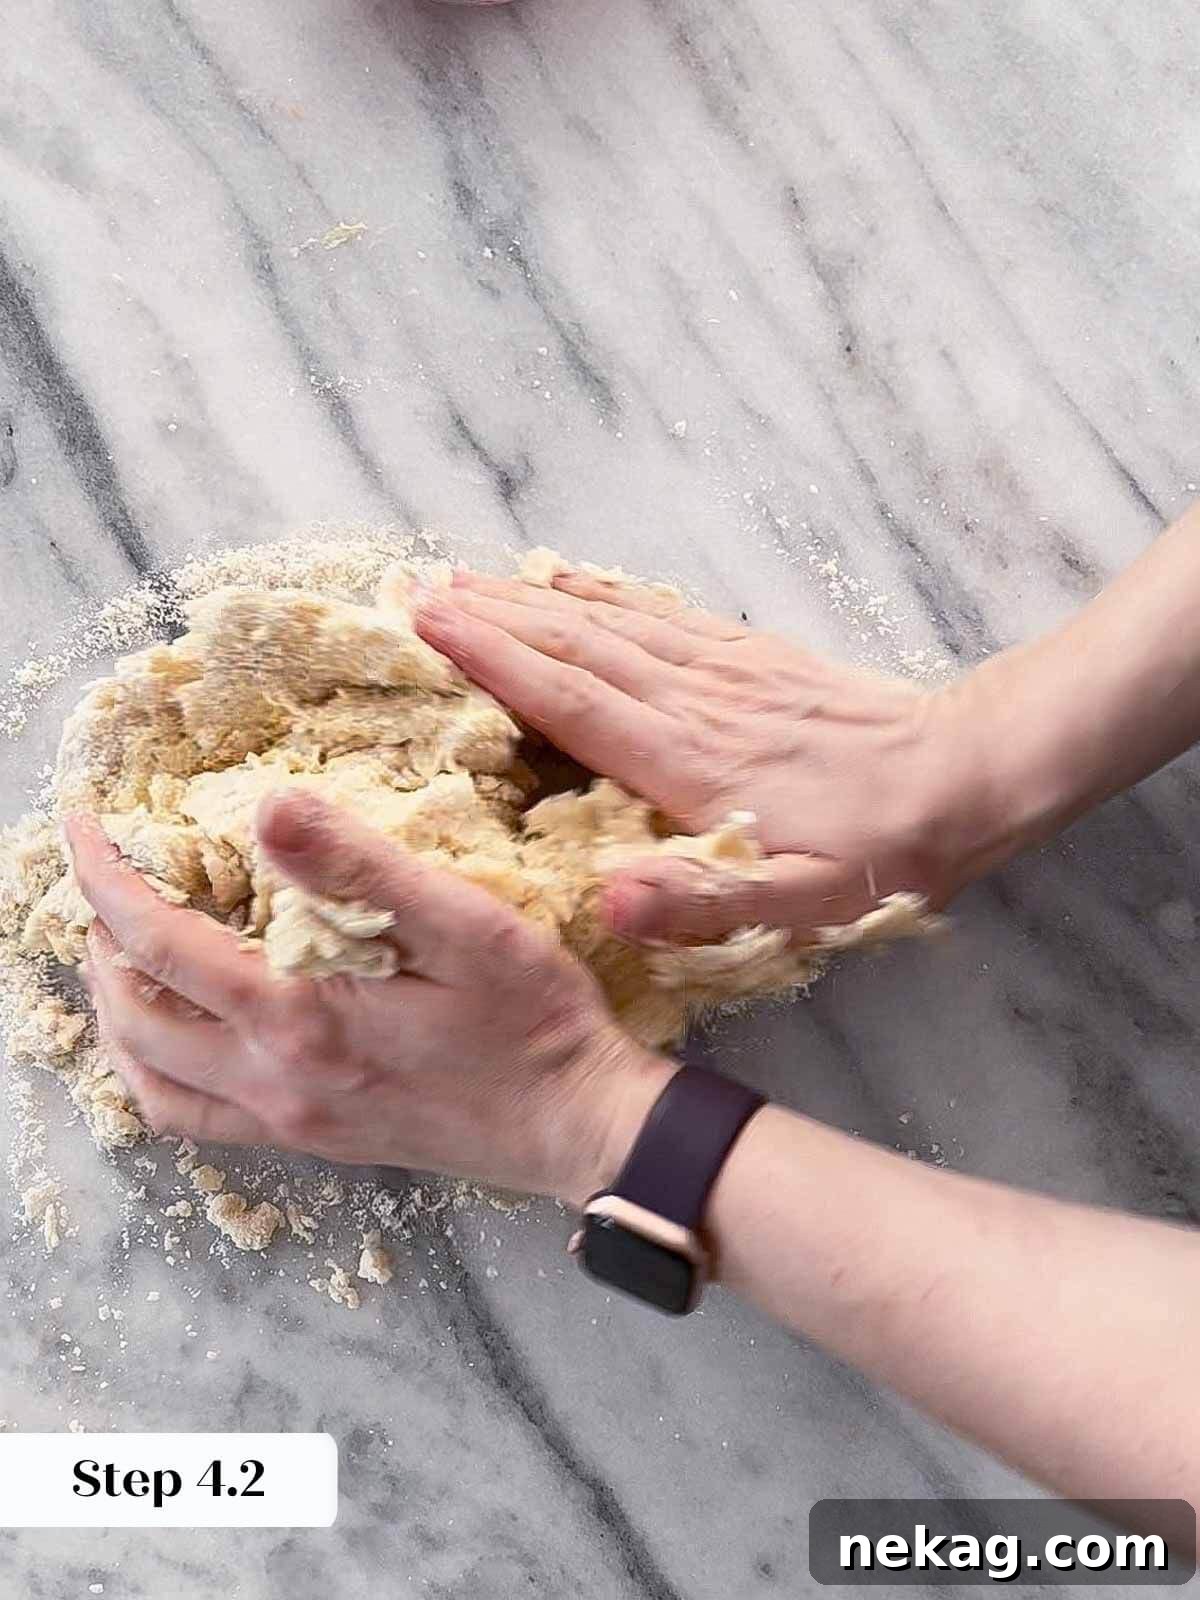
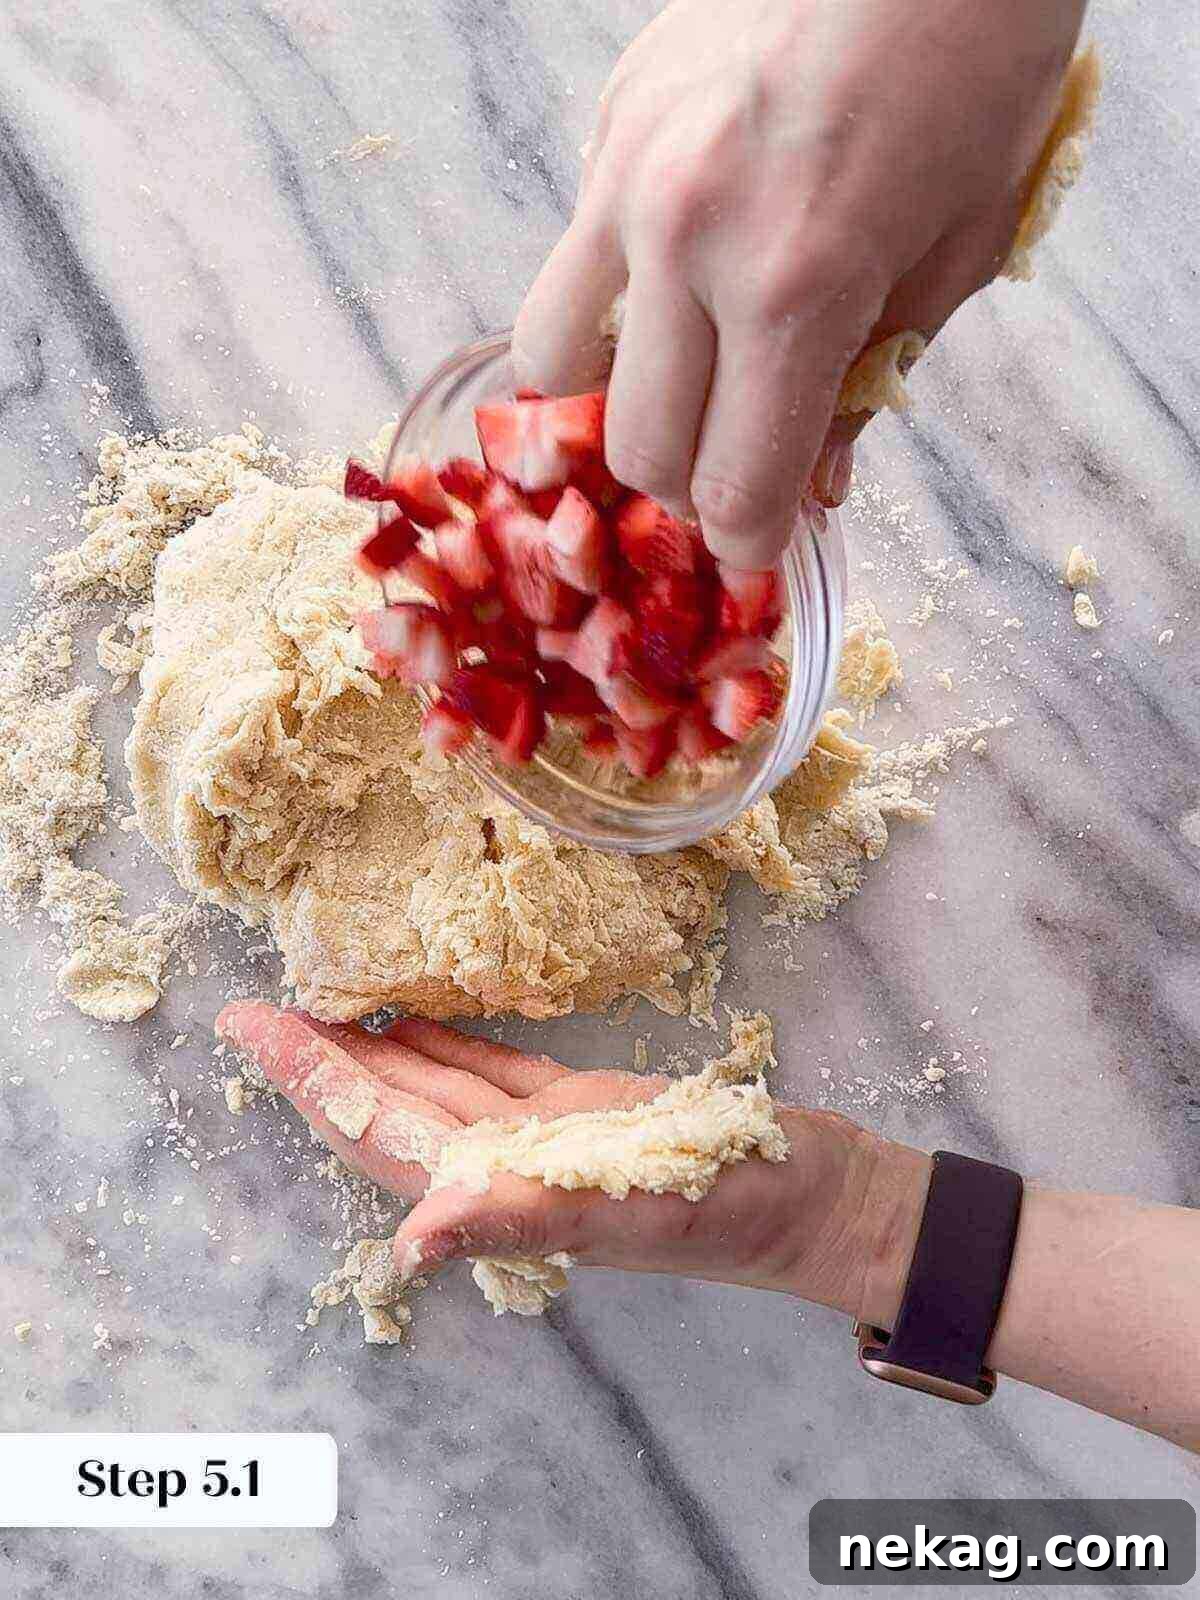
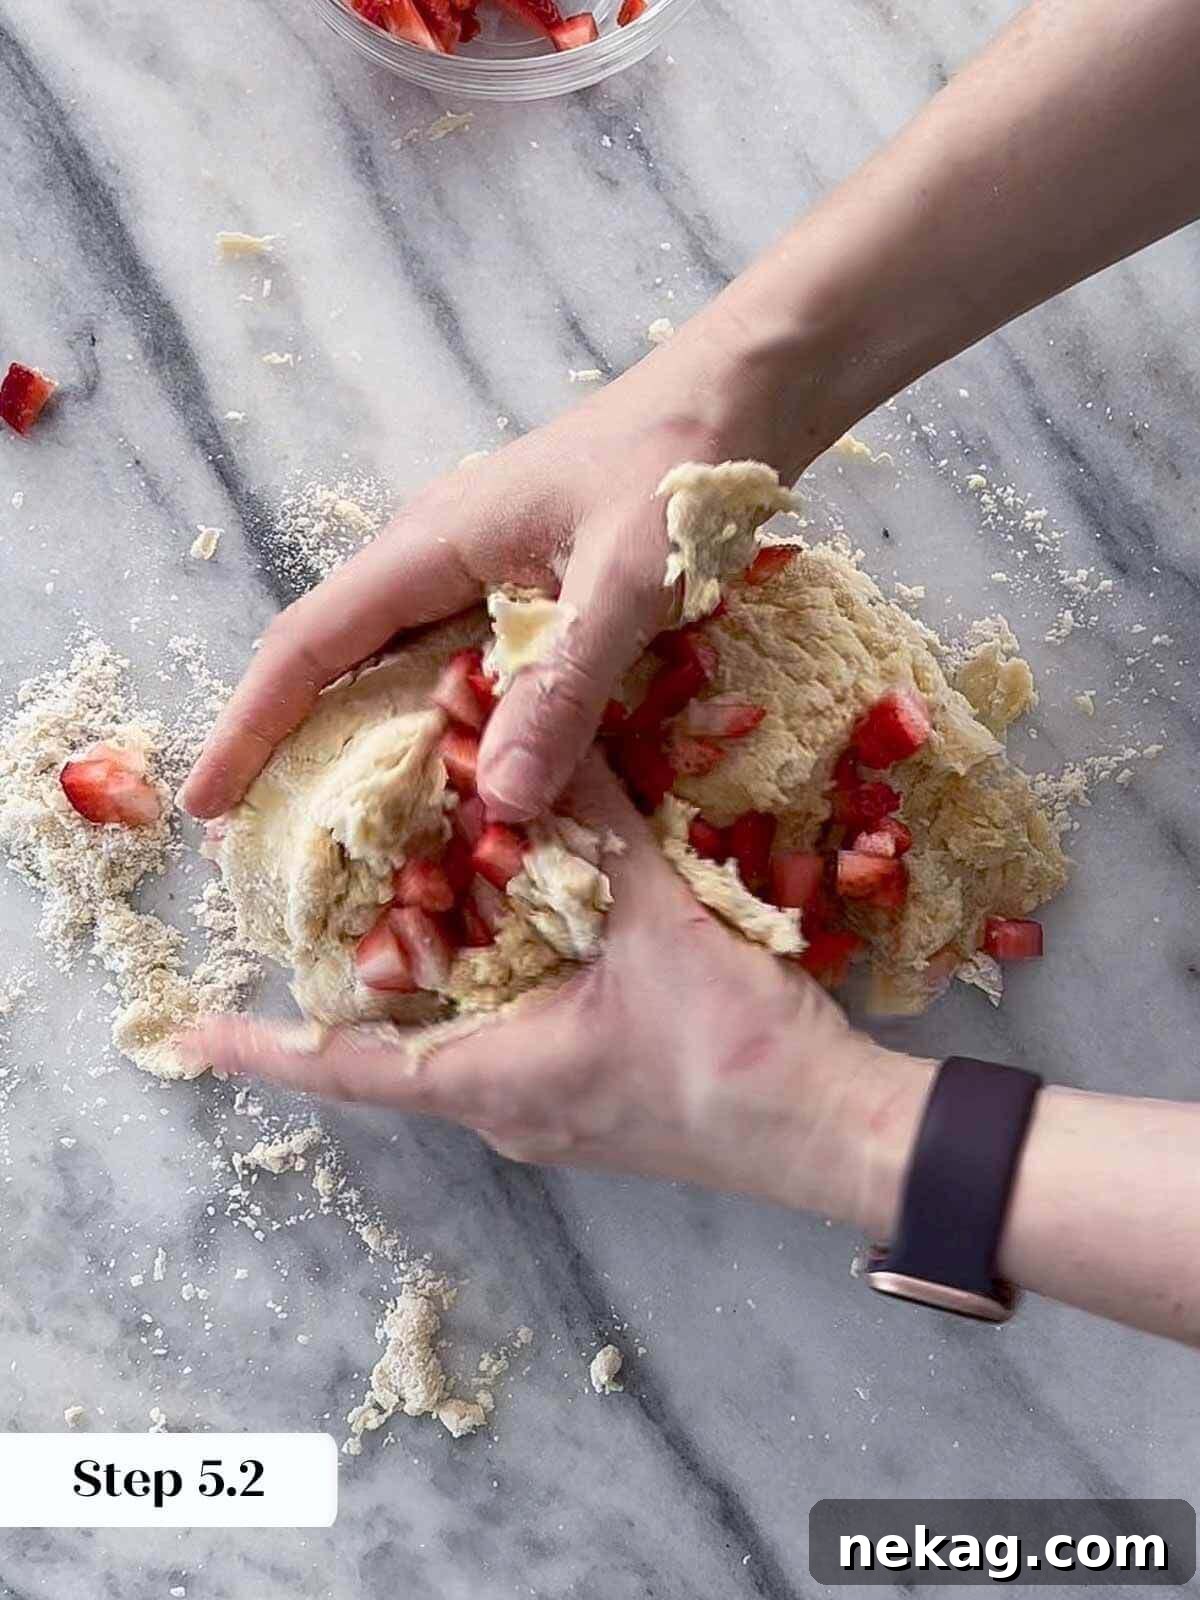
Step 5: Add Strawberries and Lemon Zest. To the flour and butter mixture, add the diced and blotted strawberries along with the fresh lemon zest. Gently toss to coat the fruit and zest evenly with flour. This prevents the strawberries from clumping together and helps distribute their flavor throughout the dough.
Step 6: Incorporate Wet into Dry Ingredients. With the mixer running on low speed, slowly and gradually pour the whisked cream mixture into the flour mixture. Mix until the ingredients are *almost* fully incorporated. The dough will still look a bit shaggy, with some dry bits at the bottom of the bowl. Be careful not to overmix at this stage, as it can lead to tough scones.
Mixing by Hand Alternative: If you’re mixing by hand, create a well in the center of the flour mixture. Pour the cream mixture into this well. Using a wooden spoon or a sturdy spatula, gently mix from the center outwards until the dough is just moistened. Don’t worry if there are still some straggling flour and butter crumbs at the bottom; these will be incorporated in the next step.
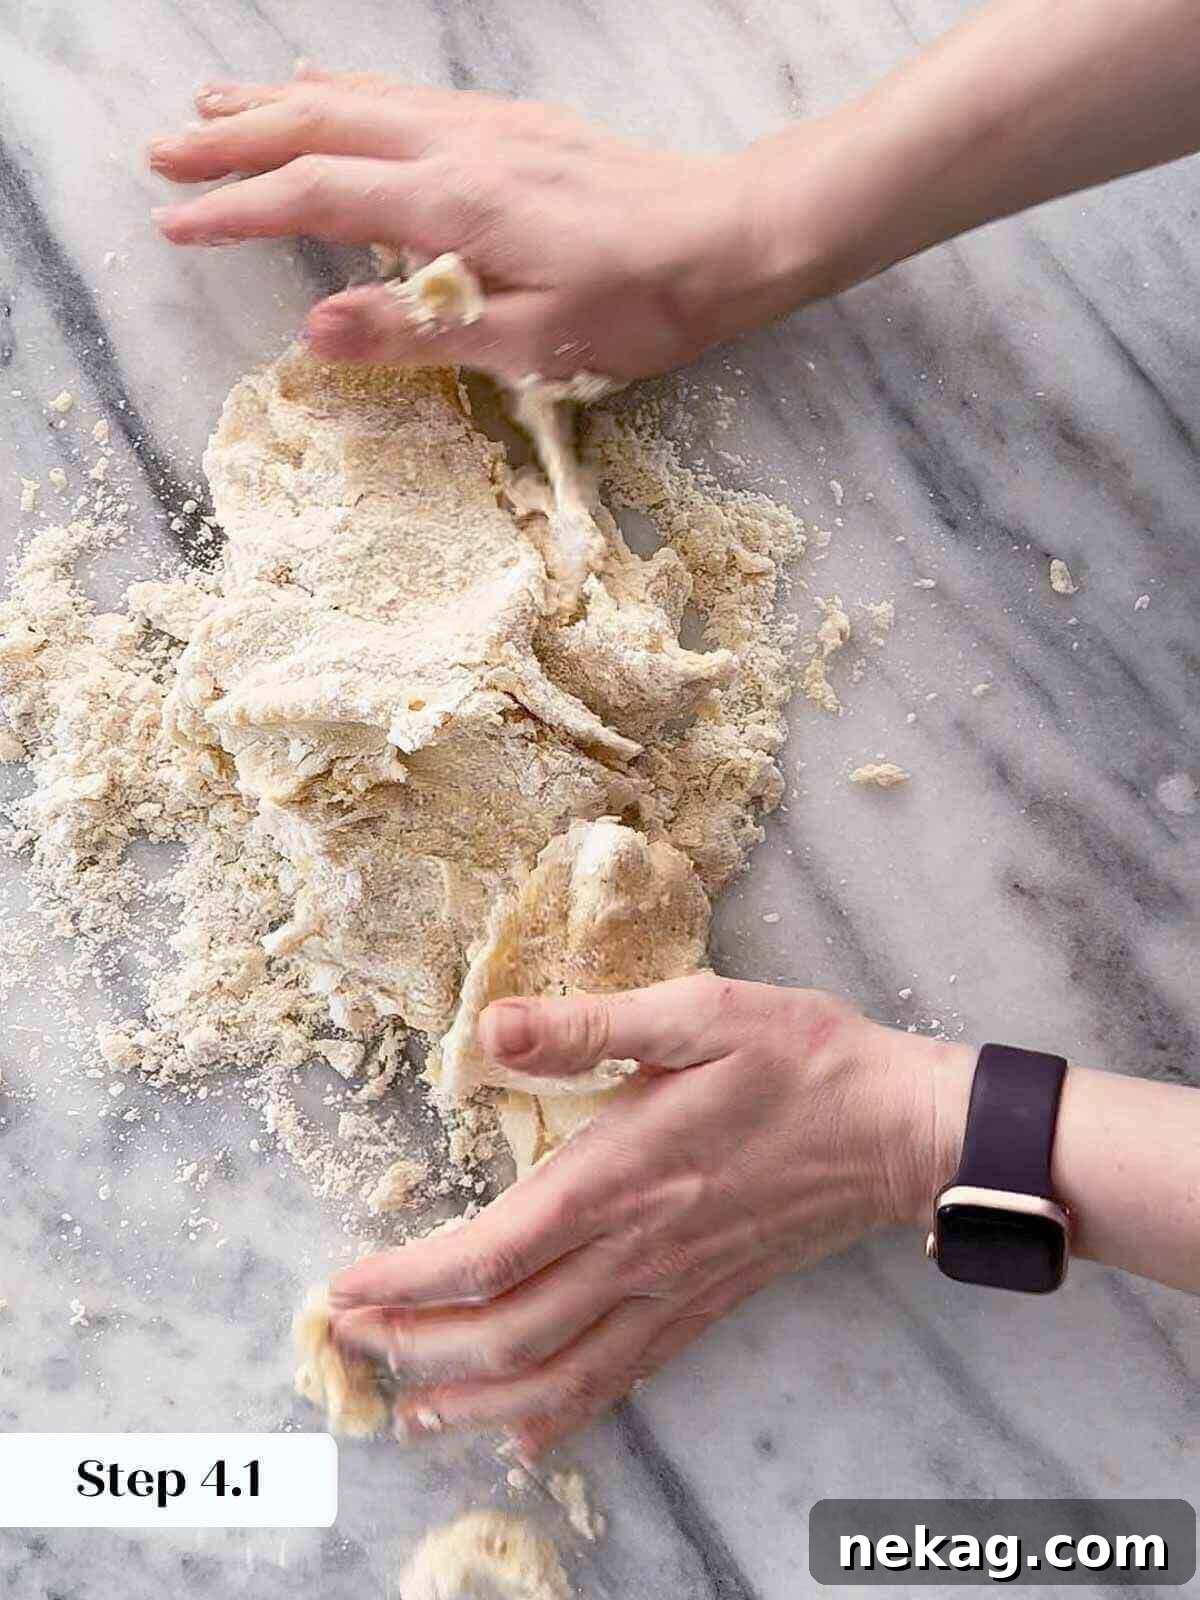
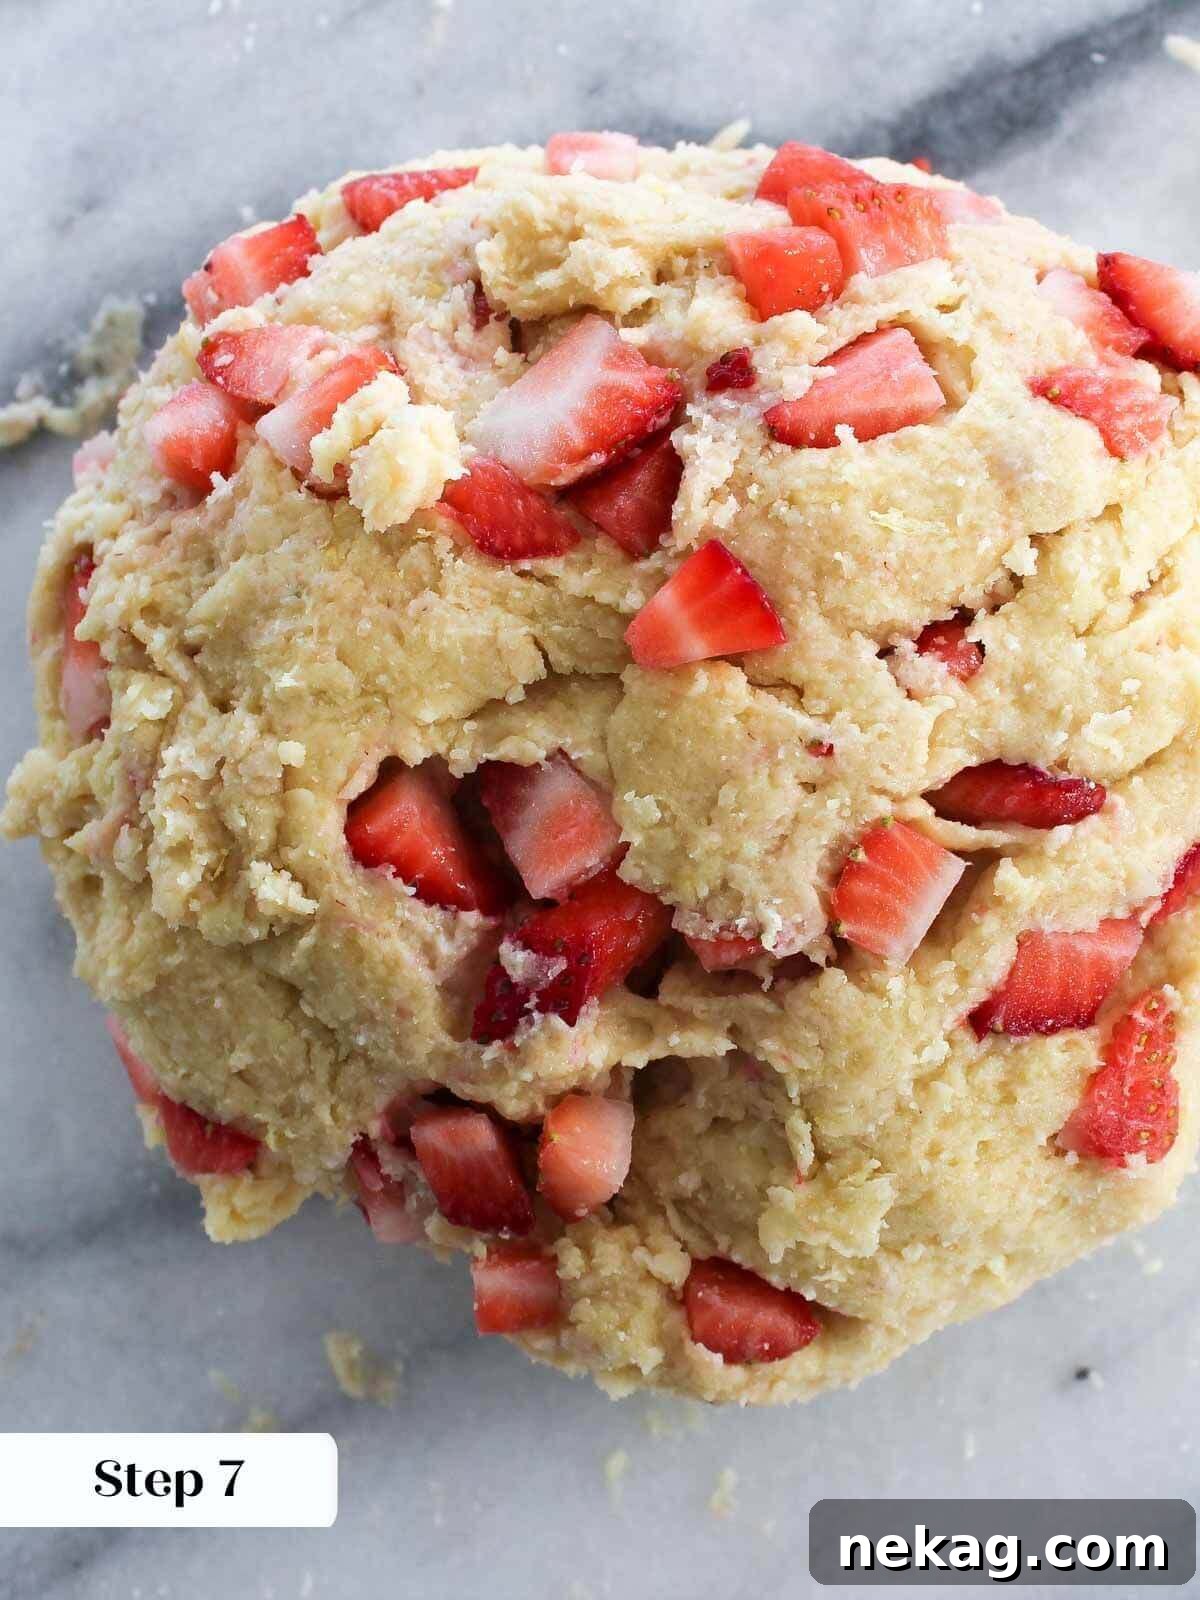
Step 7: Lightly Knead the Dough. Dump the shaggy dough out onto a generously floured surface. Using your hands, gently gather the dough together and knead it with love and care. This process should be minimal – just enough to bring the dough into a cohesive ball, incorporating any remaining dry bits. Overworking the dough will develop gluten excessively, resulting in tough scones. Aim for a soft, slightly sticky dough that just holds its shape.
Portion and Bake:
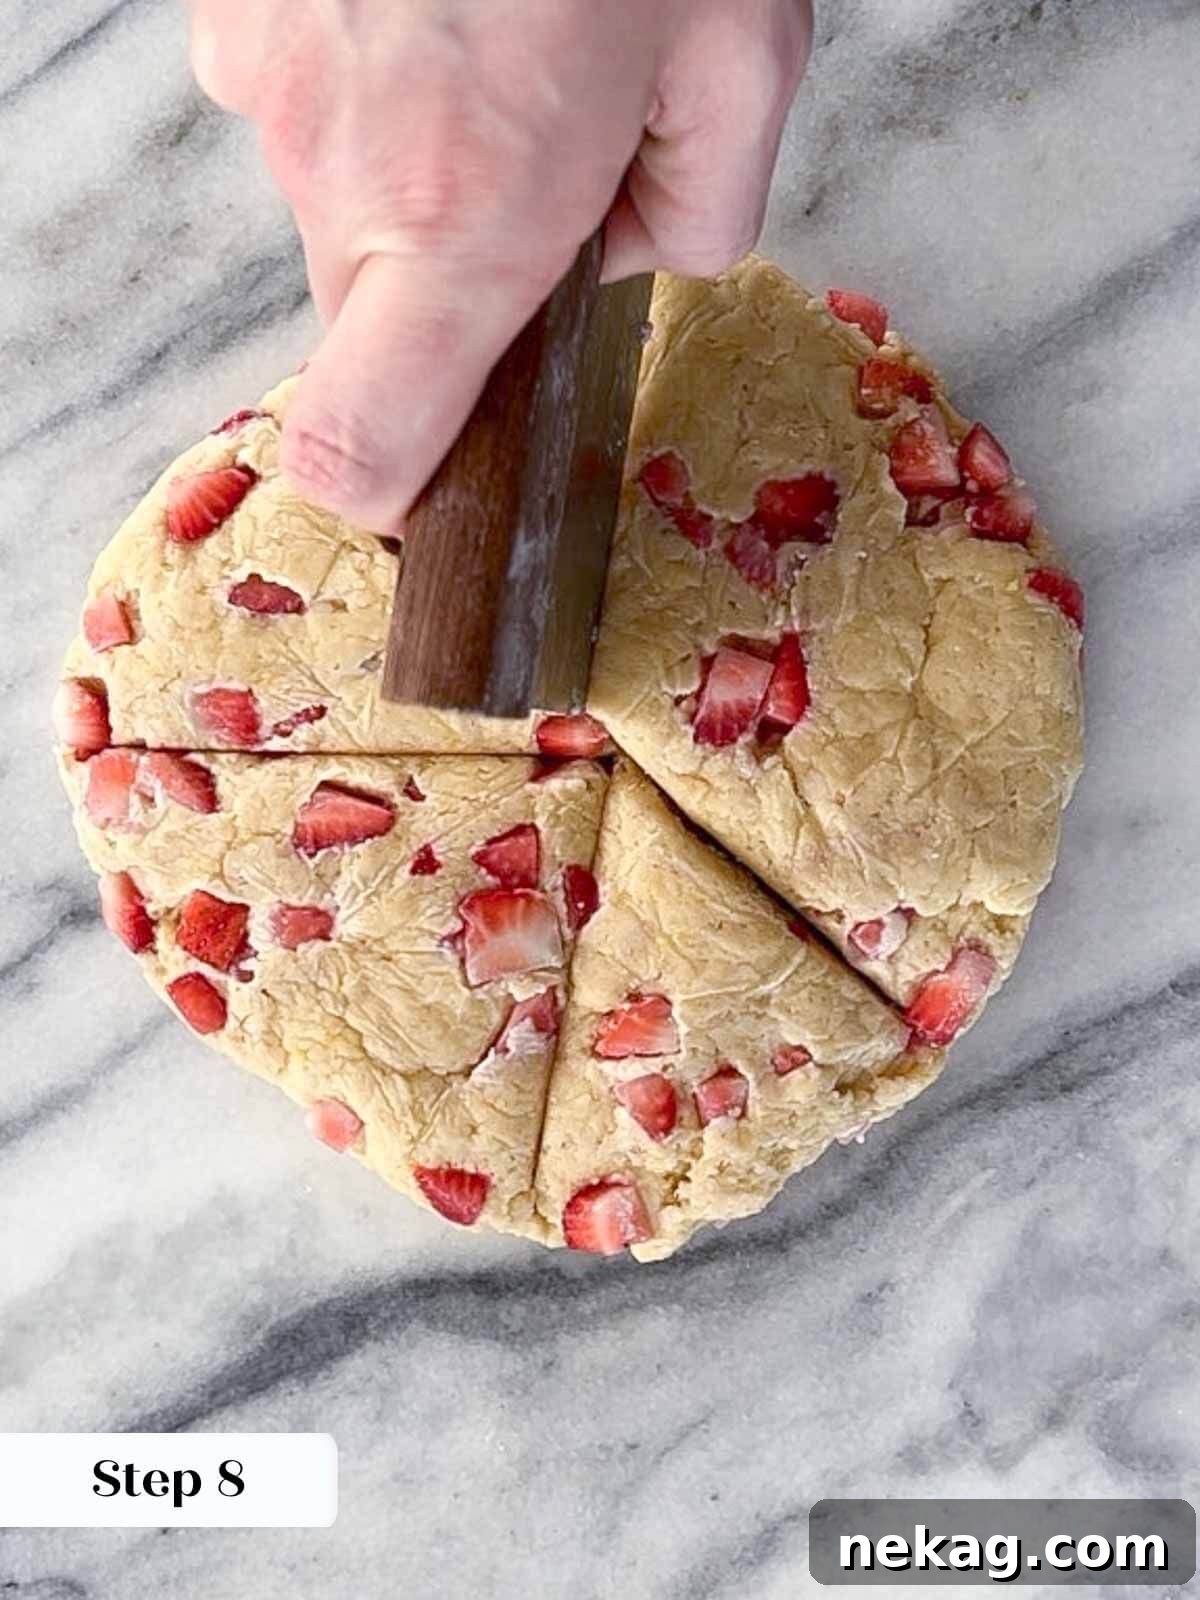
Step 8: Shape and Chill the Dough. Gently press the dough out onto your floured surface to achieve a uniform thickness of approximately 1 inch. Using a floured bench scraper, a sharp knife, or a pastry cutter, cut the dough into 6 equal triangles (or use a round cutter for traditional round scones). Carefully transfer these portions to a parchment-lined baking sheet, spacing them about 1 inch apart to allow for proper airflow during baking.
Essential Chilling for Best Texture: To truly nail that perfect scone texture and ensure optimal rise, it is highly recommended to chill the dough completely before baking. This typically takes around 2 hours in the refrigerator. The cold butter will prevent the scones from spreading too much in the oven, leading to a taller, flakier result. Alternatively, you can wrap the cut dough very well in plastic wrap and freeze it. This scone recipe bakes beautifully straight from frozen, making it ideal for meal prepping!
Step 9: Preheat Your Oven. Once the scones are chilled (or you’re ready to bake immediately), preheat your oven to 325°F (160°C). Ensuring the oven is at the correct temperature before baking is crucial for a consistent and proper rise.
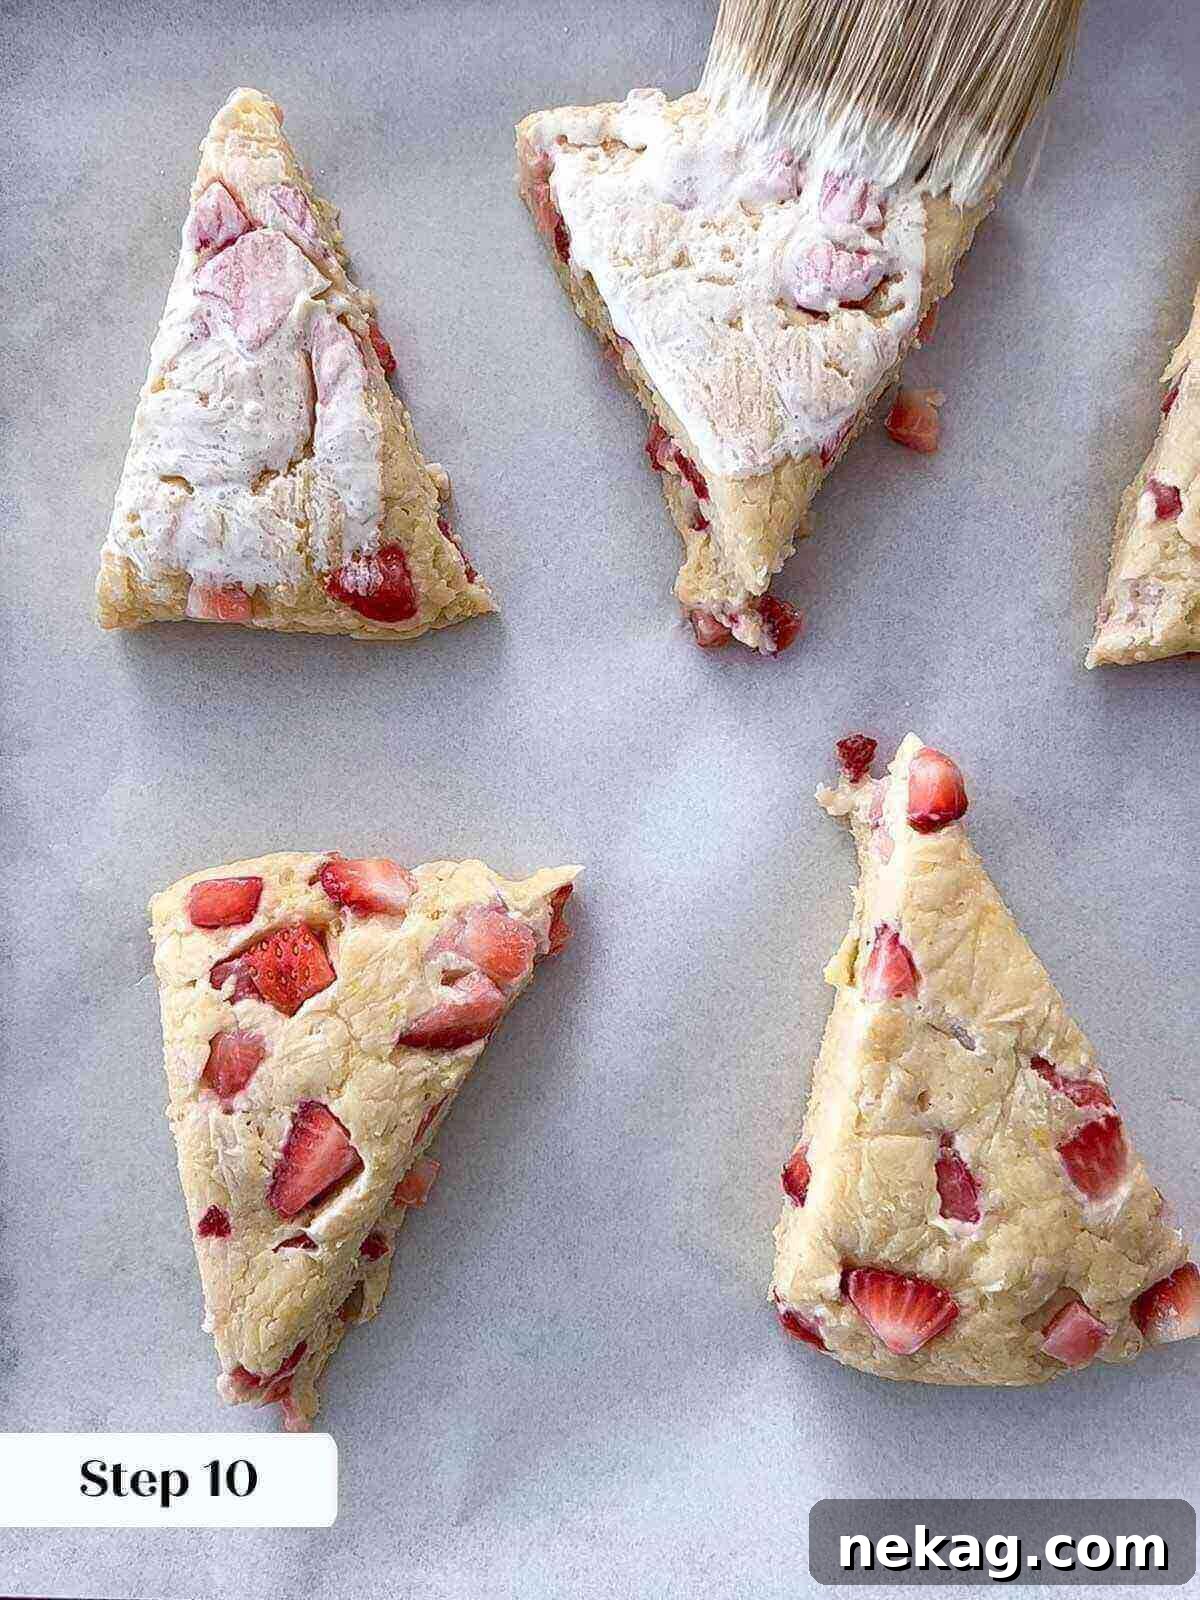
Step 10: Prepare for Baking. Before placing them in the oven, brush the tops of each scone generously with a little extra heavy cream. This wash promotes a rich, golden-brown crust. Then, sprinkle a healthy amount of turbinado sugar over the brushed tops for added sweetness and a delightful crunch.
Step 11: Bake to Golden Perfection. Bake the scones in the preheated oven for approximately 18-22 minutes. Baking time can vary depending on your oven, so watch for visual cues: the scones should be beautifully golden brown around the edges, visibly puffed, and when gently touched in the center, they should offer a slight resistance, indicating they are cooked through.
Avoiding Overbaking: Be mindful not to overbake your scones. If they feel overly firm or hard when touched, they are likely overdone, which will result in a dry texture. For an extra check, you can insert a cake tester or toothpick into the center of a scone; it should come out clean when fully baked.
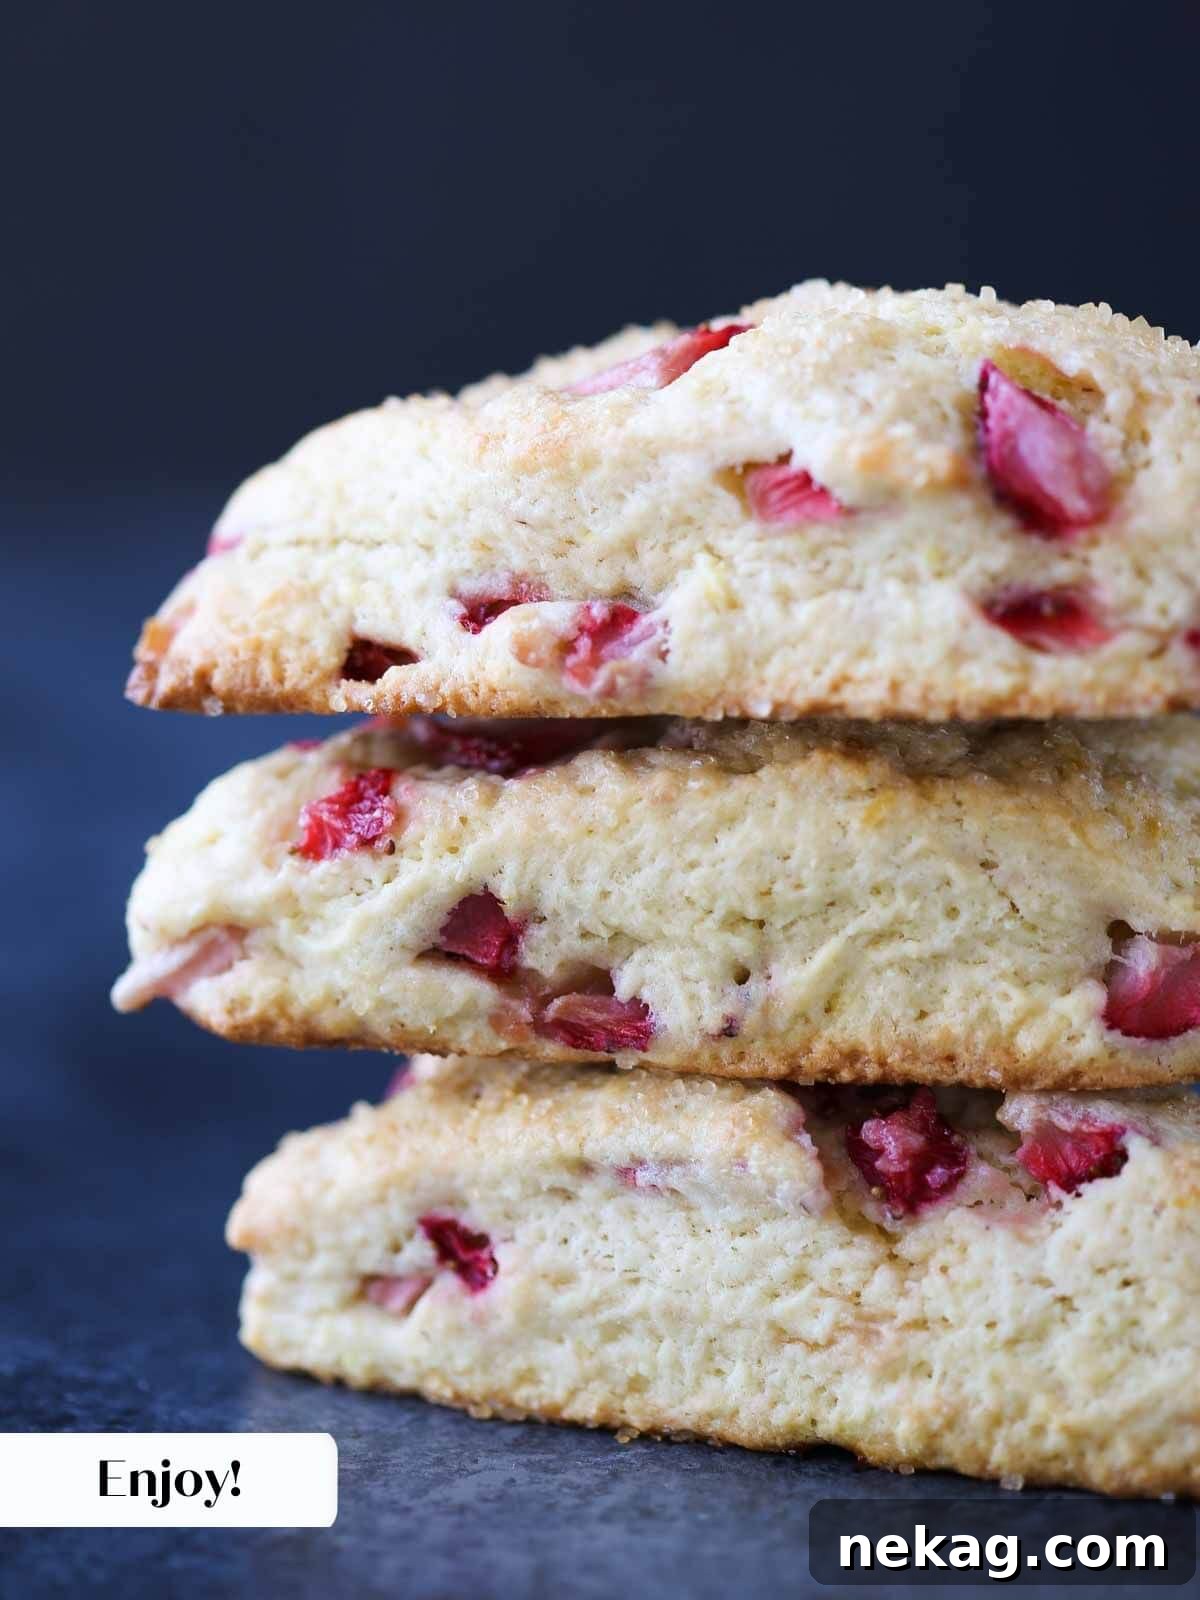
Step 12: Cool and Enjoy! Once baked, carefully remove the baking sheet from the oven. Allow the scones to cool completely on the baking sheet for the best texture and to prevent them from becoming soggy. However, if you can’t resist, they are absolutely divine eaten warm from the oven! Serve them immediately with your favorite accompaniments.
Chef Lindsey’s Pro Tip: Kneading for Perfection
Mastering the Kneading Method: The way you knead scone dough is paramount to its final texture. After bringing the dough together on a floured surface, gather it into a cohesive ball. Then, gently press the dough away from you with the heels of your hands, just enough to stretch it slightly, and immediately fold it back onto itself. Repeat this gentle pressing and folding motion about 5-7 times, turning the dough a quarter turn after each fold. The goal is to create a unified dough without overworking it. A few remaining crumbs are perfectly acceptable, as overworking the dough will develop too much gluten, resulting in tough, chewy scones rather than light and tender ones.
Frequently Asked Questions
Proper storage ensures your delicious scones stay fresh for longer. Baked scones can be stored in an airtight container at room temperature for up to 3 days, in the refrigerator for up to 7 days, or frozen for up to 3 months. For optimal freshness and that “just baked” taste, I highly recommend freezing the unbaked, cut dough. This way, you can bake them as needed, straight from the freezer, ensuring a warm, fresh scone whenever the craving strikes.
To achieve consistently excellent scones, avoid a few critical mistakes. Firstly, never use warm butter; cold, cubed butter is essential for flakiness. Secondly, improper mixing methods are detrimental. Always cut cold butter completely into your dry ingredients until it resembles coarse crumbs. Thirdly, mix your wet ingredients separately before adding them to the dry, allowing for quick and minimal incorporation. The biggest culprit for tough scones is overdeveloping the gluten, so mix the dough just until it comes together, and knead it gently and sparingly. By avoiding these pitfalls, you’ll maintain that desired tender scone texture.
Several factors can lead to scones that are less than perfectly soft. The most common reason is overbaking; if scones feel firm or hard to the touch, they’ve likely spent too long in the oven, causing them to dry out. Another contributing factor can be insufficient fat in the dough, which compromises moisture. Additionally, if the cold butter wasn’t properly cut into the flour, it won’t create those crucial steam pockets for flakiness and moisture, leading to a tougher texture. Lastly, overworking the dough develops too much gluten, making the scones chewy and dense instead of tender. Avoiding these mistakes will significantly improve your scone’s softness and moisture.
For a truly **classic** strawberry scone pairing, you simply must try them with authentic clotted cream – a rich, thick cream that is the traditional accompaniment to British scones. Softened butter or a luxurious homemade maple butter offer simpler yet equally delicious options. A dollop of easy strawberry jam, mirroring the flavors within, or sweet peach preserves would also be wonderful. For an extra bright and tangy touch, a spoonful of easy lemon curd would exquisitely complement the lemon notes in the scones. Pair these delightful treats with a mug of your favorite hot tea for the ultimate afternoon tea experience, or with a freshly brewed cup of coffee for a perfect breakfast.
Absolutely! Preparing scone dough in advance is a fantastic time-saver. You can prepare the dough up to the point of cutting out the individual scones (Step 8). Place the cut scones on a parchment-lined baking sheet and chill them in the refrigerator for up to 24 hours. For longer storage, freeze the cut scones solid on the baking sheet, then transfer them to an airtight freezer bag for up to 3 months. When ready to bake, you can bake them directly from the refrigerator or freezer, simply adding a few extra minutes to the baking time if frozen.
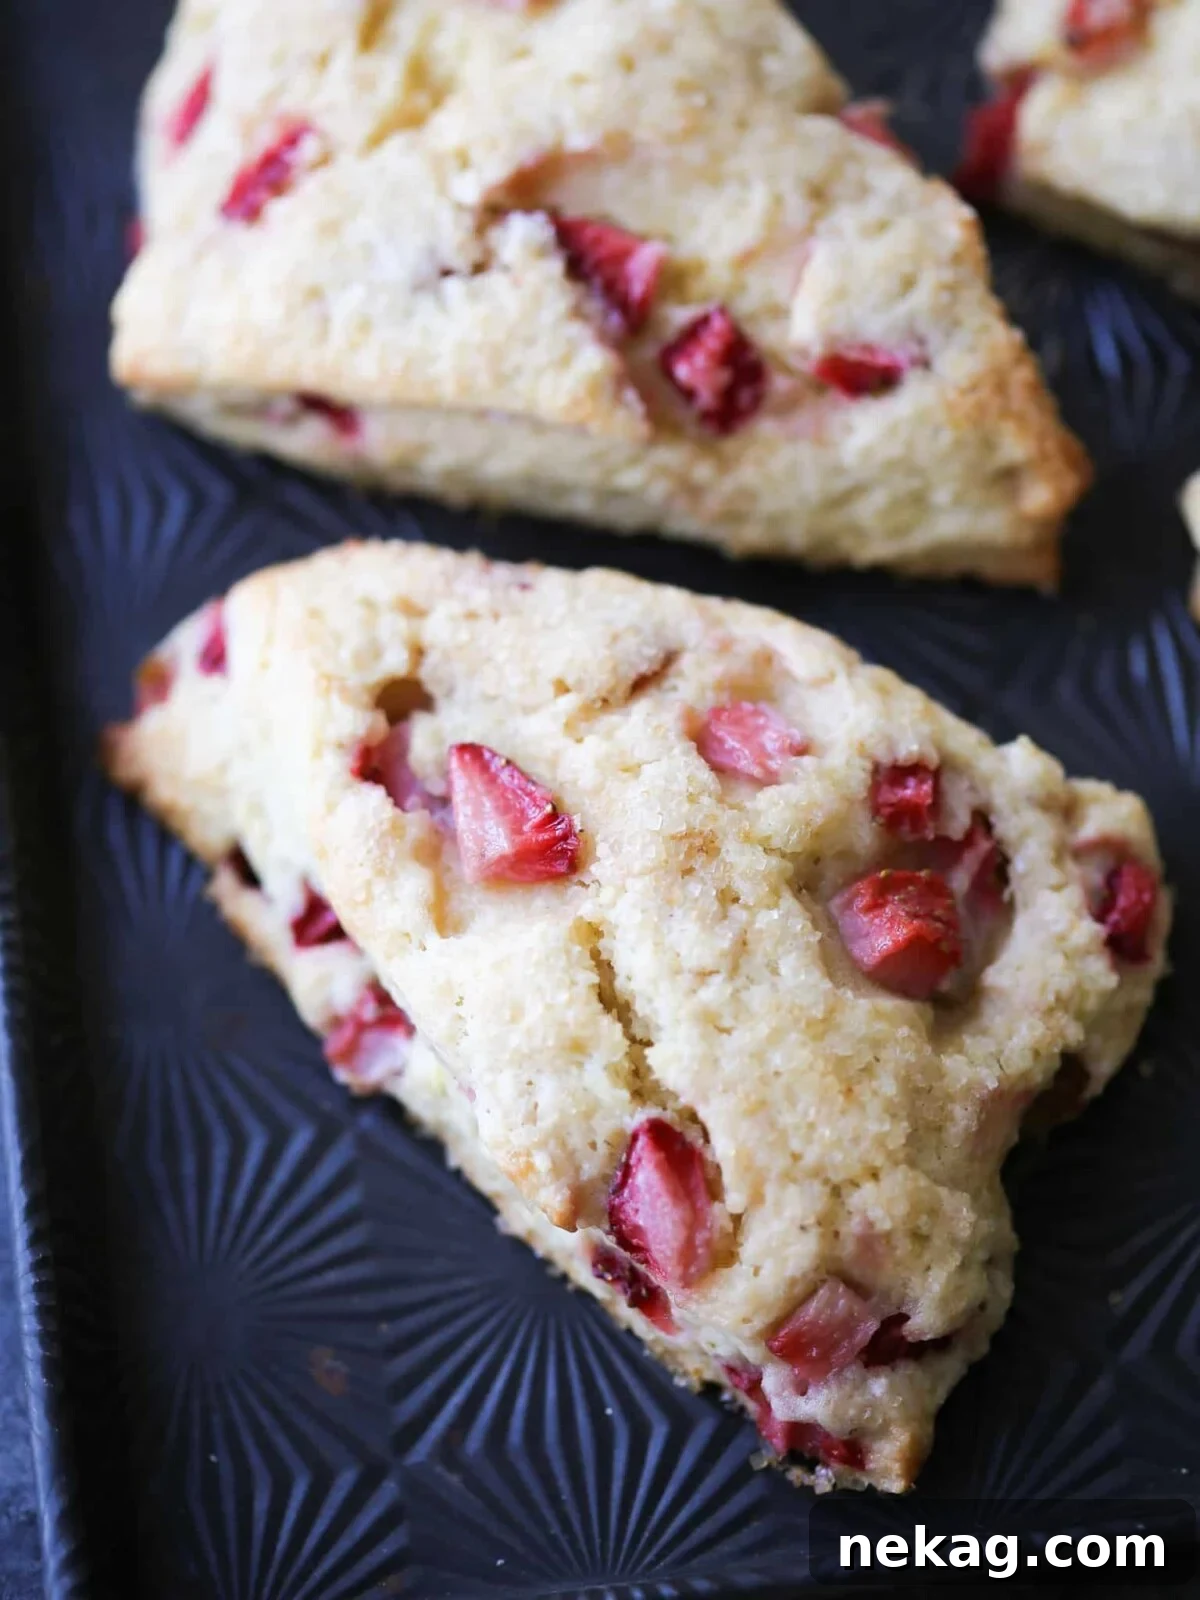
If you tried this recipe and absolutely loved it, please take a moment to leave a 🌟 star rating and share your thoughts in the comments below. I genuinely love hearing from you; your feedback and comments truly brighten my day!
Strawberry Scones
Chef Lindsey
18 mins
15 mins
1 hr
1 hr 33 mins
12 Scones
Comment
Print Recipe
Ingredients
- 1 cup fresh strawberries washed, hulled, chopped and blotted dry
- ½ cup heavy cream
- 2 eggs lightly beaten
- 1 teaspoon vanilla extract
- 2 ½ cups all-purpose flour
- ½ cup granulated sugar
- 1 teaspoon baking powder
- ½ teaspoon kosher salt
- ½ cup unsalted butter cut in small cubes, very cold
- 1 tablespoon lemon zest (from 1 large lemon, only the bright yellow parts!)
- 1 tablespoon heavy cream (for brushing)
- Turbinado sugar (for sprinkling)
Instructions
Make the scone dough:
- Dice strawberries and blot them thoroughly dry with a paper towel.
- In a separate bowl, combine the ½ cup heavy cream, eggs, and vanilla extract with a whisk or fork until smooth. Set aside.
- In the bowl of a stand mixer fitted with the paddle attachment (or a large bowl), add the flour, ½ cup sugar, salt, and baking powder. Mix on low speed, or by hand, just enough to distribute the ingredients evenly.
- Add the cold, cubed butter and mix on low speed until the butter is no longer visible and the mixture resembles coarse crumbs, with the largest butter pieces being about the size of a pea.
- Add the blotted strawberries and lemon zest to the flour mixture. Gently toss to coat them with flour and distribute them evenly.
- With the mixer running on low speed, slowly pour the prepared cream mixture into the flour mixture. Mix just until the dough is almost incorporated and begins to come together. Do not overmix.
- Dump the shaggy dough out onto a well-floured surface. Gently knead it together (with love!) just until it forms a cohesive ball, incorporating any loose crumbs.
Portion and bake:
- Press the dough out to about a 1-inch thickness. Using a floured bench scraper, sharp knife, or pastry cutter, cut the dough into 6 equal triangles. Place them 1 inch apart on a parchment-lined baking sheet. For best results, chill the dough for at least 1 hour (or freeze for later).
- Preheat your oven to 325°F (160°C).
- Brush the tops of the scones with the remaining 1 tablespoon of heavy cream and sprinkle generously with Turbinado sugar.
- Bake the scones in the preheated oven for approximately 18-22 minutes, or until they are golden brown around the edges, beautifully puffed, and the centers offer a slight resistance when gently touched.
- Cool the scones completely on the baking sheets or enjoy them warm from the oven!
Notes
Flavor Tips: Just like any baked goods that use fresh strawberries, the dough around the strawberries may be a little moister than the rest of the scone. If this texture variation bothers you, consider using blueberries or dried fruit instead.
Variations: For an extra treat, make a quick glaze with milk, salt, powdered sugar, and a touch of vanilla extract (like my classic Donut Glaze) to drizzle over the cooled scones.
Storage: Baked scones will maintain their best quality for 3 days at room temperature in an airtight container, up to 7 days in the refrigerator, or can be frozen for up to 3 months. For optimal freshness, freezing the raw, cut dough and baking as needed is highly recommended.
Nutrition
Calories: 248kcal | Carbohydrates: 30g | Protein: 4g | Fat: 13g | Saturated Fat: 8g | Polyunsaturated Fat: 1g | Monounsaturated Fat: 3g | Trans Fat: 1g | Cholesterol: 60mg | Sodium: 147mg | Potassium: 71mg | Fiber: 1g | Sugar: 9g | Vitamin A: 442IU | Vitamin C: 8mg | Calcium: 40mg | Iron: 1mg
Breakfast
British
248
Before You Go
I sincerely hope you enjoyed creating and savoring this professional chef-tested recipe for Strawberry Scones with Lemon Zest. It’s a true classic designed to bring joy to your kitchen and your palate. Don’t stop here – explore our collection of other delicious, chef-developed scone recipes to continue your baking adventure!