
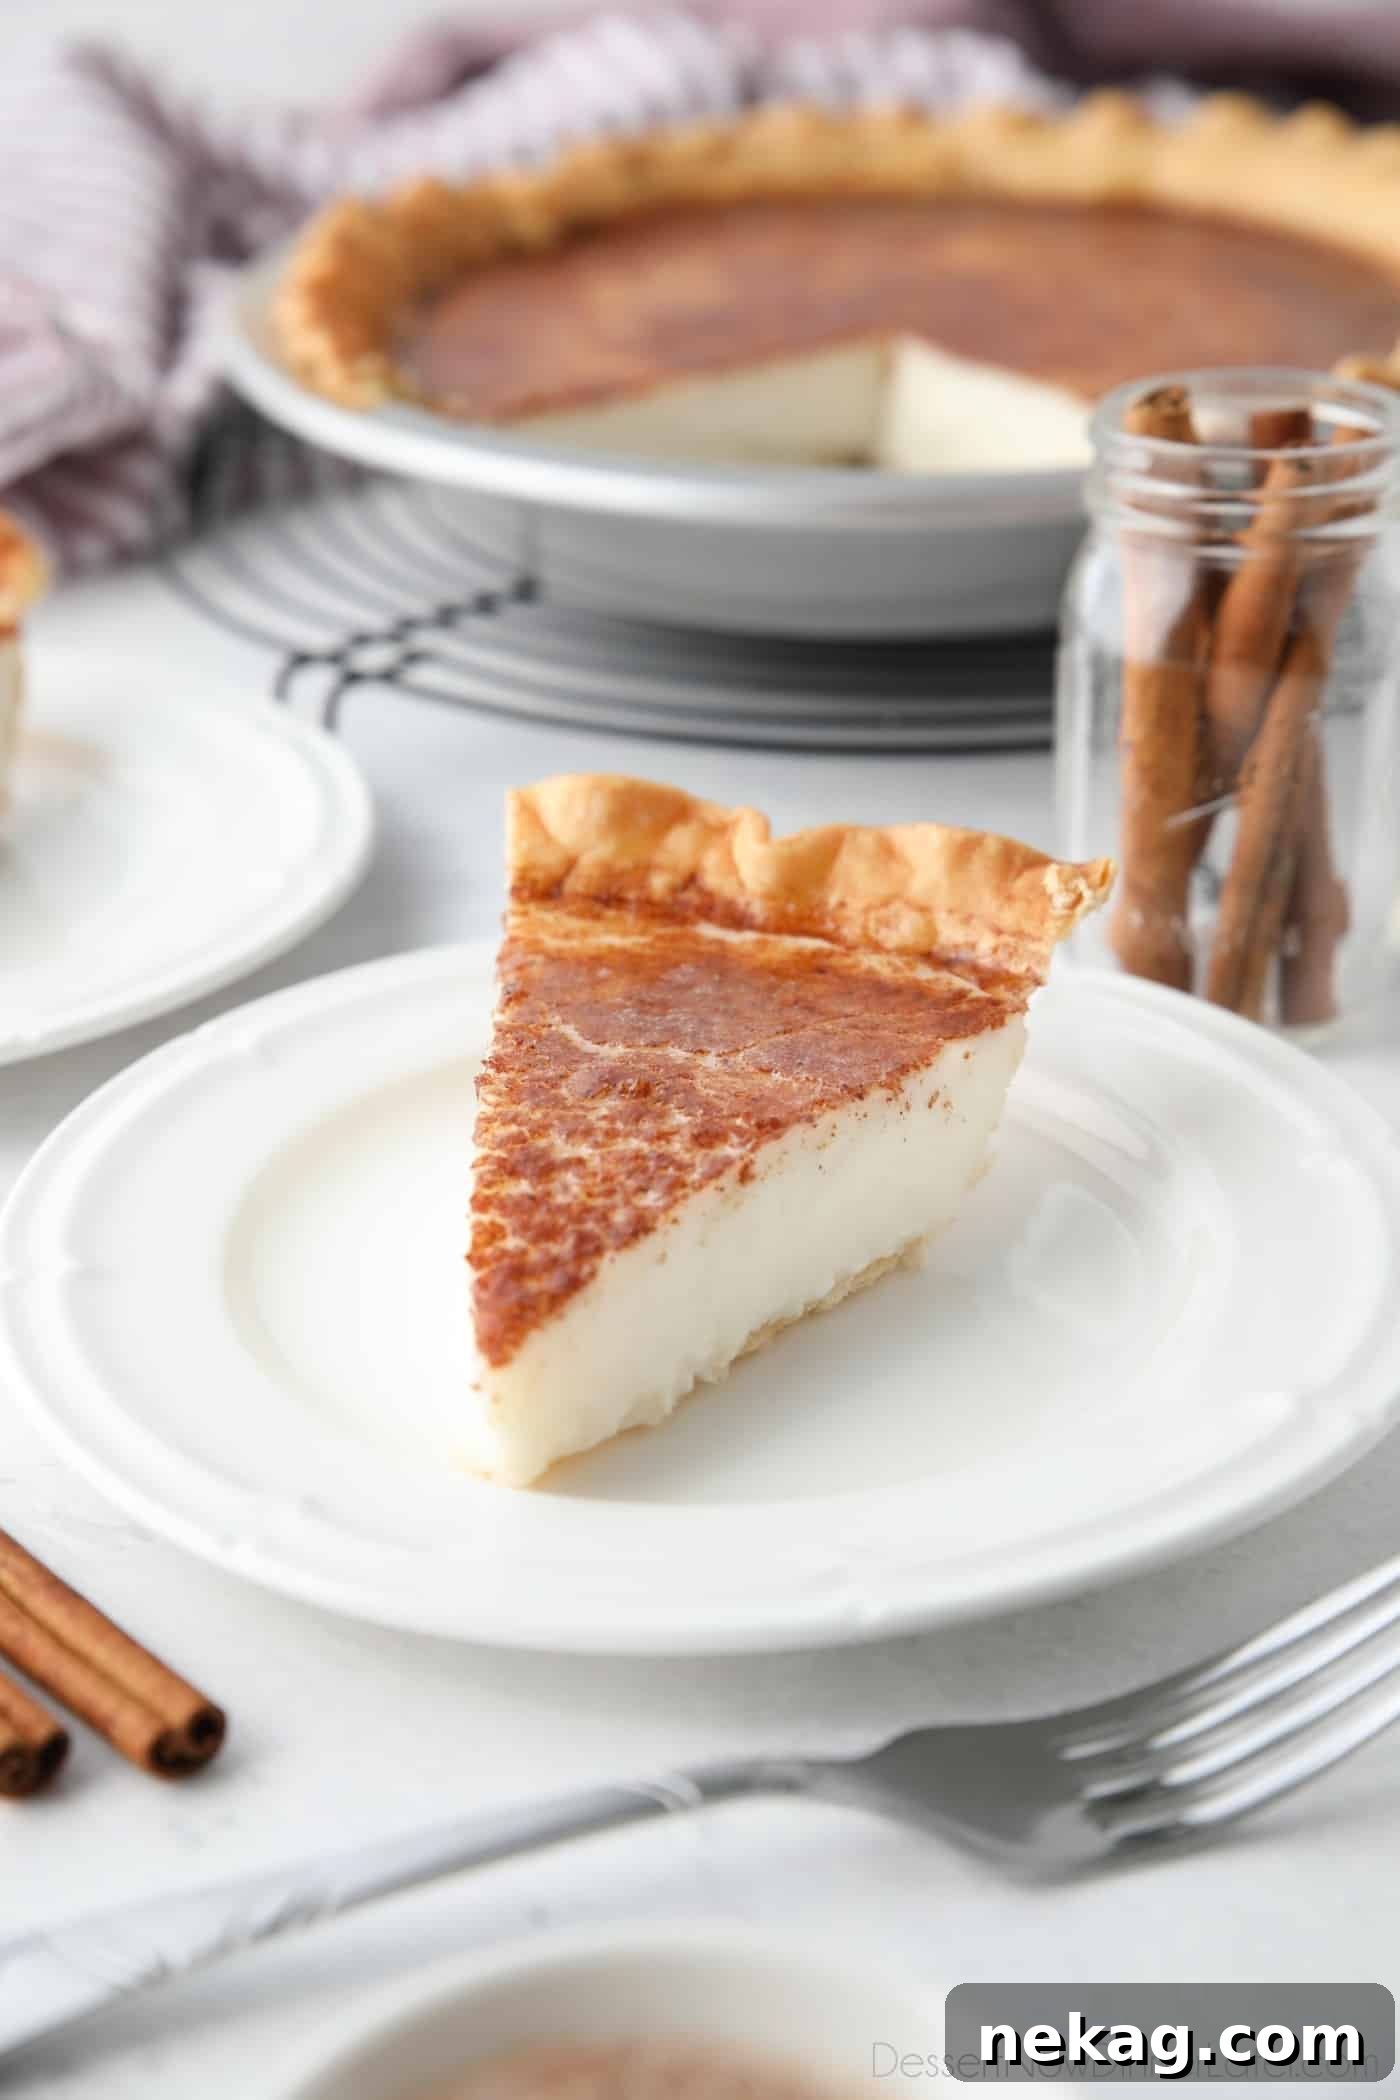
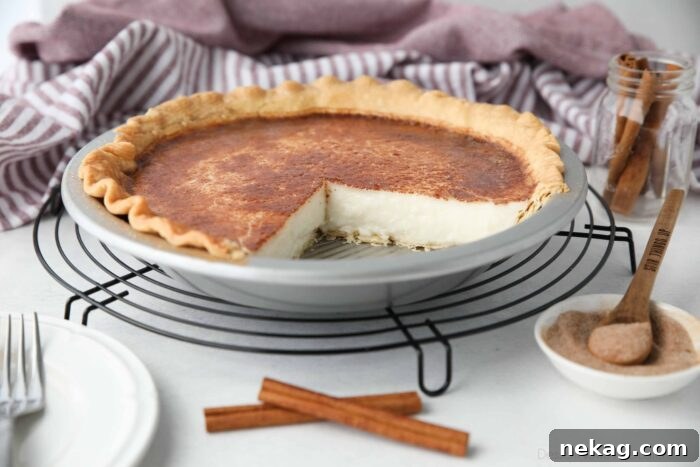
Sugar Cream Pie, also lovingly known as Hoosier Pie, is a timeless dessert that captures the essence of classic American baking. This easy-to-make, egg-free vanilla custard pie rests in a perfectly flaky pastry crust, crowned with a sweet, aromatic blend of cinnamon and nutmeg. It’s a dessert that promises comfort in every silky, spiced bite.
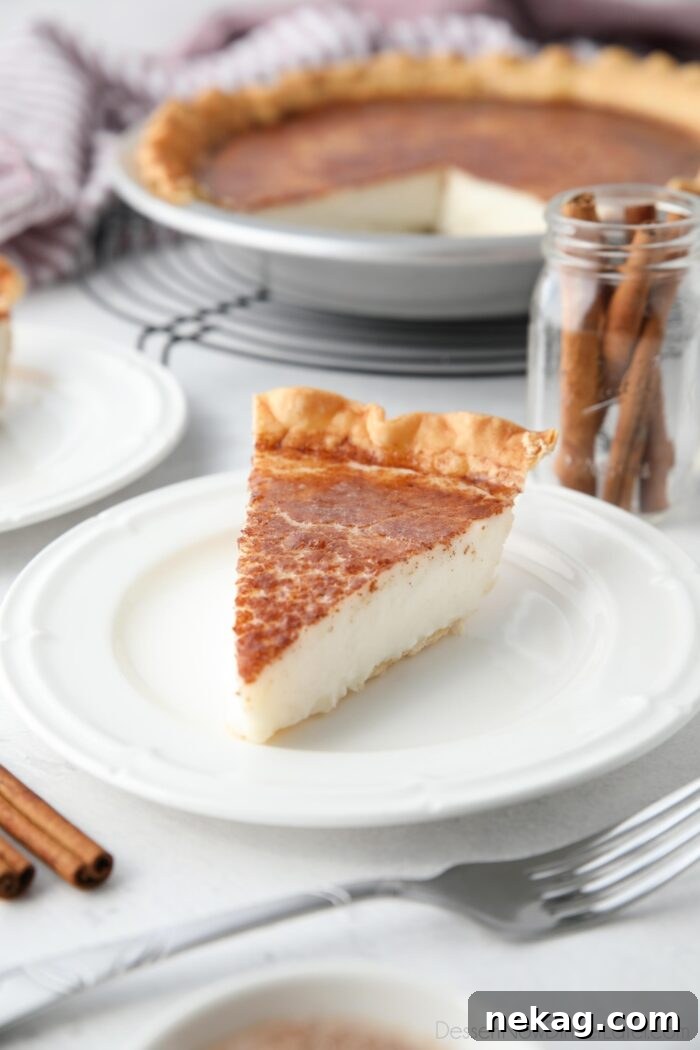
The Rich History of Sugar Cream Pie: Where Did This Classic Originate?
Sugar Cream Pie is more than just a dessert; it’s a piece of culinary history, an old-fashioned recipe that traces its roots back to the mid-1800s. This beloved pie originated within the industrious Amish and Shaker communities of Indiana, a region renowned for its simple yet deeply satisfying homemade fare. It was born out of necessity and ingenuity, crafted from the most basic ingredients readily available in any humble pantry, especially during the harsh winter months when fresh fruits and nuts were scarce.
The core components of this resourceful pie included: flour, butter, sugar, and cream or milk. These staples were typically on-hand, allowing families to create a delicious and comforting dessert even when other resources were limited. The simplicity of its ingredients belies the depth of flavor and creamy texture that has made Sugar Cream Pie an enduring favorite, symbolizing the resourcefulness and culinary heritage of its creators.
What Makes Sugar Cream Pie Irresistible: Taste and Texture Unveiled
For those unfamiliar with this Midwestern marvel, understanding its unique taste and texture is key. Imagine a dessert that offers a delicate balance of sweetness and a sumptuously smooth consistency. Sugar cream pie is often compared in taste to a classic crème brûlée, particularly due to its signature broiled topping. However, it distinguishes itself with its distinctly American charm and an even purer, more straightforward flavor profile.
The filling is wonderfully light, subtly sweet, and boasts a silky-smooth texture akin to a fine custard. What truly sets this pie apart, making it unique among its creamy counterparts, is that it’s made without eggs. This absence of eggs results in a filling that offers a pure, unadulterated taste of cream and vanilla, free from any “eggy” undertones sometimes found in traditional custards. This pureness allows the rich dairy and aromatic vanilla to shine through beautifully.
Of course, no authentic Indiana Sugar Cream Pie would be complete without its iconic topping. A generous sprinkle of fresh nutmeg, perfectly complemented by warm cinnamon, is absolutely essential. This spiced crust, often gently broiled to caramelized perfection, adds a delightful contrast in texture and a depth of flavor that elevates the entire dessert. It’s this combination of silky filling and aromatic, slightly crisped topping that creates an experience truly unlike any other pie.
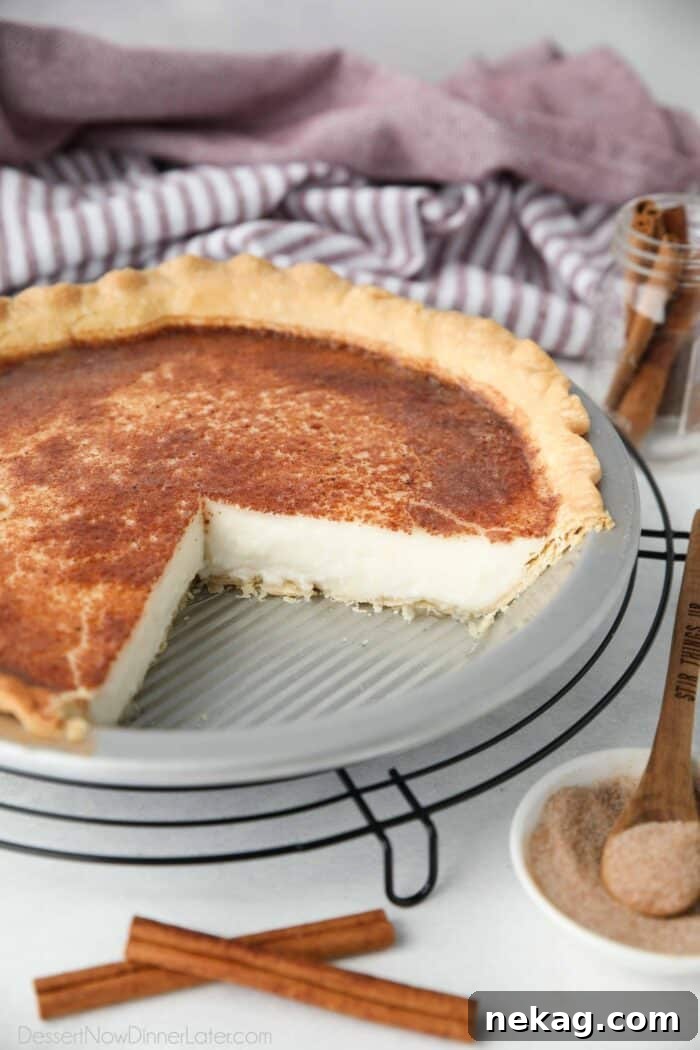
Indiana’s Sweet Heart: The Hoosier Pie Connection
The connection between Sugar Cream Pie and the state of Indiana runs deep, so much so that in 2009, Hoosier Sugar Cream Pie was officially recognized as the unofficial state pie of Indiana. The term “Hoosier” is a proud moniker, referring to a native or inhabitant of Indiana, and its association with this pie underscores the dessert’s cultural significance and widespread affection within the state.
When locals and visitors alike crave a slice of Indiana’s favorite pie, many head to the legendary **Mrs. Wick’s Bakery & Cafe**. This establishment is celebrated throughout the region and beyond for its exceptional sugar cream pies, which have become synonymous with authentic Hoosier baking. For those who don’t have the luxury of living in or near Indiana, like many avid pie enthusiasts, there’s still a way to experience the famous Mrs. Wick’s taste. You can indeed order their sugar cream pie from Goldbelly, which offers nationwide shipping. However, a price tag of $65 for a single pie can be quite steep for many budgets.
This is precisely why learning to make your own Sugar Cream Pie at home is not just a delicious endeavor, but also a cost-effective one. With this accessible sugar cream pie recipe, you can recreate the magic of Indiana’s state pie in your own kitchen. I promise, it’s surprisingly easy and incredibly rewarding!
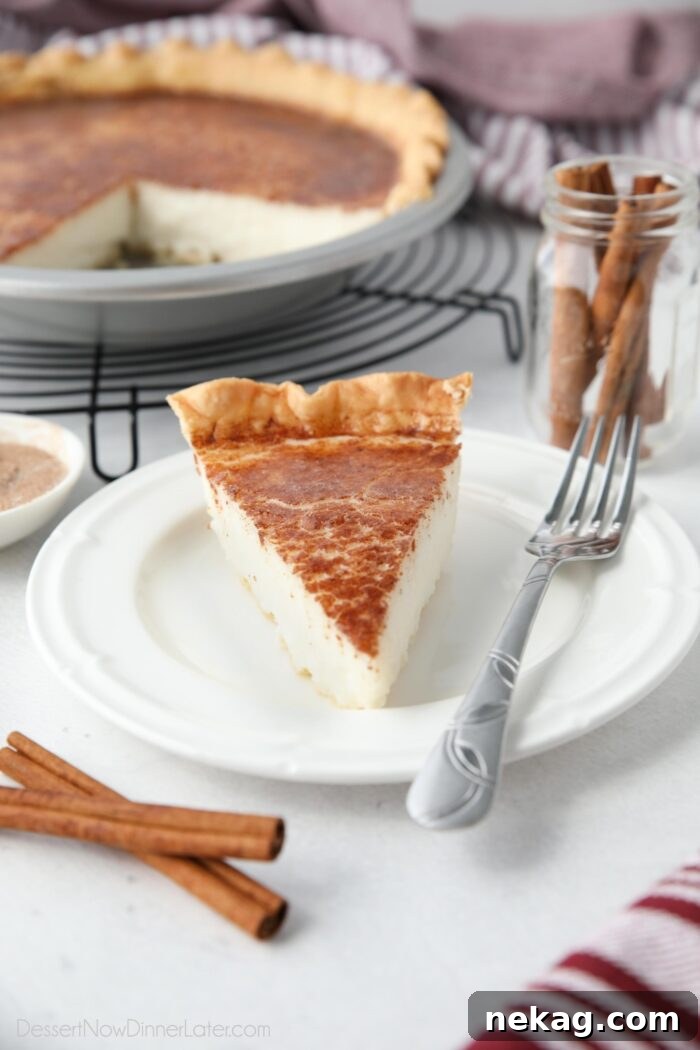
Crafting Perfection: How to Make Sugar Cream Pie From Scratch
Making a Sugar Cream Pie involves a few distinct stages, but don’t let that intimidate you. The process is straightforward, ensuring a delectable result. The primary components, the filling and the crust, are prepared and cooked (or baked) separately to achieve their ideal textures. Once both are ready, the pie is thoughtfully assembled and then briefly broiled to create that signature caramelized, spiced topping. Finally, the assembled pie is refrigerated for a crucial period to allow the creamy filling to set completely, ensuring perfect slices every time.
The beauty of this recipe lies in its methodical approach. By treating the crust and filling as separate entities until assembly, we can guarantee each element is cooked to perfection. The broiling step is quick but transformative, turning a simple sugar and spice mixture into a delicate, flavorful crust that perfectly complements the smooth vanilla custard. And the final refrigeration step is vital for achieving the firm yet yielding consistency that defines a truly great Sugar Cream Pie.
The Foundation: Blind Baking a Perfect Pie Crust
A truly exceptional Sugar Cream Pie begins with a perfectly prepared crust. To get started, you will need to bake and cool a single 9-inch pie crust completely. This process, known as blind baking, is essential to prevent the crust from becoming soggy once the creamy filling is added. If you’re new to this technique, you can explore detailed photo instructions on how to blind bake pie crust.
For convenience, you may opt for a store-bought refrigerated or frozen pie crust, especially if pastry making is not your forte. These options often come with specific instructions for baking an empty crust on their packaging, so be sure to follow those recommendations for the best results. A pre-made crust can save significant time without compromising on flavor or flakiness.
However, if you’re inclined to create a truly homemade foundation, you have excellent options. My personal favorite is the perfect pie crust recipe, made with shortening, which is quite forgiving and yields a wonderfully tender and flaky base. Alternatively, for those looking to master a classic, you can try and perfect an all-butter pie crust, known for its rich flavor and incredibly delicate layers. Whichever crust you choose, ensure it is thoroughly baked and cooled before proceeding, as this step is fundamental to the pie’s overall success.
Crafting the Velvety Vanilla Cream Filling
Once your pie crust is blind-baked and cooling, it’s time to prepare the star of the show: the rich and creamy vanilla filling. This egg-free custard is surprisingly simple to make, yet yields an incredibly luxurious texture and exquisite flavor. Precision and constant stirring are key to achieving its perfect consistency.
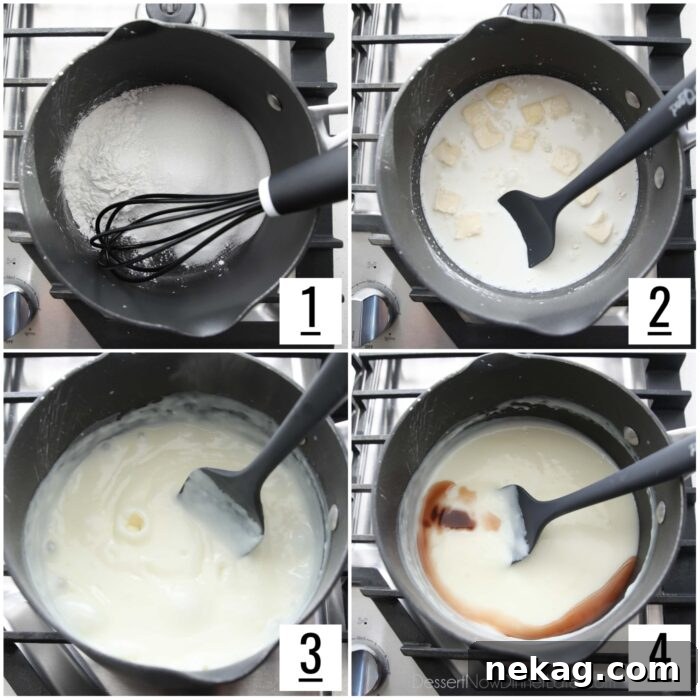
- Begin by whisking together the granulated sugar and cornstarch in a large, heavy-bottomed saucepan. This initial step is crucial for preventing lumps and ensuring the cornstarch is evenly distributed before any liquid is added.
- Next, gradually whisk in the half & half until thoroughly combined. The half & half provides the ideal balance of richness and liquid for our custard. Then, add the cubed pieces of unsalted butter to the mixture.
- Place the saucepan over medium heat and cook, stirring constantly with a whisk or silicone spatula. Continuous stirring is vital to prevent the mixture from sticking to the bottom of the pan and to ensure even cooking and thickening. Continue cooking until the mixture comes to a full boil, then allow it to boil for 1 minute more. During this time, you will notice the mixture becoming significantly very thick and creamy, signaling that the cornstarch has fully activated.
- Once the desired thickness is achieved, remove the saucepan from the heat. Stir in the vanilla extract. Use a high-quality pure vanilla extract for the best flavor, as it is a prominent note in this simple yet elegant pie. The warmth of the filling will help the vanilla infuse beautifully throughout.
This method ensures a smooth, luscious filling every time, forming the perfect complement to your flaky pie crust.
The Grand Assembly: Bringing the Pie Together
With your perfectly baked crust and velvety filling ready, it’s time for the exciting stage of assembly. This is where all the elements come together to create the foundation of your Sugar Cream Pie, preparing it for its signature broiled topping.
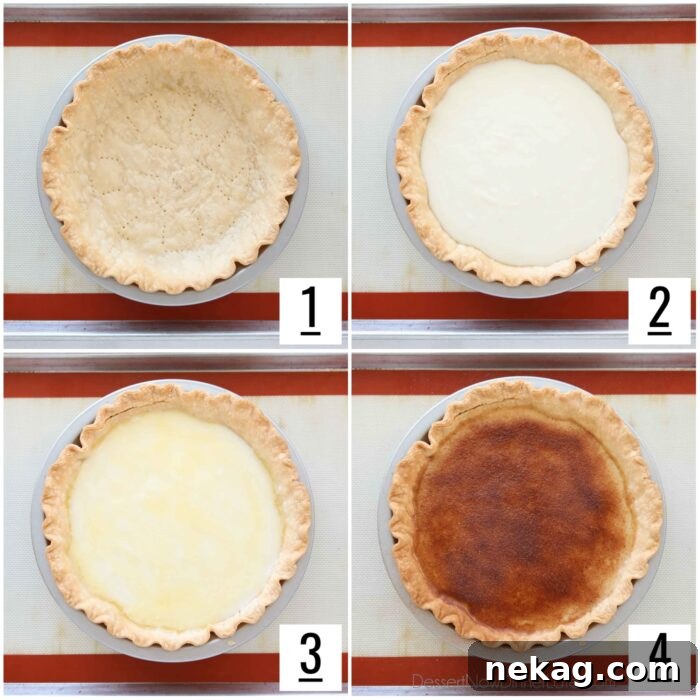
- Carefully place your blind-baked and cooled pie crust onto a rimmed baking sheet. The baking sheet is important for stability and to catch any potential spills, making transfer to and from the broiler much safer.
- Pour the warm, creamy filling into the baked pie crust. Use a spatula to gently smooth the filling evenly across the bottom of the crust, ensuring a consistent layer.
- Next, delicately pour the melted butter over the top of the filling. This butter layer is crucial as it will help create the crispy, caramelized topping. You may gently tilt the pan or use a spatula to carefully distribute the butter evenly over the entire surface of the filling.
- In a small bowl, combine the additional granulated sugar, ground cinnamon, and ground nutmeg. Whisk them together until well blended. Then, generously sprinkle this aromatic spice mixture evenly over the melted butter layer. This forms the iconic, flavorful topping that gives Sugar Cream Pie its unique character and irresistible appeal.
Each step in this assembly process is designed to build layers of flavor and texture, culminating in a pie that is both simple in its components and sophisticated in its final presentation.
The Finishing Touch: Broiling the Perfect Topping
The broiling stage is where the Sugar Cream Pie truly gets its distinctive finish, transforming the spiced sugar into a delicate, caramelized layer. This step is quick and requires vigilance, but the result is undeniably worth the attention.
- Before you begin, adjust your oven rack. Move it up so that it’s positioned about 6 inches (approximately 15 cm) from the heating element of your broiler. This ensures the topping will caramelize quickly and evenly without overcooking the filling.
- Preheat your oven broiler to high. It’s important for the broiler to be fully hot before placing the pie inside to achieve that quick, crisp caramelization.
- To protect your beautiful pie crust from burning under the intense heat of the broiler, delicately cover the edges of the crust with aluminum foil. This acts as a shield, allowing the topping to brown while keeping the crust perfectly golden.
- Using the baking sheet for stability, carefully place the assembled pie under the preheated broiler. Keep the oven door slightly cracked open during this process; this allows steam to escape and helps prevent the broiler from getting too hot, reducing the risk of burning. Broil the pie until the butter begins to bubble vigorously and the sugar topping achieves a beautiful golden-brown, caramelized appearance. It is crucial to watch the pie continuously throughout this step, as broilers can vary in intensity and the topping can go from perfectly golden to burnt in a matter of seconds.
- Once the topping is caramelized to your liking, remove the pie from the oven. Transfer it to a wire rack and allow it to cool at room temperature for 15-30 minutes. This initial cooling period begins the setting process. Afterward, the pie must be refrigerated for at least 4 hours, or ideally overnight, until the center of the filling is completely set. This chilling period is non-negotiable for achieving the firm yet creamy texture essential for clean, beautiful slices.
The Ultimate Indulgence: Thoughts and Tips for Your Sugar Cream Pie
Experiencing a homemade Sugar Cream Pie is a true delight, offering a unique flavor journey that is both comforting and sophisticated. As mentioned, this sugar cream pie shares many similarities with créme brûlée in its rich creaminess, though its caramelized topping is distinctly thinner and infused with warm spices. These spices – cinnamon and nutmeg – are not just an afterthought; they are vital to the pie’s character, perfectly complementing the pure vanilla cream filling. Without them, the flavor profile would be much more subdued, resembling a simpler Horchata-like sweetness. It’s the interplay of smooth vanilla and aromatic spice that truly makes this pie sing.
One of the most appealing aspects of this dessert is the incredible texture of the filling. I simply adored the sweet, silky-smooth cream filling, devoid of the characteristic “eggy-ness” often found in traditional custards. This allows the natural flavors of cream and high-quality vanilla to shine without any interference. The pie is surprisingly not overly sweet, striking a delightful balance that encourages another slice. For the absolute best flavor, a crucial TIP: always use pure vanilla extract. Its authentic aroma and taste will make a remarkable difference in the final product.
Serving and Storing Your Perfect Sugar Cream Pie
Proper serving and storage techniques will ensure your Sugar Cream Pie remains a showstopper from the first slice to the last. This pie is a fantastic make-ahead dessert, perfect for special occasions or simply to enjoy throughout the week.
Achieving Picture-Perfect Slices:
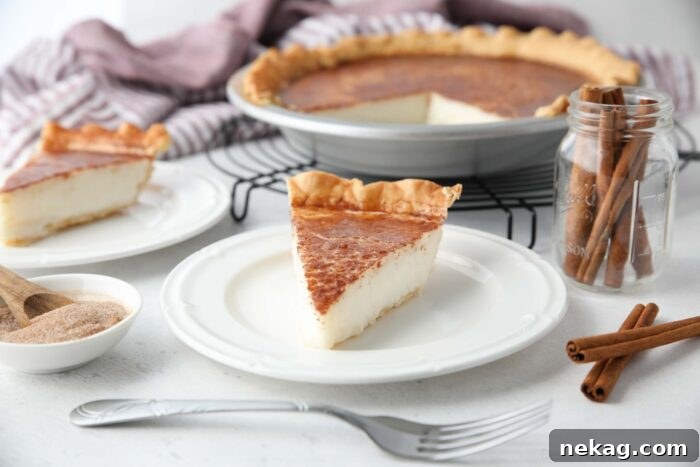
- For the cleanest, most elegant slices, a simple trick makes all the difference: run a sharp knife under hot water, then carefully wipe it completely dry with a clean cloth. Use this warm, dry knife to make each slice. Re-heat and dry the knife between slices to maintain its effectiveness. This method helps the knife glide smoothly through the creamy filling and topping without sticking, ensuring every piece is as beautiful as it is delicious.
Refrigerating for Freshness:
- This pie holds up remarkably well in the refrigerator. To maintain its freshness and prevent it from absorbing other odors, ensure it is sealed in an airtight container. When properly stored, it will keep for several days. This makes Sugar Cream Pie an ideal choice for holidays such as Thanksgiving, Christmas, or any other special event, as you can prepare it a day in advance. This allows ample time for the filling to set overnight, resulting in a perfectly firm and ready-to-serve dessert when your guests arrive.
Freezing for Long-Term Enjoyment:
- For extended enjoyment, Sugar Cream Pie freezes exceptionally well, whether you choose to freeze it whole or in individual slices. To freeze a whole pie, double-wrap it securely with plastic wrap, followed by a layer of aluminum foil. For individual slices, wrap each piece tightly in plastic wrap before placing them in an airtight freezer container. When you’re ready to enjoy it, simply transfer the pie (or slices) from the freezer to the refrigerator and allow it to thaw overnight. This gentle thawing process ensures the creamy texture remains intact, offering a delightful treat whenever the craving strikes.
Explore More Creamy Pie Recipes
If you’ve fallen in love with the luscious texture and comforting flavors of Sugar Cream Pie, you’re in for a treat! The world of cream pies is vast and varied, offering a delightful array of options for every palate. Here are some other fantastic cream pie recipes to inspire your next baking adventure, each promising a unique blend of creamy indulgence and delicious flavor:
- Decadent Chocolate Cream Pie with Pudding
- Easy Jello Coconut Cream Pie Recipe
- Sweet & Tangy Blueberry Cream Cheese Pie
- Refreshing Lemon Cream Cheese Pie
- Vibrant Raspberry Cream Pie
- Classic Strawberry Cream Pie
- Irresistible Caramel Banana Cream Pie Recipe
- Rich Chocolate Cream Cheese Pie
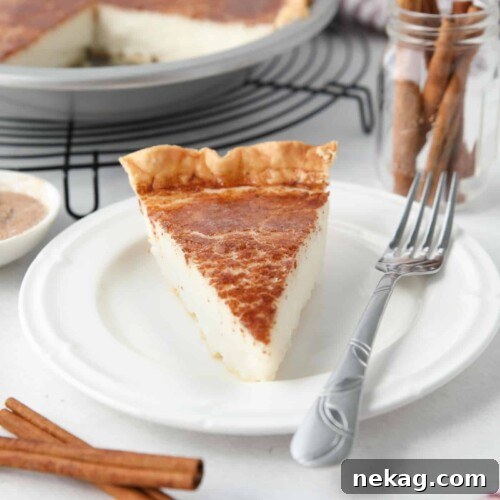
Sugar Cream Pie
Amber Brady
30
30
4
5
8
servings
Ingredients
-
9
inch
pie crust
, baked
Pie Filling:
-
¾
cup
(150 g)
granulated sugar -
¼
cup
(40 g)
cornstarch -
2 ¼
cups
(532 ml)
half & half, (half heavy cream and half milk) -
4
Tbsp
(57 g)
unsalted butter, cut into cubes -
1
Tbsp
vanilla extract
Topping:
-
2
Tbsp
unsalted butter, melted -
2
Tbsp
granulated sugar -
1
tsp
ground cinnamon -
¼
tsp
ground nutmeg
Equipment
-
Nylon Whisk
-
Silicone Spatula Set
-
9-Inch Pie Pan USA Pan Bakeware
Instructions
-
Prepare and bake the pie crust.
Homemade, frozen, or refrigerated crusts are fine. Follow directions on packaging for baking instructions, or use this tutorial for
how to blind bake pie crust. -
Pie Filling: Whisk together the sugar and cornstarch in a large saucepan. Whisk in the half & half and add the cubes of butter.
-
Cook over medium heat, stirring constantly, until the mixture boils, then cook for 1 minute more. It should become very thick and creamy. Remove from heat and stir in the vanilla.
-
Place the baked pie crust on a rimmed baking sheet. Pour the filling into the baked pie crust and smooth evenly with a spatula.
-
Topping: Pour the melted butter over the filling. You may tilt the pan or use a spatula to carefully distribute the butter evenly over the filling.
-
Combine sugar, cinnamon, and nutmeg. Sprinkle evenly over the melted butter.
-
Move the oven rack up, to about 6-inches from the heating element. Preheat the oven broiler to high. Cover the edges of the pie crust with foil. (So they don’t burn.)
-
Use the baking sheet to place the pie under the broiler. Broil until the butter bubbles, leaving the oven door cracked open. Watch the whole time because it doesn’t take long.
-
Remove pie from oven and cool on a wire rack for 15-30 minutes. Then refrigerate at least 4 hours or overnight until the center is set.
Notes
- For nice slices: Run a knife under hot water, then carefully dry it with a cloth, and use the warm knife to slice the pie. Re-heat and dry the knife between slices.
- Refrigerating: This pie keeps well for several days when sealed in an airtight container in the refrigerator.
- Freezing: This pie should freeze well whole, or in individual slices. Double wrap the full pie with plastic wrap and foil, or wrap individual slices with plastic wrap and place in an airtight freezer container. Allow pie (or slices) to thaw in the fridge overnight before serving.
Nutrition
Serving:
1
slice
|
Calories:
266
kcal
|
Carbohydrates:
29
g
|
Protein:
2
g
|
Fat:
16
g
|
Saturated Fat:
10
g
|
Polyunsaturated Fat:
5
g
|
Cholesterol:
47
mg
|
Sodium:
43
mg
|
Sugar:
25
g
Disclaimer: Nutritional values were calculated using a third-party tool and are provided as an estimation only.
Sharing this recipe with a link is both encouraged and appreciated. Copying/pasting and/or screenshots of full recipes to any social media is strictly prohibited. Content and photographs are copyright protected.
Did you make this?
Don’t forget to leave a rating below and make sure to follow on Pinterest and Instagram for more!