

Mastering the Art of Sweet French Crêpes: Your Ultimate Recipe Guide
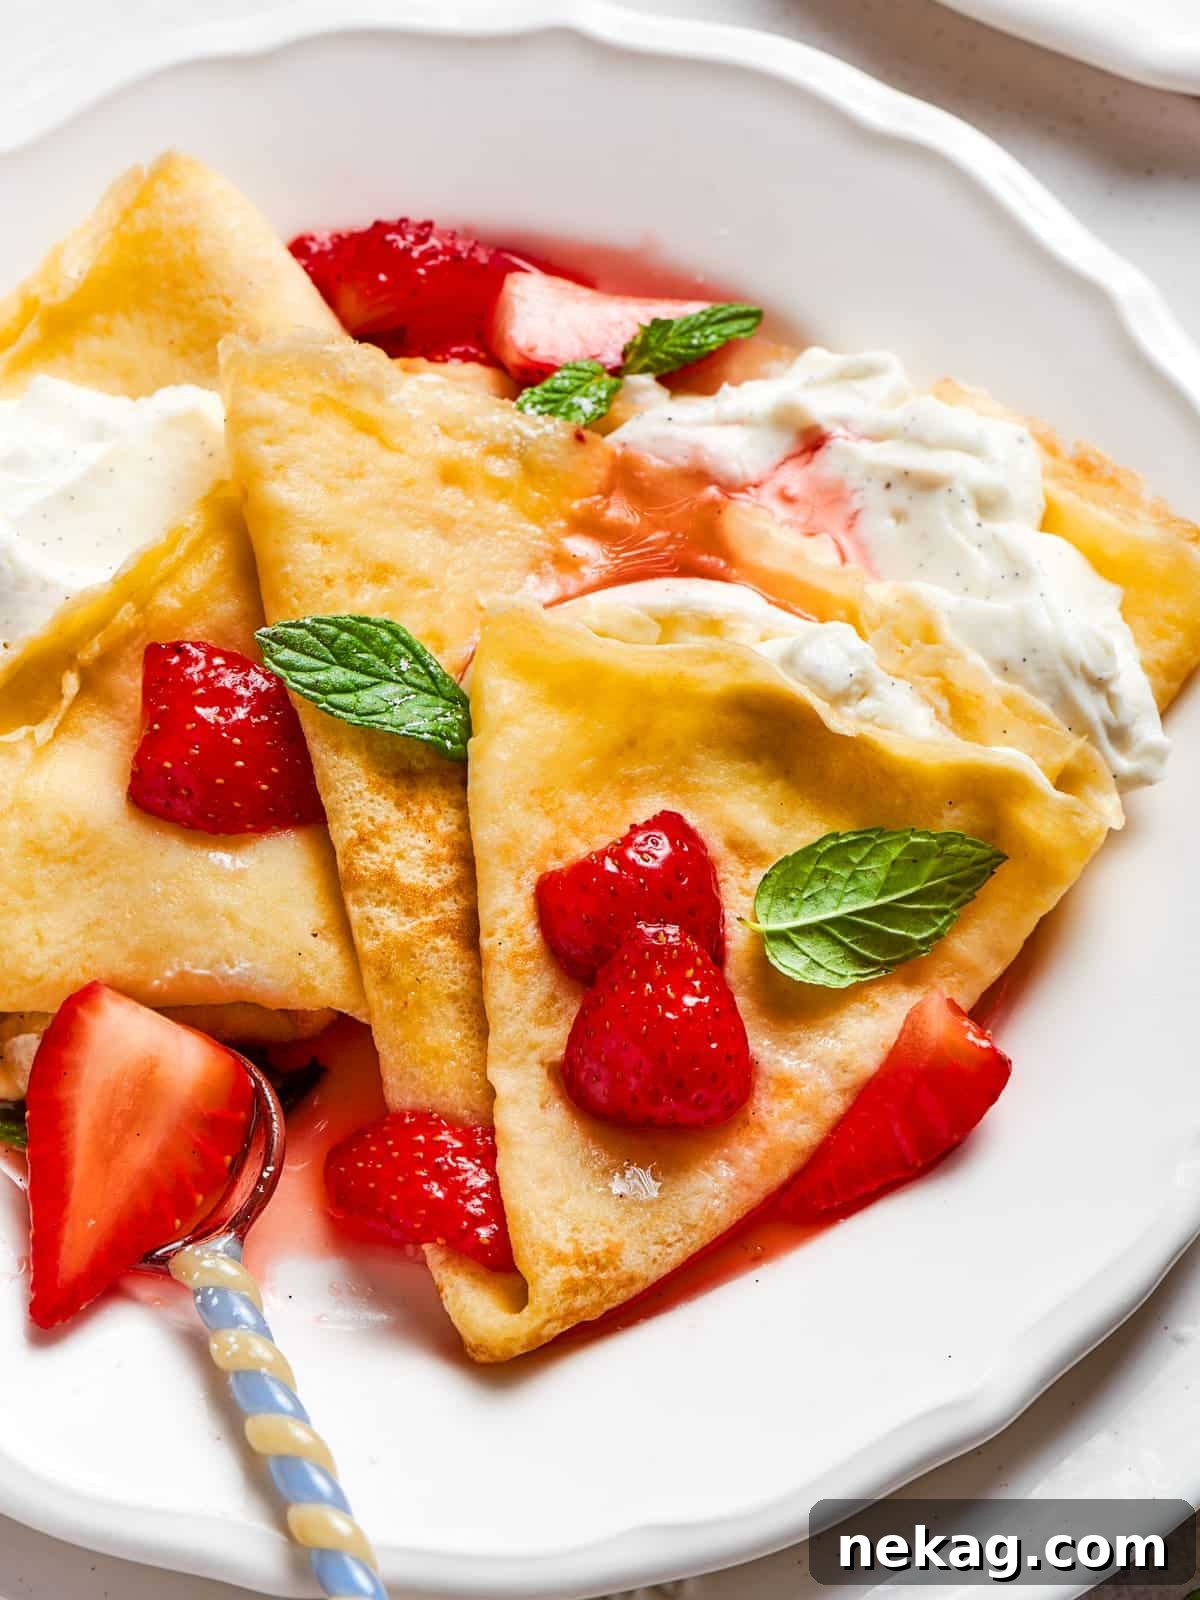
Embark on a delightful culinary journey to the heart of France with this ultimate sweet crêpe recipe. Crafted for perfection, these crêpes are wonderfully thin, exquisitely buttery, and boast those coveted crispy edges that make them truly irresistible. This professional 6-ingredient recipe, paired with invaluable tips, empowers you to create flawless crêpes every single time. Whether you envision an elegant dessert, a comforting breakfast, or a show-stopping mille crepe cake, prepare to transform your kitchen into a Parisian patisserie and impress everyone with your newfound crêpe-making prowess.

A Quick Look At The Recipe
This is a brief summary of the recipe. Jump to the full recipe for complete details.
Jump to Recipe
Prep Time
10 minutes
Cook Time
8 minutes
Chill
1 hour
Total Time
1 hour 18 minutes
Servings
13 10-inch crepes
Difficulty
Moderate, requiring patience with thin batter
Calories *
152 kcal per serving
Technique
Whisk wet ingredients, add flours and water, rest, cook until golden.
Flavor Profile
Thin, buttery crêpes with crisp edges and a soft, delicate texture.
* Based on nutrition panel
Summarize & Save this content on
Good crepes have always seemed like something you can only get at a restaurant. I love that I can make the batter the night before and then have perfect French crepes in the morning. My niece had an absolute blast figuring out what she wanted to put in hers!⭐⭐⭐⭐⭐
Lauren
Why You Will Absolutely Love This Sweet Crêpe Recipe
- Achieve Perfectly Thin and Buttery Crêpes: This recipe expertly combines both cake flour and all-purpose flour, creating a batter that results in incredibly delicate crêpes. This unique blend ensures your crêpes are not only paper-thin but also robust enough to hold a generous amount of any sweet or savory filling without tearing, providing that tender melt-in-your-mouth texture that sets truly great crêpes apart.
- Experience a True French Classic at Home: Inspired by countless crêpes enjoyed during my travels through France, this recipe faithfully recreates the authentic taste and texture of Parisian street food. Each bite will transport you straight to a charming French café, offering an unparalleled taste of European culinary tradition right in your own kitchen. Prepare to master a timeless favorite that meets the highest French standards.
- Unlock Endless Topping Possibilities for Everyone: One of the greatest joys of making these buttery soft crêpes at home is the sheer versatility they offer. Imagine a vibrant Sunday morning tradition: a create-your-own crêpe station! Lay out a spread of fresh fruits, rich chocolate spreads, homemade jams, whipped creams, and more. This interactive approach satisfies every palate and sweet tooth, making mealtime a fun and customizable experience for family and friends.
- Convenient and Freezer-Friendly: Planning ahead has never been easier! This recipe allows you to prepare a large batch of crêpes and freeze them for future enjoyment. They retain their exquisite flavor and delicate texture beautifully, making them ideal for quick weeknight desserts or hassle-free brunch parties. Get a head start on your next gathering, and your guests will be none the wiser that you pulled off such a sophisticated treat with ease.
Table of Contents
- Why You Will Absolutely Love This Sweet Crêpe Recipe
- Essential Ingredients & Clever Substitutions for Crêpes
- Delicious Variations for Sweet Crêpe Fillings
- Professional Crêpe Making Tips for Success
- Step-by-Step Guide: How to Make This Sweet Crêpe Recipe
- Chef Lindsey’s Expert Recipe Tip
- Common Crêpe Recipe FAQs
- Recommended Brunch Recipes
- Sweet Crepe Recipe
- Before You Go: Explore More Breakfast Delights
Ever since my enchanting visit to France, the memory of those perfectly thin, butter-and-sugar-dusted crêpes has lingered in my mind. For what felt like an eternity, I embarked on a mission to recreate their unparalleled delicate texture and signature crispy edges right in my own kitchen. After numerous attempts and meticulous adjustments, I am thrilled to finally share with you what I believe is the absolute perfect sweet crêpes recipe – a testament to patience and passion.
Crafting the perfect crêpe is indeed a labor of love, a dance of precision and timing, but the end result is profoundly rewarding. The sheer joy of biting into a homemade crêpe that rivals those found in Paris makes every moment worthwhile. However, I completely understand if you’re seeking a more straightforward yet equally impressive breakfast or brunch option for those busy mornings. In that case, I wholeheartedly recommend these lazy Sunday buttermilk waffles or our wholesome whole wheat pancakes. But if you’re ready to elevate your baking game and indulge in something truly extraordinary, make a beeline for this incredible cinnamon roll recipe with luscious cream cheese icing.
Essential Ingredients & Clever Substitutions for Crêpes
Crafting the perfect crêpe batter relies on a few simple, high-quality ingredients. Each component plays a crucial role in achieving that desirable thin, delicate, and buttery texture. Here’s a closer look at what you’ll need and how you can adapt the recipe if necessary:
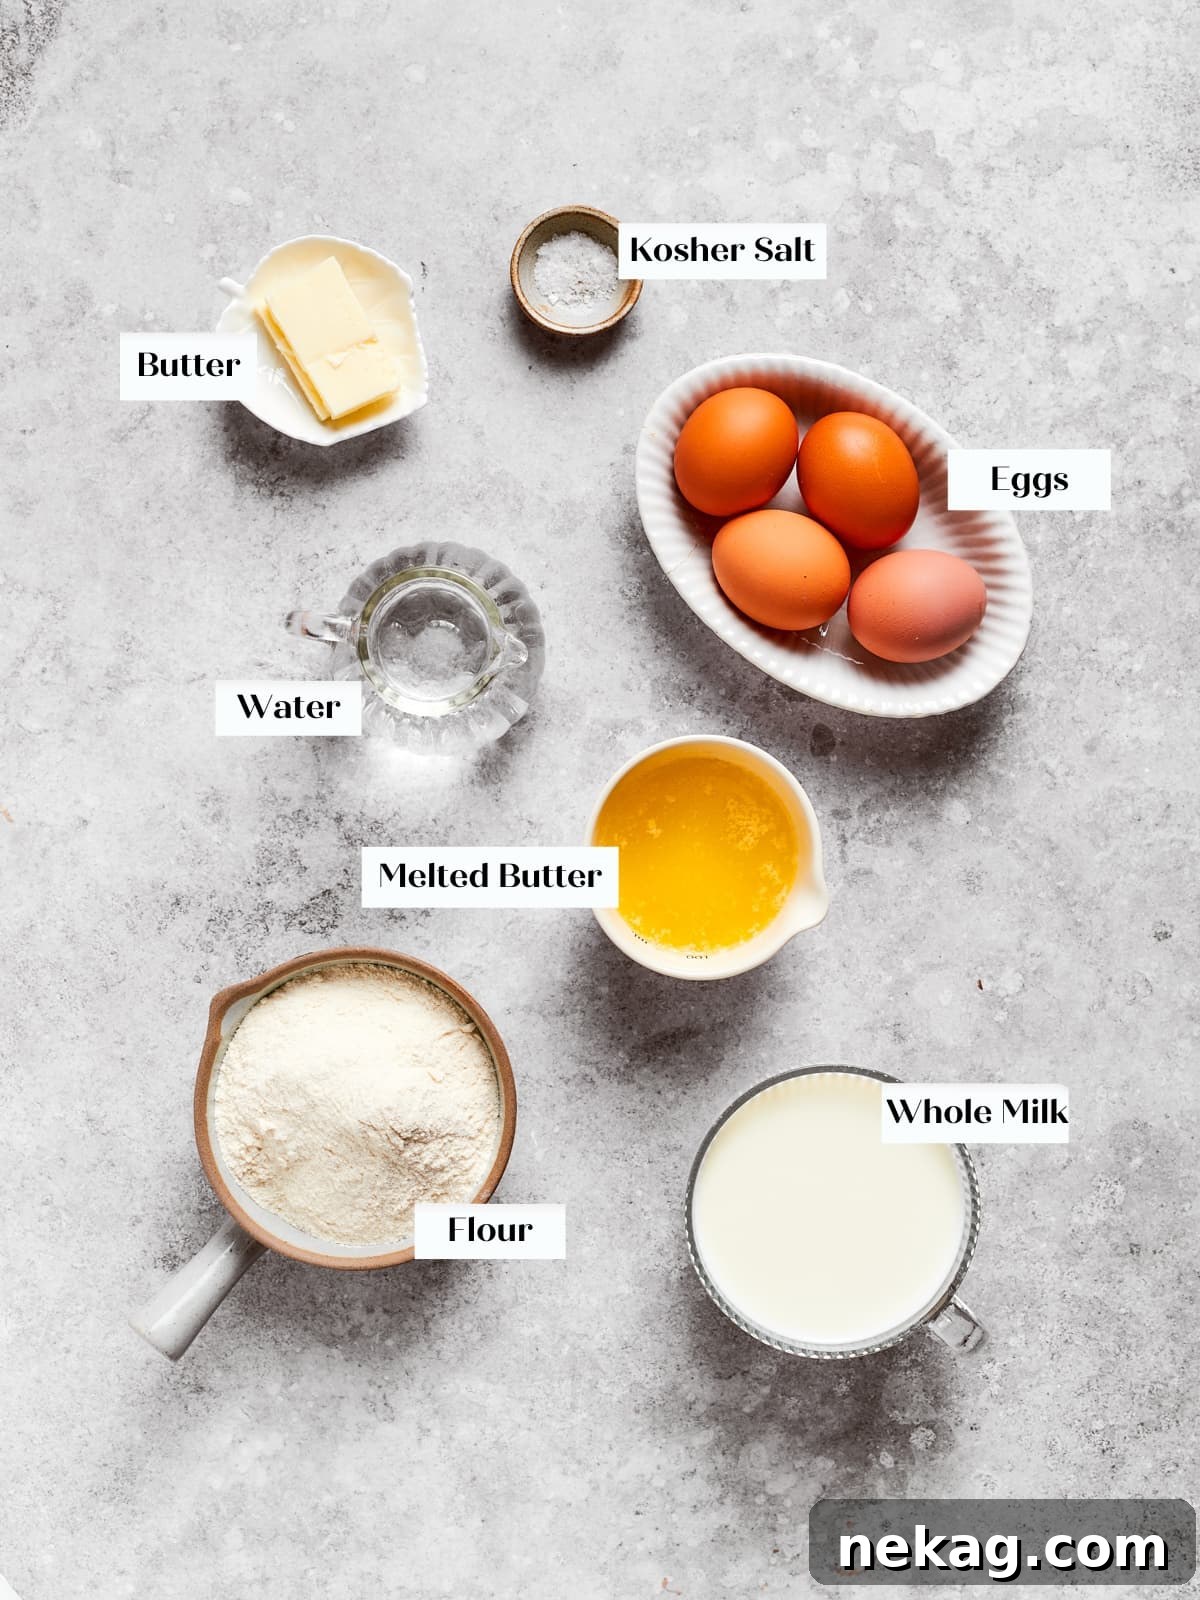
- Whole Milk: The star of our liquid base, whole milk is essential for adding richness and a beautiful tenderness to your crêpes. Its higher fat content contributes significantly to the buttery flavor and delicate texture. While whole milk is recommended for optimal results, you can certainly substitute with any milk alternative you prefer, such as almond milk, soy milk, or oat milk. Keep in mind that lower-fat milks might slightly alter the richness, but the crêpes will still be delicious.
- Butter: Melted butter is key for both flavor and texture. It imparts that classic, irresistible buttery aroma and ensures your crêpes are moist and flexible. The trick is to use *warm*, not hot, melted butter when incorporating it into the batter. If the butter is too hot, it risks cooking the eggs prematurely; if it’s too cold, it can solidify upon contact with other ingredients, creating clumps. Aim for a temperature where it’s fully liquid but won’t scald your other ingredients.
- All-purpose Flour: This forms the structural backbone of our crêpes. All-purpose flour contains just the right amount of gluten to bind the batter together, ensuring the crêpes are pliable and easy to handle without becoming tough. It provides the necessary elasticity to allow the crêpes to stretch into their characteristic thinness.
- Cake Flour: The secret weapon for truly light and tender crêpes! Cake flour has a lower protein content than all-purpose flour, which means less gluten development. This results in a softer, more delicate crêpe that practically melts in your mouth. If you don’t have cake flour, you can substitute with additional all-purpose flour. However, be extra careful not to overmix the batter in this case, and I highly recommend letting the batter rest overnight to give the gluten ample time to relax, preventing a rubbery texture.
- Water: Water is crucial for achieving the extremely thin consistency necessary for authentic crêpes. It thins out the batter without adding extra richness, allowing the crêpes to spread effortlessly across the pan. I typically use NYC tap water due to its high quality. However, if you know your local tap water is particularly hard or has a strong taste, opting for bottled or distilled water can make a noticeable difference in the final delicate flavor of your crêpes.
For precise measurements and detailed quantities, please refer to the comprehensive recipe card below.
Delicious Variations for Sweet Crêpe Fillings: Explore Endless Flavors
One of the most exciting aspects of making crêpes is the boundless creativity they inspire when it comes to fillings. While this recipe focuses on sweet crêpes, the batter itself is incredibly versatile, lending itself beautifully to a spectrum of flavors. Here are some mouth-watering ideas to get your inspiration flowing, transforming your crêpes into an unforgettable culinary experience:
- Unleash Your Inner Savory Chef: Don’t limit yourself to sweet! These crêpes make a fantastic base for savory dishes. Imagine filling them with thinly sliced ham and melted Gruyère cheese while they’re still warm in the pan. Or create a luxurious lox crêpe by spreading cream cheese, layering smoked salmon, and scattering finely chopped red onions. For a vegetarian delight, try easy caramelized onions, sautéed mushrooms, and a crumble of pungent blue cheese. A dollop of cottage cheese provides a creamy protein boost, or a drizzle of maple syrup can add a touch of unexpected sweetness to a savory combination.
- Bright and Zesty Lemon Crêpes: For a refreshing and vibrant treat, fill your cooled crêpes with our silky easy lemon curd. Take it up a notch by whisking in our delightful lemon curd whipped cream recipe. Pair this zesty filling with your favorite fresh berries – think plump blueberries, ripe raspberries, or sliced strawberries – for a burst of color and natural sweetness that perfectly complements the tart lemon.
- Embrace the Comfort of Homemade Jams: Elevate your crêpes by layering them with luscious fruit jams. Our easy strawberry jam recipe, vibrant mixed berry jam, or fragrant easy peach preserves recipe all make fantastic choices. For an extra touch of creamy indulgence that beautifully balances the sweetness of the jam, consider adding a cloud of homemade whipped cream.
- Indulge in Dessert Crêpe Pies: Why not transform your crêpes into a comforting pie-inspired dessert? Layer them with warm apple pie filling, tart cherry pie filling, or the rich filling from this amazing blueberry pie recipe! Serve these warm, pie-filled crêpes with a generous scoop of creamy vanilla bean ice cream for an ultimate treat. For a delightful crunch, sprinkle a few toasted nuts or a dash of cinnamon.
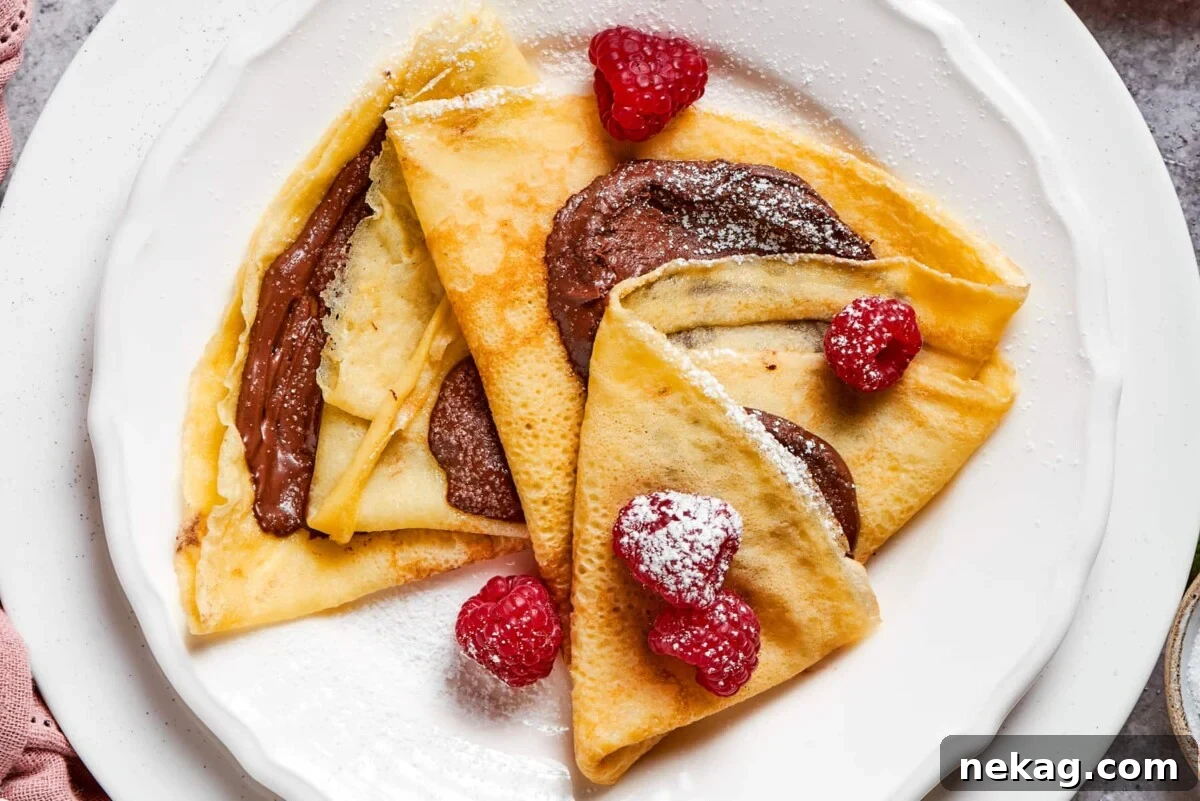
- Classic Chocolate & Hazelnut: A timeless combination! Spread a thin layer of Nutella or your favorite chocolate hazelnut spread across the warm crêpe. Add sliced bananas or strawberries for a fresh counterpoint.
- Caramel Apple Delight: Drizzle warm salted caramel sauce over freshly cooked crêpes and top with sautéed apples and a sprinkle of cinnamon. A scoop of vanilla ice cream would make this an exceptional dessert.
- Cream Cheese Frosting Swirl: For a decadent twist, spread a thin layer of sweetened cream cheese frosting, perhaps with a hint of vanilla or orange zest, and roll the crêpes for an elegant dessert.
Professional Crêpe Making Tips for Success
Achieving restaurant-quality crêpes at home is entirely possible with a few insider tricks. These professional tips will help you master the art of crêpe making, ensuring every single crêpe is thin, golden, and perfectly cooked.
- Embrace the Thin Batter: Do not be alarmed by the liquidy consistency of this crêpe batter; it’s exactly what you want! Unlike pancake batter, which is thick and fluffy, crêpe batter needs to be very thin to achieve those signature delicate, paper-thin results. A thick batter will inevitably yield thick, heavy crêpes, so trust the process and embrace the fluidity.
- The Essential Batter Rest: This is a non-negotiable step for truly tender crêpes. Allow the batter to rest for at least one hour at room temperature, or ideally, refrigerate it overnight. Resting serves two crucial purposes: it allows the flour to fully hydrate, resulting in a smoother batter without lumps, and it gives the gluten a chance to relax. Relaxed gluten prevents rubbery crêpes, ensuring a wonderfully soft and pliable texture. If refrigerating overnight, remember to take the batter out an hour before cooking so it can come to room temperature. This makes it easier to spread and contributes to thinner crêpes.
- Choosing the Right Pan for Even Cooking: The pan you use makes a significant difference. Electric and induction burners, with their consistent heat distribution, are generally more forgiving for crêpe making. However, if you’re using a gas burner, select a pan with a thick base. This thick base is essential for absorbing and evenly spreading the centralized heat from the flame, preventing hot spots and ensuring your crêpes cook uniformly to a beautiful golden brown. A dedicated crêpe pan with low sides is ideal for easy flipping, but a quality nonstick skillet works well too.
- Butter the Pan Only Once (Yes, Really!): You only need to lightly butter your pan before cooking the very first crêpe. This initial buttering is crucial to prevent sticking and ensure a perfect start. For all subsequent crêpes, the small amount of butter already present in the batter itself will subtly grease the pan with each pour. This self-lubricating effect means you won’t need to add butter between each crêpe, simplifying the process and preventing excess greasiness.
- Patience is Your Best Ingredient: True French crêpes take time to cook properly. Expect each 12-inch crêpe to take approximately 6-8 minutes, with the first side cooking longer than the second. Resist the urge to rush the process by increasing the heat, as this will lead to burned exteriors and undercooked, rubbery interiors. If you wish to speed things up, the only effective way is to use multiple crêpe pans simultaneously – a worthwhile investment if you frequently entertain or have a large family! Remember, slow and steady yields the most exquisite results.
Step-by-Step Guide: How to Make This Sweet Crêpe Recipe
Follow these detailed instructions to create perfect, delicate French crêpes every single time. For precise measurements and quantities, please refer to the comprehensive recipe card located at the bottom of this page.
Part 1: Preparing the Crêpe Batter
Step 1: Whisk Eggs, Milk, and Butter. In a generously sized mixing bowl, combine the large eggs, a pinch of kosher salt, whole milk, and the warm melted butter. Whisk these wet ingredients together thoroughly until the mixture is smooth and well-combined. This forms the flavorful foundation of your crêpe batter.
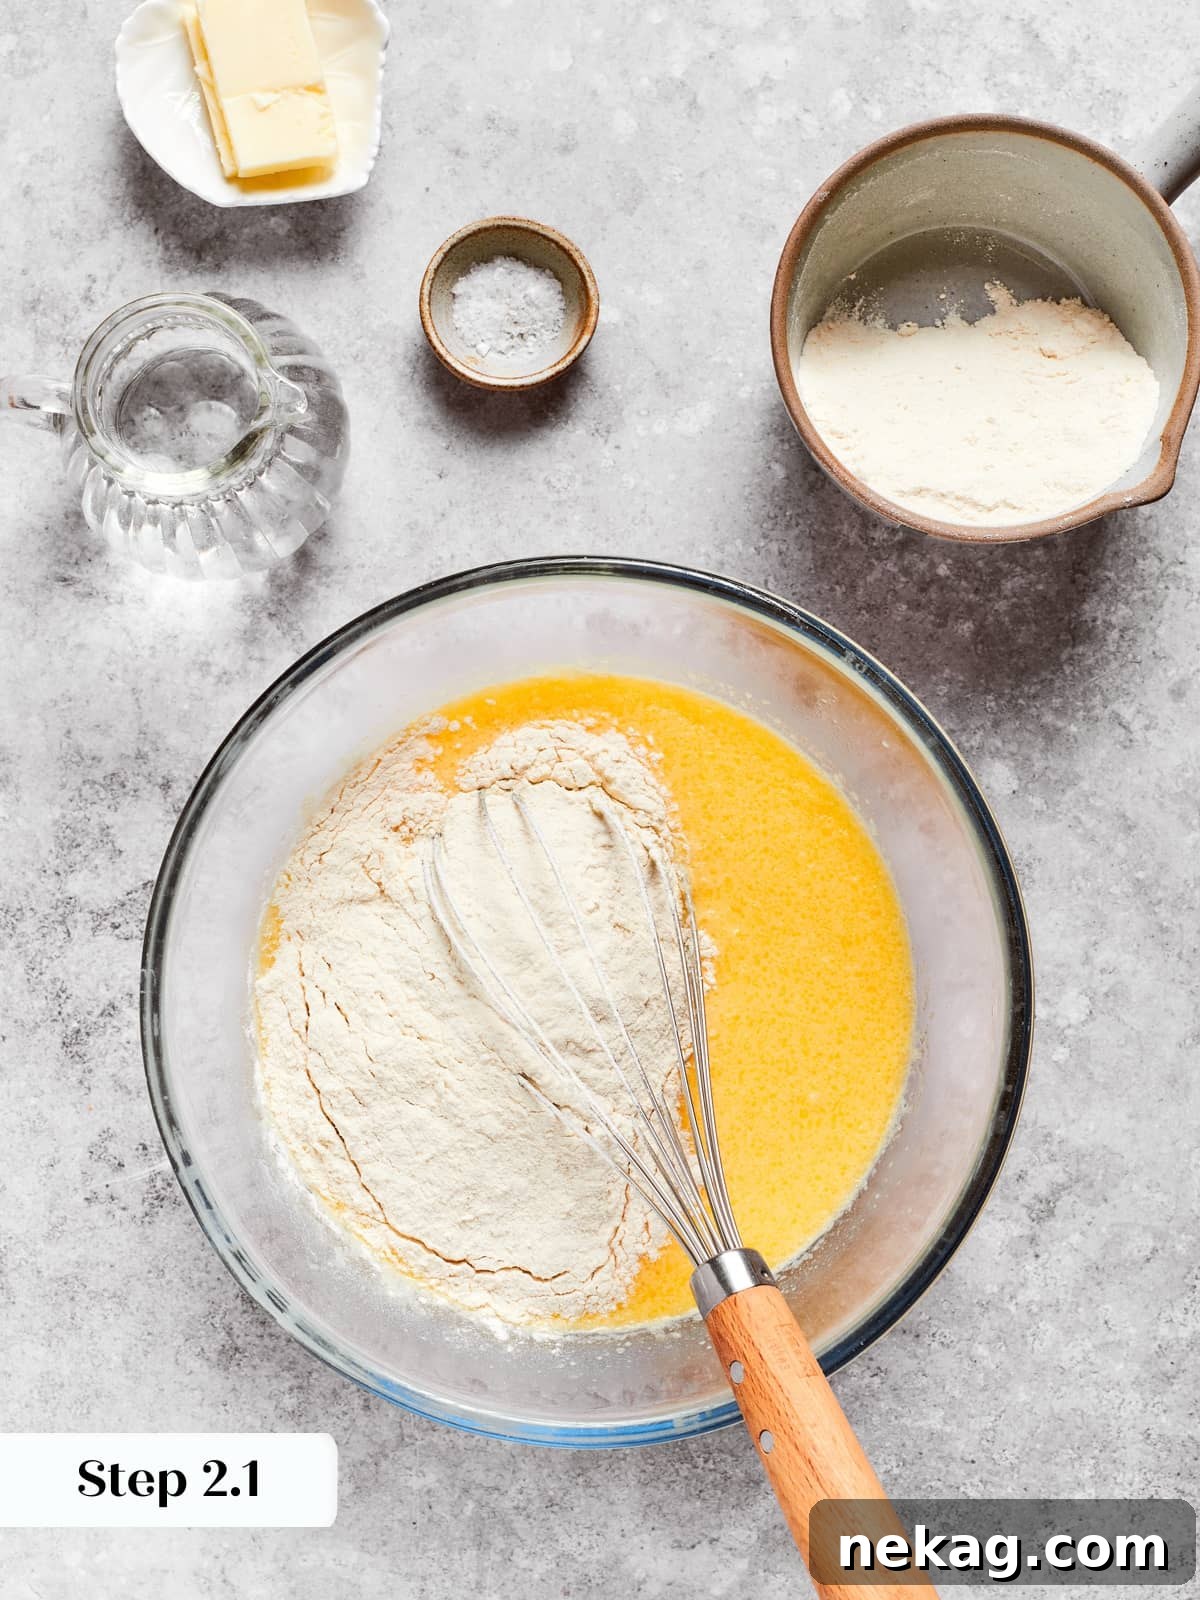
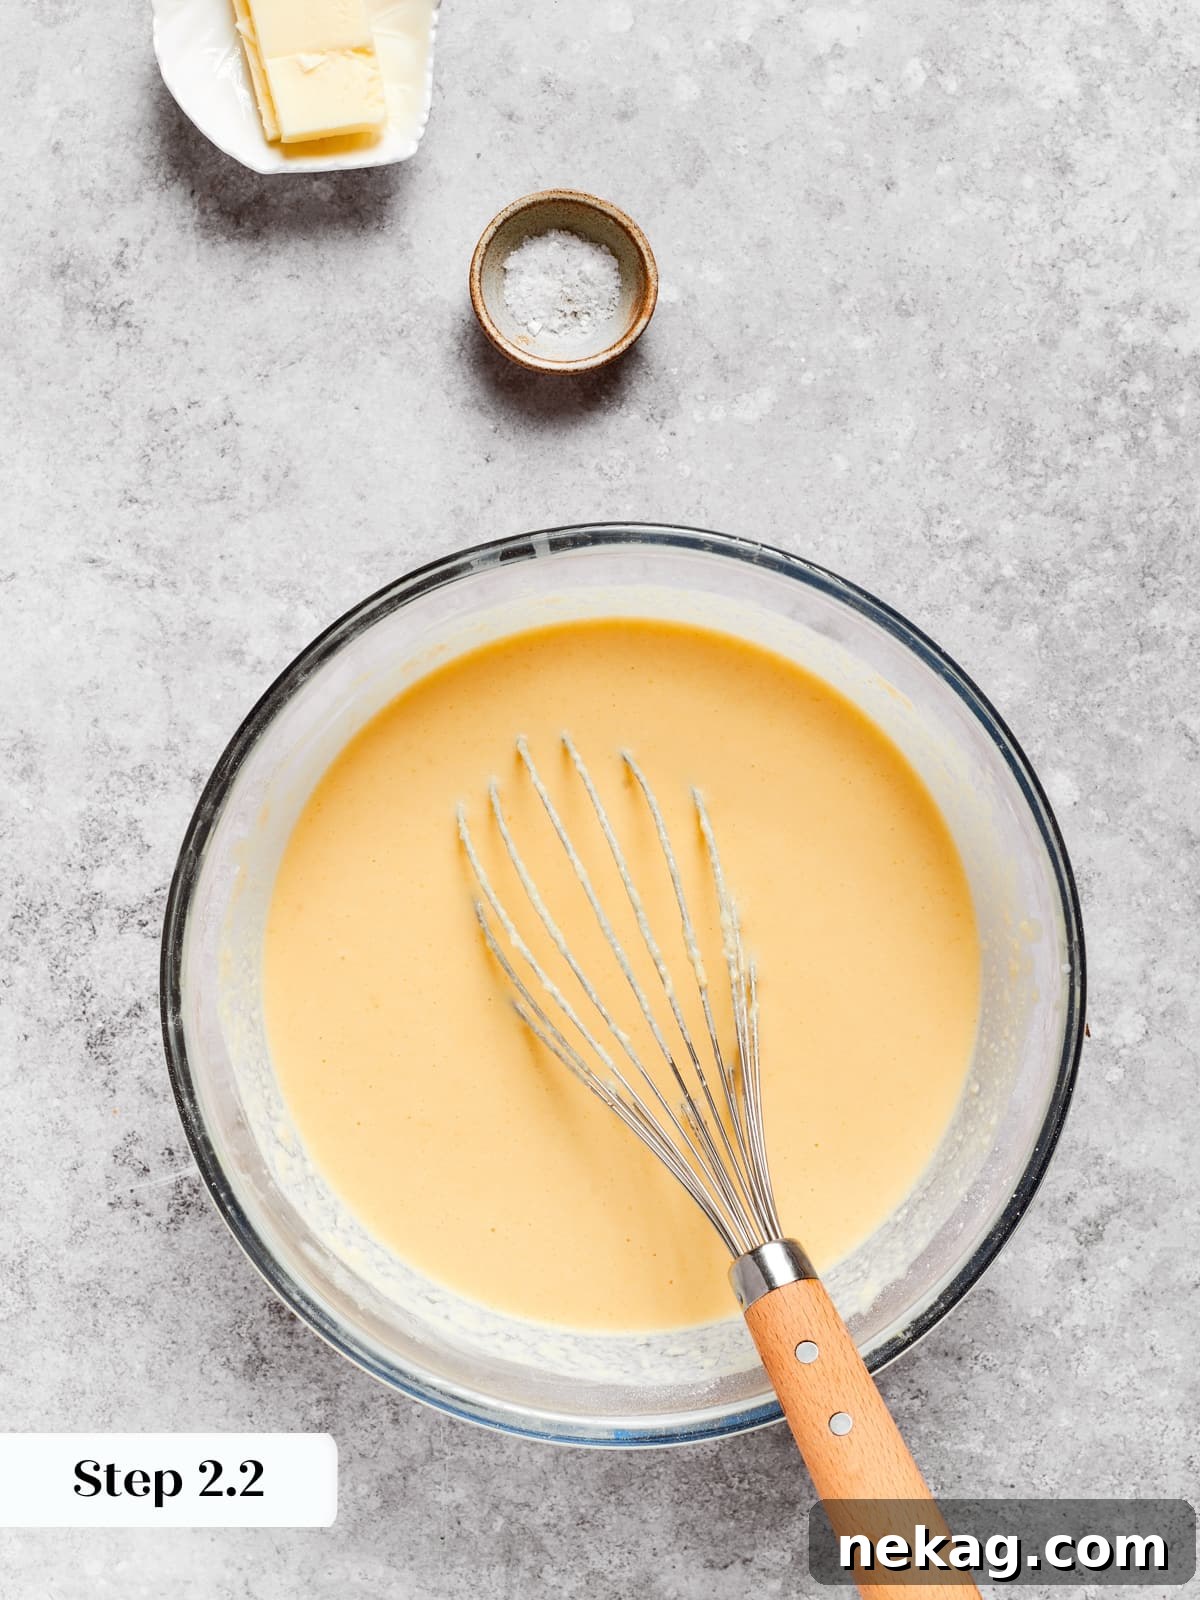
Step 2: Incorporate Flours and Water. Gradually whisk in both the all-purpose flour and cake flour, adding a little at a time, similar to the technique used for making popovers. This gradual addition helps prevent lumps and ensures a smooth batter. Once the flours are mostly incorporated, whisk in the water last (photos 1 & 2). You will notice the batter has a very liquid, almost watery consistency. This is absolutely correct; remember, a thick batter makes thick crêpes, and we’re aiming for delicate thinness.
Important Note: The batter will be notably thin and runny. This liquid consistency is fundamental for creating the paper-thin, delicate crêpes that are the hallmark of French cuisine. Resist the urge to add more flour, as this will lead to a dense and heavy crêpe.
Step 3: Allow the Batter to Rest. This step is critical for success. Cover the bowl and let the crêpe batter rest in the refrigerator overnight, or for a minimum of one hour at room temperature. Resting allows the flour granules to fully hydrate, which creates a smoother, lump-free batter. More importantly, it gives the gluten a chance to relax, preventing your cooked crêpes from becoming tough or rubbery. A well-rested batter is the key to truly tender and pliable crêpes.
Part 2: Cooking Your Perfect Crêpes
Chef’s Reminder: If your batter has been refrigerated, remove it from the fridge approximately one hour before you plan to begin cooking. This allows the butter in the batter to soften and the batter to reach room temperature, making it easier to spread thinly in the pan.
Step 4: Preheat Your Pan. Place a crêpe pan or a high-quality nonstick skillet over medium-low heat. Consistency is crucial here; “slow and steady wins the race” truly applies. Give the pan sufficient time to heat evenly across its entire surface. A properly preheated pan is essential for preventing sticking and ensuring uniform cooking.
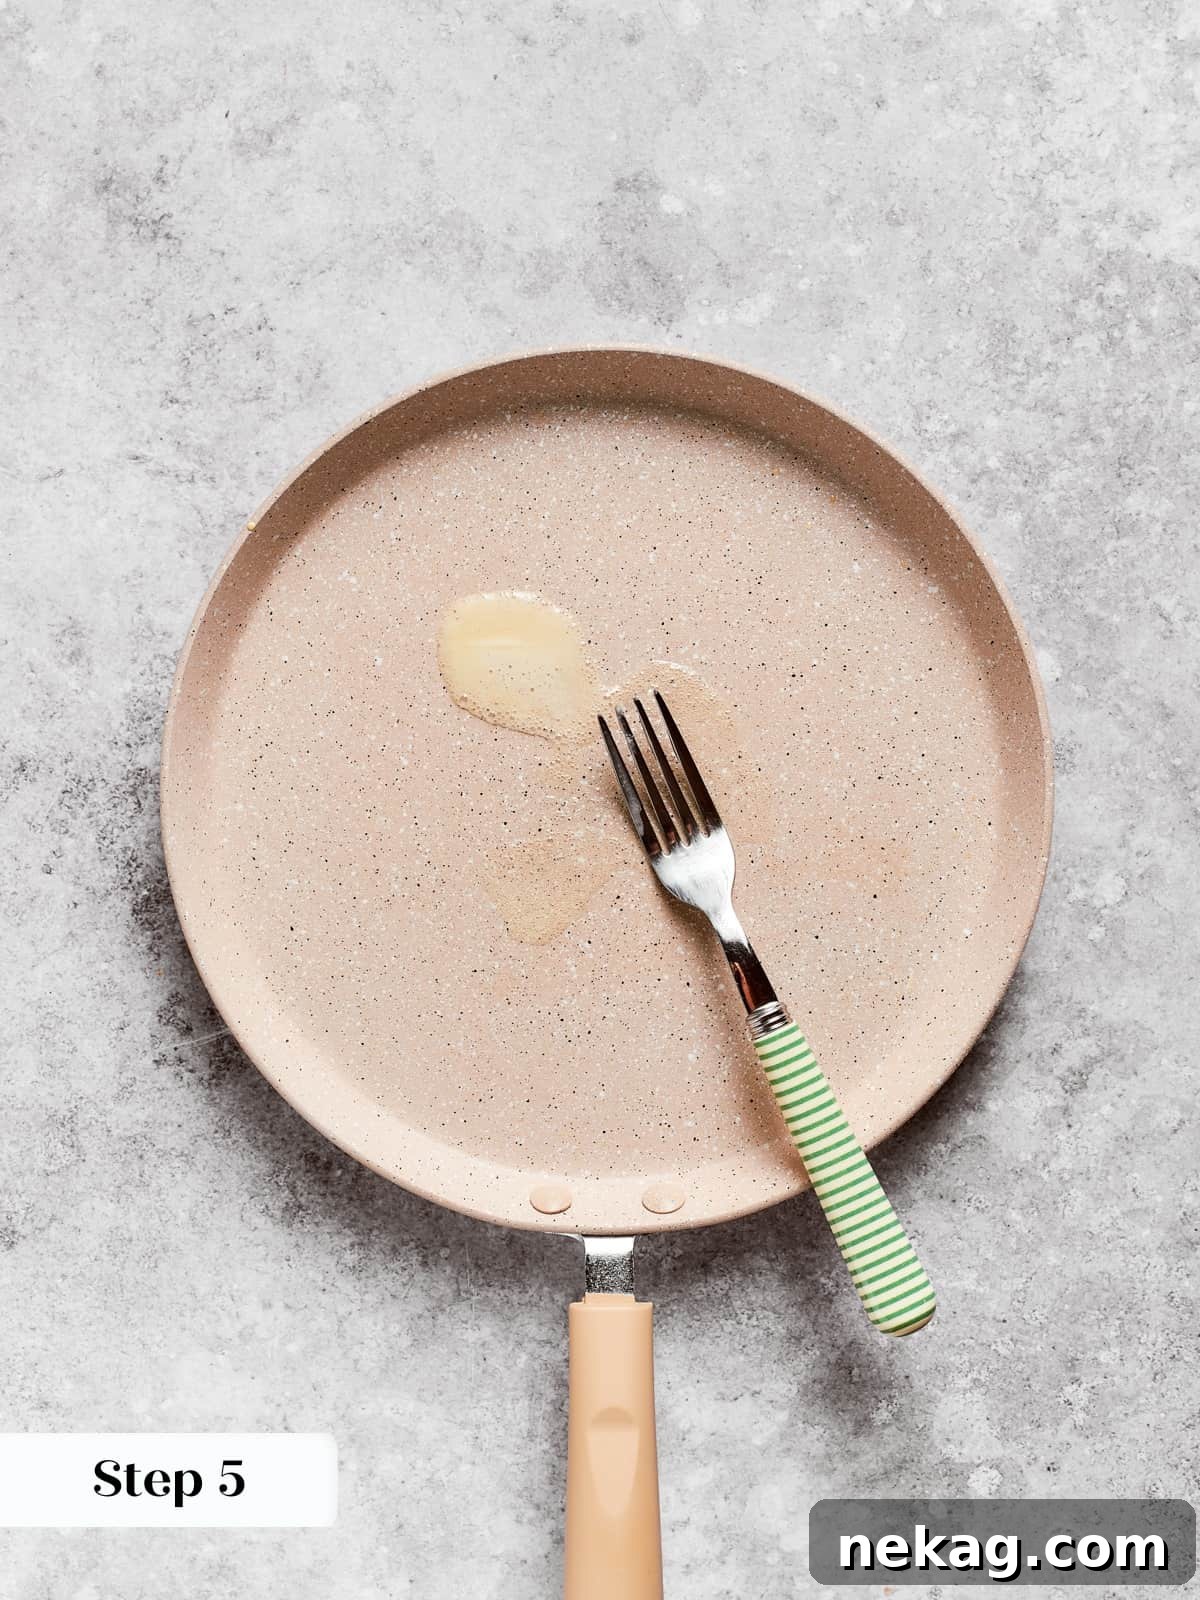
Step 5: Initial Pan Buttering. For the very first crêpe, and only the first, gently butter the pan. A simple technique is to stab a small piece of cold butter with a fork and quickly rub it over the entire cooking surface of the hot pan (photo 3). You only need a very thin, even layer. While you could use a small amount of vegetable oil, butter imparts a superior flavor and a more authentic finish to your crêpes.
Step 6: Pour and Swirl a Thin Layer of Batter. With one hand, pour a ladle (just shy of 4 ounces, or about half a cup) of the rested crêpe batter into the very center of the hot pan. Immediately, with your other hand, pick up the pan and quickly swirl it in a circular motion. This swift swirling action will evenly distribute the thin batter across the entire bottom of the pan, forming a perfect, uniform circle. The goal is to cover the pan with the thinnest possible layer of batter.
A Note on Crêpe Spreaders: While professional crêpe makers often use a T-shaped spreader, it can be a tricky tool to master for home cooks, and frankly, it’s often unnecessary. The quick swirl technique is highly effective and easier to control. Using a spreader requires precise temperature monitoring; if the pan is slightly too hot, the batter sets before you can spread it; if too cool, it just slides around. Overworking the batter with a spreader can also cause it to stick.
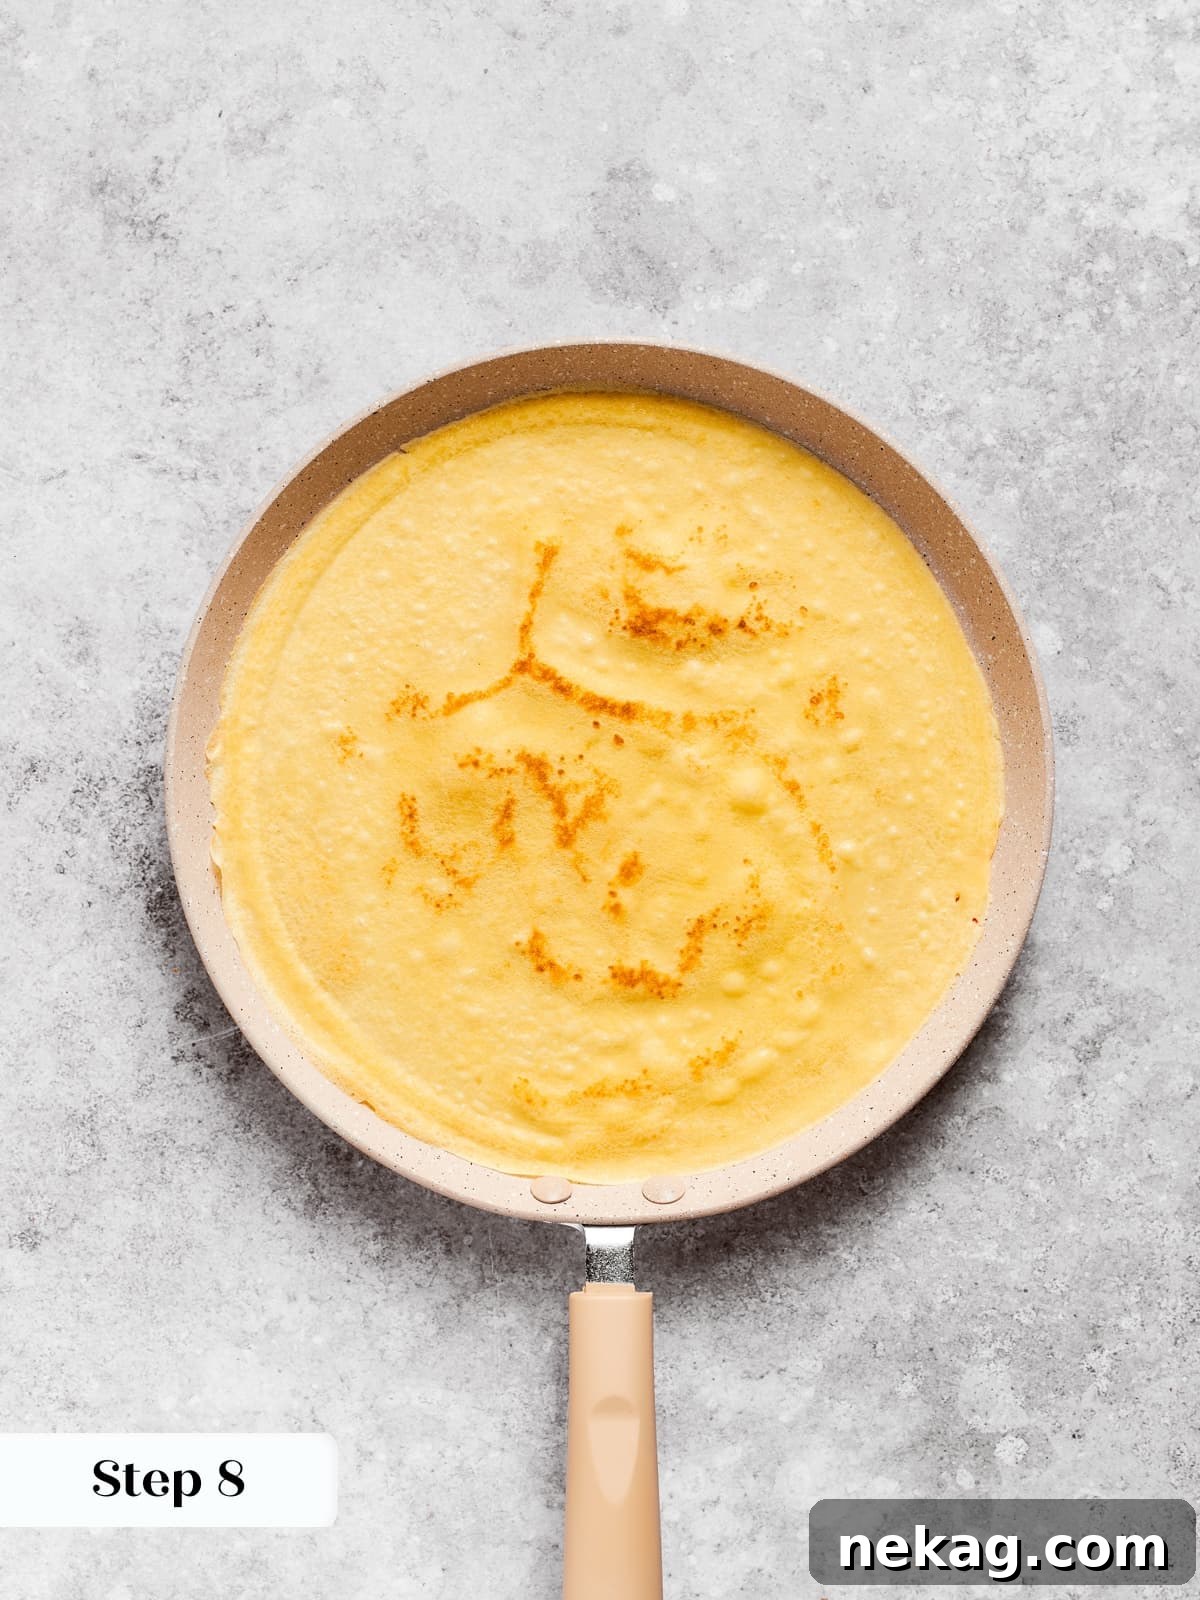
Step 7: Cook the First Side Until Golden. Allow the crêpe to cook undisturbed over medium-low heat. Watch carefully; the edges will begin to brown, and you’ll see small, subtle golden-brown spots appearing through the surface near the center. The outer edge serves as an excellent indicator of readiness. For a 12-inch crêpe, this usually takes about 6 minutes, but exact timing can vary slightly depending on your stove and pan.
Step 8: The Art of the Flip. Once the first side is perfectly golden and released from the pan, gently slide a thin spatula underneath the center of the crêpe. With a confident motion, flip it over, much like you would a pancake (photo 4). Don’t worry if it folds or crinkles slightly; you can easily unfold it with your spatula. If you flip it prematurely and it appears too pale, simply flip it back over to continue cooking until the desired color is achieved. Don’t stress; practice makes perfect!
Step 9: Finish Cooking the Second Side. Continue to cook the crêpe on the second side for an additional 1-2 minutes. This side typically cooks faster as the pan is already thoroughly heated. Look for a light golden color and ensure it’s fully cooked through.
Embrace the European Pace: It can feel like an eternity, waiting for each crêpe to cook to perfection. However, anyone who has patiently queued for a freshly made crêpe on the streets of Paris knows that c’est normal – this unhurried pace is simply part of the authentic crêpe experience. Savor the process!
Step 10: Cool or Serve Immediately. Carefully remove the cooked crêpe from the pan. You can transfer it to a wire rack to cool completely if you plan to stack or freeze them, or proceed directly to adding your desired toppings and serving warm for instant gratification!
Step 11: Repeat and Stack. Continue this process with the remaining crêpe batter. As each crêpe finishes cooking, either serve it immediately or allow it to cool completely on a wire rack before stacking them. Once fully cooled, stacked crêpes won’t stick together and are ready for storage.
Part 3: Assembling & Plating Your Delicious Sweet Crêpes
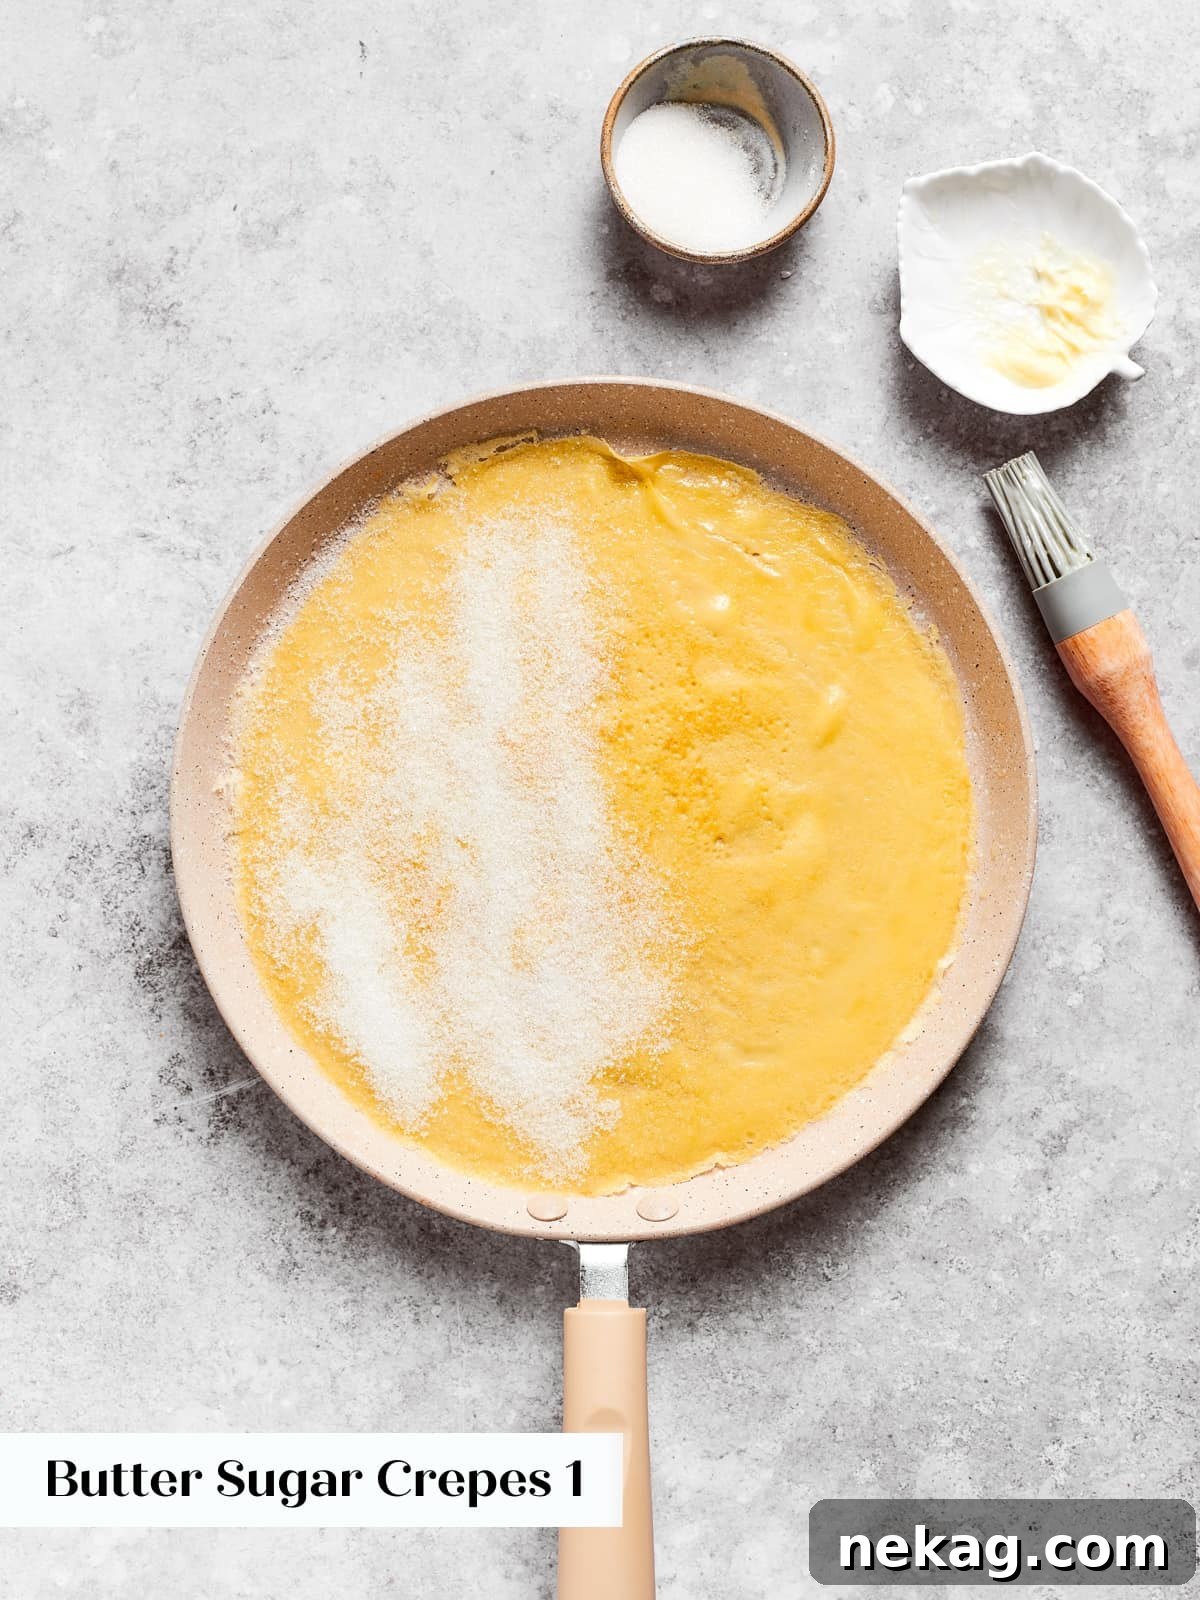
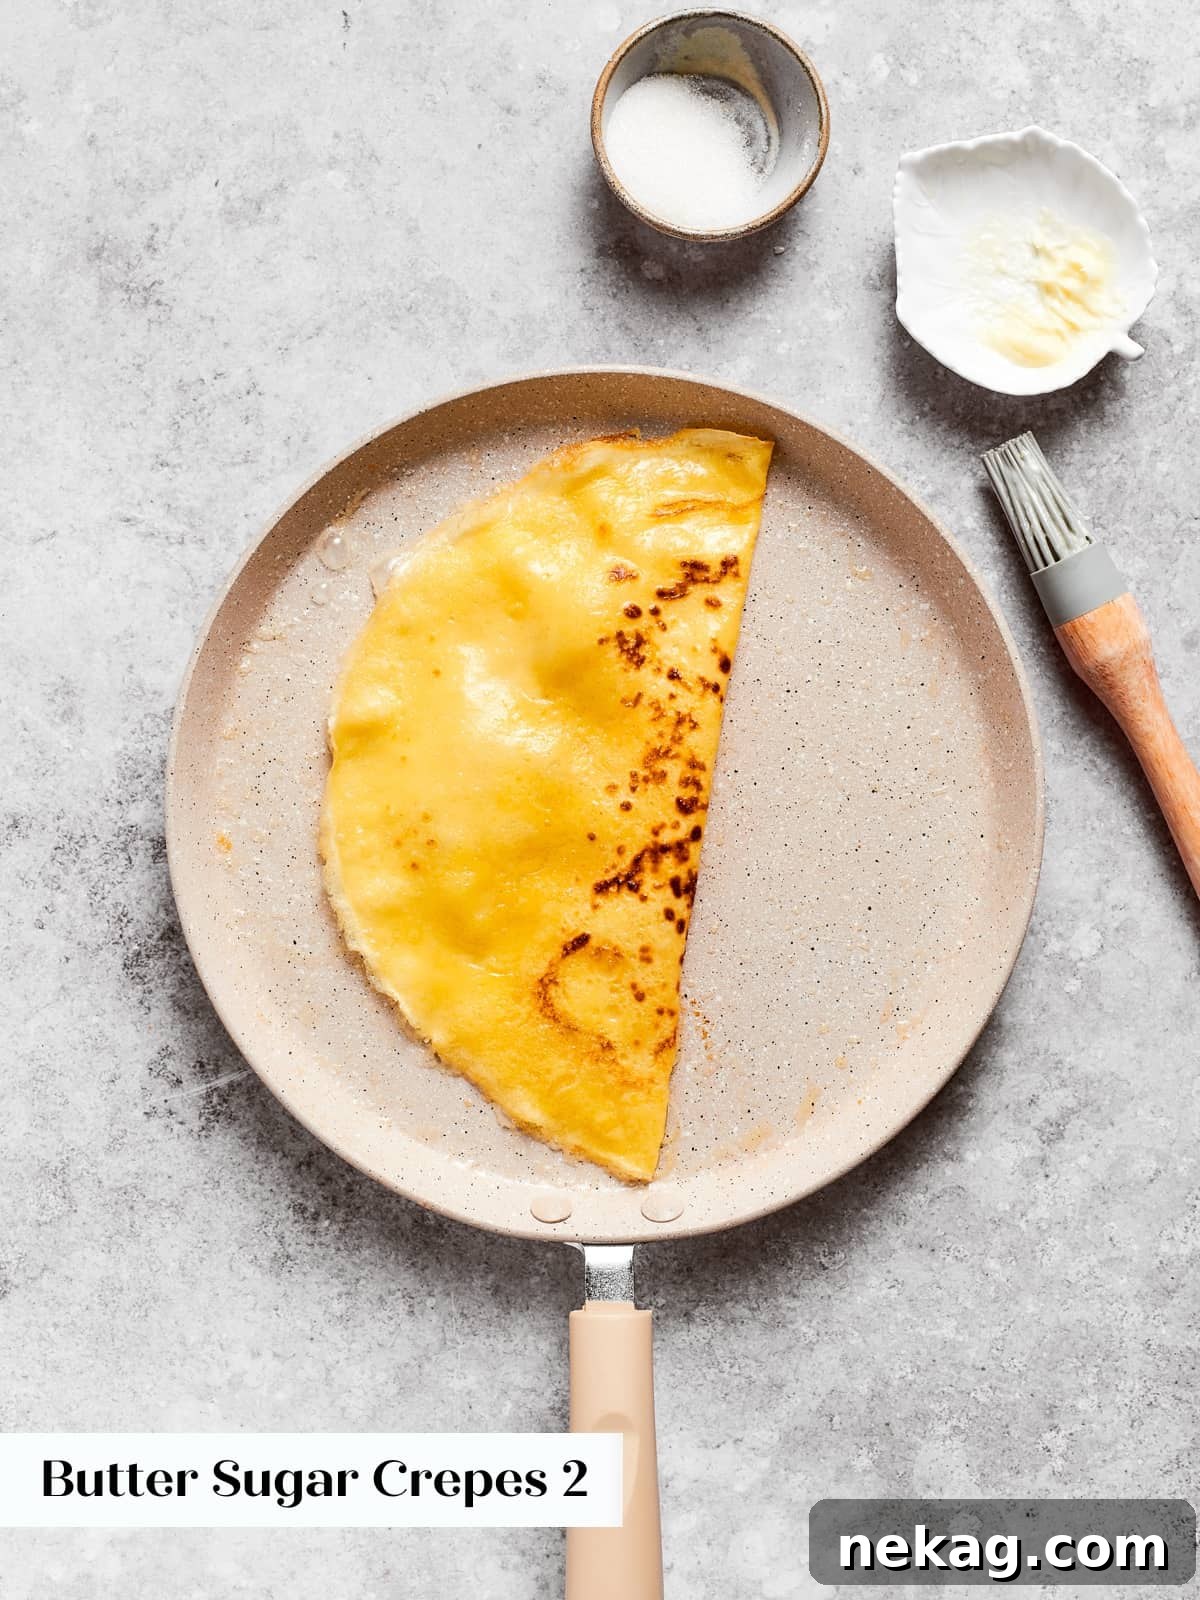
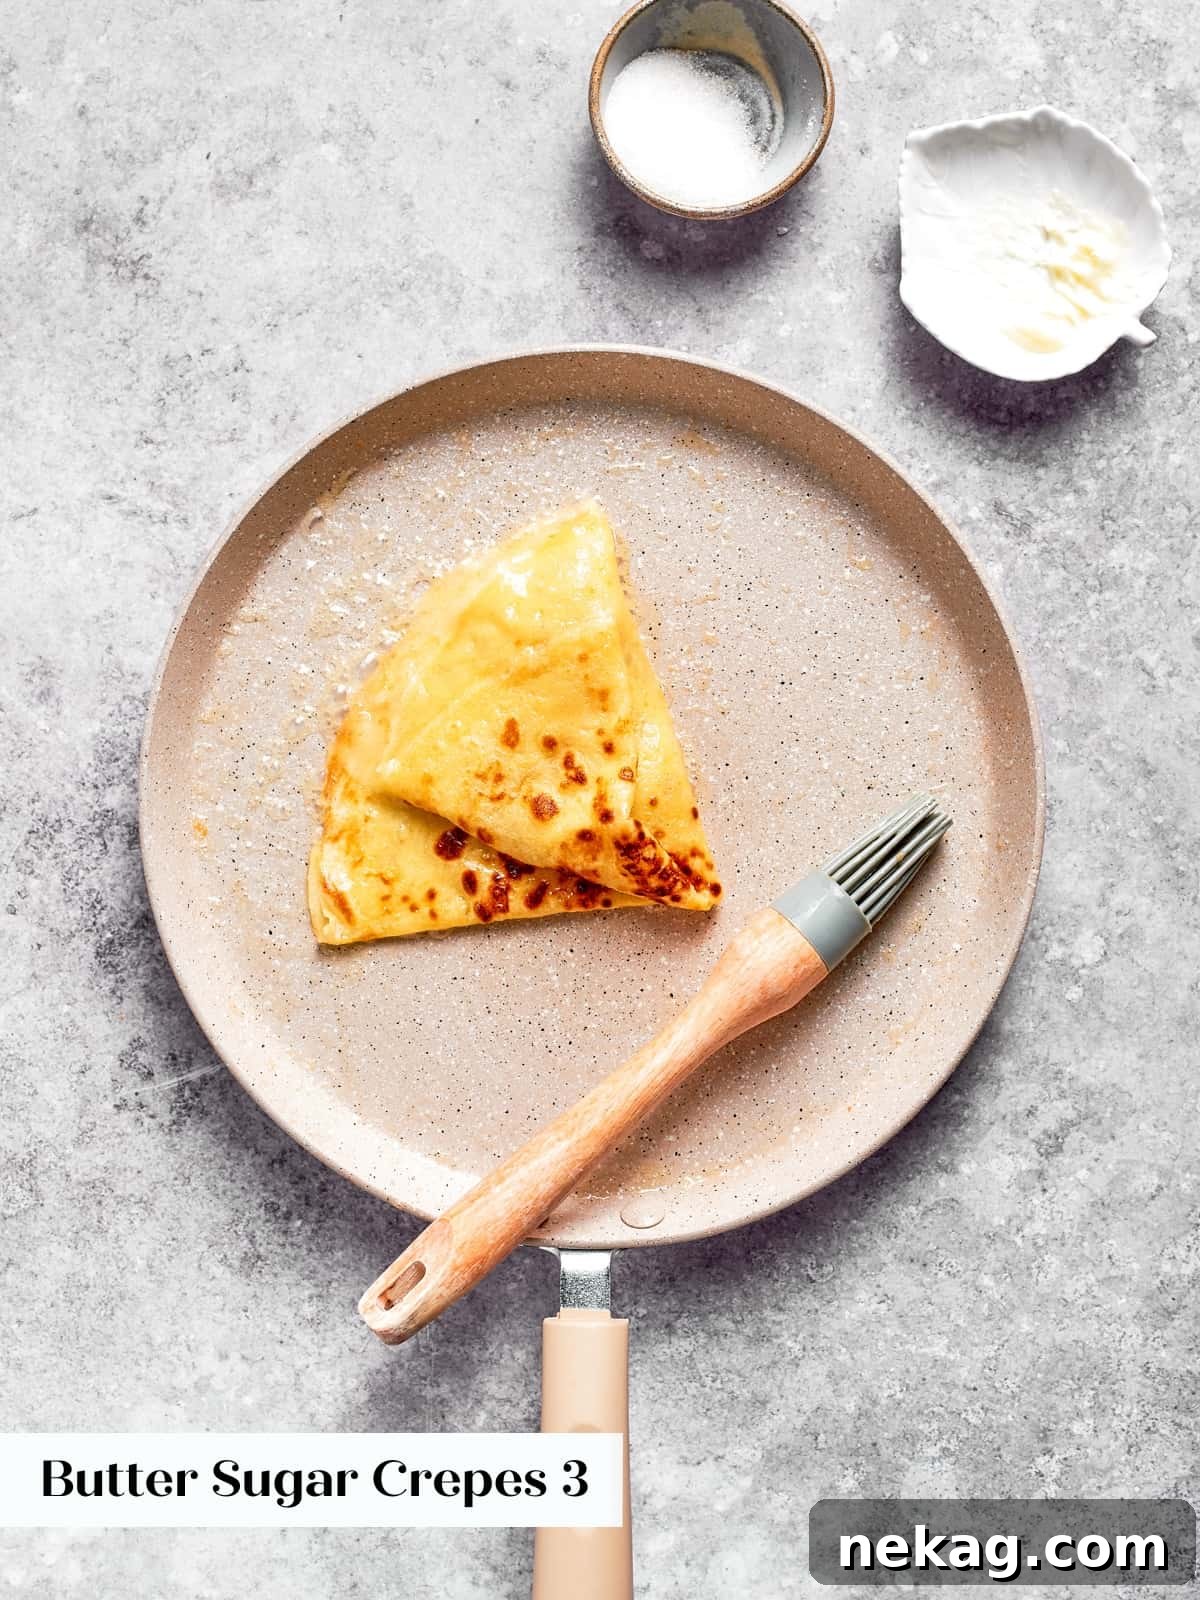
To prepare classic Butter Sugar Crêpes: For this timeless French treat, you’ll want to assemble them directly in the hot pan. After flipping the crêpe, gently rub a small pat of butter (the same one you used for the initial pan buttering) over the warm surface. Then, generously sprinkle granulated sugar over one half of the crêpe. Fold the crêpe in half, allowing the sugar and butter to melt slightly, and continue to cook for an additional minute or two until lightly caramelized. Fold it in half one more time to form a neat triangle and serve immediately while hot, perhaps with a side of pure maple syrup (photos 5-7).
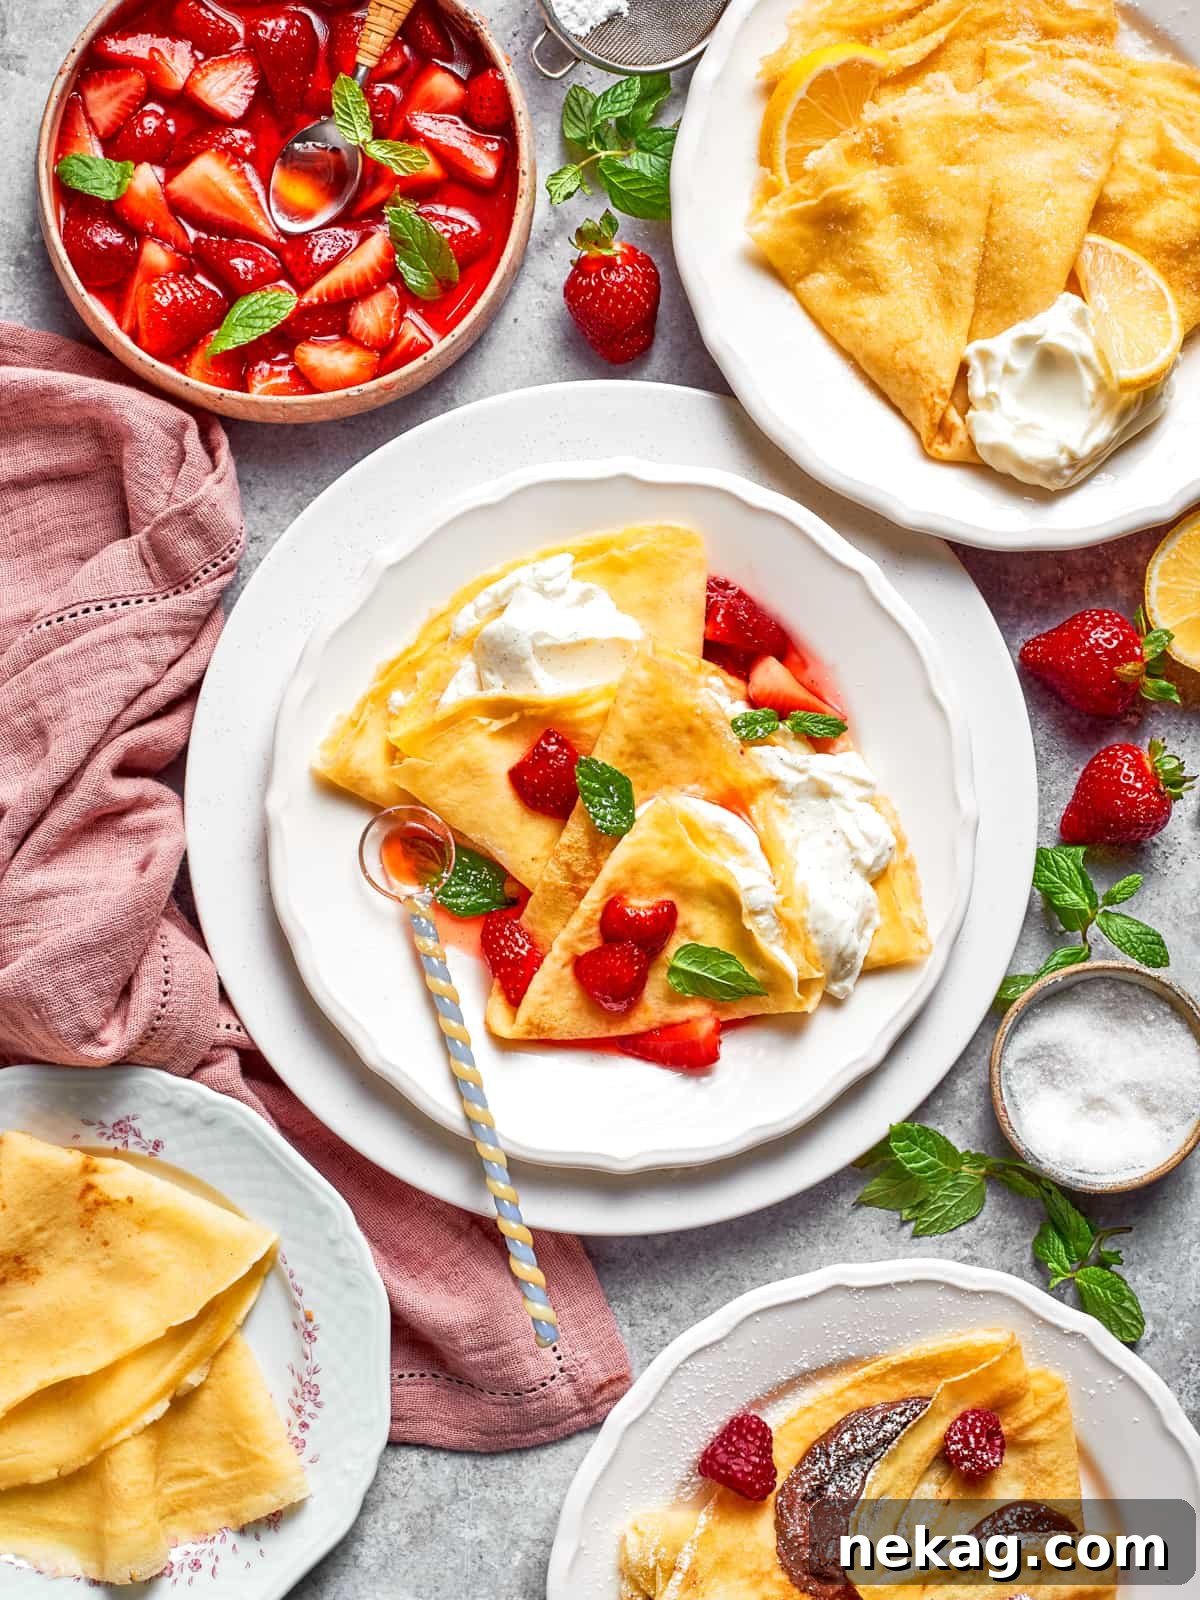
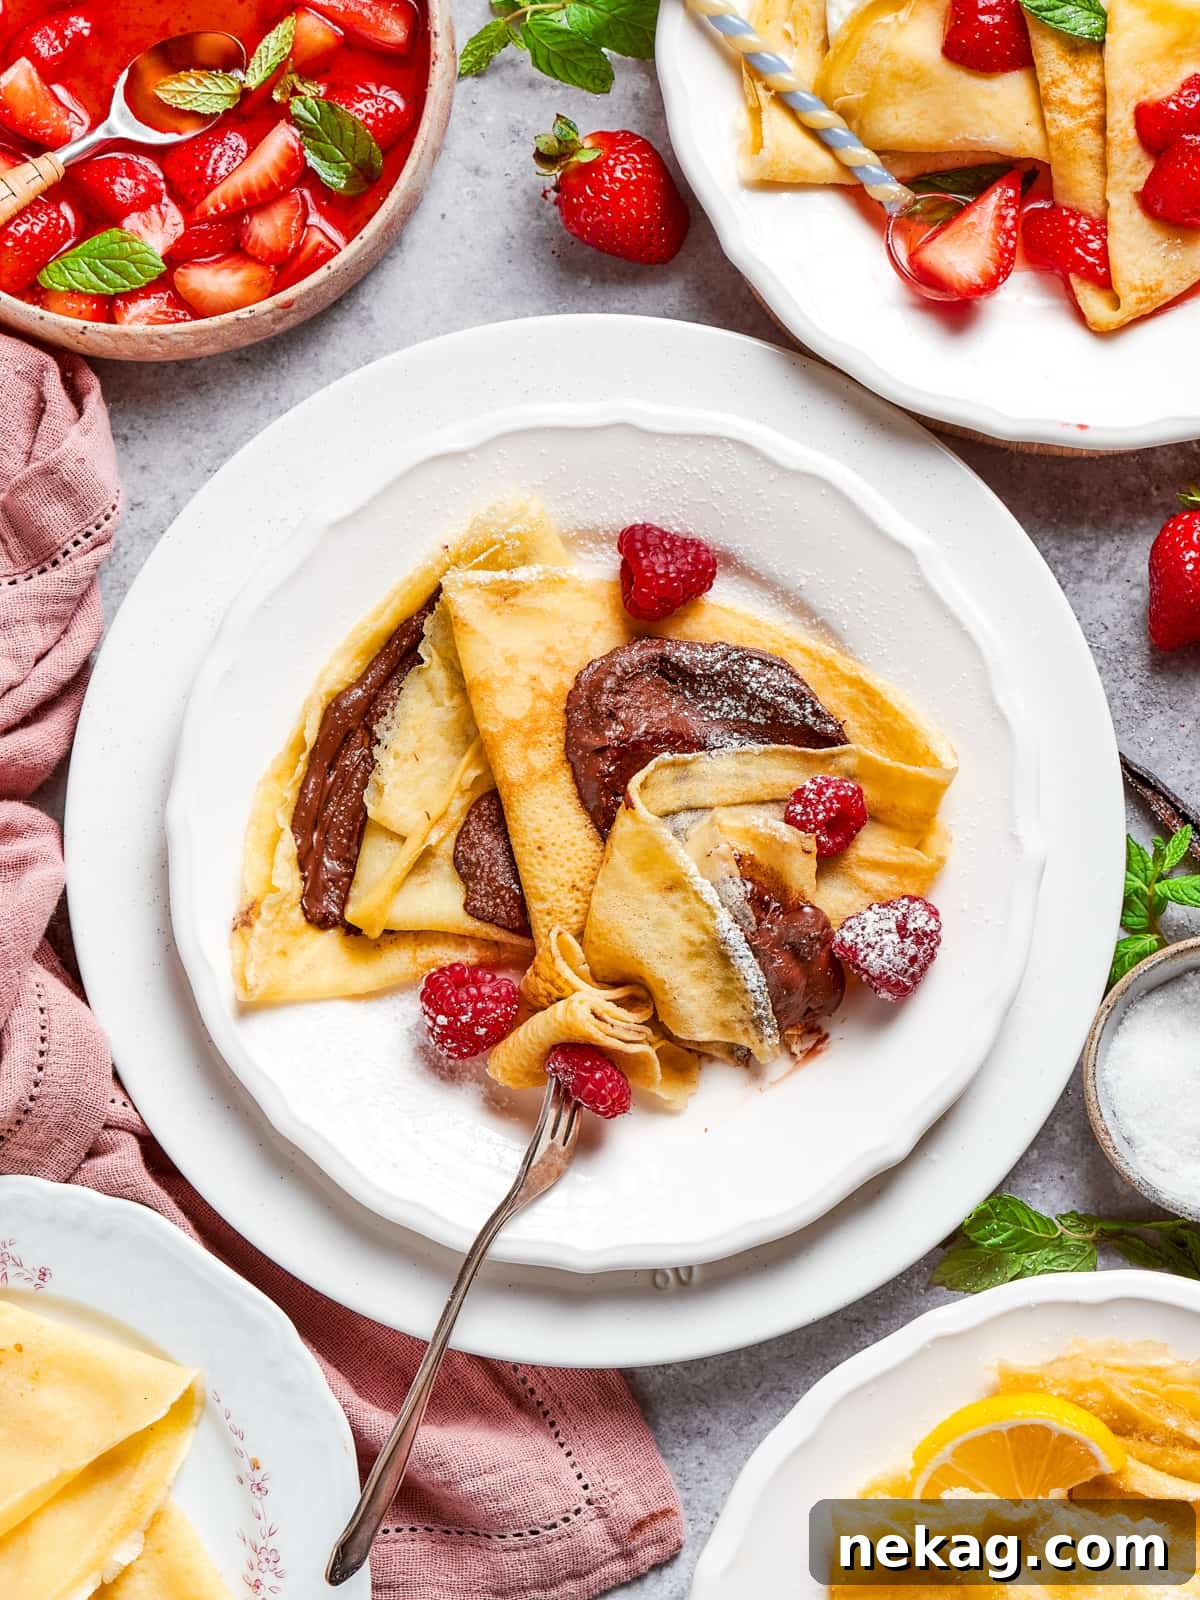
To prepare decadent Nutella Crêpes: These can be served fresh from the pan or assembled later once cooled. Simply spread a generous layer of Nutella or your favorite chocolate hazelnut spread over half of the crêpe. Fold it in half, then fold it in half again to create a classic triangle shape. Add sliced bananas or a dusting of powdered sugar for extra indulgence (photo 8).
To prepare fresh Berries and Cream Crêpes: To prevent your delicate whipped cream from melting, ensure these crêpes are fully cooled before assembly. Prepare your fruit topping by tossing 2 cups of chopped strawberries and any other desired fresh berries with about ¼ cup of granulated sugar and a squeeze of fresh lemon juice. Stir gently and cover until you are ready to serve (this fruit mixture can be prepared up to 3 days in advance). For the cream, whisk together heavy cream, a little powdered sugar, and vanilla extract to taste until soft peaks form. For an elegant visual touch, consider adding vanilla bean paste. If you prefer to serve your berry crêpes warm, I highly recommend substituting the whipped cream with a scoop of premium vanilla bean ice cream instead (photo 8).
Chef Lindsey’s Expert Recipe Tip
Patience truly is the most crucial ingredient when it comes to making perfect crêpes. It’s imperative to let the batter rest for AT LEAST an hour before you begin cooking; this allows the gluten to relax and the flour to fully hydrate, preventing a rubbery texture. Additionally, maintain your pan at a consistent medium-low heat. Each crêpe will require approximately 6-8 minutes to cook to a beautiful golden perfection. Rushing any step in the process, whether it’s the resting time or the cooking temperature, will invariably lead to undesirable results – likely tough, rubbery, or even burned crêpes. Embrace the methodical pace, and you will be rewarded with exquisitely tender and delicious crêpes.
Common Crêpe Recipe FAQs
Proper storage ensures your delicate crêpes stay fresh for longer. Once cooked, allow your crêpes to cool completely on a wire rack before stacking them. As long as they are fully cooled, there’s no need to separate each crêpe with parchment or wax paper; they typically won’t stick. Once stacked, wrap the pile tightly in plastic wrap or place them in a freezer-safe bag or airtight container. They can be refrigerated for up to 2-3 days or frozen for up to a month. Thaw frozen crêpes in the refrigerator overnight before gently reheating.
While not strictly mandatory, I highly recommend investing in a dedicated crêpe pan. Its shallow sides and even heat distribution make it significantly easier to swirl the batter thinly and flip the crêpes without tearing. This crepe pan is my personal favorite! However, if you don’t have one, a good quality nonstick skillet with no scratches in the lining can also work. Ensure your nonstick pan has low enough sides to allow for easy access when flipping.
Lumps can result from flour not being fully incorporated or hydrated. The best way to ensure a silky-smooth crêpe batter is to strain it through a fine-mesh sieve after all ingredients are mixed. To prevent lumps from forming in the first place, try sifting your flours before adding them to the wet ingredients, and always add the flours slowly while continuously whisking.
Rubbery crêpes are a common issue, usually stemming from one of two main culprits: overmixing the batter or not allowing the batter sufficient rest time. Overmixing develops the gluten too much, making the crêpes tough. Similarly, if the gluten doesn’t get a chance to relax by resting the batter for at least an hour (or preferably overnight), the crêpes will lack that desired tender, delicate texture. Always respect the resting period!
Yes, you can adapt this recipe to be gluten-free! Substitute the all-purpose and cake flours with a good quality 1:1 gluten-free all-purpose flour blend (ensure it contains xanthan gum). You might find the batter needs a bit more water to achieve the right thin consistency, and a longer resting time (at least 2 hours) can also be beneficial for optimal texture. Always check the specific recommendations for your chosen gluten-free flour blend.
Recommended Brunch Recipes to Complete Your Spread
Donut Recipes
Glazed Chocolate Donuts
Indulge in these rich, moist chocolate cake donuts, perfectly glazed for a delightful brunch treat.
Easy Bake Sale Ideas
Cinnamon Flop
A simple yet utterly delicious cinnamon-spiced cake, perfect for a casual breakfast or afternoon snack.
Easy Breakfast Recipes
Pumpkin French Toast
Embrace fall flavors with this comforting pumpkin spice French toast, a delightful twist on a classic.
Date Night
Buttermilk Biscuits
Flaky, tender buttermilk biscuits are a perfect accompaniment to any sweet or savory brunch spread.
If you tried this recipe and absolutely loved it, please take a moment to leave a 🌟 star rating and share your experience in the comments section below. I genuinely love hearing from you, and your feedback truly brightens my day!

Sweet Crepe Recipe
Comment
Print Recipe
Ingredients
For the crepe batter
- 1 ½ cups whole milk
- 4 large eggs
- ½ teaspoon kosher salt
- 6 tablespoons butter melted
- 1 ½ cups all-purpose flour
- ½ cup cake flour
- 1 cup water
For optional toppings
- unsalted butter
- granulated sugar
- strawberries
- raspberries
- whipped cream
- Nutella or another chocolate spread
Instructions
Prepare the crêpe batter:
-
In a large mixing bowl, whisk together the eggs, salt, milk, and melted butter until smooth.
-
Slowly whisk in the all-purpose and cake flours, adding a little at a time to prevent lumps. Whisk in the water last, ensuring the batter has a very liquid consistency.
-
Cover the bowl and let the batter sit refrigerated overnight or for at least an hour at room temperature. This crucial step allows the flour to hydrate properly and any gluten to relax, resulting in tender crêpes.
How to cook crêpes:
-
If using refrigerated batter, remove it from the fridge about an hour before cooking. Preheat a crêpe pan or nonstick skillet over medium-low heat. Patience is key for even cooking.
-
For the very first crêpe, use a fork to stab a small piece of butter and quickly butter the pan. You only need to do this once.
-
Pour approximately one ladle (just under 4 ounces) of batter into the center of the pan with one hand, immediately swirling the pan in a circular motion with the other to evenly distribute the batter into a thin layer.
-
Cook the first side over medium-low heat until the edges begin to brown and small golden spots appear through the center. The outer edge is your best indicator of readiness. For a 12-inch crêpe, this typically takes about 6 minutes.
-
Flip the crêpe by sliding a thin spatula underneath its center and gently turning it over like a pancake. If it folds, simply unfold it. If it’s too pale, flip it back over to continue cooking. Don’t worry about perfection on the first try.
-
Continue to cook the second side for an additional 1-2 minutes until lightly golden.
-
Remove the cooked crêpe and transfer it to a wire rack to cool, or immediately add your desired toppings and serve warm.
-
Repeat the process with the remaining batter. Stack the cooled crêpes as you finish cooking them.
To assemble & plate sweet crêpes:
-
To prepare classic Butter Sugar Crêpes: These are best prepared hot in the pan. After flipping the crêpe, rub a small amount of butter (from the initial buttering stick) over the surface, then sprinkle granulated sugar over half of the crêpe. Fold the crêpe in half, continue cooking for an extra minute or two until sugar melts slightly, then fold in half once more into a triangle. Serve hot, optionally with maple syrup.
-
To prepare Nutella Crêpes: Serve these fresh from the pan or assemble them later. Spread half the crêpe with Nutella or your chosen chocolate hazelnut spread, fold in half, and then fold again to create a triangle.
-
To prepare Berries and Cream Crêpes: Ensure these crêpes are cooled to prevent the cream from melting. Prepare your fruit mixture by tossing 2 cups of chopped strawberries and other fresh fruit with about ¼ cup granulated sugar and a squeeze of lemon juice. Stir and cover until ready to serve (can be made up to 3 days in advance). For the cream, whisk heavy cream with a little powdered sugar and vanilla extract until soft peaks form. Vanilla bean paste can be added for visual appeal. If serving warm, vanilla bean ice cream is an excellent alternative to whipped cream.
Notes
Presentation Tip – If the first side of your crêpe appears too pale, simply cook the second side a little longer to achieve that beautiful golden hue. Mastering crêpe timing is truly an art!
Best Technique – A dedicated crêpe flipper is highly recommended as it helps prevent tearing and protects your pan’s surface. An offset spatula can also work effectively.
Storage Instructions – Once cooled completely, stack your crêpes, wrap them well in plastic wrap, and either refrigerate them for a few days or freeze them for up to a month in a sealed freezer bag or airtight container.
Nutrition Facts (Per Serving)
Before You Go: Explore More Breakfast Delights
Thank you for joining me on this culinary adventure to master the French crêpe. I sincerely hope you enjoyed crafting and savoring this sweet crêpe recipe as much as I enjoyed sharing my professional tips with you. These delicate, buttery crêpes are truly a versatile delight, perfect for any occasion.
Should you be craving more delightful ways to start your day or seeking inspiration for your next brunch, be sure to explore our other fantastic breakfast recipes. You might fall in love with these incredibly soft and flavorful sourdough cinnamon rolls, perfect for a cozy morning. Or, for a healthier yet equally delicious option, try our wholesome and protein-packed blueberry banana bran muffins. Happy cooking!