
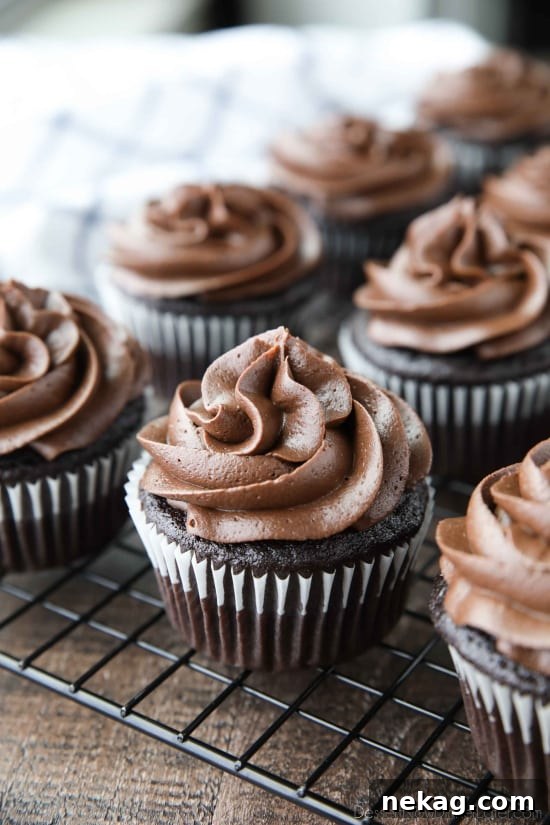
The Ultimate Guide to Baking Perfect Homemade Chocolate Cupcakes
Discover the secret to making the best rich, moist, and tender chocolate cupcakes right in your own kitchen. This easy-to-follow recipe promises a classic dessert done right, perfect for any occasion!
Every home baker deserves a go-to chocolate cupcake recipe that delivers consistent perfection. Forget the boxed mixes; this homemade version is not only incredibly simple but also yields cupcakes that are undeniably superior in flavor and texture. It’s a foundational recipe that will quickly become a cherished favorite in your culinary repertoire.
Imagine biting into a cupcake that’s perfectly balanced – a deep, satisfying chocolate flavor, a wonderfully moist crumb that melts in your mouth, and a tender texture that makes each bite pure bliss. This recipe achieves all of that with straightforward ingredients and minimal fuss, making it ideal for both seasoned bakers and beginners alike.
The Secret to Our Signature Chocolate Cupcakes Recipe
This chocolate cupcake recipe rivals the convenience of a store-bought mix while far surpassing it in quality. The magic begins with the dry ingredients. Sifting them together isn’t just an extra step; it’s crucial for ensuring a light, airy, and exquisitely tender cupcake crumb. This simple technique prevents lumps and evenly distributes the leavening agents, making a noticeable difference in the final product. For quick and easy sifting, especially if you bake frequently, consider investing in a large round sifter – a tool often found in professional bakeries for its efficiency.
Pro Tip for Sifting: To make cleanup a breeze and ensure no ingredients are lost, sift your dry ingredients onto a large piece of parchment paper. Once sifted, simply gather the ends of the parchment paper to create a funnel, allowing you to easily pour the mixture into your mixing bowl without any mess.
After the dry ingredients are perfectly prepared, you’ll incorporate the wet components: a large egg for structure, oil for ultimate moisture, vanilla extract for depth of flavor, and milk for richness. The final touch, and a true game-changer for chocolate intensity, is the addition of boiling water. This hot liquid “blooms” the cocoa powder, releasing its full flavor potential and deepening the chocolate notes considerably. For an even richer, more complex chocolate experience, feel free to substitute hot brewed coffee for the boiling water. The coffee enhances the chocolate without making the cupcakes taste like coffee.
This careful balance of ingredients ensures that each cupcake is not just chocolatey, but profoundly so, with a luxurious moistness that will leave everyone reaching for a second.
Crucial Tips for Flawless Cupcake Baking
One of the most common pitfalls in cupcake baking is overfilling the liners. This chocolate cupcake batter will appear quite thin, which is perfectly normal, so don’t be alarmed. However, this thin consistency makes it even more critical to adhere to proper filling levels. The goal is beautifully domed cupcakes without overflow, and achieving this consistency is simpler than you might think.
I recommend filling your cupcake liners approximately 2/3 full – just a little more than halfway. If you peek through the liners, you’ll see mine were filled precisely to this mark, and they rose beautifully to the top edge of the cup without a single spill. The most effective way to ensure uniform filling is by using a #24 cookie scoop. This tool dispenses the perfect amount of batter every time, ensuring all your cupcakes bake evenly and look consistent.
While we all desire that perfect 12-cupcake recipe, it’s far better to have a few extra cupcakes than to face the frustrating mess of batter overflowing in your oven, baking onto your muffin tin. An underfilled cupcake won’t rise as much, resulting in a flatter, less appealing top, while an overfilled one creates a mushroom cap that can be difficult to frost neatly. Precision in filling is key to those bakery-quality results.
The Perfect Pairing: Frosting Your Chocolate Cupcakes
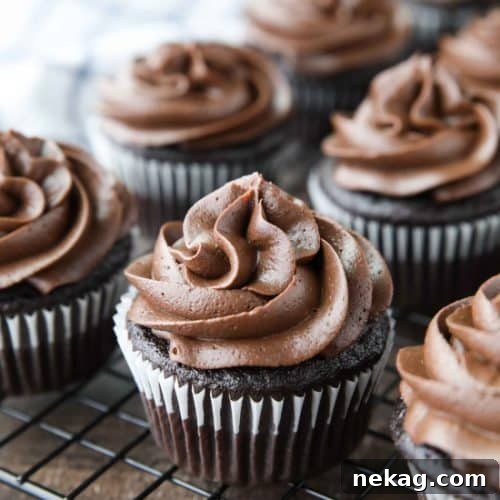
Once your delectable chocolate cupcakes have cooled completely, it’s time for the crowning glory: the frosting! I absolutely adore pairing these with my rich Chocolate Cream Cheese Frosting. The slight tang from the cream cheese perfectly complements the deep chocolate, creating a heavenly and decadent combination that is truly irresistible. It’s a match made in dessert heaven, offering a sophisticated flavor profile that elevates the entire cupcake experience.
However, if cream cheese isn’t your preference, or if you’re looking for a more traditional approach, my classic Chocolate Buttercream Frosting is an excellent alternative. It’s smooth, luscious, and intensely chocolatey, providing a comforting and familiar sweetness that everyone will love. Both options are fantastic for creating stunning cupcakes, whether for a birthday celebration, a casual get-together, or simply a treat for yourself.
And don’t forget, if you’re building your essential baking collection, be sure to grab my recipe for classic Vanilla Cupcakes as well. It’s another must-have for every recipe box, offering a delightful contrast to these rich chocolate wonders.
Chocolate Cupcakes Recipe
Average Rating: 4.43 from 225 ratings
Chocolate Cupcakes Recipe
Created by Amber Brady
Prep: 10 mins | Cook: 20 mins | Total: 30 mins
This basic homemade Chocolate Cupcakes Recipe creates the best rich, moist, tender cupcakes and is easy to make. A classic done right!
[Pin It]
[Rate Recipe]
[Save Recipe]
Yields: 18 cupcakes
Ingredients
- 1 cup (200 g) granulated sugar
- 1 cup (120 g) all-purpose flour (stir, spoon, and level when measuring for accuracy)
- ½ cup (40 g) unsweetened cocoa powder (ensure it’s baking cocoa, not hot chocolate mix)
- ¾ tsp baking powder
- ¾ tsp baking soda
- ½ tsp salt
- 1 large/XL egg
- ½ cup (118 ml) milk
- ⅓ cup (80 ml) oil (vegetable or canola oil works best for moisture)
- 1 tsp vanilla extract
- ½ cup (118 ml) boiling water (or hot brewed coffee for extra depth)
Equipment
- Cupcake Pans
- 6-inch round sifter (or a fine-mesh sieve)
- Large mixing bowl
- Whisk or electric mixer
- Liquid measuring cup
- Measuring spoons
- Rubber spatula
- #24 cookie scoop (optional, but highly recommended for even filling)
Instructions
- Preheat your oven to 350 degrees Fahrenheit (175°C). Line two standard muffin tins with paper cupcake liners, which will yield about 18 cupcakes.
- In a large mixing bowl, meticulously sift together the granulated sugar, all-purpose flour, unsweetened cocoa powder, baking powder, baking soda, and salt. Sifting is paramount here; it ensures a lighter, softer, and more tender cupcake. If you don’t have a sifter, vigorous whisking of these ingredients for at least 1-2 minutes will help break up lumps and aerate the mixture.
- To the sifted dry ingredients, add the large egg, milk, vegetable/canola oil, and vanilla extract. Stir the mixture gently until all ingredients are just incorporated. Be careful not to overmix, as this can lead to tough cupcakes. A few small lumps are acceptable at this stage.
- Next, heat ½ cup of water in a large glass measuring cup in the microwave until it reaches a rolling boil (this usually takes 1-2 minutes). Carefully pour the boiling water into your cupcake batter and mix thoroughly until the batter is smooth and uniformly consistent, with no watery spots. The batter will be quite thin, which is normal for this recipe, and is essential for its moist texture.
- Using a #24 scoop (or a spoon), fill each prepared cupcake liner 2/3 full – this means just barely over halfway. It is critically important NOT to overfill the liners, as this can cause the cupcakes to spill over or sink in the middle.
- Bake the cupcakes for 20-22 minutes. To determine doneness, insert a toothpick into the center of a cupcake; it should come out clean. Alternatively, gently touch the top of a cupcake – it should spring back when lightly pressed.
- Allow the cupcakes to cool completely on a wire rack before attempting to decorate them. For the ultimate indulgence, top with my Chocolate Cream Cheese Frosting, or for a classic touch, use Chocolate Buttercream Frosting.
Video
A video tutorial demonstrating the steps for these perfect chocolate cupcakes will be embedded here soon!
Notes
- For an even richer and darker chocolate appearance, I often use a blend of half regular unsweetened cocoa powder and half dark unsweetened cocoa powder. This small adjustment makes a significant visual and flavor impact.
- High Altitude Adjustment: If you’re baking at high altitudes, modify the recipe slightly for best results. Use only ½ tsp baking powder (instead of ¾ tsp) and add an additional 2 tablespoons of all-purpose flour. All other ingredients remain the same. Adjust baking temperature to 375˚F (190°C) and bake for a shorter duration of 15-18 minutes.
- This recipe has been lovingly adapted from a classic Hershey’s chocolate cake recipe, perfected for cupcakes.
Nutrition Information (Estimated Per Cupcake)
- Serving: 1 cupcake
- Calories: 146 kcal
- Carbohydrates: 22g
- Protein: 2g
- Fat: 6g
- Saturated Fat: 1g
- Polyunsaturated Fat: 5g
- Cholesterol: 13mg
- Sodium: 174mg
- Fiber: 1g
- Sugar: 13g
Disclaimer: Nutritional values were calculated using a third-party tool and are provided as an estimation only. Actual values may vary.
Sharing this recipe with a direct link is both encouraged and greatly appreciated. However, please note that copying, pasting, or taking screenshots of full recipes for sharing on any social media platform or website is strictly prohibited. All content and photographs are protected by copyright.
Why These Are the Best Moist Chocolate Cupcakes You’ll Ever Bake
What sets this recipe apart from the countless others out there? It’s a combination of simple techniques and thoughtfully chosen ingredients that work synergistically to create a truly exceptional cupcake. The inclusion of oil, rather than butter, is a key factor in achieving unparalleled moisture. Oil remains liquid at room temperature, contributing to a consistently tender crumb that stays moist for days, unlike butter, which can make baked goods dense and dry once cooled.
Furthermore, the boiling water or hot coffee isn’t just for blooming cocoa; it also creates a very thin batter, which can seem counter-intuitive but actually contributes to a finer, more delicate crumb. The high liquid content, coupled with the proper balance of leavening agents, ensures a gentle rise and prevents the cupcakes from becoming dense or rubbery. This careful formulation results in a cupcake that is both sturdy enough to handle frosting but delicate enough to feel luxurious with every bite.
Common Questions About Baking Chocolate Cupcakes
Why are my chocolate cupcakes dry?
Dry cupcakes are often the result of overbaking or too little fat/liquid. This recipe combats dryness with oil and boiling water. Ensure you don’t bake them longer than necessary; ovens vary, so always check for doneness at the minimum recommended time. Overmixing the batter can also develop too much gluten, leading to a tougher, drier texture.
Why do my cupcakes sink in the middle?
Cupcakes typically sink due to several reasons: overfilling the liners, opening the oven door too early (causing a sudden temperature drop), or an imbalance in leavening agents. Make sure to fill liners only 2/3 full, avoid opening the oven before the last few minutes of baking, and accurately measure your baking powder and soda.
Can I use butter instead of oil?
While you can substitute butter for oil, it will alter the texture of the cupcakes. Butter provides a richer flavor but can make cupcakes denser and less moist once cooled, as butter solidifies at room temperature. For the moistest result, stick with vegetable or canola oil as specified in the recipe.
How do I store homemade chocolate cupcakes?
Store unfrosted chocolate cupcakes in an airtight container at room temperature for up to 2-3 days. If frosted with cream cheese frosting, they should be stored in the refrigerator for up to 3-4 days. Allow refrigerated cupcakes to come to room temperature before serving for the best flavor and texture.
Can I make these chocolate cupcakes ahead of time?
Absolutely! Unfrosted cupcakes freeze exceptionally well. Once completely cooled, wrap them individually in plastic wrap, then place them in a freezer-safe bag or container for up to 2-3 months. Thaw at room temperature for a few hours before frosting and serving.
Delicious Variations and Customizations
While this classic chocolate cupcake recipe is perfect as is, it also serves as an excellent base for various flavor enhancements and customizations:
- Mint Chocolate Cupcakes: Add ½ teaspoon of peppermint extract to the batter along with the vanilla. Frost with a mint buttercream for a refreshing twist.
- Raspberry Chocolate Cupcakes: Fold in a handful of fresh or frozen raspberries (no need to thaw) into the batter just before baking. Top with a raspberry buttercream or a fresh raspberry garnish.
- Salted Caramel Chocolate Cupcakes: Drizzle a teaspoon of caramel sauce into the center of each cupcake before baking, or swirl some into the batter. Top with a salted caramel frosting and a sprinkle of sea salt.
- Chocolate Chip Surprise: Fold ½ cup of mini chocolate chips into the batter for an extra burst of chocolate in every bite.
- Espresso Powder Boost: For an even deeper, more intense chocolate flavor (without a coffee taste), add 1-2 teaspoons of instant espresso powder to the dry ingredients. It truly amplifies the chocolate.
These simple additions can transform your basic chocolate cupcakes into gourmet delights, perfect for matching any craving or occasion.