
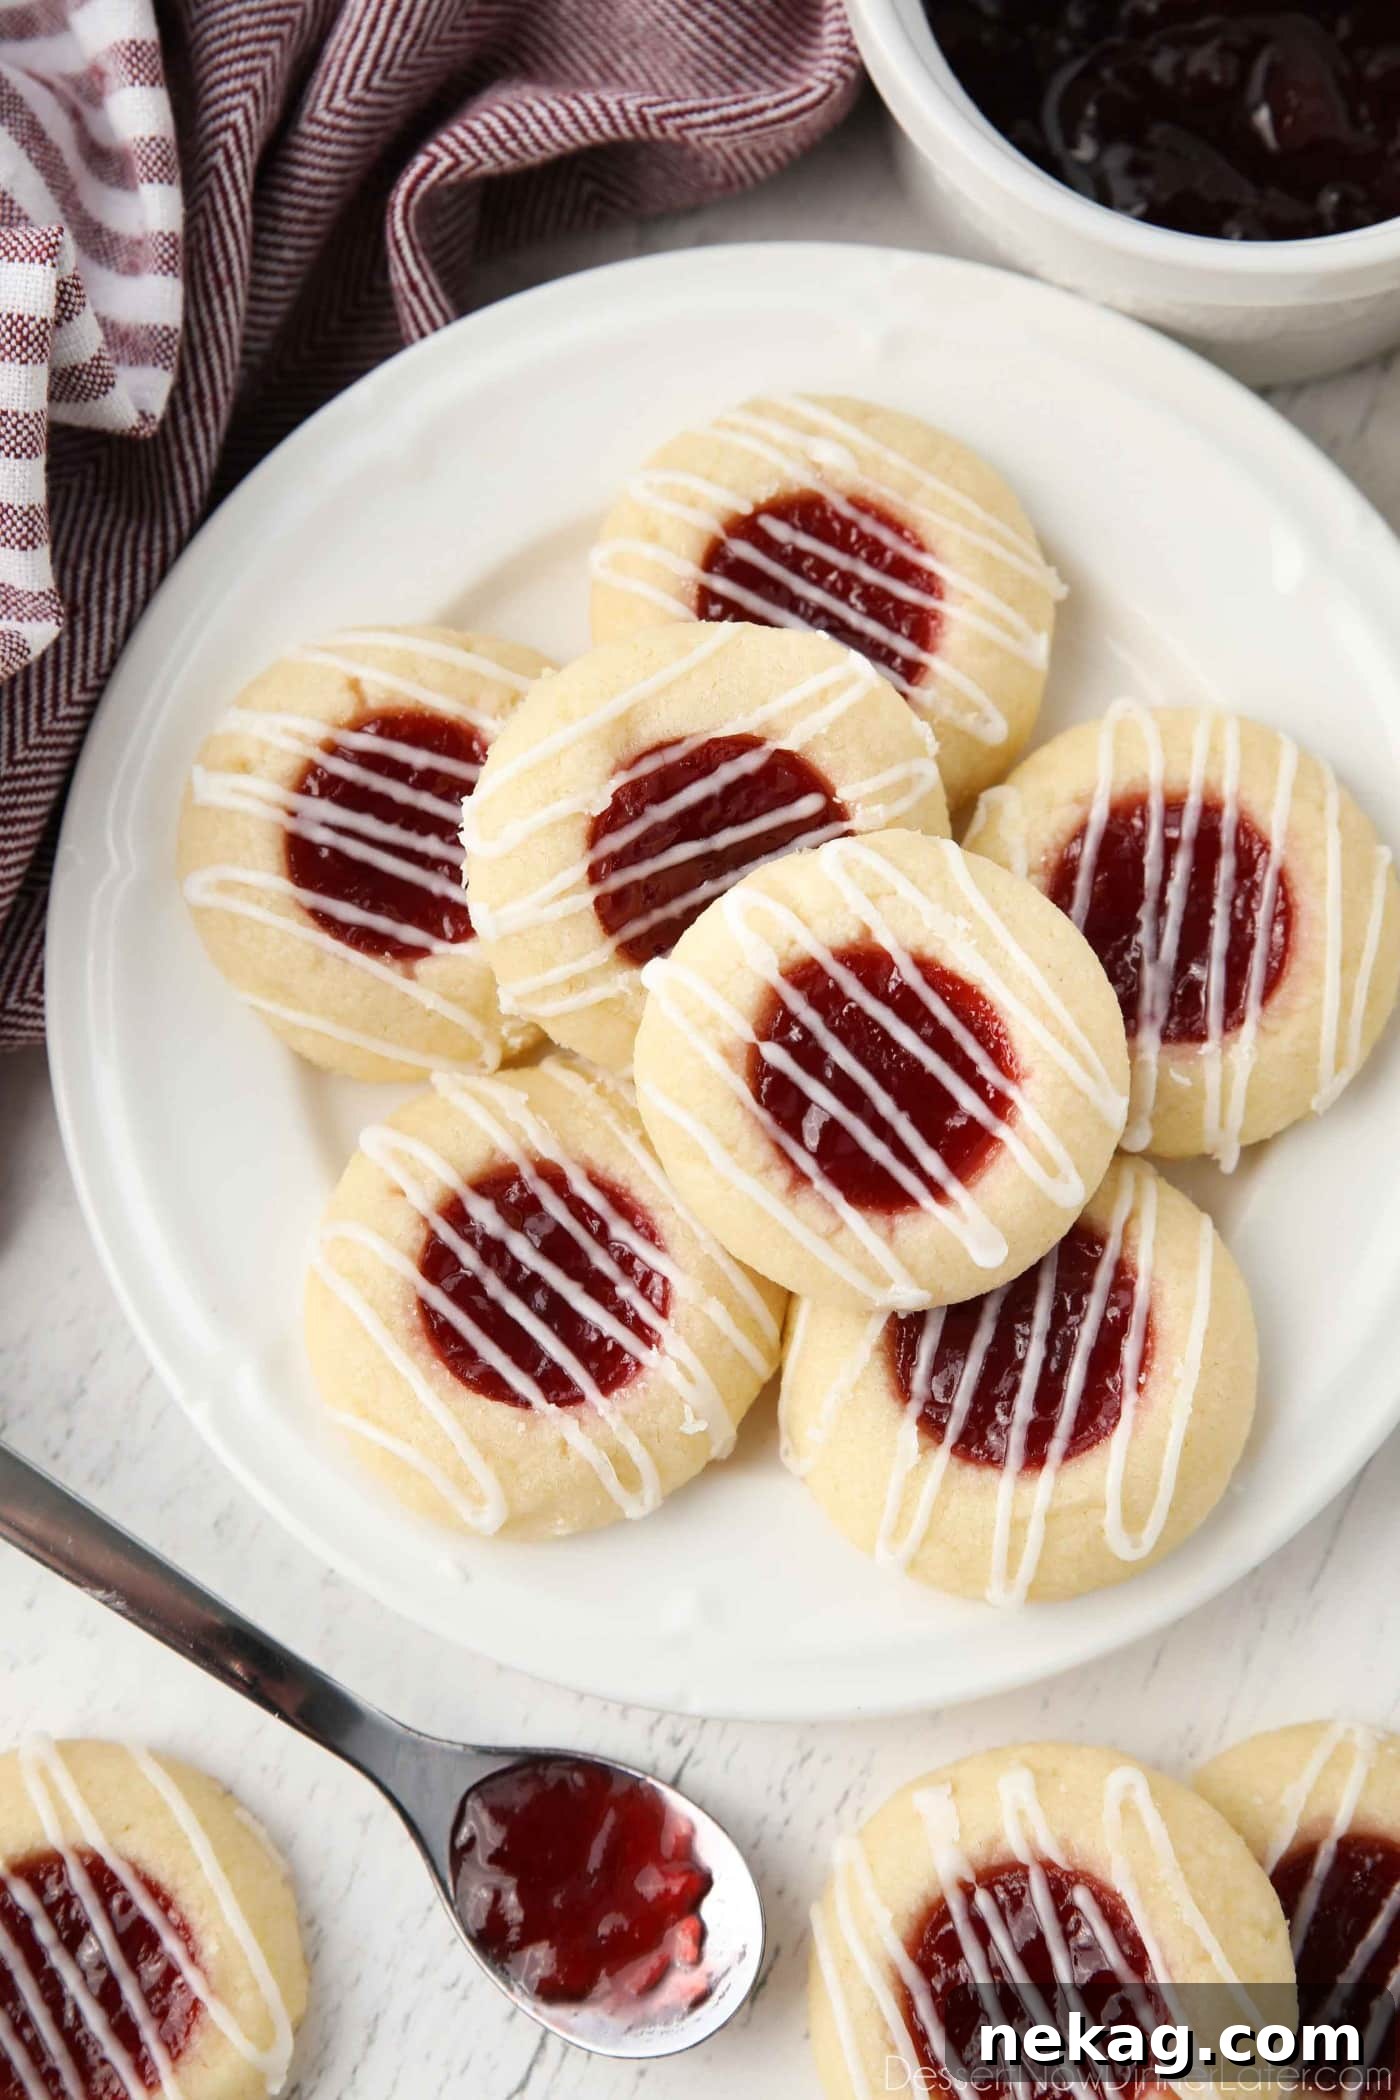
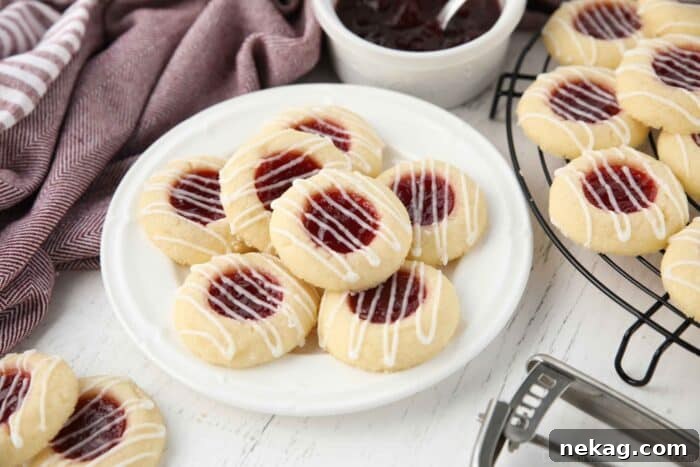
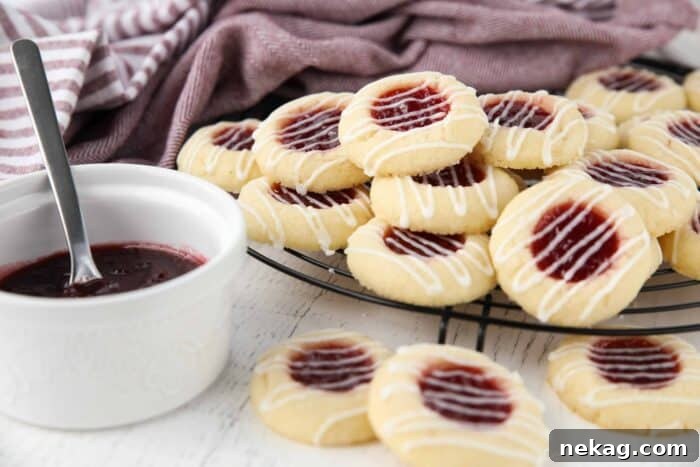
Delight in the sweet nostalgia of homemade Raspberry Thumbprint Cookies, a cherished classic that brings warmth and flavor to any occasion. These exquisite shortbread cookies are renowned for their irresistibly buttery texture, a delicate crater filled with vibrant raspberry jam, and a sophisticated drizzle of almond glaze. While raspberry is a perennial favorite, the beauty of these cookies lies in their versatility—feel free to experiment with any jam, jelly, or preserve to suit your taste! They are not only easy to prepare but also incredibly delicious, making them a perfect addition to your baking repertoire, especially during the festive season.
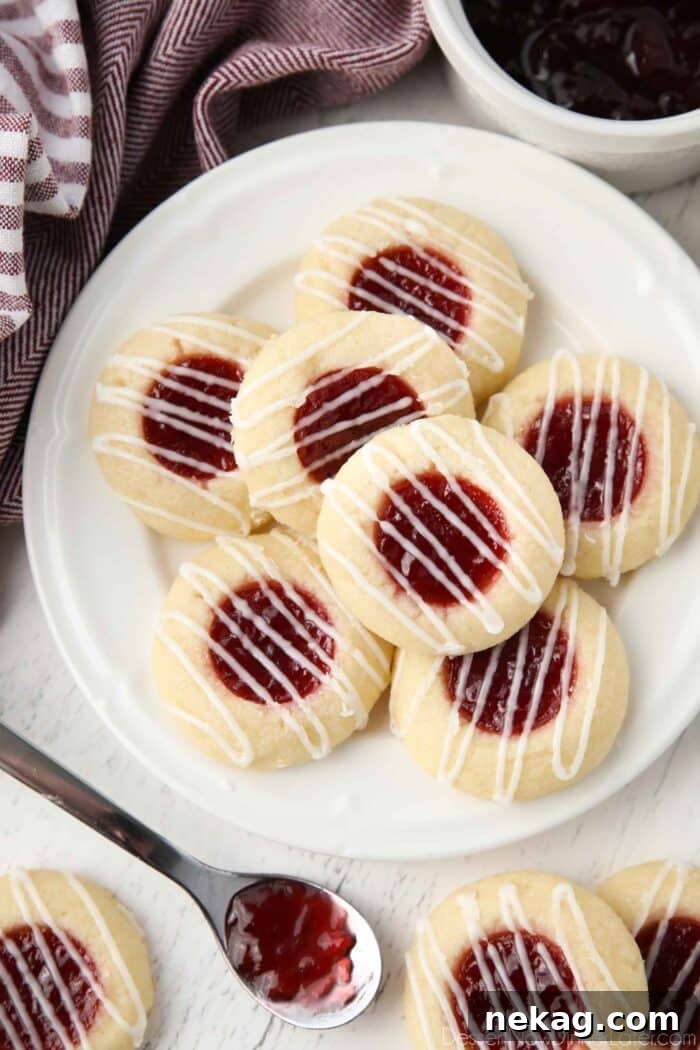
The Enduring Charm of Thumbprint Cookies
Thumbprint cookies hold a special place in the hearts of many, often becoming a beloved tradition during the holidays. Their widespread popularity stems from a delightful combination of factors: they are surprisingly easy to make, boast a beautiful presentation, and deliver an utterly yummy taste that appeals to all ages. These buttery, sweet shortbread cookies serve as the perfect canvas for a variety of fillings, making them endlessly customizable and a joy to personalize for different preferences and events.
At their core, these are buttery sugar cookies, distinguished by their characteristic jam filling. While I personally gravitate towards the bright, tart sweetness of raspberry jam, the choice is entirely yours. The adaptability of thumbprint cookies means you can use virtually any jam, jelly, or fruit preserve you adore. Popular alternatives include sweet strawberry, tangy apricot, or even a rich lemon curd for a zesty twist. Truly, the possibilities are limited only by your imagination, inviting you to experiment with unique flavor combinations for every batch.
One key decision in making thumbprint cookies is when to add the jam. Some bakers prefer to fill the cookies after they’ve baked, while others opt to do so before. My preferred method is to fill the cookies with jam before baking. This technique allows the jam to gently melt and meld with the cookie dough as it bakes, creating a seamless and less tacky finish once cooled. This results in cookies that are not only aesthetically pleasing but also stack easily without sticking together, a practical benefit for storage and gifting.

Unraveling the Name: Why “Thumbprint” Cookies?
The whimsical name “thumbprint cookies” directly refers to the simple yet iconic method of their creation. It involves gently pressing a thumb (or a small round object like a ½ teaspoon measuring spoon) into the center of each ball of cookie dough, thereby creating a perfect indent or “well” designed to hold the delicious filling. This tactile approach is not just practical; it’s a delightful part of the baking process that connects us to generations of home bakers.
These charming cookies are known by a variety of names across different cultures, reflecting their global appeal. For instance, in Sweden, they are famously called “hallongrotta,” which translates beautifully to “raspberry cave” – a name that perfectly encapsulates their raspberry-filled essence. Australians, on the other hand, often refer to them as “jam drops,” a straightforward description of their jam-filled nature. This diversity in naming underscores the universal love for these simple yet satisfying treats.
Beyond their classic jam-filled rendition, thumbprint cookies are incredibly versatile, offering endless possibilities for creative variations. While I adore the traditional fruity jam-filled thumbprints, the concept can be expanded to include entirely different flavor profiles. For example, turtle thumbprint cookies offer a decadent twist with a rich chocolate base, a gooey caramel center, and crunchy pecans adorning the outside. Such variations make thumbprint cookies a fantastic choice for Christmas cookie exchanges or any festive gathering, allowing you to showcase both traditional favorites and innovative new flavors. Their adaptability truly makes them a celebrated star in the world of home baking.
Crafting Our Favorite Raspberry Thumbprint Cookies
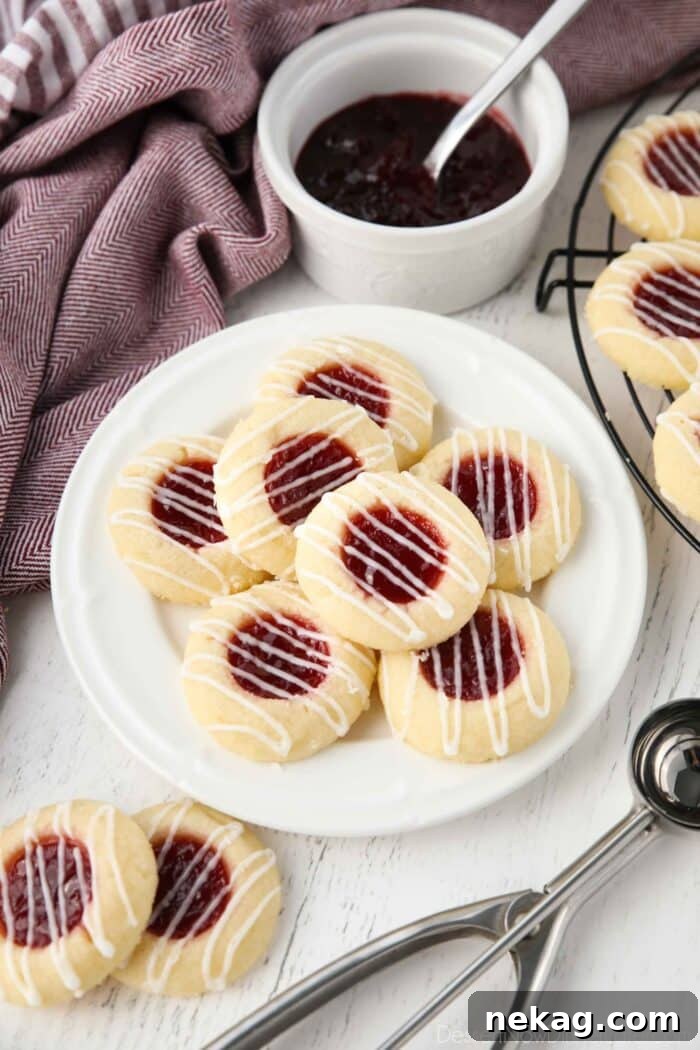
Today, we embark on the delightful journey of making our absolute favorite raspberry thumbprint cookies. This recipe elevates the classic by introducing a delicate enhancement: a thin, elegant drizzle of almond-flavored glaze. While traditional thumbprint cookies might not typically feature a glaze, this addition not only amplifies their deliciousness but also enhances their visual appeal, making them exceptionally pretty for holiday gifting or a special dessert spread. For those who aren’t keen on almond extract, a simple swap to vanilla extract will yield equally delicious results, maintaining that sweet, aromatic finish.
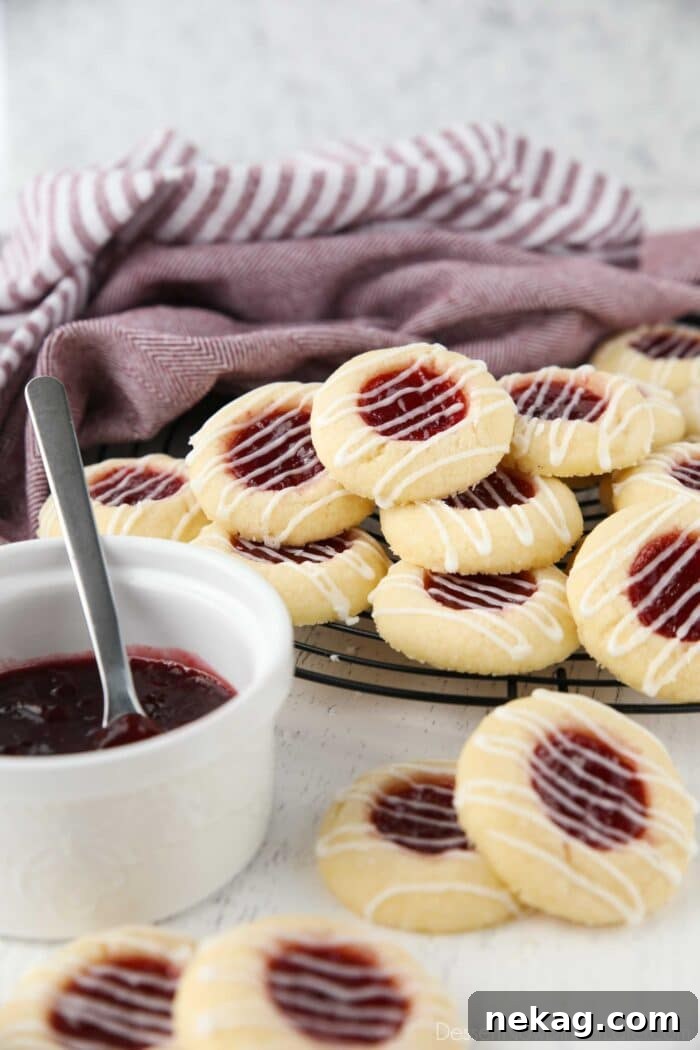
The beauty of this recipe lies in its simplicity and the rewarding outcome of tender, buttery cookies bursting with fruity flavor. The combination of the rich shortbread, the sweet-tart raspberry jam, and the subtle almond glaze creates a harmonious balance that is truly irresistible. Each bite offers a perfect blend of textures and tastes, making these cookies a standout treat that is sure to impress.
The Foundation: Making the Perfect Shortbread Cookie Dough
The secret to exceptional raspberry thumbprint cookies begins with the dough. For ease and efficiency, preparing the shortbread cookie dough is best done with the aid of a stand mixer fitted with a paddle attachment, or a robust electric hand mixer and a large mixing bowl. This ensures that your ingredients are perfectly incorporated and the dough achieves the ideal texture.
A crucial tip for success: Always ensure your butter is at proper room temperature. It should be soft enough that you can easily press a finger into it, leaving a slight indentation, but not so soft that it appears greasy or melted like lotion. Butter that is too cold will not cream properly with the sugar, leading to a dense cookie, while overly soft butter can make the dough difficult to handle and may cause the cookies to spread too much during baking. Achieving that perfect room temperature ensures a light, fluffy, and tender shortbread base.
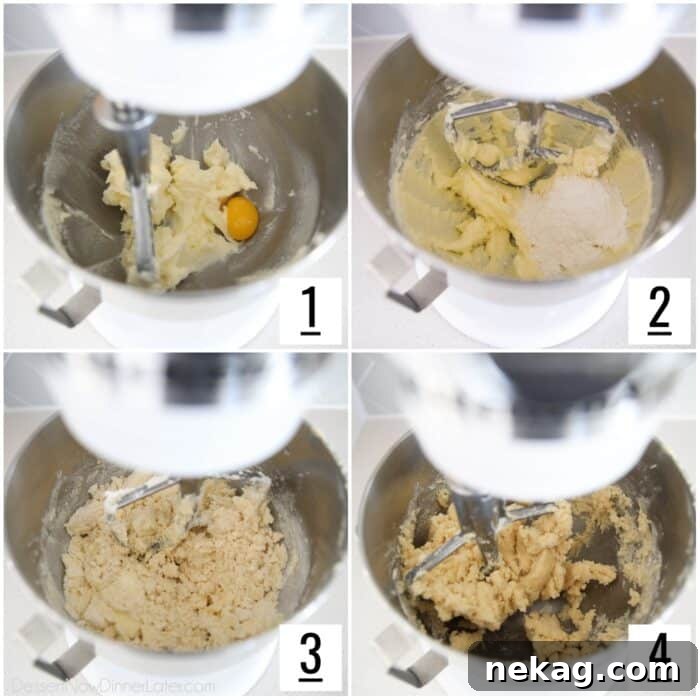
Step-by-Step Dough Preparation:
- Begin by creaming the softened butter and granulated sugar together in your stand mixer. Beat them on medium speed until the mixture is visibly fluffy and light in color, typically taking a few minutes. This process incorporates air, contributing to the cookie’s tender texture.
- Next, add the single large egg yolk and your chosen extract—almond for a distinctive nutty note, or vanilla for a more classic profile. Continue mixing just until these wet ingredients are thoroughly combined with the butter and sugar mixture. The egg yolk plays a vital role in binding the dough and helping to prevent cracks, which is particularly beneficial for thumbprint cookies.
- In a separate, medium-sized bowl, whisk together the all-purpose flour and salt. This ensures even distribution of the dry ingredients.
- With the mixer on low speed, gradually add the flour mixture to the wet ingredients. Do this in two or three additions, pausing to scrape down the sides of the bowl as needed to ensure everything is fully incorporated.
- Initially, the dough will appear dry and crumbly. This is perfectly normal.
- Continue mixing on low speed. Be patient; the dough will eventually come together to form a cohesive ball. Avoid overmixing once the flour is incorporated, as this can lead to tough cookies.
Precision in Shaping, Pressing, and Chilling
Creating the perfect thumbprint cookie involves careful attention to shaping, indenting, and chilling the dough. Remember, raspberry thumbprint cookies are typically designed to be smaller, bite-sized treats. Resist the urge to make them too large, as this can affect their baking time and overall texture.
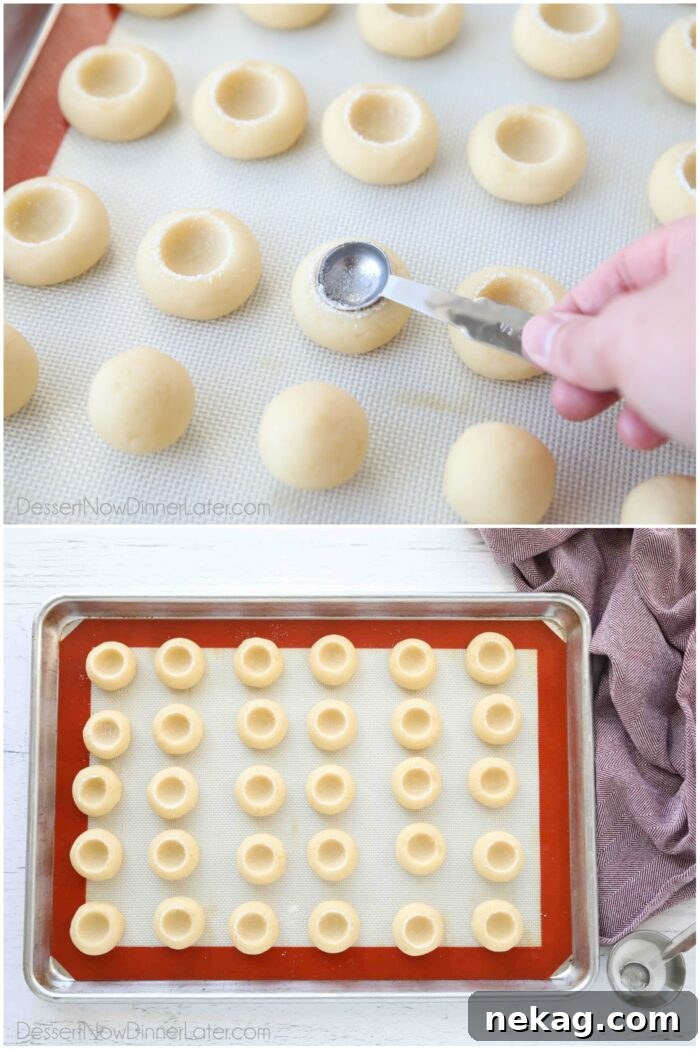
Detailed Shaping and Chilling Steps:
- First, prepare your baking surface. Line a standard sheet pan with either parchment paper or a silicone baking mat. This prevents sticking and ensures even baking.
- Using a small #50 scoop (which measures approximately 1 tablespoon), portion out uniform balls of cookie dough. Place these dough balls onto the prepared cookie sheet, ensuring they are not too close together. For efficiency, you can fit all the un-indented dough balls onto a single tray for the initial chilling stage.
- With clean hands, gently roll each portion of dough into a smooth, uniform ball. This step is crucial for preventing cracks later. Immediately after rolling each ball, make a distinct dent in its center. You can use your thumb for a classic “thumbprint” or the back of a ½ teaspoon measuring spoon for a more consistent and perfectly rounded well.
- Pro Tip for Preventing Cracks: The key to crack-free thumbprints is to indent the dough balls immediately after rolling them. The slight warmth from your hands keeps the dough pliable, making it less prone to cracking. If the spoon or your thumb begins to stick to the dough, a quick dip in granulated sugar will solve the problem.
- Once all the dough balls are shaped and indented, it’s time for a vital step: chilling the dough. Transfer the sheet pan with the indented dough balls to the freezer for approximately 20 minutes, or until they are thoroughly cold and firm to the touch. This chilling period is essential as it helps to solidify the butter in the dough, significantly reducing the likelihood of the cookies spreading too much during baking, thus preserving their perfect thumbprint shape.
The Final Stages: Filling and Baking for Perfection
With your perfectly shaped and chilled cookie dough ready, the next exciting steps involve preparing your chosen filling and baking these delightful treats to golden perfection.
Pre-Baking Preparation:
- While your cookie dough is chilling in the freezer, preheat your oven to 350 degrees Fahrenheit (175°C). Ensuring the oven is at the correct temperature before baking is critical for consistent results.
- Prepare your jam: Spoon your chosen jam (raspberry, in this case) into a small, microwave-safe bowl. Warm it in the microwave for just 5-10 seconds. Stir the jam until it becomes smooth and slightly more fluid. The goal is to make it easier to spoon into the cookie wells, not to make it hot. This slight warming helps it settle nicely into the indentations.
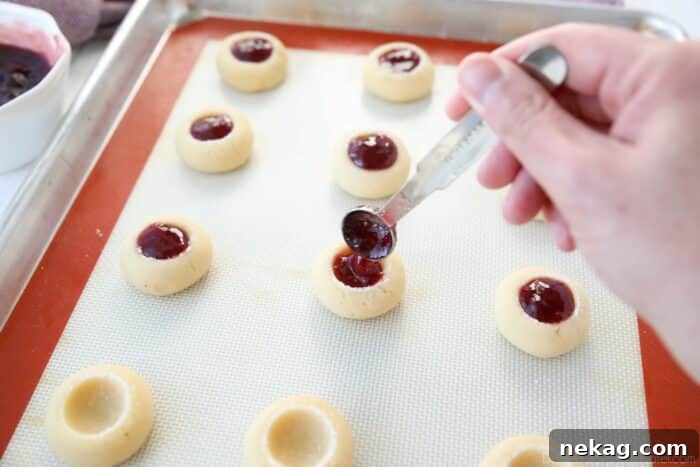
Baking Instructions:
- Carefully transfer the chilled, indented cookies to a fresh baking sheet lined with parchment paper or a silicone mat. Ensure cookies are spaced 2 to 3 inches apart to allow for proper air circulation and slight spreading. Avoid baking all cookies on the same tray they were chilled on if it’s no longer cool. For optimal baking, I typically fit about 15 cookies on my half-sheet tray per batch. Keep any remaining unbaked cookies in the freezer until you are ready to bake them.
- Working quickly to keep the dough cold, fill each cookie well with a rounded ½ teaspoon of the warmed jam. Be mindful not to overfill, as this could cause the jam to bubble over during baking.
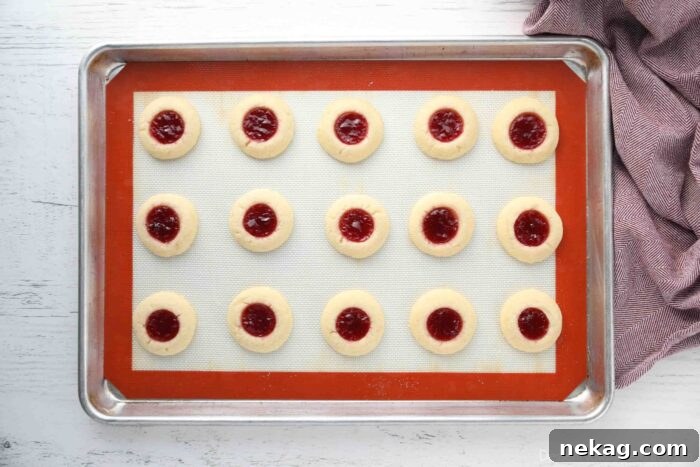
- Bake in batches in your preheated oven at 350°F (175°C) for 14 to 18 minutes. The cookies are ready when their edges are lightly golden brown. Baking time may vary depending on your oven, so keep a close eye on them. Once baked, remove the cookies from the oven and allow them to cool completely on the baking sheet. This helps them firm up and prevents breakage.
- While the cookies cool, prepare your delightful almond glaze. In a small bowl, combine the powdered sugar, almond (or vanilla) extract, and milk. Whisk until you achieve a smooth, pourable consistency. For a neat finish, you can either drizzle the glaze directly over the cooled cookies using a spoon or transfer it to a zip-top bag, snip a tiny corner, and pipe a decorative zig-zag pattern over each cookie. Allow the glaze to set completely before serving or storing, ensuring it hardens slightly to prevent stickiness.
Preserving Freshness: Storing and Freezing Your Cookies
To enjoy your delicious raspberry thumbprint cookies for an extended period, proper storage is key. Whether you plan to savor them over the next few days or save them for a future treat, these guidelines will help maintain their freshness and texture.
Storage at Room Temperature:
- Once your raspberry thumbprint cookies have cooled completely and the glaze has set, transfer them to an airtight container. They can be safely stored at room temperature. There is no need for refrigeration, as it can sometimes alter the texture of shortbread cookies.
- When stored correctly, these cookies will retain their delightful flavor and tenderness for at least a week. Beyond that, they may begin to lose some moisture and become slightly dry or crumbly.
Freezing for Long-Term Enjoyment:
- For longer-term storage, freezing is an excellent option. Allow the freshly baked cookies to cool for several hours—this crucial step ensures the jam filling is fully set and firm, preventing it from becoming messy or sticky when frozen.
- To freeze, arrange the cooled cookies in an airtight container. For best results and to prevent them from sticking together, place a layer of parchment paper between each layer of cookies. This barrier protects the cookies and their delicate jam centers.
- Frozen thumbprint cookies will maintain their quality in the freezer for up to 1 month. When you’re ready to enjoy them, simply take them out of the freezer and let them thaw at room temperature for an hour or two.
- Important Note for Freezing: If you intend to freeze a batch of cookies, you might consider omitting the glaze until after they have been thawed. Glazes, especially thinner ones, can sometimes become slightly watery or develop an altered texture after freezing and thawing. Applying the fresh glaze just before serving will ensure the best possible presentation and taste.
Mastering the Art: Tips for Perfect Raspberry Thumbprint Cookies
Even though thumbprint cookies are generally easy to make, a few common issues can arise. Here are some expert tips and troubleshooting solutions to ensure your raspberry thumbprint cookies turn out perfectly every time.
- Preventing Cracks in the Dough:
- Smooth Rolling: Always roll your cookie dough balls thoroughly and smoothly with your hands until the surface is uniform and free of visible cracks.
- Immediate Indentation: The most effective way to prevent cracking is to make the indent in the center of the dough ball immediately after rolling it. The slight warmth from your hands keeps the dough pliable and less likely to crack when pressed. If you roll all the balls first and then go back to indent them, they might have cooled slightly and become more rigid, leading to cracks. If a crack does appear, simply re-roll the ball and indent it again.
- The Magic of Egg Yolk: Many traditional shortbread cookies do not include eggs. However, adding just an egg yolk to this recipe provides extra binding power, helping the cookie dough to hold its shape better and significantly reducing the occurrence of cracks. The fat in the yolk also contributes to a richer, more tender cookie.
- Preventing Excessive Spreading:
- If your thumbprint cookies spread out too much during baking, several factors could be at play. The most common culprits are butter that was too warm (not cold enough after chilling), an oven temperature that is too high, or placing your cookie dough on a warm or hot baking tray.
- Ensure Proper Chill: Make sure your shaped and indented dough is thoroughly chilled until it’s firm to the touch and your finger leaves no indentation.
- Accurate Oven Temperature: Invest in an oven thermometer to verify your oven’s actual temperature. Ovens can often be inaccurate, and a consistently correct temperature is crucial for baking success.
- Cool Baking Trays: Always use a completely cooled baking tray for each batch of cookies. Placing cold dough on a hot tray can cause the butter to melt too quickly, leading to excessive spreading.
- Jam Leaking Out:
- This issue usually occurs from overfilling the cookie wells. It’s important to use only the amount of jam that fits comfortably within the indentation. I find that using a measuring spoon (like a ½ teaspoon) to create the indent helps standardize the well size, making it easier to gauge how much jam to add.
- It’s perfectly fine if the jam forms a slight dome on top before baking, but avoid heaping it excessively. A little less is often more to prevent spills.
- Forgot to Add Jam Before Baking:
- Don’t despair if you accidentally baked your cookies without the jam! As soon as they come out of the oven, while they are still warm and pliable, gently re-indent the centers. Then, quickly fill the wells with your prepared jam.
- Keep in mind that when the jam is added post-baking, it won’t melt and set into the cookie quite as seamlessly. The jam may remain slightly tackier after the cookies have cooled completely compared to when it’s baked with the cookie.
Explore More Festive Cookie Recipes
If you enjoyed making these delightful raspberry thumbprint cookies, you’re in for a treat with other festive favorites. Expanding your repertoire of holiday cookies is a wonderful way to celebrate the season and share joy with loved ones. Here are some more beloved Christmas cookie recipes that you might also love to try:
- Christmas Meltaway Cookies: These tender, crumbly cookies literally melt in your mouth, often dusted with powdered sugar for a snowy effect.
- Christmas Peanut Butter Blossoms: A classic holiday cookie featuring a soft peanut butter base crowned with a milk chocolate kiss.
- Snowball Cookies: Also known as Mexican Wedding Cakes, these rich, nutty butter cookies are rolled in powdered sugar, resembling snow.
- Double Chocolate Crinkle Cookies: Deeply chocolatey cookies with a fudgy interior and a beautiful crinkled, powdered sugar coating.
- Soft Gingersnap Cookies: Perfectly spiced and chewy, these ginger-infused cookies are a warm hug on a cold day.
- Oatmeal Florentine Cookies: Delicate and crisp, these lace cookies are often adorned with chocolate, offering a sophisticated crunch.
- Italian Sugar Cookies: Soft, cake-like cookies typically topped with a simple glaze and festive sprinkles, perfect for any celebration.
If you make this recipe, please rate and review it in the comments below. Your feedback is greatly appreciated! THANKS!

Raspberry Thumbprint Cookies
Created by
Amber Brady
25 mins
15 mins
20 mins
1 hr
35
cookies
Ingredients
Cookies:
- 1 cup (226 g) unsalted butter, (2 sticks) room temperature
- ⅔ cup (134 g) granulated sugar
- 1 large egg yolk, (no whites)
- ½ tsp almond extract, or vanilla extract
- 2 ¼ cups (270 g) all-purpose flour, stir, spoon & level
- ½ tsp salt
- ½ cup (160 g) seedless raspberry jam, (See NOTES)
Glaze:
- ½ cup (60 g) powdered sugar
- ½ tsp almond extract, or vanilla extract
- 2-3 tsp milk
Equipment
-
KitchenAid 5-Qt. Stand Mixer
-
Electric Hand Mixer
-
#50 Scoop
-
Aluminum Half Sheet Tray (2 Pack)
-
Silicone Baking Mat
-
Serving Spatula
-
Corelle Bowls
-
Small Whisk (Mini Whipper)
Instructions
-
Cream the butter and sugar together in a stand mixer with the paddle attachment until fluffy and light. Add the egg yolk and almond (or vanilla) extract. Mix to combine.
-
In a separate bowl, mix together the flour and salt. Gradually add to mixer, scraping the bowl as needed. Dough will be dry and crumbly at first. Keep mixing until the dough comes together.
-
Line a sheet pan with parchment paper or a silicone baking mat. Use a small #50 scoop to portion cookie dough balls, about 1 Tablespoon each, and place onto the prepared cookie sheet. NOTE: Fit all cookies on the same tray for now, so the dough balls can chill all at once.
-
Roll balls with hands to smooth the outside completely. Then make a dent in the center of each dough ball with a 1/2 teaspoon or your thumb. TIP: Indent immediately after rolling the balls, while the cookie dough is still warm from your hands, to help prevent cracks. Dip the spoon, or your thumb, in granulated sugar if it sticks to the dough.
-
Chill the indented dough balls for 20 minutes in the freezer until cold and firm to the touch. This helps prevent spreading too much.
-
While the dough is chilling, preheat the oven to 350 degrees Fahrenheit.
-
Place jam in a small microwave-safe bowl. Nuke for 5-10 seconds, and stir until jam is smooth. The jam should not be hot, but be more fluid.
-
Place cookies 2 to 3 inches apart on a parchment or silicone lined baking sheet. (Do not bake the cookies all at once on the same tray they were frozen on. I fit 15 cookies on my half-sheet tray.) Leave remaining cookies in freezer until ready to bake.
-
Quickly fill cookie wells with a rounded 1/2 teaspoon of jam. Bake in batches at 350℉ for 14 to 18 minutes, until edges are lightly browned. Allow cookies to cool on the cookie sheet.
-
Make the glaze. Mix the powdered sugar, almond (or vanilla) extract, and milk to form a glaze. Drizzle or place glaze in a zip-top bag, make a small cut in the corner, and pipe a zig-zag over the cookies. Allow the glaze to set before eating.
Notes
- You may use any jam, jelly, or preserves with or without seeds to fill these thumbprint cookies with.
- Store these raspberry thumbprint cookies in an airtight container at room temperature. There’s no need to refrigerate them. These cookies will keep for at least a week before starting to dry out and get crumbly.
- To Freeze: Allow cookies to cool for a few hours so the jam sets, then stack the cookies in an airtight container with parchment paper between the layers. The cookies will keep in the freezer for up to 1 month. NOTE: You may want to leave the glaze off if choosing to freeze the cookies.
Nutrition
Disclaimer: Nutritional values were calculated using a third-party tool and are provided as an estimation only.
Sharing this recipe with a link is both encouraged and appreciated. Copying/pasting and/or screenshots of full recipes to any social media is strictly prohibited. Content and photographs are copyright protected.
Did you make this?
Don’t forget to leave a rating below and make sure to follow on Pinterest and Instagram for more!