
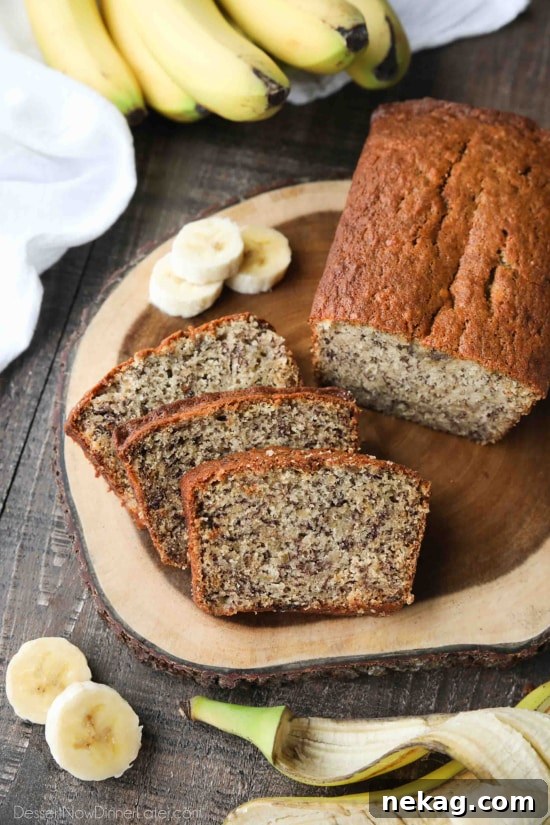
The Ultimate Classic Moist Banana Bread Recipe: A Timeless Comfort
There’s something inherently comforting and nostalgic about a perfectly baked loaf of banana bread. The aroma alone can transport you back to cherished childhood memories, filling your home with warmth and sweetness. This classic Banana Bread Recipe is the epitome of simplicity and flavor, designed to be incredibly moist, deliciously tender, and utterly satisfying. Best of all, it’s a one-bowl quick bread, meaning you won’t need a stand mixer, making cleanup a breeze. It’s the perfect way to transform those forgotten, overripe bananas on your counter into a truly spectacular treat.
While this homemade banana bread is absolutely divine on its own, imagine enhancing each slice with a generous slather of homemade cinnamon butter. The subtle spice from the butter beautifully complements the rich banana flavor, creating an unforgettable experience. For those with dietary considerations, don’t worry – we also have a fantastic gluten-free banana bread recipe that delivers all the same delightful texture and taste.
In a world full of innovative culinary creations, sometimes the best recipes are the ones that stick to tradition. We’ve explored countless variations, adding exciting twists to classic baked goods. However, we realized it was time to share the fundamental recipe that serves as the perfect foundation for all those delightful experiments. Today, we’re bringing you the purest form of classic banana bread — no fancy add-ins, just pure, unadulterated banana goodness. This simple banana bread recipe proves that sometimes, less is truly more when it comes to flavor.
Of course, if your palate craves a more adventurous take, we have plenty of other delicious options to explore. You might fall in love with our Cinnamon Swirl Banana Bread, a delightful blend of warm spices and sweet banana. Or perhaps the vibrant flavors of our Sour Cream Banana-Berry Bread will entice you. And for those moments when you’d rather indulge in cake than bread, our Double Chocolate Banana Cake is an absolute showstopper! Planning a gathering? This impressive Banana Bundt Cake with Vanilla Glaze is ideal for feeding a crowd with its elegant presentation and delightful taste.
The Secret to Perfectly Moist Banana Bread: Why Ripe Bananas are Essential
The single most crucial ingredient for achieving the best banana bread is the ripeness of your bananas. Forget those perfectly yellow, unblemished bananas you might pick up for a snack. For this recipe, we’re looking for bananas that are past their prime – think heavily speckled peels, at least half browned, and soft to the touch. The insides should be equally soft and beginning to brown. This level of ripeness isn’t just about aesthetics; it’s where the magic happens for an incredibly moist and flavorful loaf.
As bananas ripen, their starches naturally convert into simple sugars, making them significantly sweeter and infusing the bread with an intense, authentic banana flavor that underripe bananas simply can’t provide. This natural sweetness means you might even be able to reduce the amount of added sugar slightly, depending on your preference and the ripeness of your fruit. Furthermore, very ripe bananas are much softer and easier to mash, which contributes to the wonderfully moist texture and a denser crumb of the final loaf. If your bananas aren’t quite ripe enough, you can speed up the process by placing them in a paper bag with an apple or baking them on a sheet pan in a low oven (around 250°F or 120°C) for 15-20 minutes until their skins turn black and soft.
Essential Tips and Tricks for Baking the Best Banana Bread
Baking delicious banana bread is incredibly straightforward, but a few expert tips can elevate your results from good to absolutely phenomenal. Mastering these simple techniques will ensure your loaf is consistently moist, flavorful, and perfectly baked every time, making your homemade banana bread truly stand out.
Utilizing Frozen Bananas for Your Quick Bread
Never throw away those browning bananas! Whenever my bananas reach that ideal overripe stage, I simply break them into fourths (or slice them) and store them in a zip-top freezer bag. They become incredibly convenient for a variety of uses, from energizing smoothies to delectable banana cakes, or of course, this incredible quick bread. Freezing them not only preserves their ripeness but can sometimes even intensify their sweetness and moisture, concentrating that wonderful banana flavor.
If you’re using frozen bananas, remember to thaw them thoroughly before mashing. You can do this by letting them sit in the refrigerator overnight, or for a quicker method, microwave them for about 30 seconds at a time until soft. Crucially, after thawing, frozen bananas tend to release a significant amount of liquid. Be sure to drain about half of this liquid before incorporating the mashed bananas into your batter. Too much liquid can lead to a dense, gummy bread rather than the light, moist texture we’re aiming for, so this step is vital for perfect results.
The Art of Not Overmixing Your Batter
One of the most common mistakes in quick bread baking, including banana bread, is overmixing the batter. Once you add the dry ingredients to the wet, mix only until the flour streaks have just disappeared. Overmixing develops the gluten in the flour, which can result in a tough, chewy bread instead of the tender, melt-in-your-mouth crumb we desire. A few small lumps in the batter are perfectly fine and even preferred; they will bake out and contribute to a more delicate texture.
Choosing the Right Loaf Pan for Optimal Shape
An 8×4-inch (20×10 cm) loaf pan is typically ideal for this recipe, yielding a perfectly shaped loaf with a beautiful dome. If you use a larger pan, your bread might be flatter and cook faster, so adjust baking time accordingly. Conversely, a smaller pan might result in a taller loaf that needs more time to bake through the center, potentially browning too much on the outside before the inside is done. Always grease and flour your pan thoroughly, or line it with parchment paper for easy removal, ensuring your beautiful loaf doesn’t stick.
Testing for Doneness: A Baker’s Best Friend
The best way to tell if your banana bread is fully baked is by inserting a wooden skewer or toothpick into the very center of the loaf. It should come out clean or with only a few moist crumbs attached. If it comes out with wet batter, continue baking in 5-minute increments, checking frequently. Keep an eye on the top; if it starts to brown too quickly before the inside is cooked, you can loosely tent it with aluminum foil to prevent scorching.
The Importance of Proper Cooling
While it’s tempting to dive right into a warm loaf, allowing your banana bread to cool properly is essential for its structure and moisture. Let it cool in the pan for about 5-10 minutes after removing it from the oven. This resting period allows the bread to set and firm up, preventing it from crumbling when sliced. After this initial cooling, carefully invert the loaf onto a wire cooling rack to cool completely. Slicing warm banana bread can lead to a gummy texture and make it harder to cut cleanly.
A Brief History of Banana Bread: From Waste Not to Want Not
Banana bread, as we know it, is a relatively modern invention in the culinary world. Bananas first appeared in the United States in the late 19th century, but it wasn’t until baking soda and baking powder became widely available as leavening agents in the 1930s that quick breads like banana bread surged in popularity. The Great Depression also played a significant role in its rise; thrifty home cooks, eager to avoid wasting overripe fruit that was inexpensive and readily available, found banana bread to be a delicious, economical, and resourceful solution. Recipes began appearing in popular cookbooks like the Chiquita Banana’s Recipe Book, and by the 1950s, it was firmly established as an American household staple, evolving into the beloved classic we enjoy today. It’s a testament to ingenuity and a delicious reminder that some of the best culinary innovations come from making the most of what you have.
Serving and Storage Suggestions for Your Homemade Banana Bread
This classic banana bread is a beloved favorite in our home and makes for an excellent breakfast, a satisfying mid-day snack, or even a thoughtful neighborly gift. Its versatility is unmatched, easily enjoyed throughout the day. Beyond the delightful cinnamon butter, consider serving slices lightly toasted with a dollop of cream cheese, a smear of hazelnut spread, a drizzle of honey, or simply plain with a cup of coffee or tea. You can also toast slices and serve them with fresh fruit and a sprinkle of powdered sugar for a more substantial and elegant breakfast.
To keep your banana bread fresh and moist, ensure it is completely cooled before storing. Wrap cooled leftovers tightly in plastic wrap or aluminum foil. Store it at room temperature in an airtight container for up to 3-4 days. For longer storage, you can refrigerate it for up to a week, though the texture might become slightly denser. For the ultimate freshness, banana bread freezes beautifully. Wrap individual slices or the entire loaf tightly in plastic wrap, then again in aluminum foil, and store in a freezer-safe bag for up to 3 months. Thaw at room temperature for a few hours, or gently warm in the microwave or oven for a delicious, fresh-baked taste anytime.
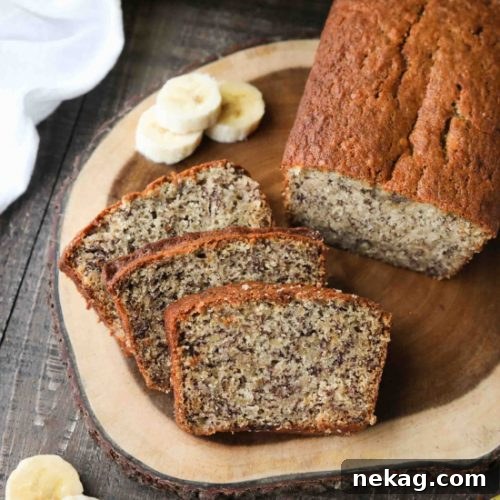
Classic Banana Bread Recipe
Amber Brady
10 mins
55 mins
1 hr 5 mins
12
slices
Ingredients
- 1 ⅓ cups (315 g) mashed bananas, (about 3 medium overripe bananas)
- ⅓ cup (75 g) unsalted butter, melted
- ¾ cup (150 g) granulated sugar, (you may use ½ cup or 1 cup depending on the desired sweetness)
- 1 large egg
- 1 tsp vanilla extract
- 1 ½ cups (180 g) all-purpose flour, (stir, spoon, & level)
- 1 tsp baking soda
- ½ tsp salt
Instructions
-
Preheat your oven to 350 degrees Fahrenheit (175°C). Prepare an 8×4-inch loaf pan by buttering and flouring it thoroughly, or by lining the bottom with parchment paper and spraying the sides with cooking spray. This prevents sticking and ensures easy removal of your baked loaf.
-
In a large mixing bowl, thoroughly mash the overripe bananas with a fork until they reach a smooth consistency with no large lumps remaining. Add the melted butter, granulated sugar, large egg, and vanilla extract to the mashed bananas. Mix all these wet ingredients well until they are fully combined and smooth, ensuring a homogenous mixture.
-
In a separate small bowl, whisk together the all-purpose flour, baking soda, and salt until well combined. Then, gradually add the dry ingredients to the wet batter. Stir gently, just until the flour barely disappears into the mixture. Be careful not to overmix; a few streaks of flour are acceptable and will ensure a tender, rather than tough, loaf.
-
Pour the prepared batter evenly into your greased and floured (or parchment-lined) loaf pan. Bake for 50-60 minutes, or until a wooden skewer or toothpick inserted into the center of the loaf comes out clean. If the top starts to brown too quickly before the inside is cooked, you can loosely tent it with aluminum foil to prevent scorching.
-
Once baked, remove the banana bread from the oven and let it cool in the pan for about 5 minutes. This brief cooling period helps the bread set and firm up its structure. After 5 minutes, carefully invert the loaf onto a wire cooling rack to cool completely before slicing. Use a serrated knife for clean cuts. Wrap any leftovers tightly in plastic wrap to maintain freshness for up to 1 week at room temperature.
Notes
For an extra treat, consider adding ½ cup of chocolate chips, chopped nuts (like walnuts or pecans), or a sprinkle of cinnamon into the batter before baking. Adjust the sugar quantity based on the sweetness of your bananas and your personal preference for sweetness. For a richer flavor, you can brown the butter slightly before adding it to the wet ingredients.
Sharing this recipe with a link is both encouraged and appreciated. Copying/pasting and/or screenshots of full recipes to any social media is strictly prohibited. Content and photographs are copyright protected.
Did you make this?
Don’t forget to leave a rating below and make sure to follow on Pinterest and Instagram for more delicious recipes and baking inspiration!