
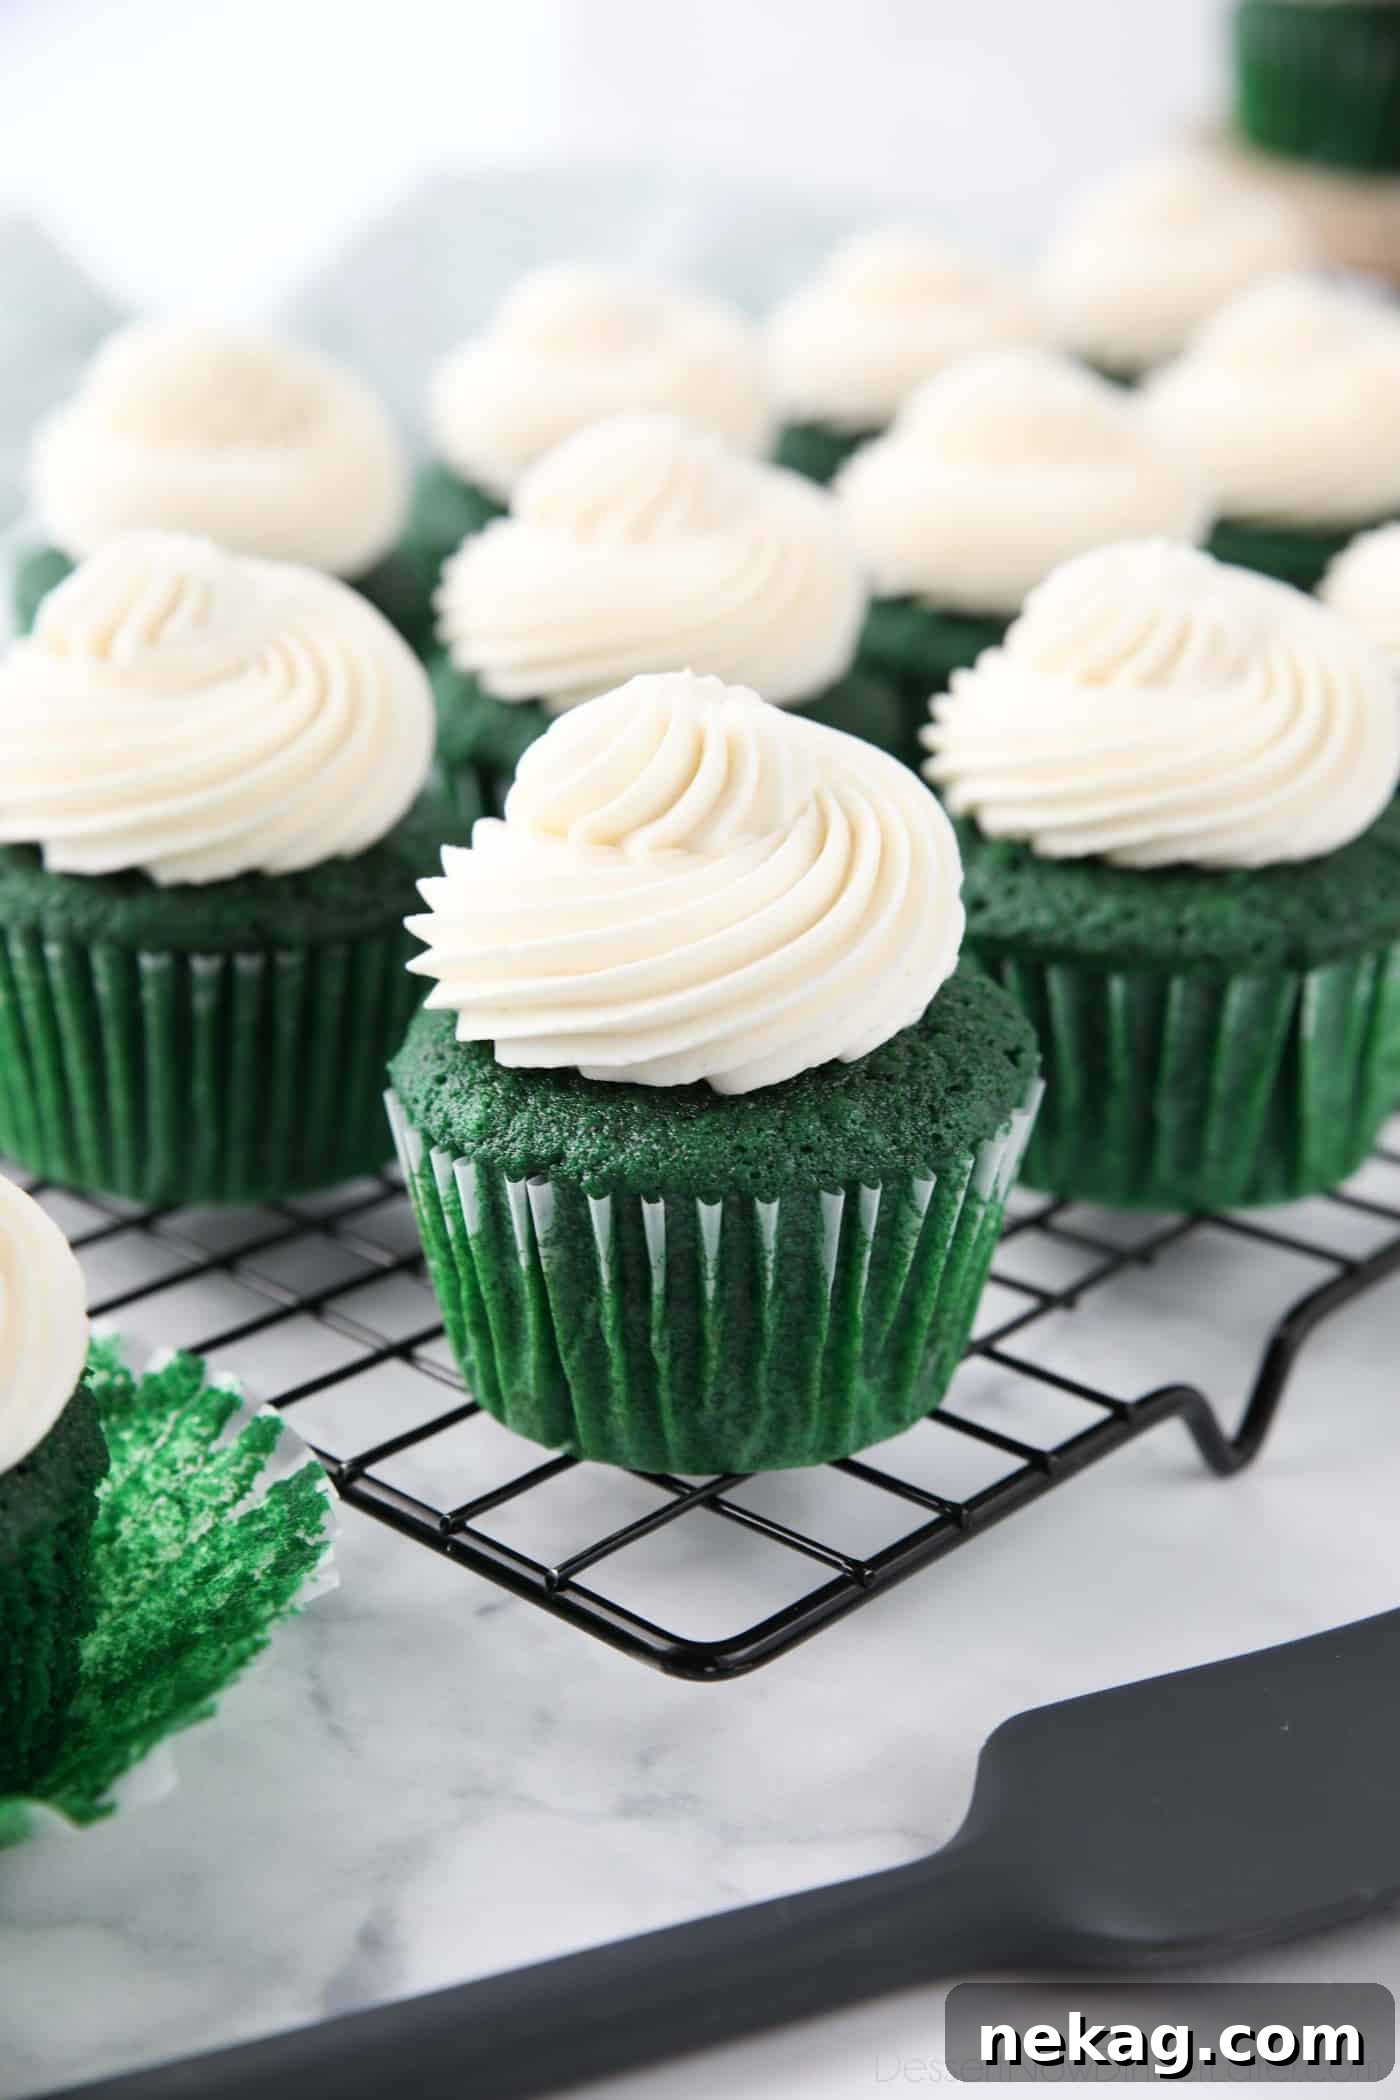
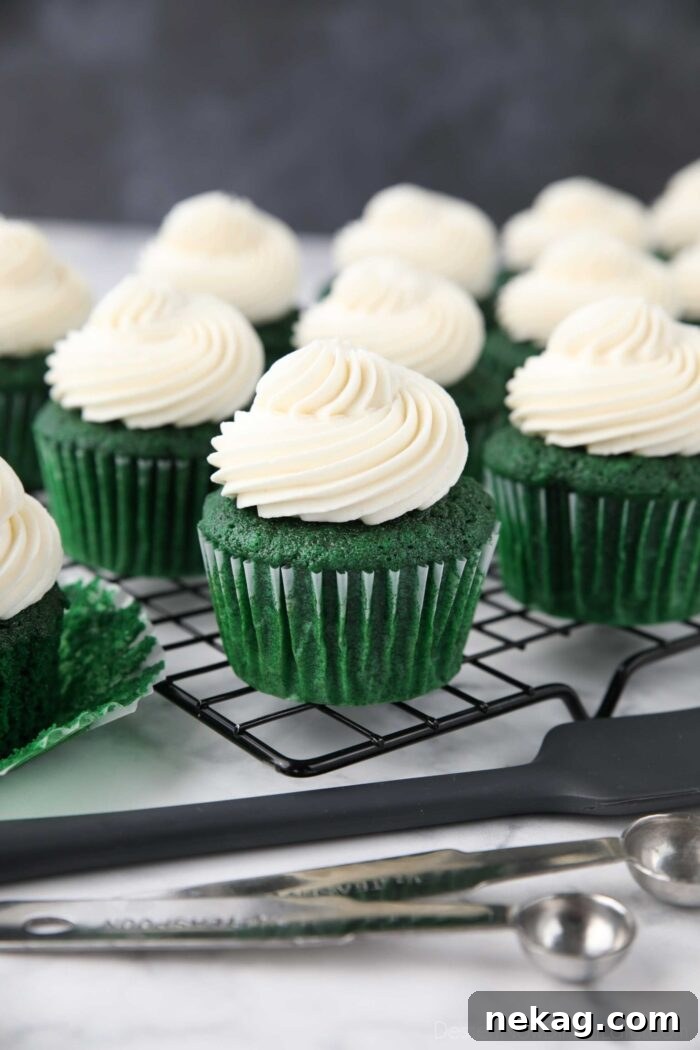
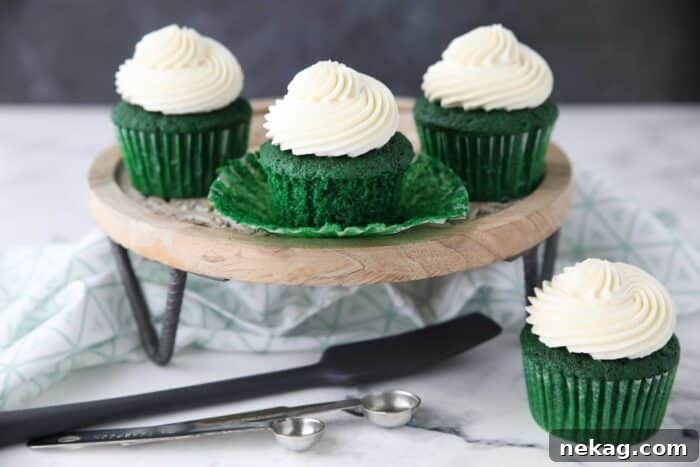
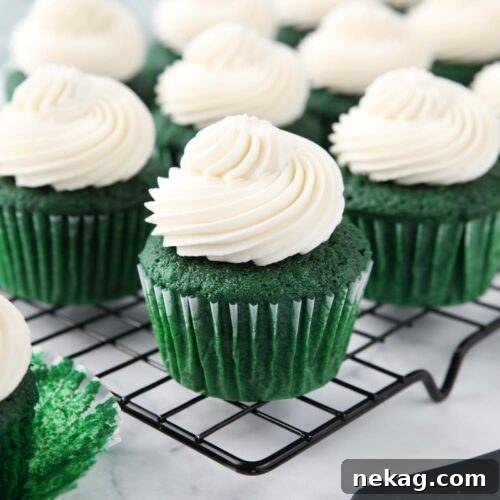
Welcome to the delightful world of Green Velvet Cupcakes – a festive and irresistibly delicious twist on the classic red velvet. Imagine the same melt-in-your-mouth texture, the delicate hint of cocoa, and the signature tangy cream cheese frosting, but infused with a vibrant green hue. These charming cupcakes are not only a treat for the taste buds but also a feast for the eyes, making them the perfect centerpiece for any celebration where green reigns supreme.
Whether you’re planning a spirited St. Patrick’s Day celebration, adding a unique color to your Christmas party spread, or simply seeking a fun and flavorful dessert, these green velvet beauties are sure to impress. Their velvety soft crumb and moist texture, crowned with a luscious whipped cream cheese frosting, offer an exquisite balance of richness and lightness that everyone will adore. Get ready to bake a batch of these enchanting green treats that promise both comfort and cheer!
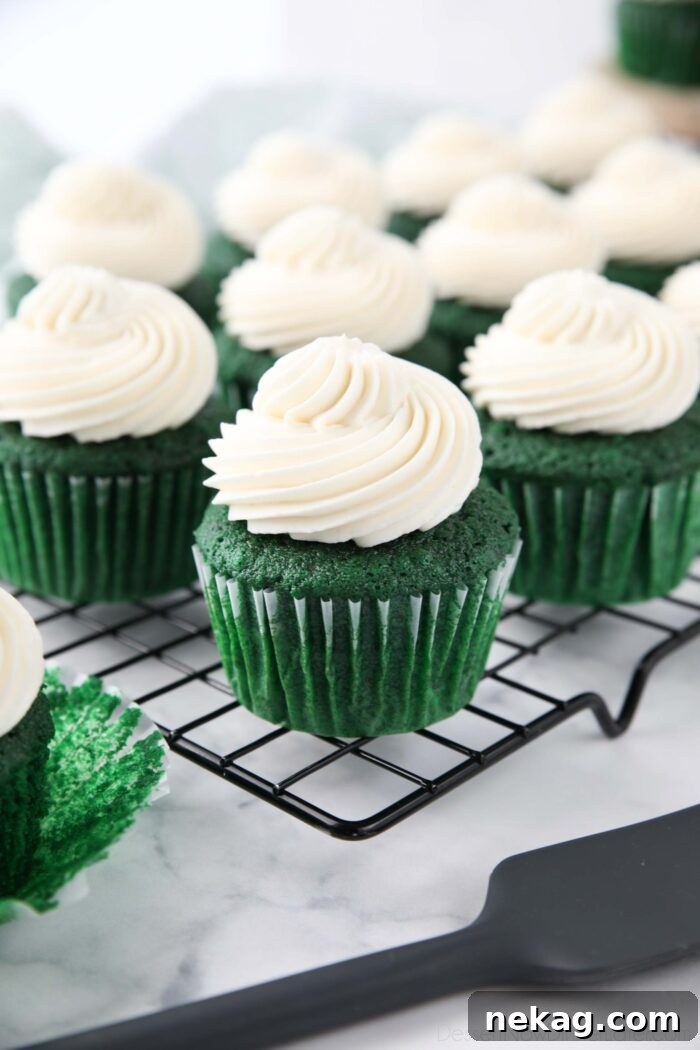
Why You’ll Fall in Love with These Green Velvet Cupcakes
There are countless reasons why these vibrant green cupcakes deserve a spot in your baking repertoire. Beyond their striking appearance, they offer a host of qualities that make them a truly special dessert:
- Perfect for Any Celebration: These Green Velvet Cupcakes transcend a single holiday. While they are an undeniable hit for St. Patrick’s Day, their lively green color also makes them ideal for Christmas parties, Earth Day gatherings, garden-themed events, color-scheme parties, or showing support for your favorite sports team. Their versatility ensures they’ll be a crowd-pleaser for many festive occasions throughout the year.
- Made with Accessible Ingredients: You don’t need fancy, hard-to-find components to create these extraordinary cupcakes. This recipe utilizes common pantry staples that you likely already have on hand, such as all-purpose flour, baking powder, salt, butter, and sugar. This means you can whip up a batch on a whim without a special trip to the grocery store.
- Achieve Unrivaled Softness and Velvety Texture: While many velvet cake recipes call for cake flour, we’ll achieve an incredibly soft and tender crumb using readily available all-purpose flour combined with a clever trick: cornstarch. This simple addition works wonders, transforming ordinary flour into a blend that mimics the lightness of cake flour. The result is a cupcake that boasts an irresistibly velvety texture, moistness, and a delightful melt-in-your-mouth quality that distinguishes truly exceptional baked goods.
- A Subtle Yet Satisfying Flavor Profile: Like their red counterparts, these green velvet cupcakes offer a unique flavor that’s more than just a colorful sponge. They feature a delicate hint of unsweetened cocoa powder, which provides a subtle depth and complements the rich, tangy cream cheese frosting beautifully. It’s a nuanced flavor experience that keeps you coming back for more.
- Easy to Master for All Bakers: Whether you’re a seasoned baker or just starting your culinary journey, this recipe is designed to be straightforward and rewarding. With clear, step-by-step instructions and helpful tips, you’ll be able to create bakery-quality green velvet cupcakes right in your own kitchen with confidence.
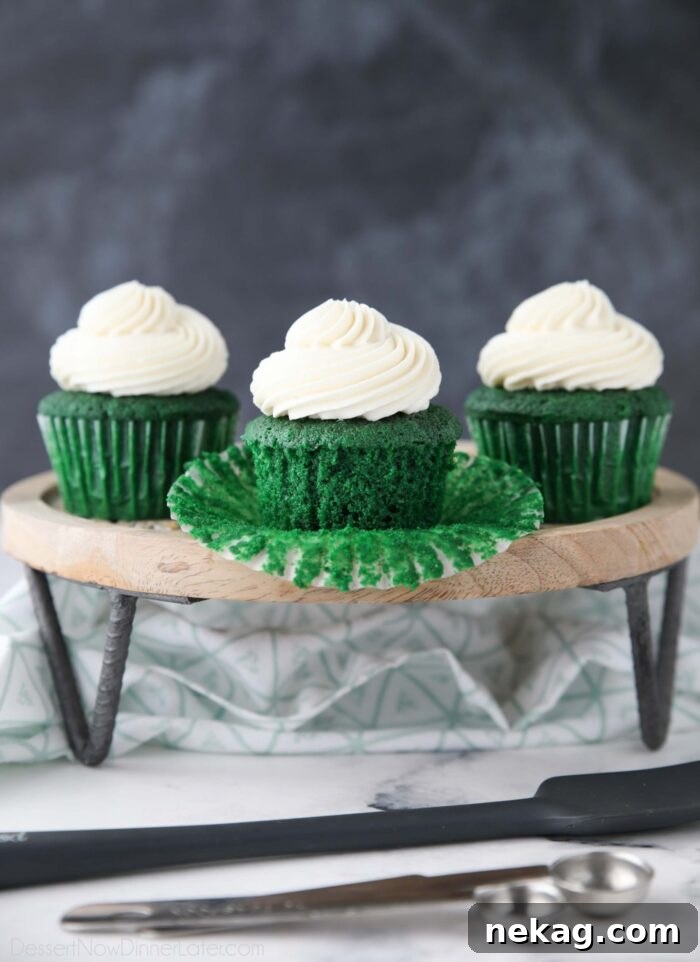
Essential Ingredients for Your Green Velvet Cupcakes
Crafting these delectable green velvet cupcakes requires a selection of fresh, high-quality ingredients. Pay close attention to the details, especially regarding the food coloring, to ensure the best results. Full ingredient amounts and detailed instructions are provided in the printable recipe card at the bottom of this post.
For the Irresistible Green Cupcakes
- All-Purpose Flour: The foundation of our cupcakes. For accurate measurement and a light texture, remember to stir the flour in its container, then spoon it gently into your measuring cup, and level it off with a straight edge. For the most precise measurement, use a food scale to weigh it (grams are usually provided in recipes for this reason).
- Cornstarch: This is our secret weapon for achieving that coveted velvety softness. When combined with all-purpose flour, it mimics the low-protein content of cake flour, resulting in an incredibly tender crumb.
- Unsweetened Cocoa Powder: Don’t skip this! It provides the subtle, signature hint of chocolate flavor that defines velvet cakes and interacts with the food coloring to create the perfect green shade.
- Baking Powder: Our primary leavening agent, ensuring the cupcakes rise beautifully and have a light, airy structure.
- Salt: A pinch of salt enhances all the other flavors, balancing the sweetness and bringing out the depth of the cocoa.
- Unsalted Butter: Ensure your butter is at room temperature. This allows it to cream smoothly with the sugar, incorporating air for a light and fluffy batter.
- Granulated Sugar: Provides sweetness and moisture, contributing to the tender texture.
- Large Eggs: Also at room temperature. Eggs add structure, richness, and help bind the ingredients together. Adding them one at a time ensures proper emulsification.
- Buttermilk: The acidity in buttermilk reacts with the baking powder to create an extra tender and moist crumb, as well as contributing a slight tang that is characteristic of velvet cakes. If you don’t have buttermilk, don’t worry – you can easily make your own (see recipe notes below).
- Oil (Canola or Vegetable): A neutral-flavored oil adds additional moisture and helps keep the cupcakes tender for longer.
- Liquid Green Food Coloring: This is CRUCIAL. You need LIQUID food coloring, not gel. Liquid food coloring disperses evenly throughout the batter, creating a uniform, vibrant green color without altering the texture. I found liquid green food coloring at my local Kroger (Smith’s), and McCormick also offers a reliable liquid option.
- Pure Vanilla Extract: For the best flavor, always opt for pure vanilla extract. It enhances the overall sweetness and aroma of the cupcakes.
IMPORTANT RECIPE TESTING NOTES ON FOOD COLORING: Through extensive testing, I discovered that the type of green food coloring makes a significant difference. My first attempt used a whole tube of green food coloring *gel* because I couldn’t find liquid coloring at Walmart. The gel didn’t mix in easily, resulting in an unappealing olive green rather than the deep, vibrant green I envisioned. While it darkened slightly the next day, it still wasn’t the desired shade.
In that same initial test, I also used vinegar, similar to my red velvet cupcakes recipe, where it enhances the red color. However, when I switched to *liquid* green food coloring for my second test (which I found at Kroger/Smith’s), I opted to omit the vinegar. This combination – liquid green food coloring and no vinegar – produced the stunning, rich green color you see in the accompanying photos.
THE CRITICAL CONCLUSION: Learn from my experience and always use liquid green food coloring for these cupcakes. Using green food coloring gel will likely yield a muddy, olive-green color that won’t give you the festive results you’re aiming for. The liquid coloring incorporates seamlessly and effectively masks the natural brown tint of the cocoa powder.
For the Luscious Whipped Cream Cheese Frosting
- Cream Cheese: Essential for that signature tangy flavor and creamy texture. Always use brick/block-style cream cheese, softened to room temperature. The spreadable cream cheese from a tub has a different consistency and won’t yield the same results.
- Powdered Sugar: Also known as confectioners’ sugar. It sweetens the frosting and helps create a smooth, pipeable consistency without any grittiness.
- Salt: Just a pinch to balance the sweetness and cut through the richness of the cream cheese.
- Vanilla Extract: Enhances the classic flavor profile of cream cheese frosting.
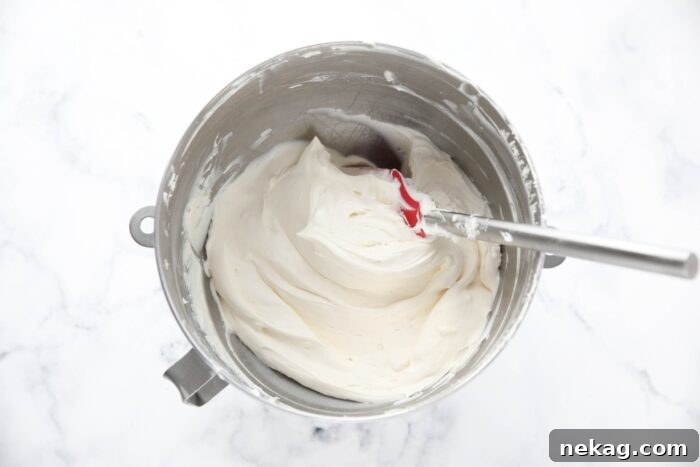
- Heavy Whipping Cream: This is what gives our frosting its “whipped” quality, making it lighter and fluffier than traditional cream cheese frosting, while still maintaining its decadent taste.
You can prepare this frosting using either a single bowl or two, depending on your preferred method for whipping the cream and then folding it into the cream cheese mixture.
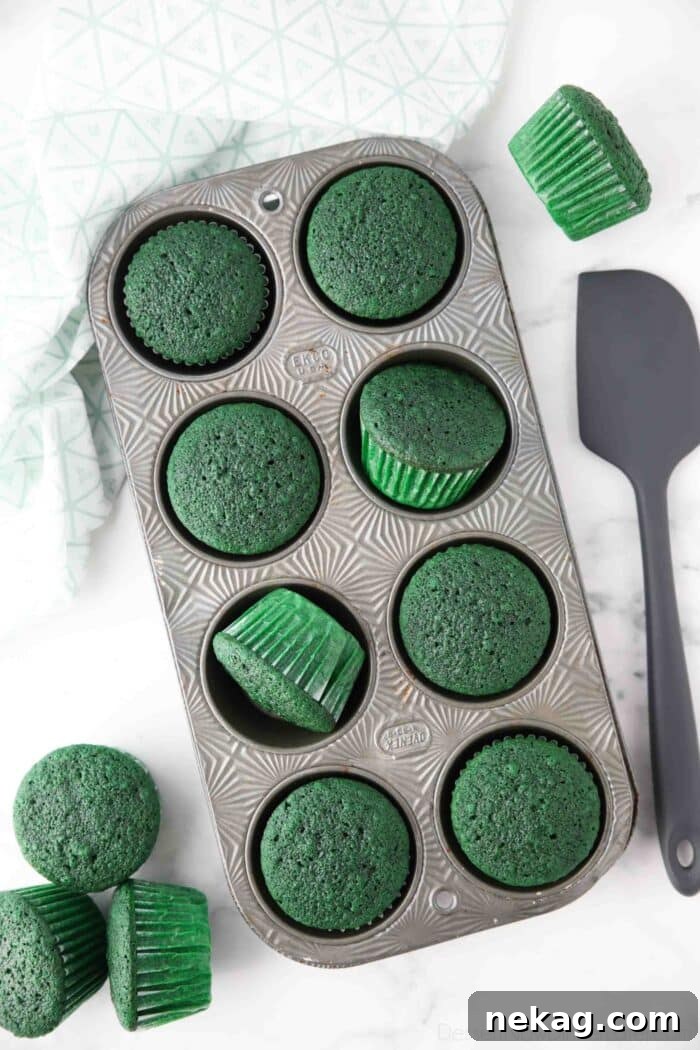
Helpful Tools for Baking Success
Having the right kitchen tools can make the baking process smoother and ensure professional-looking results. Before diving into the step-by-step photo tutorial, gather these essential items:
- Fine Mesh Sieve: Indispensable for sifting your dry ingredients. This step is crucial for breaking up clumps, aerating the flour, and ensuring a light, uniform cupcake batter, preventing dense or lumpy results.
- KitchenAid Stand Mixer: (or a powerful Electric Hand Mixer) A stand mixer makes creaming butter and sugar, and mixing the batter, effortless and efficient. Its consistent power ensures proper aeration and blending, which are key for a light cupcake texture.
- Cupcake Pans: Standard 12-cup muffin tins are perfect for baking your cupcakes. Having two on hand allows you to bake a full batch (this recipe yields about 20 cupcakes) without waiting for a pan to cool and be refilled.
- #24 Trigger Scoop: This handy tool is a game-changer for portioning batter evenly into your cupcake liners. It ensures all cupcakes are the same size, promoting consistent baking times and a professional presentation.
- Silicone Spatulas: An invaluable kitchen staple! My favorite bundles include various sizes and shapes, perfect for scraping down the sides of your mixing bowl, folding ingredients gently, and ensuring no precious batter is left behind.
- Wilton 6B Piping Tip: If you desire the elegant, swirled frosting look pictured, this open star piping tip is ideal. It creates beautiful, defined ridges and adds a professional touch to your frosted cupcakes.
NOTE: The links provided are Amazon affiliate links. This means I may earn a small percentage from qualifying purchases at no extra cost to you, helping to support the creation of more delicious recipes.
Mastering the Art of Green Velvet Cupcakes: A Step-by-Step Guide
Creating these vibrant and delicious green velvet cupcakes is a straightforward process, even for beginner bakers. Follow these detailed steps to achieve perfect results. For a comprehensive, printable version of this recipe, please scroll down to the recipe card at the end of this post.
- Step 1: Prepare Your Oven and Pans. Begin by preheating your oven to 350 degrees Fahrenheit (175°C). This ensures the oven is at the correct temperature when your batter is ready, promoting even baking. Line your muffin tins with paper cupcake liners. These liners prevent sticking and make for easy serving. Set the prepared pans aside.
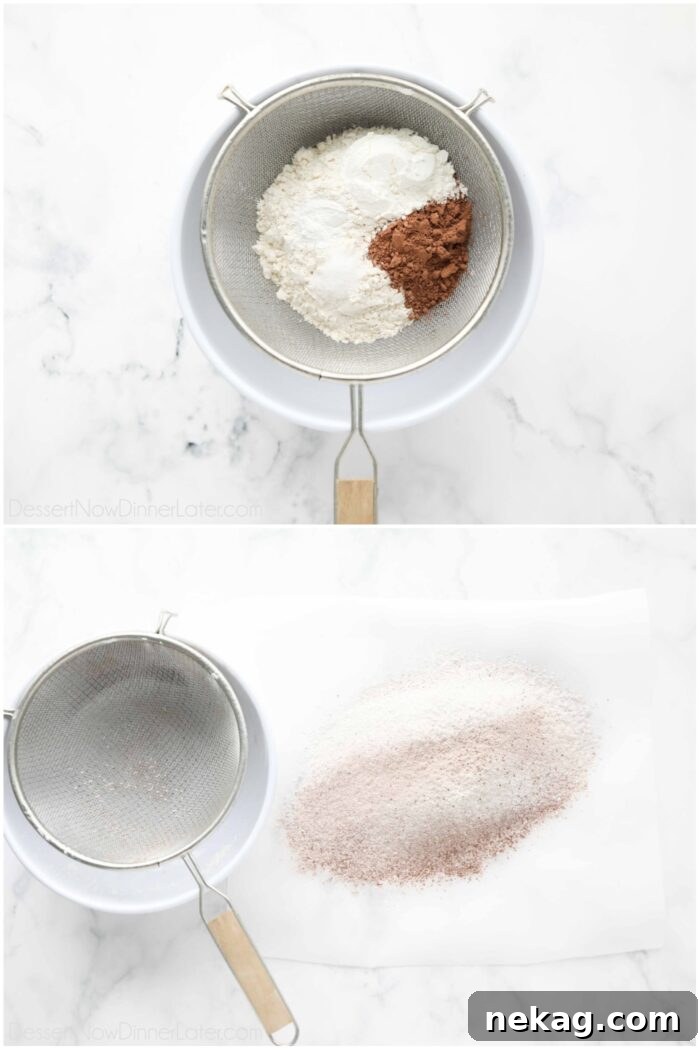
- Step 2: Sift the Dry Ingredients. In a medium bowl, combine the all-purpose flour, cornstarch, cocoa powder, baking powder, and salt. Use a fine mesh sieve to sift these dry ingredients *twice*. Sifting not only breaks up any lumps but also aerates the flour, which contributes significantly to the cupcakes’ light and tender texture.
PRO TIP: To make the transfer to your mixer easier later, I recommend sifting your dry ingredients directly onto a sheet of parchment paper. Once sifted, you can simply lift the parchment paper to create a funnel, allowing you to pour the dry mixture neatly into your mixer bowl.
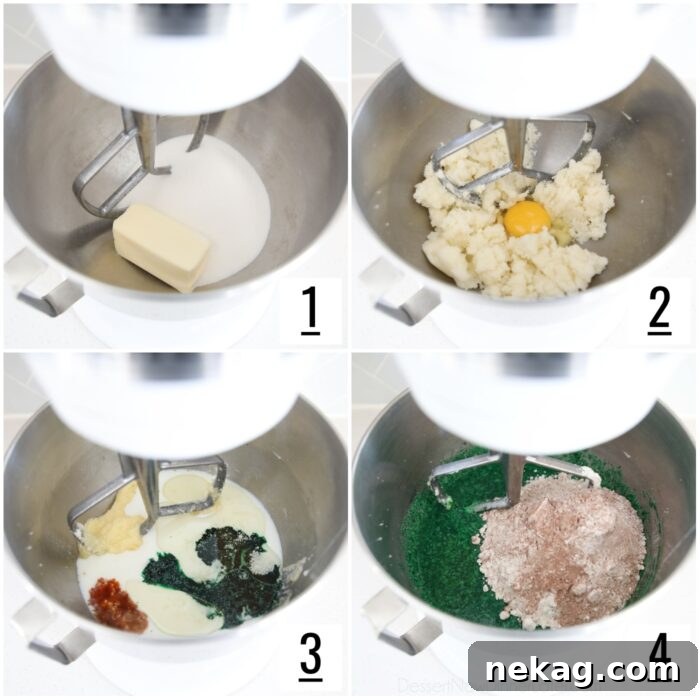
- Step 3: Cream Butter and Sugar. In the bowl of an electric stand mixer fitted with the paddle attachment, place the softened unsalted butter and granulated sugar. Beat on medium-high speed until the mixture is light, fluffy, and pale in color. This process, known as creaming, incorporates air into the batter, which is essential for a tender cupcake.
- Step 4: Incorporate Eggs. Add the large eggs to the creamed butter and sugar mixture, one at a time. Beat thoroughly after each addition, ensuring the egg is fully incorporated before adding the next. Mixing the eggs separately helps them emulsify correctly with the fat, creating a stable and smooth batter.
- Step 5: Mix Wet Ingredients. In a separate bowl or directly into the mixer, add the room temperature buttermilk, oil, liquid green food coloring, and vanilla extract. Mix until just combined. The liquid food coloring should blend in easily to create a uniform green base. Don’t forget to scrape down the sides of the bowl with a silicone spatula to ensure all ingredients are well mixed.
- Step 6: Combine Wet and Dry Ingredients. With the mixer on low speed, gradually add the sifted dry ingredients to the wet mixture. Mix until *just* incorporated. It’s crucial not to over-mix at this stage, as over-mixing can develop the gluten in the flour too much, leading to tough, dense cupcakes. A few streaks of flour are acceptable; they will disappear during baking.
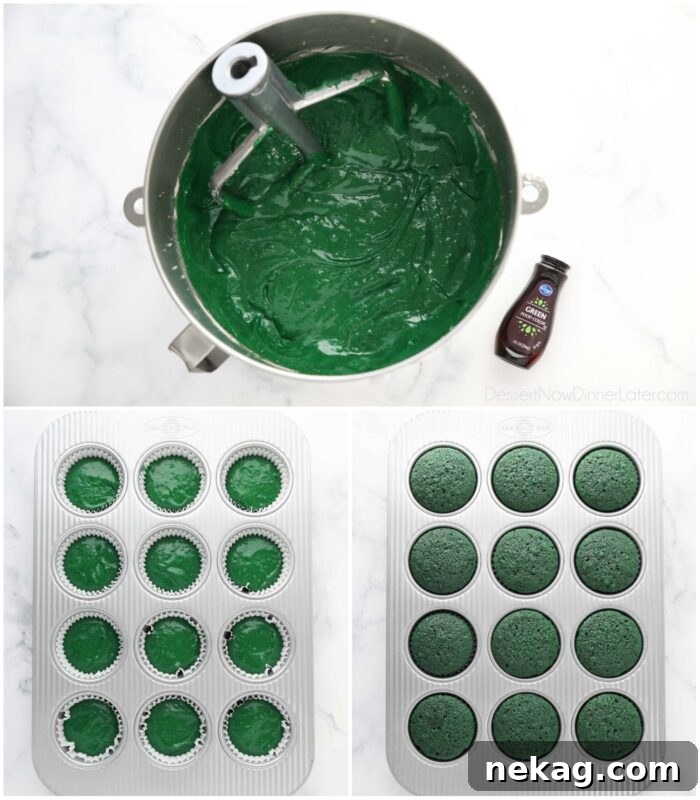
- Step 7: Fill and Bake. Immediately spoon the vibrant green batter into the prepared cupcake liners, filling each about 2/3 full. Using a #24 trigger scoop will help you achieve consistent portions and even baking. This recipe typically yields around 20 cupcakes.
- Step 8: Baking and Cooling. Bake in the preheated oven at 350˚F (175°C) for approximately 20 minutes, or until a wooden toothpick inserted into the center of a cupcake comes out clean or with only a few moist crumbs attached. The tops of the cupcakes should also spring back gently when lightly touched. Once baked, remove the cupcakes from the oven and let them cool in the muffin tins for a few minutes before transferring them to a wire rack to cool completely. It is essential for the cupcakes to be entirely cool before frosting to prevent the frosting from melting.
Elevate Your Cupcakes with the Perfect Frosting
No velvet cupcake, whether red or green, is truly complete without the quintessential creamy, tangy frosting. The right frosting not only adds a burst of flavor but also contributes to the overall aesthetic appeal of your baked creations.
While my classic cream cheese frosting recipe is always a fantastic choice, these particular green velvet cupcakes shine brightest when paired with a lighter, airier option. Since this recipe makes about 20 cupcakes, you will likely need to double or even triple (1.5-2x the recipe) the amount of your chosen frosting to get those generously piled, Instagram-worthy swirls as pictured. It’s always better to have a little extra frosting than not enough!
For these Green Velvet Cupcakes, I highly recommend using my whipped cream cheese frosting. This frosting yields a generous amount (approximately 4 cups), making it perfect for lavish piping. It offers the same irresistible tangy and sweet flavor profile as traditional cream cheese frosting but with a lighter, more delicate texture. The addition of heavy whipping cream makes it incredibly fluffy and smooth, allowing it to pipe beautifully and create stunning decorations. It’s truly just as delicious, if not even more delightful, and less heavy on the palate than its denser counterpart, providing a wonderful contrast to the moist cupcake base.
Transforming Them into St. Patrick’s Day Cupcakes
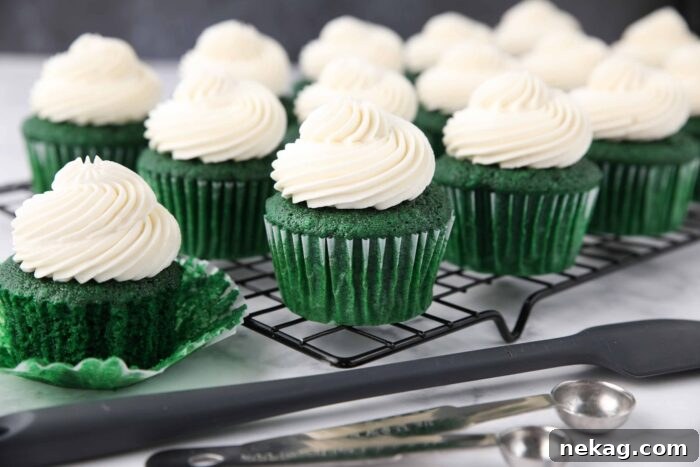
To truly embrace the spirit of St. Patrick’s Day, these vibrant green velvet cupcakes offer a perfect canvas for creative and festive decorations. Here are some fun ideas to make your cupcakes shamrock-ready:
- Glistening Gold Chocolate Coins: Place small, foil-wrapped gold chocolate coins on top of the frosting. These instantly evoke the imagery of a pot of gold at the end of a rainbow, adding a playful and delicious element.
- Festive Sprinkles: Sprinkles are an easy way to add instant cheer! Opt for classic gold and green sprinkles for a traditional look, or get creative with rainbow sprinkles to represent a leprechaun’s treasure. Edible glitter in gold or iridescent green can also add a magical shimmer.
- Colorful Rainbow Belt Candies: Cut rainbow belt candies into short strips and gently arch them over the frosting to mimic a mini rainbow. This adds a playful touch and a burst of fruity flavor.
- “Pot of Gold” with Rolos: For a delightful “pot of gold” effect, place a few Rolo candies (or similar chocolate caramel candies) on top of the frosting. Their round shape and golden wrapper-like appearance are perfect for this theme. You can even pipe a small “handle” of frosting to complete the pot look.
- Shamrock Decorations: Use green fondant to cut out small shamrocks, or pipe tiny shamrocks directly onto the frosting with a green-tinted frosting using a small star tip. Edible sugar shamrocks are also readily available at most baking supply stores during the season.
Optimal Storage for Freshness
Proper storage is key to preserving the delicious taste and tender texture of your green velvet cupcakes. Since they are topped with a cream cheese frosting, refrigeration is necessary for any frosted cupcakes.
- Storing Frosted Cupcakes: To maintain freshness and prevent the frosting from spoiling, place frosted cupcakes in an airtight container. Store them in the refrigerator for up to 3-5 days. For the best flavor and texture experience, remove the cupcakes from the fridge about 20-30 minutes before serving. This allows the cake to come to a more enjoyable room temperature, softening the frosting slightly and enhancing the overall taste.
- Storing Unfrosted Cupcakes: If you plan to frost your cupcakes later, or prefer to store them without frosting, place the unfrosted cupcakes in an airtight container at room temperature. They will stay fresh and moist for up to 1 week. This method is ideal for preparing the cake base in advance.
- Freezing Unfrosted Cupcakes: For longer storage, unfrosted cupcakes can be frozen. Wrap them tightly in plastic wrap (either individually or in groups of up to 6) and place them inside an airtight container or a freezer-safe bag. They will keep well in the freezer for up to 2 months. To defrost, simply remove them from the freezer and let them thaw at room temperature.
- Freezing Frosted Cupcakes: Freezing frosted cupcakes requires a slightly different approach to protect the delicate frosting. First, partially freeze the frosted cupcakes on a baking sheet until the frosting is firm enough to handle without smudging (about 30-60 minutes). Once firm, individually wrap each cupcake tightly in plastic wrap, then place them in an airtight container to freeze completely. To enjoy, remove the plastic wrap and thaw the cupcakes overnight in the refrigerator or for 1-2 hours at room temperature. This method ensures both the cake and frosting remain intact and delicious.
Expert Tips for Green Velvet Cupcake Perfection
Achieving consistently perfect green velvet cupcakes involves a few key techniques. Incorporating these tips into your baking process will ensure your cupcakes are always moist, tender, and beautifully colored:
- The Power of Sifting Dry Ingredients: This step is non-negotiable for achieving a truly velvety texture. Since we’re using all-purpose flour rather than cake flour, sifting the dry ingredients—twice—is paramount. Use a fine mesh sieve to break up any clumps, aerate the flour, and ensure an even distribution of the cocoa powder, baking powder, and salt. This leads to a lighter, fluffier cupcake with a consistent crumb. Additionally, always measure your flour by stirring it, spooning it into the measuring cup, and then leveling it off. Better yet, use a food scale for the most accurate measurement.
- Room Temperature Ingredients are Key: For the batter to emulsify correctly and create a smooth, homogenous mixture, all refrigerated ingredients (butter, eggs, buttermilk) must be at room temperature. Cold ingredients can cause the batter to curdle or result in a dense, inconsistent texture. Plan ahead and pull these items from the fridge 30-60 minutes before you begin baking.
- Liquid Green Food Coloring: A Non-Negotiable! As detailed in the recipe testing notes, the choice of food coloring is critical. Always use *liquid* green food coloring, not gel. Liquid coloring disperses more easily and uniformly throughout the batter, effectively masking the brown hue of the cocoa powder to deliver that vibrant, consistent green color. Gel food coloring can lead to a streaky, olive-green result that isn’t as appealing.
- No Buttermilk? No Problem! Make Your Own: If you don’t have buttermilk on hand, it’s incredibly simple to make a substitute. Add 1 Tablespoon of distilled white vinegar or lemon juice to a liquid measuring cup. Then, pour regular milk (dairy or non-dairy) up to the 1 cup line. Stir the mixture gently and let it sit for 5-10 minutes. The milk will curdle slightly, forming a suitable buttermilk substitute.
- Achieve Uniformity with a Cupcake Scoop: For perfectly sized and evenly baked cupcakes, I highly recommend using a #24 scoop (affiliate link) to fill your cupcake liners. Fill each liner about 2/3 full. This practice ensures that all your cupcakes bake at the same rate, preventing some from being overdone while others are undercooked. It also gives your final presentation a professional, consistent look.
Green Velvet Cupcakes
Pin
Rate
Save
Ingredients
- 1 ¾ cups (210 g) all-purpose flour
- 4 Tablespoons (40 g) cornstarch
- 2 Tablespoons (10 g) unsweetened cocoa powder
- 1 ½ teaspoons baking powder
- ½ teaspoon salt
- ½ cup (113 g) unsalted butter, room temperature
- 1 ½ cups (300 g) granulated sugar
- 2 large eggs, room temperature
- 1 cup (237 ml) buttermilk, room temperature – see notes
- ¼ cup (59 ml) oil, (canola/vegetable)
- 1 ounce (2 Tablespoons) green food coloring, liquid coloring, not gel
- 1 teaspoon vanilla extract
Equipment
-
Fine Mesh Strainer/Sieve
-
KitchenAid 5-Qt. Stand Mixer
-
Electric Hand Mixer
-
USA Bakeware 12-cup Muffin or Cupcake Pan
-
#24 scoop
-
Silicone Spatula Set
-
Wilton Disposable Piping Bags
-
Wilton 6B Tip
Instructions
-
Preheat oven to 350 degrees Fahrenheit. Line muffin tins with paper cupcake liners. Set aside.
-
Sift the flour, corn starch, cocoa powder, baking powder, and salt, TWICE, with a fine mesh sieve. Set aside.
-
In the bowl of a stand mixer with the paddle attachment, cream the butter and sugar until fluffy and pale. Add eggs one at a time, mixing completely between each addition.
-
Add the buttermilk, oil, liquid green food coloring, and vanilla. Mix until combined. Scrape bowl.
-
Add the dry ingredients to the wet ingredients in mixer. Mix until just combined. Do not over-mix! Use a #24 scoop to divide batter into cups 2/3 full. Will make 20 cupcakes.
-
Bake at 350˚F for 20 minutes or until a toothpick inserted into the center comes out clean or with a few moist crumbs and the cake springs back when touched. Allow to cool completely before frosting. I used my Whipped Cream Cheese Frosting recipe.
Notes
- Homemade Buttermilk: Add 1 Tablespoon of distilled white vinegar or lemon juice to a measuring cup. Pour regular milk to reach the 1 cup line. Stir and let it sit for 5-10 minutes before using it.
- To store frosted cupcakes: Place the frosted cupcakes inside of an airtight container. Store in the refrigerator for up to 3-5 days. Remove leftover cupcakes from fridge 20-30 minutes before serving to take the chill off the cake.
- To store unfrosted cupcakes: Place unfrosted cupcakes inside of an airtight container and store at room temperature for up to 1 week.
- To freeze unfrosted cupcakes: Wrap in plastic wrap (in groups of up to 6, or individually) inside of an airtight container or freezer bag for up to 2 months. Defrost at room temperature.
- To freeze frosted cupcakes: Partially freeze cupcakes until firm enough to wrap individually. Then place in an airtight container to freeze completely. Remove plastic wrap and thaw in the fridge overnight or at room temperature for 1-2 hours.
Nutrition
Calories: 185kcal |
Carbohydrates: 26g |
Protein: 2g |
Fat: 8g |
Saturated Fat: 4g |
Polyunsaturated Fat: 1g |
Monounsaturated Fat: 3g |
Trans Fat: 0.2g |
Cholesterol: 30mg |
Sodium: 110mg |
Potassium: 44mg |
Fiber: 0.5g |
Sugar: 16g |
Vitamin A: 186IU |
Calcium: 38mg |
Iron: 1mg
Disclaimer: Nutritional values were calculated using a third-party tool and are provided as an estimation only.
Sharing this recipe with a link is both encouraged and appreciated. Copying/pasting and/or screenshots of full recipes to any social media is strictly prohibited. Content and photographs are copyright protected.
Did you make this?
Don’t forget to leave a rating below and make sure to follow on Pinterest and Instagram for more!