
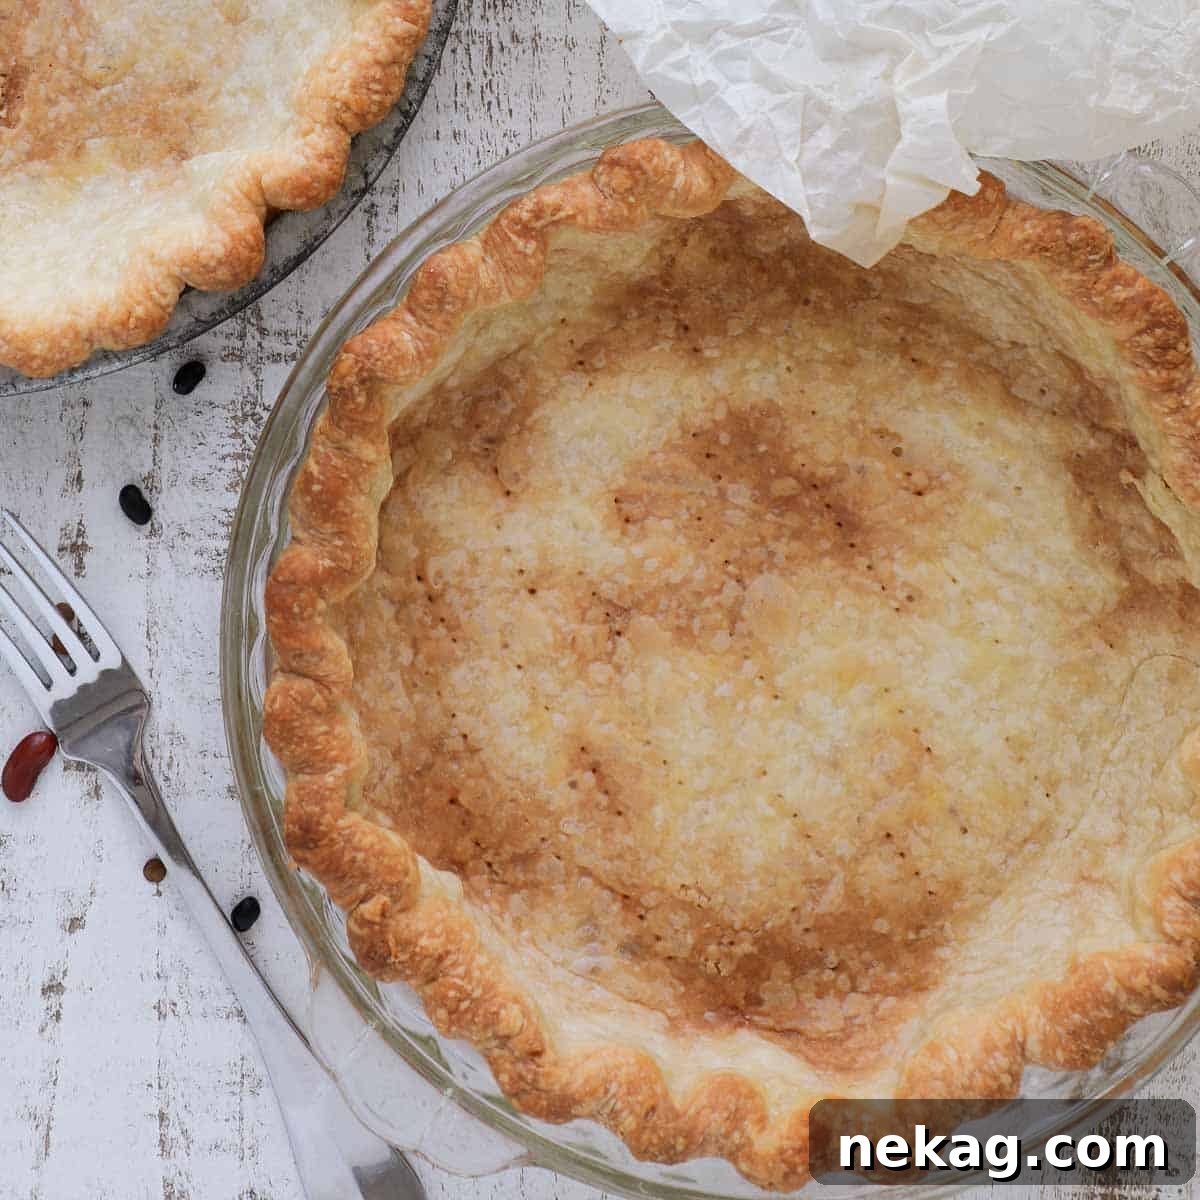
Achieve the Perfect Pie: Your Essential Guide to Blind Baking Pie Crust
Unlock the secret to consistently crisp, flaky, and beautifully golden pie crusts! A professional pastry chef shares invaluable insights into the techniques of blind baking and par baking, guiding you through every step to ensure your single-crust pies are nothing short of perfection. Discover when to use each method and eliminate soggy bottoms forever!
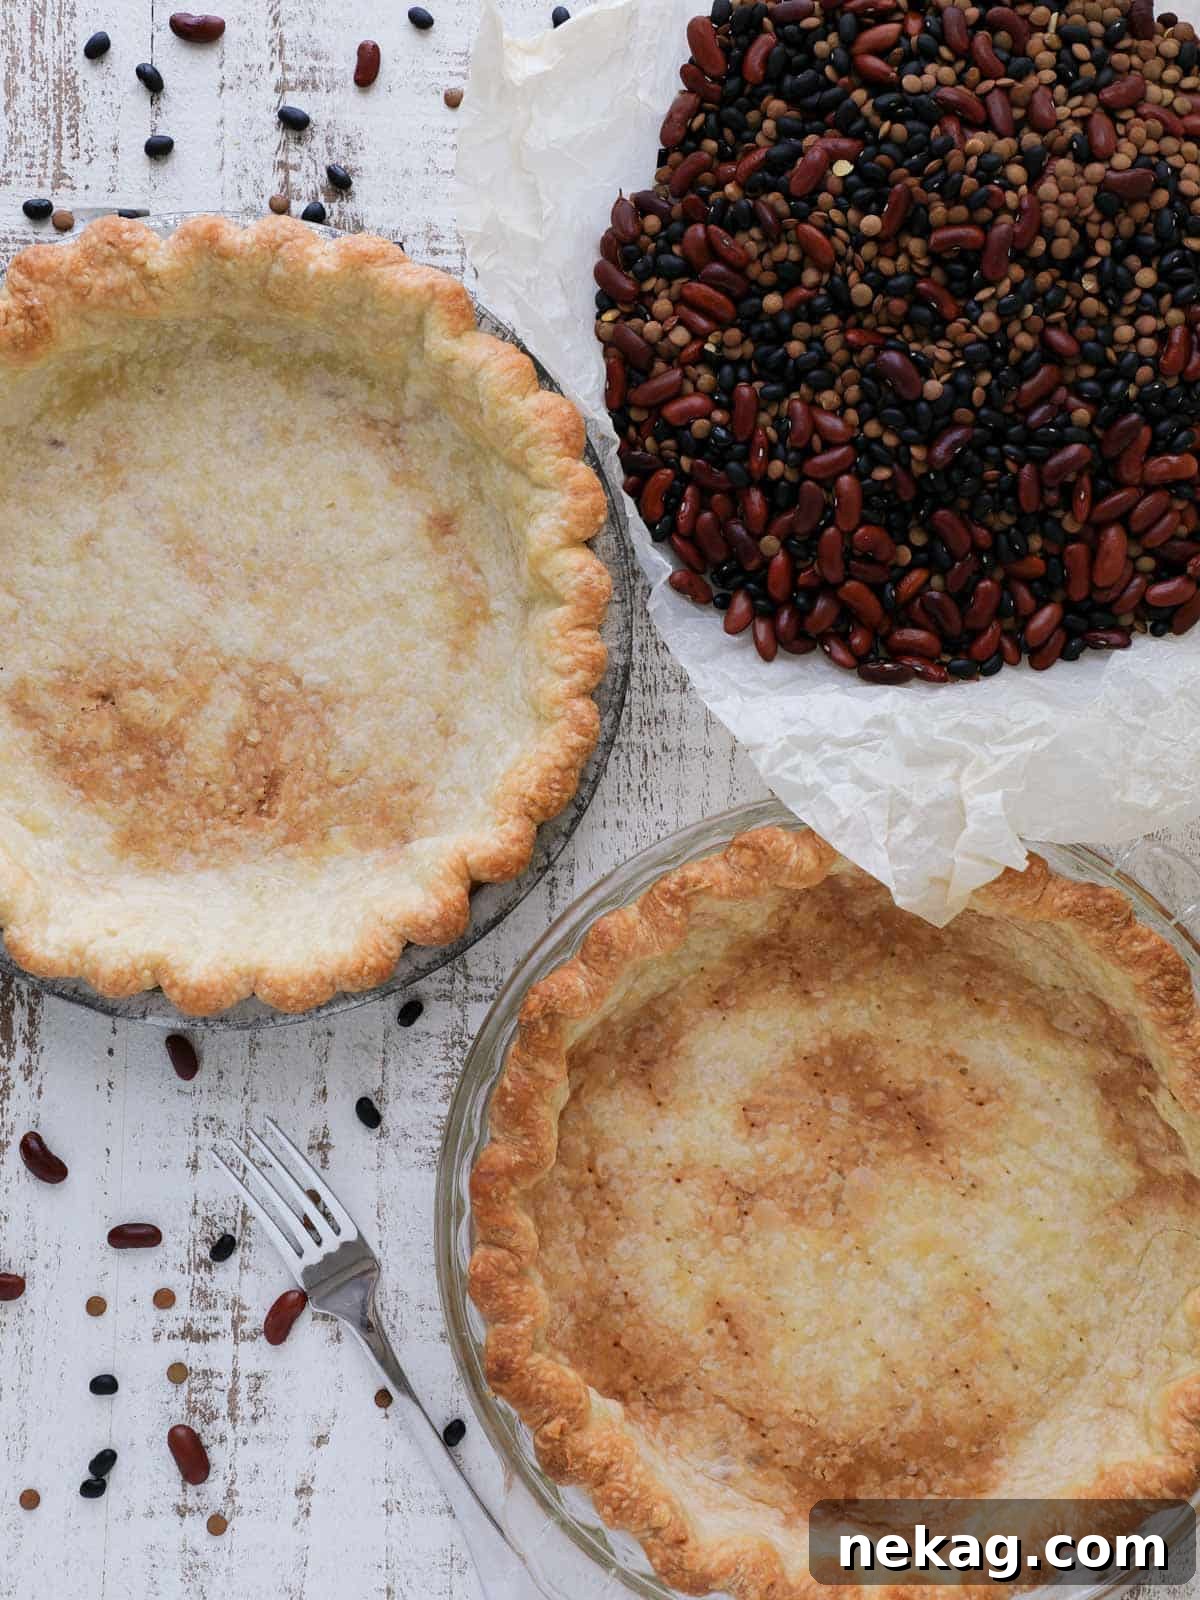
Understanding the Basics: Blind Baking vs. Par Baking
Achieving a perfectly baked pie often starts before the filling even enters the crust. Partially or fully blind baking pie crust is the foundational technique that prevents dreaded soggy bottoms and ensures a robust, flaky, golden-brown foundation for any single-crust pie or tart. But what exactly is the difference, and when should you choose one over the other?
When to Par Bake (Partially Bake) Your Pie Crust
You’ll want to par bake an empty pie crust when your chosen pie filling requires a longer baking time in the oven, and the crust will continue to bake alongside it. This technique ensures that your crust isn’t raw or undercooked by the time the filling is perfectly set. Par baking provides a head start, guaranteeing the bottom crust develops structure and a light golden hue before it’s weighed down by a liquid filling. This method is ideal for pies where the filling needs to bake at a lower temperature, or simply doesn’t require enough baking time for an uncooked crust to become fully done.
Excellent examples of pies that benefit from a par-baked crust include classics like lemon meringue pie, where the meringue topping browns quickly, and creamy, rich easy pumpkin pie. In these cases, the crust gets just enough baking time to become firm and lightly colored, then finishes cooking as the filling sets.
When to Fully Blind Bake Your Pie Crust
Full blind baking, on the other hand, is essential for pies and tarts that feature unbaked or very lightly cooked fillings. If your filling requires no baking at all, or very minimal heat, a fully blind-baked crust is your best friend. This ensures the crust is completely cooked through, golden brown, and perfectly crisp, providing the necessary support and texture for your delicate filling without overcooking it.
This method is crucial for many types of custard pies and those with fresh fruit or cream fillings. Think of luscious desserts like classic banana cream pie, decadent coconut cream pie, or the luxurious French silk pie. For these, the crust must be an independent, perfectly cooked component, ready to cradle a filling that doesn’t rely on the oven for its final texture.
Table of Contents
- Professional Bakers’ Tips for Prebaking Pie Crusts
- What is Blind Baking?
- What is Par Baking?
- Essential Tools & Ingredients You Will Need
- Step-by-Step Guide: How to Blind Bake Pie Crust
- Chef Lindsey’s Expert Recipe Tip
- How to Prevent Pie Crust from Shrinking
- Frequently Asked Questions About Blind Baking
- How to Blind Bake Pie Crust Recipe
- Expand Your Pie Baking Skills
Professional Bakers’ Tips for Prebaking Pie Crusts
- Understand When to Dock Your Pie Crust: Docking refers to gently poking holes in the bottom of the raw pie crust before blind baking. This crucial step allows steam to escape during baking, preventing the crust from puffing up like a balloon. Generally, you should dock a crust that will hold a thick, non-liquid filling. However, if your pie will have a liquid filling, such as a delicate pecan pie or quiche, avoid docking. The holes could cause the filling to leak out. For an in-depth guide, read more about when & how to dock pie crust effectively.
- Strategic Removal of Pie Weights: Resist the urge to remove your pie weights too early! Only take them out when the bottom of the crust has just begun to show signs of browning. This timing is critical for two reasons: it prevents the crust from puffing up after the weights are removed, maintaining a flat, even base. More importantly, it helps anchor the sides of the pie crust, keeping them from attractively sliding down the sides of the pie plate and losing their shape.
- Prepare Prebaked Pie Crusts in Advance: Save time and reduce stress, especially during busy baking seasons. Blind baked or par-baked pie crusts are incredibly versatile and can be prepared ahead of time. Store them securely wrapped at room temperature for up to 3 days, or for longer-term planning, freeze them for an impressive duration of up to 2 months. This makes holiday baking or dinner party prep a breeze!
What is Blind Baking?
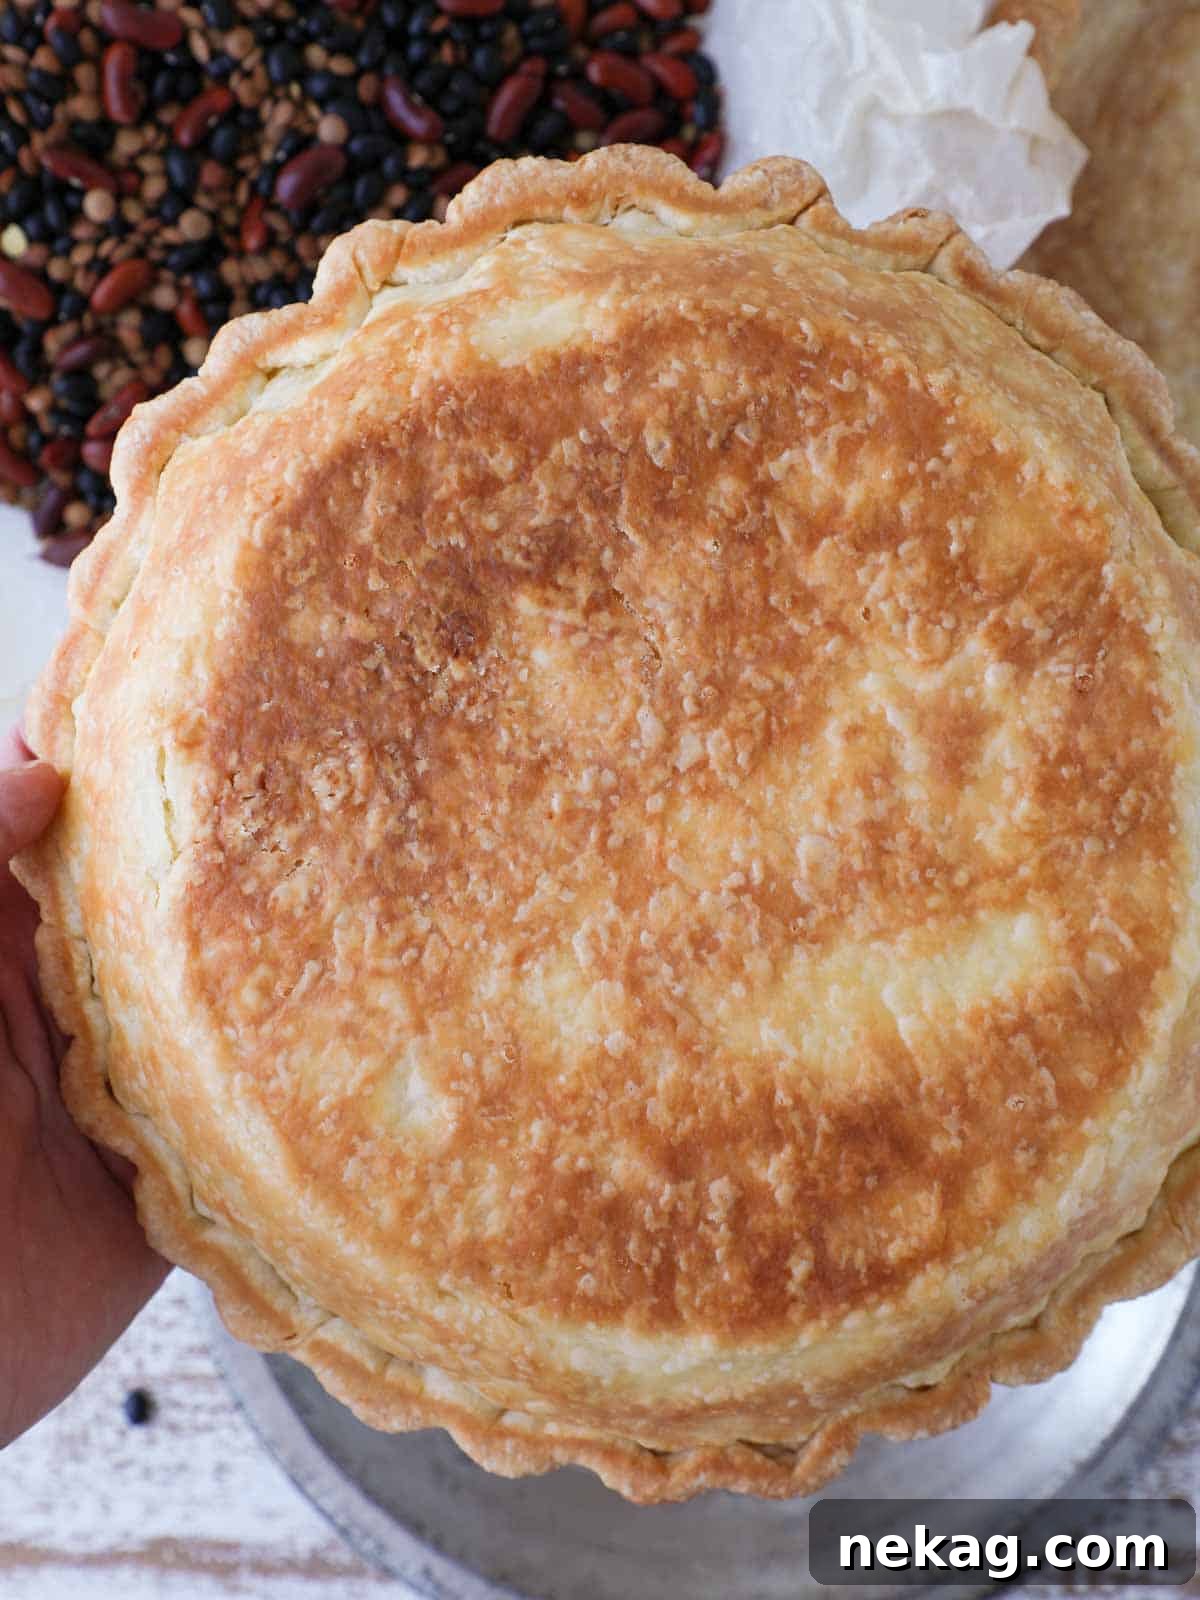
Blind baking is a culinary technique where a pie or tart crust is baked fully or partially before its filling is added. The term “blind” refers to baking the crust without seeing the filling. To blind bake, you first line a pie dish with your chosen pie dough. To prevent the crust from bubbling or shrinking, it’s then lined with parchment paper and weighed down with pie weights, dried beans, or rice. The crust is baked until it reaches a desired level of doneness, typically a fully cooked, golden-brown state. A fully blind-baked crust is then usually filled with an unbaked or minimally cooked filling, creating a perfect contrast of textures.
What is Par Baking?
Par baking (or partially baking) a pie crust is a specific form of blind baking. In this method, the pie shell is baked only partially before the filling is added. Similar to full blind baking, you line the crust with parchment and weights. However, the baking process is stopped once the crust is no longer raw or doughy but has achieved only a light golden color and a firm texture. At this point, the weights and parchment are removed. The partially baked crust is then filled, and both the filling and the crust continue baking together until the pie is completely done. This ensures the crust is not undercooked and maintains its flakiness and structure throughout the full baking cycle of the pie.
Essential Tools & Ingredients You Will Need
Equipping yourself with the right tools and ingredients is crucial for a successful blind baking experience. Here’s what you’ll need to achieve that perfect pie crust:
- Pie Dough: The quality of your crust starts with your dough. Any pie crust recipe can be partially or fully blind baked! Select a dough that perfectly complements your intended filling. For a rich, buttery flavor, consider an all-butter pastry like my vodka pie crust. If you prefer a lighter, flakier texture, a Crisco pie crust might be ideal, or for a unique twist, try an almond flour pie crust. Don’t have time to make it from scratch? Store-bought crust works beautifully too!
- Rolling Pin: A good rolling pin is indispensable. I personally favor a French rolling pin due to its tapered ends. This design allows for more precise control, making it easier to apply even pressure across the dough initially and then to target specific areas for thinner rolling later on, ensuring a uniform crust thickness.
- Kitchen Shears: For neatly trimming excess dough, kitchen shears are a game-changer. They offer more control and precision than a knife, making it the easiest way to achieve clean edges around your pie dish. I recommend dedicating a specific pair of kitchen shears solely for baking and cooking tasks to maintain hygiene – nobody wants the same scissors that cut open boxes touching their delicious baked goods!
- Pie Dish: The material of your pie dish significantly impacts how your crust bakes. Both metal and glass dishes are excellent choices as they conduct heat more efficiently than ceramic. This efficient heat transfer encourages quicker and more even browning of the crust, leading to a consistently cooked, crispy bottom.
- Parchment Paper: Essential for protecting your dough from direct contact with pie weights. I have a simple trick: gently crumple my parchment paper into a tight ball, then unroll it. This makes the paper more pliable and allows it to conform easily to the shape of the pie dish without tearing the delicate dough.
- Pie Weights or Dried Beans: These are crucial for weighing down the crust during baking, preventing it from puffing up and maintaining its shape. You can use specialized ceramic pie weights, or more common household alternatives like dried beans or rice. To truly ensure the crust doesn’t puff and the sides don’t slump, wait until the bottom crust has visibly started to brown before removing the parchment and weights.
How to Blind-Bake Pie Crust: A Step-by-Step Guide
Follow these detailed instructions to perfectly partially or fully blind bake your pie crust every single time, ensuring a flaky, golden foundation for your favorite pies!
Step 1: Prepare Your Work Surface and Dough
Begin by lightly flouring a clean, flat surface, the top of your pie dough, and your rolling pin. This prevents sticking and ensures a smooth rolling process.
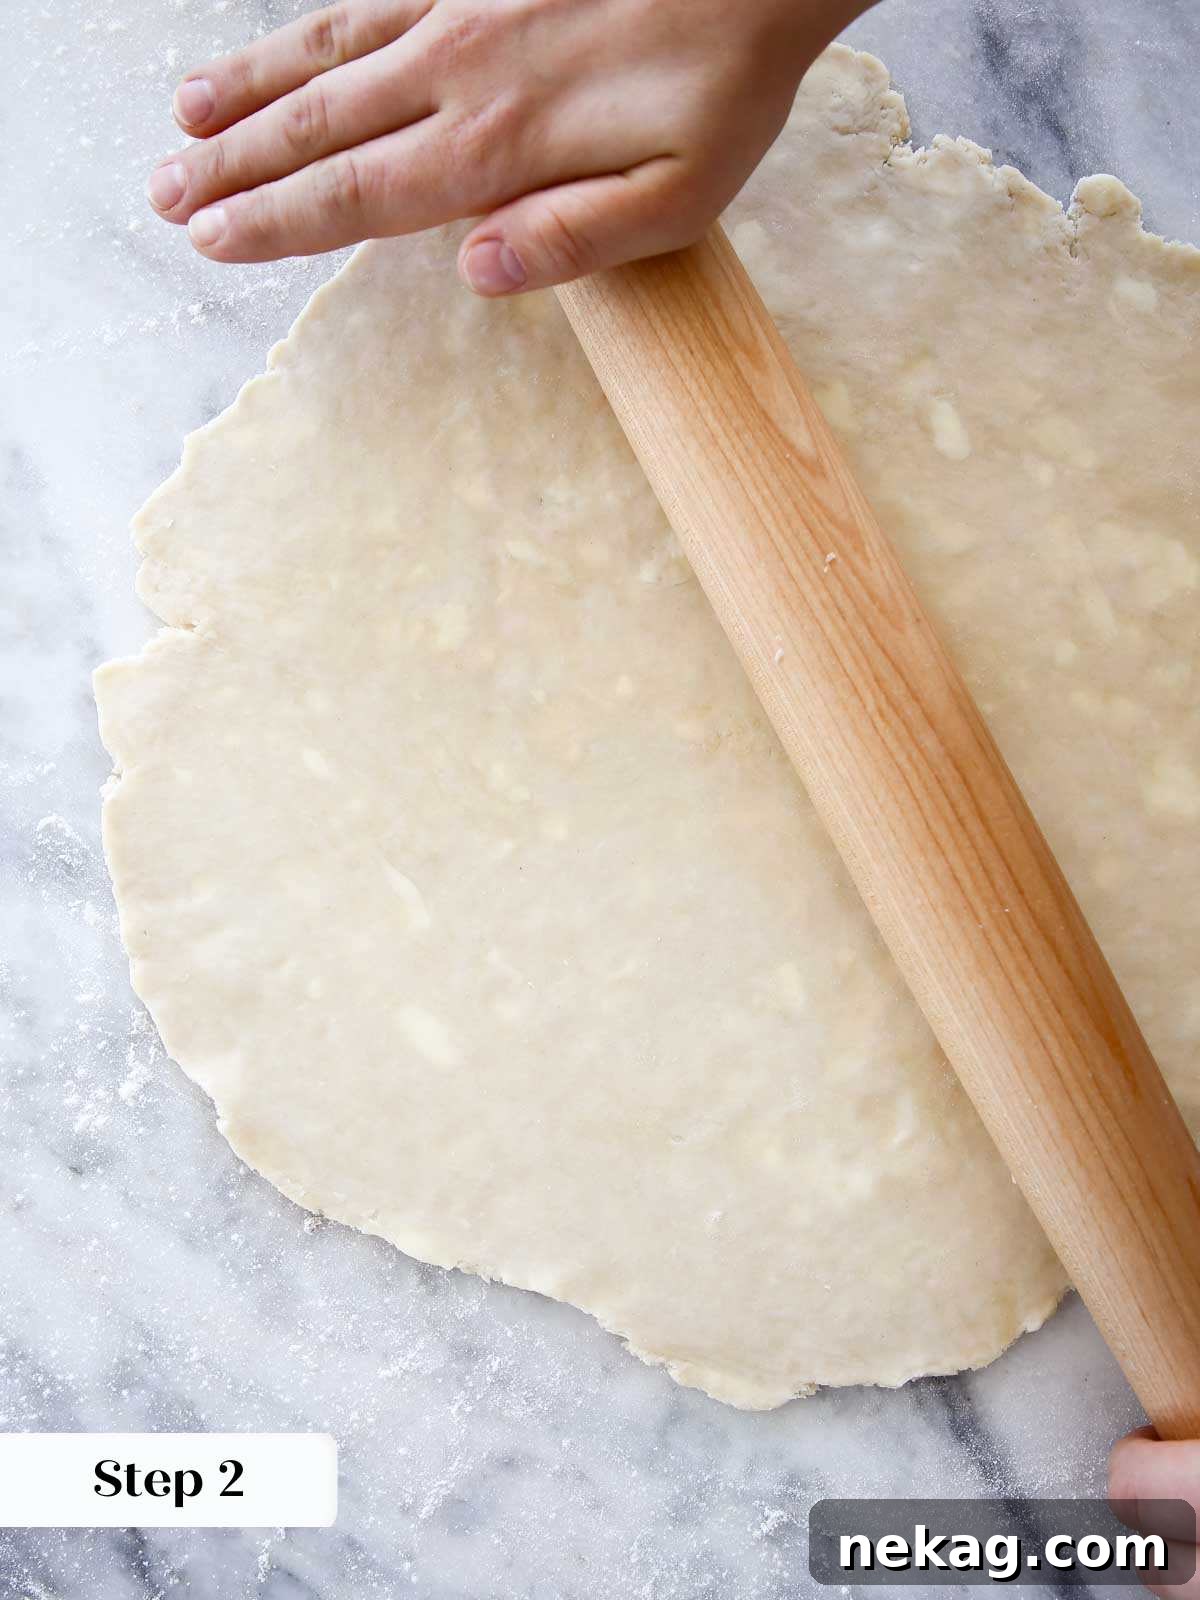
Step 2: Roll and Chill the Dough
Roll your pie dough out to an even thickness of approximately 1/8th inch, aiming for a shape as close to a circle as possible. Once rolled, transfer the dough to a baking sheet and chill it in the refrigerator for at least 30 minutes. This critical chilling period helps relax the gluten, which prevents shrinkage during baking, and solidifies the fat, contributing to a flakier crust. While the dough chills, preheat your oven to 350°F (175°C) for convection or 375°F (190°C) for conventional ovens.
Step 3: Transfer and Shape the Dough in the Pie Dish
Carefully transfer the chilled pie dough into your pie dish. Gently press the dough to fit flush against the bottom and sides of the dish, ensuring there are no air bubbles. Allow any excess dough to generously overhang the edges of the pie plate. Once again, chill the dough-lined pie dish for another 30 minutes. This second chill further relaxes the gluten and helps the dough hold its shape during the initial bake.
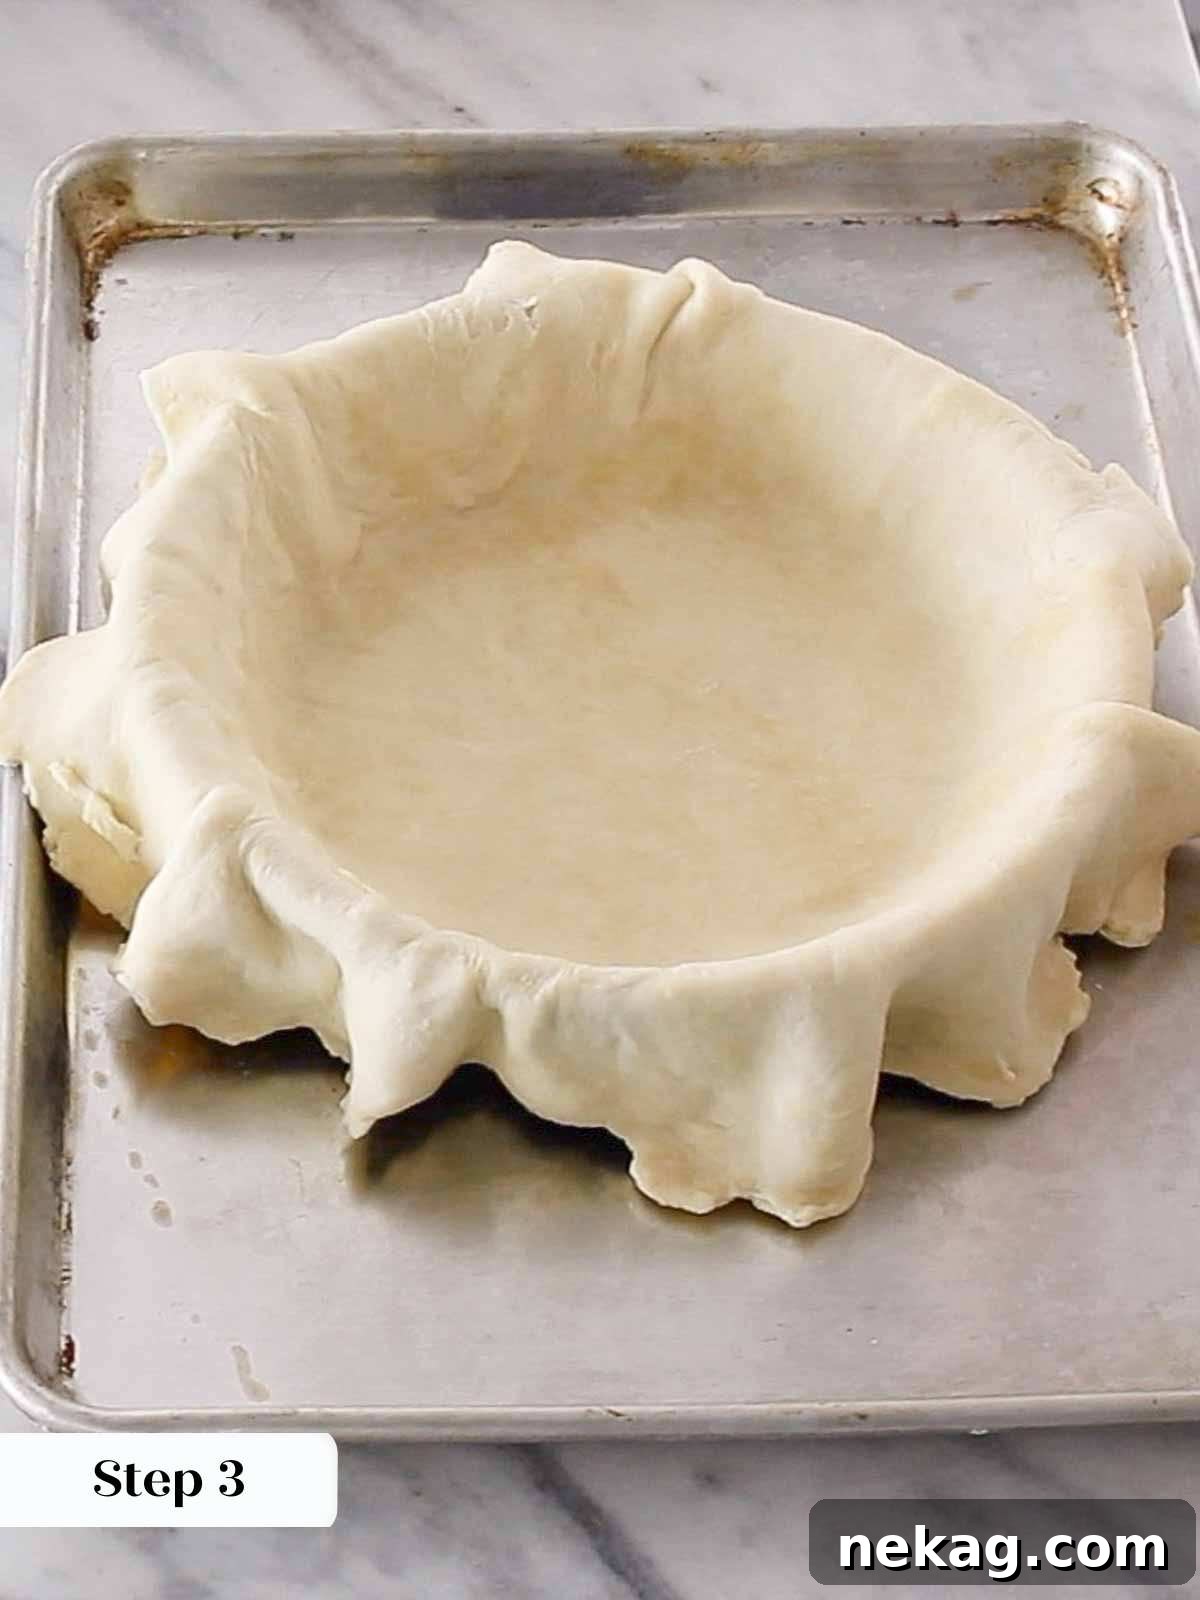
While you can skip chilling at this stage if you’re in a rush, a chilled dough will consistently yield the best, flakiest, and most evenly baked pie crust with minimal shrinkage.
Step 4: Trim and Roll the Edges
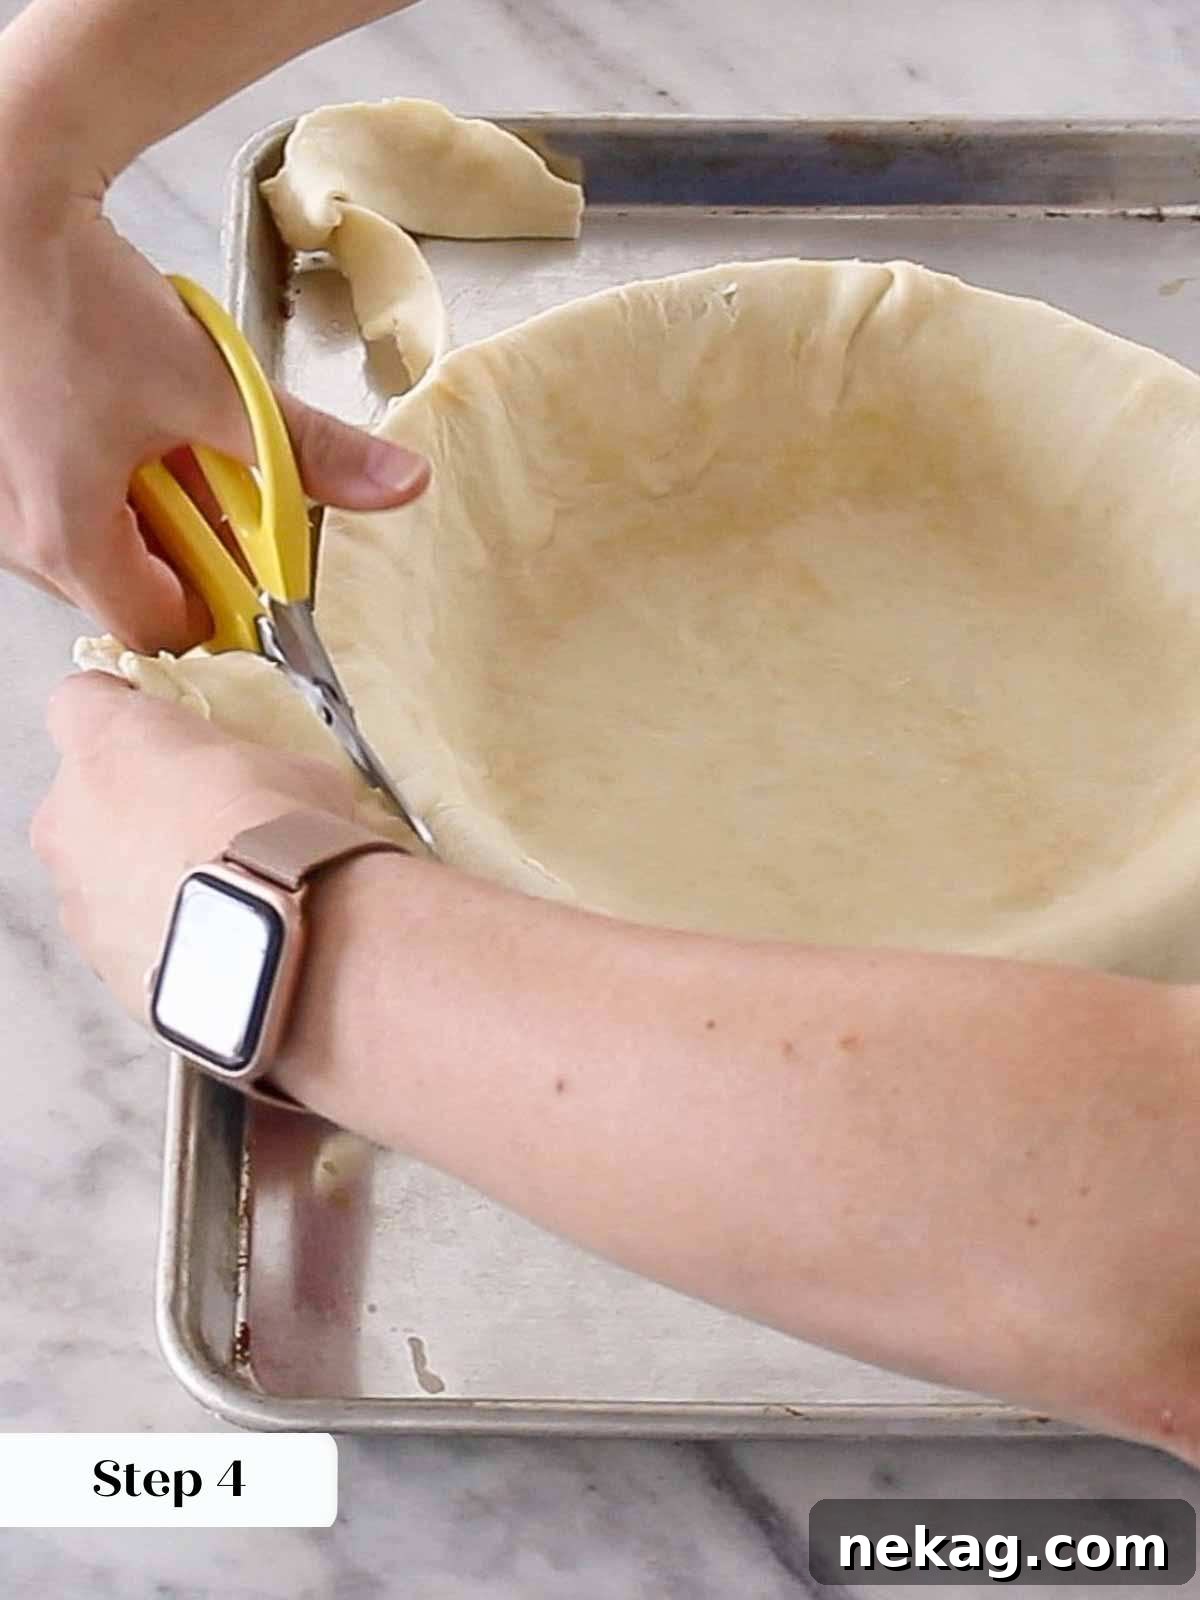
Trim any excess dough hanging over the edges, leaving about a 1-inch overhang. Then, tightly roll this overhang underneath itself by pressing and rolling the dough between your thumb and first two fingers. Ensure you roll it tightly against the rim of the pie dish. This meticulous step prevents the edge from popping open or slumping down during baking, creating a beautiful, sturdy crust edge.
Leaving too much dough around the edges will result in an overly thick crust rim that bakes unevenly compared to the rest of the crust, potentially leading to an underbaked, doughy center and edges that don’t crisp properly.
Step 5: Crimp and Chill (Again!)
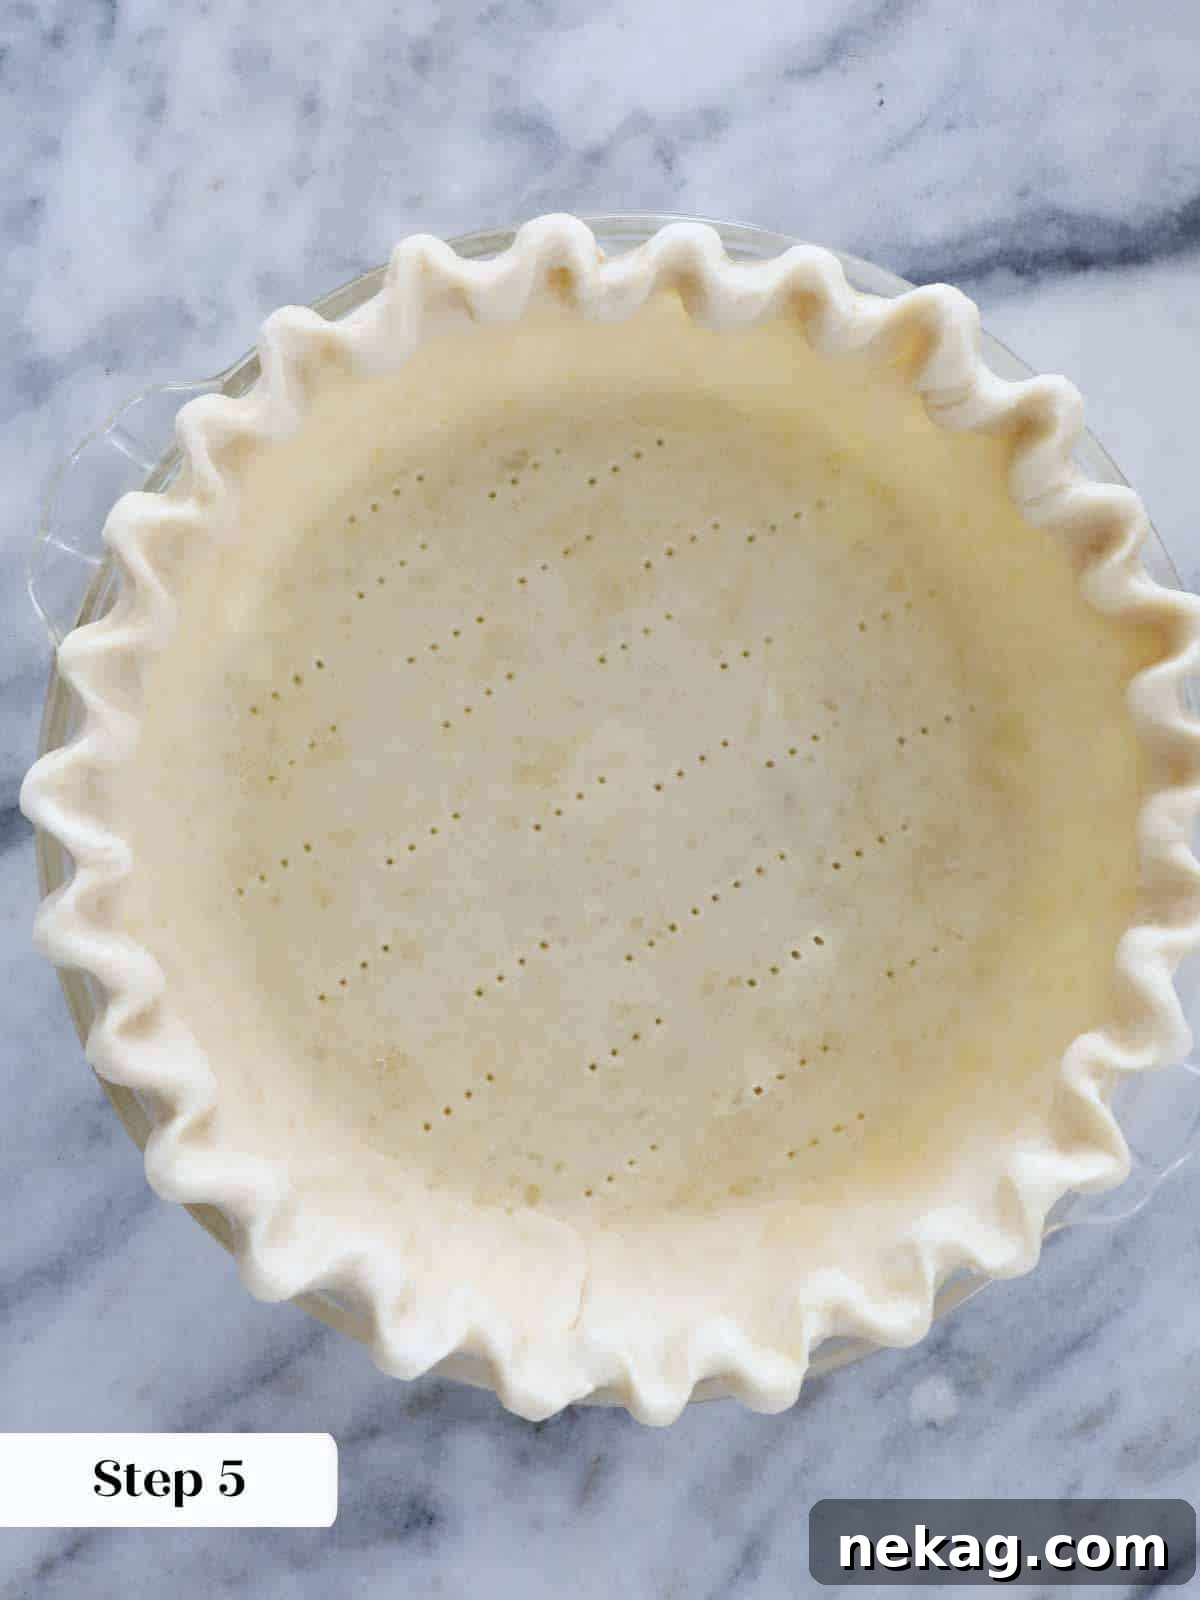
Now, it’s time to create your decorative edge. Crimp or flute the edges of the dough, or simply mark them with the tines of a fork for a rustic look. If, at any point during these steps, the dough no longer feels cool to the touch, it’s vital to chill it again for another 15-30 minutes. Cold dough is key to preventing shrinkage and ensuring a perfect, flaky texture.
Step 6: Line with Parchment and Weights
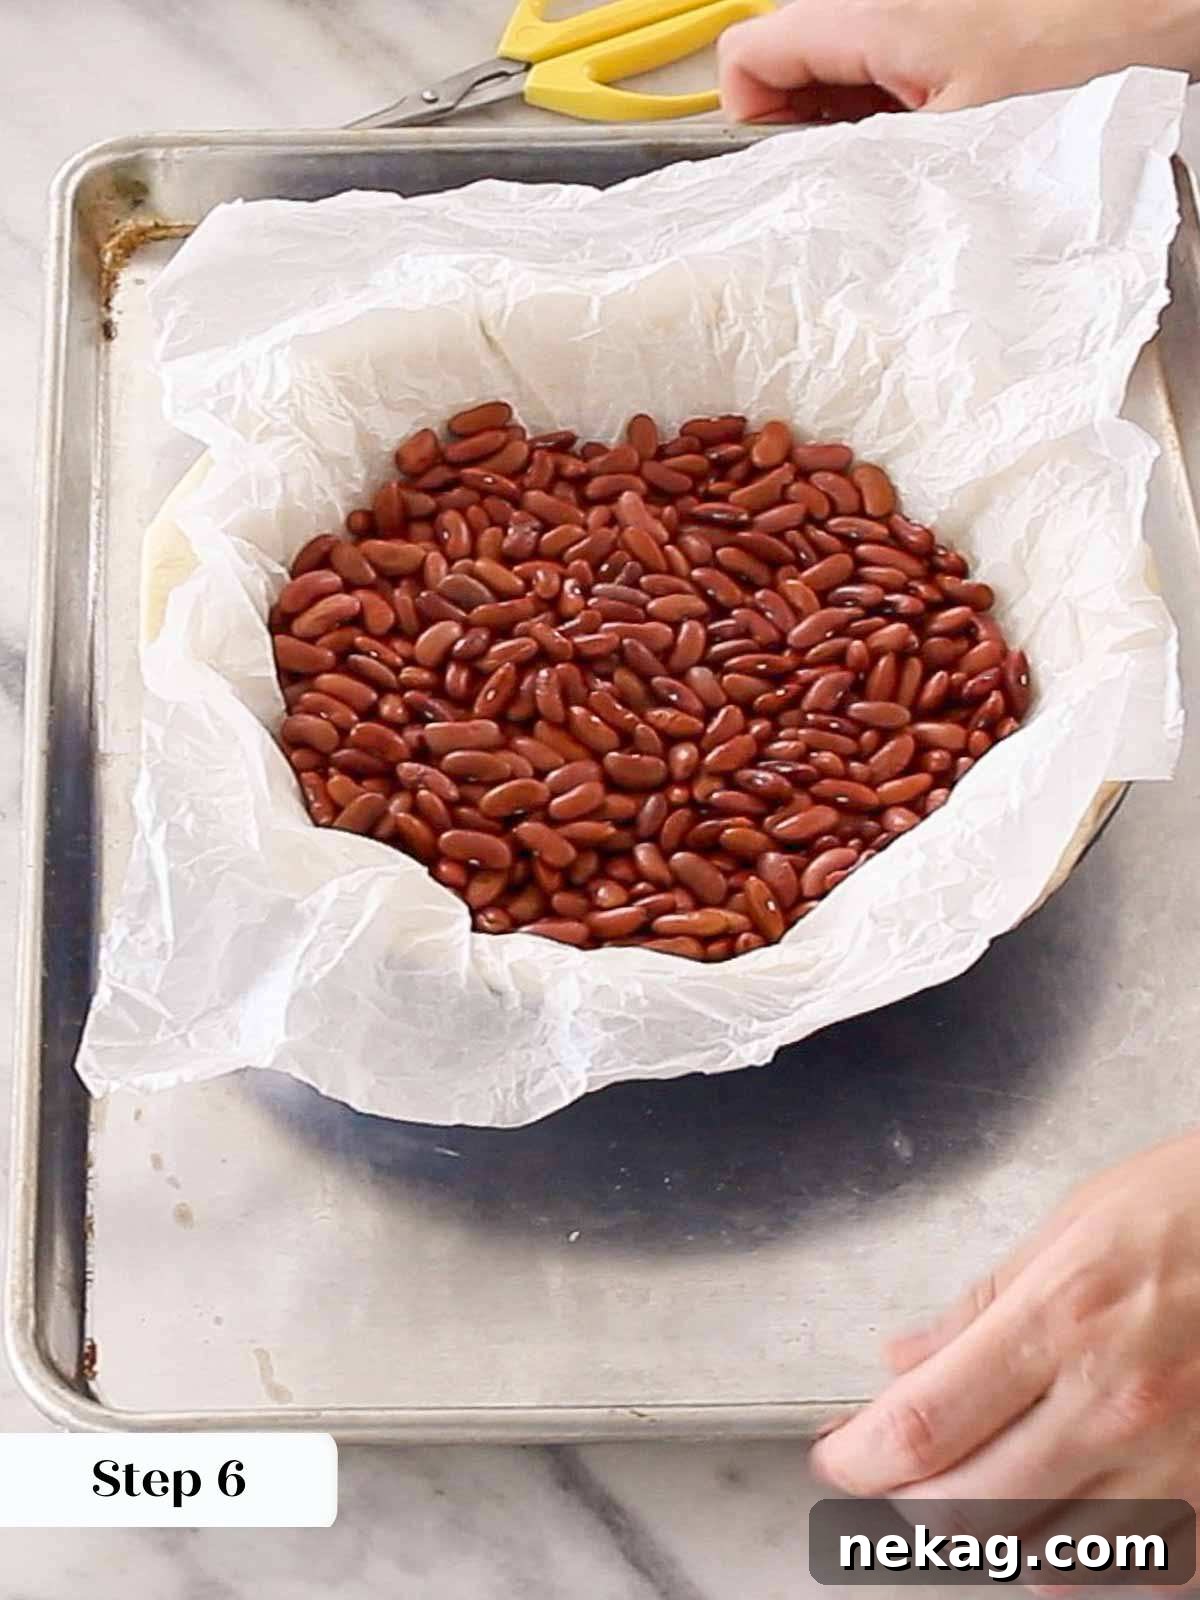
Gently line the chilled pie crust with parchment paper, carefully pressing it into the contours of the dish. Then, fill the parchment-lined crust generously with your chosen pie weights, dried beans, or rice. The weights are essential to prevent the bottom crust from puffing up and the sides from collapsing during baking. For the best results in preventing bubbles and keeping the crust’s integrity, only remove the parchment and weights once the bottom crust has started to develop a slight golden-brown color.
Through extensive testing, I’ve found that rice often isn’t quite heavy enough to completely prevent the crust from developing small bubbles or puffing unevenly. Conversely, ceramic pie weights can sometimes be *too* heavy, compacting the dough too much and inhibiting the slight rise needed for a truly flaky crust. My personal preference? Dried beans! They provide the perfect balance of weight. I cool and reuse the same batch of beans every time—any variety will work beautifully.
Step 7: The Par-Baked Stage (Partial Blind Bake)
Place the weighted crust into your preheated oven and bake for 12-20 minutes. Keep a close eye on it; the goal for par-baking is for the bottom crust to just begin turning a light golden brown and appear dry, not doughy. This is the par-baked stage! If your recipe calls for continuing to bake the crust with a filling, you are done with this step! Carefully remove the crust from the oven. Depending on your pie filling, you can either use the par-baked crust immediately or allow it to cool completely before adding the filling and continuing with your recipe.
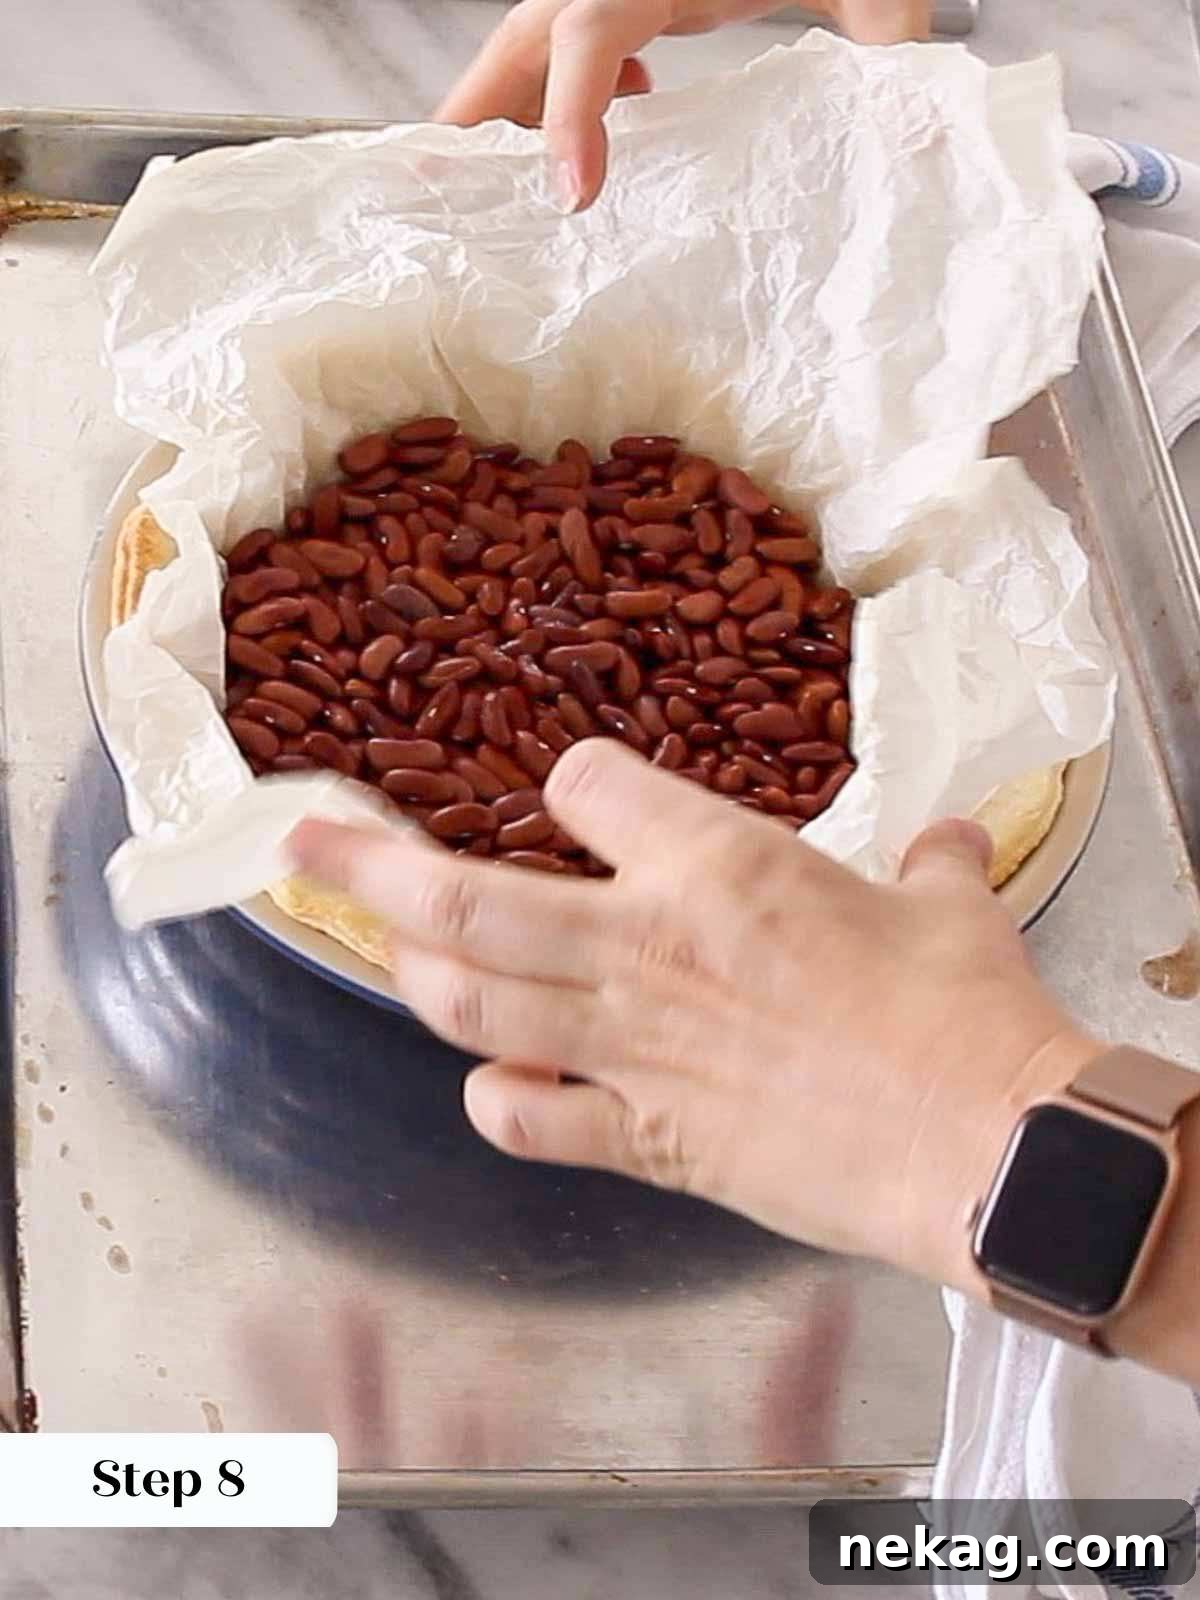
Step 8: Completing the Full Blind Bake
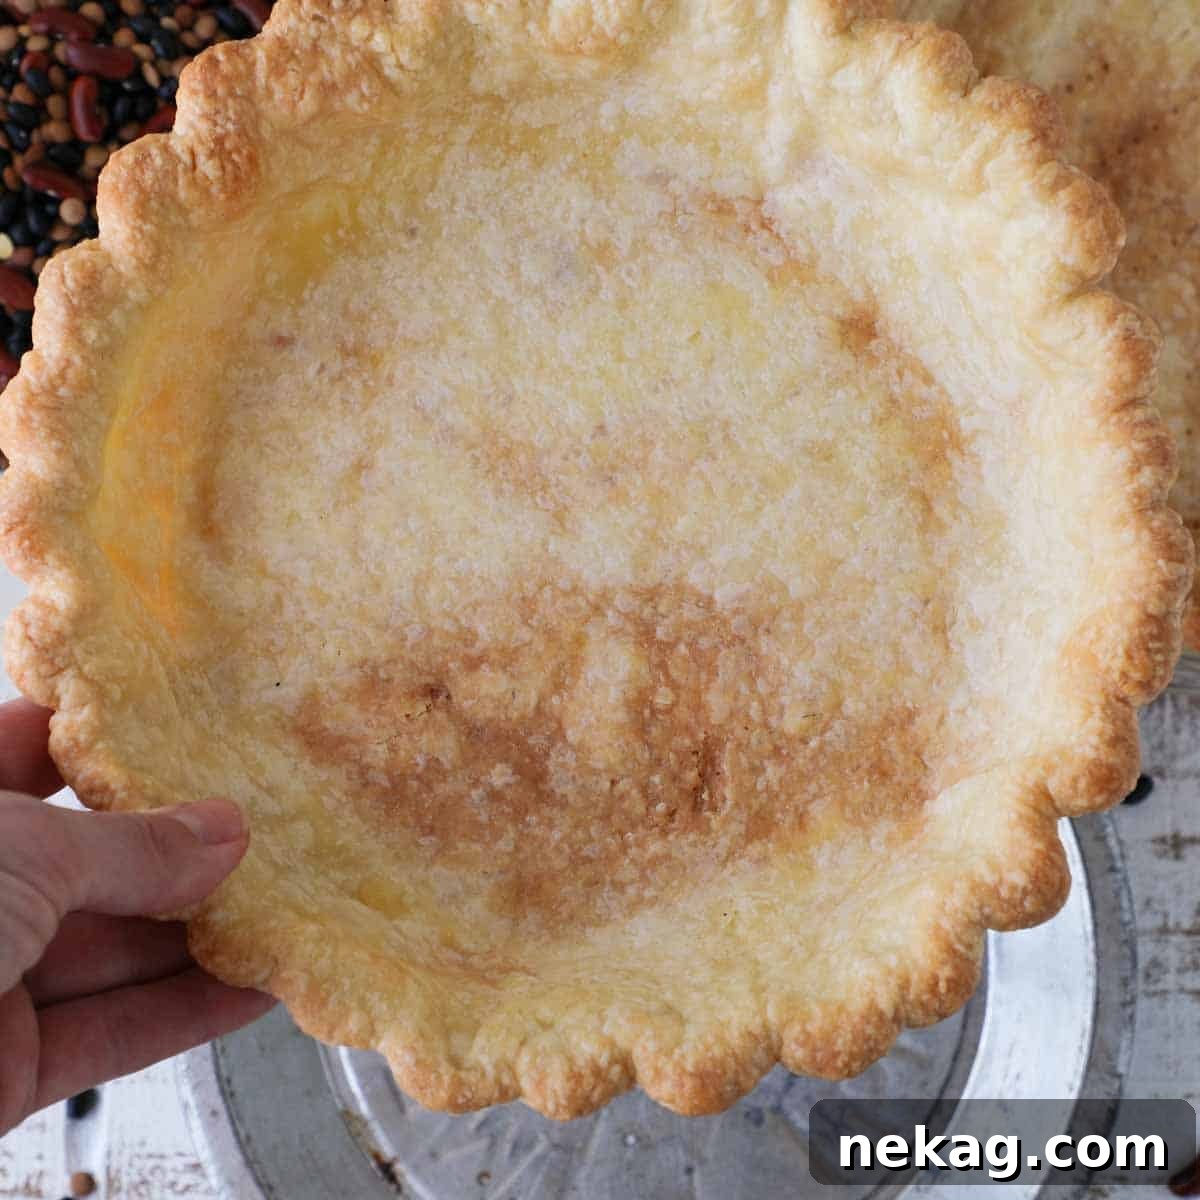
If your recipe requires a fully blind-baked crust (for no-bake fillings, for example), you’ll continue from the par-baked stage. Carefully remove the parchment paper and all the pie weights, beans, or rice from the crust. Return the empty crust to the oven and continue baking for another 8-15 minutes. During this final stage, watch for the bottom and edges to transform into a beautiful, even golden brown. This indicates a fully cooked, crisp crust. Once baked to perfection, allow the crust to cool completely on a wire rack before adding your chosen filling. A completely cooled crust will help maintain its structural integrity and prevent the filling from warming prematurely.
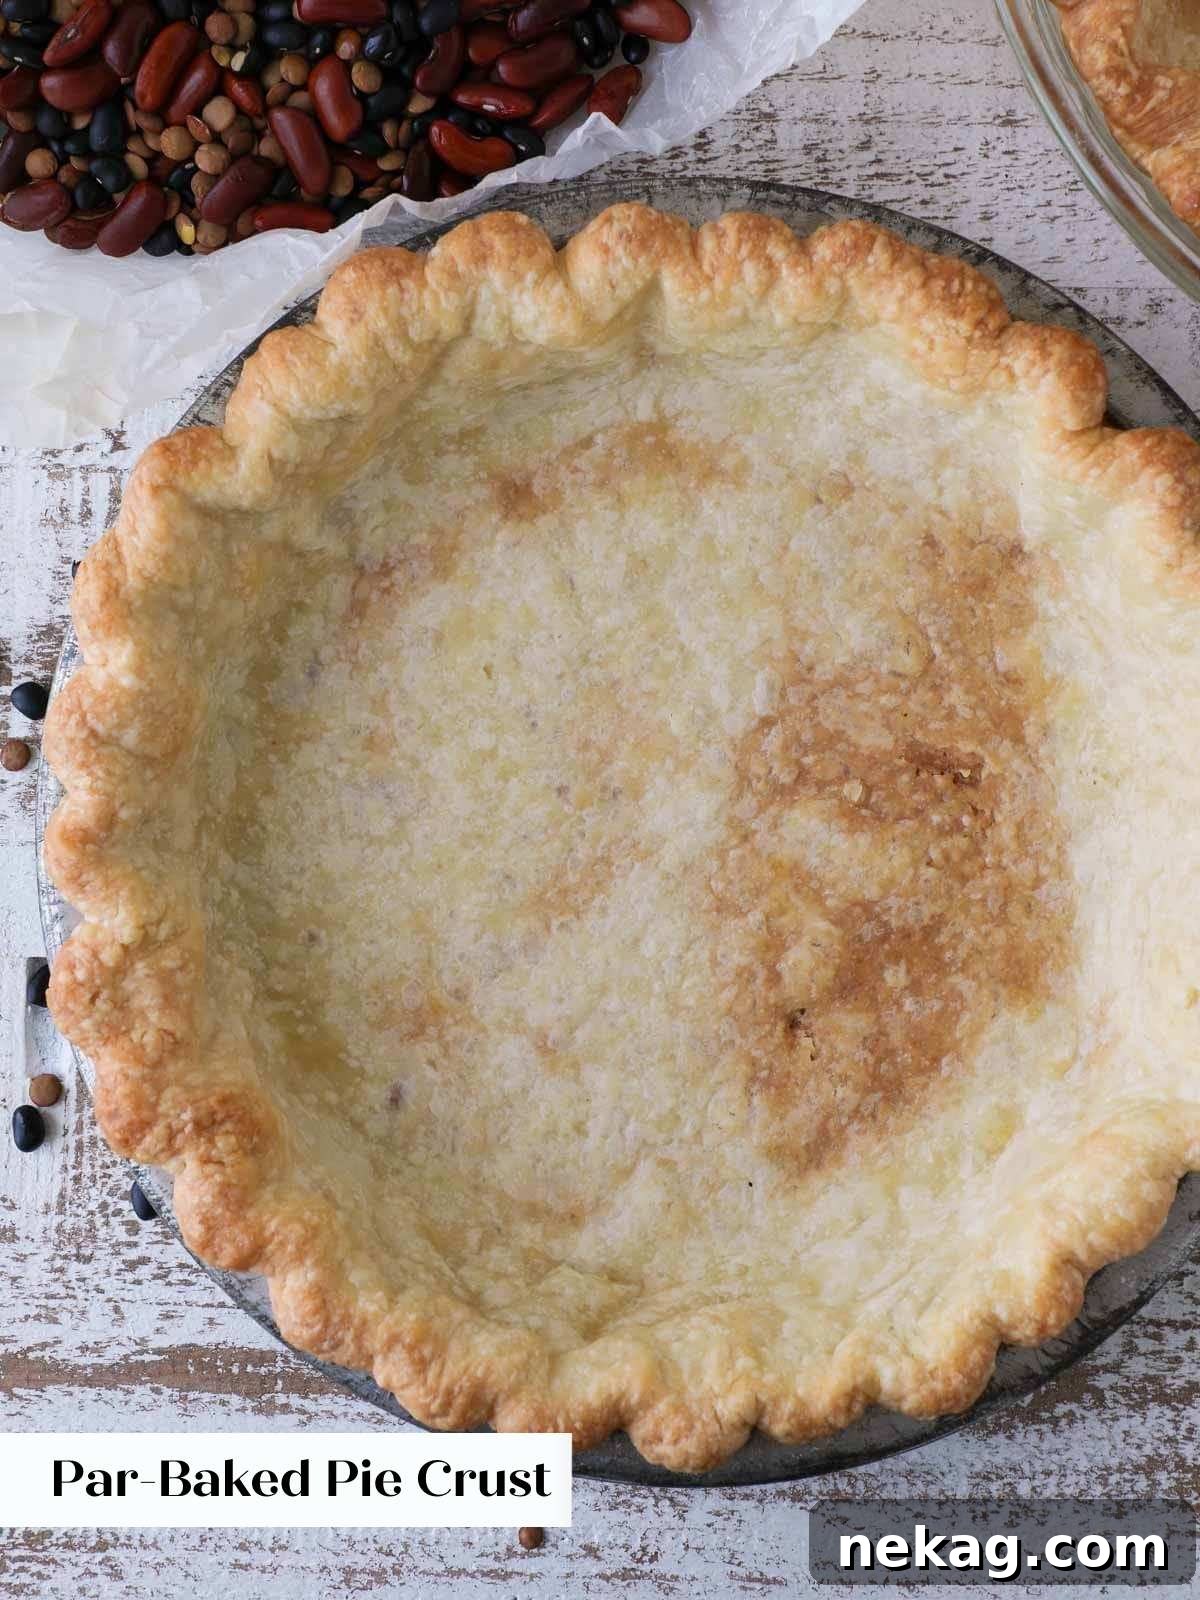
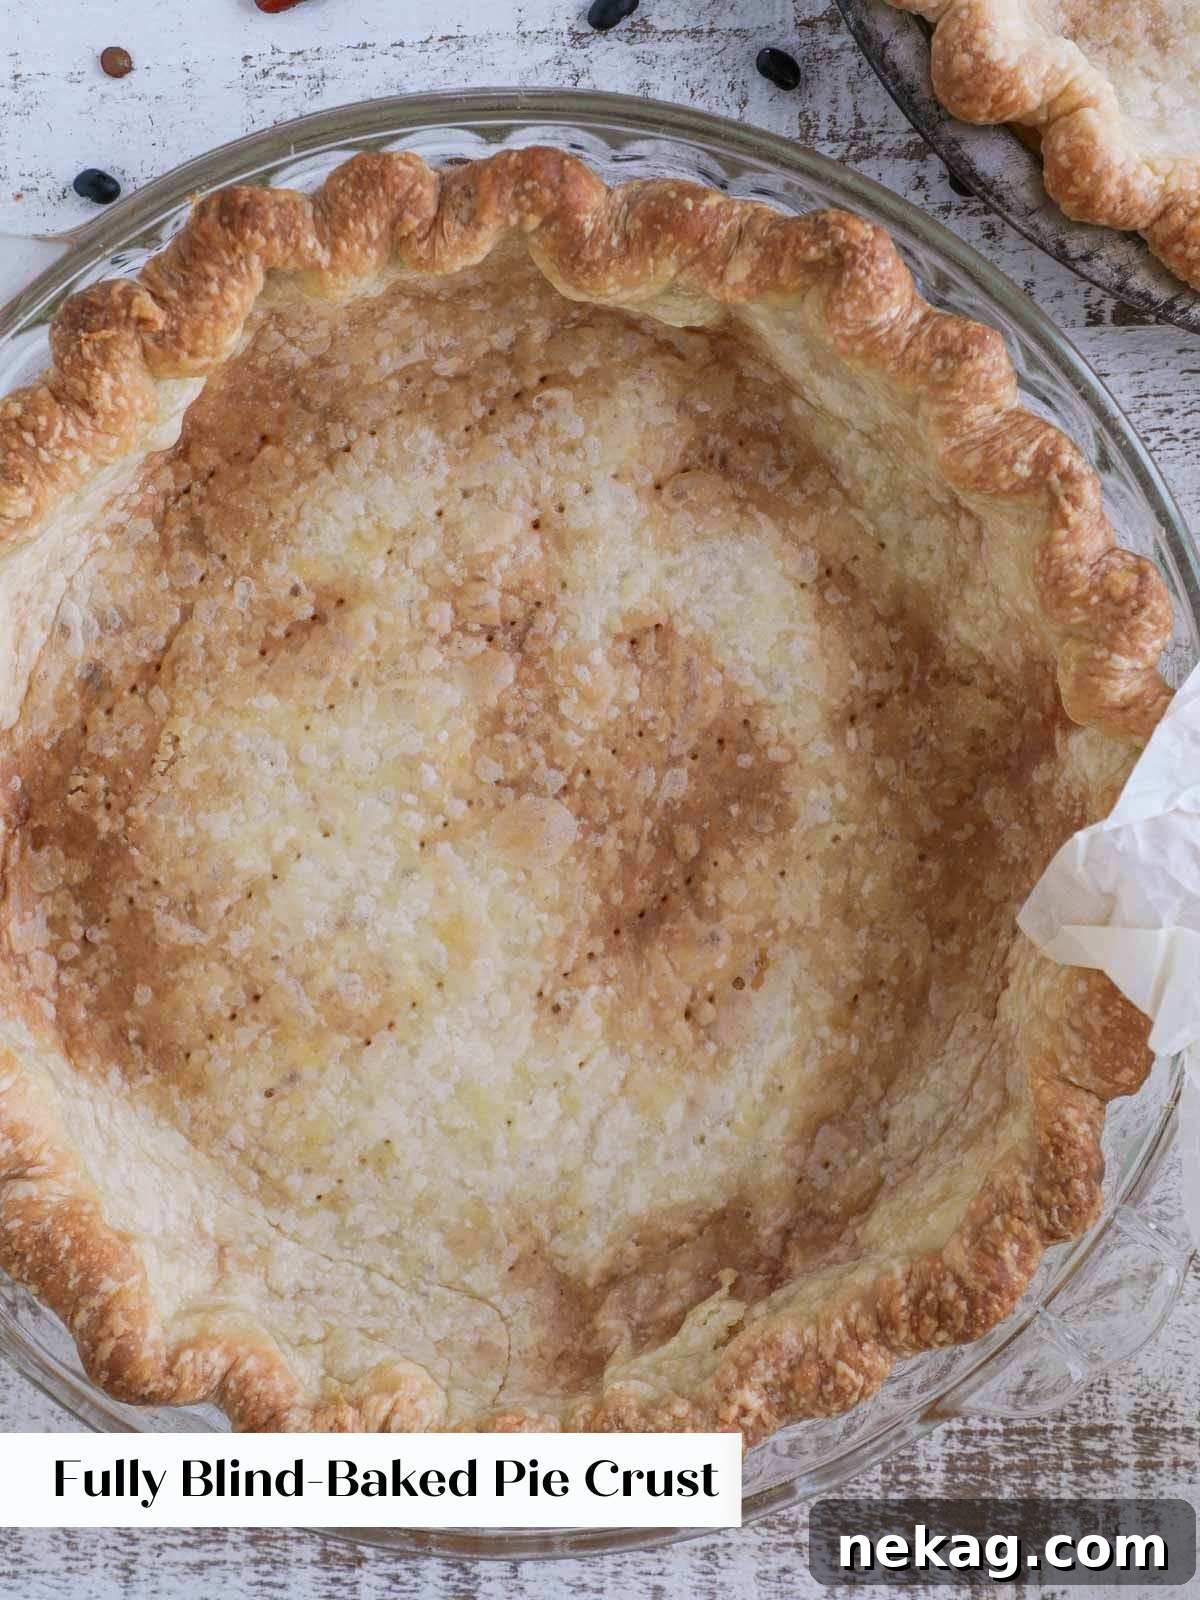
Did you know: Occasionally, you might find that your pie crust gets fully baked while still covered with parchment and weights. While not ideal for achieving perfectly even browning on the bottom, it’s not a disaster. Simply remove the parchment and weights, and proceed as usual. Your pie will still be delicious!
Chef Lindsey’s Expert Recipe Tip
If you’re opting for store-bought pie dough, remember that it is generally much thinner than homemade crusts. This difference in thickness means baking times will be significantly reduced. Keep a very close eye on your crust; I recommend checking it after just 5 minutes in the oven to ensure it doesn’t burn. Adjust subsequent baking times accordingly.
How to Keep Pie Crust from Shrinking: Essential Troubleshooting
Pie crust shrinkage is a common frustration for bakers, but it’s entirely preventable. By understanding the underlying causes and applying a few key techniques throughout the process, you can ensure your pie crust maintains its shape and size beautifully:
- Avoid Overworking the Dough: The journey to a perfect crust begins with the dough-making itself. Over-mixing or excessively kneading pie dough activates more gluten strands, causing them to develop elasticity. This elasticity, while desirable in bread, causes pie crust to contract and shrink significantly when exposed to the heat of the oven. Aim for minimal handling and combine ingredients just until they come together.
- Chill, Chill, Chill Your Dough! This is perhaps the most crucial tip for preventing shrinkage and achieving optimal flakiness. After each major step—after mixing, after rolling, and especially after placing it in the pie dish and crimping—return the dough to the refrigerator. Chill it for at least 30 minutes, or even longer (up to an hour), to allow the gluten strands to fully relax. This chilling also re-solidifies the fat in the dough, which is essential for creating those coveted flaky layers. A well-chilled dough is the secret to the flakiest, most tender crust imaginable.
- Choose the Right Pie Dish: The material of your pie dish plays a surprising role. Glass or metal pie dishes are superior to ceramic for blind baking. Not only do they encourage better heat conduction, leading to even browning and a faster cooking rate, but their surfaces also provide more friction. This grip helps to “anchor” the dough, preventing the crust from easily sliding down the sides of the pan as it bakes. While ceramic dishes are beautiful, they can exacerbate shrinkage issues due to their smooth, less heat-conductive surface.
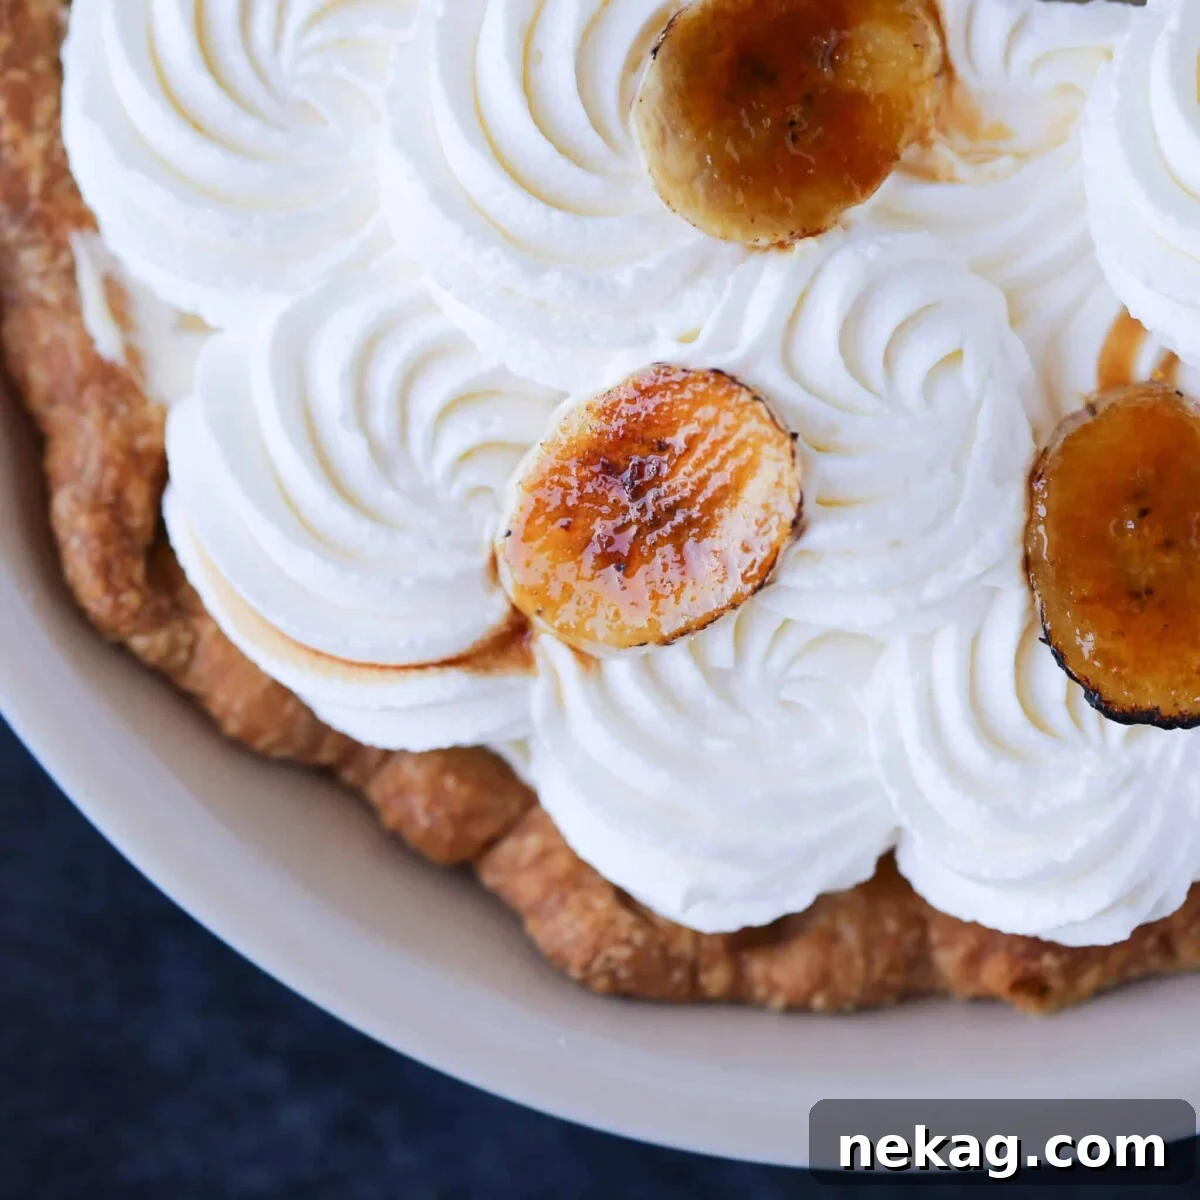
- Blind Bake with Weights for Sufficient Time: Using pie weights is not just about preventing puffing; it’s also a powerful tool against shrinkage. The weight firmly holds the crust in place against the sides and bottom of the dish during the initial, most crucial phase of baking when shrinkage is most likely to occur. Ensure you bake the crust long enough with the weights in place until the bottom has started to brown. This sets the structure of the crust, making it far less prone to collapsing or pulling away from the edges, even in a trickier ceramic dish, as sometimes happened in my early attempts with banana cream pie!
Frequently Asked Questions About Blind Baking
Proper storage is key to maintaining the freshness and texture of your prebaked crusts. Store partially or fully prebaked pie crusts, carefully wrapped in plastic wrap or foil, at room temperature for up to 3 days. For longer preservation, they can be frozen for up to 2 months. Simply thaw at room temperature before filling. I generally do not recommend refrigerating prebaked pie crusts; the humid environment can cause the crust to soften and absorb unwanted flavors from your fridge.
Prebaking pie crusts is an excellent make-ahead strategy! You can bake them up to 3 days in advance if you plan to store them at room temperature. If you’re preparing for a larger event or simply want to stock your freezer, you can make several crusts, allow them to cool completely, then stack and wrap them securely to store frozen for up to 2 months. This allows for convenient and efficient pie preparation whenever you need it.
Baking times for an unfilled pie crust can vary slightly depending on whether it’s homemade or store-bought. For a store-bought pie crust, bake at 375°F (190°C) for approximately 8 minutes before carefully removing the weights. For homemade pie crusts, which are typically a bit thicker, bake for about 12 minutes before removing the weights. The crucial indicator is when the bottom crust is just beginning to show signs of browning. From this point, you can either add your filling and continue baking according to your pie recipe’s instructions, or continue baking the empty crust for an additional 8-10 minutes, or until the edges and bottom are a beautiful, even golden brown, indicating a fully baked crust.
You should fully blind bake a pie crust when you plan to fill it with a completely unbaked or very lightly cooked filling. This ensures the crust is fully cooked, crisp, and structurally sound before it encounters a filling that doesn’t require oven time. Classic examples include creamy, decadent banana cream pie, rich French silk pie, or delicate chocolate tarts, where the filling is set by chilling, not baking.
You should partially blind bake a pie crust when both the crust and the filling will continue to bake together in the oven. This method gives the crust a crucial head start, preventing it from becoming soggy or undercooked while the filling sets. It’s perfectly suited for pies like comforting pumpkin pie, savory sweet potato pie, or luscious chocolate pie. I also par-bake crusts when the filling ideally bakes at a lower temperature or for a shorter duration, such as a traditional pecan pie, where the filling can benefit from a more gentle heat.
If you tried this recipe and loved it, please leave a 🌟 star rating and let me know how it goes in the comments below. I love hearing from you; your comments make my day!
How to Blind Bake Pie Crust
Pin Recipe
Comment
Print Recipe
Ingredients
- 1 cup all-purpose flour
- ½ teaspoon kosher salt
- ½ teaspoon granulated sugar
- 4 ½ tablespoons unsalted butter cubed, cold
- 1 ¼ oz cold water as much or as little as needed
Instructions
-
Begin by preparing your pie crust. You can follow any of the 5 detailed methods in this all-butter pie crust recipe tutorial, or choose from any of our other delicious pie crust recipes. Alternatively, use your favorite store-bought pie dough.
-
Lightly flour a flat work surface, the top of your prepared dough, and your rolling pin to prevent sticking.
-
Roll the dough out evenly to approximately 1/8th inch thickness, aiming for a circular shape. Chill the rolled dough for 30 minutes in the refrigerator. During this time, preheat your oven to 350°F (175°C) for convection or 375°F (190°C) for conventional baking.
-
Carefully place the chilled pie dough into your pie dish. Gently fold and press the dough to fit flush against the bottom and sides, allowing any excess dough to generously overhang the edges of the dish. Chill the dough-lined pie dish for another 30 minutes.
-
Trim any dough that extends more than 1 inch beyond the rim of the pie dish. Then, tightly roll the remaining overhang underneath itself, pressing and rolling the dough between your thumb and first two fingers. Ensure it is tightly sealed against the rim to prevent it from popping open during baking.
-
Crimp or flute the edges of the pie crust for a decorative finish, or simply mark them with the tines of a fork. If the dough has become warm to the touch during this process, chill it again for 15-30 minutes to ensure it’s cold before baking.
-
Line the chilled crust with parchment paper, gently pressing it into the contours. Fill the parchment with pie weights, dried beans, or rice to weigh down the crust.
-
Bake the weighted crust in the preheated oven for 12-20 minutes, or until the bottom crust begins to turn a light golden brown. This marks the par-baked stage! If your recipe requires baking the crust with a filling, you can stop here. Depending on your filling, you may use the crust immediately or allow it to cool completely before filling.
-
To achieve a fully blind-baked pie crust, remove the parchment paper and all pie weights, beans, or rice. Return the empty crust to the oven and continue baking for another 8-15 minutes, or until the bottom and edges have developed a rich, even golden brown color. Allow the fully blind-baked crust to cool completely on a wire rack before adding your filling.
Video
Notes
Presentation: Proper trimming and rolling of the dough edges are vital for an aesthetically pleasing and evenly baked crust. Leaving too much dough around the edges will result in a thick, underbaked rim that cooks at a different rate than the rest of the crust, leading to a doughy center.
Technique: When selecting pie weights, consider the balance. While rice is convenient, it often lacks the necessary weight to completely prevent the crust from puffing or bubbling. Conversely, heavy ceramic pie weights can sometimes overly compress the dough, hindering the slight lift required for a truly flaky texture. My preferred method involves using dried beans, which offer optimal weight without compaction. I cool and diligently reuse the same batch of beans for all my blind baking needs. Any type of dried bean will suffice.
Storage: To ensure freshness and flavor, store partially or fully blind-baked pie crusts securely wrapped at room temperature for up to 3 days. For longer storage, tightly wrap them and freeze for up to 2 months. Always allow frozen crusts to thaw at room temperature before using.
Nutrition
Expand Your Pie Baking Skills
Now that you’ve mastered the art of blind baking, why stop there? Dive deeper into the wonderful world of pie baking with more expert guidance and delicious recipes. You might also want to explore our extensive collection of pie recipes, featuring everything from my favorite creamy custard pies to vibrant fruit pies, perfect for any occasion. To complement your newly acquired crust-baking skills, be sure to check out our other dedicated pie crust recipes for diverse flavor profiles and textures. And for truly professional-level pies, don’t miss this essential tutorial on when to dock a pie crust, ensuring your creations are flawless from start to finish. Happy baking!