
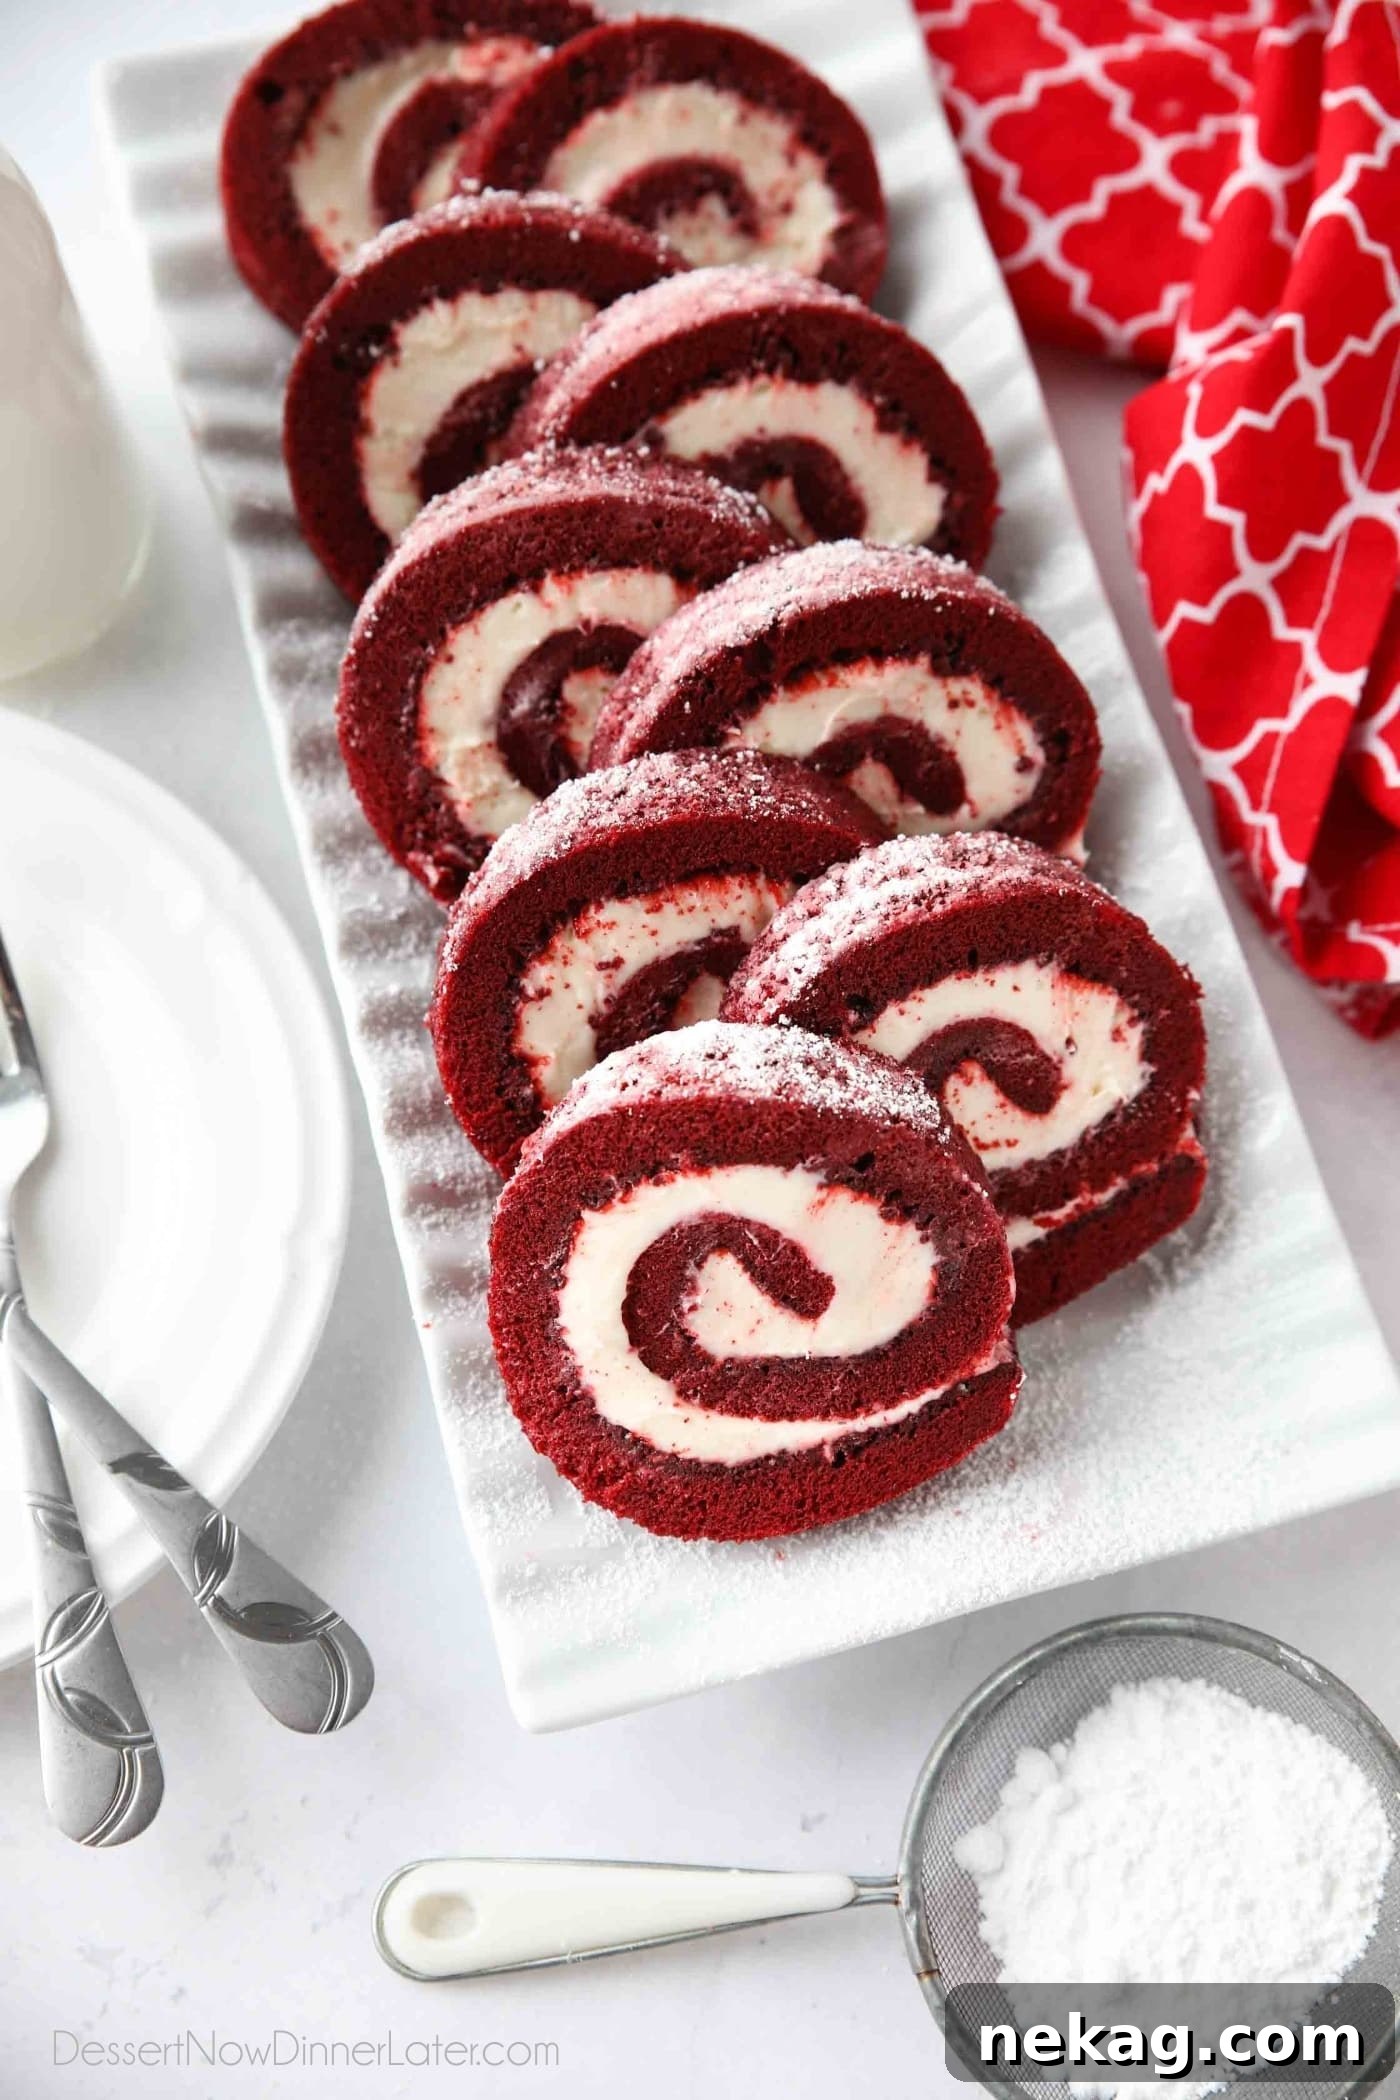
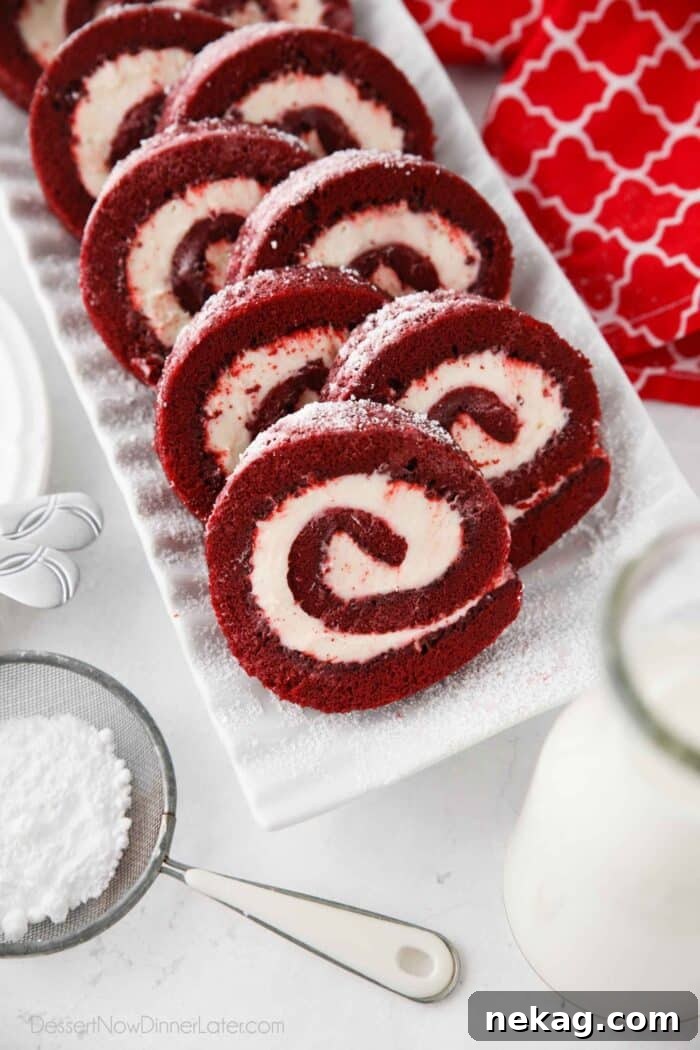
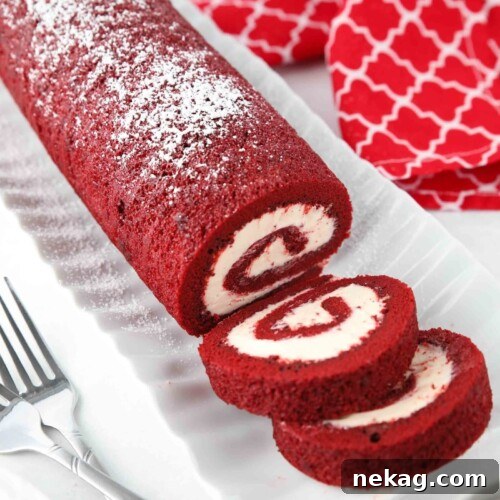
Indulge in the exquisite charm of this delightful Red Velvet Cake Roll, a dessert that perfectly marries the rich, subtle cocoa flavor of red velvet cake with the luscious tang of the best cream cheese frosting. Every slice reveals a stunning swirl of vibrant red cake and creamy white filling, promising a balance of texture and taste in each bite. This recipe guides you to create a soft, fluffy cake that’s not just beautiful to behold but also surprisingly simple to master. Perfect for holiday gatherings, special occasions, or simply a luxurious treat, this Red Velvet Cake Roll is destined to become a cherished favorite.
Understanding the Art of the Cake Roll
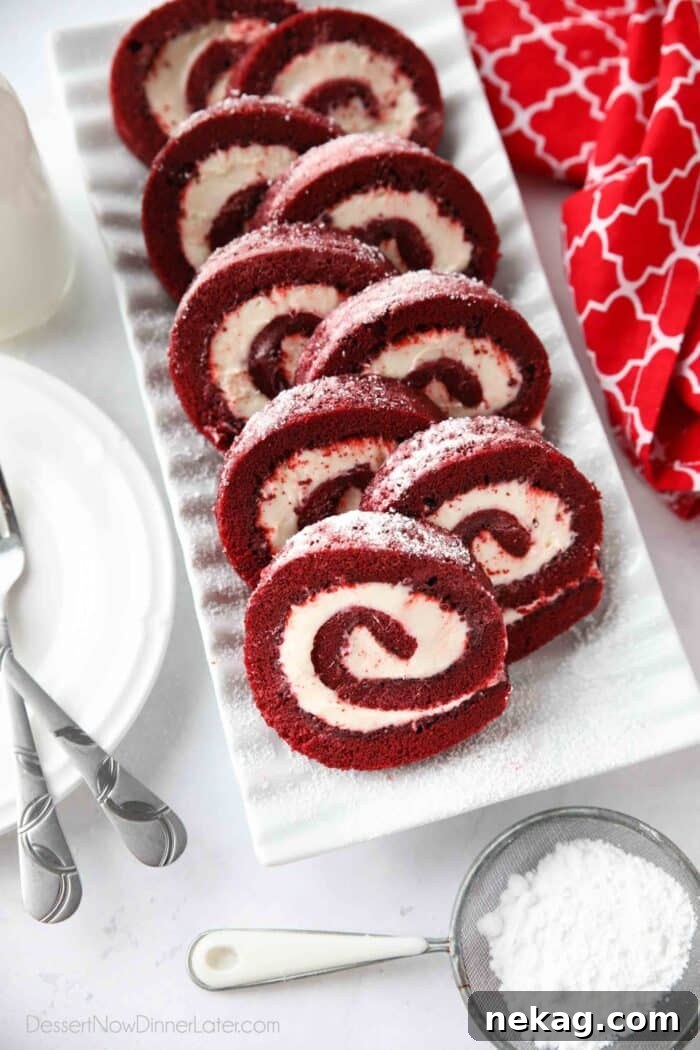
A rolled cake, known by various delightful names such as a jelly roll, roulade, or Swiss roll, is a fascinating dessert that captivates with its elegant presentation and satisfying texture. Essentially, it involves a thin sheet of sponge cake, baked to perfection, then gently rolled around a delectable filling while still warm. This technique creates a distinctive spiral pattern of cake and filling, making each serving a miniature masterpiece. These cakes are incredibly versatile, lending themselves to an array of fillings, from light whipped creams and fresh fruit jams to rich ganaches and decadent frostings. Their impressive appearance often belies their relatively straightforward preparation, making them a popular choice for those looking to impress without excessive fuss.
My journey with rolled cakes began many years ago, and I even ventured into shaping a red velvet cake into charming heart shapes for Valentine’s Day. While that variation offered a playful twist, it presented a slightly more advanced challenge than the classic, continuous swirl. For this recipe, I’ve returned to the traditional, cohesive roll, perfecting the method to ensure a flawless presentation and an unforgettable flavor experience, especially ideal for festive occasions like the Christmas holiday season.
The Ultimate Holiday Dessert: Red Velvet Cake Roll
There’s something truly special about a cake roll that makes it a phenomenal choice for holiday entertaining. Its impressive visual appeal, with its neat, spiraled layers, instantly elevates any dessert table. Over the years, cake rolls have become a beloved tradition in our family for seasonal celebrations. We often prepare a comforting pumpkin roll to mark Thanksgiving, and a delightful carrot cake roll with rich cream cheese filling for Easter.
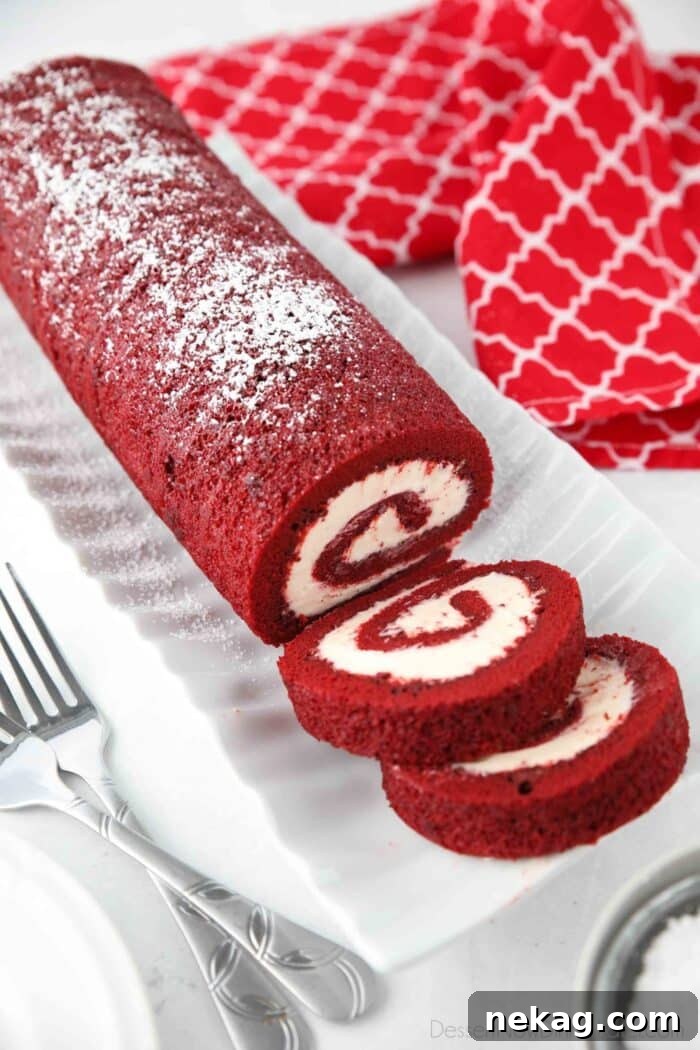
While a chocolate peppermint cake roll has previously graced our Christmas feasts, the allure of a vibrant Red Velvet Swiss roll became irresistible. The iconic deep red hue, contrasted with its pristine white frosting, perfectly encapsulates the festive spirit of the season. Beyond its striking appearance, the classic flavor profile of red velvet, with its subtle cocoa notes and signature tang, offers a comforting yet sophisticated taste that resonates beautifully with holiday traditions. It’s a dessert that not only looks spectacular but also delivers on taste, making it an ideal centerpiece for your holiday spread.
Why Choose a Red Velvet Cake Roll for Your Next Celebration?
Beyond its festive appeal, the Red Velvet Cake Roll offers a multitude of practical advantages and delightful characteristics that make it an excellent choice for any gathering, from intimate family dinners to grand celebrations.
- Effortless Make-Ahead Option: One of the most significant benefits is its freezer-friendly nature. You can prepare the entire cake roll well in advance, wrap it properly, and freeze it. This frees up valuable time on the day of your event, allowing you to focus on other preparations. In fact, many find that a slightly frozen cake roll is even easier to slice, resulting in cleaner, more defined portions.
- Space-Saving Storage: Unlike large, multi-tiered cakes, a rolled cake occupies minimal space in your refrigerator or freezer. Its compact, cylindrical shape makes it easy to store, which is a huge plus, especially during holidays when fridge space is often at a premium.
- Generous Servings: A single 15×10-inch cake roll typically yields between 12 to 14 uniform slices. This makes it an efficient dessert for serving a crowd without the need for multiple smaller cakes.
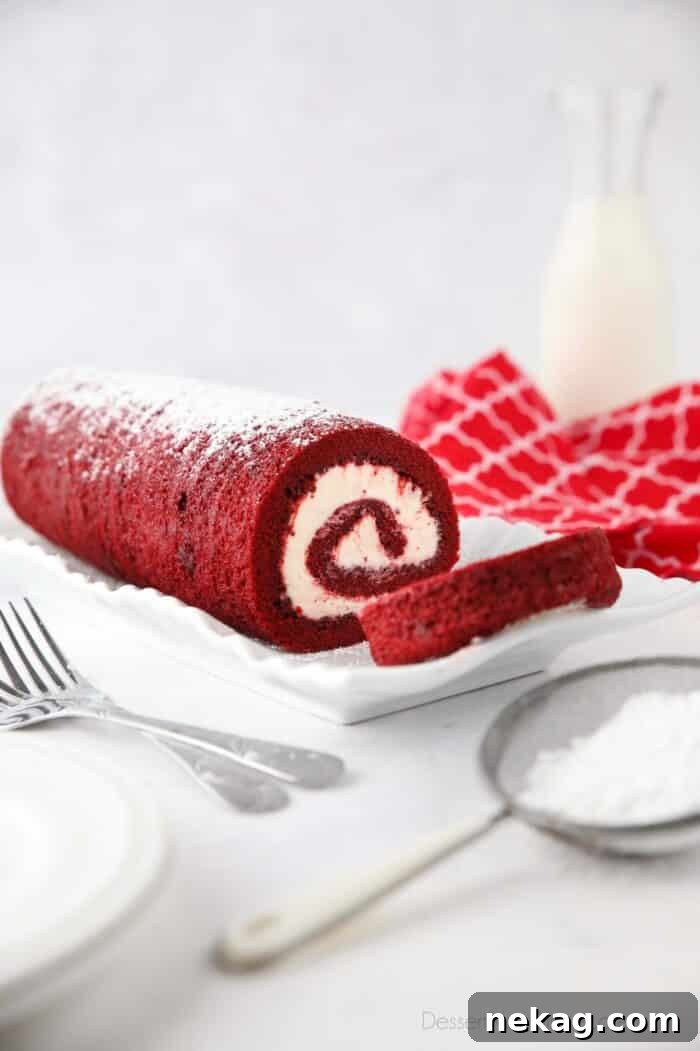
- Perfect Frosting-to-Cake Ratio: The unique rolled structure ensures that every single bite offers a harmonious balance of soft, tender cake and rich, creamy frosting. There are no dry edges or frosting-heavy pieces – just pure, consistent deliciousness throughout.
- Stunning Visual Appeal: Let’s be honest, the aesthetic appeal of a cake roll is undeniable. The elegant spiral of contrasting colors creates an instant “wow” factor, making it a show-stopping centerpiece that looks far more complicated to create than it actually is.
- Unforgettable Flavor Profile: Red velvet cake itself is a classic for a reason. The subtle hint of cocoa, combined with the tang of buttermilk and vinegar, creates a depth of flavor that is both unique and universally loved. Paired with the iconic cream cheese frosting, it’s a match made in dessert heaven.
Mastering the Cake Roll: The No-Towel Method
Traditionally, rolling a cake involves dusting a clean kitchen towel with powdered sugar and immediately inverting the hot cake onto it before rolling. While effective, this method can sometimes lead to stained towels, especially with vibrant cakes like red velvet. To circumvent this, I’ve developed and perfected a “no-towel” method for all my cake rolls, ensuring your linens remain pristine.
The secret to this ingenious technique lies in using parchment paper. By baking the cake directly on parchment paper and then using that same parchment paper to facilitate the initial roll, you avoid any direct contact between the cake and your towels. There is a slight trade-off, however: the cake can “sweat” a bit against the parchment, leading to a slightly moist and sticky inner surface where the frosting will be applied. But fear not, this is easily manageable with a few clever tricks that ensure your Red Velvet Cake Roll turns out perfectly. We’ll discuss how to handle this moisture and ensure a smooth, delicious filling process.
Essential Supplies for Your Red Velvet Cake Roll
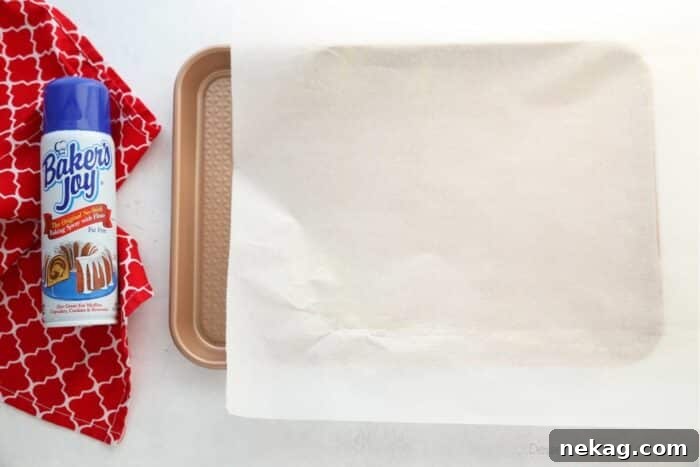
To ensure your Red Velvet Cake Roll comes out flawlessly, having the right equipment is key.
- 15×10-inch Jelly Roll Pan: This specific size is crucial for achieving the ideal thickness of your cake sheet. A thinner cake, like one baked in a larger half-sheet pan (18×13 inches), might be more prone to cracking when rolled. The jelly roll pan provides the perfect dimensions for a pliable yet sturdy cake.
- Parchment Paper: This is your best friend for the no-towel method. Line your jelly roll pan with parchment paper, allowing an inch or two to overhang on the sides. This overhang acts as “handles” for easy removal of the baked cake. Parchment paper also prevents sticking, ensuring a smooth release. If you opt not to use parchment, you’ll need to meticulously grease and flour your pan to prevent the cake from adhering.
- Nonstick Baking Spray with Flour (e.g., Baker’s Joy): For an extra layer of insurance against sticking, especially if you’re not using parchment paper, a quality baking spray containing flour is invaluable. You can even lightly spray your parchment paper, though it’s typically not essential when using good quality parchment.
- Stand Mixer with Whisk Attachment: Essential for whipping the eggs to a light and frothy consistency, and for preparing the smooth cream cheese frosting. A hand mixer can also work but might require more effort.
- Fine-Mesh Sifter: For sifting your dry ingredients (flour, cocoa powder, baking powder, salt). This helps to remove lumps and ensures a light, airy cake texture.
- Offset Spatula: Indispensable for spreading the cake batter evenly in the pan and, more importantly, for applying the cream cheese frosting smoothly over the unrolled cake. Its angled blade helps achieve an even layer without disturbing the delicate cake surface.
- Wire Rack: For cooling the cake after baking and while it’s rolled. Proper air circulation is vital for an evenly cooled cake.
- Serrated Knife: For clean, precise slices of your chilled cake roll. A sharp serrated knife, used with a gentle sawing motion, prevents smashing the cake and squeezing out the filling.
Ingredients for Your Irresistible Red Velvet Cake Roll
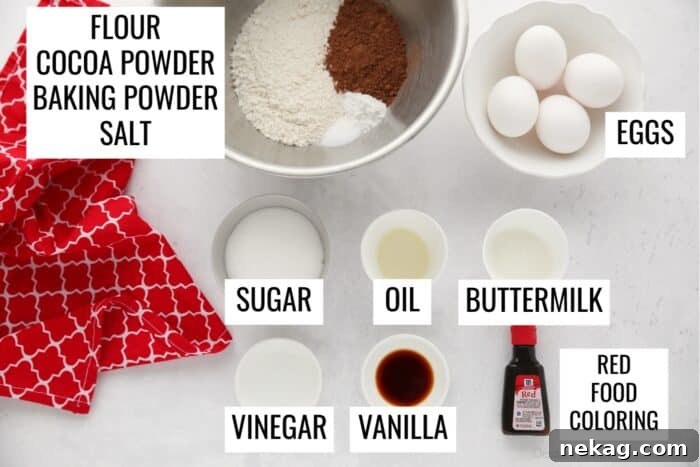
Crafting the perfect Red Velvet Cake Roll requires a thoughtful selection of ingredients, each playing a vital role in achieving its signature flavor, color, and texture.
For the Red Velvet Cake:
- All-Purpose Flour: The structural backbone of the cake. Ensure it’s spooned and leveled for accurate measurement, preventing a dense cake.
- Unsweetened Cocoa Powder (100% natural cacao): Provides the subtle chocolate flavor characteristic of red velvet. Using unsweetened natural cocoa powder, rather than Dutch-processed, is important for interacting with the baking powder and vinegar to achieve the desired rise and flavor balance.
- Baking Powder: The primary leavening agent, ensuring your cake is light and fluffy.
- Salt: A pinch of salt enhances all the other flavors, balancing the sweetness and deepening the cocoa notes.
- Large Eggs: Provide structure, richness, and help create the cake’s tender crumb. Whipping them until light and frothy is a key step for an airy cake.
- Granulated Sugar: Sweetens the cake and contributes to its moistness and tender texture.
- Oil (Canola/Vegetable): Adds moisture and tenderness to the cake. Unlike butter, oil ensures a consistently moist cake even when cold.
- Buttermilk: Crucial for the classic red velvet tang and helps activate the baking powder. If you don’t have buttermilk, you can easily make your own by adding ½ teaspoon of white distilled vinegar to 2 tablespoons of regular milk and letting it sit for 5 minutes until it curdles slightly.
- White Distilled Vinegar: Reacts with the buttermilk and cocoa powder to create the distinctive red velvet flavor and helps tenderize the cake. It also helps to deepen the red color.
- Vanilla Extract: Enhances the overall flavor profile, adding warmth and sweetness.
- Red Food Coloring (optional but recommended for vibrant color): While traditional red velvet recipes get a subtle reddish-brown hue from the reaction of cocoa with acidic ingredients, modern versions rely on food coloring for that iconic vibrant red. A 1-ounce bottle (approximately 2 tablespoons) usually achieves a striking color.
- Powdered Sugar (optional): If you choose the traditional towel method instead of parchment paper, you’ll need to generously dust your tea towel with powdered sugar to prevent sticking.
For the Cream Cheese Filling:
This luscious filling is what truly sets the Red Velvet Cake Roll apart.
- Brick Cream Cheese (COLD): This is a crucial detail! Using cold, firm cream cheese helps the frosting maintain its structure and prevents it from becoming too soft or runny, which could cause it to squeeze out when the cake is rolled. Opt for full-fat block cream cheese for the best texture and flavor.
- Unsalted Butter (Room Temperature): While the cream cheese is cold, the butter should be softened to room temperature. This allows it to cream smoothly with the cold cream cheese, resulting in a perfectly blended and stable frosting.
- Powdered Sugar: The sweetener for the frosting. Using just 1 cup provides a balanced sweetness that doesn’t overpower the tang of the cream cheese, and it helps create a smooth, non-stringy consistency.
- Vanilla Extract: Essential for flavoring, adding depth and warmth to the rich cream cheese.
Crafting the Perfect Red Velvet Cake Batter
The foundation of a great Red Velvet Cake Roll is a light, pliable, and flavorful cake sheet. Follow these steps carefully to achieve a perfect crumb that rolls beautifully without cracking.
- Begin by preheating your oven to 350 degrees Fahrenheit (175°C). Prepare your 15×10-inch jelly roll pan by lining it with parchment paper, ensuring the paper covers the bottom and extends up the sides with an inch or two overhanging. If any sides of the pan are exposed, make sure to grease and flour them thoroughly (a nonstick spray with flour like Baker’s Joy is excellent for this).
- In a medium bowl, sift together the all-purpose flour, unsweetened cocoa powder, baking powder, and salt. Sifting is crucial here to prevent lumps and ensure a light texture in your finished cake. Set this dry mixture aside.
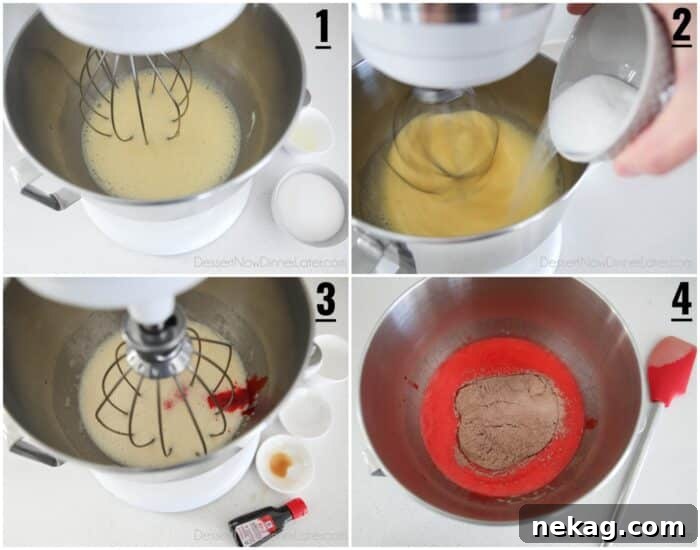
- Using a stand mixer fitted with the whisk attachment, begin whisking the large eggs on medium speed. Continue for about 5 minutes, until the eggs become light, pale, and very frothy. This step incorporates air, which is vital for a tender cake.
- With the mixer running on medium-low speed, slowly and gradually add the granulated sugar, followed by the oil. Mix until these ingredients are well combined and the mixture is smooth.
- Next, incorporate the buttermilk, white distilled vinegar, vanilla extract, and red food coloring (if using). Continue to mix until all the wet ingredients are thoroughly combined, ensuring a uniform vibrant color.
- Finally, with the mixer on low speed, gradually add the sifted flour and cocoa mixture to the wet ingredients. Mix only until the dry ingredients are just incorporated. Be careful not to overmix, as this can lead to a tough cake. A few streaks of flour are acceptable; they will disappear during baking.
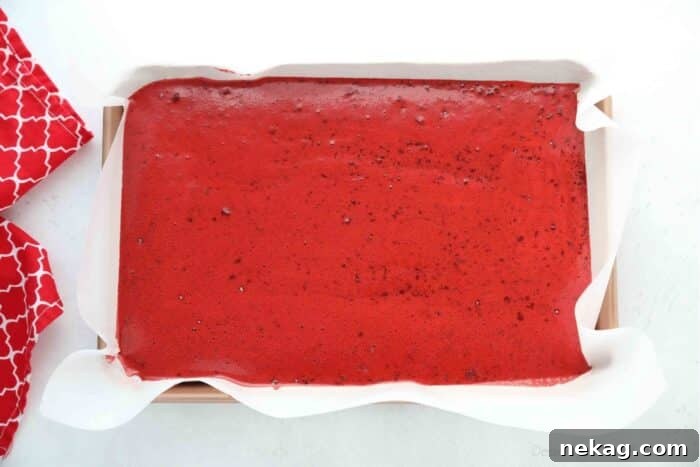
- Pour the prepared cake batter into your parchment-lined jelly roll pan. Use an offset spatula or the back of a spoon to gently spread the batter evenly across the entire surface of the pan, ensuring it reaches all corners.
- Bake in the preheated oven for 13 to 15 minutes. The cake is done when the top springs back lightly when gently touched, or a toothpick inserted into the center comes out clean or with a few moist crumbs attached. Avoid overbaking, as this can dry out the cake and make it prone to cracking when rolled.
The Art of Rolling the Cake (No-Towel Method)
Rolling the cake while it’s still warm is one of the most critical steps to prevent cracking and ensure a perfect spiral. The flexibility of a warm cake is essential for this process.
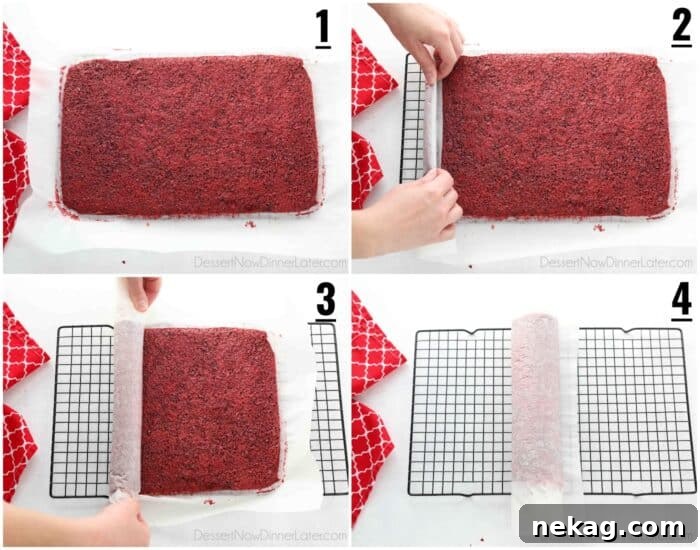
Once your Red Velvet Cake is baked, it’s time for the crucial rolling step. Remember, you want to do this while the cake is still warm and pliable. Traditional methods often involve immediately inverting the cake onto a powdered sugar-dusted tea towel, peeling off the parchment, and then rolling. However, for our no-towel method, we’ll use the parchment paper itself.
- Immediately after removing the cake from the oven, carefully lift the entire cake out of the pan using the parchment paper overhang and place it on a wire rack. Let it rest for just 3 minutes to allow some of the initial steam to escape. It’s vital not to let it cool completely at this stage, as it needs to retain warmth and flexibility for proper shaping.
- After the brief resting period, take one of the shorter (10-inch) ends of the parchment paper and fold it over the corresponding edge of the cake. Then, gently lift the cake and parchment together, using the parchment paper to guide the first roll. Fold the cake over itself, tucking the edge firmly to start a tight roll.
- Continue to roll the cake tightly towards the opposite shorter (10-inch) side. You can use the ends of the parchment paper to assist you if the cake is too hot to handle directly, ensuring the roll remains snug. The goal is to create a compact log.
- Once fully rolled, leave the cake, still wrapped in its parchment paper, on the wire rack to cool completely to room temperature. This slow cooling process in its rolled form helps the cake “learn” and maintain its spiral shape, preventing cracks when it’s later unrolled for frosting.
Preparing the Signature Cream Cheese Filling
While your beautiful red velvet cake cools and sets its shape, you can prepare the iconic cream cheese frosting. This frosting is not just a topping; it’s an integral part of the Red Velvet Cake Roll experience, offering a delightful tang and creamy texture that perfectly complements the cake.
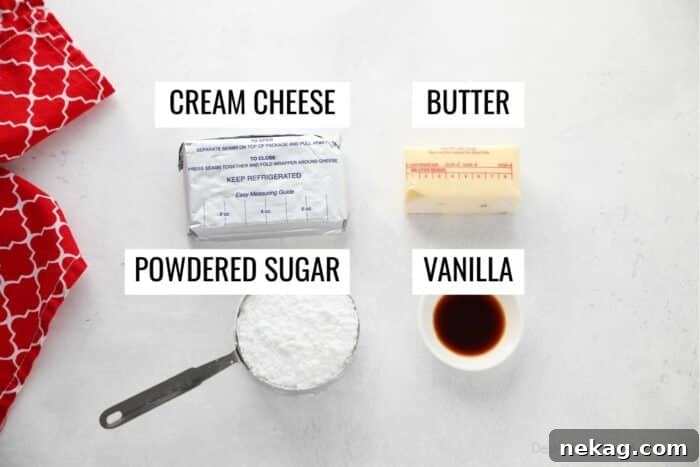
For the perfect cream cheese filling, you will need:
- 8 ounces (226 g) Brick Cream Cheese (COLD): The key here is *cold* cream cheese. While it might seem counterintuitive to use cold cream cheese for frosting, it’s a critical tip for cake rolls. Cold cream cheese helps the filling stay firm and stable, preventing it from oozing out of the roll when sliced. Don’t worry, it will still incorporate smoothly with the room-temperature butter.
- ½ cup (113 g) Unsalted Butter (Room Temperature): This softens the cold cream cheese slightly and allows both fats to cream together beautifully, creating a silky-smooth, well-emulsified frosting.
- 1 cup (120 g) Powdered Sugar: I find that 1 cup is the perfect amount to achieve just enough sweetness without making the frosting overly cloying or giving it a stringy texture. It dissolves easily into the butter and cream cheese for a smooth finish.
- 1 teaspoon Vanilla Extract: A generous splash of vanilla enhances the creaminess and adds a warm, inviting aroma and taste to the frosting.
In a mixing bowl, combine the cold brick cream cheese and the room-temperature butter. Beat them together with an electric mixer until the mixture is completely smooth and free of any lumps. This might take a few minutes, so be patient. Then, add the powdered sugar and vanilla extract. Continue to mix until these ingredients are fully combined and the frosting is light, fluffy, and perfectly spreadable. Once prepared, transfer the frosting to the refrigerator to chill and firm up slightly until your cake is completely cool and ready to be filled. This ensures the frosting has the ideal consistency for spreading and holding its shape within the roll.
Filling and Re-Rolling Your Red Velvet Cake Roll
Once your red velvet cake has completely cooled in its rolled form, it’s time to reveal its smooth interior and apply the creamy filling. This step requires a gentle touch to ensure an even spread of frosting and a tight, beautiful re-roll.
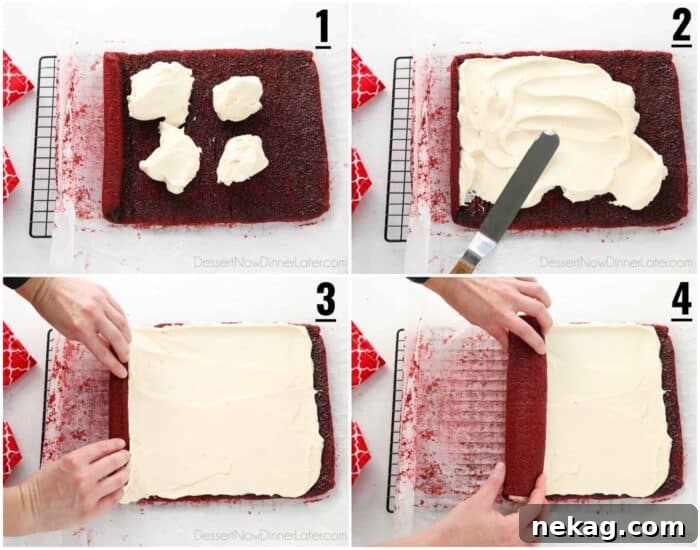
- Carefully unroll the cooled cake. You’ll notice the parchment paper is quite sticky and moist, and the inner surface of the cake might feel a bit damp. This is normal with the no-towel method. If it feels excessively wet, let the unrolled cake rest for about 5 minutes on the parchment paper to allow some of the excess moisture to evaporate.
- Generously dollop the chilled cream cheese frosting over the entire surface of the unrolled cake.
- Using an offset spatula, gently and evenly spread the cream cheese filling across the cake. It’s crucial to leave a ½-inch border bare along the edge that you will roll towards. This prevents the frosting from squeezing out excessively when you re-roll. IMPORTANT TIP: Keep the tip of your spatula consistently in the frosting. If you lift it and then re-dip, you risk pulling up moist cake crumbs, which can mix into your pristine white frosting. Maintain a continuous, smooth motion.
- Begin to re-roll the cake. Start by lifting the short end closest to you, bringing the cake up and over the filling. Gently tuck this edge into the frosting to start a tight spiral. Continue to roll the cake tightly, using your hands to guide it. The key is a “lift and fold/roll” motion rather than pressing down, which could force the frosting out. You can also alternate by lifting the parchment paper with one hand while using the other to gently guide and roll the cake, ensuring a firm, compact log.
Chilling and Slicing for Picture-Perfect Presentation
After all your effort, the final steps are critical for achieving those clean, irresistible slices of your Red Velvet Cake Roll. Proper chilling and a smart slicing technique make all the difference.
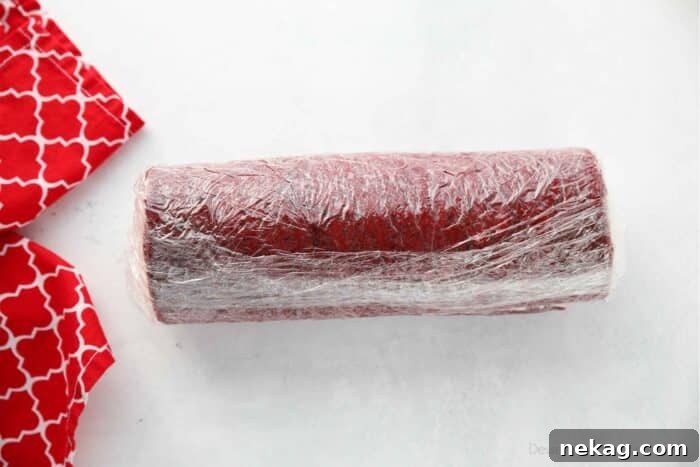
Once your Red Velvet Cake Roll is filled and re-rolled, the most important next step is to chill it thoroughly. This allows the cream cheese filling to firm up and set, ensuring the cake maintains its beautiful spiral shape and the frosting doesn’t squish out when you cut it.
- Chilling: Wrap the cake roll tightly in plastic wrap. For best results, double-wrap it to prevent freezer burn or absorption of other food odors. Place the wrapped cake roll in the refrigerator for at least 1-2 hours, or even longer if time allows. For truly exceptional results and the easiest slicing, I highly recommend double wrapping and freezing the cake roll overnight. A slightly frozen cake roll yields the cleanest, most precise slices.
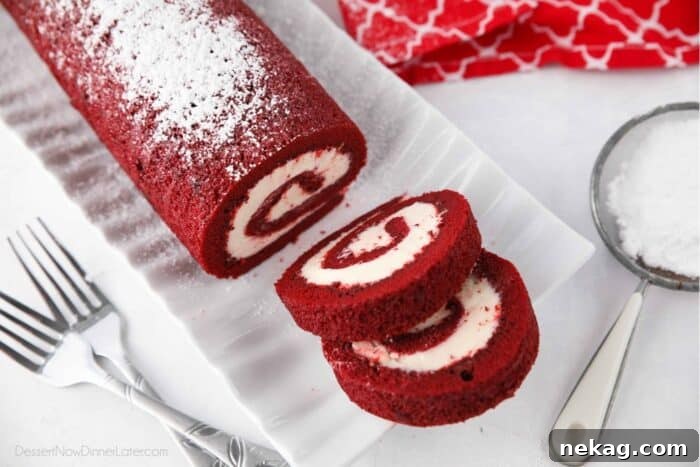
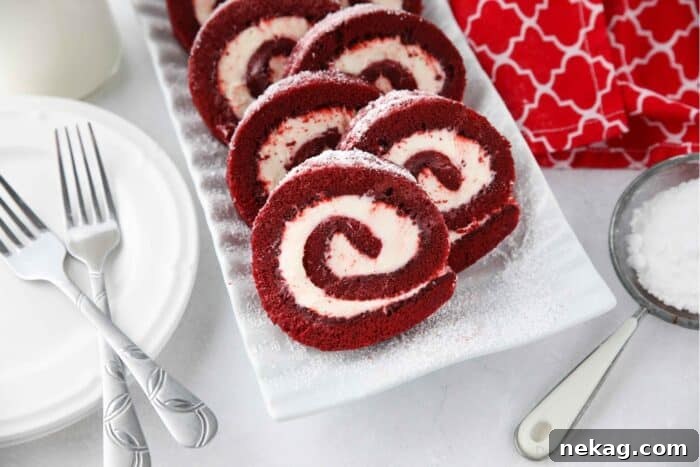
- Slicing: When you’re ready to serve, unwrap your chilled cake roll. For the most pristine slices, use a sharp serrated knife. A serrated knife allows you to gently saw through the cake rather than pressing down, which can smash the delicate cake and push the filling out. Aim for slices that are approximately ½ to ¾ inch thick, which should give you around 12-14 servings from one roll.
- Clean Cuts: For professional-looking slices, here’s a pro tip: rinse your serrated knife under hot water and thoroughly dry the blade between each cut. The warm, clean blade will glide through the cake and frosting more smoothly, preventing stickiness and ensuring each slice is perfectly defined.
Any leftover slices of your decadent Red Velvet Cake Roll can be stored directly on the platter, covered tightly with plastic wrap, in the refrigerator for up to 5 days. This cake holds up beautifully, tasting just as delicious on subsequent days.
Make-Ahead and Freezing Tips for Convenience
One of the greatest advantages of this Red Velvet Cake Roll is its make-ahead potential, making it an ideal dessert for busy holidays or when you simply want to prepare something delicious in advance. Freezing the cake roll is not only convenient but can actually enhance the slicing experience.
- To Freeze the Entire Cake Roll: After filling and re-rolling the cake, wrap it tightly with at least two layers of plastic wrap. For added protection against freezer burn, you can then add a layer of aluminum foil. Label the package with the date, and it can be safely stored in the freezer for up to 2-3 months. This allows you to prepare the cake weeks or even months before your event, reducing stress closer to the date.
- Slicing from Frozen (Preferred Method): You can absolutely slice the cake roll directly from frozen. In fact, many people, myself included, prefer this method! A frozen cake is very firm, which makes cutting incredibly easy and results in impeccably clean, sharp slices with no squishing or smearing of the frosting. Once sliced, arrange the pieces on a serving platter. They will thaw beautifully at room temperature within about 20 minutes, becoming perfectly tender and ready to enjoy.
- Thawing Overnight: Alternatively, if you prefer to slice a softer cake, you can transfer the frozen cake roll to the refrigerator overnight to thaw completely before slicing and serving.
- Storing Leftover Slices: If you have any remaining slices, cover them tightly with plastic wrap or store them in an airtight container. They will keep well in the refrigerator for up to 5 days, maintaining their delicious flavor and moist texture.
Embracing these make-ahead and freezing techniques means you can enjoy this stunning Red Velvet Cake Roll with minimal last-minute effort, ensuring a stress-free and delicious dessert experience every time.
Video Guide
Red Velvet Cake Roll: Expert Tips & Troubleshooting
Achieving a perfect cake roll can feel intimidating, but with these tips and solutions to common issues, you’ll be rolling like a pro in no time.
- Preventing Cracks: The most common concern is the cake cracking during rolling. The primary reasons are overbaking (which dries out the cake) or letting it cool too much before the initial roll. Ensure you bake for the minimum recommended time until just set. Roll the cake while it’s still warm – the warmth provides necessary flexibility.
- Dealing with a Sticky Cake/Parchment: With the no-towel method, the parchment paper and cake surface can be moist. This is normal. After the initial cool-down and unrolling, if the cake still feels excessively sticky, let it air out for 5-10 minutes before applying frosting. A slight stickiness is actually beneficial as it helps the frosting adhere.
- Frosting Consistency: If your cream cheese frosting is too soft, it will squeeze out during rolling. Ensure your cream cheese is cold and the butter is at a cool room temperature (not melted). If it still seems too soft, a quick chill in the refrigerator for 15-20 minutes can firm it up.
- Achieving a Tight Roll: A loose roll will result in a less defined spiral. Use the parchment paper to aid in the rolling process. Lift and gently fold the cake over, pressing lightly to keep it snug. Don’t be afraid to apply slight pressure; the initial roll without filling helps train the cake.
- Even Frosting Distribution: An offset spatula is your best tool for spreading the frosting evenly. Remember the tip: keep the spatula in the frosting at all times to avoid picking up cake crumbs.
- Make-Ahead Strategy: This cake is fantastic for making ahead. The flavor actually deepens overnight. Freezing is your secret weapon for stress-free holiday baking.
Final Thoughts on Your Red Velvet Masterpiece
This Red Velvet Cake Roll is more than just a dessert; it’s an experience. From its stunning crimson layers intertwined with luxurious cream cheese frosting to its melt-in-your-mouth texture, it promises to be a memorable addition to any occasion. Whether you’re a seasoned baker or just starting your culinary journey, this recipe offers a rewarding challenge with a truly delicious outcome. Embrace the process, enjoy the vibrant colors, and savor every exquisite bite of this classic dessert with a delightful twist. It’s perfect for holidays, celebrations, or simply to brighten an ordinary day.