
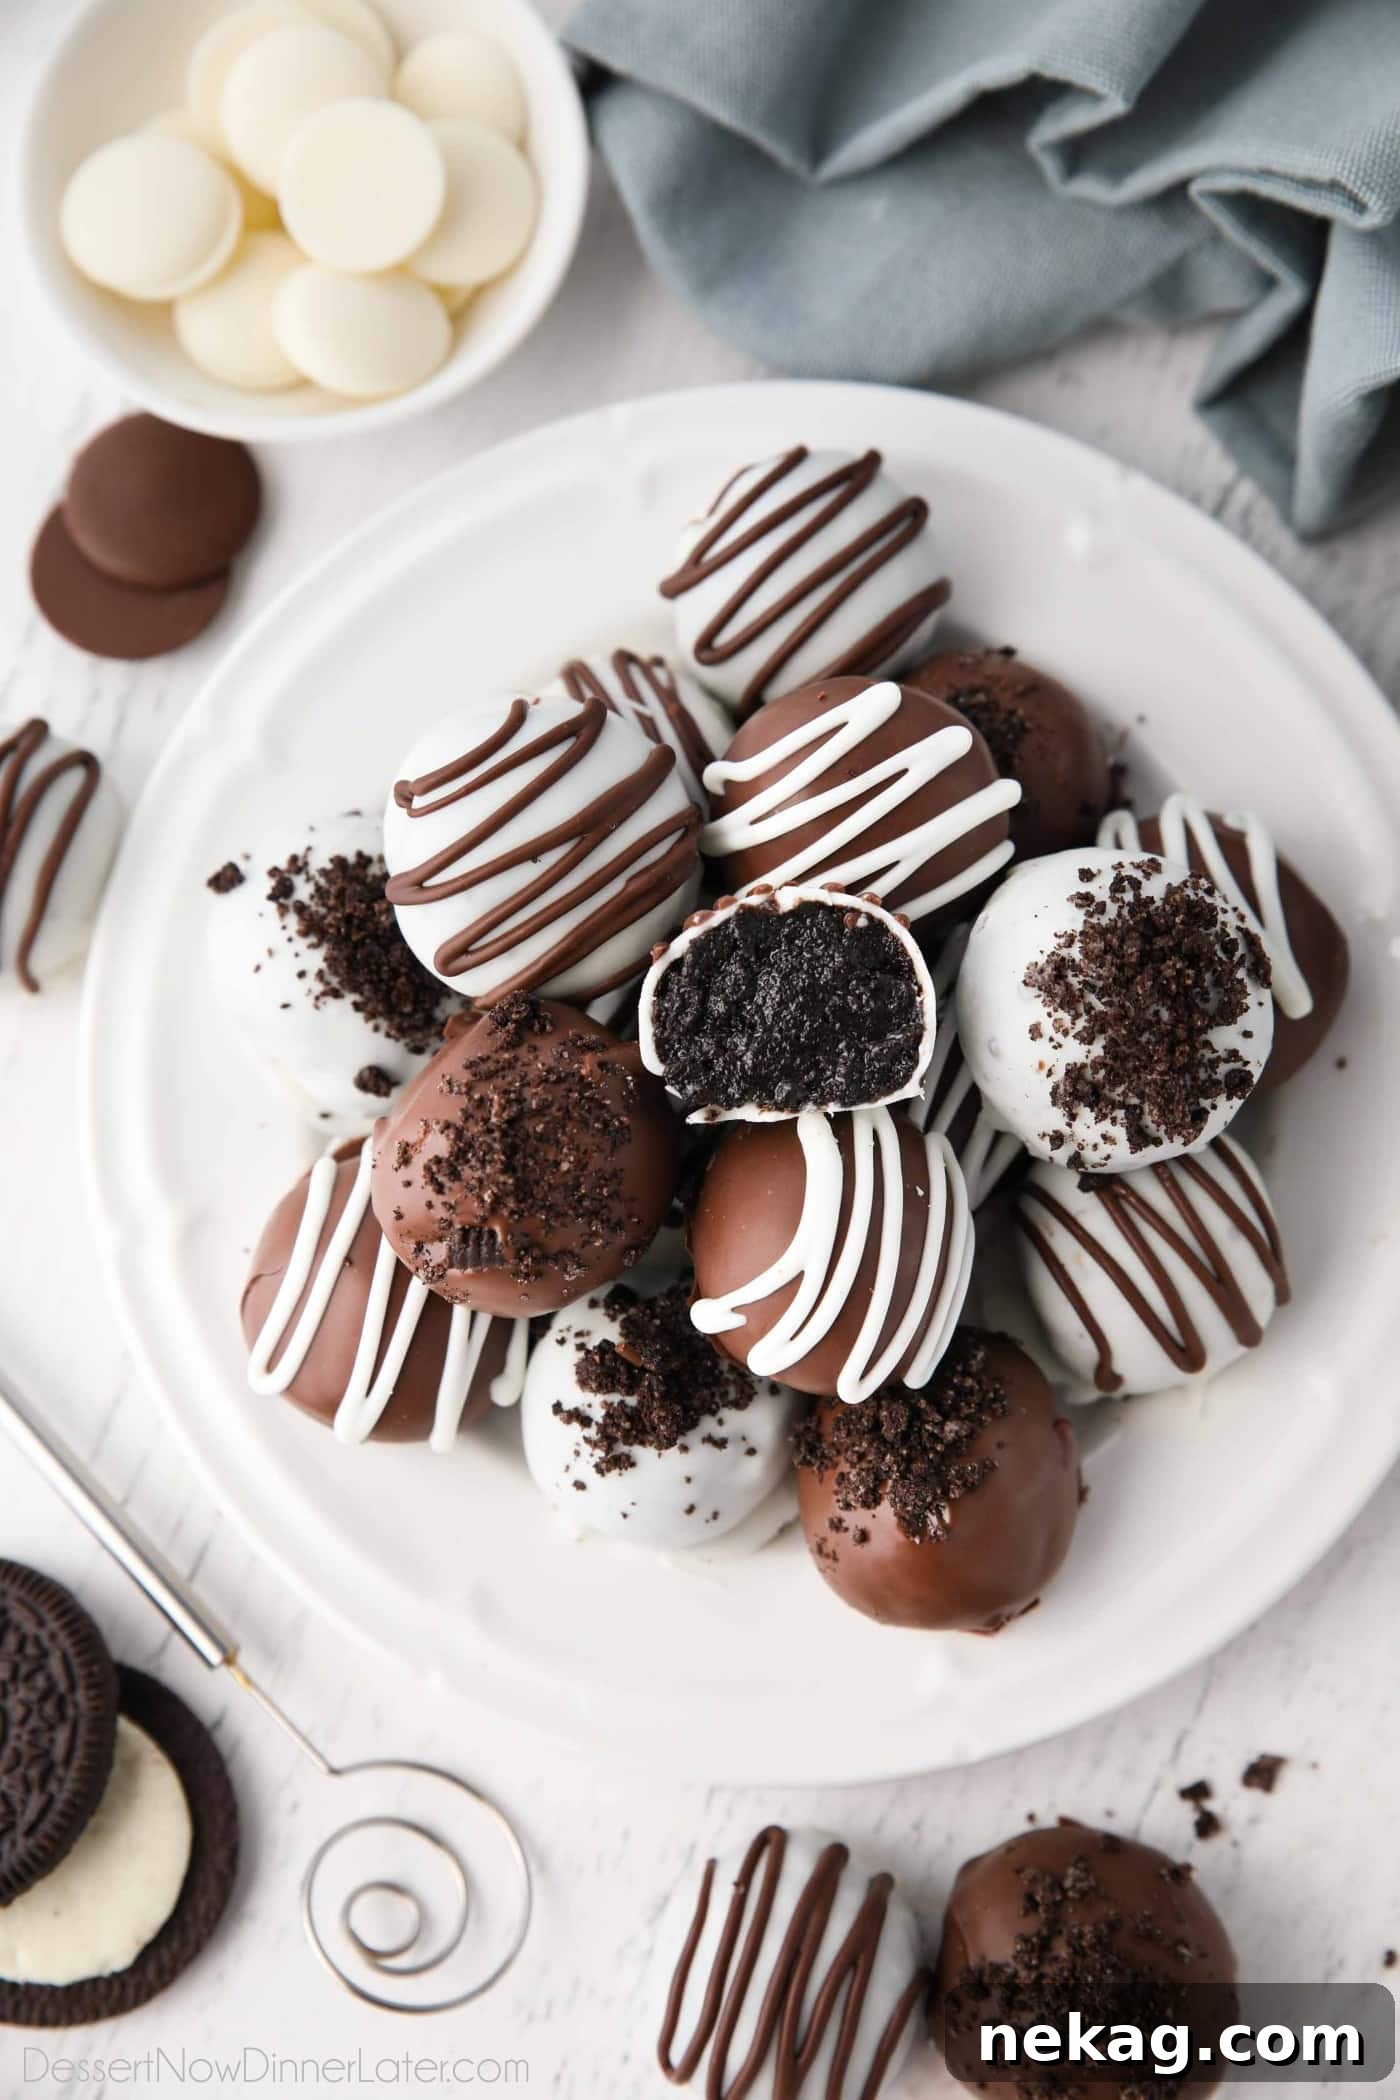
Easy No-Bake Oreo Balls Recipe: The Ultimate 3-Ingredient Treat
Welcome to the simplest, most delightful dessert recipe you’ll ever make: Oreo Balls! These irresistible no-bake treats, often affectionately called Oreo Truffles, require only three basic ingredients – Oreos, cream cheese, and chocolate – yet they deliver an explosion of flavor and texture that will captivate any palate. Whether you’re planning a festive holiday gathering, preparing for a party, or simply seeking a quick and easy homemade candy, these chocolate-covered delights are guaranteed to be a spectacular crowd-pleaser every single time. Get ready to impress with minimal effort and maximum deliciousness!
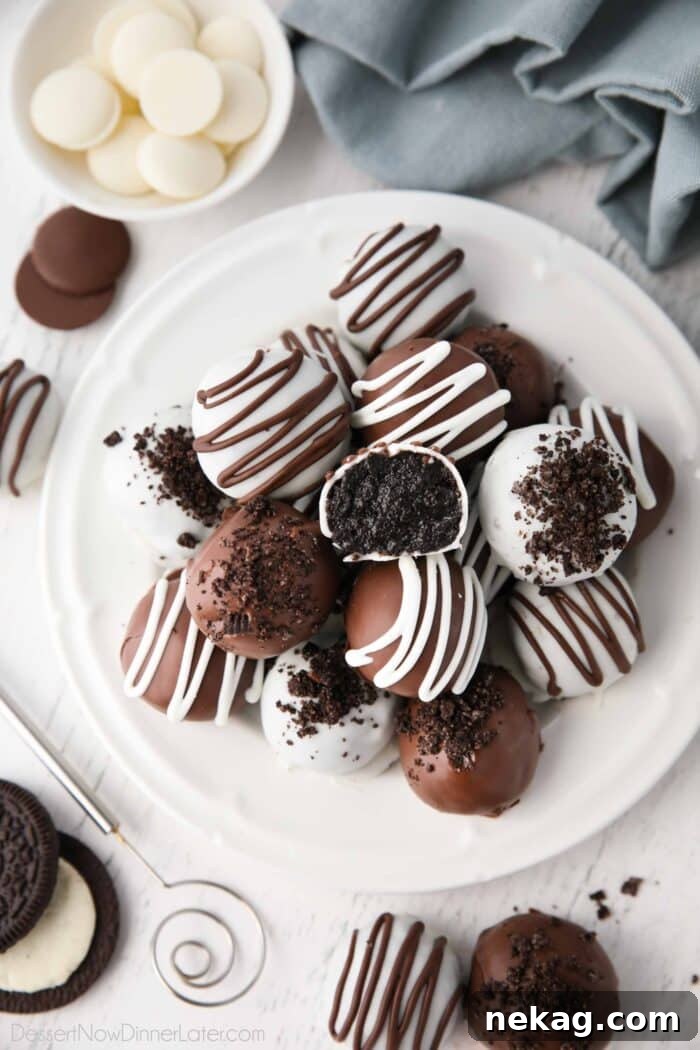
Why Everyone Loves Oreo Balls: A Timeless Favorite!
Oreo Balls have secured their place as a perennial favorite, especially cherished during the bustling holiday season. From Christmas family gatherings to casual get-togethers with friends, these charming confections consistently steal the spotlight. My own mother, whom we fondly call Grandma Joy, meticulously prepares them every Christmas, and without fail, they vanish within minutes! Their appeal isn’t just limited to festive occasions; they’re perfect for birthdays, potlucks, baby showers, or simply as an indulgent weekend treat.
The secret to their widespread adoration lies in their effortless preparation and universally loved flavor profile. In a world of complex baking, the simplicity of a 3-ingredient, no-bake treat is truly a lifesaver, particularly when time is precious. Imagine creating what feels like a “fancy” homemade candy with minimal fuss and no oven required! Despite a slight potential for mess during the dipping process, the outcome is so rewarding that any minor cleanup is quickly forgotten. These delightful truffles disappear rapidly because, quite simply, everyone absolutely adores them!
Even if you consider yourself a novice in the kitchen or lack specialized candy-making skills, you can confidently create these stunning Oreo Balls. Their forgiving nature means that any imperfections in your chocolate coating can be easily disguised. A simple drizzle of extra chocolate or a sprinkle of crushed cookies on top provides the perfect elegant finish, masking any “mistakes” and making your treats look professionally made. This makes them an ideal project for beginners and seasoned dessert enthusiasts alike.
Oreo Truffles: A Decadent Delight by Any Name
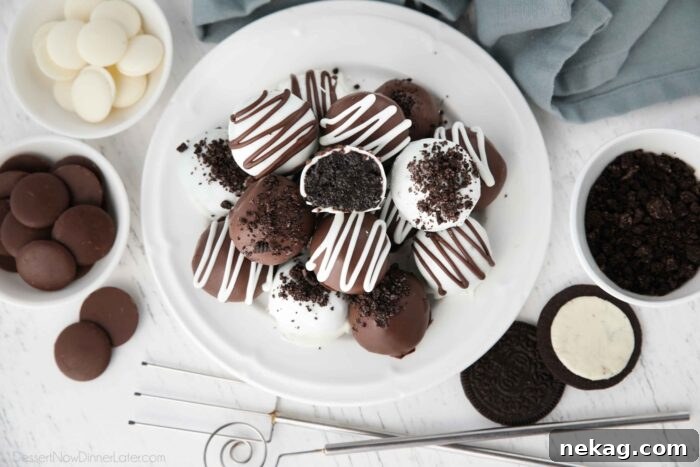
While commonly known as Oreo Balls, these delightful confections are also widely referred to as Oreo Truffles. The “truffle” moniker stems from their striking resemblance to classic chocolate truffles – small, round, and typically coated in a decadent layer of chocolate. However, instead of a traditional rich ganache filling, our version boasts a unique and incredibly satisfying Oreo cream cheese filling. This creamy, cookie-infused center sets them apart, offering a familiar yet elevated dessert experience that truly highlights the iconic flavor of Oreo cookies.
For any ardent fan of Oreo cookies, these truffles are an absolute must-try. They take the beloved cookie to a whole new level of indulgence, transforming it into a sophisticated, bite-sized treat that’s perfect for sharing (or not!). The combination of crushed Oreos with tangy cream cheese creates a surprisingly balanced and utterly addictive filling that pairs perfectly with a crisp chocolate shell. Prepare yourself; if you love Oreos, you are going to absolutely fall in love with these!
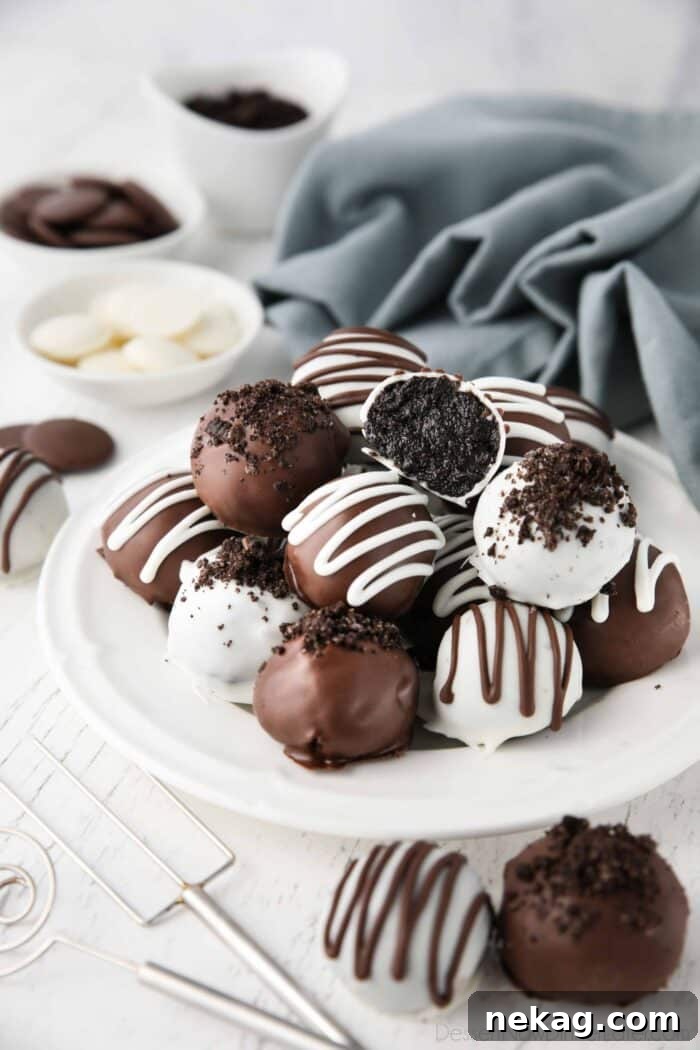
The Essential 3 Ingredients for Your Oreo Balls Recipe
The beauty of this Oreo Balls recipe truly lies in its simplicity, requiring just three core ingredients. Let’s delve into what makes each component crucial for the perfect truffle:
What are Oreo balls made of? A Closer Look at the Ingredients
- Oreos: For this recipe, you’ll need approximately 36 Oreo cookies. While a standard 14.3 oz package often claims to contain this amount, manufacturers prioritize weight over exact cookie count, so there’s always a slight chance of coming up short. To avoid any disappointment and to ensure you have extra cookies for topping (a highly recommended step!), I strongly suggest opting for the 19.1 oz Family Size package. This gives you plenty of cookies for the filling and a generous amount to crush for a beautiful, thematic garnish. Remember, use original Oreos, not “Double Stuf,” as the extra cream can alter the consistency of your mixture, making it too sticky.
- Cream Cheese: A single 8-oz block of full-fat, brick-style cream cheese is essential. The key here is to ensure your cream cheese is thoroughly softened to room temperature before mixing. This allows it to easily incorporate with the crushed cookies, creating a smooth, homogenous, and pliable filling. Cold cream cheese will result in a lumpy, difficult-to-work-with mixture. Full-fat cream cheese also contributes significantly to the rich, creamy texture and decadent flavor that makes these Oreo Balls so irresistible.
- Chocolate: You’ll need about 10 to 12 ounces of high-quality melting chocolate for dipping. My personal preference for ease and a consistently smooth finish is Ghirardelli melting wafers. These wafers are designed to melt beautifully without requiring additional oil for thinning, making your dipping process much smoother and less prone to seizing. You have the freedom to choose your favorite type of chocolate – milk, dark, or white – or even combine two, as seen in many variations. Beyond melting wafers, you can also use good quality baking chocolate, premium chocolate chips (which might need a tiny bit of neutral oil, like coconut oil, to achieve the right consistency), Wilton candy melts for vibrant colors, or convenient almond bark.
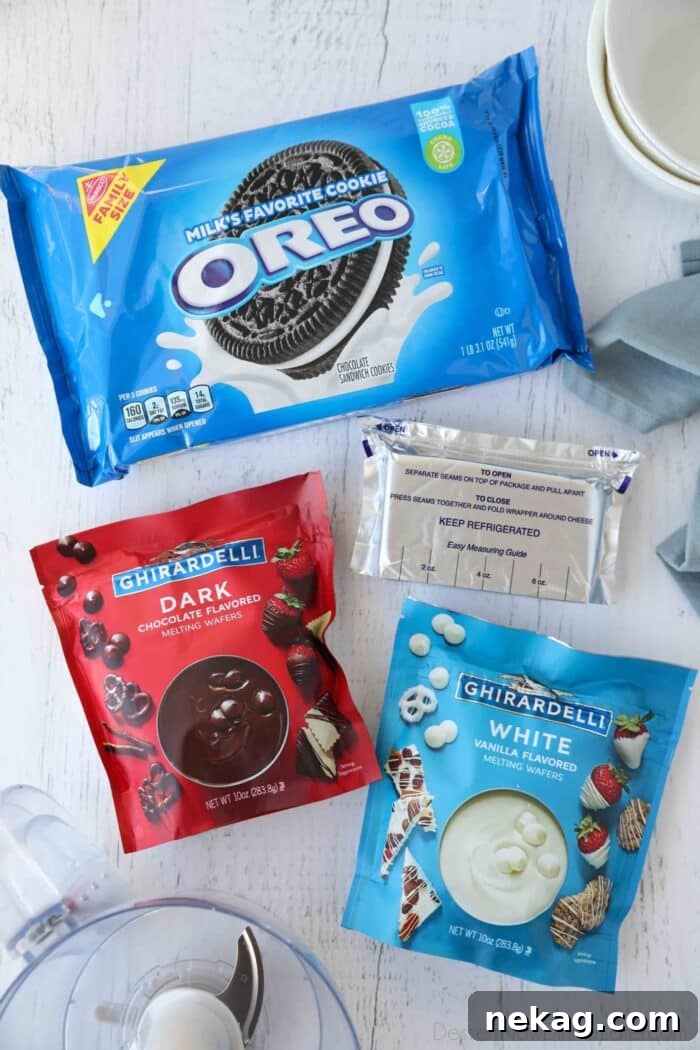
Now that you’re acquainted with the simple yet powerful ingredients, let’s get down to the exciting part: making this utterly delicious Oreo Balls Recipe!
Step-by-Step: Crafting the Perfect Oreo Truffle Filling
The first step to creating these delectable no-bake treats is to prepare the rich and creamy Oreo filling. Precision in this stage ensures a smooth, easy-to-handle mixture that forms the heart of your truffles.
- Crush the Oreos: Begin by placing your entire Oreo cookies – cream filling and all – into a food processor or a high-powered blender. Process them until they are transformed into very fine crumbs. It’s crucial that there are no large or chunky pieces remaining, as this will affect the smoothness and consistency of your truffle balls. A fine crumb texture is key to a uniform and delightful bite.
- Combine with Cream Cheese: Once your Oreos are finely crushed, add the softened brick-style cream cheese to the food processor. For easier blending, especially if your cream cheese block is large, you can cut it into smaller cubes beforehand. Pulse the mixture repeatedly until it is thoroughly combined and forms a thick, cohesive dough-like consistency. Scrape down the sides of the food processor as needed to ensure everything is evenly mixed. The result should be a rich, dark, and slightly sticky mixture that holds its shape when pressed.
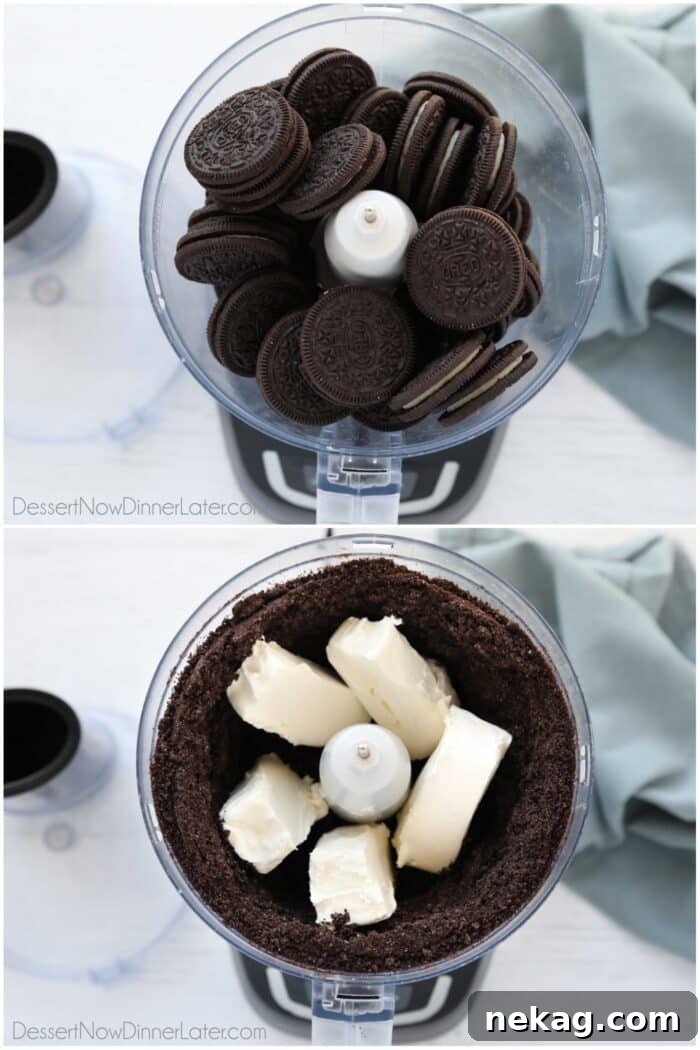
Shaping and Chilling Your Oreo Balls for Perfection
With your delectable Oreo cream cheese filling ready, the next step is to shape it into uniform balls and chill them to ensure they hold their form perfectly for dipping.
- Scoop for Consistency: To ensure all your Oreo truffles are consistently sized, use a small cookie scoop, ideally a #50 scoop, which measures approximately 1 tablespoon. This will help you divide the mixture evenly into about 36 balls. Place each scoop of the filling onto a half sheet tray that has been lined with parchment paper. The parchment paper prevents sticking and makes transfer easier.
- Shape into Smooth Spheres: Once scooped, gently roll each portion of the mixture between your palms to form perfectly round and completely smooth balls. The warmth of your hands will help smooth out any cracks or irregularities, giving your truffles a polished appearance. Aim for uniformity in size and shape for the best presentation.
- Chill for Firmness: This chilling step is absolutely crucial for the structural integrity of your Oreo Balls. Place the formed truffles into the freezer for approximately 15 minutes. This brief stint in the freezer will firm up the cream cheese mixture, making the balls much easier to dip in chocolate without them falling apart or losing their shape. It also helps the chocolate coating set quickly and adhere smoothly. However, be careful not to over-chill, as excessively cold balls can cause the chocolate coating to crack later.
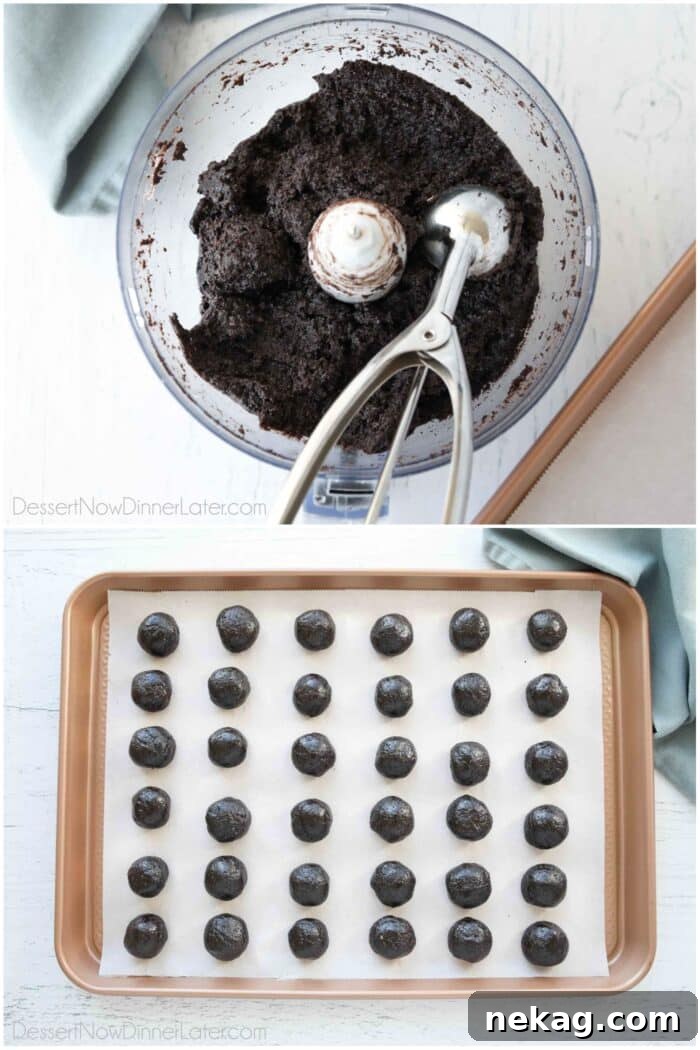
The Grand Finale: Coating Your Oreo Balls in Decadent Chocolate
The final, and arguably most exciting, step is transforming your chilled Oreo balls into elegant, chocolate-coated truffles. This process requires a little care but is immensely rewarding.
- Melt Your Chocolate: Begin by melting your chosen chocolate according to the specific directions on its package. Whether you’re using melting wafers, chocolate chips, or almond bark, follow the manufacturer’s instructions for best results. Typically, this involves using a microwave in short bursts, stirring frequently, or a double boiler method. Ensure the chocolate is smooth, glossy, and completely melted, with no lumps, for an even coating.
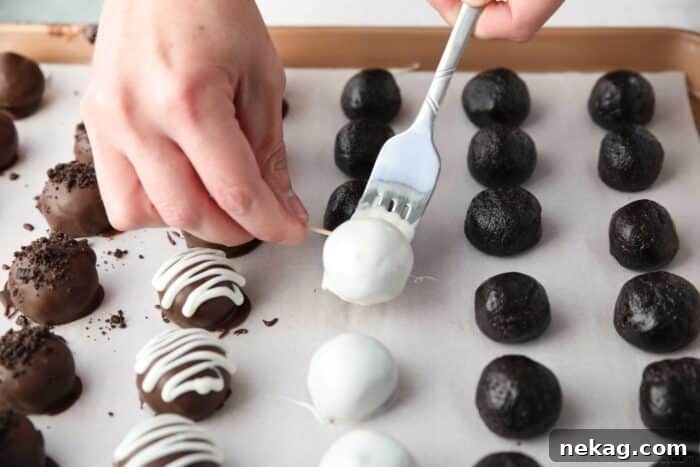
- Expert Dipping Technique: Once the chocolate is perfectly melted, remove your firm Oreo balls from the freezer. To coat each truffle, gently place one ball at the tip of a large fork (a candy dipping tool can also be used). Using a large spoon, generously pour the melted chocolate over the entire surface of the truffle, ensuring it’s fully submerged and coated. Gently tap the fork against the side of your bowl to allow any excess chocolate to drip off. This creates a thin, even coating and prevents pooling at the base. Finally, use a toothpick to carefully slide the chocolate-coated Oreo truffle off the fork and back onto the parchment paper-lined tray.
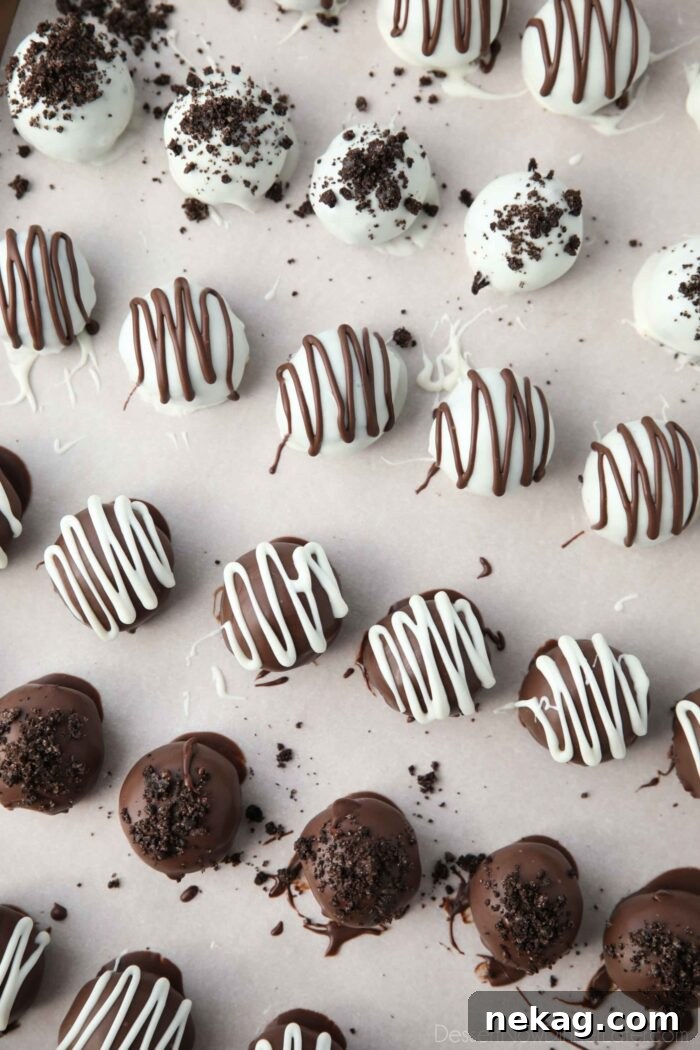
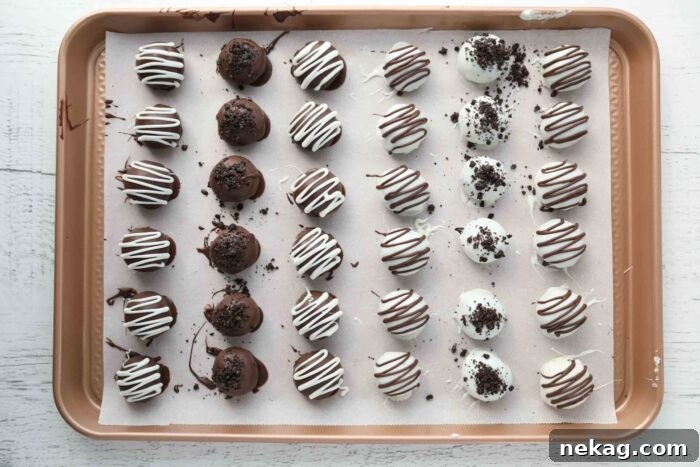
- Immediate Topping or Drizzle: If you plan to adorn your Oreo truffles with crushed cookies or sprinkles, do so immediately after dipping each ball, while the chocolate is still wet and tacky. This ensures the toppings adhere properly. If you prefer a elegant chocolate drizzle, wait until all your Oreo balls have been dipped and the chocolate has slightly set, then drizzle as described in the “Toppings and Variations” section.
- Set the Chocolate: Once all your truffles are dipped and topped, return the tray to the refrigerator. Allow them to chill for approximately 30-60 minutes, or until the chocolate coating has completely set and hardened. This creates that satisfying crisp shell that contrasts beautifully with the soft, creamy interior.
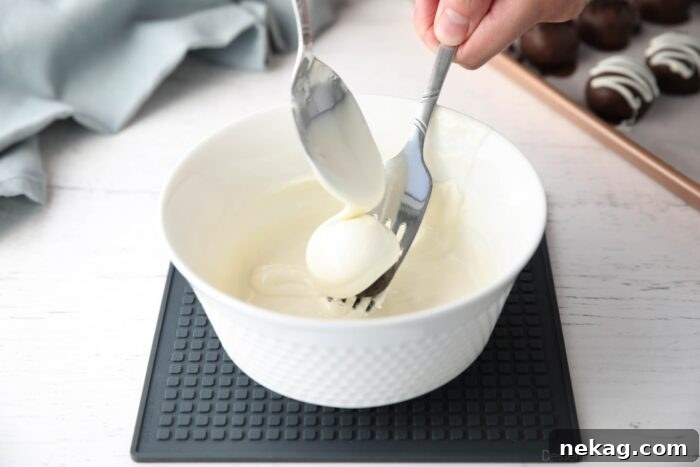
Elevate Your Oreo Balls: Creative Toppings and Flavor Variations
While delicious in their simplest form, Oreo Balls offer a fantastic canvas for creative toppings and flavor variations. Here are some ideas to make your truffles truly stand out:
- Classic Crushed Cookies: For a signature look and an extra burst of Oreo flavor, top your truffles with additional crushed Oreo cookies. This step must be performed immediately after dipping each truffle, while the chocolate coating is still wet and pliable, allowing the crumbs to adhere perfectly.
- Vibrant Sprinkles: Add a festive touch with colorful sprinkles! Whether it’s holiday-themed sprinkles, classic rainbow jimmies, or sophisticated nonpareils, they instantly elevate the visual appeal of your Oreo Balls, making them even more inviting for parties and celebrations.
- Elegant Chocolate Drizzle: For a touch of sophistication, a chocolate drizzle is a perfect choice. To achieve this, simply place some of your melted chocolate (or a contrasting color) into a zip-top bag. Snip a very small corner off the bag to create a fine opening. Gently squeeze and drizzle the chocolate back-and-forth in elegant patterns over your set truffles. This is best done after the initial chocolate coating has slightly hardened.
- Peppermint Variation: Infuse a festive, minty flavor by using peppermint Oreos for the filling. For the topping, crush candy canes or peppermint starlight mints and sprinkle them over the wet chocolate. You can further enhance the minty kick by adding about 1 ½ teaspoons of food-grade peppermint oil (or extract) to the cream cheese-Oreo mixture during the filling stage.
- Other Topping Ideas: Don’t limit yourself! Consider finely chopped nuts (like pecans or walnuts), toasted coconut flakes, mini chocolate chips, or even a dusting of cocoa powder for a more sophisticated truffle appearance.
Storage and Freezing Guidelines for Your Oreo Balls
Proper storage is key to maintaining the freshness and deliciousness of your homemade Oreo Balls. Since they contain cream cheese, refrigeration is essential.
- Do Oreo balls have to be refrigerated? Yes, absolutely. Due to the presence of cream cheese in the filling, Oreo Balls are a perishable item and must be refrigerated. They should not be left out at room temperature for longer than 2 hours to ensure food safety and maintain their optimal texture and flavor.
- How long are Oreo balls good for? When stored properly in an airtight container in the refrigerator, your Oreo Balls will remain fresh and delightful for up to 2 weeks. For longer storage, they freeze exceptionally well.
- Freezing Instructions: To freeze, place the set Oreo Balls in a single layer on a parchment-lined tray and freeze until solid (about 1-2 hours). Once firm, transfer them to an airtight freezer-safe container. For best results and to prevent sticking, place parchment paper between layers of truffles. Frozen Oreo Balls will maintain their quality for up to 3 months. When you’re ready to enjoy them, simply thaw them overnight in the refrigerator.
Expert Tips for Crafting Perfect Oreo Truffles Every Time
Achieving perfectly smooth, delicious Oreo Balls is simple, especially with these insider tips:
- Embrace the Whole Oreo Cookie: Always use the entire Oreo cookie – cream filling and all! The cream filling contributes to the moisture and sweetness of the truffle. However, it’s crucial to stick with original Oreos. “Double Stuf” or similar variations have too much cream, which can make your truffle mixture overly sticky and difficult to roll and coat.
- Fine Crumbs are Fundamental: For the best texture, process your cookies in a food processor or a powerful blender until they become very fine crumbs. The absence of large cookie pieces ensures a smooth, uniform truffle filling that’s easy to shape and pleasant to eat. While a food processor is ideal, if you don’t have one, you can place cookies in a sturdy zip-top bag and crush them with a rolling pin. Just be prepared to thoroughly mix the cream cheese by hand afterward.
- Soft, Full-Fat Cream Cheese is Key: The temperature and type of cream cheese significantly impact your truffle’s consistency. Always use soft, full-fat, brick-style cream cheese at room temperature. Cold cream cheese will be stiff and will not blend smoothly into the Oreo crumbs, leading to a lumpy mixture. Full-fat cream cheese also imparts a richer, creamier flavor and superior texture to your finished truffles.
- Optimal Chilling Time is Crucial: There’s a sweet spot for chilling your Oreo truffles. Aim for approximately 15 minutes in the freezer. If the balls are too cold (e.g., frozen solid), the chocolate shell may crack after it sets due to temperature differences and contraction. Conversely, if the filling is too soft, the balls will be challenging to coat, potentially falling apart or leaving crumbs in your melted chocolate. Fifteen minutes generally ensures they are firm enough for easy dipping without being overly cold.
- Work Efficiently with Chocolate: Melted chocolate can start to set if left for too long. Work quickly when dipping your truffles, especially if your kitchen is cool. If your chocolate starts to thicken, gently rewarm it in the microwave in short bursts, stirring well.
- Clean Dipping Technique: For the cleanest finish, use a candy dipping fork or a regular dinner fork. Tap off excess chocolate gently against the side of the bowl. This prevents thick puddles of chocolate at the base of your truffles.

Frequently Asked Questions (FAQs) About Oreo Balls
- Can I use flavored Oreos? Absolutely! While this recipe calls for original Oreos, you can experiment with many different flavored Oreos like mint, peanut butter, or golden Oreos for unique twists. Just ensure they are not “Double Stuf” varieties for best consistency.
- What if my chocolate becomes too thick or seizes? If your chocolate thickens, gently reheat it in a double boiler or microwave on low power, stirring frequently. If it seizes (becomes grainy and solid), it likely came into contact with water. Unfortunately, seized chocolate is difficult to salvage for dipping, so it’s best to start with a fresh batch.
- How many truffles does this recipe make? This recipe yields approximately 36 delicious Oreo truffles, making it perfect for sharing at parties or enjoying over several days.
- Can kids help make Oreo Balls? Yes! This no-bake recipe is fantastic for involving children in the kitchen. They can help crush cookies (under supervision), roll the balls, and sprinkle toppings. It’s a fun and easy activity for the whole family.
More Irresistible No-Bake & Easy Christmas Treats
If you’ve fallen in love with the simplicity and deliciousness of these Oreo Balls, you’ll definitely want to explore these other easy-to-make Christmas treats and no-bake desserts. They’re perfect for expanding your holiday baking repertoire or simply enjoying a quick sweet fix:
- Easy Peanut Butter Balls
- Pretzel Christmas Treats
- Avalanche Cookies (no bake)
- Peanut Butter Pretzel Bites
- Cracker Toffee Recipe
- Oreo Fudge Recipe
- Cookie Dough Pretzel Bites
- Peppermint Bark Recipe
- Pumpkin Balls
If You Make This Recipe, Please Rate and Review it in the Comments Below. THANKS! We always love hearing from you!
Oreo Balls Recipe
Amber Brady
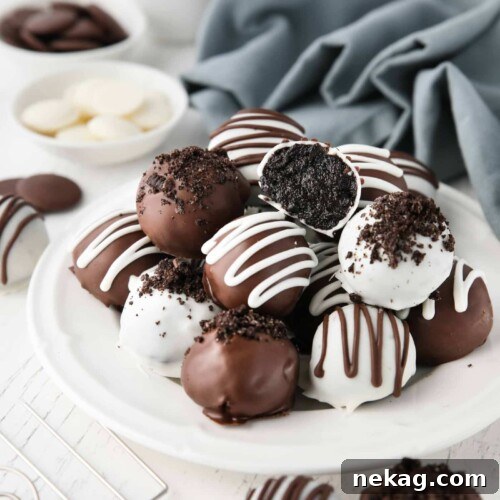
These 3-ingredient Oreo cream cheese truffles are coated in chocolate and incredibly easy to make, perfect for any occasion!
Ingredients
- 36 Oreo cookies, Original, not Double Stuf (plus 3 extra for topping, if desired)
- 8 oz (226 g) brick-style cream cheese, softened
- 12 oz (340 g) Ghirardelli Melting Wafers, white, milk, dark, or a combination (or other melting chocolate)
Equipment
- Food Processor
- #50 Scoop
- Aluminum Half Sheet Tray (2 Pack)
- Parchment Paper
- Corelle Bowls
- Chocolate Dipping Set
Instructions
- Line an 18×13-inch half sheet pan with parchment paper. Set aside.
- Crush the Oreos, cream filling and all, in a food processor or blender until fine crumbs. Make sure there aren’t any big pieces. Add the softened cream cheese and pulse until combined into a smooth, cohesive mixture.
- Use a small (#50) scoop to divide the mixture into 36 balls, approximately 1 Tablespoon each. Place each scoop of filling onto the prepared pan.
- Roll each ball with your hands to make it perfectly round and completely smooth on the outside.
- Place the formed truffles in the freezer for 15 minutes to firm up.
- Melt the chocolate according to the directions on the package until smooth and glossy.
- Remove Oreo balls from the freezer and coat them with melted chocolate. To do this, place a truffle at the tip of a large fork, pour chocolate over it with a spoon, and gently tap off any excess chocolate. Use a toothpick to slide the truffle off the fork onto the parchment paper.
- Immediately top with crushed cookies or sprinkles while chocolate is wet, or drizzle with contrasting chocolate after all balls have been dipped and slightly set. Refrigerate the dipped truffles for 30-60 minutes, or until the chocolate has set completely.
Notes
- OREOS: I recommend buying the 19.1 oz Family Size package of Oreos to ensure there’s enough for the filling and extra for topping, if desired.
- CHOCOLATE: You may substitute Ghirardelli Melting Wafers with 12 oz of baking chocolate, quality chocolate chips melted with 1/2 to 1 tsp neutral tasting oil to thin it out, Wilton candy melts, or almond bark.
- CHILL TIME: Don’t freeze/chill the Oreo truffle filling too long. If the balls are too cold, the chocolate shell may crack after setting. 15 minutes in the freezer is ideal – firm enough for dipping, but not overly cold.
- STORAGE: Oreo balls will keep for 2 weeks in the refrigerator, or 3 months in the freezer in an airtight container with parchment paper separating layers. Thaw in the fridge overnight. Do not allow truffles to sit out at room temperature for more than 2 hours.
Nutrition
Serving: 1 truffle | Calories: 118 kcal | Carbohydrates: 13.3 g | Protein: 1.1 g | Fat: 7.4 g | Saturated Fat: 4.4 g | Cholesterol: 6.4 mg | Sodium: 72.2 mg | Fiber: 0.7 g | Sugar: 9.5 g
Disclaimer: Nutritional values were calculated using a third-party tool and are provided as an estimation only.
Sharing this recipe with a link is both encouraged and appreciated. Copying/pasting and/or screenshots of full recipes to any social media is strictly prohibited. Content and photographs are copyright protected.
Did you make this?
Don’t forget to leave a rating below and make sure to follow on Pinterest and Instagram for more delicious recipes and inspiration!