
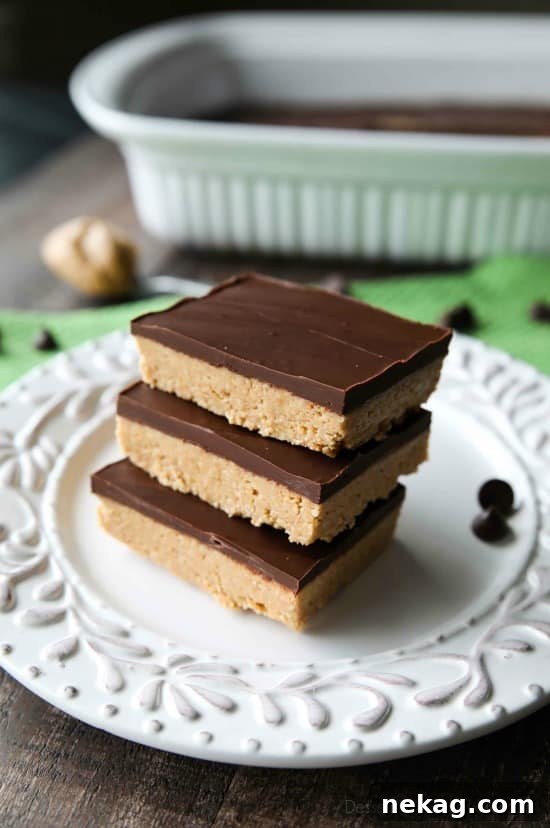
Easy No-Bake Peanut Butter Bars: Your Ultimate Indulgence
Indulge your cravings with these incredibly simple and utterly delicious No-Bake Peanut Butter Bars. Capturing the iconic taste of a Reese’s Peanut Butter Cup, this crowd-pleasing dessert boasts a perfectly sweet, slightly crunchy peanut butter base, generously topped with a rich, creamy chocolate ganache. It’s the ideal treat for any gathering, requiring minimal effort but delivering maximum satisfaction.
Few flavor combinations achieve the legendary status of peanut butter and chocolate. This timeless duo creates a symphony of textures and tastes that is nothing short of magical. For a long time, the concept of crafting the perfect No-Bake Peanut Butter Bars remained an intriguing item on my culinary wishlist. Interestingly, fate intervened when a friend brought a batch of these very bars to a backyard barbecue we hosted. One bite was all it took – I was instantly smitten, regretting every moment I hadn’t tried them sooner! Their creamy, rich, and perfectly balanced flavors are truly an experience.
Why These No-Bake Peanut Butter Bars Will Become Your Go-To Dessert
Beyond their mouth-watering taste, these no-bake wonders offer a multitude of reasons to fall in love:
- Effortless Preparation: The biggest draw is right in the name – no baking required! This makes them a fantastic option for warm weather, busy schedules, or simply when you want a delicious treat without turning on the oven.
- Lightning-Fast Assembly: From start to finish, the active preparation time for these bars is incredibly short, often less than 15 minutes. The majority of the “work” involves letting them chill and set in the refrigerator.
- Unanimous Crowd-Pleaser: The classic pairing of peanut butter and chocolate is universally loved. These bars are a guaranteed hit at any party, potluck, or family gathering, delighting guests of all ages.
- Irresistible Texture Contrast: The base features a unique blend of creamy peanut butter and finely ground graham cracker crumbs, providing a delightful crunch that perfectly complements the smooth, luscious chocolate topping.
- Perfectly Portable: Once chilled and cut, these bars are sturdy enough to transport, making them excellent for picnics, school events, or office treats.
- Budget-Friendly Ingredients: Made with common pantry staples, this recipe is economical without compromising on flavor or decadence.
Unlocking the Perfect Texture: The Role of Graham Crackers
While these bars might remind you of a rich Peanut Butter Pie, they possess a distinct characteristic that sets them apart: a subtly crunchy peanut butter layer. This delightful texture comes from the generous addition of finely ground graham cracker crumbs. Far from being a mere filler, these crumbs introduce a wonderful structural integrity and a delicate crispness that beautifully counterpoints the otherwise smooth and indulgent components. The result is a dessert that feels incredibly decadent and satisfying, yet surprisingly light in its texture. Each square is a harmonious blend of creamy, sweet, and just enough crunch to keep you coming back for more. This unique element ensures that every bite is a memorable experience, providing a depth of character that elevates these simple bars to an extraordinary level.
Mastering the Art of No-Bake: Simple Steps for Sweet Success
The beauty of these No-Bake Peanut Butter Bars lies in their incredible simplicity. They are designed for quick preparation, making them an excellent choice when you need a show-stopping dessert without the fuss. While a brief period in the refrigerator or freezer is necessary for them to set perfectly, the active hands-on time is truly minimal. You’ll be astonished at how effortlessly these bars come together, allowing you more time to savor them with loved ones. Let’s walk through the straightforward steps to create this delightful treat!
No-Bake Peanut Butter Bars Recipe
Average rating: 4.67 out of 5 stars based on 3 ratings.
Amber Brady
10 minutes
10 minutes (plus chilling time)
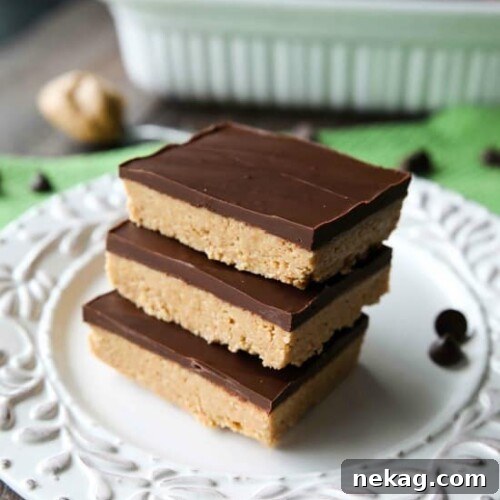
These delightful no-bake bars bring together the classic flavors of peanut butter and chocolate in a simple, satisfying dessert. Perfect for any occasion, they require minimal effort and no oven, making them a fantastic choice for busy bakers and dessert enthusiasts alike.
Pin Recipe
Rate This Recipe
Save Recipe
Yields:
24
bars
Ingredients
For the Peanut Butter Layer:
- 2 cups (208 g) finely ground graham crackers (about 13 full graham crackers)
- 2 cups (240 g) powdered sugar (confectioners’ sugar, plus up to ½ cup more if needed)
- 1 cup (264 g) creamy peanut butter (such as Jif or Skippy for best consistency)
- 1 cup (226 g) unsalted butter, melted
For the Chocolate Layer:
- 1 ½ cups (255 g) semi-sweet chocolate chips
- ¼ cup (61 g) creamy peanut butter (to help with melting and flavor)
Instructions
-
1. Prepare the Peanut Butter Base: In a large mixing bowl, combine the finely ground graham crackers, powdered sugar, and 1 cup of creamy peanut butter. Pour in the melted butter and mix thoroughly. Use a sturdy spoon or a stand mixer with a paddle attachment to ensure all ingredients are well incorporated and a thick, crumbly mixture forms. If the mixture appears too wet or sticky to handle, gradually add up to an additional ½ cup of powdered sugar, mixing until it reaches a consistency that comes together easily when pressed, without being overly dry or crumbly. Press this mixture evenly into the bottom of an ungreased 9×13-inch baking pan. Use the back of a spoon, a flat-bottomed glass, or your hands to firmly compact the mixture and create a smooth, even layer across the entire pan. Set aside.
-
2. Make the Chocolate Topping: In a medium microwave-safe bowl, combine the semi-sweet chocolate chips and the ¼ cup of creamy peanut butter. Microwave on high for 30 seconds. Remove the bowl and stir the mixture vigorously until smooth. If the chocolate is not completely melted, continue microwaving in short 15-second bursts, stirring thoroughly after each interval, until the chocolate and peanut butter are fully melted and glossy. Be cautious not to overheat the mixture, as this can cause the chocolate to seize. As an alternative method, you can melt the chocolate and peanut butter together in a heatproof bowl set over a pot of simmering water (a double boiler), stirring constantly until smooth and uniform.
-
3. Assemble and Chill: Once the chocolate mixture is perfectly smooth, immediately pour it over the prepared peanut butter layer in the baking pan. Using an offset spatula, the back of a spoon, or a butter knife, carefully spread the melted chocolate evenly to cover the entire surface of the peanut butter base. Work quickly as the chocolate will begin to set. Transfer the pan to the refrigerator and chill for at least 30 minutes, or place it in the freezer for about 15 minutes, until the chocolate layer is just barely set – it should be firm enough to touch but still yield slightly when gentle pressure is applied. This “just set” stage is crucial for achieving clean and neat cuts.
-
4. Cut and Serve: Remove the chilled pan from the refrigerator or freezer. To get perfect squares, use a large, sharp knife. For the cleanest cuts, run your knife under hot water, wipe it dry, and then make a cut. Repeat this process for each cut. Slice the bars into your desired square size. For optimal texture and to prevent the bars from becoming too soft, it is best to keep them refrigerated. Serve cold and enjoy the irresistible combination of peanut butter and chocolate!
Notes and Expert Tips for Success
Serving Temperature: These No-Bake Peanut Butter Bars are absolutely at their best when served chilled. Due to the high content of butter and peanut butter, they will soften significantly at room temperature and are prone to melting in warmer conditions.
For Easier and Cleaner Cutting: If your bars become too firm after extended refrigeration, allow them to sit at room temperature for 5-10 minutes before attempting to cut. For perfectly crisp edges, use a large, sharp knife and clean it with a warm, damp cloth after each cut.
Choosing Your Peanut Butter: For this recipe, we highly recommend using a conventional creamy peanut butter, such as Jif or Skippy. Natural peanut butter, which tends to separate and can be runnier, may result in an overly oily or crumbly base that doesn’t set as effectively.
Graham Cracker Crumbs: You can either purchase pre-ground graham cracker crumbs or easily make your own by pulsing whole graham crackers in a food processor until they are finely ground. Ensure there are no large, uncrushed pieces for a smooth base.
Butter Quality: Using high-quality unsalted butter will contribute to the rich flavor and smooth texture of the base. Ensure it’s fully melted before combining with other ingredients.
Powdered Sugar Adjustment: The amount of powdered sugar in the base can be adjusted slightly. If your peanut butter mixture seems too sticky or loose, add a little more powdered sugar until it reaches a firm, pressable consistency. If it’s too dry, a tiny bit more melted butter can help.
*This recipe has been lightly adapted from a version originally found on Rumbly In My Tumbly.
Nutrition Information
Disclaimer: Nutritional values were calculated using a third-party tool and are provided as an estimation only. Actual nutritional content may vary based on specific ingredients, portion sizes, and preparation methods. This information is intended for general guidance only and should not be considered professional dietary advice.
Sharing this recipe with a direct link to this page is both encouraged and greatly appreciated. However, copying, pasting, or taking screenshots of full recipes for sharing on any social media platform, website, or other publication without explicit permission is strictly prohibited. All content, including text and photographs, is protected by copyright.
Did you whip up these delightful No-Bake Peanut Butter Bars?
We’d absolutely love to see your creations and hear your thoughts! Don’t forget to leave a rating below and share your photos with us. Be sure to follow us on Pinterest and Instagram for a daily dose of inspiring recipes, baking tips, and delicious dessert ideas!
Exciting Variations and Customizations for Your Peanut Butter Bars
While the classic No-Bake Peanut Butter Bars are perfect in their original form, they also serve as a fantastic canvas for your culinary creativity. Don’t hesitate to experiment with these exciting variations to personalize your batch:
- Chocolate Choices: Experiment with different types of chocolate for the topping. Milk chocolate chips will yield a sweeter, creamier top layer, while dark chocolate chips (60% cocoa or higher) will provide a richer, more intense flavor that balances the sweetness of the peanut butter base. You could even use white chocolate chips for a unique look and taste.
- Adding Crunch to the Base: For an extra layer of texture, consider folding in mini chocolate chips, chopped roasted peanuts, or even some shredded coconut into the peanut butter base mixture before pressing it into the pan.
- Creative Toppings: Before the chocolate topping fully sets, sprinkle it with a variety of fun additions. Flaky sea salt enhances the chocolate-peanut butter dynamic beautifully. Colorful sprinkles are perfect for celebrations, while additional crushed peanuts, mini M&M’s, or a dusting of cocoa powder can elevate both the look and flavor.
- Flavor Enhancers: A teaspoon of vanilla extract added to the peanut butter base can deepen its aroma. For a more adventurous twist, a hint of almond extract or even a tiny pinch of cayenne pepper in the chocolate layer can create an unexpected but delicious flavor profile.
- Nut-Free Alternative: If you’re catering to nut allergies, sunflower seed butter (often sold as SunButter) makes an excellent substitute for peanut butter, allowing you to create a delicious and safe nut-free version. Always double-check that all other ingredients are also free from nuts.
- Butterscotch Swirl: For another layer of flavor, drizzle melted butterscotch chips over the chocolate topping before it sets, then swirl gently with a toothpick.
Storage Solutions and Make-Ahead Strategies
These No-Bake Peanut Butter Bars are not only delicious but also incredibly convenient for make-ahead planning, ensuring you always have a delightful treat on hand:
- Refrigerator Storage: To maintain their optimal firm texture and prevent the chocolate from softening, store the bars in an airtight container in the refrigerator. They will remain fresh and delicious for up to 5-7 days.
- Freezing for Longer Shelf Life: For extended storage, cut the bars into individual squares after they are fully set. Place them in an airtight, freezer-safe container, using parchment paper to separate layers and prevent sticking. These bars can be frozen for up to 2-3 months. When you’re ready to enjoy them, simply thaw them in the refrigerator for a few hours or at room temperature for 15-30 minutes until they reach your desired consistency.
- Ideal Make-Ahead Dessert: Planning for a party or a busy week? These bars can be easily prepared a day or two in advance. Simply keep them properly chilled in the refrigerator until it’s time to serve. They actually taste even better after a day, allowing the flavors to fully meld.
- Preventing Stickiness: If stacking bars, always use parchment or wax paper between layers to prevent them from sticking together. This makes it easier to grab a single bar without disturbing the rest.
Frequently Asked Questions About No-Bake Peanut Butter Bars
- Can I use natural peanut butter for this recipe?
- While you might be tempted to use natural peanut butter, we strongly recommend sticking with conventional creamy peanut butter (like Jif or Skippy) for this recipe. Natural varieties, which often separate oil and solids, tend to result in a greasier base that can be too crumbly or fail to set properly, affecting the overall texture.
- How can I prevent the chocolate topping from cracking when I cut the bars?
- The key is to cut the bars when the chocolate layer is “just set.” It should be firm enough that it’s no longer gooey but still slightly pliable when gently pressed. If the chocolate is too hard, let the pan sit at room temperature for 5-10 minutes to soften slightly. Additionally, using a very sharp knife that has been run under hot water and wiped dry before each cut can significantly help achieve clean, crack-free slices.
- What should I do if my peanut butter mixture is too crumbly or too wet?
- If the peanut butter base mixture seems too dry or crumbly, it might need a little more moisture. Try adding melted butter, one tablespoon at a time, until it comes together easily and is pressable. Conversely, if the mixture is too wet or sticky, gradually add more powdered sugar, a tablespoon at a time, until it reaches the desired consistency.
- Is it possible to double this recipe?
- Absolutely! This recipe doubles beautifully. You will need a larger baking vessel, such as two 9×13-inch pans, or one exceptionally large pan if available. Ensure that the layers are not excessively thick, as this could affect the setting time and final texture.
- Are these bars suitable for a gluten-free diet?
- The primary ingredient containing gluten in this recipe is typically the graham crackers. To make these bars gluten-free, simply substitute traditional graham cracker crumbs with a certified gluten-free brand. Always check the labels of all other ingredients to ensure they are also gluten-free.
- Can I use different types of chocolate for the topping?
- Yes, feel free to experiment! Milk chocolate chips will make the topping sweeter, while dark chocolate chips will provide a more intense, less sweet contrast. You can even mix different types of chocolate or add a swirl of white chocolate for visual appeal.
Conclusion: Uncomplicated Perfection in Every Bite
These Easy No-Bake Peanut Butter Bars are more than just a simple dessert; they are a delightful testament to the fact that extraordinary flavor does not always require complex techniques or hours spent in the kitchen. With their irresistible combination of a rich, sweet peanut butter base, the subtle crunch of graham crackers, and a luxurious chocolate ganache topping, they achieve a perfect harmony of textures and tastes that is truly captivating. Whether you are a seasoned baker looking for a quick treat or a kitchen novice eager to impress, this foolproof recipe provides an accessible path to creating a dessert that will win over hearts and taste buds alike. So, gather your ingredients, whip up a batch, and prepare to experience the sheer joy of these delightful, fuss-free bars. Your sweet tooth (and your guests) will undoubtedly thank you!