
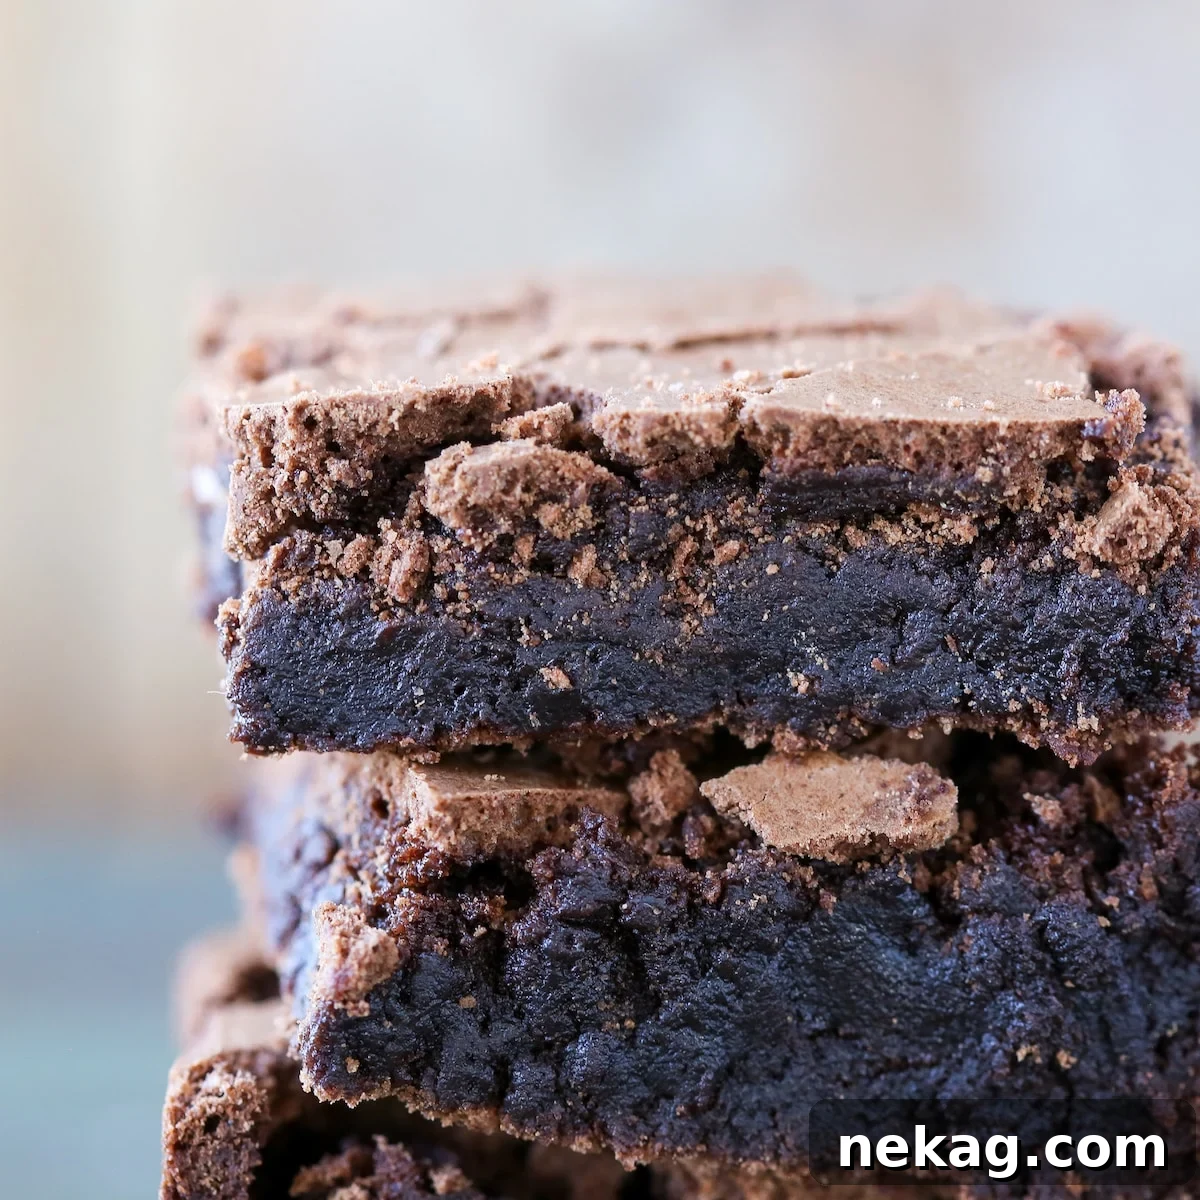
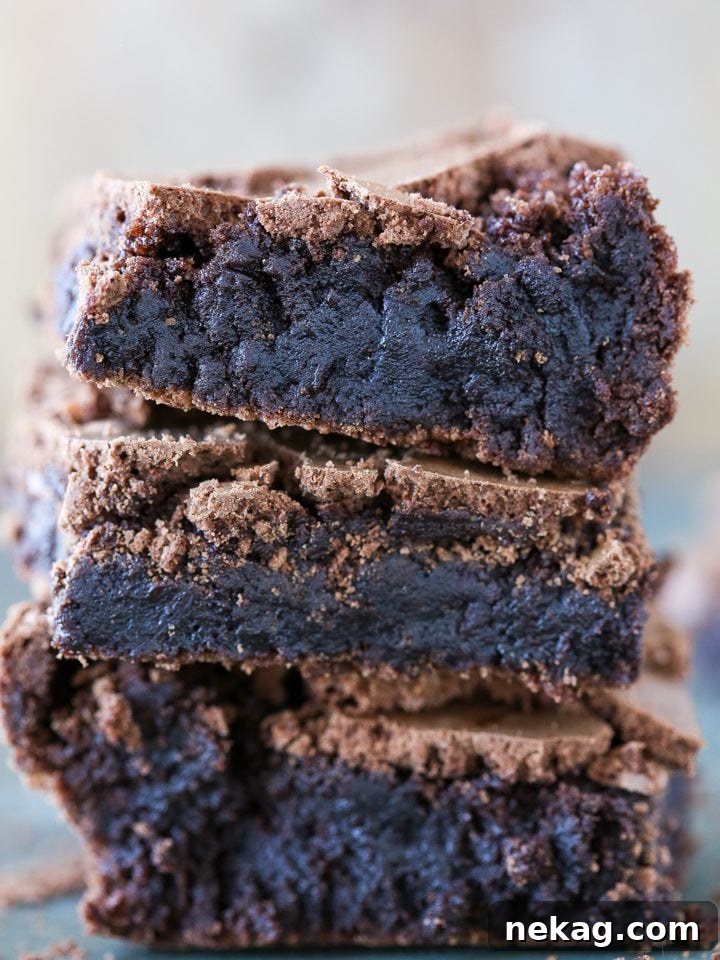
Transform your baking repertoire with a dessert that truly stands out: these irresistible brown butter brownies. Renowned for their gorgeously chewy texture, intensely fudgy interior, and a unique, sophisticated nutty flavor from the slow-caramelized butter (known elegantly as beurre noisette), they promise an elevated brownie experience. Forget ordinary chocolate squares; prepare for a delightful journey into rich, complex flavors and a melt-in-your-mouth indulgence that will captivate every palate.
A Quick Look At The Recipe
This is a brief summary of the recipe’s key aspects. For comprehensive instructions and detailed measurements, please navigate to the full recipe card below.
Jump to Recipe
Prep Time
15 minutes
Cook Time
20 minutes
Total Time
35 minutes
Servings
16 people
Difficulty
Easy
Calories *
199 kcal per serving
Technique
Perfectly brown the butter, skillfully combine with chocolate, master the batter mixing, and bake to achieve that coveted crackly top.
Flavor Profile
Rich and profoundly chocolatey, beautifully complemented by the nutty, deeply caramelized notes derived from brown butter.
* Based on nutrition panel for a standard serving size
Summarize & Save this content on
Featured Comment
⭐⭐⭐⭐⭐ “Making the brown butter had me hovering like a hawk, but it was totally worth it for that nutty depth. Brought these to book club and they vanished before I could blink. Absolutely delicious and a new favorite!” -Lauren
Why You Will Fall in Love with These Brown Butter Brownies
These aren’t just any brownies; they’re a revelation! Here’s what makes this recipe an absolute must-try:
- Elevated Flavor with Brown Butter: The secret ingredient is brown butter! By carefully browning the butter, we unlock a rich, complex, and subtly nutty aroma and flavor reminiscent of toasted hazelnuts. This unique “beurre noisette” quality deepens the chocolate notes without overpowering them, adding an incredible dimension that sets these brownies apart from any other.
- Professional Pastry Chef Expertise: Benefit from years of culinary experience! I’ve refined this brownie recipe over countless batches, perfecting every detail to ensure a consistent, foolproof result every time. From ingredient selection to mixing techniques, you’ll receive all the insider tips and tricks to bake brownies like a pro.
- Effortless Scaling for Any Occasion: Whether you’re baking for a small family treat or catering a large gathering, this recipe is incredibly versatile. It has been successfully scaled for quantities as large as an 80-quart mixer, meaning you can easily adjust the batch size up or down without compromising on quality or texture.
- Unforgettable Texture: Prepare for the ultimate brownie texture! The unique method of incorporating a whole egg foam as the leavening agent creates an exceptionally light and exquisitely fudgy interior. Combined with the richness of melted brown butter, these brownies boast a delightfully chewy edge and a supremely moist, melt-in-your-mouth crumb that is simply divine.
- The Coveted Crinkly Top: Achieve that signature, delicate crackly top that is the hallmark of a perfectly baked brownie. Our precise instructions guide you to this desirable aesthetic, adding to the overall appeal and textural pleasure.
Table of Contents
- Why You Will Fall in Love with These Brown Butter Brownies
- The Magic of Brown Butter (Beurre Noisette)
- Essential Ingredients for Perfect Brown Butter Brownies
- Creative Variations and Flavor Boosters
- Pro Tips for Brownie Perfection
- Step-by-Step Guide to Making Brown Butter Brownies
- Chef Lindsey’s Expert Tip for Clean Cuts
- Recipe FAQs
- More Chewy Bar Recipes You’ll Love
- The Ultimate Brown Butter Brownies Recipe
- Before You Go: Explore More Delicious Baking Adventures
While some of life’s greatest pleasures require a little extra effort, these brown butter brownies are undeniably worth every moment! This recipe involves a few more steps than our incredibly easy one-bowl brownies, but I assure you, the depth of flavor and superior texture achieved are unparalleled. Browning the butter introduces an exquisite nutty undertone that enriches the chocolate without ever dominating it, creating a harmonious and sophisticated taste profile. Furthermore, our specialized whole egg mixing method is a tried-and-true pastry technique, guaranteeing consistently rich, dense, and utterly fudgy brownies every single time.
Once you’ve mastered these indulgent treats, you’ll find tackling other recipes, like my luscious milk chocolate brownies with milk chocolate ganache, to be a breeze! And if you’re eager to expand your brown butter culinary skills, I highly recommend exploring these fresh takes on classic desserts: try my beloved brown butter chocolate chip cookies or the uniquely spiced brown butter cardamom snickerdoodles for more delightful brown butter adventures.
The Magic of Brown Butter (Beurre Noisette)
Before we delve into the full recipe, let’s appreciate the star of the show: brown butter. Also known by its French name, beurre noisette, which literally translates to “hazelnut butter,” this ingredient is a culinary game-changer. It’s crafted by gently heating unsalted butter over medium heat. As the butter melts, the water content evaporates, allowing the milk solids to separate and gracefully sink to the bottom of the pan. Here, these milk solids undergo a fascinating transformation through the Maillard reaction – a complex chemical process responsible for the browning and flavor development in many foods. They caramelize into beautiful golden-brown specks, releasing an intoxicating aroma and a deep, nutty flavor profile strikingly similar to toasted hazelnuts.
This simple technique elevates the flavor of any dish, especially baked goods like these brownies. It adds an incredible depth and complexity that cannot be achieved with regular melted butter. Mastering brown butter is an essential skill for any home baker looking to add a gourmet touch to their creations.
Essential Ingredients for Perfect Brown Butter Brownies
Crafting the perfect brown butter brownie starts with understanding the role of each high-quality ingredient. Here’s what you’ll need and why each component is crucial for achieving that irresistible chewy, fudgy texture and rich flavor:
- Unsalted Butter: Using unsalted butter is paramount as it grants you complete control over the total salt content in your brownies. Different butter brands contain varying amounts of salt, making precise flavor adjustment difficult if you start with salted butter. This control ensures a perfectly balanced taste every time.
- Dark Chocolate (54-65% Cocoa Solids): For an intensely chocolatey and perfectly fudgy brownie, I highly recommend using dark chocolate with at least 54% cocoa solids, ideally up to 65%. This range strikes the perfect balance, providing a deep chocolate flavor that complements the sweetness of the other ingredients without becoming overly bitter. High-quality chocolate bars or pistoles melt more smoothly and contribute significantly to the rich, dense, and fudgy texture.
- Granulated Sugar: Beyond simply providing sweetness, granulated sugar plays a critical role in the texture and appearance of these brownies. The precise sugar ratio contributes to both the chewy consistency and the highly sought-after signature crinkly top that indicates a perfectly baked brownie.
- Light Brown Sugar: The addition of light brown sugar introduces subtle molasses notes that beautifully complement the warm, caramelized, and nutty undertones of the brown butter. It adds an extra layer of complexity to the overall flavor profile, making these brownies even more delicious.
- Kosher Salt: A touch of kosher salt is essential to balance the sweetness and enhance the deep chocolate flavors. It brightens the profile and prevents the brownies from tasting flat or overly sweet.
- Whole Eggs (Cold): The eggs in this recipe serve as the primary leavening agent. By whisking them vigorously with the sugars, we create a light and airy whole egg foam (known as the “ribbon stage”). This method traps air, contributing to the brownies’ light yet fudgy structure, and ensuring a tender crumb. Using cold eggs can sometimes aid in achieving a more stable foam, though room temperature also works well.
- Vanilla Extract: Pure vanilla extract is a flavor enhancer that bridges the gap between the chocolate and the nutty brown butter, adding a warm, aromatic note that rounds out the overall taste.
- All-Purpose Flour: This recipe uses just enough all-purpose flour to bind the batter together, ensuring the brownies remain incredibly fudgy rather than cakey. The carefully balanced flour ratio is key to achieving that desirable dense and chewy texture.
- Dutch-Processed Cocoa Powder: For a more robust, deeper, and rounder chocolate flavor, particularly when paired with dark chocolate, Dutch-processed cocoa powder is my preference. It has a less acidic profile compared to natural cocoa, resulting in a smoother, richer chocolate taste in these brownies and other recipes like my banana brownies.
Refer to the detailed recipe card at the end of this article for precise quantities and additional notes on each ingredient.
Creative Variations and Flavor Boosters for Your Brown Butter Brownies
While these brown butter brownies are divine on their own, they also serve as a fantastic canvas for your creativity. Experiment with these delightful variations to customize your next batch:
- Transform Them into S’mores Brownies! Elevate your brownies into a nostalgic S’mores experience. Begin by preparing my easy no-bake graham cracker crust and press it into the bottom of your baking dish. Pour the luscious brownie batter over the crust, then bake. For an extra touch of indulgence, top the warm brownies with a layer of homemade marshmallow frosting and toast it gently with a kitchen torch or under the broiler until golden brown. It’s a fresh, irresistible take on two beloved classics!
- Irresistible Swirls: Who can resist a beautifully swirled brownie? Before baking, add dollops or pipes of your favorite sweet additions on top of the brownie batter. Try a rich salted caramel sauce for a sweet-and-salty contrast, creamy Nutella for a hazelnut-chocolate dream, or a vibrant fruit jam for a tangy twist. Use a toothpick or a butter knife to gently swirl these additions into the batter for a stunning marble effect and bursts of flavor. This technique also works wonderfully for other baked goods, like my Brown Butter Rum Raisin Banana Bread!
- Personalized Mix-ins and Toppings: The possibilities are endless when it comes to customizing your brownies with various mix-ins and toppings. We’ve successfully experimented with a plethora of options, including colorful M&M’s, extra chocolate chips (milk, white, or dark), creamy peanut butter chips, chopped Reese’s peanut butter cups, crunchy Reese’s Pieces, earthy walnuts, and buttery pecans. Feel free to fold your chosen additions directly into the batter before baking, or sprinkle them generously over the top for added texture and visual appeal. For more inspiration, check out my decadent Caramel Stuffed Brown Butter Snickers Chocolate Chip Cookies!
- A Crown of Frosting: Take your brownies to the next level by topping them with a luxurious frosting. The pairing options are truly limitless! For a classic combination, I suggest a tangy and sweet cream cheese frosting. Alternatively, for a more sophisticated flair, consider the cherry mascarpone frosting from my double chocolate cupcakes, which offers a delightful fruity and creamy contrast.
Pro Tips for Brownie Perfection
Achieving bakery-quality brownies at home is easier than you think with these expert tips, honed over countless hours in the kitchen:
- Prioritize Browning Your Butter: Always begin your baking process by browning the butter before you even think about measuring your other ingredients. This crucial step allows you to devote your full, undivided attention to the butter, ensuring it achieves that perfect golden-brown hue and nutty aroma without burning. Furthermore, it provides ample time for the browned butter and chocolate mixture to cool slightly before it’s incorporated into the eggs, preventing any accidental scrambling.
- Opt for Metal Baking Dishes: While brownies will certainly bake in any dish, a metal baking dish is highly recommended for superior results. Metal conducts heat more efficiently and evenly than glass or ceramic, which helps create a more delightful chewy texture around the edges and significantly aids in forming that iconic, crinkly top that every brownie lover craves.
- Thoroughly Sift Dry Ingredients: It’s a simple step that makes a big difference: always sift your dry ingredients, especially cocoa powder and flour. Cocoa powder has a notorious tendency to clump, and these stubborn lumps can be incredibly difficult to incorporate smoothly once they’re in the wet batter. Sifting prevents lumps, ensures a uniform batter, and reduces the risk of overmixing, which can lead to tough brownies.
- Don’t Overmix the Batter: Once the wet and dry ingredients are combined, fold them gently until just incorporated. Overmixing develops the gluten in the flour, resulting in a dense, tough brownie rather than the desired fudgy, tender crumb.
- Achieve “Ribbon Stage” for Eggs: When whisking eggs and sugar, aim for the “ribbon stage.” This means the mixture will be pale yellow, significantly increased in volume, and when you lift the whisk, the batter should fall back into the bowl in a thick ribbon that holds its shape on the surface for a few seconds before slowly dissolving. This aeration is key to the brownies’ light and fudgy texture.
- Temperature Matters for Chocolate-Butter Mixture: Before combining the chocolate-brown butter mixture with the egg foam, ensure it has cooled to approximately body temperature. If it’s too hot, it can deflate the egg foam or even cook the eggs, leading to a less desirable texture. If it cools too much and begins to solidify, gently rewarm it slightly.
Step-by-Step Guide to Making Brown Butter Brownies
Follow these meticulous instructions to ensure rich, fudgy brownies with that perfect crinkly top every single time! Detailed measurements for all ingredients can be found in the comprehensive recipe card below.
Part 1: The Art of Browning the Butter
Achieving perfectly browned butter is the cornerstone of this recipe. Pay close attention during these steps to unlock that irresistible nutty flavor.
- Step 1: Begin by cutting your unsalted butter into small, uniform cubes. This helps the butter melt and brown more evenly and quickly. Place the butter into a light-colored saucepot (this allows you to easily observe the color changes) and heat it over medium heat.
- Step 2: While the butter is in its initial melting phase, take a moment to prepare your dark chocolate and kosher salt. Measure them accurately and place them into a separate heat-safe bowl. Set this bowl aside, ready for the browned butter.
- Step 3: As the butter melts, it will first become opaque, then gradually transition to a more translucent golden-yellow. Soon, it will begin to foam. This is your cue to become more attentive. With a heat-resistant rubber spatula, gently and continuously scrape the bottom of the pot. This prevents the milk solids from sticking and burning, ensuring even caramelization. Continue cooking and stirring until the butter emanates a delightful, nutty aroma, and the milk solids at the bottom of the pot turn a light golden brown. The butter itself will be a rich, amber color.
- Step 4: Immediately remove the pot from the heat. Carefully pour the hot brown butter over the chopped chocolate and salt in the prepared heat-safe bowl. Be sure to scrape every last bit from the bottom of the pot to capture all those precious brown bits, as they are packed with incredible flavor. Let the hot butter sit over the chocolate for 2-3 minutes; this allows the residual heat to gently melt the chocolate.
- Step 5: After a few minutes, use a whisk to gently combine the chocolate and brown butter mixture. Whisk until the chocolate is fully melted and the mixture is smooth and glossy. It should emulsify beautifully; if it appears slightly separated, don’t worry, it will come together in the batter. Set this mixture aside to cool slightly while you prepare the remaining ingredients. It should be warm to the touch, but not hot.
Expert Browning Test: To confirm your butter is perfectly browned, use your spatula to scrape the bottom of the pot. You should see distinct brown specks clinging to the bottom – these are the perfectly caramelized milk solids that contribute the majority of the rich, nutty flavor. If they are dark brown or black, you’ve gone too far; discard and start over.
Part 2: Crafting the Silky Brownie Batter
This section focuses on the proper mixing techniques to ensure a light, airy, and ultimately fudgy brownie texture.
- Step 6: Preheat your oven to 350°F (175°C) if using a conventional oven (no fan), or 325°F (160°C) for a convection oven. Prepare your chosen baking dish by lining it with two pieces of parchment paper. Criss-cross them in the middle, ensuring they extend up all sides of the dish. This creates “slings” that make removing the cooled brownies incredibly easy.
- Step 7: In the bowl of your stand mixer fitted with the whisk attachment, combine the cold eggs, vanilla extract, granulated sugar, and light brown sugar. Mix on medium speed until all ingredients are just combined. Then, increase the speed to high and beat the mixture until it reaches the “Ribbon Stage.”
- Step 8: Before proceeding, ensure your brown butter chocolate mixture has cooled sufficiently – it should be around body temperature (warm but not hot). If it’s still too warm, you can speed up the cooling process by placing the bowl over an ice bath for a minute or two, stirring constantly. With your stand mixer running on medium speed, slowly and carefully pour the chocolate mixture down the side of the bowl. Take care not to pour directly onto the whisk, as this can cause the chocolate to splatter. Mix until the chocolate is fully incorporated and the batter is a uniform color.
- Step 9: Once the chocolate is fully incorporated, remove the bowl from the stand mixer. Using a rubber spatula, gently fold the batter a few times to ensure everything at the bottom of the bowl, which the whisk might not have reached, is thoroughly combined. Now, sift the cocoa powder and all-purpose flour directly into the batter. Using the rubber spatula, fold the dry ingredients in carefully until just combined. Overmixing at this stage can lead to tough brownies.
Understanding the “Ribbon Stage”: There are three key indicators for the perfect ribbon stage. First, the mixture should have tripled in volume and transformed into a pale, creamy yellow color. Second, when you lift the whisk, the egg foam should fall back onto the surface of the mixture in a thick “ribbon” that holds its shape for several seconds before slowly dissolving back into the batter. Third, if you gently rub a small amount of the mixture between your fingers, you should no longer feel any discernible sugar granules, indicating the sugar has completely dissolved.
When to Add Mix-ins: If you plan to include any optional mix-ins (like chocolate chips, nuts, or candies), this is the ideal moment to add them. Fold them in gently just before the flour and cocoa powder are fully incorporated into the batter. This strategy helps prevent overmixing, allowing you to maintain the precious volume you’ve built into the egg foam.
Part 3: Baking and Cooling for Optimal Indulgence
The final steps for achieving your perfect brown butter brownies.
- Step 10: Pour the rich brownie batter into your prepared baking dish. Use an offset spatula or a rubber spatula to gently spread the batter evenly across the pan, ensuring a consistent thickness for even baking.
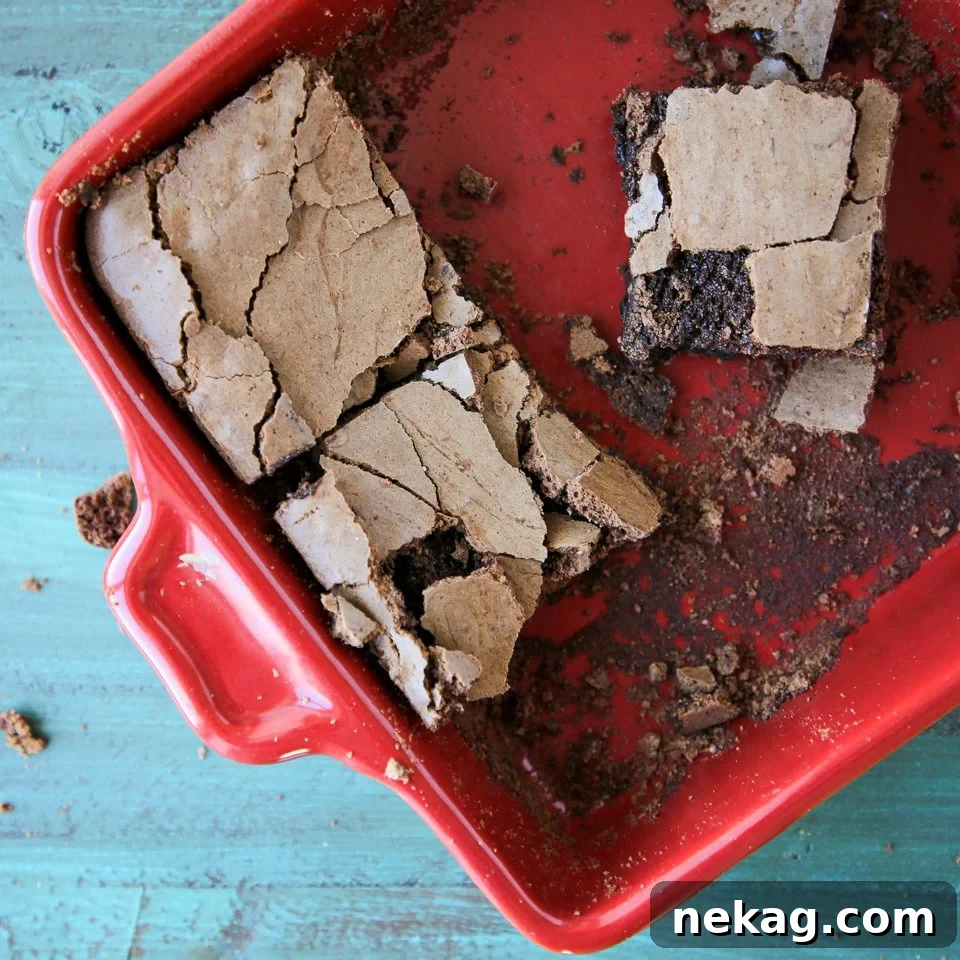
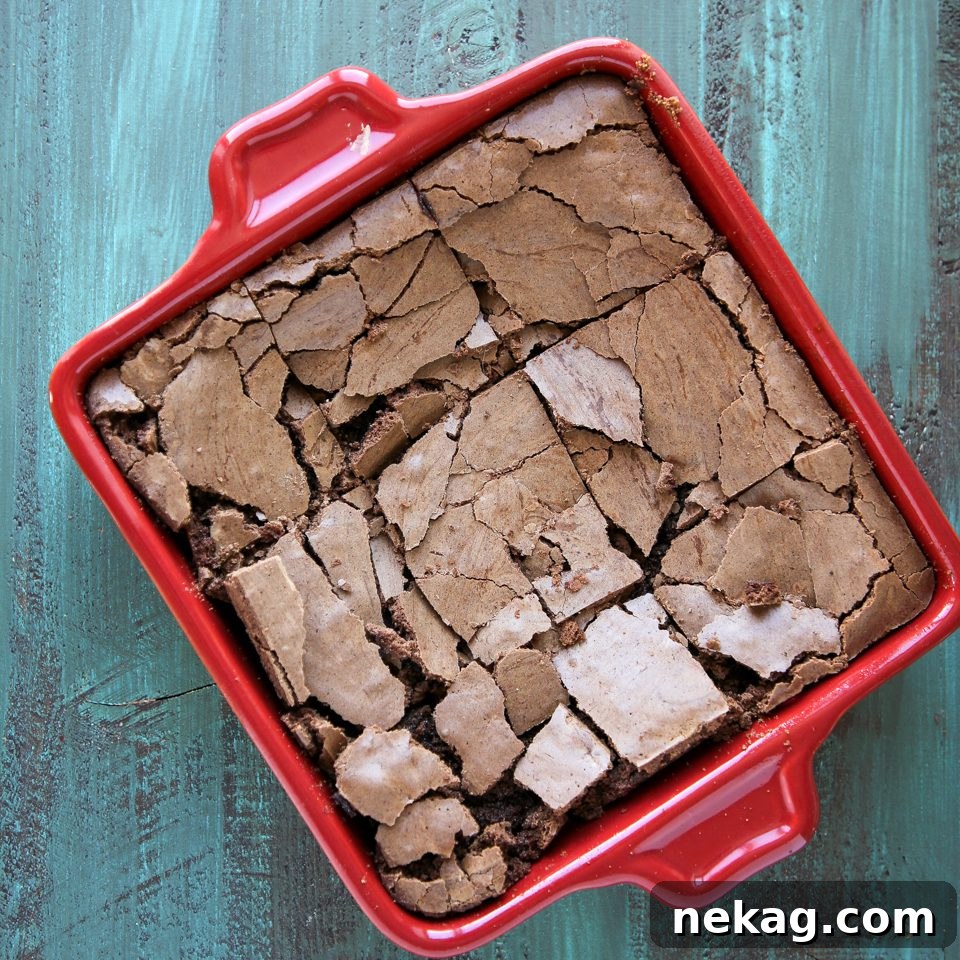
- Step 11: Place the baking dish into your preheated oven and bake for approximately 20 minutes. The ultimate sign that your brownies are perfectly baked is the appearance of a beautiful crackly top. The cracks should extend towards the center of the brownies, and the middle should be slightly puffed, indicating they are set but still wonderfully fudgy. A toothpick inserted into the center should come out with moist crumbs, not wet batter.
- Step 12: Once baked, carefully remove the brownies from the oven. Resist the urge to cut into them immediately! Allow them to cool completely in the baking dish on a wire rack. This cooling process is crucial for the brownies to set properly, ensuring that desirable dense, fudgy texture. If you can wait that long, of course!
Chef Lindsey’s Expert Tip for Clean Cuts
For the neatest, most aesthetically pleasing brownie squares or rectangles, patience is key! Allow your brownies to cool completely to room temperature first. Then, for an extra professional touch, place them in the refrigerator or freezer until they are thoroughly chilled and firm. Before each cut, run your sharp knife under hot water, then wipe off any excess water to ensure it’s clean and warm. Make your cut, then wipe the knife clean again and repeat the process for subsequent cuts. If I’m feeling particularly meticulous, I’ll even use a clear ruler to mark all four sides of the brownie slab before cutting, guaranteeing perfectly equal portions every time!
Recipe FAQs
To maintain their optimal freshness and chewy texture, store your brown butter brownies well-wrapped in plastic wrap or in an airtight container at room temperature for up to 3 days. For extended freshness, they can be kept in the refrigerator for up to a week. For even longer storage, wrap them tightly in plastic wrap and then aluminum foil, or place them in an airtight freezer-safe container, and freeze for up to 2 months. Thaw at room temperature before serving.
Absolutely! This recipe is highly scalable, provided you have a sufficiently large mixing bowl and appropriately sized baking dishes to accommodate the increased volume. When working with larger quantities, be mindful of the egg whipping process; you need enough space in your bowl to allow the eggs to reach the ribbon stage effectively without overflowing when the chocolate mixture is added. Ensure your baking pans are deep enough to prevent spillage and allow for proper heat distribution during baking.
Yes, you can certainly halve or even quarter this recipe for a smaller batch. However, if reducing the recipe to use fewer than two eggs, it’s advisable to mix the batter by hand or with a handheld electric mixer. A stand mixer’s whisk attachment may not effectively reach and aerate such a small volume of eggs at the bottom of the bowl, making it difficult to achieve the desired “ribbon stage.” Hand mixing will give you better control and prevent ingredients from splattering.
These brownies are exceptional on their own, but for an extra special treat, consider serving them warm with a generous scoop of creamy vanilla bean ice cream on top – a truly classic and irresistible combination! You can also drizzle them with my luscious chocolate fudge sauce or a delicate creme anglaise for an elegant presentation. They also pair wonderfully with fresh berries or a dollop of whipped cream.
More Chewy Bar Recipes You’ll Love
Brownies & Bars Recipes
Maple Pecan Caramel Blondie
Brownies & Bars Recipes
Caramel Brownie Recipe
Brownies & Bars Recipes
The Best Fudgy Brownie Recipe
Brownies & Bars Recipes
Classic Chewy Blondies Recipe
If you’ve had the pleasure of trying this exquisite recipe and loved it as much as we do, please consider leaving a 🌟 star rating and sharing your feedback in the comments section below. Your thoughts and experiences truly brighten my day and help others discover these delicious treats!
Brown Butter Brownies
Comment
Print Recipe
Ingredients
- ½ cup all-purpose flour
- ½ cup cocoa powder
- ½ cup chopped dark chocolate
- ¾ cup unsalted butter
- 1 cup granulated sugar
- 2 tablespoons light brown sugar
- ¾ teaspoon kosher salt
- 3 cold eggs
- ½ tablespoon vanilla extract
Instructions
Brown the butter:
-
Cut the unsalted butter into small cubes and place in a light-colored saucepot. Heat over medium heat. Cutting into small cubes helps the butter melt and brown more evenly and quickly.
-
While the butter is melting, measure your dark chocolate and kosher salt into a separate heat-safe bowl and set aside.
-
The butter will turn from opaque to translucent, then begin to foam. At this stage, use a rubber spatula to continuously scrape the bottom of the pot. Continue cooking until the butter smells nutty, and the milk solids at the bottom are light golden brown.
-
Immediately pour the hot brown butter over the chocolate and salt in the prepared bowl. Scrape all brown bits from the bottom of the pot, as these contain intense nutty flavor. Let the mixture sit for a few minutes to allow the chocolate to melt, then whisk until fully combined and smooth.
-
Whisk the chocolate-butter mixture until it’s smooth and emulsified. If it separates slightly, that’s acceptable. Set it aside to cool to body temperature while you measure the rest of your ingredients.
Making the Batter:
-
Preheat the oven to 350°F (conventional, no fan) or 325°F (convection). Line your desired baking dish with two pieces of parchment paper criss-crossed to create “slings” that extend up all sides.
-
In a stand mixer bowl with the whisk attachment, add the eggs, vanilla extract, granulated sugar, and light brown sugar. Mix on medium speed to combine, then increase to high speed and beat until the mixture triples in volume, becomes pale yellow, and reaches the “Ribbon Stage.”
-
Ensure the brown butter chocolate mixture has cooled to about body temperature. If needed, cool it over an ice bath. With the mixer on medium speed, slowly and carefully pour the chocolate mixture down the side of the bowl, avoiding the whisk, until fully incorporated.
-
Remove the bowl from the mixer. Use a rubber spatula to fold the batter a few times to ensure everything at the bottom is combined. Sift in the cocoa powder and all-purpose flour. Gently fold until just incorporated. If adding mix-ins, fold them in at this point before the flour is fully mixed.
Baking and Cooling:
-
Pour the batter into your prepared baking dish. Use an offset spatula or rubber spatula to spread the batter evenly.
-
Bake in the preheated oven for approximately 20 minutes. The brownies are done when a crackly top forms, the cracks extend towards the middle, and the center is slightly puffed. A toothpick inserted should come out with moist crumbs.
-
Remove the brownies from the oven and allow them to cool completely in the pan on a wire rack before cutting. Patience is rewarded with perfectly fudgy, set brownies!
Video
Notes
Flavor Tips – For the most intense nutty flavor, ensure your butter is browned sufficiently, looking for those golden-brown milk solids sticking to the bottom of the pan. This is where the magic happens!
Variations – The options for customizing these brownies are truly endless! Feel free to fold in any type of chocolate (white, milk, dark), your favorite nuts (walnuts, pecans, almonds), or various candies (M&Ms, chopped candy bars) to create your unique masterpiece.
Storage – Store the cooled brownies well-wrapped in plastic wrap or in an airtight container at room temperature for up to 3 days, or in the refrigerator for up to a week. They also freeze beautifully for up to 2 months.
Nutrition
Before You Go: Explore More Delicious Baking Adventures
Thank you for embarking on this delightful baking journey with a recipe that has been meticulously tested and perfected by a professional chef. I sincerely hope you enjoyed creating and savoring these exceptional brown butter brownies, a true testament to how simple techniques can yield extraordinary flavors.
Don’t let your culinary exploration end here! I invite you to delve into our other collection of chef-developed bar recipes. If you’re a devoted chocolate lover, you absolutely must try my definitive fudgy brownie recipe, guaranteed to satisfy your deepest chocolate cravings. And for those who have now mastered the magic of browned butter, put your newfound skill to brilliant use with the exquisite brown butter icing featured on my Chewy Chocolate Chip Pumpkin Cookies. Happy baking!