
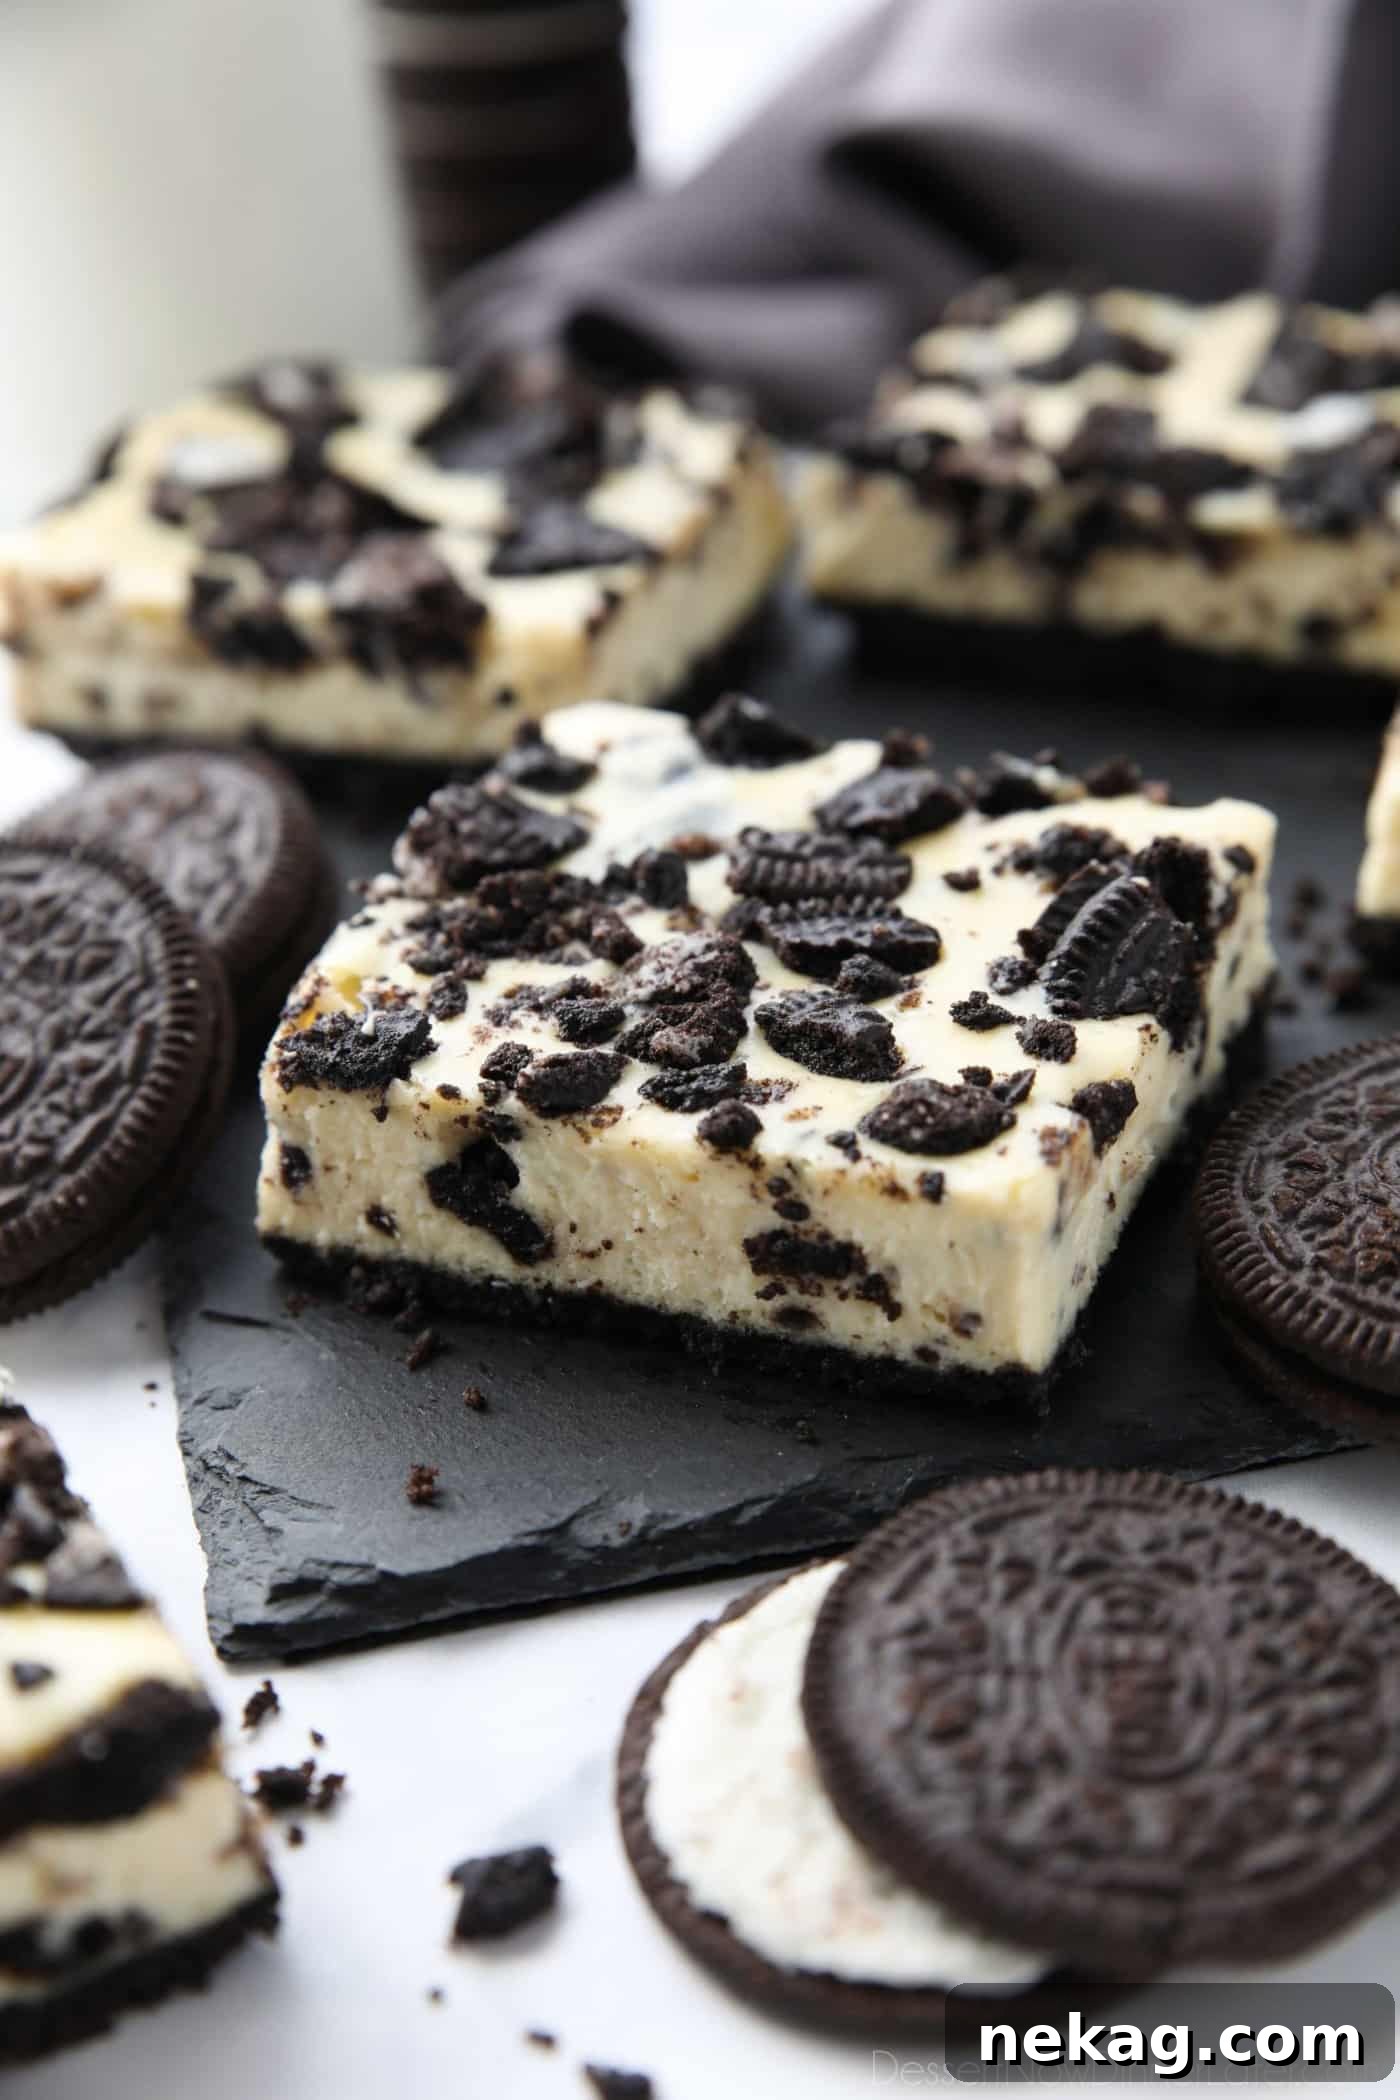
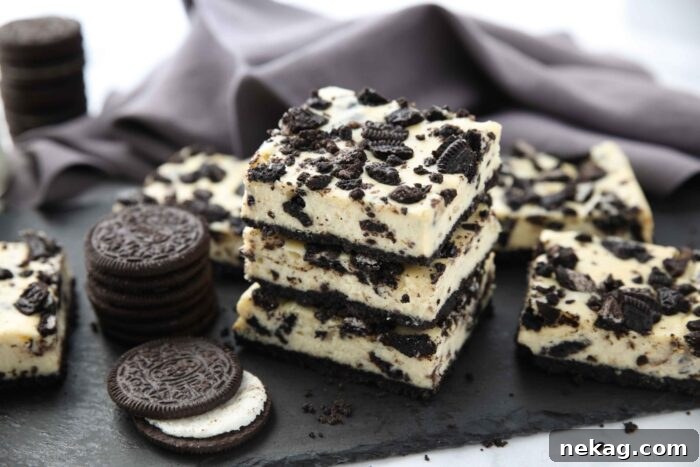
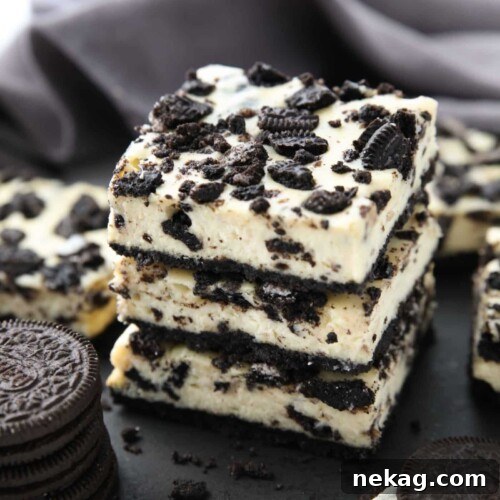
Welcome to the ultimate indulgence for every cookie lover! These **Oreo Cheesecake Bars** are a dream come true for anyone craving the classic cookies and cream combination, elevated to a decadent new level. Imagine a rich, chocolatey Oreo cookie crust, perfectly complementing a velvety vanilla cheesecake filling, generously studded with crunchy Oreo pieces both inside and on top. This isn’t just a dessert; it’s an experience waiting to happen, a symphony of textures and flavors that will leave you wanting more.
Whether you’re hosting a party, looking for a treat to brighten your day, or simply a die-hard Oreo fan, these cheesecake bars are guaranteed to be a hit. They’re straightforward to make, portable, and utterly irresistible. Forget complicated desserts; this recipe brings gourmet flavor to your kitchen with minimal fuss.
**Craving more delightful Oreo desserts?** Explore these fantastic recipes to satisfy your sweet tooth:
Cookies and Cream **CUPCAKES**,
Oreo **FUDGE**,
Cookies and Cream **COOKIES**,
Oreo **MONKEY BREAD**,
Cookies and Cream **POPCORN**, or
Cookies and Cream **DONUTS**.
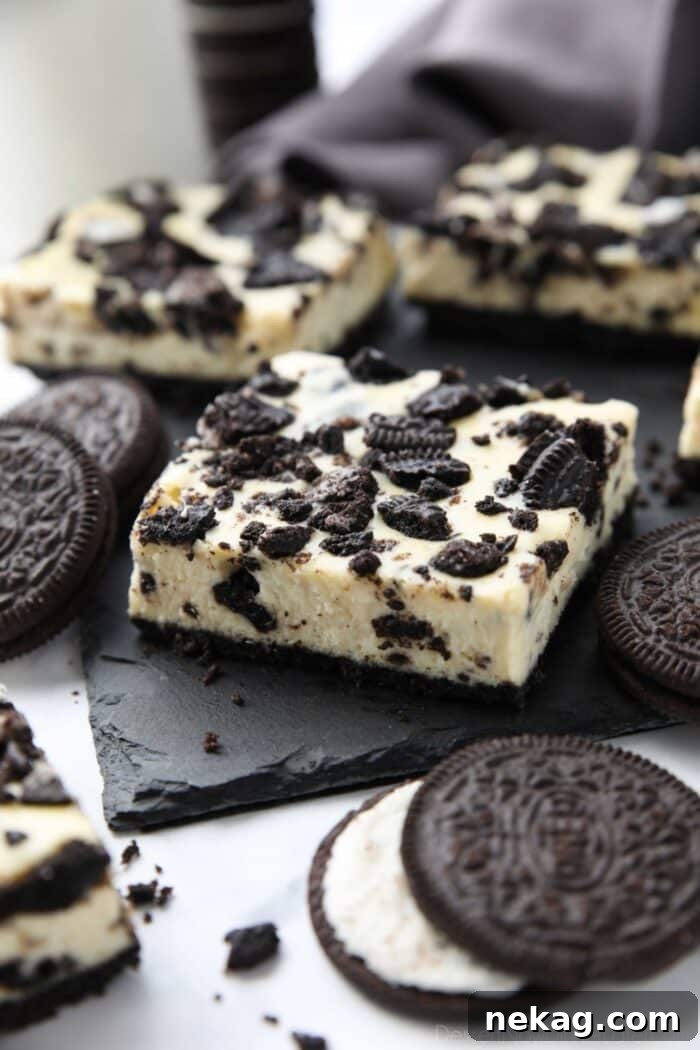
The Irresistible Allure of Oreo Desserts
Are you a huge fan of Oreo desserts? If so, you’re in excellent company! Oreos hold a special place in the hearts of dessert lovers worldwide, and for good reason. Their iconic chocolate wafers and sweet cream filling offer a distinct flavor and texture that transforms any dessert into something extraordinary. From simple milk and cookies to elaborate cakes, Oreos are a universally beloved ingredient, making them the ultimate foundation for a wide array of treats.
My affection for Oreos runs deep, leading me to experiment with homemade versions that capture their essence while offering a unique twist. For instance, my Homemade Mint Oreos feature a vibrant mint buttercream nestled between crisp, yet tender, dark chocolate cookies. It’s a refreshing take on a classic that mint chocolate enthusiasts adore.
Then there are my original Homemade Oreos, which deviate slightly from the store-bought crunch. These are crafted with soft, fudgy chocolate cookies – almost brownie-like in their richness – embracing a luscious vanilla cream filling. For those who enjoy a tangier note, they’re also fantastic with my cream cheese frosting in the middle. While they might be less “classic” in their crunch than the packaged variety, their soft texture evokes the nostalgic feel of Oreo Cakesters, without being as cake-y as a traditional whoopie pie. These homemade options highlight the versatility of the Oreo flavor profile, showcasing how this simple cookie can inspire diverse and delicious creations.
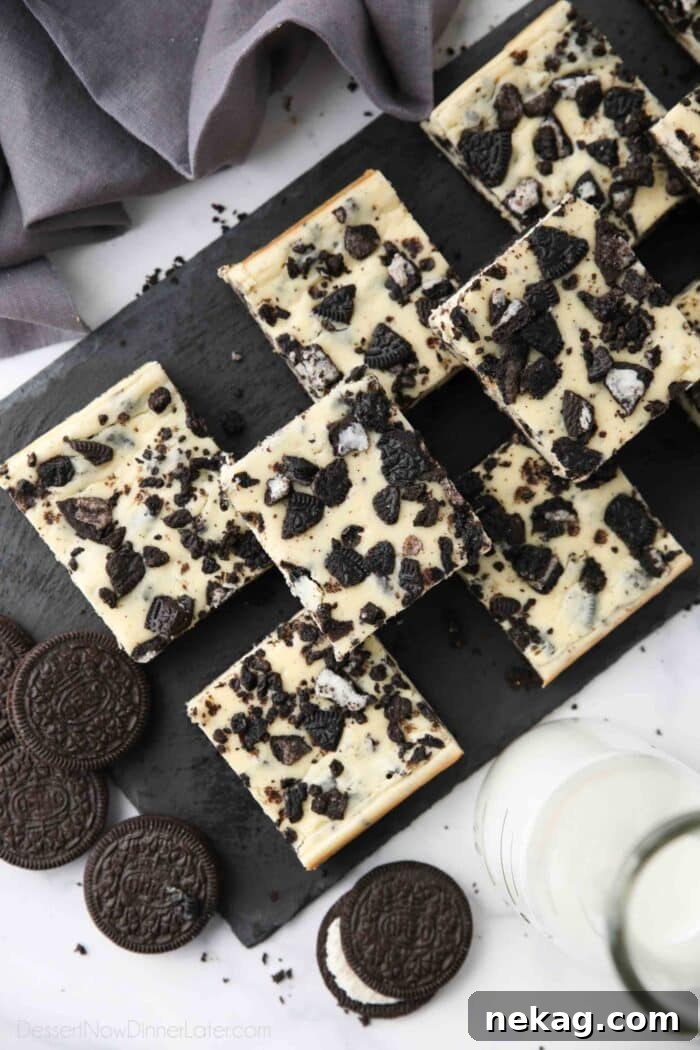
Introducing Our Star: Oreo Cheesecake Bars
While homemade Oreos are a delight, there’s nothing quite like the convenience and consistent quality of good old store-bought Oreo cookies, especially when they form the irresistible foundation for recipes like these heavenly Oreo Cheesecake Bars. This recipe capitalizes on the beloved taste and texture of Oreos, transforming them into a show-stopping dessert that’s surprisingly easy to achieve.
Oreos are, without a doubt, the undisputed essence of **cookies and cream desserts**. My obsession with cookies and cream everything knows no bounds, and these cheesecake bars truly embody that passion. They perfectly marry the crunch of the cookie with the smooth decadence of cheesecake, creating a dessert that’s both familiar and exciting.
These aren’t just any cheesecake bars; they are the **ultimate cookies and cream combination**, meticulously crafted to deliver maximum flavor and texture in every bite. Here’s what makes them so incredibly special:
- A **rich, chocolatey Oreo cookie crust** forms the sturdy base, providing a delightful crunch and deep cocoa flavor that sets the stage for what’s to come.
- A **creamy, luscious vanilla cheesecake filling** that’s smooth as silk, offering a sweet and tangy contrast to the cookie crust. Its velvety texture melts in your mouth.
- **Generous amounts of extra Oreo cookies** are incorporated, not just folded into the filling but also sprinkled lavishly on top, ensuring that classic cookies and cream taste and satisfying crunch are present in every single forkful.
Cookies and Cream is, in my humble opinion, THE BEST FLAVOR, and it shines brilliantly in these creamy, dreamy Oreo cheesecake bars. The blend of sweet, tangy, smooth, and crunchy creates a dessert that’s both comforting and gourmet. Get ready to impress your taste buds and your guests, because I’m thrilled to show you exactly how to make this show-stopping recipe! Let’s dive into the simple steps to create these phenomenal treats.
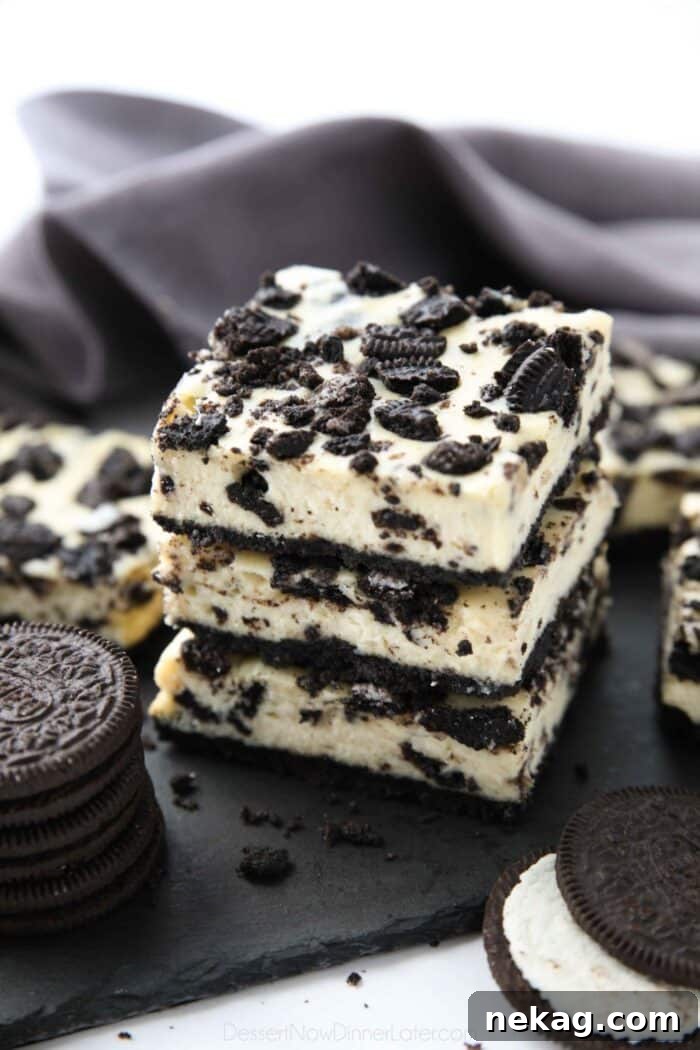
Crafting the Perfect Oreo Crust
The foundation of any great cheesecake bar is its crust, and for our Oreo Cheesecake Bars, we’re building a truly spectacular one. This chocolate Oreo cookie crust provides the perfect contrast to the creamy filling, adding a delightful crunch and intense cocoa flavor. Precision is key here to ensure a sturdy and flavorful base.
NOTE: For this recipe, you will need a total of **40 regular Oreo chocolate sandwich cookies**, carefully divided. It’s often easiest to purchase a family-size package to ensure you have enough. Make sure to use original Oreos, not Double Stuf, as the extra cream can alter the crust’s texture.
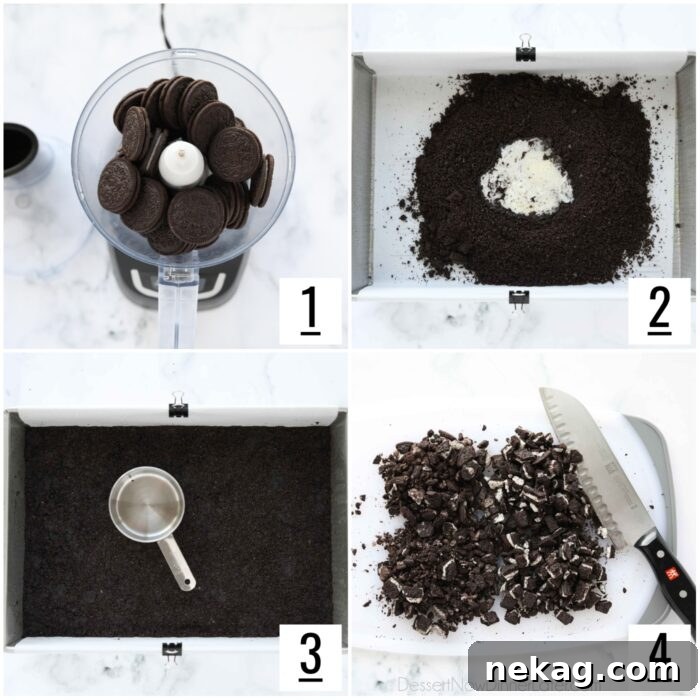
- **Prepare the Oreo Crumbs:** Begin by placing **26 of your Oreo cookies** into a food processor. Process these cookies until they are finely ground into consistent crumbs. The finer the crumbs, the more compact and stable your crust will be.
- **Combine with Butter:** Empty the finely ground crumbs into a **13×9-inch baking pan**. Ensure this pan has been lined with parchment paper, leaving a generous overhang on two sides. This overhang will be crucial later for easily lifting the entire cheesecake out of the pan. Add the pre-melted butter to the crumbs and stir thoroughly until all the crumbs are evenly coated. The butter acts as a binder, creating a cohesive crust.
- **Press and Bake:** Firmly press the buttered Oreo crumbs evenly into the bottom of the prepared pan. Use the back of a spoon or the bottom of a flat glass to compact them tightly. This creates a dense, sturdy crust. Bake the crust in a preheated oven for **10 minutes**. This brief bake time helps to set the crust, preventing it from becoming soggy once the filling is added. After baking, transfer the pan to a cooling rack.
- **Chop Remaining Oreos:** Take the remaining **14 Oreo cookies** and roughly chop them into semi-big pieces. These will be incorporated into the cheesecake filling and sprinkled on top for an added burst of Oreo flavor and texture. Set these aside until needed.
A perfectly pressed and slightly baked crust ensures that your cheesecake bars will hold their shape beautifully and offer that satisfying crunch with every bite.
Crafting the Velvety Oreo Cheesecake Filling
The heart of these delicious bars is the creamy, smooth vanilla cheesecake filling, generously studded with those delightful Oreo pieces. Achieving the perfect texture and preventing cracks in your cheesecake relies heavily on a few key techniques, starting with the temperature of your ingredients.
TIP: For the silkiest, most evenly baked cheesecake filling, it is absolutely essential that all refrigerated items (cream cheese, sour cream, and eggs) are brought to **room temperature** before you begin mixing. This helps the ingredients blend smoothly, preventing lumps, overmixing, and ultimately, cracks in your finished cheesecake. Plan ahead and remove these items from the fridge approximately **1 hour** before you intend to start baking.
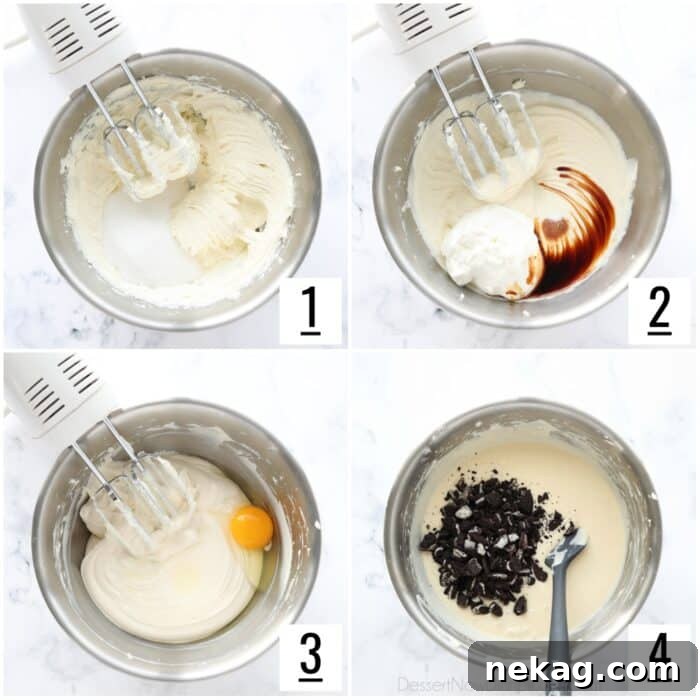
- **Cream the Cheese and Sugar:** In a large mixing bowl, use an electric hand mixer to beat the room temperature block-style cream cheese on medium speed. Continue beating until the cream cheese is completely smooth and creamy, with no lumps remaining. Once smooth, add the granulated sugar and blend well until fully incorporated. Stop and scrape down the sides of the bowl with a silicone spatula to ensure everything is evenly mixed.
- **Add Wet Ingredients:** Next, beat in the room temperature sour cream, pure vanilla extract, and a pinch of salt. These ingredients add richness, moisture, and a subtle tang that balances the sweetness of the cheesecake. Blend until just combined, then scrape down the bowl once more.
- **Incorporate Eggs Carefully:** Add the large eggs, one at a time. After each egg addition, beat just until it is incorporated into the mixture. It’s crucial not to overmix the batter once the eggs are added, as overmixing can incorporate too much air, leading to a cracked cheesecake. Continue scraping the bowl as needed to ensure a uniform batter.
- **Fold in Chopped Oreos:** Finally, gently fold in half of the roughly chopped Oreos you prepared earlier. Use your spatula to carefully mix them into the cheesecake batter, distributing them evenly without crushing them too much. This ensures delightful pockets of cookie crunch throughout the creamy filling.
By following these steps, you’ll create a perfectly smooth, rich, and flavorful cheesecake filling that’s ready to be paired with its crunchy Oreo crust.
Assemble, Bake, and Cool to Perfection
With your golden-brown Oreo crust cooled and your velvety cheesecake filling prepared, it’s time to bring these components together and transform them into irresistible bars. The baking process is straightforward but requires a keen eye to achieve that signature cheesecake texture.
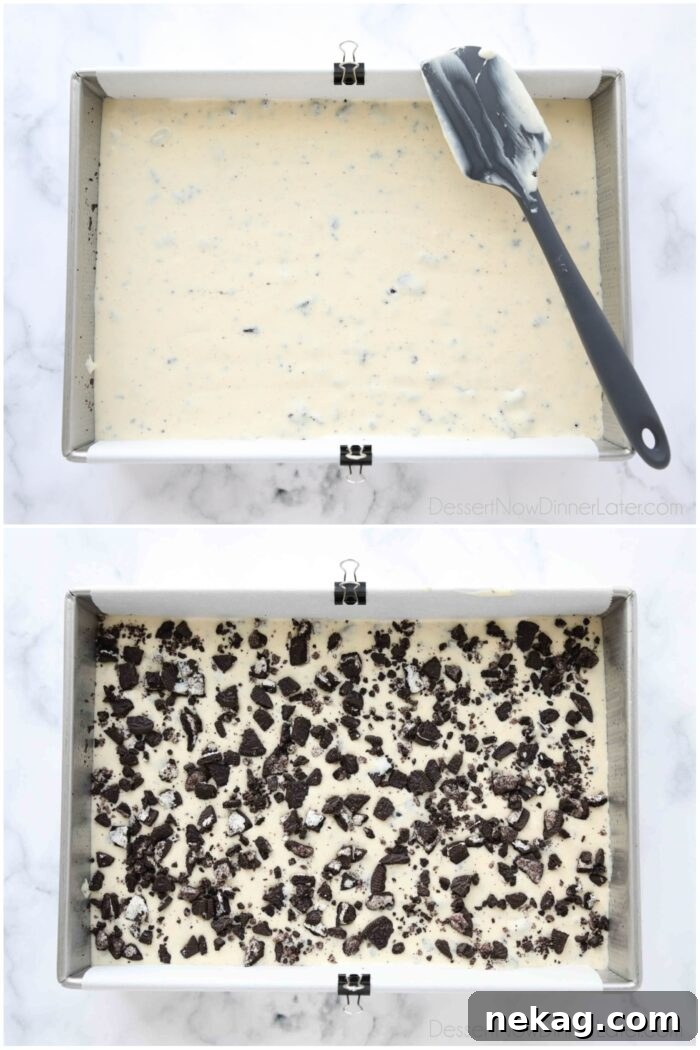
- **Layer the Filling:** Carefully pour the prepared cream cheese mixture over the cooled Oreo crust in the pan. Gently spread the filling evenly across the entire surface of the crust using your spatula. Take care not to disturb the crust too much.
- **Add Topping Oreos:** Sprinkle the remaining chopped Oreos generously over the top of the cheesecake filling. These pieces will add both visual appeal and an extra layer of crunch and flavor to the finished bars.
- **Bake Until Set:** Place the pan into your preheated oven and bake for **35-40 minutes**. The cheesecake is done when the edges appear set and firm, but the very center still has a slight wobble when the pan is gently shaken. This slight jiggle indicates that it will continue to set as it cools, resulting in a perfectly creamy texture. Once baked, carefully transfer the pan to a wire cooling rack and allow it to cool completely at room temperature for **1 hour**. This gradual cooling helps prevent cracks.
Chill, Slice, and Serve
Patience is a virtue, especially when it comes to cheesecake. The chilling step is arguably one of the most crucial, allowing the flavors to meld and the cheesecake to firm up to its ideal consistency. Skipping this step will result in a messy, unset dessert, so resist the urge to cut into it too soon!
- **Thorough Chilling:** Once the Oreo cheesecake has fully cooled to room temperature on the rack, cover the pan loosely with plastic wrap and place it in the refrigerator. Chill for at least **2-3 hours**, or preferably even longer, up to overnight. This extended chilling time is vital for the cheesecake to firm up, making it easier to slice and enhancing its rich flavor.
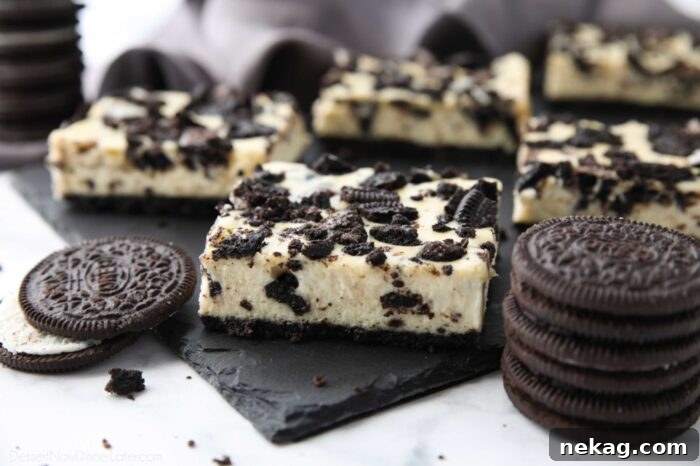
- **Easy Removal and Slicing:** To serve, first run a thin, sharp knife under hot water, wipe it dry, and then carefully run it along the sides of the cheesecake where it meets the pan, just to loosen any stuck bits. Next, use the parchment paper overhang as handles to gently lift the entire cheesecake slab out of the pan and onto a cutting board.
- **Perfect Portions:** Again, warm your knife under hot water and wipe it clean before each cut. This will ensure clean, sharp slices every time. Cut the cheesecake into desired squares or bars. Arrange them beautifully on a platter and serve immediately. Enjoy the satisfying layers of crunchy crust, creamy filling, and delightful Oreo chunks!
Cream Cheese vs. Neufchâtel Cheese in Cheesecake: A Delicious Dilemma
It might surprise you to learn that these particular Oreo Cheesecake Bars were actually made using **Neufchâtel cheese** instead of the more commonly specified **cream cheese**. While they are often used interchangeably in recipes, there are subtle yet significant differences between the two that can impact your cheesecake’s final texture. Understanding these distinctions can help you choose the best ingredient for your personal preference.
By legal definition, **cream cheese** must contain at least 33% milk fat and not more than 55% moisture. This higher fat content contributes to its rich, dense consistency. **American Neufchâtel cheese**, on the other hand, contains approximately 23% milk fat and a slightly higher moisture content. Despite these differences, both cheeses share a wonderfully similar tangy flavor profile, which is characteristic of a great cheesecake.
When it comes to cheesecake specifically, the choice between these two will result in a discernibly different texture, as visually illustrated in this cheesecake graphic:
- Cheesecake prepared with **full-fat cream cheese** will typically be very thick, rich, and have a dense, mousse-like consistency. It’s wonderfully luxurious and holds its shape exceptionally well.
- Cheesecake made with **Neufchâtel cheese** will tend to be softer, lighter, and possess a more pudding-like or custard-like texture. It’s still incredibly creamy but has a less firm set.
Ultimately, the choice between cream cheese and Neufchâtel cheese boils down to **personal preference**. I personally lean towards a **softer-set filling that is undeniably moist**, which is why I often opt for Neufchâtel cheese in my recipes. As an added bonus, it never hurts to **save a few calories and a bit of fat** without sacrificing flavor.
Rest assured, however, that **both full-fat cream cheese or Neufchâtel cheese will work beautifully** in these Oreo Cheesecake Bars. The recipe is forgiving enough to accommodate either choice, allowing you to tailor the texture to your liking. If you enjoy experimenting with different Oreo-cheesecake combinations, be sure to also check out my festive mint Oreo cheesecake bars for another delightful variation!
If You Make This Recipe, Please Rate and Review it in the Comments Below. Your feedback is greatly appreciated! THANKS!
Oreo Cheesecake Bars
Amber Brady
15 minutes
50 minutes
3 hours
4 hours
5 minutes
Pin
Rate
Save
Saved!
15
servings
Ingredients
-
40
Oreo cookies, original NOT Double Stuf (about 1 family size package) -
4 Tbsp
(57 g)
butter, melted -
24 ounces
(678 g)
block-style cream cheese, room temperature; 24 ounces = 3 (8oz) blocks -
¾ cup
(150 g)
granulated sugar -
¾ cup
(180 g)
sour cream, room temperature -
2 tsp
vanilla extract -
¼ tsp
salt -
3
large eggs, room temperature
Equipment
-
Food Processor
-
Silicone Spatula Set
-
Electric Hand Mixer
-
6-Quart Steel Mixing Bowl
-
9×13-inch Pan
-
Parchment Paper
Instructions
-
Preheat oven to 325℉ (160°C). Line a 13×9-inch pan with parchment paper, leaving a 2-inch overhang on two sides for easy lifting.
-
Place 26 Oreos in a food processor and process until finely ground. Empty crumbs into the prepared pan. Add the melted butter and stir until crumbs are evenly coated. Press buttered crumbs evenly onto the bottom of the pan. Bake crust at 325℉ (160°C) for 10 minutes and transfer to a cooling rack.
-
Roughly chop the remaining 14 Oreos into semi-big pieces. Set aside.
-
In a large bowl, use an electric hand mixer to beat the room temperature cream cheese on medium speed until smooth and creamy. Add the granulated sugar and blend well. Scrape down the bowl.
-
Beat in the room temperature sour cream, vanilla extract, and salt. Scrape down the bowl. Add eggs, one at a time, beating well after each addition until just incorporated. Avoid overmixing. Scrape the bowl as needed. Gently fold in half of the chopped Oreos.
-
Pour the cream cheese mixture over the partially baked crust, spreading it evenly in the pan. Sprinkle the remaining chopped Oreos on top.
-
Bake cheesecake at 325℉ (160°C) for 35-40 minutes, until the filling is slightly wobbly in the middle and set on the outside. Transfer to a cooling rack for 1 hour to cool completely to room temperature.
-
Once the Oreo cheesecake has cooled to room temperature, cover the pan loosely and place it in the refrigerator. Chill for at least 2-3 hours, or preferably overnight, to allow it to fully set.
-
To serve, run a hot knife along the sides of the cheesecake to loosen it from the pan. Then, use the parchment paper overhang to lift the cheesecake out of the pan onto a cutting board. Cut into squares, warming and wiping your knife between cuts for clean slices, and serve.
Notes
- Store cheesecake bars in an airtight container in the refrigerator for up to 3-7 days.
- Individual slices can be wrapped tightly with plastic wrap and placed in a freezer-safe zip-top bag for up to 1-2 months. Thaw in the refrigerator overnight before serving.
Tips for Success with Your Oreo Cheesecake Bars
Achieving a perfect batch of Oreo Cheesecake Bars is incredibly rewarding. Here are some extra tips to ensure your dessert turns out flawless every time:
- **Room Temperature Ingredients are Key:** As mentioned, this is critical for a smooth, lump-free cheesecake batter and helps prevent overmixing, which can lead to cracks.
- **Don’t Overmix the Batter:** Once the eggs are added, mix just until combined. Overmixing incorporates too much air, which expands during baking and then collapses, causing cracks.
- **Use a Water Bath (Optional but Recommended):** For an even creamier, crack-free cheesecake, you can bake the pan in a larger roasting pan filled with about an inch of hot water. Ensure your springform pan (if using a different recipe for a full cheesecake) is tightly wrapped in foil to prevent water from seeping in. For bars in a 9×13 pan, this is less common but still possible.
- **Chill Thoroughly:** This cannot be stressed enough. Proper chilling sets the cheesecake and allows the flavors to deepen. It also makes for much cleaner slices.
- **Clean Slices Every Time:** For professional-looking bars, use a sharp knife that has been run under hot water and wiped clean between each cut. This will prevent the cheesecake and Oreos from sticking to the blade.
- **Quality Matters:** While store-bought Oreos are perfect, ensure your cream cheese is block-style, not whipped or spreadable, for the best results.
Variations and Customizations for Your Oreo Cheesecake Bars
These Oreo Cheesecake Bars are fantastic as is, but don’t hesitate to get creative! Here are some ideas to customize them:
- **Different Oreo Flavors:** Experiment with other Oreo varieties for the crust and topping. Mint Oreos, Golden Oreos, or even seasonal flavors can create unique twists.
- **Chocolate Drizzle:** Once chilled, melt some chocolate chips (milk, dark, or white) and drizzle it artfully over the top of the bars for an extra touch of decadence.
- **Whipped Cream Topping:** Serve each bar with a dollop of fresh whipped cream, perhaps sprinkled with a few extra Oreo crumbs.
- **Fruit Companion:** A few fresh berries like raspberries or strawberries can add a lovely tart contrast to the richness of the cheesecake.
- **Caramel Swirl:** Swirl some caramel sauce into the cheesecake batter before baking, or drizzle it over the top after chilling.
Frequently Asked Questions (FAQ)
Here are answers to some common questions you might have about making these delightful Oreo Cheesecake Bars:
-
**Can I use Double Stuf Oreos for the crust?**
While tempting, it’s best to stick to original Oreos for the crust. Double Stuf Oreos have more cream, which can make the crust too greasy and less firm. You can use them for the chopped pieces in the filling or topping if you prefer! -
**How do I prevent my cheesecake from cracking?**
The most common reasons for cracks are overmixing the batter (especially after adding eggs) and sudden temperature changes during baking or cooling. Ensure all ingredients are at room temperature, mix gently, and allow the cheesecake to cool gradually on a wire rack before chilling in the refrigerator. Using a water bath (as mentioned in tips) can also greatly reduce cracks. -
**Can I make these ahead of time?**
Absolutely! Cheesecake is a fantastic make-ahead dessert. These bars need a minimum of 2-3 hours to chill, but they are even better when prepared the day before and allowed to chill overnight. -
**What if I don’t have a food processor?**
No problem! You can place the Oreos in a large zip-top bag and crush them using a rolling pin or the bottom of a heavy pan until finely ground. It requires a bit more effort but works just as well. -
**How do I know when the cheesecake is fully baked?**
Look for edges that are set and slightly puffed, while the center (about 2-3 inches wide) still has a slight jiggle when you gently shake the pan. It will continue to cook and set as it cools.
Nutrition
Serving:
1
bar
|
Calories:
260
kcal
|
Carbohydrates:
34
g
|
Protein:
3
g
|
Fat:
13
g
|
Saturated Fat:
6
g
|
Polyunsaturated Fat:
6
g
|
Cholesterol:
54
mg
|
Sodium:
211
mg
|
Fiber:
1
g
|
Sugar:
24
g
Disclaimer: Nutritional values were calculated using a third-party tool and are provided as an estimation only.
Sharing this recipe with a link is both encouraged and appreciated. Copying/pasting and/or screenshots of full recipes to any social media is strictly prohibited. Content and photographs are copyright protected.
Did you make this?
Don’t forget to leave a rating below and make sure to follow on Pinterest and Instagram for more!