
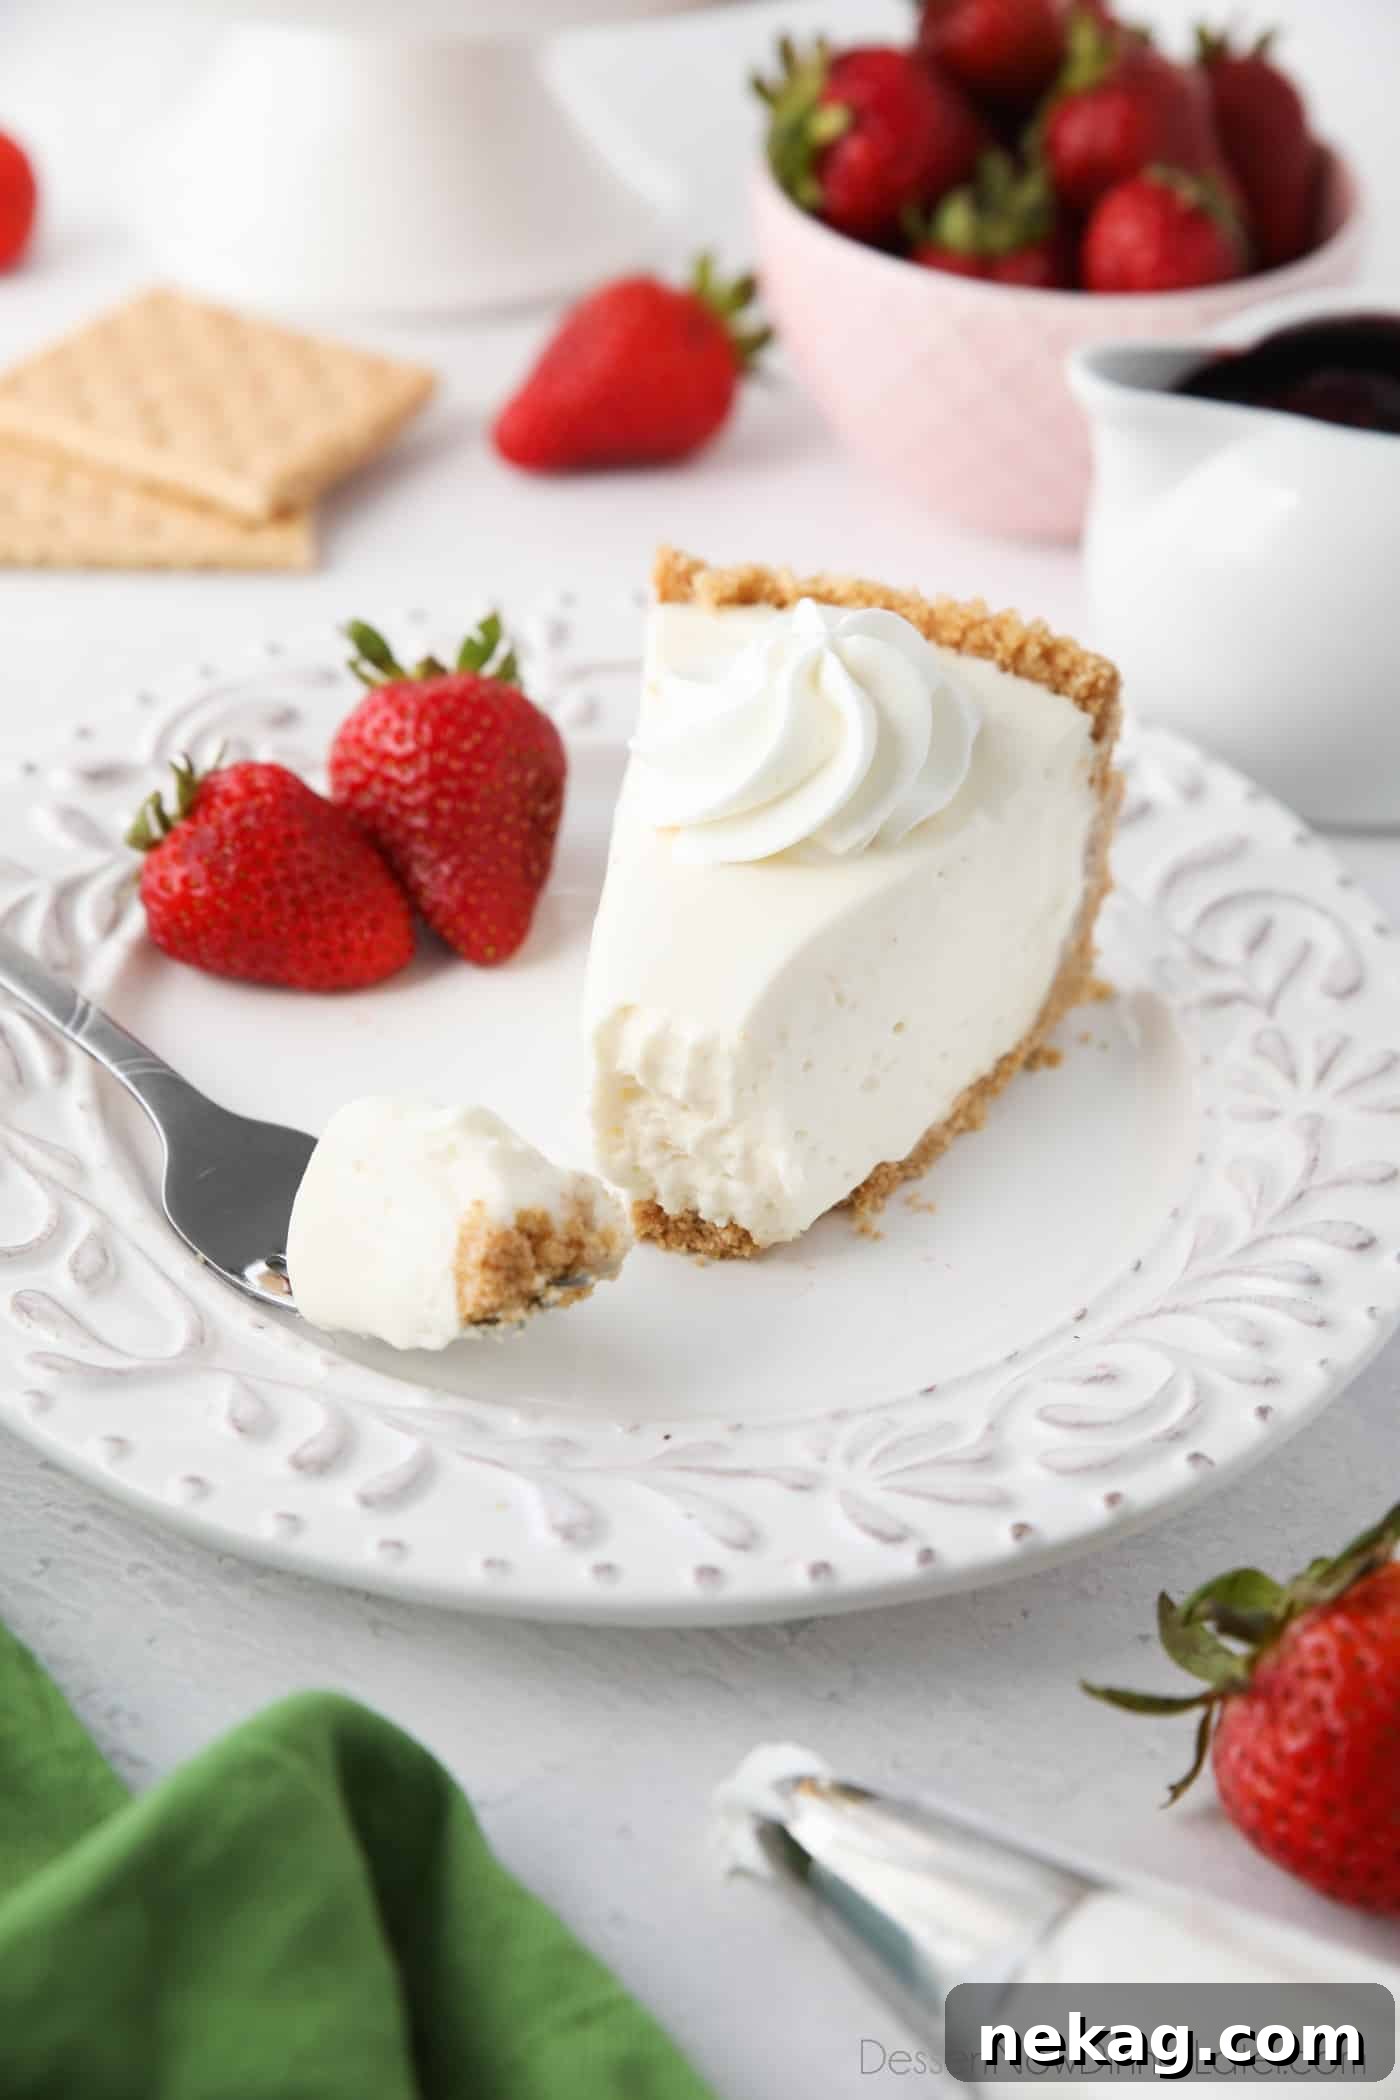
Welcome to the ultimate guide for creating the most luscious and incredibly easy no-bake cheesecake you’ll ever taste! Forget complex water baths and oven anxiety; this recipe delivers a classic, velvety-smooth cheesecake experience without a single minute of baking. Featuring a perfectly crisp, buttery graham cracker crust and a rich, one-bowl creamy filling, this dessert is designed for simplicity and maximum indulgence. Whether you’re a seasoned baker looking for a shortcut or a complete novice eager to impress, our step-by-step instructions and insightful tips will empower you to create a show-stopping dessert that’s ideal for any occasion, from casual summer gatherings to elegant holiday feasts.
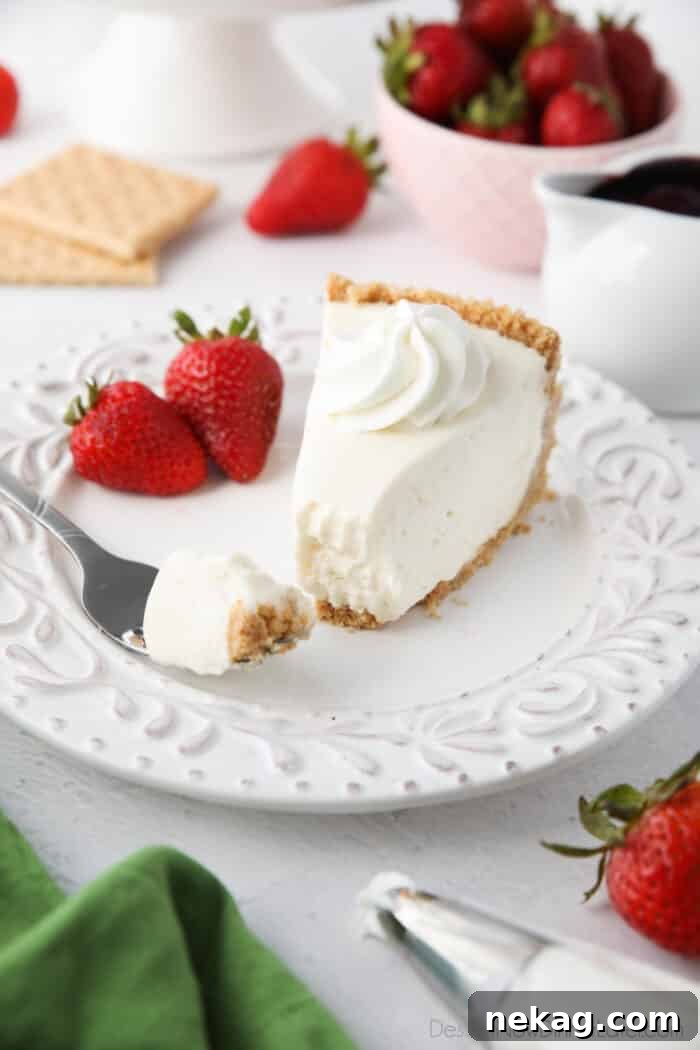
No-Bake vs. Baked Cheesecake: Unveiling the Differences
Cheesecake is a universally adored dessert, a true staple for celebrations and special moments. However, the thought of making a traditional baked cheesecake can be quite daunting, especially for those who aren’t confident in their baking skills. It typically involves a multi-step process: preparing and pre-baking the crust, meticulously crafting a delicate filling, baking it in a water bath to prevent cracks, and then enduring a lengthy chilling period. This intricate method, while yielding spectacular results, requires precision and patience.
Enter the no-bake cheesecake – a revelation for dessert lovers seeking an easier path to creamy perfection. This delightful alternative streamlines the entire process. Instead of oven time, the crust and filling are simply assembled and then allowed to set in the refrigerator. The convenience factor alone makes no-bake cheesecake a winner in many households, especially during warmer months when turning on the oven is less appealing.
Beyond the preparation method, the most significant distinction between these two cheesecake styles lies in their texture. A traditional baked cheesecake is renowned for its firm, dense, and incredibly rich consistency. Its custard-like body, often achieved with eggs, offers a velvety smoothness that slices cleanly and holds its shape beautifully. It’s a dessert that feels substantial and deeply satisfying.
In contrast, a no-bake cheesecake presents a much lighter, airier, and more delicate texture. It’s akin to a luxurious whipped mousse, melting effortlessly in your mouth. This ethereal quality comes from incorporating whipped cream into the cream cheese base, creating a cloud-like consistency that is both refreshing and indulgent. The absence of eggs contributes to this lighter profile.
So, which one is “better”? The answer truly hinges on personal preference. Both types offer an equally delightful sweet, creamy, and utterly delicious experience. If you appreciate a dense, rich, and almost custard-like dessert, the traditional baked version might be your preferred choice. However, if you crave a dessert that is light, fluffy, and effortlessly melts on the tongue, or if you simply value simplicity and speed, the no-bake cheesecake is undeniably superior in ease and a fantastic option for a refreshing treat. When it comes to sheer simplicity and a foolproof approach to cheesecake, the no-bake method emerges as the clear victor every single time.
Mastering the One-Bowl Method for a Flawless Filling
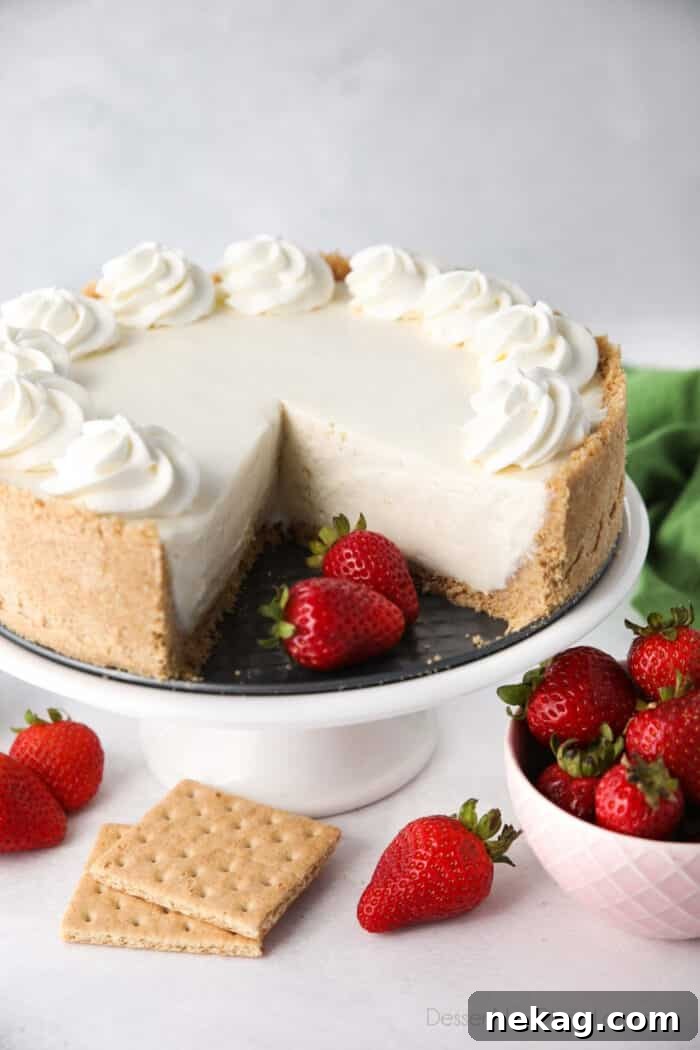
One of the common challenges when preparing a no-bake cheesecake is ensuring the filling achieves that perfect, firm-yet-creamy consistency. The key lies in effectively combining the cream cheese mixture with whipped cream without sacrificing too much of the delicate air that gives it its light, whipped texture. The ideal filling should be thick, smooth, and hold its shape beautifully when chilled.
Many traditional no-bake cheesecake recipes instruct you to beat heavy cream to stiff peaks in a separate bowl and then carefully fold it into the cream cheese mixture. While this method can be effective, it often comes with a few drawbacks. Over-mixing during the folding process can easily deflate the whipped cream, leading to a softer, less stable filling. Moreover, it creates an extra bowl to wash, adding unnecessary steps to your clean-up routine.
Our featured one-bowl method revolutionizes this process, offering a simpler, more foolproof approach to a perfectly firm and fluffy no-bake cheesecake filling. Here’s the clever trick: begin by beating your cold cream cheese in a stand mixer with the paddle attachment until it’s perfectly smooth and lump-free. This initial step is crucial for achieving a silky base. Once the cream cheese is softened and uniform, switch to the whisk attachment. This is where the magic happens! Slowly, while the mixer runs on medium speed, begin to drizzle in the cold heavy cream. Continue to whip the mixture, gradually increasing the speed to high.
What you’ll observe is truly remarkable: the heavy cream will whip and thicken just as it would on its own, but simultaneously incorporate seamlessly with the cream cheese. This innovative technique eliminates the need for a second bowl and the delicate folding process, minimizing the risk of deflating your mixture. The result is a wonderfully light, yet incredibly sturdy, cheesecake filling that whips up beautifully in just one single bowl.
For best results with this “fun trick,” ensure you whip the mixture long enough. You’ll know it’s reached the desired consistency when it’s visibly thick, fluffy, and the whisk attachment leaves distinct ripples and peaks in the cream cheese mixture. The filling will continue to firm up and set beautifully as it chills in the refrigerator, promising a delightful texture with every bite.
Crafting the Perfect Graham Cracker Crust
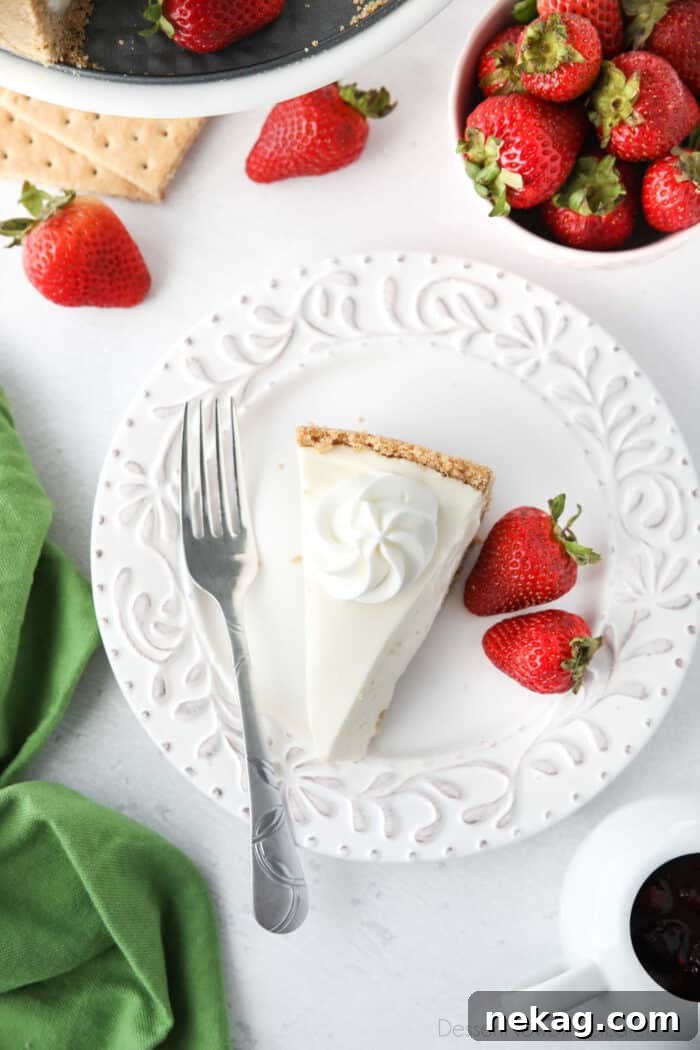
The foundation of any great cheesecake, baked or no-bake, is its crust. For this effortless no-bake cheesecake, we stick with a traditional graham cracker crust – simple to make and requiring absolutely no oven time! A well-made graham cracker crust provides a delightful textural contrast to the creamy filling, adding a buttery, slightly sweet crunch that complements every bite. It’s a crucial element for a balanced and truly satisfying dessert.
To create your ideal graham cracker crust:
- Prepare the Crumbs: Start by crushing graham crackers into fine crumbs. The easiest way to achieve this is by pulsing them in a food processor until uniformly fine. If you don’t have a food processor, you can place the crackers in a large zip-top bag and crush them with a rolling pin. Aim for a consistency similar to fine sand, ensuring there are no large chunks.
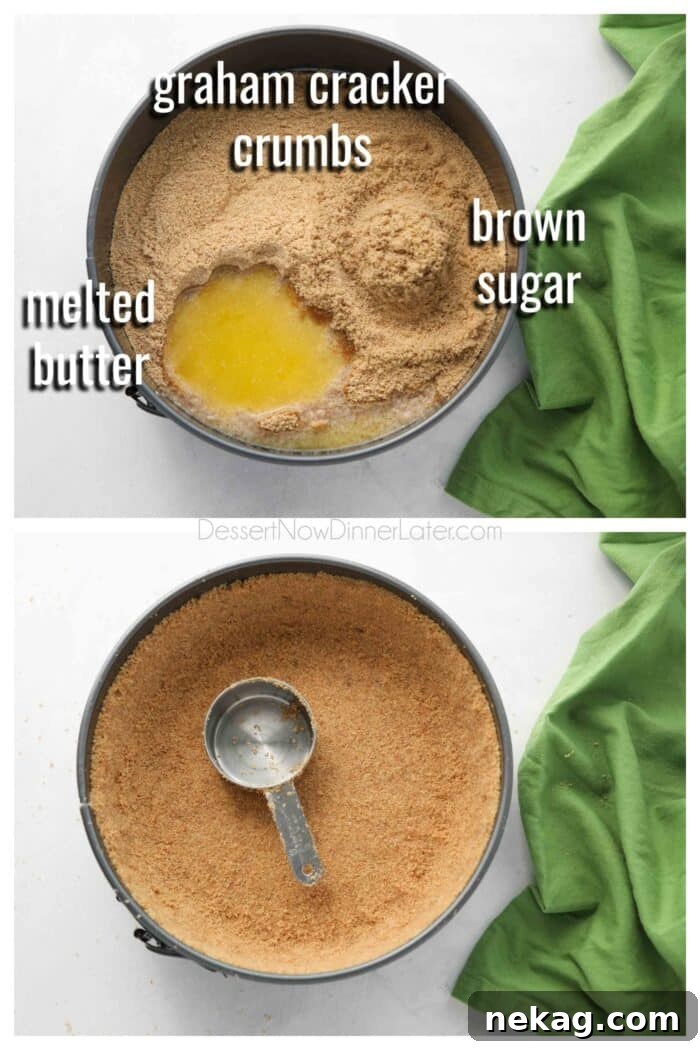
- Combine Ingredients: In a 9-inch springform pan, combine your finely crushed graham cracker crumbs, packed brown sugar, and melted unsalted butter. The brown sugar adds a subtle caramel note and helps bind the crust, while the butter is essential for holding it all together.
- Press and Form: Mix the ingredients thoroughly until the crumbs are evenly moistened and resemble wet sand. Then, press this mixture firmly and evenly onto the bottom and slightly up the sides of the springform pan. Pro Tip: Using the flat bottom of a measuring cup or a glass can help you achieve a perfectly smooth and compact crust, especially around the edges and in the corners of the pan. The more firmly you press, the less likely your crust is to crumble when sliced.
- Chill to Set: Once formed, place the graham cracker crust in the freezer to chill while you prepare the cheesecake filling. This crucial step allows the butter to solidify, creating a sturdy and crisp base that won’t get soggy from the creamy filling. A well-chilled crust is key to a clean slice and an enjoyable texture contrast.
This simple, four-step process ensures a flawless crust every time, laying the perfect foundation for your magnificent no-bake cheesecake. For a delightful variation, consider using chocolate graham crackers or even crushed Oreo cookies for a different flavor profile.
Deconstructing the Delicious No-Bake Cheesecake Filling
The magic of no-bake cheesecake lies in its ability to achieve a firm yet wonderfully light texture without the need for eggs, which are typically used in baked cheesecakes for structure. Instead, the creamy consistency and setting power come primarily from whipped cream, combined with other essential ingredients that enhance both flavor and stability. This recipe celebrates the classic vanilla cheesecake, free from sour cream, for a pure and delightful taste. Each component plays a vital role in creating that irresistible velvety filling.
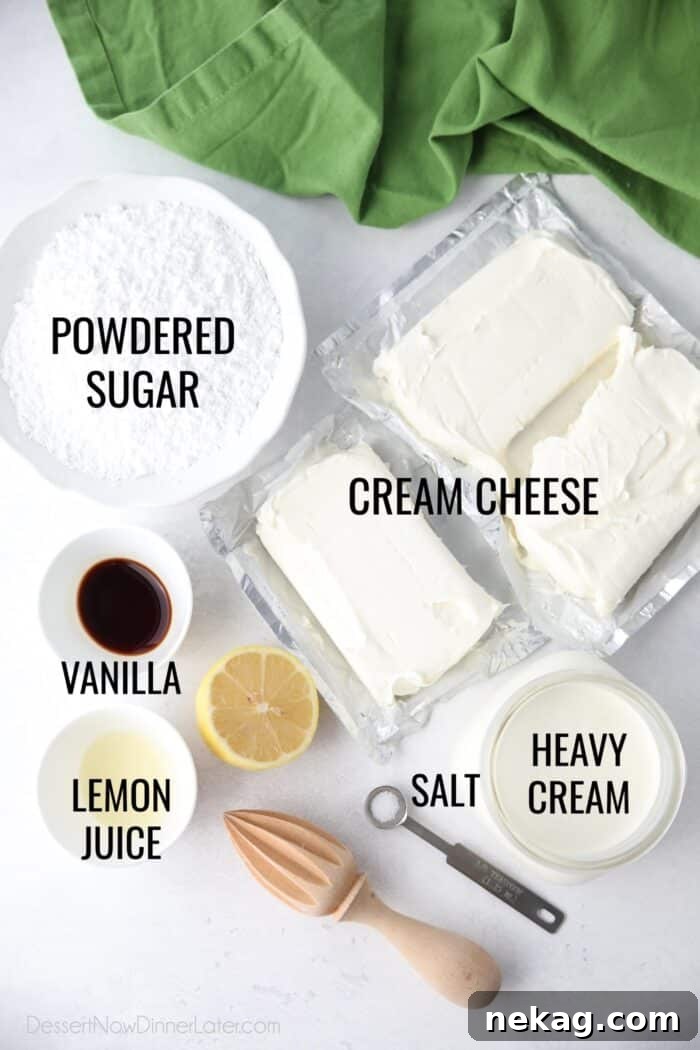
Here’s what you’ll need for this classic no-bake cheesecake filling:
- Cream Cheese: This is the heart of your cheesecake! For a slightly lighter option without sacrificing texture, I often opt for Neufchâtel cream cheese, which is a French-style cream cheese with about one-third less fat than regular cream cheese but maintains a similar rich flavor and consistency. Avoid using fat-free cream cheese, as it contains more water and less fat, which can prevent your cheesecake from setting properly. Always choose full-fat or 1/3 less fat varieties. For optimal mixing and to prevent lumps, I recommend using cold cream cheese directly from the fridge when using the paddle attachment first. While some recipes suggest softening, a good stand mixer paddle attachment should be sufficient to eliminate any lumps, ensuring a smooth base.
- Powdered Sugar (Confectioners’ Sugar): This fine sugar not only sweetens the dessert but also acts as a crucial thickener. Powdered sugar naturally contains a small amount of cornstarch, which is a fantastic stabilizer. This hidden ingredient helps the cheesecake filling to set up beautifully without the need for additional gelatin, contributing to its creamy, stable texture.
- Salt: Just a small pinch of salt is all it takes to elevate and balance the sweetness, enhancing all the other flavors in the cheesecake. It’s a subtle but essential ingredient that rounds out the taste profile.
- Vanilla Extract: A staple in almost any dessert, high-quality vanilla extract provides that comforting, warm, and classic cheesecake flavor. Use pure vanilla extract for the best results.
- Fresh Lemon Juice: A squeeze of fresh lemon juice is a secret weapon that brightens the flavor profile and adds a delicate tang, perfectly complementing the richness of the cream cheese. It prevents the cheesecake from tasting overly sweet and adds a refreshing note.
- Heavy Whipping Cream (or Heavy Cream): This is the setting agent for our no-bake wonder. When whipped, cold heavy cream incorporates air, creating a light, fluffy texture that, when combined with cream cheese, firms up beautifully as it chills. Ensure your heavy cream is very cold for maximum volume and stability when whipping.
Essentially, this no-bake cheesecake filling is a brilliant adaptation of my whipped cream cheese frosting recipe, scaled and refined to perfectly fill an entire cheesecake. It’s a testament to the versatility of classic ingredients and clever techniques!
Preparing the Irresistible No-Bake Cheesecake Filling
Creating the perfect no-bake cheesecake filling is straightforward, especially with our innovative one-bowl method. The key is to follow these steps carefully to achieve a smooth, thick, and perfectly aerated cream that will set beautifully into a delectable cheesecake.
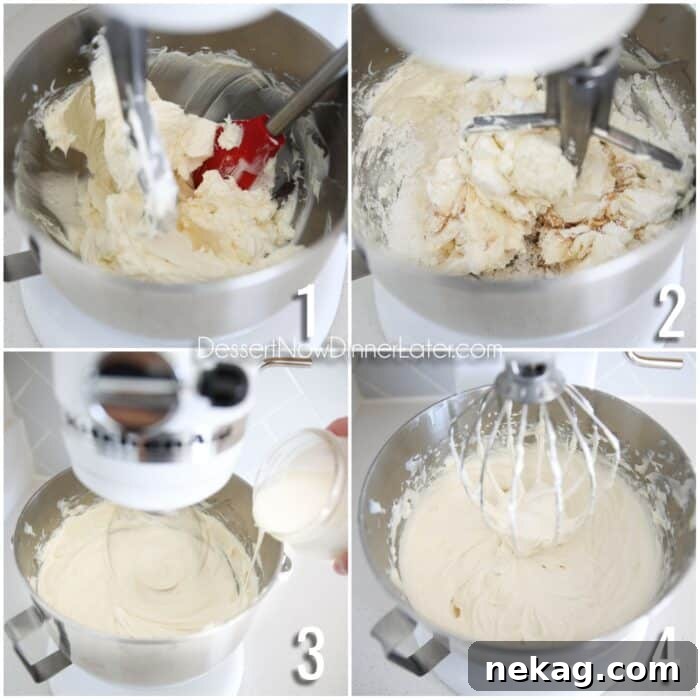
- Beat the Cream Cheese: In the bowl of a stand mixer fitted with the paddle attachment, beat the cold cream cheese on medium speed for about 10-15 seconds. This initial step helps to break down the cream cheese and makes it smooth, removing any potential lumps. After beating, pause to scrape down the sides and bottom of the bowl with a spatula to ensure everything is evenly incorporated.
- Add Sweeteners and Flavorings: To the smooth cream cheese, add the powdered sugar, a pinch of salt, vanilla extract, and fresh lemon juice. These ingredients infuse the cheesecake with its signature sweet, tangy, and aromatic notes. Mix on low speed until all ingredients are just incorporated and no lumps of powdered sugar remain. It’s crucial not to overmix at this stage. Scrape the bowl once more to ensure thorough blending.
- Introduce the Heavy Cream: Switch your mixer attachment from the paddle to the whisk. With the mixer running on medium-low speed, slowly drizzle in the very cold heavy whipping cream. Adding it gradually allows it to incorporate smoothly without splashing and helps begin the whipping process.
- Whip to Perfection: Once all the heavy cream has been added, increase the mixer speed to high. Continue to whip the mixture vigorously until it becomes thick, fluffy, and holds stiff peaks. You’ll notice the filling becoming significantly denser and aerated, leaving distinct ripples and trails from the whisk. It should be firm enough to stick to the whisk when lifted. This whipping action is what gives the no-bake cheesecake its light, mousse-like texture and ensures it will set correctly. Don’t stop whipping until you achieve this thick consistency, as under-whipped filling will not set properly.
This streamlined process not only saves you time and an extra bowl but also consistently produces a stable, rich, and wonderfully light no-bake cheesecake filling that is truly hard to resist.
The Grand Finale: Assemble and Chill for Perfection
With your perfectly chilled graham cracker crust and your luscious, thick cheesecake filling ready, the final steps to creating your magnificent no-bake cheesecake are simple yet crucial. Proper assembly and, most importantly, sufficient chilling time are what transform these individual components into a cohesive, sliceable, and utterly delightful dessert.
To assemble your no-bake cheesecake:
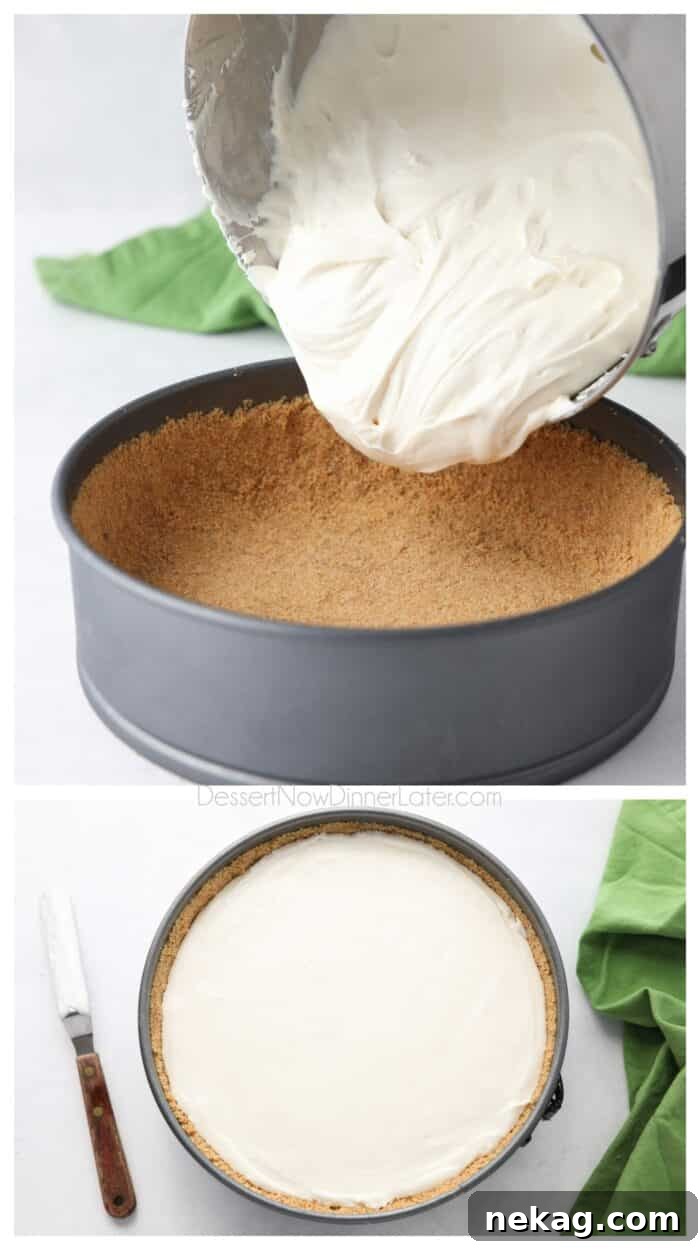
Carefully spoon or empty the entire no-bake cheesecake filling into your prepared and chilled graham cracker crust. Once the filling is in the pan, use an offset spatula or the back of a spoon to gently smooth the top. Aim for an even, level surface. You can also create a subtle swirl pattern for an elegant finish, if desired.
Once the filling is smoothly distributed, it’s time for the most important step: chilling. Cover the entire springform pan tightly with plastic wrap or aluminum foil. This prevents the cheesecake from absorbing any refrigerator odors and helps retain moisture. Then, transfer the covered cheesecake to the refrigerator. For the absolute best results and a perfectly set texture, allow the cheesecake to chill overnight, or for a minimum of 6 to 8 hours. This extended chilling time is non-negotiable for ensuring the filling fully sets, firming up to that ideal sliceable consistency. Rushing this step will result in a soft or wobbly cheesecake that lacks the desired structure. Patience truly is a virtue when it comes to no-bake cheesecakes, yielding a dessert that is worth every moment of anticipation.
Troubleshooting: How to Stiffen a No-Bake Cheesecake
A common concern when making no-bake cheesecakes is ensuring the filling sets to a firm, sliceable consistency. If your cheesecake is still a bit too soft after the initial chilling, don’t despair! There are several steps you can take to encourage it to firm up perfectly. The setting process is primarily driven by the cold, allowing the fats in the cream cheese and heavy cream to solidify and bind the ingredients together.
To ensure your cheesecake filling stiffens and firms up completely, adherence to the recommended chilling time is paramount. It absolutely needs to be refrigerated for a minimum of 6 to 8 hours. However, for truly optimal results, chilling it overnight is highly recommended. The longer it rests in the cold, the more opportunity the fats have to solidify, resulting in a perfectly firm and stable slice. Think of it as allowing the cheesecake to “cure” – the longer it chills, the better its structure and flavor will develop.
If you’ve followed the chilling guidelines and your cheesecake still feels a bit too soft, consider the temperature of your refrigerator. Many fridges are set to a minimum cool temperature to save energy. Dropping the temperature of your fridge slightly for a few hours (just until the cheesecake is firm) can significantly help the setting process. You want your cheesecake nice and cold, ideally between 35-40°F (1-4°C).
Another factor could be the initial whipping of the filling. If the heavy cream wasn’t whipped to sufficiently stiff peaks, or if the mixture was over-mixed and lost too much air, the filling might struggle to set as firmly. Always ensure your heavy cream is very cold before whipping and avoid over-folding if using the separate bowl method, or under-whipping if using our one-bowl technique.
As a last resort, if your cheesecake is still not firm enough even after adequate refrigeration, you can place it in the freezer. Freezing it for 1-2 hours can help it set up beautifully. Once firm, you can transfer it back to the refrigerator to thaw slightly before serving, or even serve it partially frozen for a delightful, ice cream-like dessert, especially on a hot day. Just be mindful not to freeze it for too long unless you intend to store it long-term (see freezing instructions below).
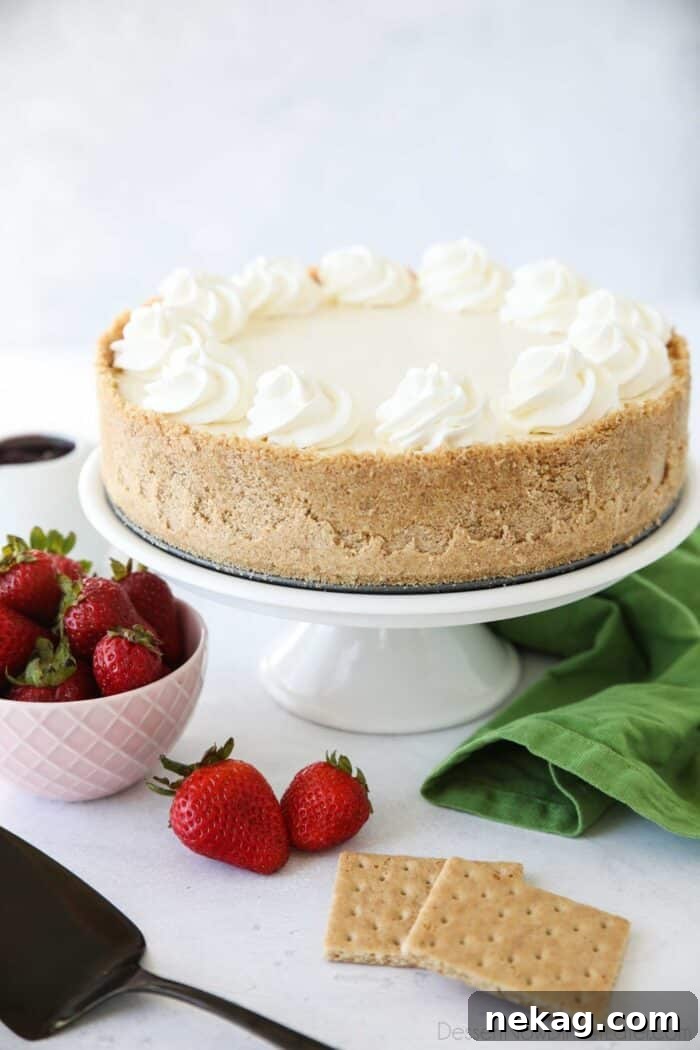
Cool Whip in No-Bake Cheesecake: A Convenient Shortcut
Many home bakers wonder if they can use store-bought frozen whipped topping, commonly known as Cool Whip, as a substitute for freshly whipped heavy cream in no-bake cheesecake recipes. The good news is, absolutely! Cool Whip can be a fantastic shortcut, saving you time and effort while still delivering a delicious and well-set cheesecake.
Cool Whip is designed to be stable and fluffy, making it an excellent base for no-bake desserts. If you choose to use it in this recipe, you’ll need one standard 8-ounce container of thawed Cool Whip. Instead of whipping heavy cream with the cream cheese mixture, you will prepare the cream cheese, powdered sugar, salt, vanilla, and lemon juice as directed. Once that base is smooth and lump-free, gently fold in the thawed Cool Whip until just combined. The key here is to be careful not to over-mix, as this can cause the Cool Whip to lose its airy volume and result in a denser, less fluffy filling. The goal is to retain as much of that light texture as possible. While the flavor profile might be slightly different than using fresh heavy cream, the convenience and reliable setting power of Cool Whip make it a perfectly viable and popular option for this easy no-bake cheesecake.
Freezing Your No-Bake Cheesecake for Future Indulgence
One of the many advantages of no-bake cheesecakes is their freezer-friendly nature, making them perfect for advance preparation or for saving leftovers for a future treat. You can absolutely freeze this delicious no-bake cheesecake with excellent results, ensuring you always have a delightful dessert on hand.
To freeze your no-bake cheesecake for optimal quality and longevity, it’s best to do so without any toppings. First, ensure the cheesecake is fully set and chilled in the refrigerator. Then, remove it from the springform pan if possible, or keep it in the pan for structural support. Carefully cover it tightly with several layers of plastic wrap, ensuring no part of the cheesecake is exposed to the air. This layer of plastic wrap acts as the primary defense against freezer burn. For an extra layer of protection, especially if freezing for an extended period, follow the plastic wrap with a layer of heavy-duty aluminum foil. Label the cheesecake with the date, and then place it in the freezer. Properly wrapped, your no-bake cheesecake can be safely frozen for up to 3 months.
When you’re ready to enjoy your frozen masterpiece, the best way to thaw cheesecake is in the refrigerator overnight. This slow thawing process helps maintain the creamy texture and prevents condensation from making the crust soggy. Alternatively, for a unique twist, you can slice the cheesecake while it’s still frozen and serve it immediately. This creates a delightful, ice cream-like dessert that is especially refreshing on a warm day. Just be sure to use a sharp knife for clean slices when serving frozen.
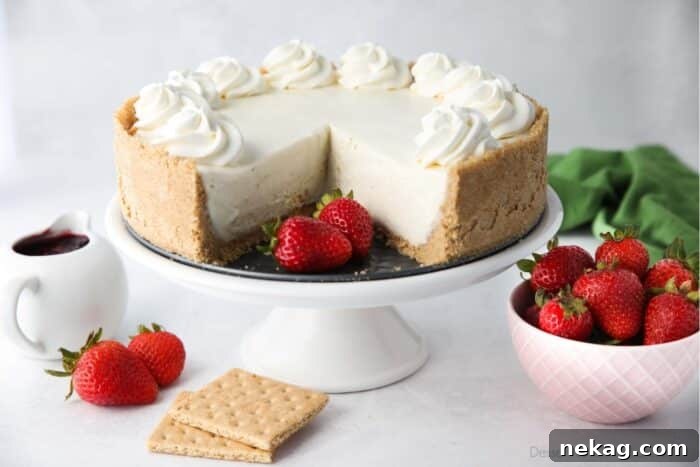
Elevate Your No-Bake Cheesecake: Topping & Flavor Ideas
While this classic no-bake cheesecake is simply heavenly on its own, its smooth, creamy canvas invites a myriad of delicious toppings and flavor variations. Elevating your cheesecake with the right accompaniment can transform it into an even more spectacular dessert, suited for any taste or occasion. Here are some fantastic ideas to inspire you, categorized for easy selection:
Classic & Creamy Toppings:
- Whipped Cream: A dollop of freshly whipped cream is always a perfect, light addition, enhancing the creamy texture of the cheesecake without overwhelming it.
- Cream Cheese Glaze: A simple glaze made from cream cheese, powdered sugar, and a touch of milk can add an extra layer of tangy sweetness.
Fresh & Fruity Enhancements:
- Fresh Fruit: A medley of seasonal berries (strawberries, raspberries, blueberries), sliced kiwi, peaches, or cherries adds vibrant color, natural sweetness, and a refreshing tang.
- Pie Filling: Pre-made fruit pie fillings like classic Cherry, vibrant Raspberry, sweet Strawberry, or rich Blueberry provide an instant burst of flavor and a lovely glossy finish. You can also try a spiced Apple pie filling for a warm, comforting twist.
- Lemon Curd: A bright and tangy lemon curd offers a zesty contrast to the rich creaminess of the cheesecake.
Decadent Chocolate & Caramel Delights:
- Caramel Sauce: A drizzle of homemade or store-bought caramel sauce adds a rich, buttery sweetness that pairs beautifully with the tangy cream cheese. For a salted caramel version, sprinkle a touch of sea salt on top.
- Hot Fudge/Chocolate Sauce: Indulge your chocolate cravings with a generous pour of warm hot fudge or a smooth chocolate ganache.
- Chocolate Shavings or Curls: A sprinkle of elegant chocolate shavings adds a sophisticated touch and subtle chocolate flavor.
- Chopped Candy Bars: For an extra dose of indulgence, crush or chop your favorite candy bars like Snickers, Twix, or Hershey’s for a fun, textural topping.
- Nutella Drizzle: A swirl of warm Nutella adds a rich hazelnut-chocolate flavor.
Nutty & Crunchy Additions:
- Toasted Nuts: Finely chopped and toasted pecans, walnuts, or almonds provide a lovely crunch and earthy flavor.
- Crushed Cookies: Beyond the graham cracker crust, a sprinkle of crushed Oreos, shortbread, or Biscoff cookies on top can add another layer of texture and flavor.
Flavor Variations for the Filling Itself:
Beyond toppings, you can also infuse the cheesecake filling with different flavors:
- Citrus Zest: Add lemon, lime, or orange zest directly into the filling for a brighter, more aromatic cheesecake.
- Coffee/Espresso: Mix in a tablespoon of instant espresso powder or strong cold brew for a mocha-flavored cheesecake.
- Spices: A pinch of cinnamon, nutmeg, or pumpkin pie spice can transform it into a seasonal treat.
- Nut Butters: Swirl in a couple of tablespoons of melted peanut butter or almond butter for a nutty flavor.
Don’t be afraid to mix and match! A classic combination like fresh strawberries and a drizzle of chocolate sauce, or caramel with toasted pecans, can take your no-bake cheesecake from delightful to truly unforgettable. The possibilities are endless, allowing you to customize this easy dessert for every palate and occasion.
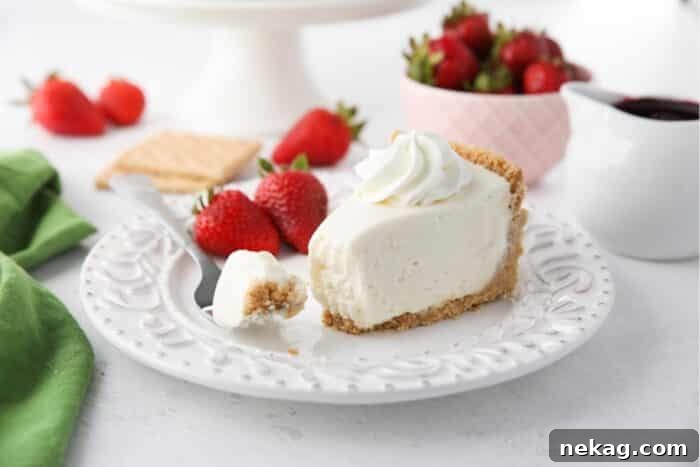
Explore More Effortless No-Bake Dessert Recipes
If you’ve fallen in love with the simplicity and deliciousness of this easy no-bake cheesecake, you’ll be thrilled to discover a world of other fantastic no-bake desserts. These recipes are perfect for satisfying your sweet tooth without ever turning on the oven, making them ideal for hot summer days, quick entertaining, or simply when you want a treat with minimal fuss. Dive into these delightful creations and expand your repertoire of effortless desserts!
- No Bake Chocolate Cheesecake: For the ultimate chocolate lover, this rich and creamy chocolate version is a dream come true.
- Layered No Bake Cheesecake: Elevate your presentation with a beautiful layered cheesecake, offering multiple textures and flavors.
- No Bake Peanut Butter Bars: A decadent, chewy bar packed with peanut butter goodness, perfect for a quick snack or dessert.
- Cheesecake Filled Strawberries: A bite-sized delight, fresh strawberries bursting with a sweet, creamy cheesecake filling.
- Peanut Butter Pie Recipe: A classic, rich, and irresistible pie featuring a fluffy peanut butter filling.
- S’mores Rice Krispie Treats: All the flavors of a campfire s’more, transformed into a chewy, no-bake bar.
- No Bake Nutella Cheesecake: Indulge in the irresistible hazelnut-chocolate flavor of Nutella in this easy cheesecake.
- Avalanche Cookies: A delightful mix of peanut butter, white chocolate, and marshmallows in a crunchy cluster.
Each of these recipes is designed for ease and maximum flavor, proving that you don’t need an oven to create truly spectacular desserts. Happy no-baking!
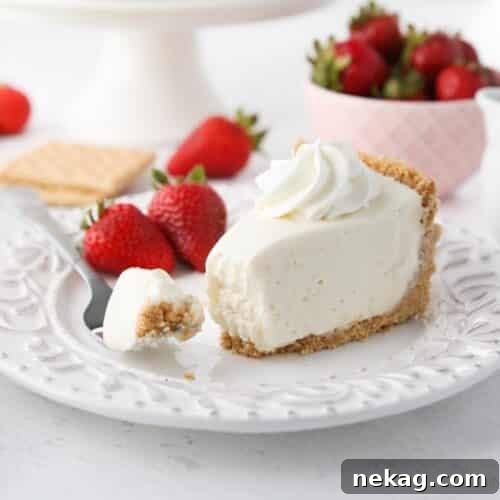
★★★★★
No Bake Cheesecake
Created by: Amber Brady
Prep Time: 20 minutes
Chill Time: 8 hours
Total Time: 8 hours 20 minutes
Easy no bake cheesecake with a graham cracker crust and whipped cream cheese filling.
Yields: 16 Servings
Ingredients
Graham Cracker Crust
- 2 ¼ cups (234 g) graham cracker crumbs (18 full graham crackers/2 sleeves)
- ⅓ cup (68 g) brown sugar, packed
- ½ cup (113 g) unsalted butter (1 stick) melted
Cheesecake Filling
- 24 oz (678 g) cream cheese, COLD (full fat or Neufchatel)
- 1 ½ cups (180 g) powdered sugar
- ⅛ tsp salt
- 1 tsp vanilla extract
- 2 tsp fresh lemon juice
- 1 ½ cups (355 g) heavy whipping cream or heavy cream, COLD
Equipment
- KitchenAid 5-Qt. Stand Mixer
- Silicone Spatula Set
- 9 Inch Springform Pan with parchment paper
Instructions
Graham Cracker Crust:
- Using a food processor, pulse graham crackers into fine crumbs.
- Combine graham cracker crumbs, brown sugar, and melted butter in a 9-inch springform pan.
- Press evenly on the bottom and up the sides of the pan. Tip: Using the bottom of a measuring cup can help, especially with corners.
- Chill graham cracker crust in freezer until filling is made.
Cheesecake Filling:
- Beat the cream cheese in a stand mixer with the paddle attachment for 10-15 seconds. Scrape bowl.
- Add the powdered sugar, salt, vanilla, and lemon juice. Incorporate and mix until no lumps appear. Scrape bowl.
- Switch to the whisk attachment and slowly add the heavy cream while the mixer is running on medium speed.
- Increase speed to high and whip the heavy cream with the cream cheese until thick and fluffy. (Whisk will leave defined ripples in the cream cheese mixture and stick to the whisk.)
- Empty the no-bake cheesecake filling into the graham cracker crust and spread filling evenly with a spatula.
- Cover the pan with foil and chill the cheesecake in the refrigerator 6-8 hours or overnight, for best results.
Notes
- I used a thin, offset spatula to separate the crust from the springform pan before un-molding, so it wouldn’t stick to the sides.
- Serve with extra whipped cream, fresh fruit, or your favorite pie filling.
- Cover and store cheesecake in fridge up to 5 days.
- To Freeze: Cover cheesecake tightly with plastic wrap and then foil. Freeze up to 3 months.
Nutrition
Serving: 1 slice | Calories: 312kcal | Carbohydrates: 27g | Protein: 4g | Fat: 22g | Saturated Fat: 12g | Polyunsaturated Fat: 1g | Monounsaturated Fat: 6g | Trans Fat: 0.2g | Cholesterol: 58mg | Sodium: 232mg | Potassium: 86mg | Fiber: 0.4g | Sugar: 20g | Vitamin A: 748IU | Vitamin C: 0.2mg | Calcium: 56mg | Iron: 1mg
Disclaimer: Nutritional values were calculated using a third-party tool and are provided as an estimation only.
Sharing this recipe with a link is both encouraged and appreciated. Copying/pasting and/or screenshots of full recipes to any social media is strictly prohibited. Content and photographs are copyright protected.
Did you make this?
Don’t forget to leave a rating below and make sure to follow on Pinterest and Instagram for more!