
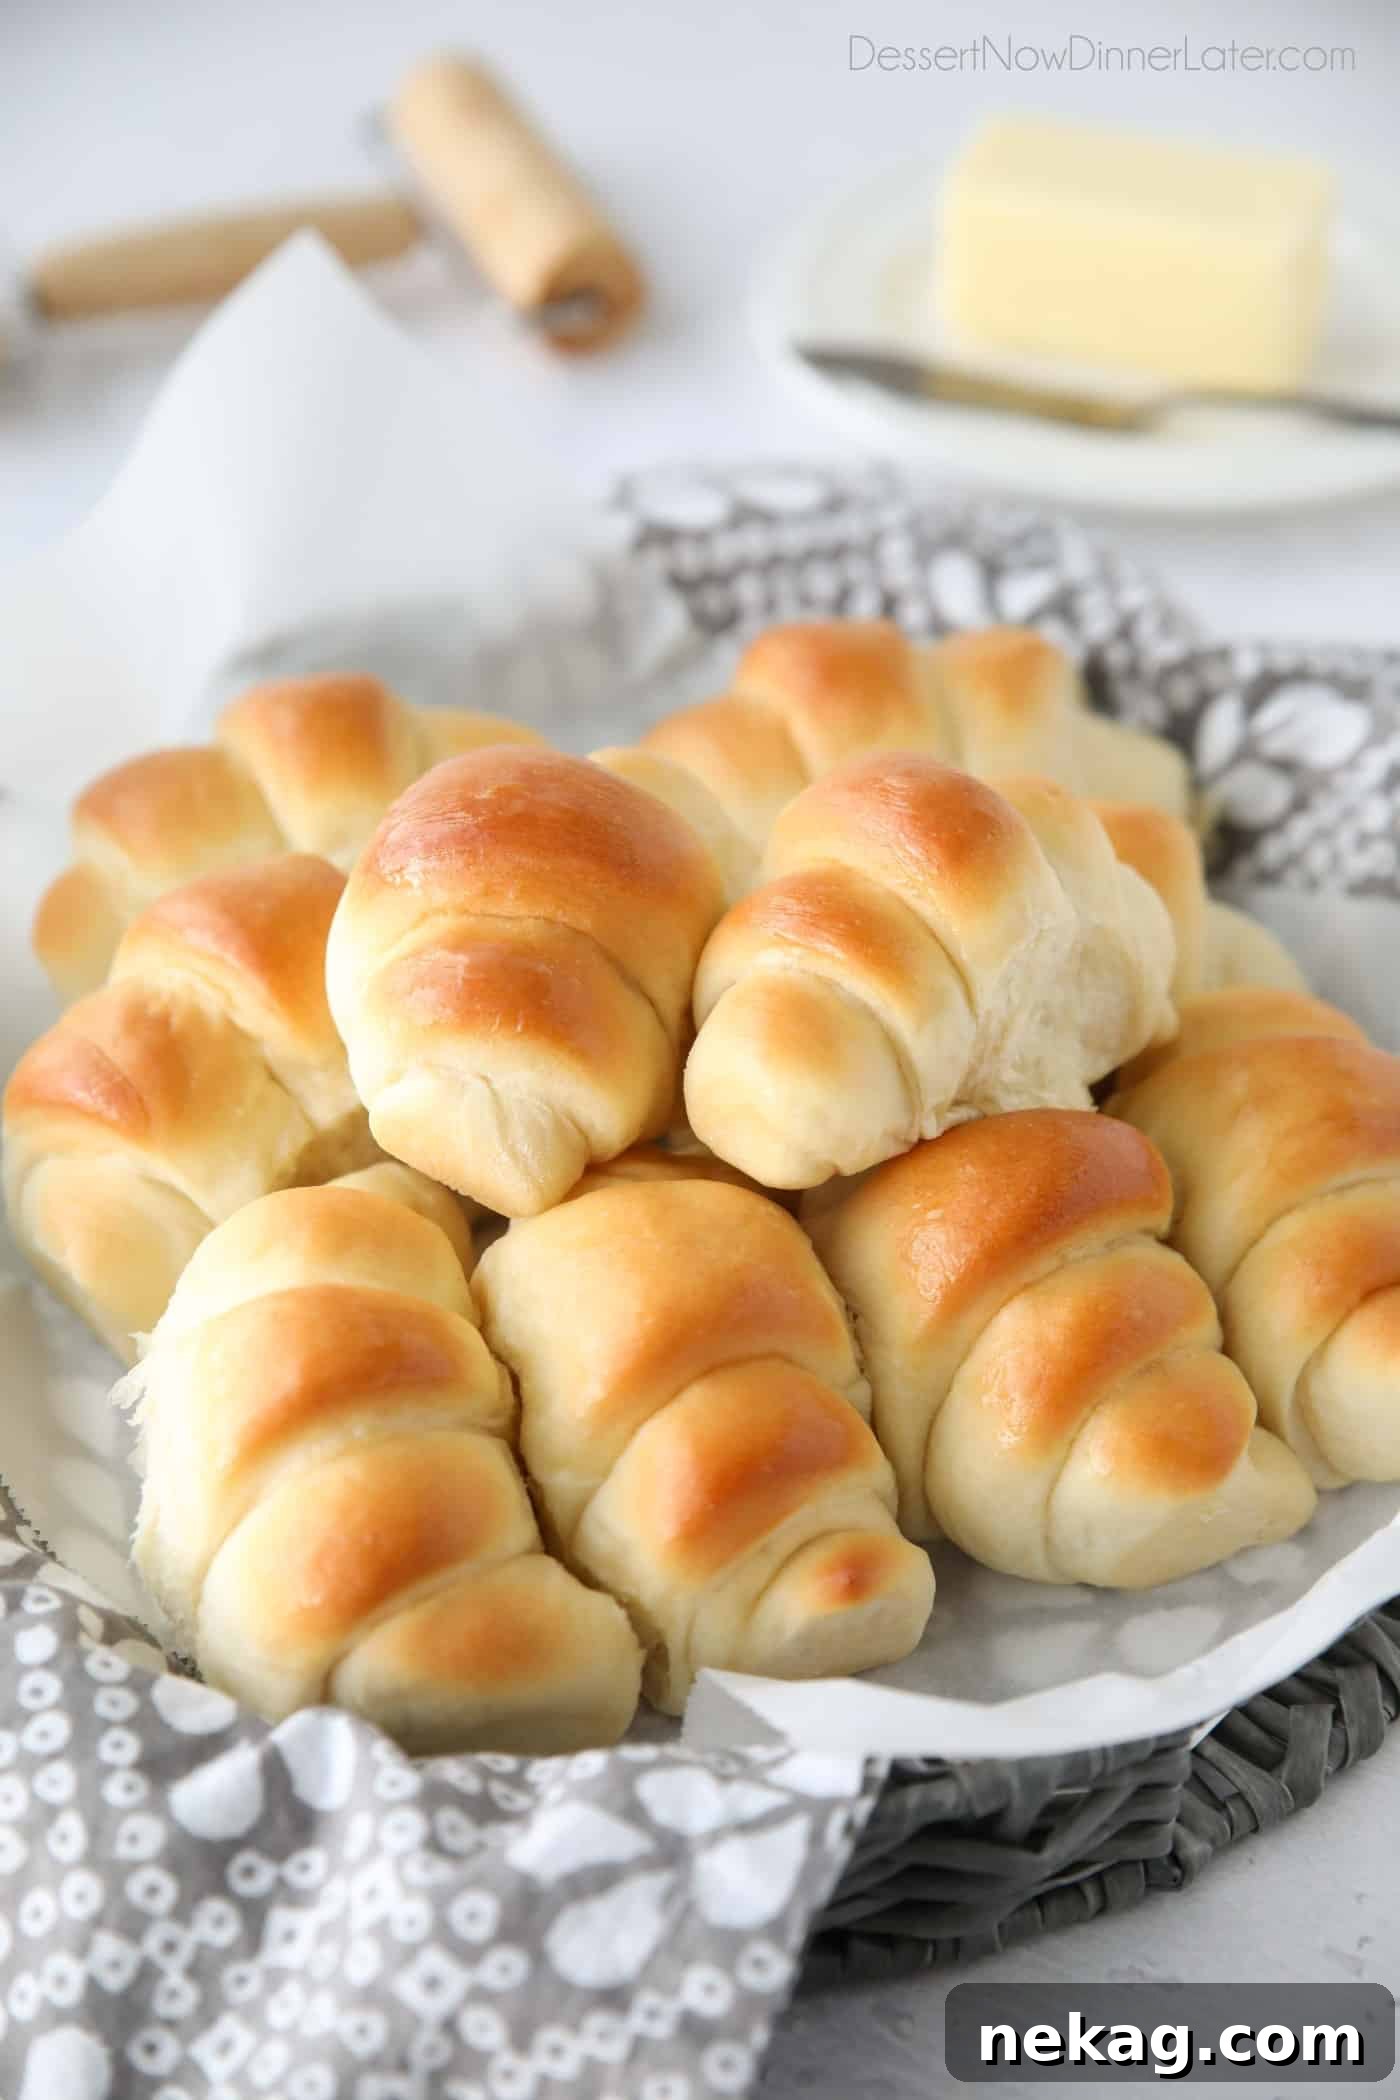
Step into the comforting world of homemade baking with this incredible recipe for Homemade Crescent Rolls. Imagine biting into a dinner roll that’s not just soft and fluffy but also tender, rich, and perfectly buttery. These aren’t just rolls; they’re an experience, designed to elevate any meal from a casual Sunday dinner to a grand holiday feast. Easy to make and always impressive, these crescent rolls are poised to become your new family favorite, bringing warmth and a touch of magic to your table.
The joy of baking lies in the creation, and there’s nothing quite like the aroma of freshly baked bread filling your home. While these crescent rolls are a standout, our versatile dough can also be shaped into classic dinner rolls. For those seeking a heartier option, our whole wheat rolls offer a wholesome twist. If you’re ready to advance your bread-making skills, challenge yourself with our elegant butterflake rolls. And for beginners eager to dive into yeast baking, these easy yeast rolls for beginners are the perfect starting point.
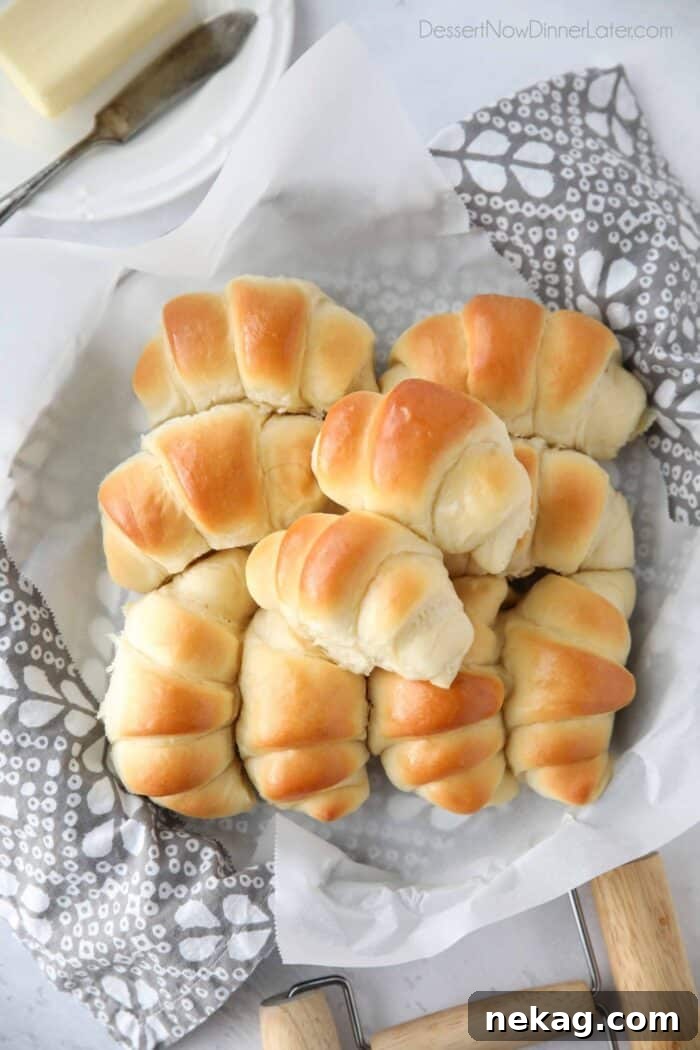
Croissant vs. Crescent Rolls: Unveiling the Differences
It’s a common misconception that croissants and crescent rolls are one and the same, often due to their signature curved shape. However, while they share a similar aesthetic, their preparation and resulting textures are distinctly different. Understanding these differences will deepen your appreciation for both delightful pastries.
Croissants are a marvel of French pastry-making, renowned for their incredibly light, airy, and distinctively flaky layers. This exquisite texture is achieved through a painstaking process called lamination, where chilled butter is repeatedly folded and rolled into yeast-leavened dough. This creates numerous thin layers of butter separated by thin layers of dough, which puff up in the oven as the butter melts and creates steam. The result is a crisp exterior that shatters upon biting, revealing a tender, honeycomb interior. They are essentially a yeasted version of puff pastry.
In contrast, crescent rolls, particularly these homemade versions, are crafted from a rich, buttery enriched dough. This dough typically contains milk, eggs, sugar, and a generous amount of butter, contributing to its tender crumb and rich flavor. While crescent rolls do exhibit some layering, these layers are formed solely through the simple rolling of the dough during the shaping process, rather than the intricate lamination of butter found in croissants. The outcome is a wonderfully soft, fluffy, and slightly chewy bread roll with a delicate, buttery taste, making them perfect for accompanying meals rather than serving as a standalone pastry.
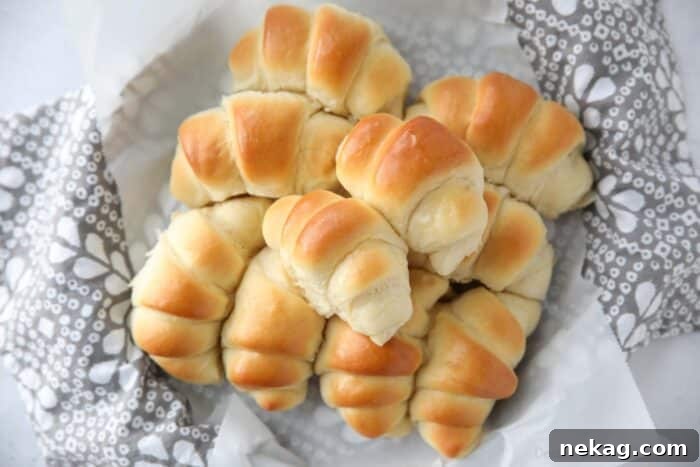
Why Indulge in Homemade Crescent Rolls? The Unforgettable Taste and Experience
There’s an undeniable allure to homemade bread, and these crescent rolls are a prime example of why. Beyond merely satisfying hunger, making these rolls from scratch offers a truly rewarding culinary experience. They are genuinely fun to make, involving tactile steps that connect you with the art of baking. The shaping process is easy to master, yet the final crescent form looks far more impressive than a standard round dinner roll, making them a stunning addition to any table.
Homemade crescent rolls are particularly magnificent for special occasions and holidays – Thanksgiving, Christmas, Easter, or any festive gathering. Their golden hue and delicate shape add an elegant touch that store-bought varieties simply can’t match. But don’t reserve them just for grand events; they are equally perfect for elevating a simple Sunday dinner into a comforting family tradition. The best part? Any leftovers transform into a delightful breakfast. Just warm them slightly and smother with butter, jam, or a drizzle of honey for a truly decadent start to your day.
While popping open a can of Pillsbury Crescents might seem quicker, the homemade version offers an unparalleled difference in quality and taste. Canned crescent rolls, often made with vegetable shortening and baking powder, tend to have a texture more akin to a biscuit – denser and sometimes dry. Our homemade recipe, however, relies on the finest real butter and the magical leavening power of yeast. This combination yields rolls that are remarkably lighter, softer, and infused with a rich, authentic buttery flavor that you simply cannot replicate from a can. Choosing homemade means choosing superior taste, texture, and the satisfaction of knowing exactly what wholesome ingredients went into your delicious bread.
The Origin of the Name: Why “Crescent Roll”?
The name “crescent roll” is as straightforward as it is descriptive: these delicious rolls derive their name from their distinctive shape, resembling a crescent moon. This iconic curve has been associated with baked goods for centuries, evoking a sense of charm and tradition.
Historically, the crescent shape is deeply rooted in European baking, particularly with the “kipferl” from Austria, believed to be an ancestor to both the crescent roll and the more elaborate French croissant. While the symbolic significance of the crescent varies across cultures and histories, for bread, it primarily serves as a delightful and visually appealing form that also offers practical benefits. The tapered ends and wider base of the crescent shape lend themselves to a wonderful texture variation from end to end, making each bite an interesting experience.
Interestingly, while the classic crescent shape is part of their identity, many bakers, including myself, sometimes opt for a slightly straighter roll. This minor modification makes it considerably easier to slice the roll in half, perfect for spreading generous amounts of butter or jam inside, or for crafting small, delectable sandwiches. Whether curved or slightly straighter, the essence of the crescent roll remains: a buttery, soft, and irresistible bread perfect for any meal.
The Magic Behind the Dough: Ingredients for Perfect Crescent Rolls
Creating these delightful homemade crescent rolls begins with a selection of simple, yet potent ingredients. Each component plays a vital role in developing the rich flavor, tender texture, and beautiful rise that define these rolls. Understanding the purpose of each ingredient is key to successful baking:
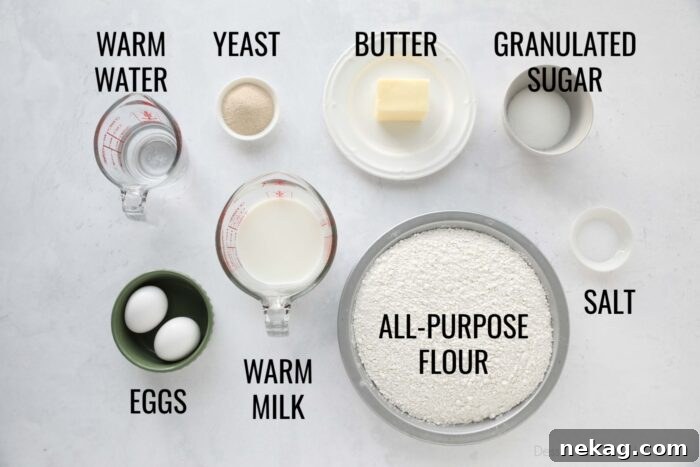
- Quick Rise or Instant Dry Yeast: This is the powerhouse behind the roll’s light and fluffy texture. Quick rise or instant yeast is highly active, allowing the dough to rise faster, saving you time. While active dry yeast can also be used, anticipate a slightly longer rising time.
- Warm Water (approx. 110˚F): The perfect temperature to awaken and activate the dormant yeast. Water that is too hot can kill the yeast, while water that is too cold will inhibit its activity.
- Unsalted Butter (softened): A generous amount of butter enriches the dough, imparting its signature flavor and contributing to the roll’s tender crumb. Using unsalted butter gives you precise control over the overall saltiness of the recipe. If you only have salted butter, remember to reduce the added salt by half, or omit it completely.
- Granulated Sugar: Beyond sweetness, sugar serves as food for the yeast, helping it to activate and thrive. It also plays a crucial role in giving the rolls a beautiful golden-brown crust during baking.
- Large Eggs: Eggs are a multi-tasking ingredient in bread dough. They act as a leavening agent, helping the dough to rise higher and creating a more open, airy structure. Additionally, eggs enrich the dough, contributing to its tender texture, moistness, and a richer flavor profile.
- Warm Milk (approx. 110˚F): Similar to warm water, milk helps activate the yeast, promoting a good rise. It also adds a subtle richness and flavor to the dough, contributing to a softer texture and a more golden crust.
- Salt (Table Salt): Crucial for balancing the flavors in the bread and enhancing the taste of the other ingredients. It also helps to control yeast activity, ensuring the dough doesn’t over-proof too quickly.
- All-Purpose Flour: The structural backbone of the rolls. All-purpose flour provides the necessary gluten development that gives the dough its elasticity and strength, allowing it to trap gases from the yeast and rise beautifully. Using the “stir, spoon & level” method for measuring ensures accuracy.
The Foundation of Fluffy Rolls: Understanding and Blooming Yeast
The success of any yeast bread, including these delectable crescent rolls, hinges on one key ingredient: yeast. This microscopic fungus is a living organism responsible for the dough’s rise, creating those coveted airy pockets and soft texture. While it might seem intimidating at first, understanding how to properly activate or “bloom” yeast is a fundamental skill for any baker.
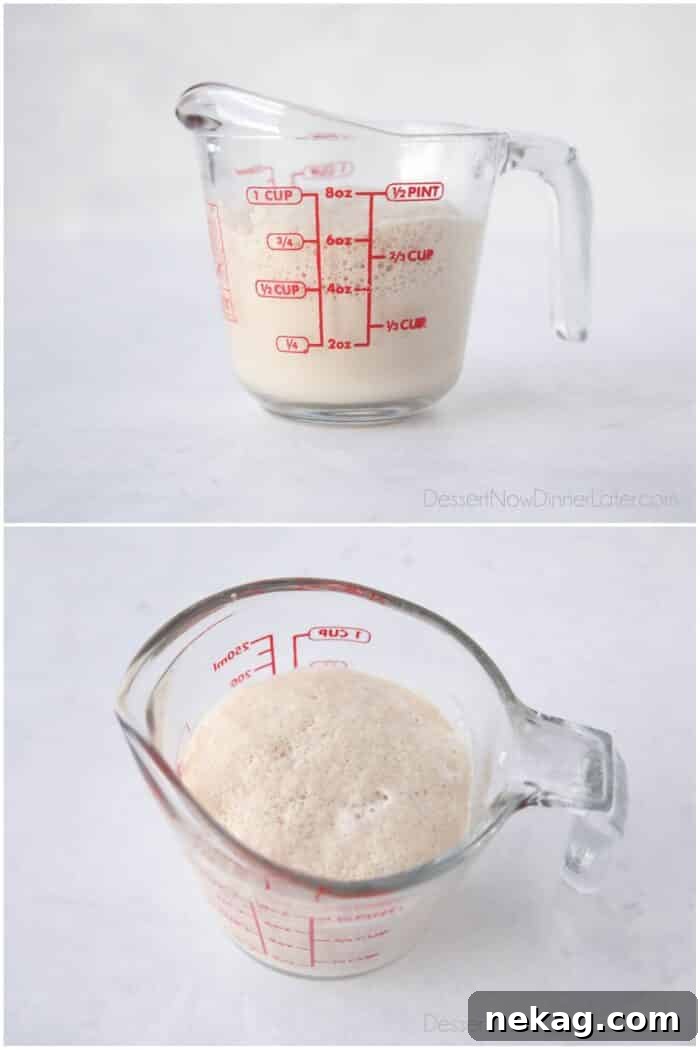
For quick rise or instant dry yeast, blooming isn’t strictly necessary as these varieties are designed to be mixed directly with dry ingredients. However, I always advocate for blooming the yeast first. Why? Because it serves as a simple yet effective test to ensure your yeast is alive and active before you commit all your ingredients to the dough. There’s nothing more disappointing than a flat, dense loaf due to inactive yeast, and a quick bloom can prevent this heartache.
To bloom yeast: Begin by warming your water to approximately 110˚F (43˚C). This temperature is ideal for activating yeast without killing it. Add the dry yeast to the warm water and give it a gentle stir. Then, set the mixture aside for about 5 minutes to allow the yeast to dissolve and become active. If you don’t have a thermometer, a good old-fashioned wrist test works wonders: the water should feel very warm, but not uncomfortably hot, similar to a baby’s bathwater.
A successful bloom will result in the yeast mixture bubbling, frothing, and forming a creamy foam on the surface. This bubbly activity is a clear sign that your yeast is alive, active, and ready to get to work. If, after 5-10 minutes, your mixture still looks flat and unchanged, it indicates a problem. The yeast might be old and expired, the water could have been too hot (killing the yeast), or too cold (failing to activate it). In such cases, it’s best to discard the mixture and start fresh with new yeast and correctly tempered water.
PRO TIP: To give your yeast an extra boost, especially if using active dry yeast which is typically slower to activate, you can add about 1 Tablespoon of the granulated sugar from the recipe to the warm water along with the yeast. The sugar acts as a quick food source, encouraging more vigorous activity and a stronger bloom.
Crafting the Dough: Step-by-Step to Perfection
Once your yeast is happily blooming and proving its vitality, it’s time to bring together the rest of the ingredients to form the rich, buttery dough for your homemade crescent rolls. This process, while requiring attention to detail, is straightforward and immensely satisfying.
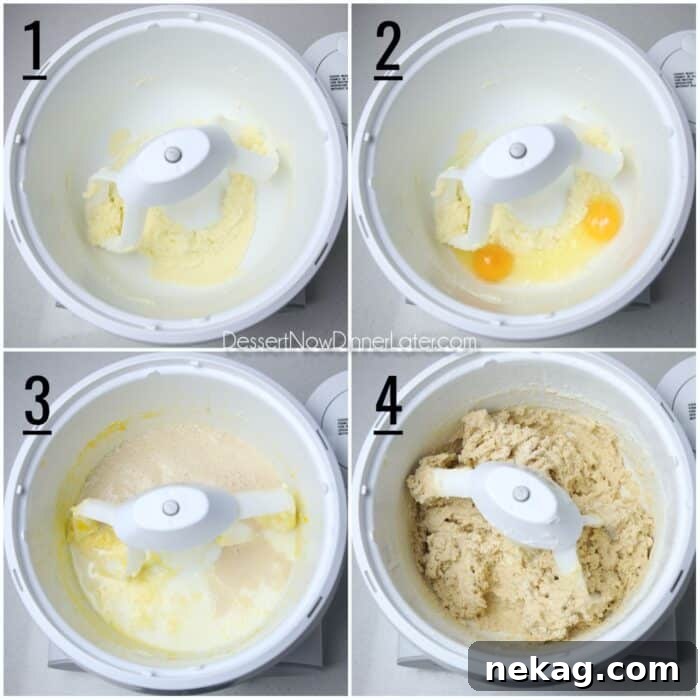
Follow these detailed instructions for creating the perfect crescent roll dough:
- Cream Butter and Sugar: In the bowl of a stand mixer fitted with the paddle attachment, cream together the softened butter and granulated sugar until the mixture is light, fluffy, and pale in color. This step incorporates air, contributing to the rolls’ tender texture.
- Incorporate Eggs: Add the large eggs one at a time, mixing well after each addition until fully incorporated. Use a spatula to scrape down the sides of the bowl to ensure everything is thoroughly combined. Eggs add richness, moisture, and help with the dough’s structure.
- Add Liquids and Salt: Pour in the warm milk, salt, and your bloomed yeast mixture. Mix on low speed until all ingredients are just combined. Be careful not to overmix at this stage.
- Introduce Flour: Gradually add 5 cups of the all-purpose flour to the wet ingredients. Mix slowly on the lowest speed until the flour is just combined and no dry streaks remain. The dough will look shaggy and sticky. At this point, switch from the paddle attachment to the dough hook.
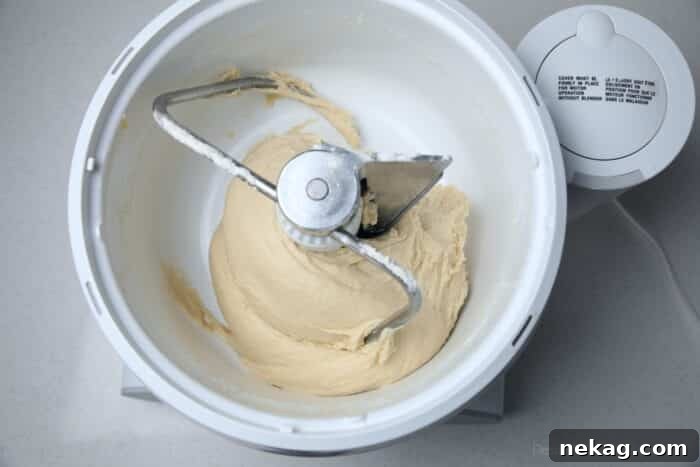
Knead the Dough: Continue kneading the dough with the dough hook on medium speed for 5 to 7 minutes. As you knead, you’ll notice the dough transforming, becoming smoother and more elastic. It should be a soft dough that is still slightly sticky to the touch but pulls away cleanly from the sides of the bowl. If the dough seems too wet or isn’t pulling away, add the remaining 1/2 cup of flour gradually, one tablespoon at a time, until the desired consistency is reached. Avoid adding too much flour, as this can result in tough rolls.
The First Rise: Bulk Fermentation for Flavor and Texture
After kneading, your dough is ready for its crucial first rise, also known as bulk fermentation. This period allows the yeast to feast on the sugars, producing carbon dioxide that inflates the dough and alcohol that contributes to the bread’s complex flavor. A proper first rise is fundamental for achieving light, airy, and flavorful crescent rolls.
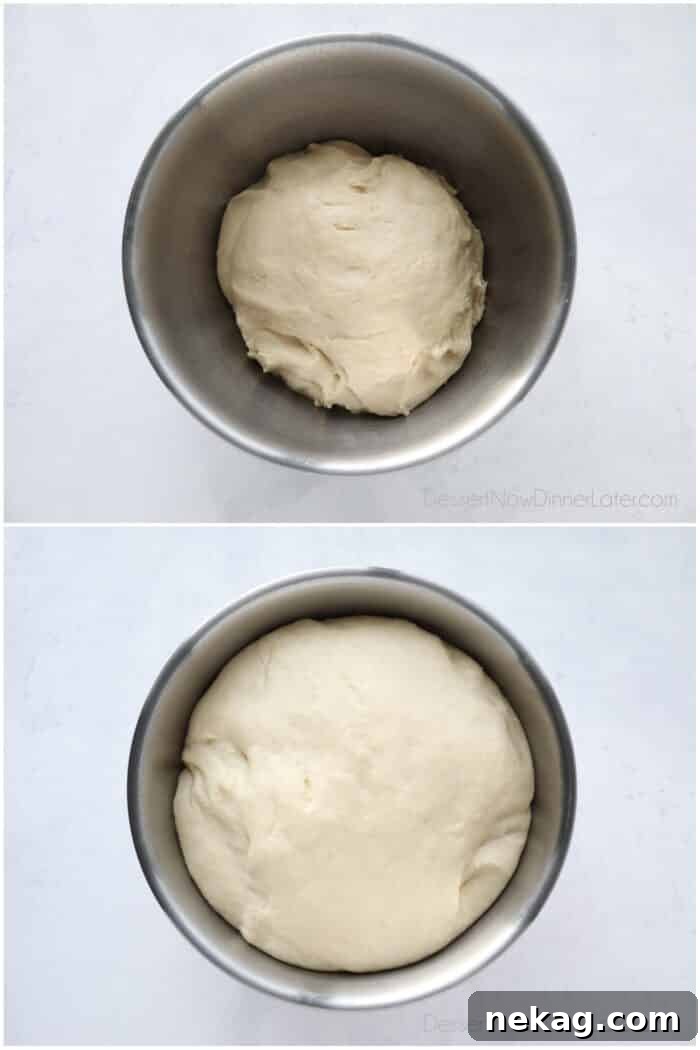
Prepare for Rising: Transfer the freshly kneaded dough to a large, lightly greased bowl. Ensure the bowl is spacious enough to accommodate the dough doubling in size. Lightly spray one side of plastic wrap with non-stick spray and use this to cover the bowl, sprayed side down, forming a loose dome over the dough. This prevents a crust from forming on the dough’s surface and keeps it moist.
Allow to Rise: Place the covered bowl in a warm, draft-free place for 30-45 minutes, or until the dough has visibly doubled in size. The exact timing can vary depending on the ambient temperature of your kitchen. A slightly warmer environment will encourage faster rising.
PRO TIP for Faster Rising: If your kitchen is cool or you’re short on time, there are several methods to create an optimal warm environment for your dough. One popular method is the oven proofing technique: simply place a pan of hot water on the bottom rack of your oven, then place your covered dough bowl on the middle rack. The steam and warmth will create a perfect proofing box, significantly speeding up the rise time. Another option is to use your microwave – heat a cup of water until boiling, then remove the water and immediately place the covered dough bowl inside the warm (but not hot) microwave, closing the door.
Mastering the Art of Shaping Homemade Crescent Rolls
Once your dough has completed its beautiful first rise, transforming into a puffy, airy mass, it’s time for the fun and artistic part: shaping your homemade crescent rolls. This process is surprisingly simple yet creates the elegant, iconic form that makes these rolls so appealing.
Follow these steps to perfectly shape your crescent rolls:
- Prepare the Dough: Gently punch the risen dough down to release the trapped gases. This helps create a finer, more even crumb. Divide the dough into two equal halves, and gently shape each half into a smooth ball.
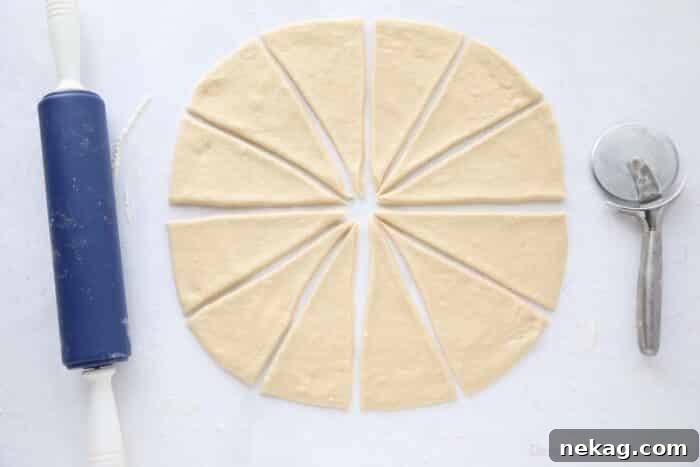
- Roll into Circles: On a lightly floured surface, take one dough ball and roll it out into a large, even circle, approximately 14 inches in diameter. Aim for a thickness of about 1/4-inch; rolling the dough fairly thin is key to achieving several full turns and distinct layers in your finished rolls. Repeat with the second dough ball.
- Cut into Wedges: Using a pizza cutter, slice each large circle into twelve uniform wedges. Start by cutting the circle in half, then into quarters, and then each quarter into three smaller wedges. This ensures consistency in the size of your rolls.
- Roll Each Wedge: Take one wedge and, starting from the wide end, gently roll it towards the tip. Aim for about six turns or folds as you roll. As you begin, it can be helpful to lightly tug on the two wide corners of the wedge to slightly widen them; this can make the initial rolling easier and create a more defined crescent shape.
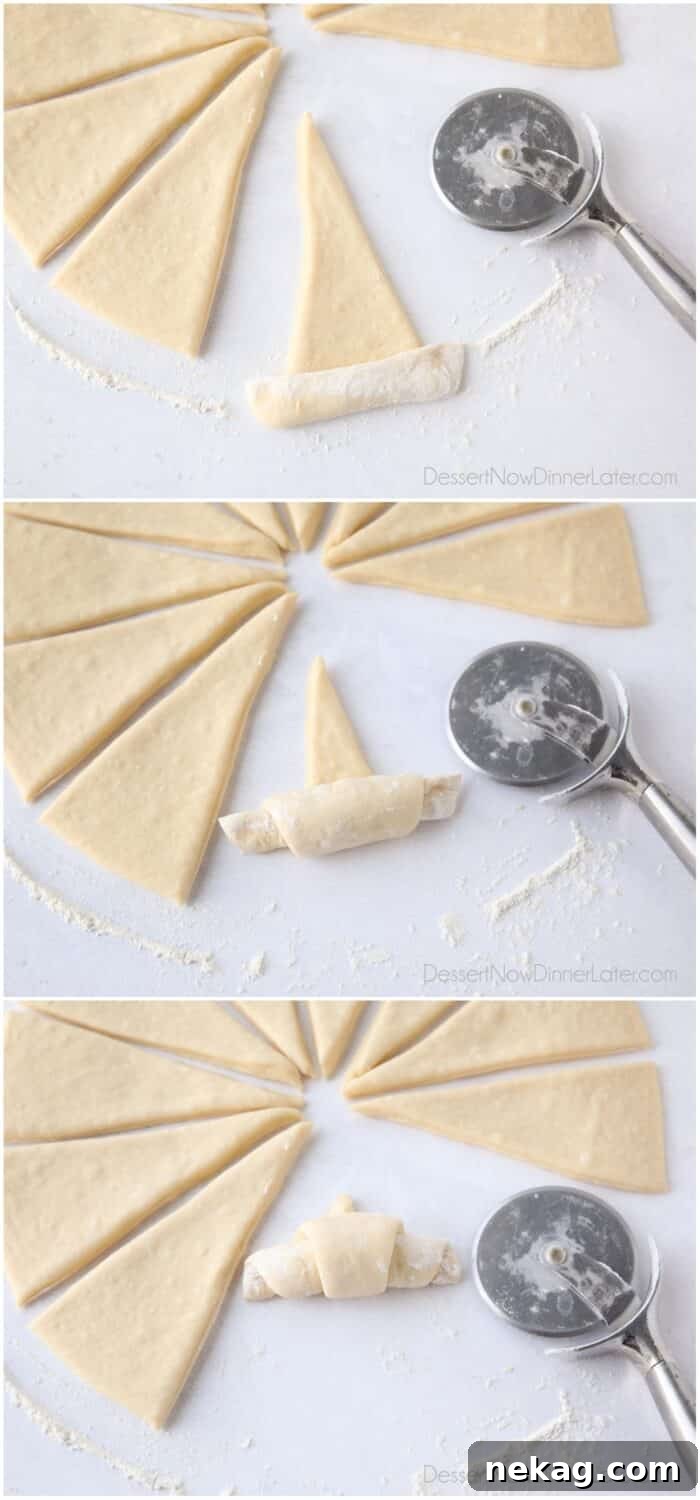
- Form the Crescent: Once rolled, gently curve the ends of each roll slightly to enhance the classic crescent moon shape. Place the shaped rolls, with the tip side facing down, onto a lightly greased half sheet pan. Ensure there’s enough space between each roll to allow for their second rise.
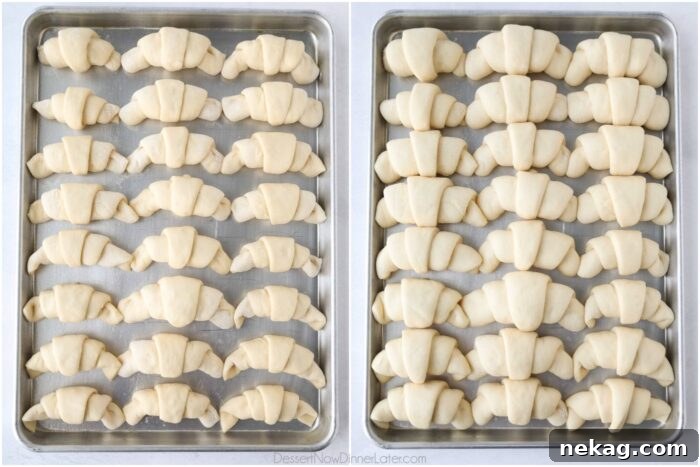
- Second Rise (Proofing): Cover the rolls loosely with sprayed plastic wrap to prevent drying. Allow them to rise in a warm, draft-free place for another 30-45 minutes, or until they have visibly doubled in size. This final rise, known as proofing, is essential for achieving the rolls’ ultimate lightness and soft texture before baking.
The Grand Finale: Baking and Serving Your Golden Crescent Rolls
After all the careful preparation and patience through two rises, the moment arrives to transform your beautifully shaped dough into golden, irresistible crescent rolls. Baking them to perfection ensures a crisp exterior and a tender, fluffy interior, making every bite a delight.
Baking Instructions: Preheat your oven to 350 degrees Fahrenheit (175°C). Place the risen crescent rolls in the preheated oven and bake for 15-20 minutes. Keep a close eye on them; you’re looking for a beautiful golden-brown color on both the top and bottom of the rolls. To be absolutely certain they are perfectly baked, you can use an instant-read thermometer. The internal temperature of fully baked yeast rolls should register between 190-200˚F (88-93°C). This ensures they are cooked through without being overbaked and dry.
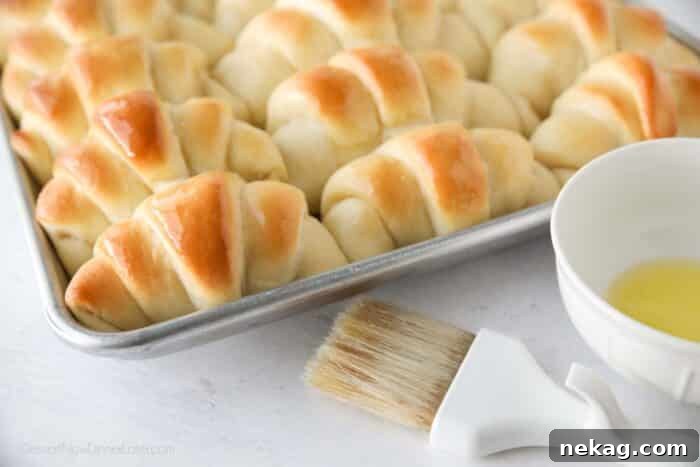
The Buttery Finish: As soon as the rolls emerge from the oven, hot and fragrant, immediately brush their tops generously with melted butter. This not only adds an extra layer of rich, savory flavor but also gives them a beautiful, glossy sheen. The warm rolls will eagerly absorb the butter, enhancing their tenderness and making them even more irresistible.

Serving Suggestions: These homemade crescent rolls are truly best served warm, straight from the oven. Their soft texture and buttery aroma are at their peak when fresh. Present them in a bread basket for an inviting display. They are the perfect accompaniment to almost any meal, from hearty stews and roasts to lighter salads. Pair them with a pat of butter, a dollop of homemade jam, or a drizzle of honey for an extra touch of indulgence. Get ready to enjoy the ultimate comfort food experience!
Storing and Reheating Crescent Rolls: Keeping Them Fresh
While homemade crescent rolls are undeniably best enjoyed fresh and warm from the oven, it’s wonderful to know that any leftovers can be stored and revived to near-perfect deliciousness. Proper storage ensures they remain soft and flavorful for a few days, and reheating techniques can bring back their comforting warmth.
Storing Leftovers: To maintain their freshness, allow any leftover crescent rolls to cool completely before storing. Once cooled, place them in an airtight zip-top bag or container. They can be stored at room temperature for up to 2-3 days. For longer storage, you can refrigerate them for up to a week, or freeze them (as detailed below) for several months.
Reheating for Optimal Enjoyment:
- Microwave Method (for individual rolls): For a quick reheat, place a single roll in the microwave for 5-10 seconds. Be cautious not to overheat, as this can make the roll tough or dry.
- Oven Method (for multiple rolls): To reheat several rolls and restore some of their original texture, wrap them loosely in aluminum foil. Place the foil-wrapped rolls in a preheated oven at 350ºF (175°C) for 5-7 minutes. The foil helps to steam the rolls, keeping them moist while warming them through.
Regardless of the method, reheating your crescent rolls will bring back their inviting warmth, making them almost as delightful as when they were first baked.
Make-Ahead Options for Convenience and Freshness
One of the beauties of working with yeast dough is its flexibility. These homemade crescent rolls can be prepared in advance, offering incredible convenience for busy schedules or special occasions. Whether you prefer to store the dough in the fridge or freeze the shaped rolls for later, these make-ahead options ensure you can enjoy fresh-baked goodness with minimal effort on serving day.
- To Refrigerate the Dough: If you want to prepare the dough a day or two in advance, simply follow the recipe through the kneading stage. Once the dough is kneaded, transfer it to a lightly greased bowl and cover it tightly with sprayed plastic wrap. Place the bowl in the refrigerator for up to 2 days. The cold temperature will significantly slow down the yeast activity. When you’re ready to bake, remove the dough from the fridge and let it come to room temperature for about 30-60 minutes before proceeding with rolling, cutting, shaping, and the final rise and bake.
- To Freeze the Dough (Shaped, Unbaked Rolls): For even greater convenience, you can shape the crescent rolls and freeze them unbaked. After shaping the rolls and placing them on a parchment-lined baking sheet, put the entire sheet into the freezer. Once the rolls are solid (usually a few hours), transfer them to a freezer-safe zip-top bag or airtight container, removing as much air as possible. Label and freeze for up to 6 months.
- To Bake from Frozen: When you’re ready to bake, arrange the frozen crescent rolls 2-3 inches apart on a lightly greased sheet pan. Cover the pan loosely with greased plastic wrap to prevent the rolls from drying out and sticking. Allow the rolls to thaw and rise at room temperature for approximately 4 hours, or you can place them in the refrigerator overnight for a slower thaw and rise. They should double in size before baking. Once risen, bake according to the recipe instructions (350˚F for 15-20 minutes). This method allows you to enjoy freshly baked rolls whenever the craving strikes!

Discover More Savory and Sweet Roll Recipes
If you’ve fallen in love with the art of making homemade rolls, there’s a whole world of delicious variations waiting for you to explore. From savory delights perfect for dinner to sweet treats ideal for breakfast or dessert, these recipes are sure to inspire your next baking adventure:
- Pull-Apart Garlic Parmesan Rolls: Irresistibly cheesy and garlicky, these rolls are a flavorful addition to any Italian meal.
- Olive Garden Breadsticks Recipe: Recreate the popular restaurant classic right in your own kitchen – soft, garlicky, and utterly addictive.
- Empty Tomb Rolls: A meaningful and delicious sweet roll, often made for Easter, with a surprise inside.
- Sweet Orange Rolls: Zesty, sweet, and incredibly tender, these rolls are a bright and cheerful breakfast or brunch item.
- Easy Caramel Pecan Rolls: Decadent rolls topped with gooey caramel and crunchy pecans, a perfect indulgence.
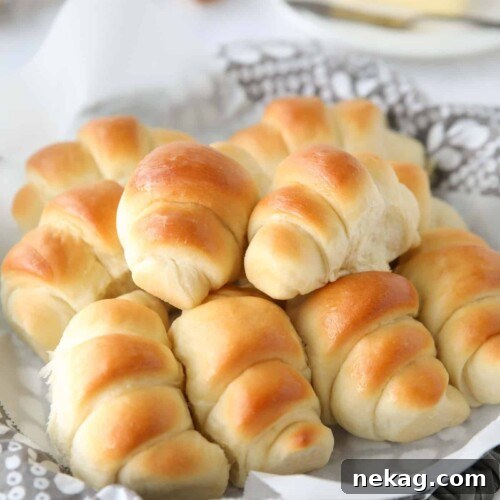
Homemade Crescent Rolls
Created by: Amber Brady
Prep Time: 15 mins
Cook Time: 20 mins
Resting Time: 1 hr
Total Time: 1 hr 35 mins
Pin Recipe
Yields: 24 rolls
Ingredients
- ½ cup (118 ml) warm water (110˚F)
- 2 Tbsp quick rise or instant dry yeast
- 6 Tbsp (85 g) unsalted butter, softened
- ⅓ cup (68 g) granulated sugar
- 2 large eggs
- 1 cup (237 ml) warm milk (110˚F)
- 2 tsp salt
- 5 to 5 ½ cups (600 to 660 g) all-purpose flour (stir, spoon & level)
- 2 Tbsp (29 g) butter, melted (for brushing rolls)
Equipment
- 6-Quart Steel Mixing Bowl
- Pizza Cutter
- Aluminum Half Sheet Tray (2 Pack)
Instructions
- Stir yeast in warm water to dissolve. Set aside for 5 minutes until foamy.
- In a stand mixer with the paddle attachment, cream softened butter and granulated sugar until light and fluffy. Add eggs one at a time, mixing well after each; scrape down the bowl.
- Add the warm milk, salt, and bloomed yeast mixture. Mix to combine.
- Add 5 cups of all-purpose flour and mix slowly until just combined. Switch to a dough hook.
- Knead dough for 5 minutes on medium speed until a soft dough is formed. Add up to 1/2 cup of extra flour, 1 Tbsp at a time, as needed. The dough will be sticky but should pull away from the sides of the bowl.
- Transfer dough to a greased bowl. Cover the bowl with sprayed plastic wrap. Let rise for 30-45 minutes in a warm place until doubled in size.
- After the dough has doubled, gently punch it down. Divide the dough in half and shape each half into a ball.
- Roll each half into a large circle, about 14-inches wide and 1/4-inch thick. Cut each circle into twelve wedges using a pizza cutter.
- Roll each wedge from the wide end to the tip, making about six turns/folds. Gently curve the ends slightly to form a crescent shape.
- Place the shaped crescent rolls, tip side down, onto a lightly greased half sheet pan. Cover the rolls with sprayed plastic wrap and let rise until double in size, about 30-45 minutes.
- Preheat oven to 350 degrees Fahrenheit (175°C).
- Bake homemade crescent rolls at 350˚F for 15-20 minutes, or until golden brown on top and bottom. The internal temperature of fully baked rolls should be 190-200˚F (88-93°C).
- Brush the top of the hot rolls generously with melted butter immediately after baking. Enjoy warm.
Video
Notes
- Store any leftover crescent rolls in a zip-top bag at room temperature for up to 2-3 days.
- To re-heat: Microwave individual rolls for 5-10 seconds, or wrap multiple rolls in foil and place in a 350ºF oven for 5-7 minutes.
- This recipe makes just under 3 lbs (approximately 1.35 kg) of dough, yielding 24 delicious rolls.
Nutrition
Serving: 1 roll
Calories: 157 kcal
Carbohydrates: 23 g
Protein: 4 g
Fat: 5 g
Saturated Fat: 3 g
Cholesterol: 26 mg
Sodium: 207 mg
Fiber: 1 g
Sugar: 3 g
Disclaimer: Nutritional values were calculated using a third-party tool and are provided as an estimation only. Actual values may vary.
Sharing this recipe with a link is both encouraged and appreciated. Copying/pasting and/or screenshots of full recipes to any social media is strictly prohibited. Content and photographs are copyright protected.
Did you make this?
Don’t forget to leave a rating below and make sure to follow on Pinterest and Instagram for more delicious recipes!
Making homemade crescent rolls is more than just a recipe; it’s an act of love, a tradition in the making, and a guaranteed way to bring smiles to faces around your dining table. The satisfaction of pulling a pan of golden, aromatic rolls from your oven is truly unmatched. With their tender crumb, rich buttery flavor, and impressive appearance, these rolls are destined to become a cherished part of your culinary repertoire. Don’t be intimidated by yeast; with these detailed steps, you’re well on your way to baking perfection. Embrace the process, savor the aroma, and enjoy the exquisite taste of truly homemade goodness!