
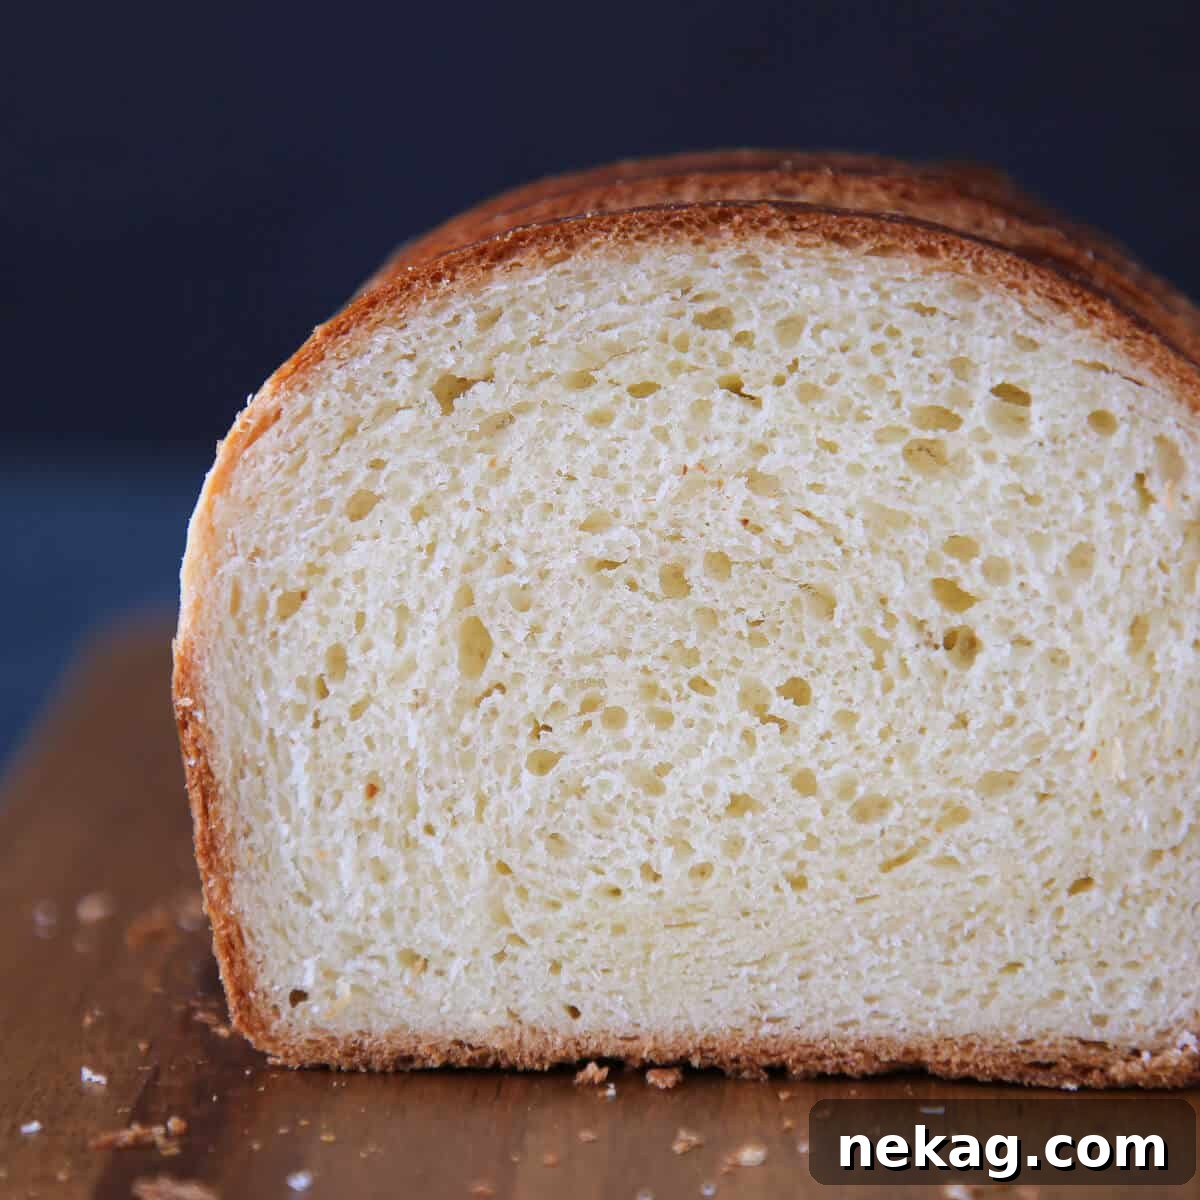
The Ultimate Soft & Buttery Brioche Bread: A Professional Chef’s Recipe
Imagine a bread so incredibly soft and buttery it simply melts in your mouth, bringing the authentic taste of a traditional French bakery right into your kitchen. This **brioche bread recipe** is designed to be not only simple to make but also delivers an exceptionally tender crumb and rich flavor. Perfect for serving with dinner, making luxurious sandwiches, or transforming into delightful desserts like our easy bread pudding, this brioche is a true culinary masterpiece you can create at home.
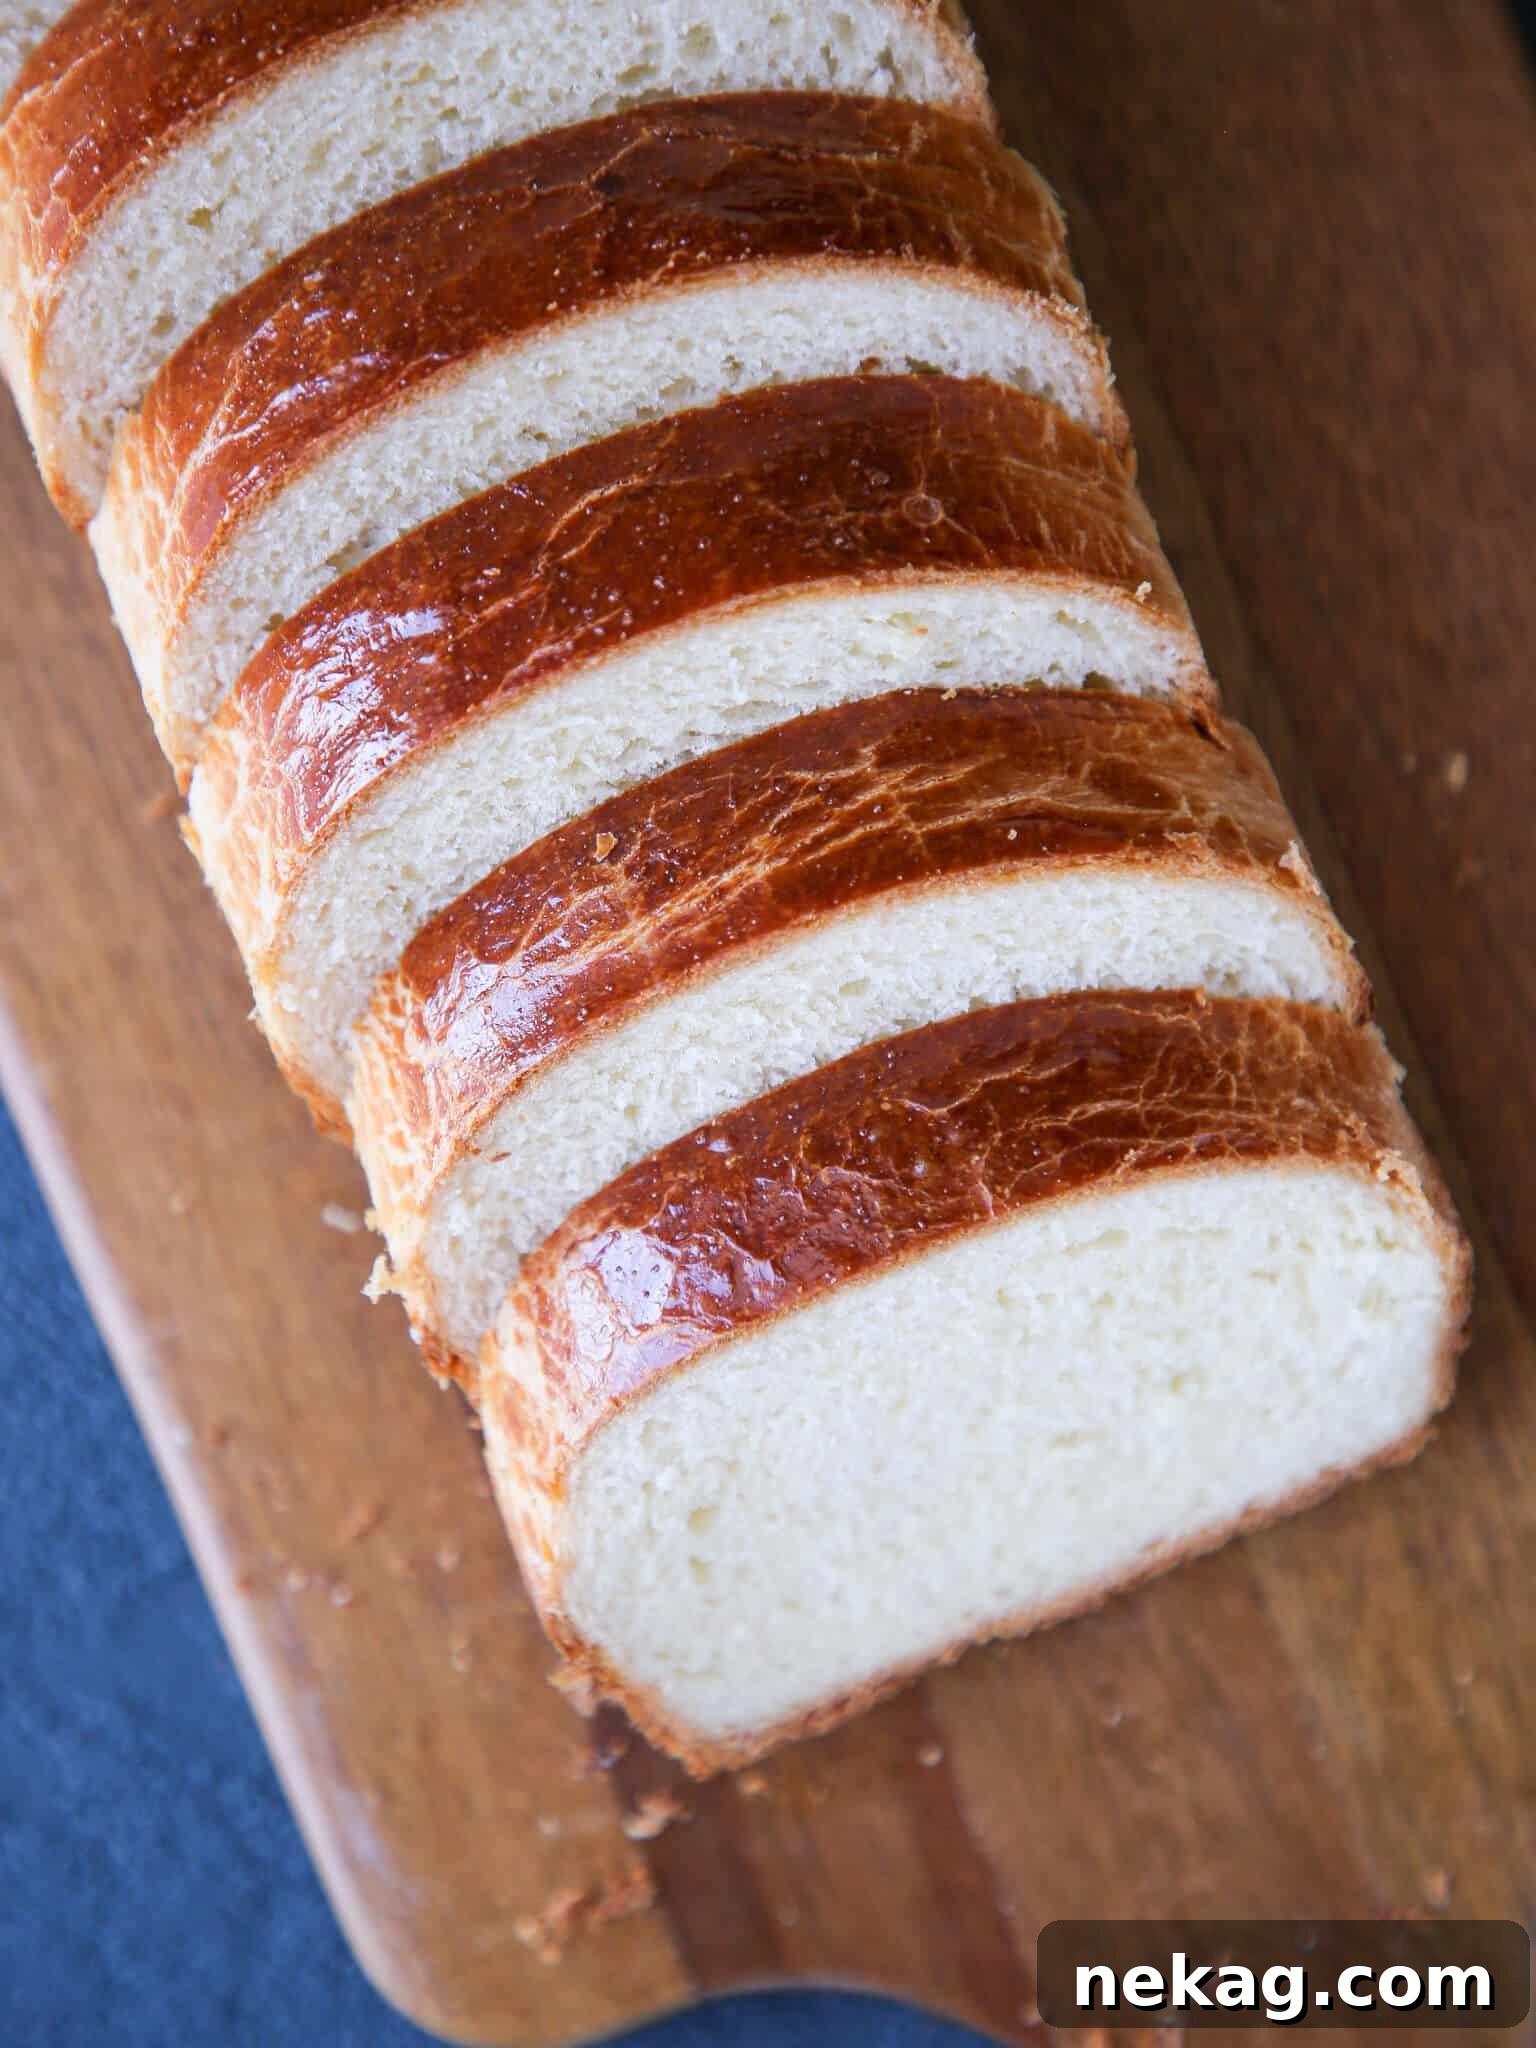
Achieving your very own loaf of perfect brioche, with its characteristic tender crumb and harmonious balance of buttery sweetness, is now well within your reach. As a pastry chef who honed skills in some of New York City’s top restaurants and bakeries, I’ve poured all my learned steps, detailed photos, and invaluable secret tips into this recipe. You’ll gain professional insights that elevate your home baking to an entirely new level.
While brioche bread holds a special place in my heart, I sometimes enjoy exploring other delicious options. For variety, my whole wheat sandwich bread recipe, soft honey whole wheat buttermilk rolls, and easy dinner rolls offer fantastic alternatives that can make any meal feel extra special. And for those glorious leftovers (should you be lucky enough to have any!), they can be transformed into decadent treats like my lemon raspberry bread pudding or pumpkin French toast, perfect for seasonal indulgence.
Table of Contents
- Why You Will Love This Brioche Recipe
- What is Brioche Bread Made Of? Essential Ingredients Revealed
- Creative Variations for Your Brioche Loaf
- Smart Ingredient Substitutions for Brioche
- Professional Tips for Perfect Brioche
- How to Make Brioche Bread: A Step-by-Step Guide
- Chef Lindsey’s Expert Recipe Tip
- Brioche Bread FAQs
- More Recommended Fluffy Bread Recipes
- Brioche Bread Recipe Card
- Before You Go: Explore More Bread Recipes
Why You Will Love This Brioche Recipe: Master the Art of French Baking at Home
- Developed by a Professional Pastry Chef: This isn’t just another bread recipe; it’s a meticulously tested and perfected brioche formula crafted by a professional pastry chef. My years of experience in high-end French bakeries and NYC restaurants mean you’re getting insider secrets and techniques that guarantee a truly authentic, melt-in-your-mouth brioche. Prepare to impress everyone with bread that tastes like it came straight from Paris!
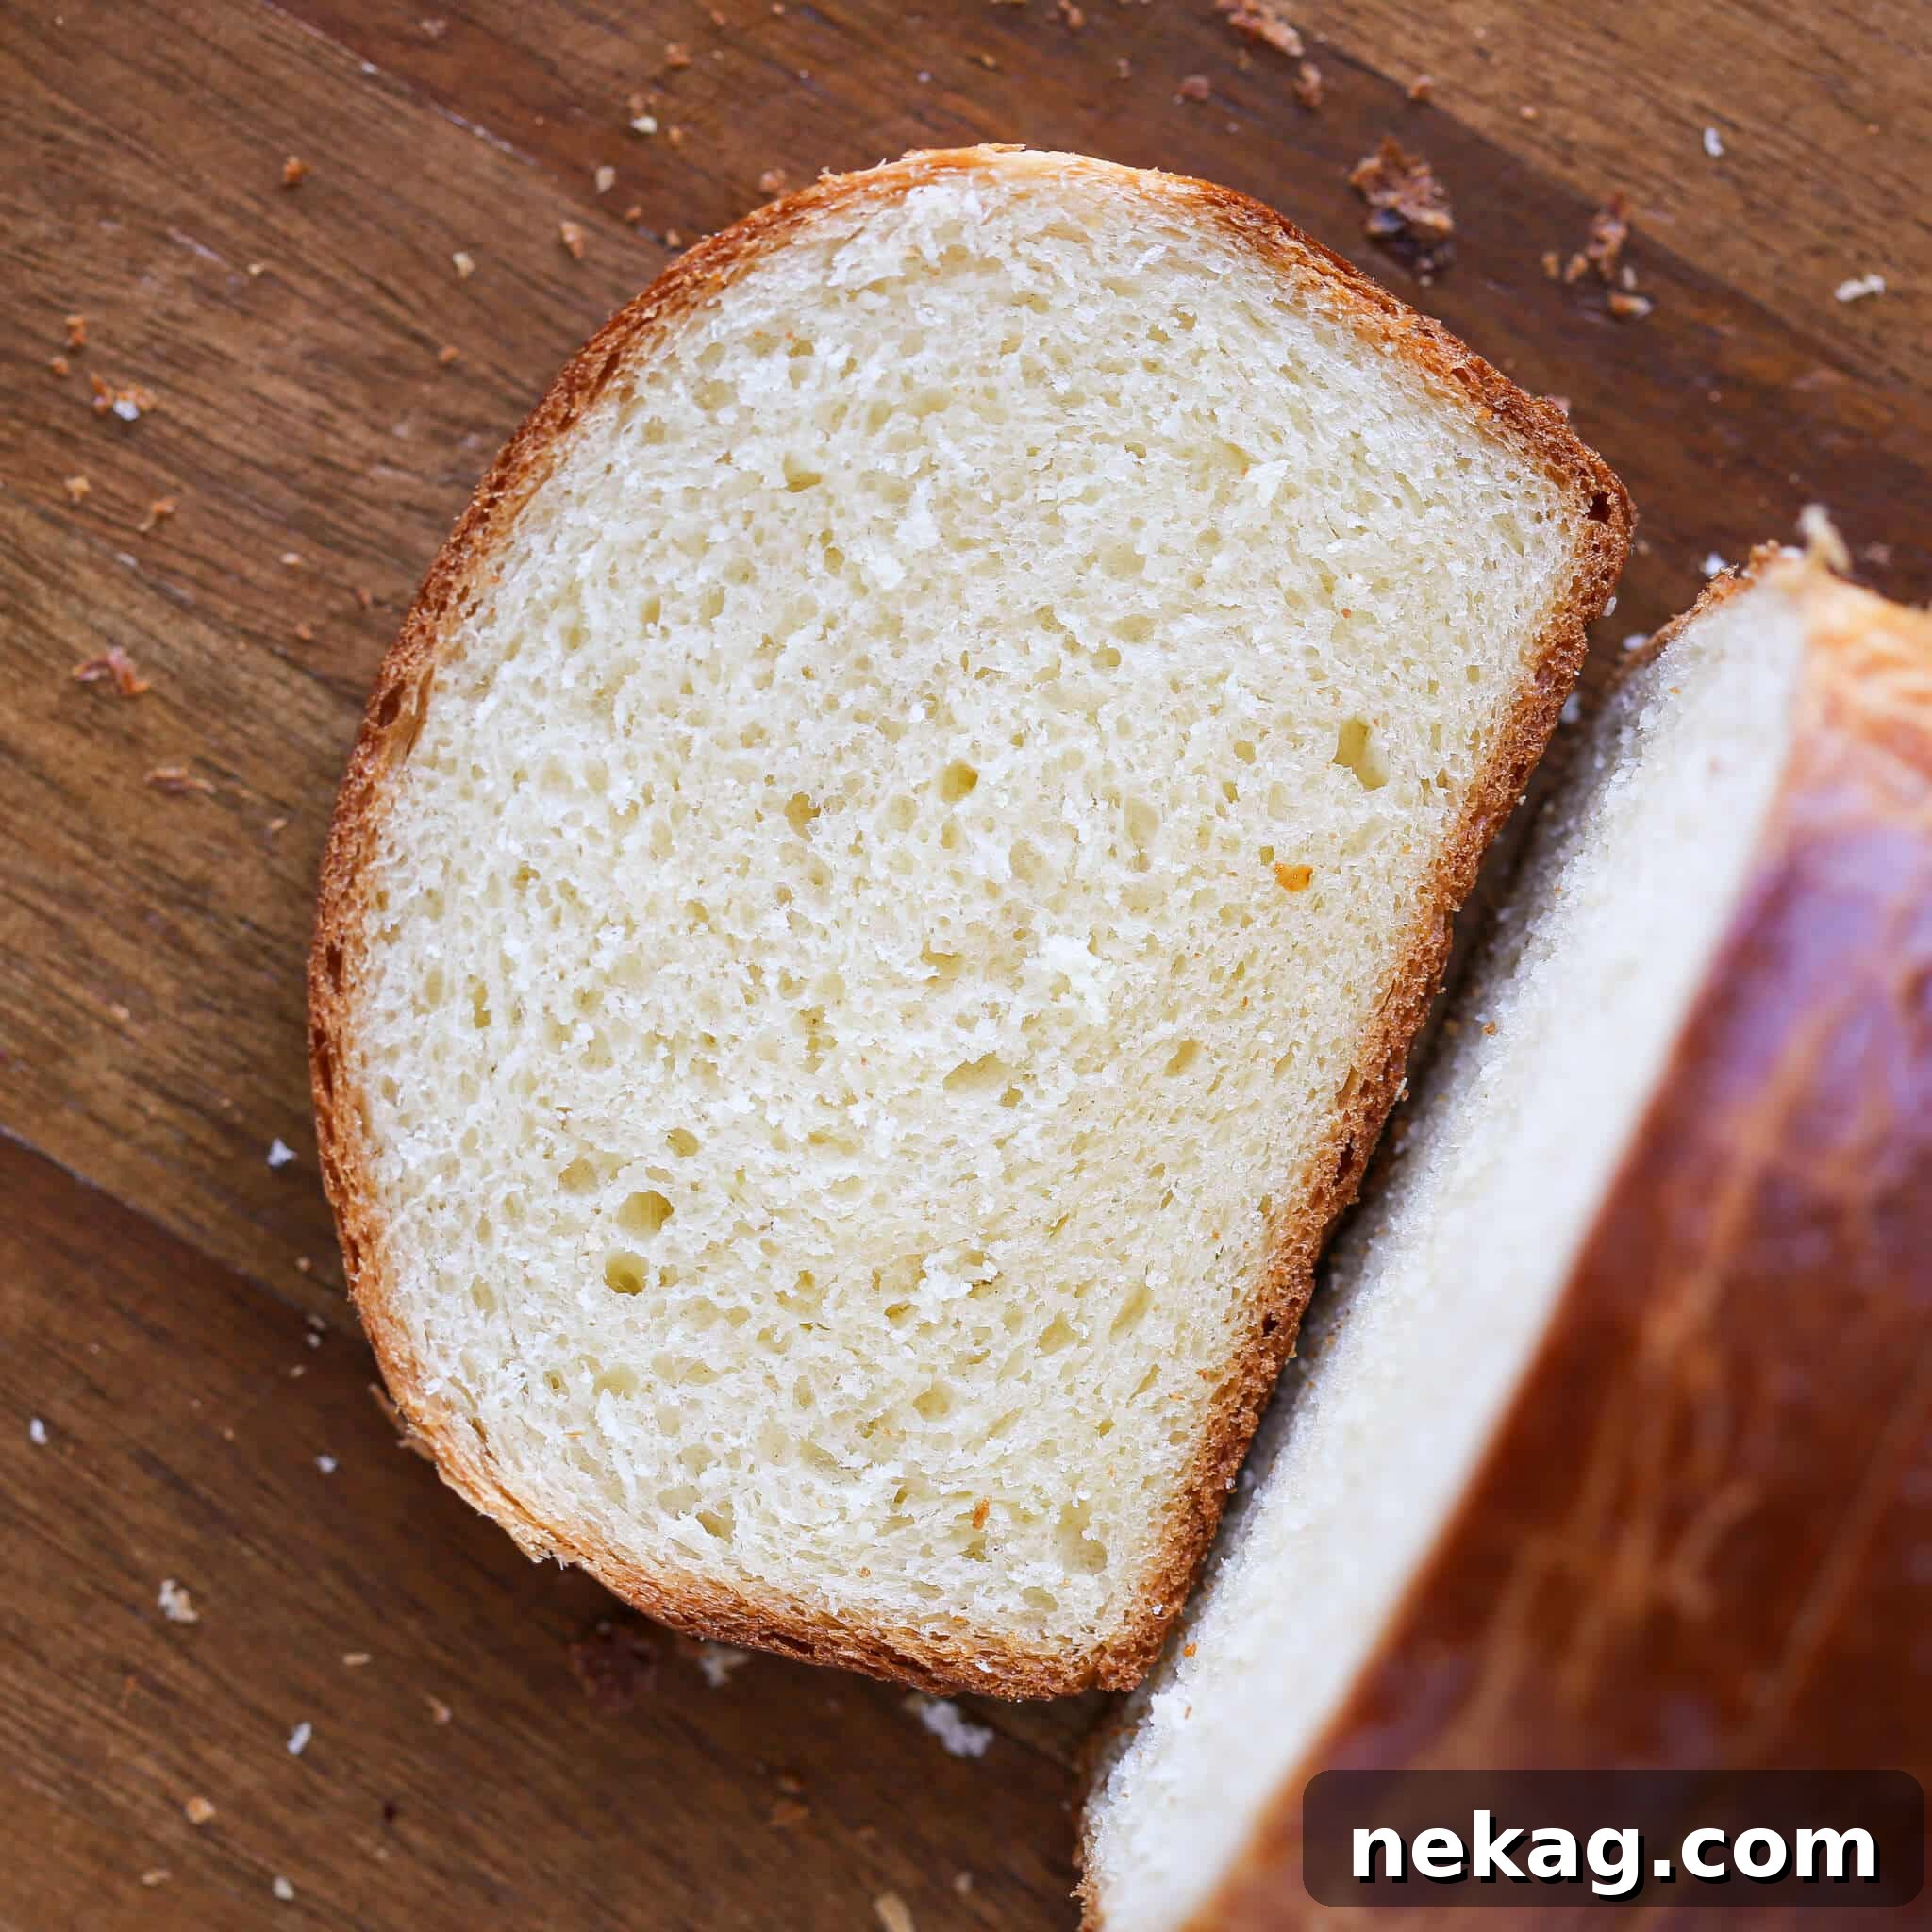
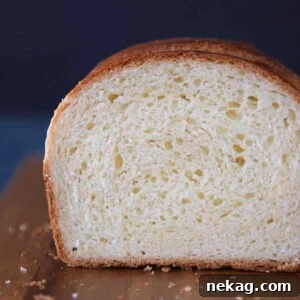
- Achieve that Signature Soft and Tender Brioche Texture: The hallmark of outstanding brioche is its exquisite texture—a delicate, airy, and incredibly tender crumb. This recipe achieves that perfect balance through the precise amount of butter and a hint of sweetness, resulting in a bread that’s rich, subtly buttery, and unbelievably soft. It’s a sensory experience that defines true brioche.
- An Easy-to-Make Brioche Recipe with Manageable Dough: Forget the struggle of overly sticky or difficult-to-handle doughs. This brioche recipe is designed for ease. The dough comes together beautifully, making the entire process enjoyable, even for novice bakers. If you have a stand mixer, your dough will be ready in surprisingly little time, simplifying the kneading process considerably.
- Incredibly Versatile for Any Meal: One of brioche’s greatest strengths is its adaptability. While it shines as a standalone treat, its delicate flavor profile makes it perfect for both sweet and savory applications. Use it for gourmet sandwiches, as a refined accompaniment to dinner, or toast it for an unparalleled breakfast experience. Its adaptability makes it a staple for any home cook.
- A Touch of French Elegance for Your Table: There’s something inherently luxurious about brioche. Baking it at home fills your kitchen with an intoxicating aroma and brings a touch of sophisticated French charm to your table. It’s more than just bread; it’s an experience that elevates everyday meals and special occasions alike.
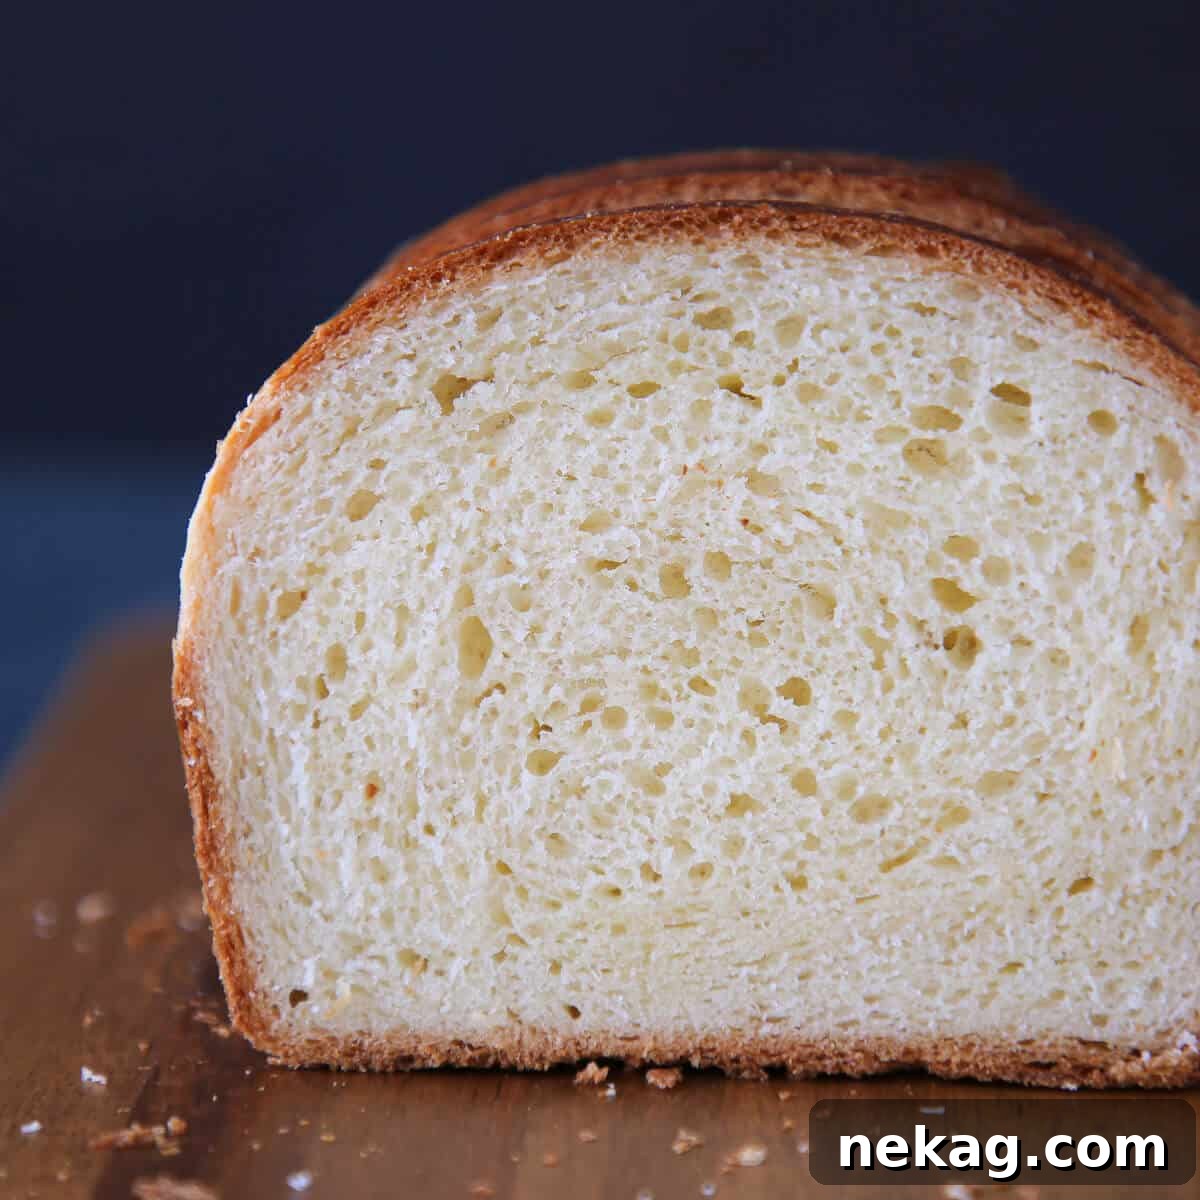
What is Brioche Bread Made Of? Essential Ingredients Revealed
Brioche is a celebrated French pastry-like bread, renowned for its rich and tender texture, which comes from a high content of eggs, butter, and often sugar. Understanding the role of each ingredient is key to perfecting your homemade brioche. Here’s a breakdown of what makes this brioche truly special:
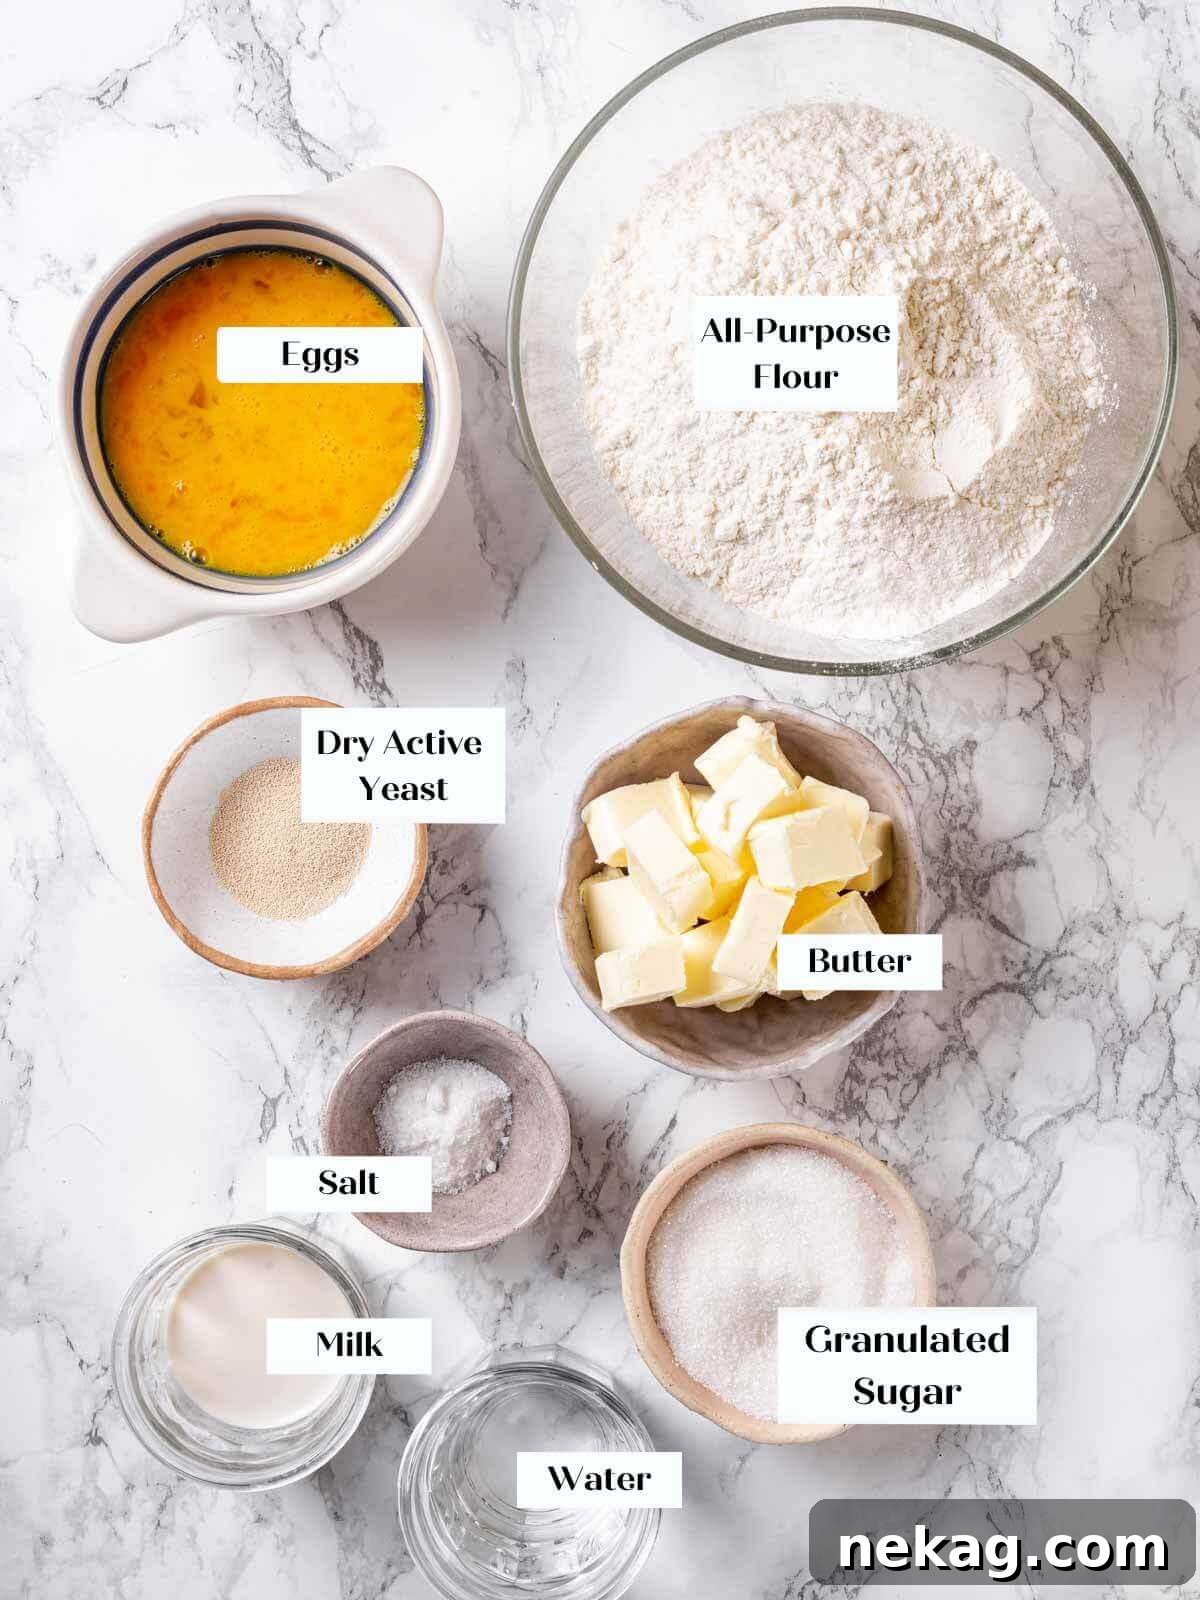
- Water & Milk: A combination of warm water and milk is used to create the initial sponge and hydrate the dough. The milk adds richness and helps create a softer crumb, contributing to brioche’s signature tenderness. Using warm liquids is crucial for activating the yeast effectively.
- Kosher Salt: Salt is more than just a seasoning; it plays a vital role in controlling yeast activity and enhancing the overall flavor profile of the bread. It balances the sweetness and brings out the subtle richness of the butter and eggs.
- Dry Active Yeast: While it requires an initial hydration step, dry active yeast offers consistent and reliable results. It ensures a good rise and contributes to the bread’s airy structure. See our substitutions section for other yeast options if needed.
- Eggs: Large eggs are a cornerstone of brioche, adding significant fat, richness, and color to the dough. Beyond flavor, they also contribute essential hydration and help build the luxurious texture. Remember, you’ll need an additional egg specifically for the golden egg wash before baking.
- Butter: This is the star ingredient! Unsalted butter is preferred as it allows you to precisely control the salt content in your dough. It’s the generous amount of high-quality butter that gives brioche its distinctive flaky, tender, and incredibly rich character – truly what makes brioche, **brioche**.
- Is there a lot of sugar in brioche? Contrary to popular belief, traditional brioche isn’t overly sweet, especially when compared to desserts or sweet breads like sweet cornbread. This recipe uses only ¼ cup of sugar for two loaves, a modest amount that enhances flavor without making it cloyingly sweet. This subtle sweetness is why brioche is wonderfully versatile, equally perfect for both sweet and savory dishes.
- What type of flour is best for brioche? While many associate bread flour with superior bread, all-purpose flour is actually ideal for brioche. Its slightly lower protein content results in a lighter, more tender crumb, which is precisely the desired characteristic for this delicate French bread. Bread flour would yield a chewier texture, which isn’t traditional for brioche.
For a complete list of ingredients and their exact quantities, please refer to the comprehensive recipe card below.
Creative Variations for Your Brioche Loaf: Customize Your French Masterpiece
One of the joys of brioche is its adaptability. This foundational recipe can be easily customized to create a range of delightful treats. Here are some popular variations to inspire your baking:
- Transform them into Rolls or Buns: This versatile brioche dough is perfect for shaping into individual rolls or hamburger buns. Simply divide the dough as you would for my brioche bun recipe. This recipe yields approximately 12 perfectly sized dinner rolls. Follow the precise dividing, shaping, and baking instructions from my easy dinner roll recipe for best results. For those who appreciate precision, each roll should weigh about 82g for uniform baking.
- Whip up a Raisin or Nut Variety: Elevate your brioche with delicious add-ins! You can incorporate any combination of dried fruits or nuts, up to one pound (454g). For example, if you love old fashioned raisin bread as much as I do, feel free to add up to a pound of plump raisins to the dough after the initial mixing stage. Other great options include dried cranberries, chopped almonds, or pecans.
- Add Some Citrus Zing: Infuse your brioche with subtle, bright notes of citrus. Incorporate finely grated lemon or orange zest into the batter along with the other dry ingredients. For an even more pronounced flavor, substitute the water in the recipe with fresh orange juice or another fruit juice of your choice. This adds a lovely aromatic complexity that pairs beautifully with the rich butter.
- Savory Brioche: While often associated with sweetness, brioche can also be a fantastic base for savory flavors. Consider adding herbs like rosemary or thyme, grated Parmesan cheese, or even some caramelized onions to the dough. This makes an incredible accompaniment to soups, stews, or a cheese board.
Smart Ingredient Substitutions for Brioche: Adapting the Recipe with Confidence
Life happens, and sometimes you don’t have every ingredient on hand. Here are some smart substitutions that will allow you to make this brioche recipe successfully without compromising too much on quality or flavor:
- Whole Milk: My preference for baking, especially in brioche, is whole milk due to its rich flavor and higher fat content, which contributes to a more tender crumb. However, you can successfully use skim milk, any plant-based alternative milk (like almond or soy milk), or even use all water for the liquid component. Keep in mind that using lower-fat liquids might result in a slightly less rich and tender bread, but it will still be delicious.
- All-purpose flour: This recipe specifically calls for all-purpose flour to achieve that wonderfully light and tender brioche texture. If bread flour is all you have, you can certainly use it. However, be aware that bread flour has a higher protein content, which means it will develop gluten faster. This could lead to a slightly chewier final product rather than the desired tender crumb. Adjust your mixing time accordingly – you’ll likely need less time to achieve the window pane test.
- Yeast: Dry active yeast is our preferred choice for its consistency. If you need to make a substitution, here are your options:
- Fresh Yeast: Use double the weight of fresh yeast compared to dry active yeast.
- Instant Yeast: Use half the weight of instant yeast compared to dry active yeast.
If using either fresh or instant yeast, you can add them directly to the dry ingredients with the flour. However, for an optimal start to fermentation and gluten development, I highly recommend mixing them into the warm liquids to create a sponge, just as you would with dry active yeast. This pre-activation step helps ensure a vigorous rise.
- Unsalted Butter: While unsalted butter gives you the most control over the salt content, if you only have salted butter, you can use it. Just be sure to reduce the amount of kosher salt called for in the recipe by about ¼ to ½ teaspoon to prevent your brioche from becoming too salty.
Professional Tips for Perfect Brioche: Unlock Bakery-Quality Results
Achieving bakery-quality brioche at home is entirely possible with a few professional insights. These tips are gleaned from years of experience and will help you produce a truly exceptional loaf:
- Patience is Key: Wait for the Dough to Rise, Really Wait. It’s incredibly tempting to rush the proofing process, especially the bulk proof (the first rise). However, this stage is paramount for developing both the deep flavor and robust structure of fluffy, soft bread. The yeast needs ample time to ferment, producing gases that create air pockets and building the complex flavors that define brioche. Don’t underestimate this waiting period – it’s a non-negotiable step for superior results.
- Measure by Weight for Consistency: While cup measurements are common, an inexpensive kitchen scale is your best friend in baking, especially for precision-driven recipes like brioche. Measuring ingredients by weight (grams or ounces) ensures accuracy and consistency every single time. It eliminates variables caused by different packing methods for flour and allows you to easily scale the recipe up or down. Having personally made 40-quart batches of this recipe in a commercial kitchen, I can attest to the importance of accurate weighing for consistent success.
- Develop the Dough Before Adding the Butter: This is a crucial technique that differentiates this recipe from many others. Butter, particularly cold butter, can inhibit gluten formation. By mixing and developing the gluten network in your dough *before* incorporating the butter, you significantly speed up the overall mixing process. This allows the gluten to form a strong, elastic structure capable of holding all that rich butter and eggs, leading to a perfectly airy and tender crumb. Trust this professional tip – it makes a real difference!
- Master the Window Pane Test: This isn’t just a fancy chef technique; it’s a vital indicator of proper gluten development. Understanding how to perform and interpret the window pane test ensures your dough has the right elasticity and strength before proceeding. This step is detailed further in the “How to Make Brioche Bread” section.
- Control Your Proofing Environment: Yeast loves warmth and humidity. Find a warm, draft-free spot in your kitchen for proofing. If your kitchen is cool, consider using a proofing box, a slightly warmed oven (turned off!), or even placing the bowl near a sunny window. Consistent warmth helps the dough rise evenly and efficiently.
How to Make Brioche Bread: A Step-by-Step Guide to French Bakery Perfection
Crafting homemade brioche is a rewarding experience, yielding a bread that’s far superior to anything store-bought. Follow these detailed steps to create a truly magnificent loaf. Further precise measurements and comprehensive details can be found in the recipe card below!
Mix the Dough: Creating the Foundation
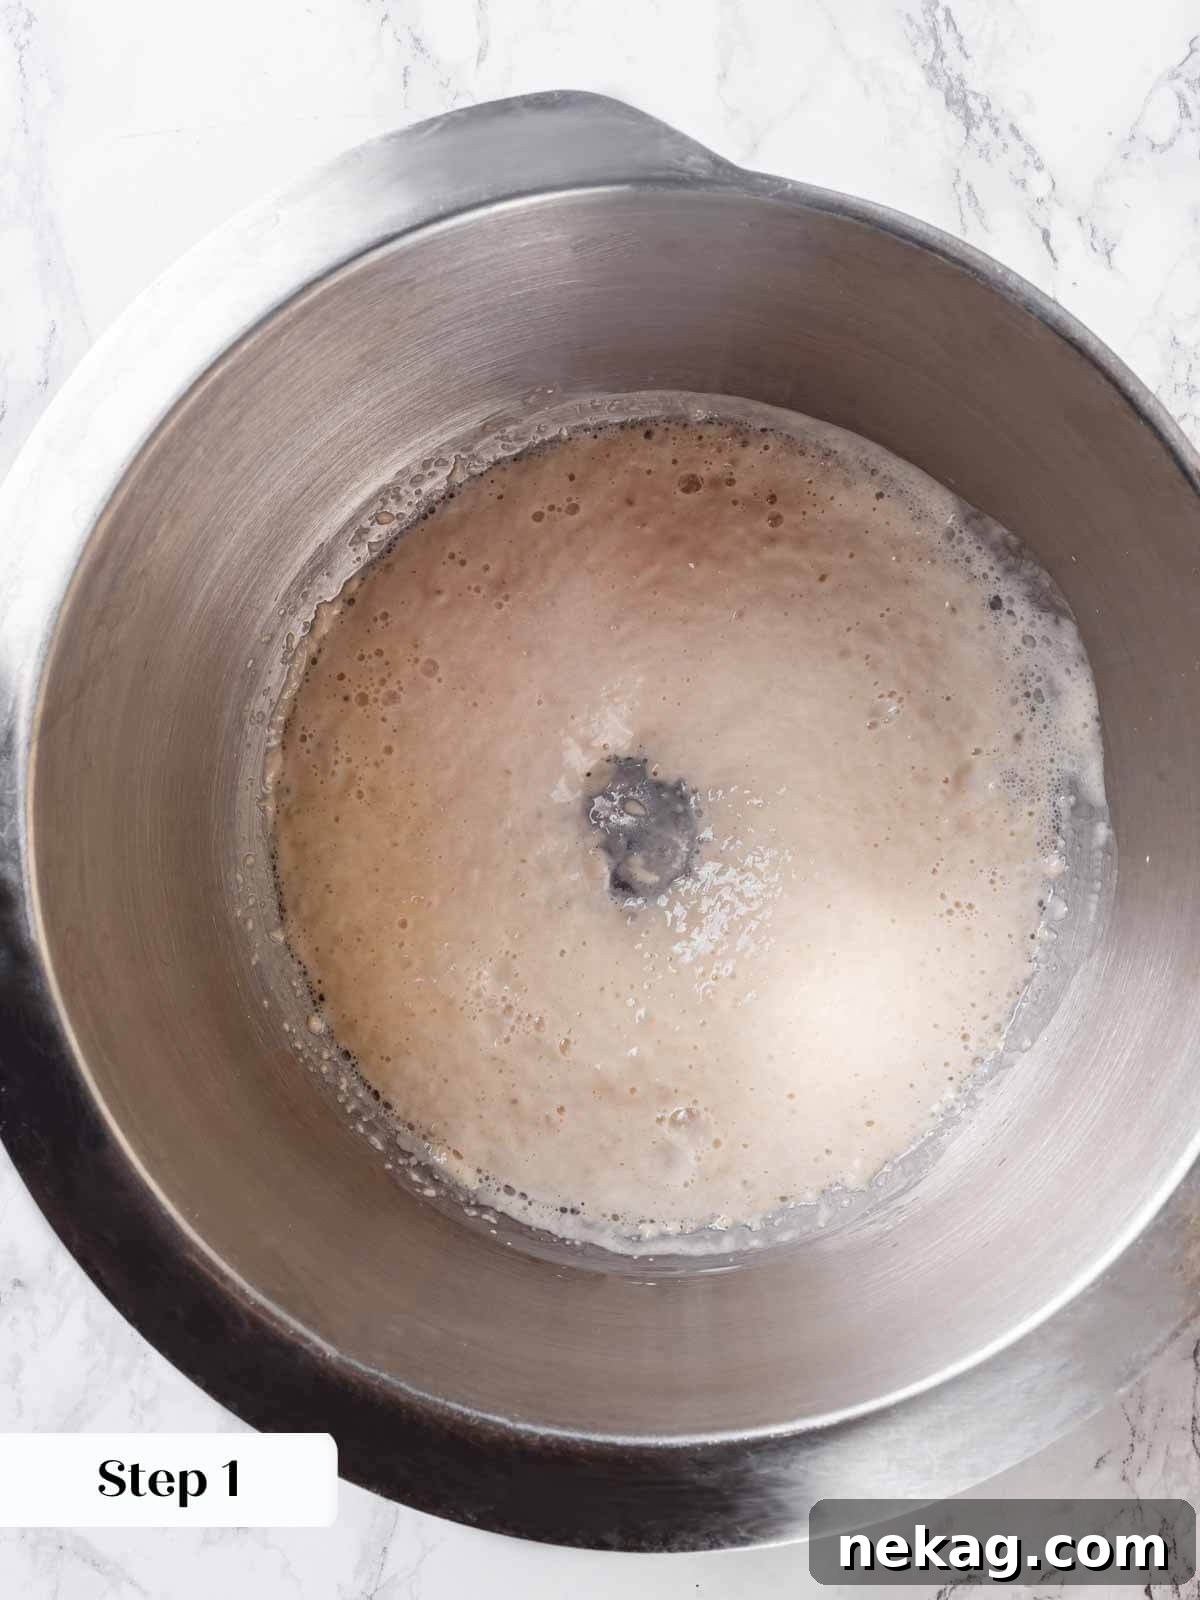
Step 1: Activate the Yeast. In the bowl of your stand mixer, gently whisk together the dry active yeast with the specified amount of warm water (around 105-115°F or 40-46°C). Allow this mixture to sit undisturbed for 10-15 minutes. You’ll know the yeast is active and thriving when a foamy, bubbly layer forms on the surface, indicating it’s ready to work its magic.
Chef’s Note: Batch Size Matters for Home Mixers. I’ve found that preparing two loaves at once yields optimal results in most home stand mixers, as it provides enough volume for efficient gluten development. I often bake two and freeze one for later enjoyment. While you can halve this recipe for a single loaf, be aware that smaller quantities can sometimes make it more challenging for stand mixers to adequately develop the gluten network.
Step 2: Combine Initial Ingredients. Into the stand mixer bowl with the activated yeast, add the milk, sugar, eggs, salt, and all-purpose flour. Attach the paddle attachment to your mixer. Begin mixing on the lowest speed until all the ingredients are just incorporated and no dry pockets of flour remain. This initial gentle mix ensures everything is hydrated before intense kneading begins.
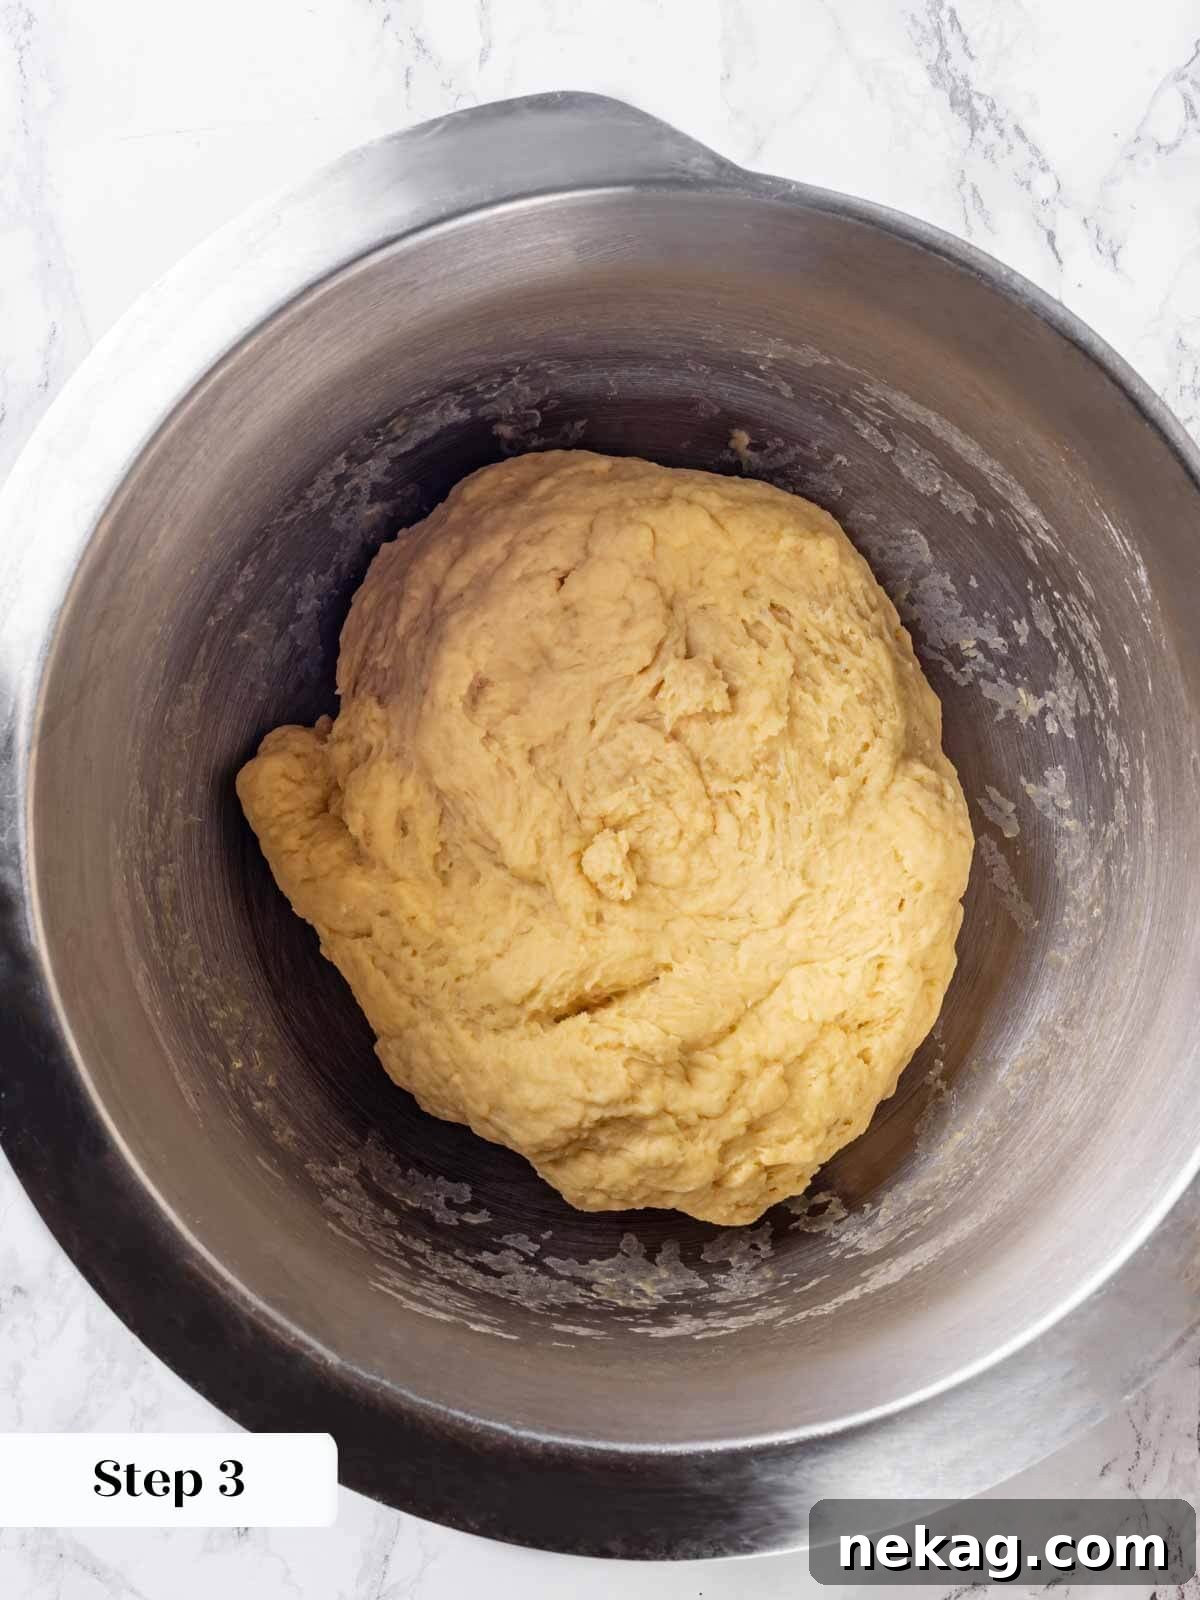
Step 3: Develop the Gluten (Pre-Butter). Switch from the paddle attachment to the dough hook. Increase the mixer speed to medium and continue mixing until a smooth, elastic dough forms. At this stage, the dough should pull away cleanly from the sides of the bowl. Perform the “window pane test” to confirm sufficient gluten development before proceeding to add the butter.
Mastering the WINDOW PANE TEST: Your Gluten Development Indicator. To perform this crucial test, take a golf ball-sized piece of dough from the mixer. Gently begin to stretch and pull the dough apart with your fingers, working from the center outwards. Imagine forming a small, thin square, carefully pulling on opposite sides, then rotating and repeating. If the dough tears instantly, it needs more mixing time. However, if you can stretch it thin enough to see light passing through it without tearing – much like a window pane – then your gluten is well-developed. For brioche, we aim for a strong gluten network to support the high fat content from butter and eggs. Ideally, the dough will be smooth with minimal visible “veins,” but even with some slight veins (as seen in the accompanying picture), the resulting bread will be wonderful.

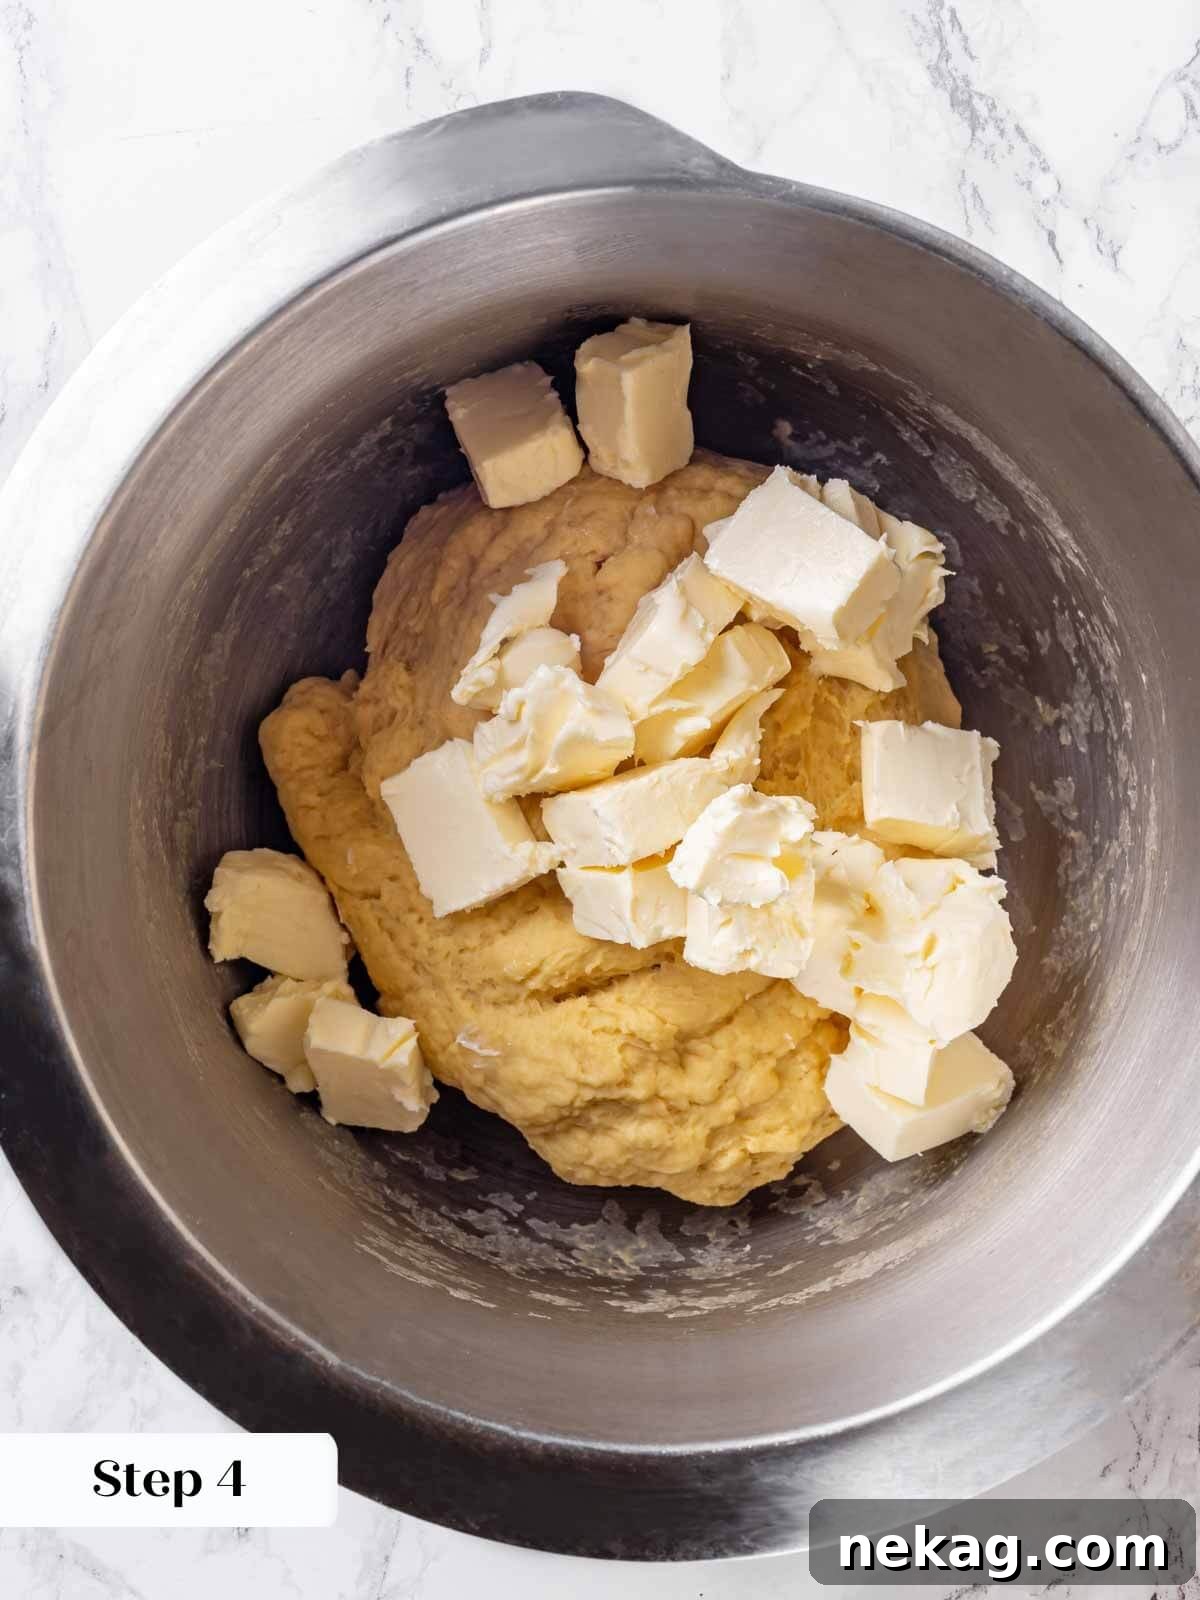
Step 4: Incorporate the Butter. Once the dough passes the window pane test, it’s time to add the softened (but crucially, not melted) unsalted butter. Add it one piece at a time to the stand mixer and mix on low speed until the butter is fully absorbed and disappears into the dough. The dough will become even smoother and incredibly rich.
Professional Insight: Why Add Butter Later? As mentioned in our professional tips, adding butter *after* the initial gluten development significantly shortens the overall mixing time and ensures a stronger, more resilient dough. This robust gluten structure is essential for holding up to the rich content of eggs and butter. While you *can* add the butter with the other ingredients in Step 2, be prepared for a longer mixing process to achieve proper gluten development. If you find your dough isn’t developing perfectly with the butter already in, simply incorporate an extra set of folds during the proofing stage to further strengthen the gluten.
Step 5: First Proofing and Folds. Carefully remove the dough from the stand mixer bowl using a stiff silicone spatula or a bowl scraper. Transfer it to a lightly oiled bowl, turning it once to coat. Cover the bowl tightly with plastic wrap to prevent a skin from forming, and place it in a warm, draft-free spot. Allow the dough to proof for 30 minutes. After this initial rise, perform one “set of folds.”
Understanding a Set of Folds: A “set of folds” involves four distinct folds that strengthen the dough’s gluten network. Imagine the dough in the bowl as a clock face. Gently pull a portion of the dough up from one side (e.g., 12 o’clock) and fold it over onto the center of the remaining dough. Rotate the bowl a quarter turn (to 3 o’clock) and repeat the pull-and-fold action. Continue this process for all four sides. This gentle manipulation further develops gluten, creating a more structured and airy final product.
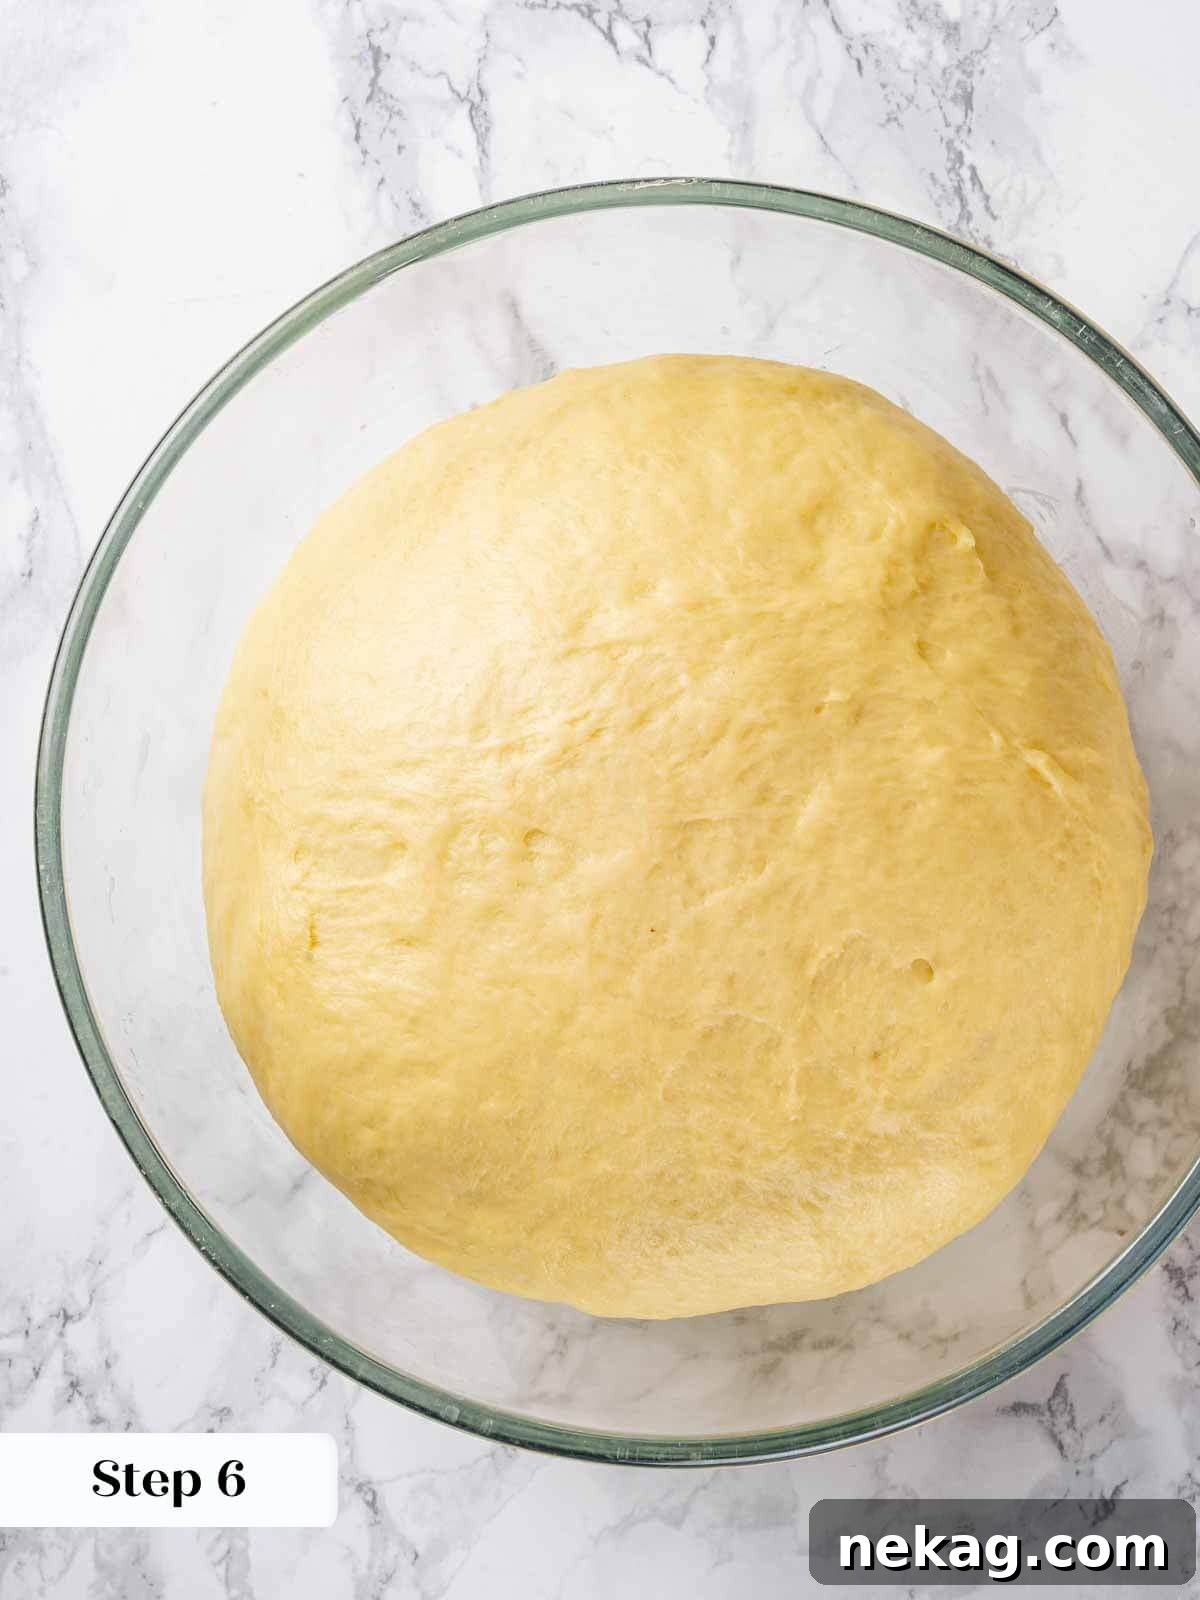
Step 6: Bulk Proof – The Main Rise. After performing the folds, re-cover the dough with plastic wrap and return it to your warm proofing spot. The bulk proof is a longer process, typically taking about 1 ½ hours, but can vary depending on your kitchen temperature. Check the dough every 45 minutes: lightly oil or flour your hand and gently poke the dough. It should feel significantly lighter, airy, and springy, not stiff or dense. It should have roughly doubled in size. This extended proofing time is crucial for flavor development.
Optional: Cold Proofing Brioche Dough for Enhanced Flavor. Traditional brioche often benefits from a long, slow cold proof in the refrigerator, especially for doughs with a very high butter content. While this recipe is designed to be quick and doesn’t strictly *require* a cold proof, you can certainly opt to refrigerate your dough overnight (8-12 hours) after the bulk proof. This slow fermentation in the cold deepens the flavor profile of the brioche, making it even more complex and delicious. If cold proofing, allow the dough to come to room temperature for about 30-60 minutes before proceeding to pre-shaping.
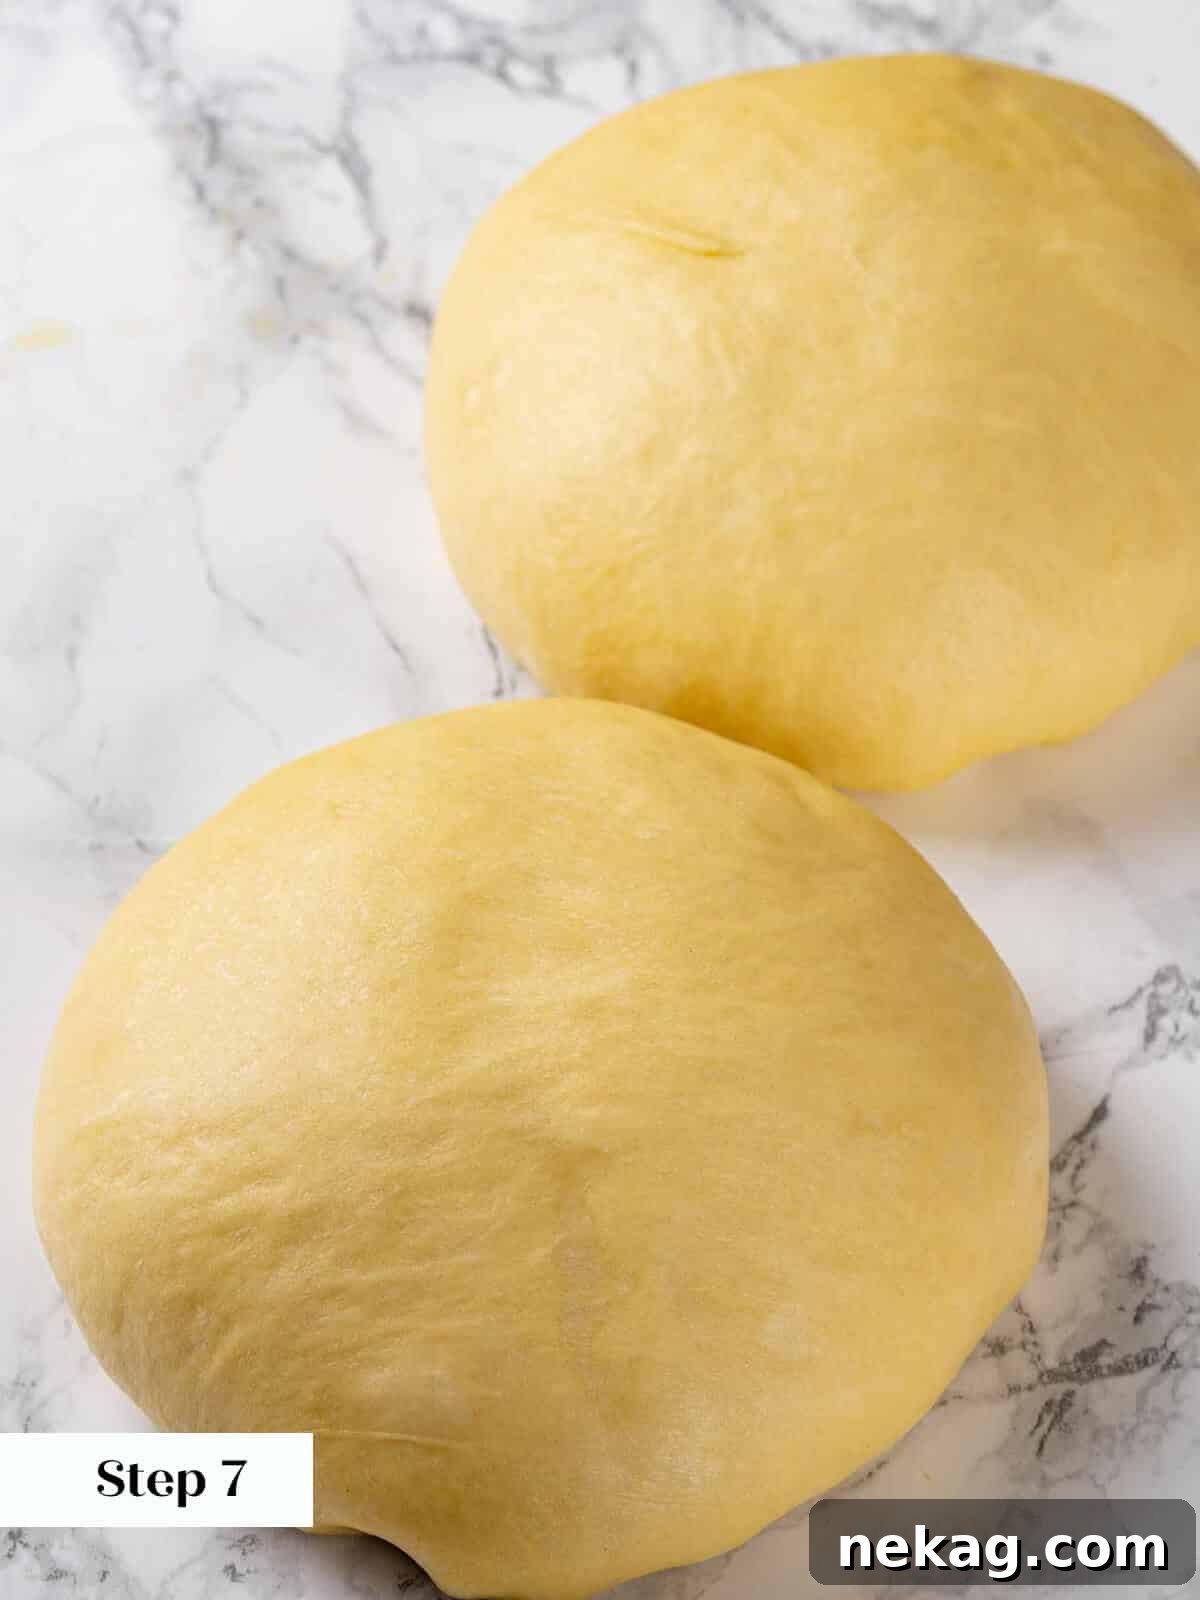
Step 7: Pre-shape & Bench Rest. Gently turn the proofed dough out onto a lightly floured work surface. Divide the dough into two equal halves (for two loaves). Take one half and gently perform a pre-shape: fold each of the four sides towards the center, creating a small, somewhat neat packet. Flip the dough over so the seam is now on the counter. Using both hands, gently cup the dough and pull it towards you, rotating it slightly to create tension on the surface and form a tight, round ball with a smooth top. Cover these shaped rounds with plastic wrap or a clean kitchen towel to prevent them from drying out, and allow them to rest on the counter for 15 minutes. This “bench rest” allows the gluten to relax, making the dough much easier to handle in the final shaping stage.
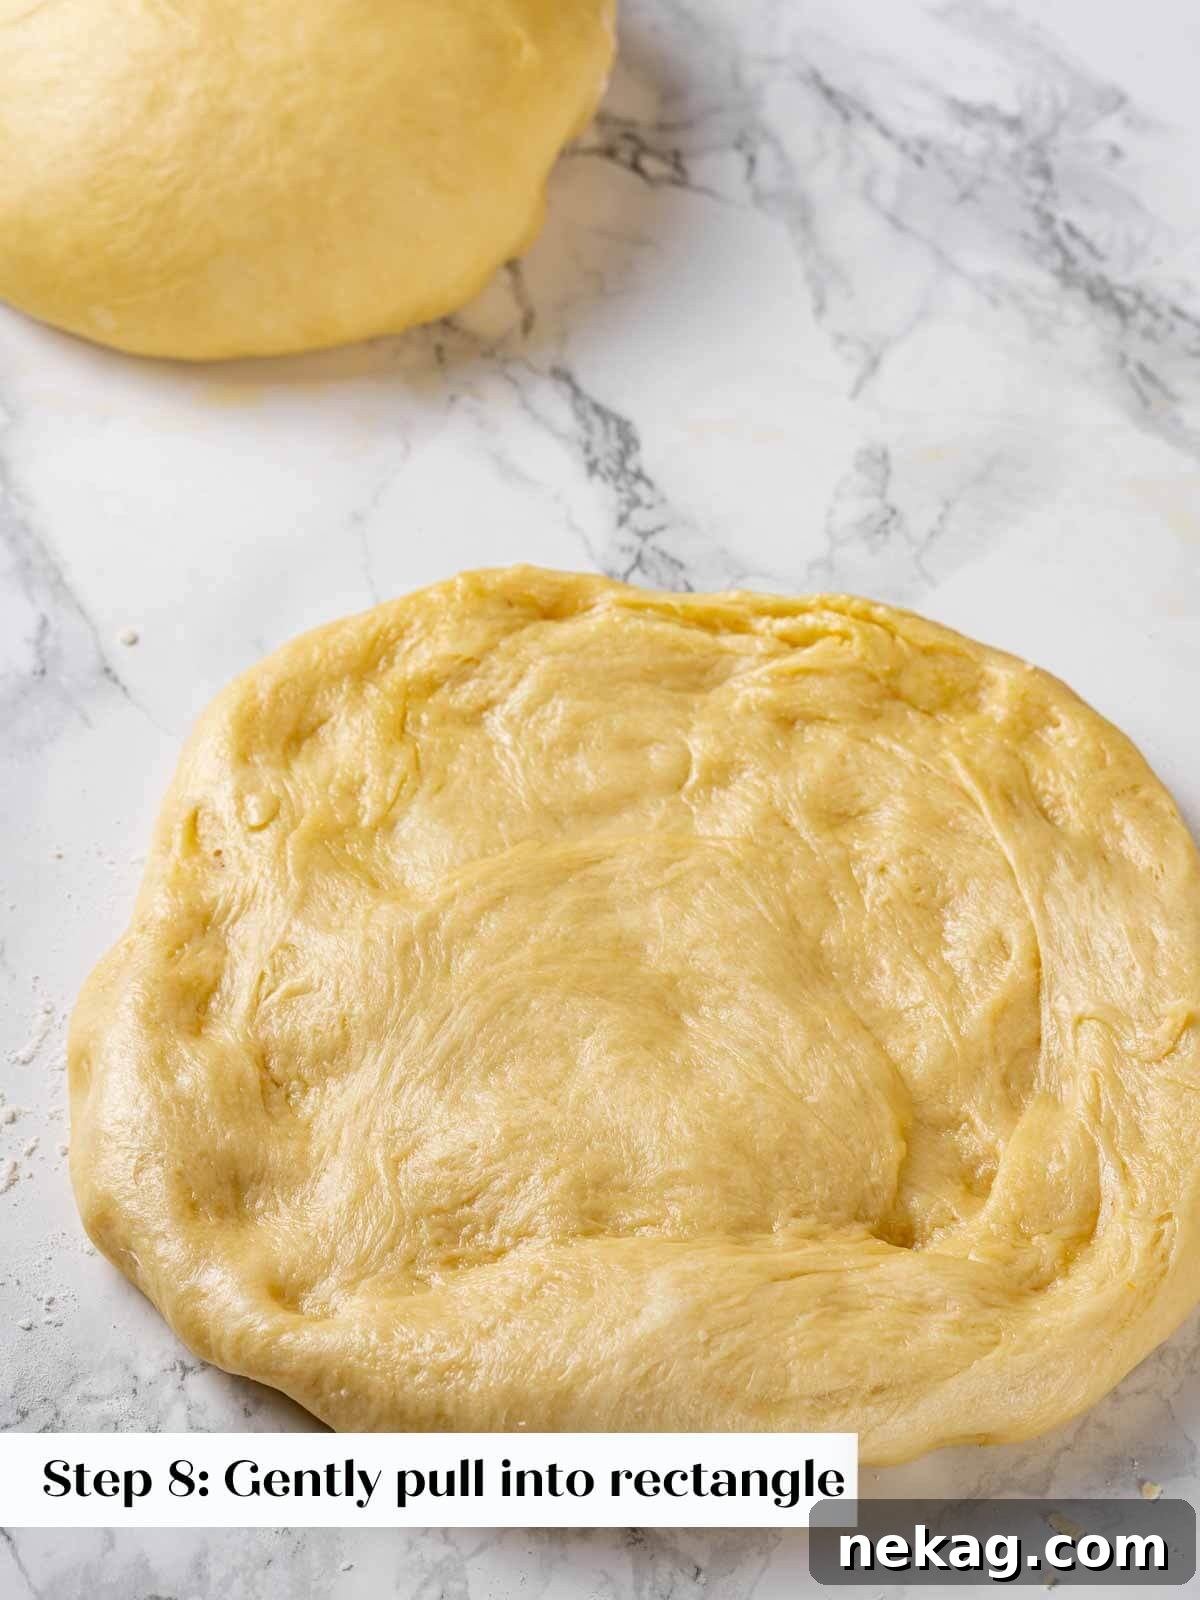
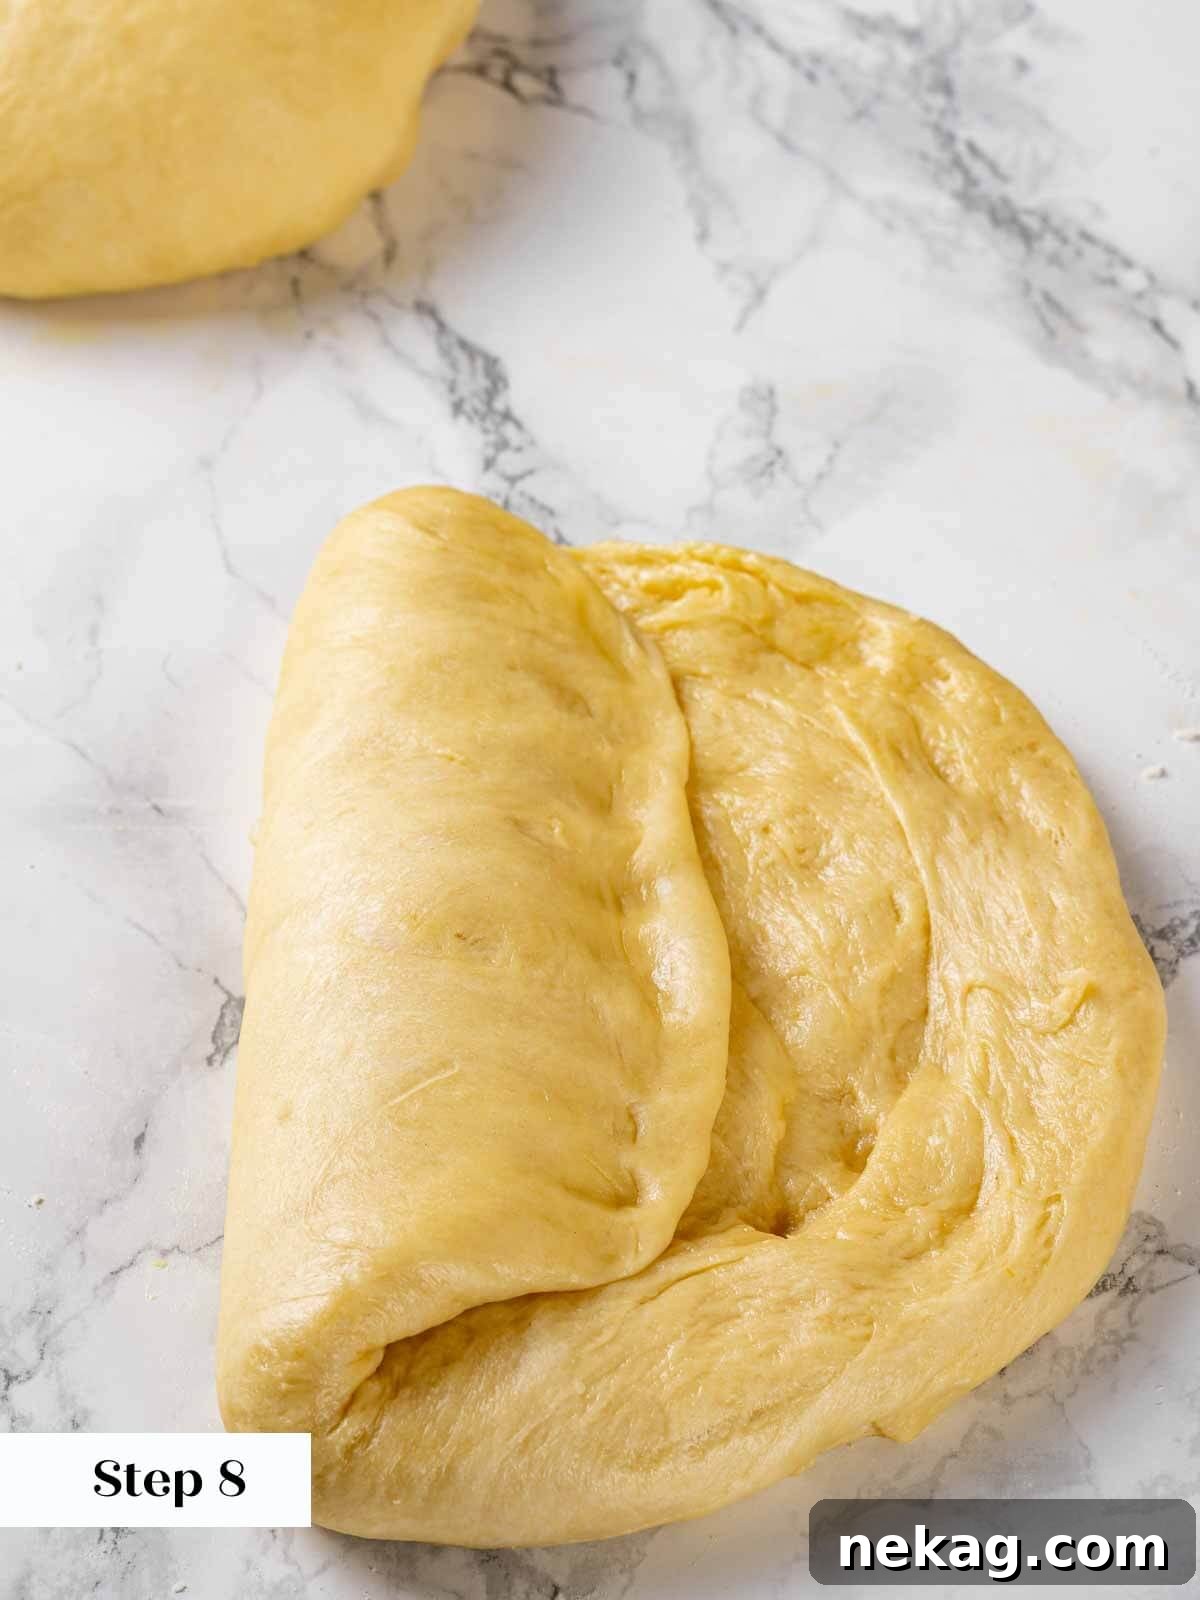
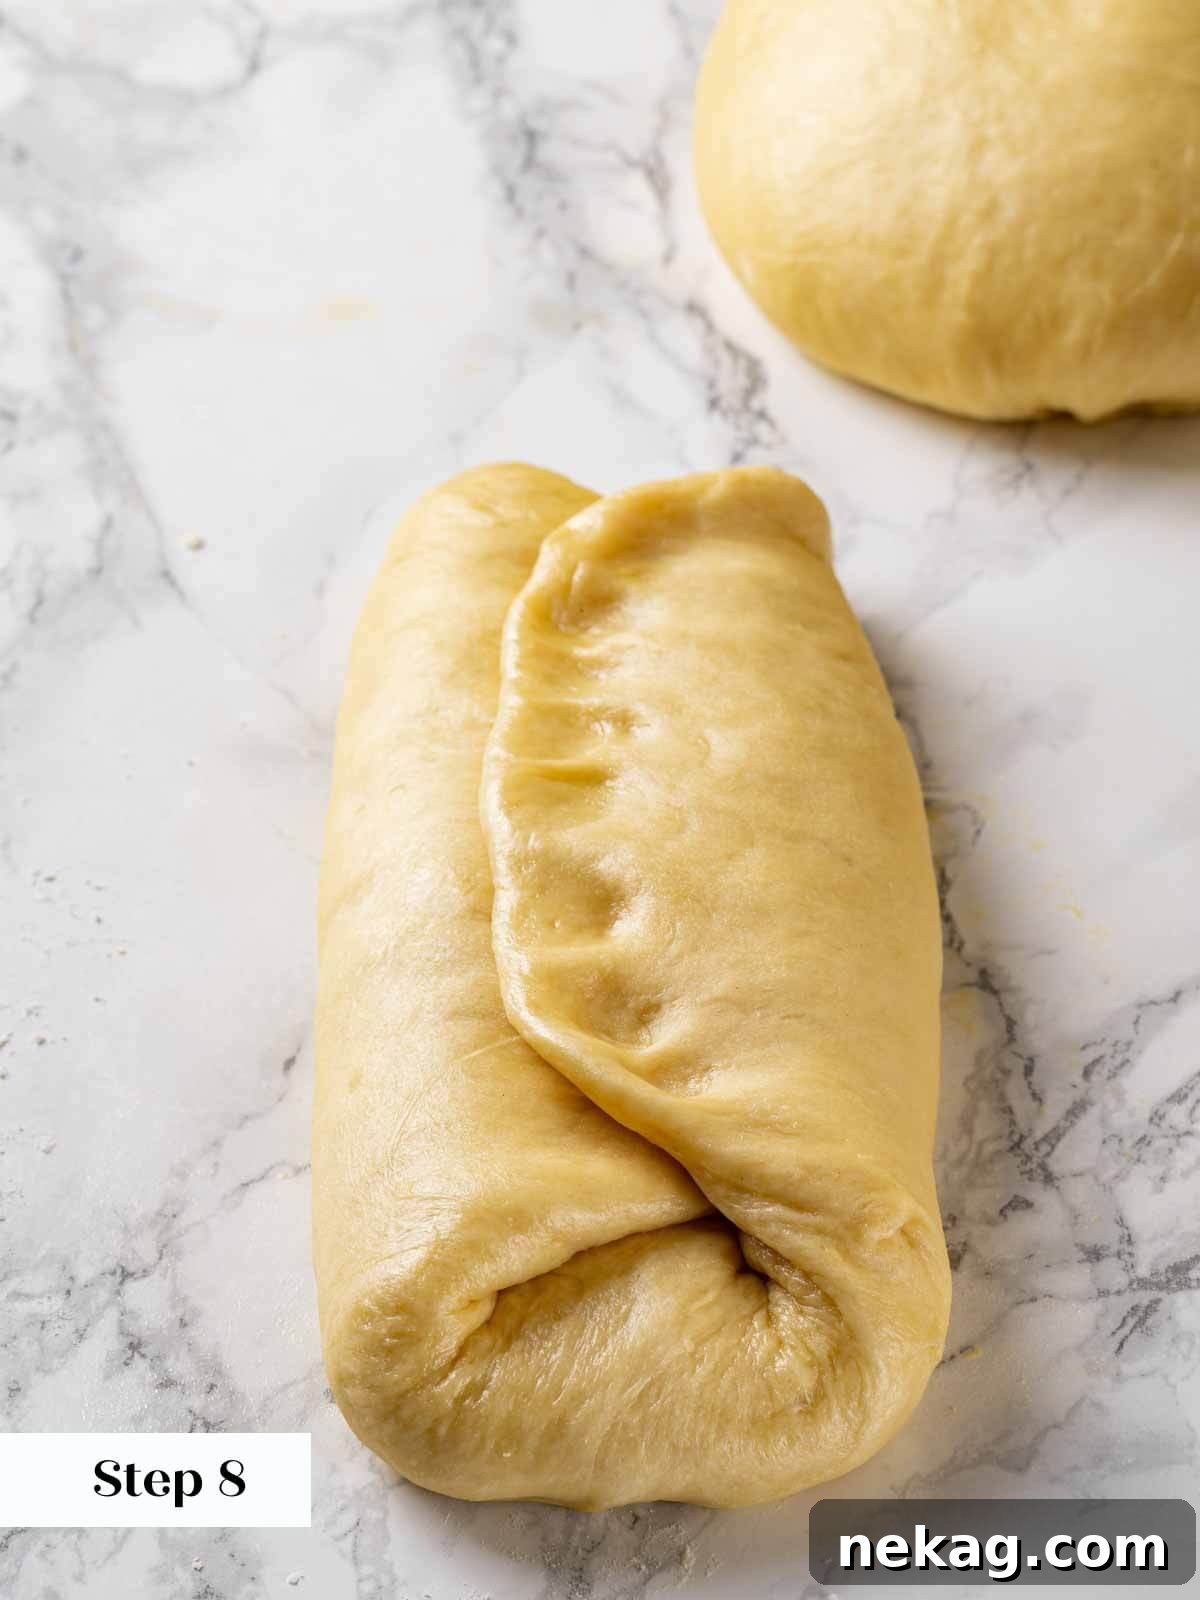
Step 8: Final Shape (Log or Bâtard). Now for the final shaping into a log, or a “bâtard” as it’s known in French bread making. Take one of your rested dough rounds and flip it over onto your lightly floured surface. Gently pat and pull it into a small rectangle. Place the rectangle flat on the counter. Fold the top edge down about 2/3 of the way and firmly press it into the dough beneath. Rotate the dough 180 degrees so the unfolded edge is now facing away from you. Fold that new top edge down towards you, meeting the bottom edge, and press firmly to seal the seam. Now, we’ll perform two “thumb folds”: with your right hand, take the top edge of the dough, fold it over your thumb about halfway down the length, and press firmly to seal as you go. Repeat this action, continuously folding and sealing, until you’ve folded the entire length of the dough. You’ll observe the dough becoming progressively tighter and longer with each fold.
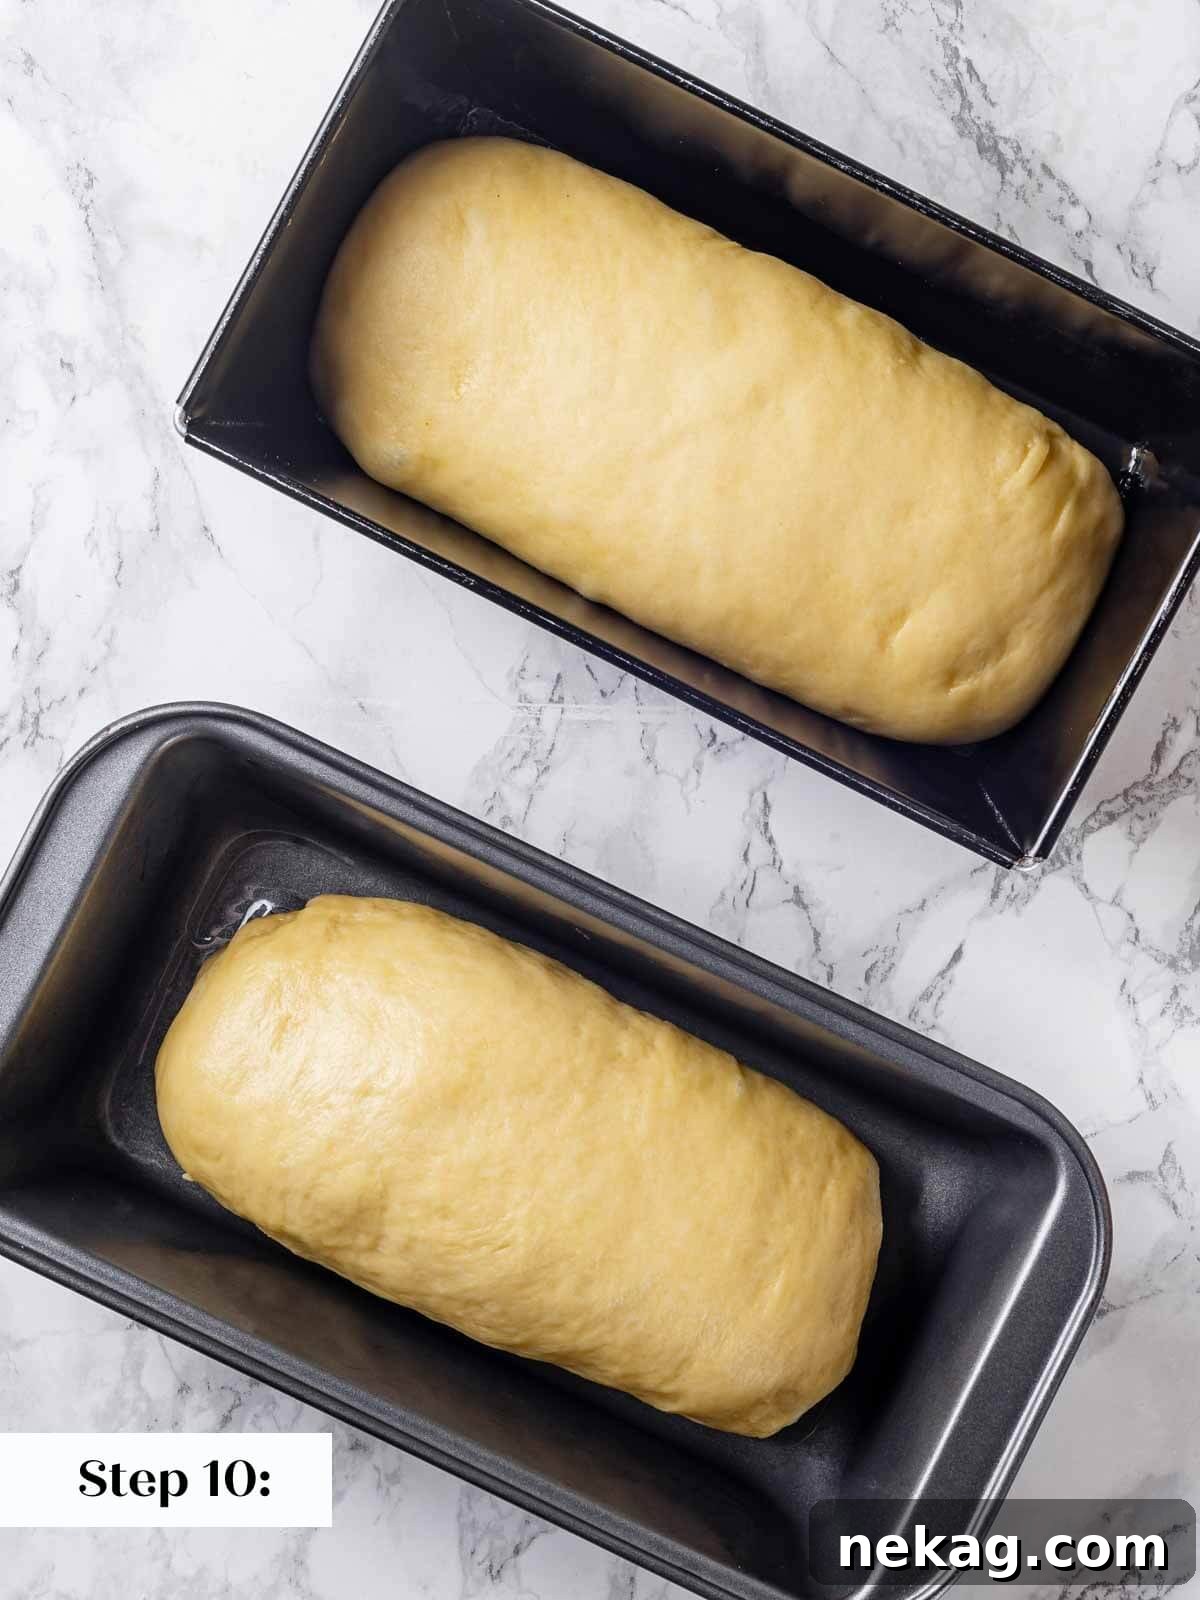
Shaping Tip: Pan Length Reference. Always keep the length of your loaf pan in mind while shaping. You want your dough log to be slightly shorter than the pan to allow for expansion during the final proof. You can even place your pan on the counter next to the dough as a visual reference to guide your shaping.
Step 9: Refine the Shape. Repeat the “thumb fold” process once more if needed, ensuring the bottom seam is very well sealed. Your goal is a perfectly uniform log shape: consistent in width along its entire length, appropriately sized for your loaf pan, and taut enough to hold its form without spreading on the counter. If the dough still feels a bit too loose, don’t hesitate to perform one more thumb fold to achieve that desired tension.
Step 10: Pan and Final Proof. Lightly spray a 9×5 inch loaf pan with non-stick spray or generously butter it. Carefully transfer your beautifully shaped brioche log into the prepared pan, ensuring the seam side is facing down. Cover the pan loosely with plastic wrap and place it back into your warm proofing spot for its final rise.
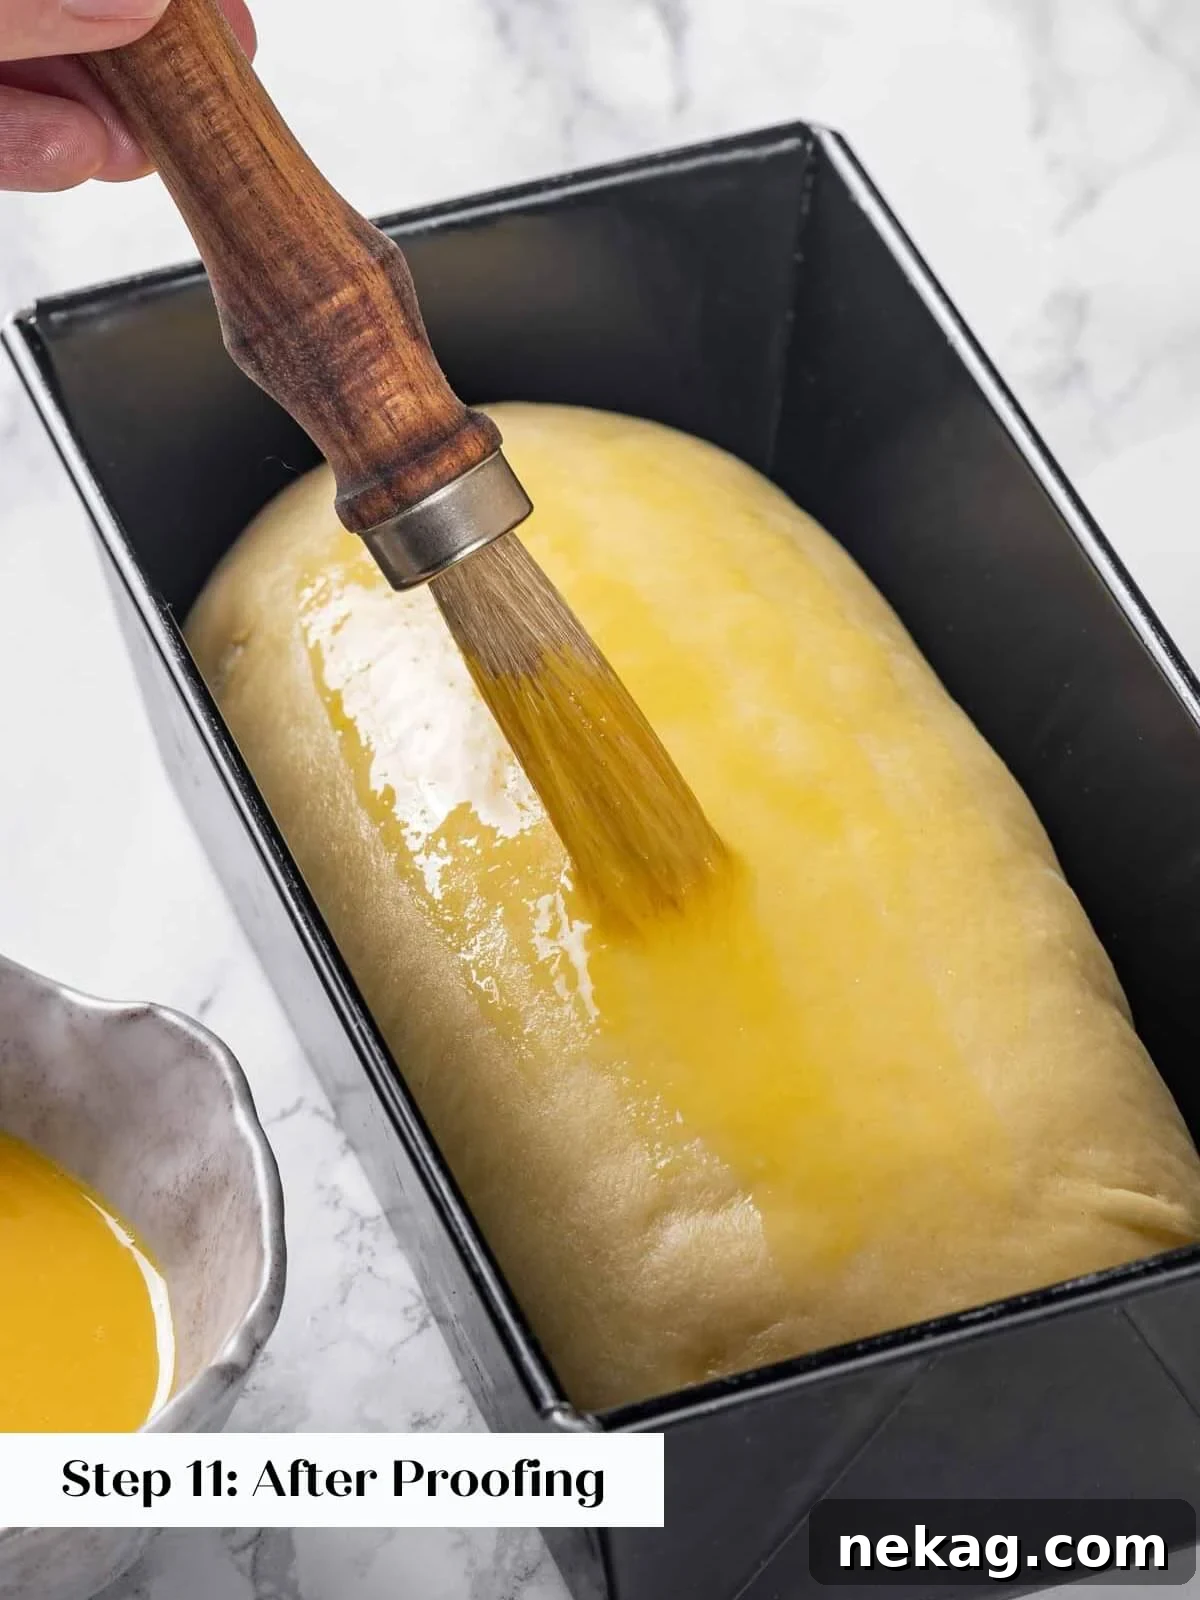
Step 11: Bake to Golden Perfection. Allow the dough to proof until it has risen just to the top edge of the loaf pan. This is your cue to preheat your oven to 350°F (175°C). While the oven preheats, gently brush the top surface of the dough with a well-beaten egg (this creates that iconic golden-brown, glossy crust). Be careful not to let the egg wash drip down the sides of the pan, as it can cause the bread to stick. As soon as your oven reaches temperature, carefully place the brioche in and bake for 35-40 minutes. The bread is perfectly done when its internal temperature reads 185°F (85°C) using an instant-read thermometer.
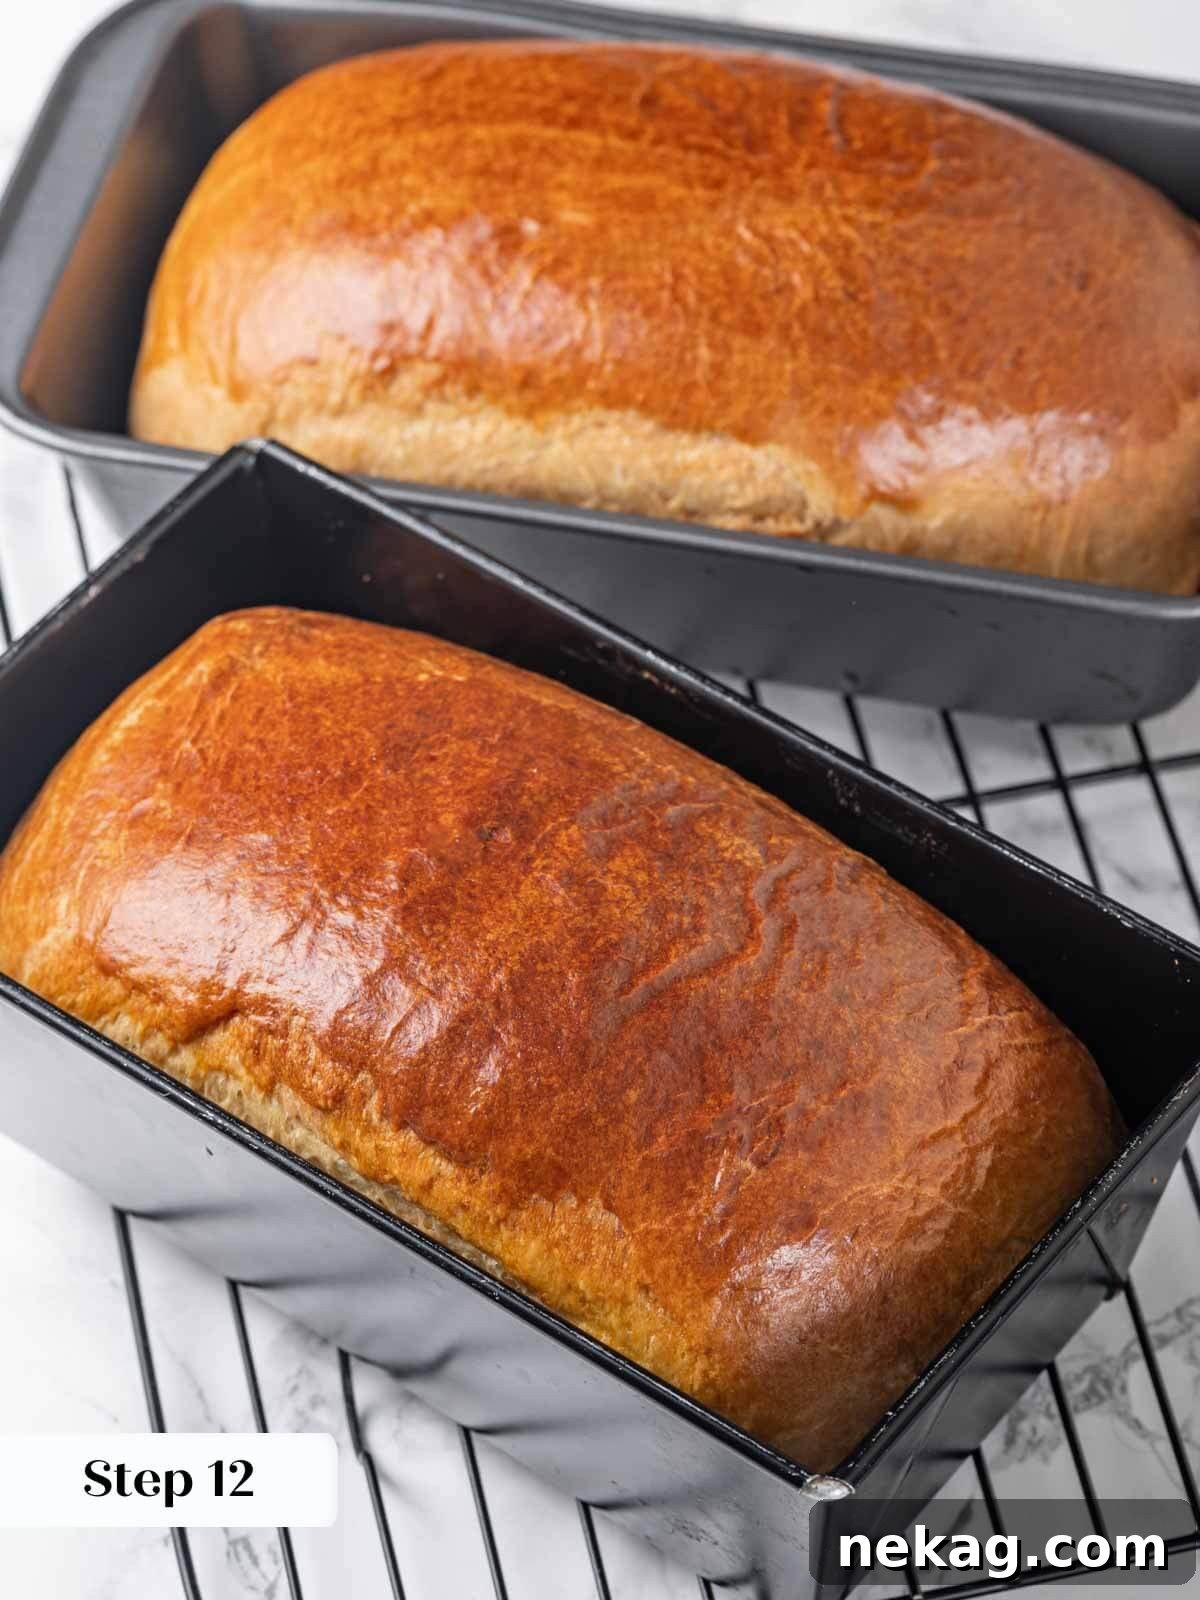
Step 12: Cool Completely. Once baked, remove the brioche from the oven and allow it to cool in the loaf pan for a crucial 5 minutes. This brief resting period helps the structure set. After 5 minutes, carefully remove the loaf from the pan and transfer it to a wire rack to cool completely. Slicing too early can result in a gummy texture.
Cooling Caution: Avoid Soggy Sides! It’s essential not to let your brioche loaf sit in the pan for too long after baking. Excess steam trapped within the pan can lead to soggy sides and bottom, compromising that perfect crust and texture.
Chef Lindsey’s Expert Recipe Tip: Home Mixer Butter Technique
While classic brioche mixing methods often advocate for adding cold butter after gluten is fully developed, I’ve discovered a slightly different approach works best for home stand mixers when preparing just 1-2 loaves. In a domestic setting, the butter tends to incorporate more smoothly and efficiently when added alongside the other initial ingredients, with the dough first mixed using the paddle attachment. This adjustment accounts for the differences in power and scale between commercial and home equipment, helping you achieve a perfectly emulsified and silky dough in your own kitchen.
Brioche Bread FAQs: Your Questions Answered
Thanks to its generous butter and sugar content, brioche remains wonderfully soft at room temperature for up to 3 days. To maximize freshness, store it well-wrapped in plastic wrap or in an airtight container. It can last up to 5 days at room temperature. For longer storage, freeze it immediately after it has cooled completely. Storing brioche in the refrigerator is generally not recommended, as it can accelerate drying out. I find it most convenient to pre-slice the loaf before wrapping and freezing. This way, you can easily retrieve and thaw only the amount you need, whether it’s for pumpkin bread pudding, the best tuna melt, or even to soak up the rich flavors of a Mangalorean prawn curry!
Brioche distinguishes itself as a unique category of yeasted bread due to the substantial amount of butter incorporated into the dough. Unlike lean breads, brioche is an “enriched dough,” often further enhanced with eggs and sugar. The defining characteristic is its butter content, typically calculated as a percentage of the total flour weight. This specific recipe is a 32% brioche, meaning the butter’s weight is 32% of the flour’s weight. I’ve personally crafted brioche with up to 50% butter, which is nearing the practical maximum for maintaining gluten structure. Recipes with less than 25% butter are often considered enriched doughs rather than true brioche, as they lack that signature buttery richness – though they can still be incredibly tasty!
A “sponge” is a foundational bread-making technique where a portion of the flour, along with all the yeast and liquids (in this recipe, milk and water), are combined and allowed to ferment before the rest of the ingredients are added. This initial sponge phase serves several important purposes: it thoroughly activates the yeast, giving it a head start in fermentation, and it allows the gluten network to begin forming early. The primary benefit is a reduction in the total mixing or kneading time required for the final dough, leading to a more efficient and effective bread-making process.
More Recommended Fluffy Bread Recipes You’ll Love
Dinner Roll Recipes
Irresistible Brioche Bun Recipe
Sourdough Bread Recipes
Wholesome Sourdough Raisin Bread
Yeasted Bread Recipes
The Best Traditional Stollen Recipe
Dinner Roll Recipes
Effortless Easy Dinner Roll Recipe
If you tried this amazing brioche recipe and loved it, please take a moment to leave a 🌟 star rating and share your experience in the comments below. Your feedback truly brightens my day!
Brioche Bread Recipe
Chef Lindsey
1 hr
35 mins
2 hrs
3 hrs 35 mins
24 Slices (2 loaves)
Comment
Print Recipe
Ingredients (Yields 2 Loaves)
- 4 cups all purpose flour
- ½ cup warm water
- ¼ cup whole milk
- 2 ½ teaspoons kosher salt
- 1 tablespoon dry active yeast
- 2 large eggs (plus 1 extra for egg wash)
- ¼ cup granulated sugar
- ⅔ cup unsalted butter (softened, but not melted)
Instructions
Mix the Dough:
-
1. Activate Yeast: In a stand mixer bowl, whisk warm water and dry active yeast. Let stand 10-15 minutes until bubbly.
-
2. Combine Wet & Dry: Add milk, sugar, eggs, salt, and flour to the bowl. Mix on low with the paddle attachment until incorporated and hydrated.
-
3. Develop Gluten: Switch to the dough hook. Mix on medium speed until a smooth, elastic dough forms and pulls away from the bowl sides. Perform the window pane test to ensure gluten development.
-
4. Add Butter: Incorporate softened (not melted) butter into the dough on low speed until fully absorbed.
-
5. First Proof & Fold: Transfer dough to a lightly oiled bowl. Cover with plastic wrap and proof in a warm spot for 30 minutes. Perform one set of folds (four folds into the center).
Bulk Proof:
-
6. Bulk Rise: Recover the dough and return to a warm spot for bulk proofing. Check every 45 minutes; it should take about 1 ½ hours until light and airy.
Pre-shape & Bench Rest:
-
7. Pre-shape: Turn dough onto a floured surface. Divide in half. Fold each half into a packet, then flip and shape into a tight round ball. Cover and bench rest for 15 minutes.
Final Shape & Bake:
-
8. Final Shape: Take one round, flatten into a rectangle. Fold top edge down 2/3, press. Rotate, fold new top edge down to meet bottom, press. Perform 2 thumb folds along the length, sealing tightly to create a log (bâtard). Repeat for the second loaf.
-
9. Refine Shape: Repeat thumb fold once more if needed to create an even, taut log the length of your pan. Ensure the bottom seam is well-sealed.
-
10. Pan & Final Proof: Spray or butter a 9×5 inch loaf pan. Place the log seam-side down. Cover with plastic wrap and return to a warm spot for the final proof until it just reaches the top of the pan.
-
11. Bake: Preheat oven to 350°F (175°C). Brush dough with a well-beaten egg (egg wash). Bake for 35-40 minutes, or until internal temperature reaches 185°F (85°C).
-
12. Cool: Cool in the pan for 5 minutes, then transfer to a wire rack to cool completely to prevent sogginess.
Video Tutorial
Recipe Notes
Variations – Customize your brioche by flavoring the dough with citrus zest, warm spices like cinnamon or nutmeg, or aromatic herbs such as rosemary. For delightful add-ins, consider incorporating chopped nuts (like pecans or almonds), dried fruits (such as cranberries or apricots), or candied citrus zest after the dough has been fully developed and the butter incorporated.
Storage – Brioche bread maintains its exceptional softness and flavor when stored at room temperature for up to 5 days. Ensure it is tightly wrapped in plastic wrap or kept in an airtight container to prevent it from drying out. For longer preservation, freeze the brioche immediately after it has cooled completely.
To Freeze – For convenience, I highly recommend pre-slicing your brioche loaf before freezing. Wrap individual slices or smaller portions VERY well in plastic wrap, then place them into a gallon zip-top freezer bag. This method allows you to remove and toast (or microwave) only as many slices as you desire, preserving the rest perfectly.
Nutrition (per slice)
Carbohydrates: 18g |
Protein: 3g |
Fat: 6g |
Saturated Fat: 4g |
Polyunsaturated Fat: 0.4g |
Monounsaturated Fat: 2g |
Trans Fat: 0.2g |
Cholesterol: 30mg |
Sodium: 211mg |
Potassium: 37mg |
Fiber: 1g |
Sugar: 3g |
Vitamin A: 190IU |
Vitamin C: 0.001mg |
Calcium: 11mg |
Iron: 1mg
Like this? Leave a comment below!
Before You Go: Explore More Professional Bread Recipes
I genuinely hope you enjoyed mastering this professional chef-developed brioche recipe. Building on your newfound skills, I invite you to explore more of my yeasted bread recipes. Consider trying these delightful sourdough rolls, indulging in rich sourdough cinnamon rolls, or preparing the very best stollen recipe—often considered brioche’s festive big sister—perfect for holiday celebrations. Happy baking!