
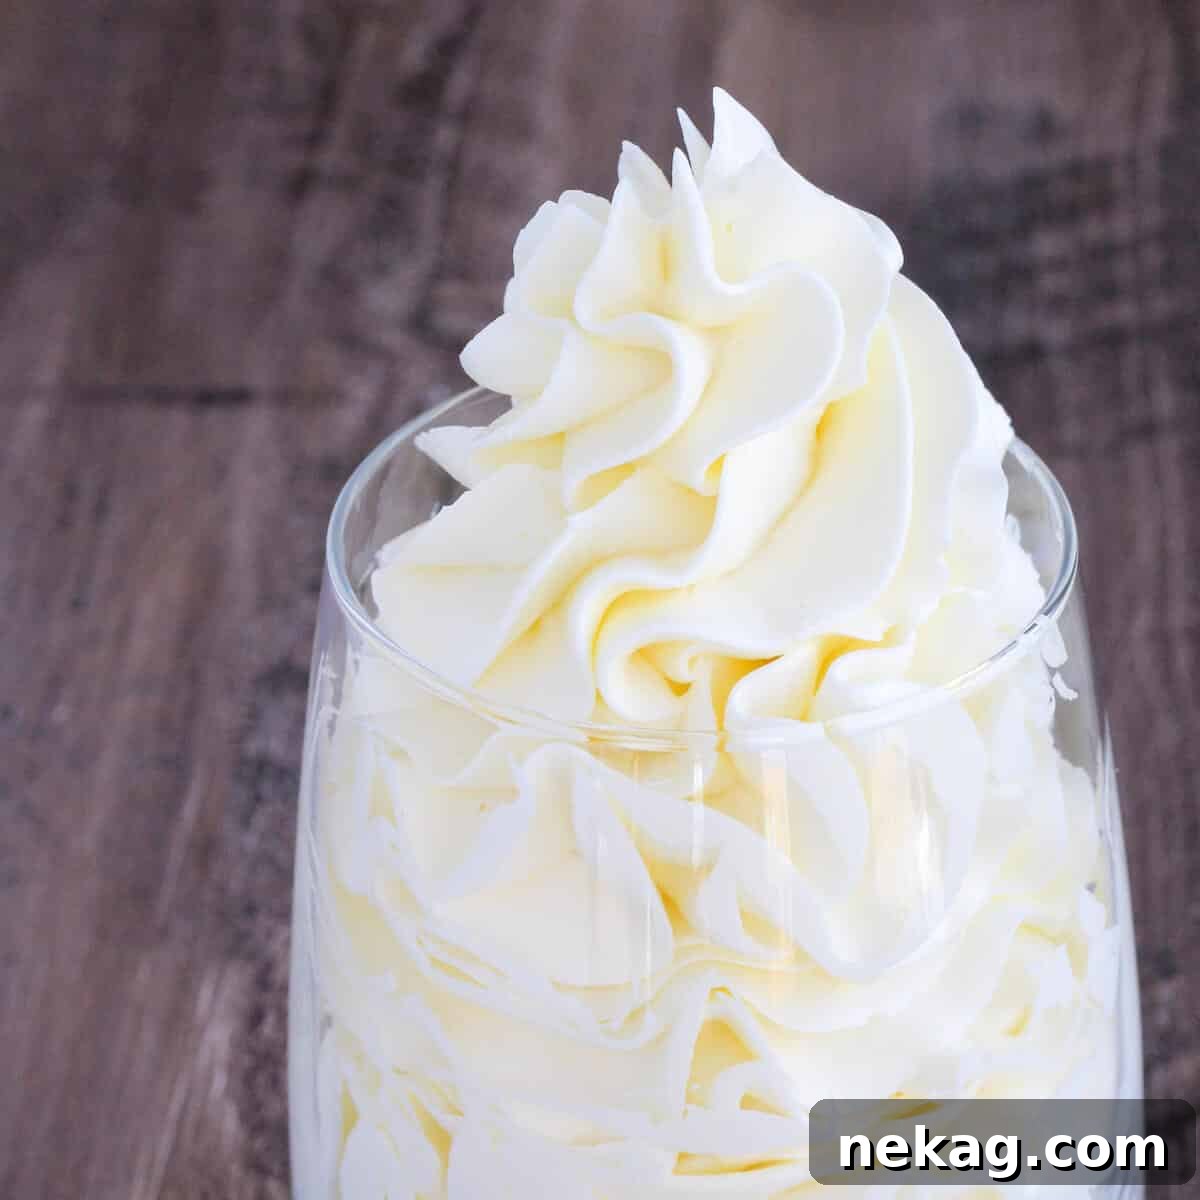
The Ultimate Guide to Silky Smooth Italian Meringue Buttercream
Discover the secret to impeccably smooth, light, and airy frosting with this ultimate guide to Italian Meringue Buttercream (IMB). This professional-grade buttercream is the choice of pastry chefs for creating polished, bakery-quality cakes and exquisitely piped cupcakes. While it may seem daunting at first glance, IMB is surprisingly accessible, and I’m here to equip you with all the expert techniques and essential troubleshooting advice to guarantee your success.
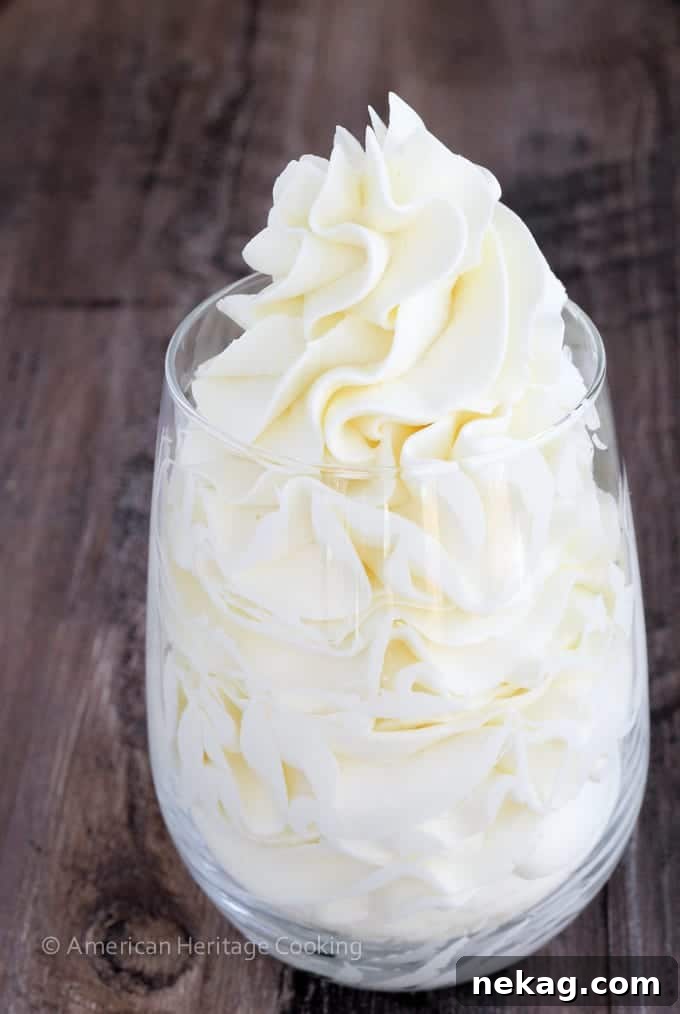
Italian Meringue Buttercream holds a special place in my heart due to its unique combination of lightness and richness. It’s incredibly airy on the palate yet delivers a wonderfully creamy texture. Beyond its delightful taste and feel, IMB boasts remarkable stability, making it ideal for various decorating applications and allowing it to be stored for months in the freezer. Its forgiving nature means that even if you think you’ve made a mistake, it’s very likely fixable! Below, I’ll share all my best troubleshooting tips to help you recover any seemingly “failed” batches.
This exquisite buttercream is perfect for crafting professional layer cakes, as demonstrated in my layer cake assembly tutorial using a decadent devil’s food cake. It’s equally fantastic for piping elegant designs onto cupcakes, such as these delightful lemon coconut cupcakes. Once you master IMB, your baking creations will reach a whole new level of sophistication.
Table of Contents
- Why You’ll Adore This Italian Meringue Buttercream
- What Exactly is Italian Meringue Buttercream?
- Italian Meringue Buttercream vs. Other Frostings
- Essential Tools for Buttercream Perfection
- Expert Tips for Mastering Italian Meringue Buttercream
- Key Ingredients for the Perfect Buttercream
- Flavoring Your Italian Meringue Buttercream
- How to Color Italian Meringue Buttercream
- Step-by-Step: Making Italian Meringue Buttercream
- Chef Lindsey’s Golden Rule for Buttercream
- Reviving Refrigerated or Frozen Italian Meringue Buttercream
- Troubleshooting Italian Meringue Buttercream Common Issues
- Storage Guidelines for IMB
- Italian Meringue Buttercream Recipe
- Before You Go
Why You’ll Adore This Italian Meringue Buttercream: A Chef’s Perspective
- Luxuriously Less Sweet: If you find traditional frostings overly sugary, you’ll fall in love with Italian Meringue Buttercream. Its balanced sweetness allows other flavors to shine through, offering a creamy, delightful experience without overwhelming your palate. This makes it a perfect choice for those who appreciate refined desserts.
- A Versatile Canvas for Creativity: Think of this IMB recipe as your blank canvas, ready for any culinary masterpiece you envision. Its neutral base allows you to infuse a myriad of flavors, from rich melted chocolate and luscious salted caramel sauce to tangy lemon curd, creamy Nutella, or any other delicious addition your imagination conjures. The possibilities are truly endless, making it a staple for any baker.
- Unmatched Stability: Among all meringue-based buttercreams, Italian Meringue Buttercream stands out for its superior stability. It can withstand warmer temperatures better than Swiss meringue buttercream, though it will still soften above 70 degrees F (21 degrees C). This robustness makes it ideal for decorating intricate cakes, creating sharp edges, and piping elaborate designs, ensuring your creations hold their shape beautifully.
- Professionally Tested and Proven: This isn’t just another recipe; it’s the exact buttercream I honed and perfected during my career as an Executive Pastry Chef, and the one I continue to use for bespoke cake orders. Having made it countless times, I guarantee its reliability and exceptional performance. You can trust that this recipe is a tried-and-true winner, designed to give you consistent, professional results every single time.
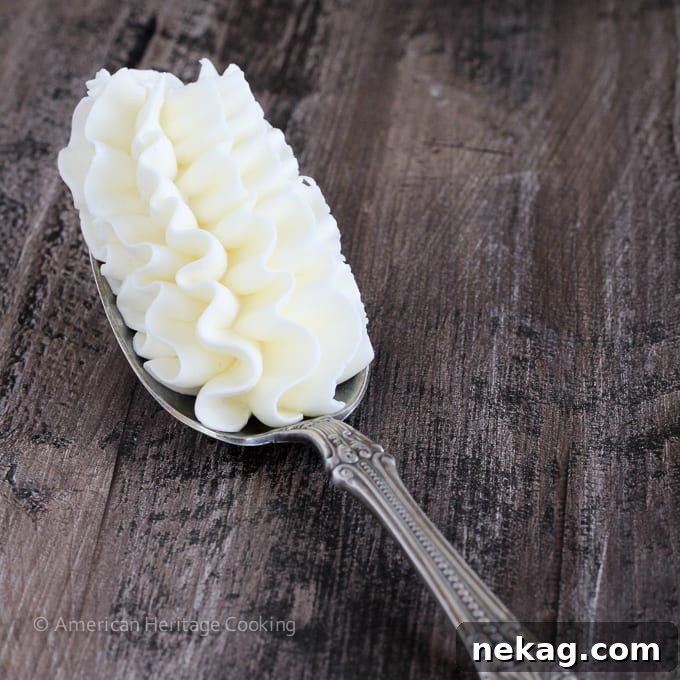
What Exactly is Italian Meringue Buttercream?
Italian Meringue Buttercream (IMB) might sound complex, often considered the most sophisticated of buttercreams, but its core process is quite straightforward. At its heart, IMB is created by carefully combining three main components: egg whites, a hot sugar syrup, and butter. The process begins with whipping egg whites to firm, glossy peaks. Simultaneously, a sugar syrup is cooked to a precise “soft ball” stage. This hot syrup is then slowly and carefully streamed into the whipping egg whites, essentially cooking them and creating a stable Italian meringue. Once the meringue is cool and stable, softened butter is gradually incorporated, transforming the light meringue into a rich, silky, and unbelievably smooth buttercream.
Italian Meringue Buttercream vs. Other Frostings: A Comparative Look
Italian Meringue Buttercream distinguishes itself from its counterparts primarily through its unique method of preparing the meringue base, as its name suggests. This method involves pouring hot sugar syrup directly into whipping egg whites, resulting in a cooked, stable meringue that forms the foundation of the buttercream. Here’s how it compares to other popular buttercreams:
- Compared to Swiss Meringue Buttercream: While both are meringue-based, Swiss Meringue Buttercream involves cooking egg whites and sugar over a double boiler until warm before whipping. Italian meringue’s hot syrup method yields a slightly lighter, airier texture and often greater stability, especially in warmer conditions.
- Compared to German Buttercream: German buttercream, or Crème Mousseline, starts with a pastry cream base, into which butter is then whipped. This results in a richer, denser buttercream with a more pronounced custard-like flavor and a slightly heavier texture than IMB.
- Compared to French Buttercream: French buttercream is made with egg yolks (or whole eggs) and hot sugar syrup, producing a very rich, intensely buttery, and golden-hued frosting. It has a melt-in-your-mouth quality but is less stable than IMB due to its higher fat content and reliance on raw yolks, making it unsuitable for piping intricate details or hot climates.
- Compared to American Buttercream: Often the simplest to make, American buttercream is a mixture of powdered sugar, butter, milk or cream, and flavorings. It is notoriously sweet and dense, lacking the sophisticated lightness and silky smooth texture of IMB. Its sweetness can often overpower delicate cake flavors, whereas IMB provides a more balanced sweetness.
In essence, Italian Meringue Buttercream offers a refined balance of richness and lightness, superior stability, and a less cloyingly sweet profile, making it a versatile and preferred choice for professional bakers and discerning home cooks alike.
Essential Tools for Buttercream Perfection
To ensure a smooth and successful Italian Meringue Buttercream experience, having the right tools on hand is crucial. While the process itself isn’t overly complicated, precision is key, and these items will greatly assist you:
- Stand Mixer with Whisk and Paddle Attachments: This is arguably the most important tool. A powerful stand mixer is essential for consistently whipping egg whites to stiff peaks and later incorporating butter effectively. You’ll use the whisk attachment for the meringue and the paddle attachment for the final butter incorporation.
- Candy Thermometer: Absolutely indispensable for accurately measuring the temperature of your sugar syrup. Reaching the precise “soft ball” stage (235°F / 113°C) is critical for the meringue’s structure and safety. Don’t eyeball this step!
- Heavy-Bottomed Saucepan: A sturdy saucepan will help distribute heat evenly, preventing the sugar syrup from burning or crystallizing.
- Clean Pastry Brush (or Paper Towel): Used to brush down the sides of the saucepan during sugar syrup cooking, preventing crystallization.
- Rubber Spatula: Ideal for scraping down the sides of the mixing bowl and ensuring all ingredients are fully incorporated.
- Heat-Proof Bowl: While not strictly necessary if you have a metal stand mixer bowl, a separate heat-proof bowl is useful for the ice water test if you’re not using a candy thermometer.
Expert Tips for Mastering Italian Meringue Buttercream
- Pace Yourself with Confidence: There’s no rigid rule dictating that your egg whites must whip at warp speed while your sugar syrup slowly simmers. If your egg whites reach stiff peaks ahead of your sugar syrup stubbornly lingering at 220˚F (71˚C) – believe me, it happens! – simply reduce your mixer speed to low. The key is *not* to stop the mixer entirely; just slow it down to maintain the meringue’s volume and consistency until the syrup is ready.
- High Speed for Sugar Stream: When it’s time to add the hot sugar syrup, ensure your mixer is running on HIGH speed. This rapid movement helps to disperse the hot syrup quickly and efficiently, preventing the egg whites from scrambling. You want a beautifully cooked meringue, not an unfortunate batch of sweetened scrambled eggs!
- Precision Pouring: Stream Down the Side: Always pour the hot sugar syrup slowly and carefully down the inside wall of the mixing bowl, rather than directly onto the whisk. This prevents the extremely hot syrup (which is around 235˚F or 113˚C) from splattering onto you – a truly unpleasant experience. When done correctly, you’ll observe a single, thin trail of cooled, solidified sugar along one side of the bowl. This indicates a perfect, controlled pour with minimal sugar loss.
- The Magic Number: Cook Sugar to 235˚F (113˚C): While the “soft ball” stage is a range, aiming for precisely 235˚F (113˚C) is your best bet. By the time you transfer the syrup from the stove to the mixer, its temperature might creep up a few degrees, but this slight increase won’t compromise your meringue. Overcooking the sugar, however, will result in a hard, glassy pool of sugar at the bottom of your mixer, which is a clear sign it went too far. A candy thermometer is invaluable here.
- Butter Temperature is Paramount: Your unsalted butter should be soft enough to indent easily with your finger, yet still cool to the touch – not greasy or melted. If it’s a bit too firm, add it in smaller pieces and, for an extra step, gently squeeze each piece with your hand before adding it to the meringue. This tactile check ensures the butter is pliable and integrates smoothly, preventing chunks. It’s a slightly messy but effective technique!
- Soupy Buttercream? Don’t Panic! If your buttercream suddenly turns soupy during the butter addition, all is not lost! Simply switch your mixer attachment from the paddle back to the whisk and beat the mixture on high. The continuous whipping will help cool the mixture and emulsify the butter back into a smooth consistency. Patience is key here, trust the process, and it will likely come together. More detailed fixes are provided below.
- Curdled Appearance? Keep Going! It’s common for Italian Meringue Buttercream to look curdled or separated when you first start adding the butter. This is a temporary phase! Continue adding the butter piece by piece, ensuring each is soft and slightly cool. If the curdling persists, a gentle warming trick can help: with the mixer on high, carefully wave a kitchen torch around the outside of the mixing bowl. Keep the torch moving constantly to warm the bowl gently, not melt the buttercream directly. This slight increase in temperature will encourage the butter to emulsify, bringing your buttercream back to a smooth, unified state.
Key Ingredients for the Perfect Buttercream
Understanding the role of each ingredient is fundamental to creating flawless Italian Meringue Buttercream:
- Granulated Sugar: The granulated sugar serves a dual purpose in the meringue: it provides sweetness and, more critically, it acts as a stabilizer. A higher sugar content in the meringue typically leads to greater stability and a denser, less voluminous meringue. Precise measurement is key.
- Water: Unlike making a dry caramel where all water evaporates, the exact quantity of water in an Italian meringue is important. It controls the concentration and temperature of the sugar syrup, which in turn affects the meringue’s structure. Always measure your water accurately for the best results.
- Egg Whites: For optimal stability and whipping consistency, it’s highly recommended to use freshly separated large egg whites. Liquid egg whites (from a carton) often contain stabilizers and foaming agents that can prevent them from whipping up as stably and make them more prone to curdling when the hot syrup is added. Don’t discard those yolks! They’re perfect for making a tangy lemon curd, which you can then fold into your finished buttercream for a zesty lemon flavor.
- Kosher Salt: While optional, a pinch of kosher salt not only helps to subtly balance the sweetness of the buttercream but also contributes to the stability of the meringue.
- Cream of Tartar: Another optional but beneficial ingredient, cream of tartar acts as an acid that helps stabilize the egg whites, allowing them to achieve stronger, more consistent peaks. It’s a small addition that can make a big difference in the robustness of your meringue.
- Unsalted Butter: The quality of your unsalted butter directly impacts the flavor and stability of your final buttercream. Always opt for a high-quality, unsalted butter. Using salted butter will result in a noticeably salty buttercream, which is generally undesirable for most sweet applications. Ensure your butter is at the correct temperature – cool but pliable – for seamless incorporation.
Flavoring Your Italian Meringue Buttercream: A World of Possibilities
One of the greatest joys of Italian Meringue Buttercream is its incredible versatility. Its mild, balanced base makes it a perfect vehicle for a wide array of flavors. Here’s how you can transform your IMB:
- Lemon: Achieve a bright citrus flavor using Nielson Massey lemon extract (my personal favorite), Nielson Massey lemon paste, or by mixing fresh lemon zest with the granulated sugar before making the meringue. For a vibrant, tangy twist, fold in a generous amount of homemade lemon curd at the final stage.
- Strawberry: While fresh strawberry puree can sometimes destabilize buttercream due to its water content, you can achieve delicious strawberry flavor by incorporating high-quality strawberry jam (such as my strawberry jam without pectin) or finely ground dehydrated strawberry powder.
- Other Berries: For most other berry flavors like raspberry, blueberry, or blackberry, I find that incorporating a good quality berry jam yields the best results without compromising the buttercream’s stability.
- Peanut Butter: For a delightful nutty flavor, add about ½ cup of smooth peanut butter to the finished buttercream. If you prefer a textural contrast, use chunky peanut butter or, for a more refined touch, add crushed salted peanuts as a garnish.
- Nutella: Indulge in a chocolate-hazelnut dream by folding in ½ cup of Nutella or another high-quality chocolate hazelnut spread to the fully prepared buttercream.
- Chocolate: For a rich chocolate buttercream, melt 200g (approximately 7 ounces) of your preferred chocolate (milk, semi-sweet, or unsweetened) and let it cool slightly. Incorporate the cooled, melted chocolate into the finished buttercream until thoroughly combined.
- Vanilla: Enhance the classic flavor of your buttercream with up to 2 tablespoons of high-quality vanilla extract, 1 tablespoon of fragrant vanilla bean paste, or the seeds from 2 split and scraped vanilla bean pods. Remember to save those spent pods for infusing into other desserts like vanilla bean anglaise or vanilla bean pastry cream!
How to Color Italian Meringue Buttercream
Coloring Italian Meringue Buttercream is straightforward, allowing you to match any theme or aesthetic. The best options are:
- Gel Food Colorings: These are highly concentrated and ideal for achieving vibrant colors without adding excess liquid, which can destabilize the buttercream. Start with a tiny amount and gradually add more until you reach your desired shade.
- Natural Colorings: For a more natural approach, you can use powders like dehydrated strawberry powder (which also adds flavor) or beet powder for lovely pinks and reds. Spinach powder can be used for green, or spirulina for blues and greens. These powders should be mixed in carefully to avoid any graininess.
Step-by-Step: Making Italian Meringue Buttercream
Creating Italian Meringue Buttercream involves a few critical steps, but with careful preparation and attention to detail, you’ll achieve perfect results. Let’s break it down:
Phase 1: Prepare Your Workspace and Ingredients (Mise en Place)
Step 1: Gather and Measure Everything (Mise en Place). This foundational step is paramount for success in any professional kitchen. Ensure all your ingredients are precisely measured and laid out before you begin. While this recipe is fundamentally simple, its execution demands seamless transitions between steps. Having everything ready eliminates stress and ensures you can react swiftly to temperature changes.
Step 2: Prepare Your Tools. Cleanliness is absolutely vital. Make certain your mixing bowl (especially if using a stand mixer) is impeccably clean and completely free of any residual grease or fat. Even a tiny trace of fat can prevent your egg whites from whipping up properly, leading to a deflated meringue and a lot of frustration. Similarly, ensure your saucepan is spotless; any dirty residue can act as a seed for sugar crystallization, ruining your syrup.
Phase 2: Crafting the Italian Meringue Base
Step 3: Begin the Sugar Syrup. In a medium saucepan, combine half of the granulated sugar with the water. Place it over medium heat and stir gently just until the sugar completely dissolves. As the syrup begins to heat and bubble, take a clean pastry brush (or, in a pinch, a rolled-up paper towel or even a clean finger) dipped in water, and carefully brush down the inside sides of the pot. This crucial step washes down any sugar crystals that may have splashed onto the sides, preventing them from seeding the entire syrup and causing it to crystallize.
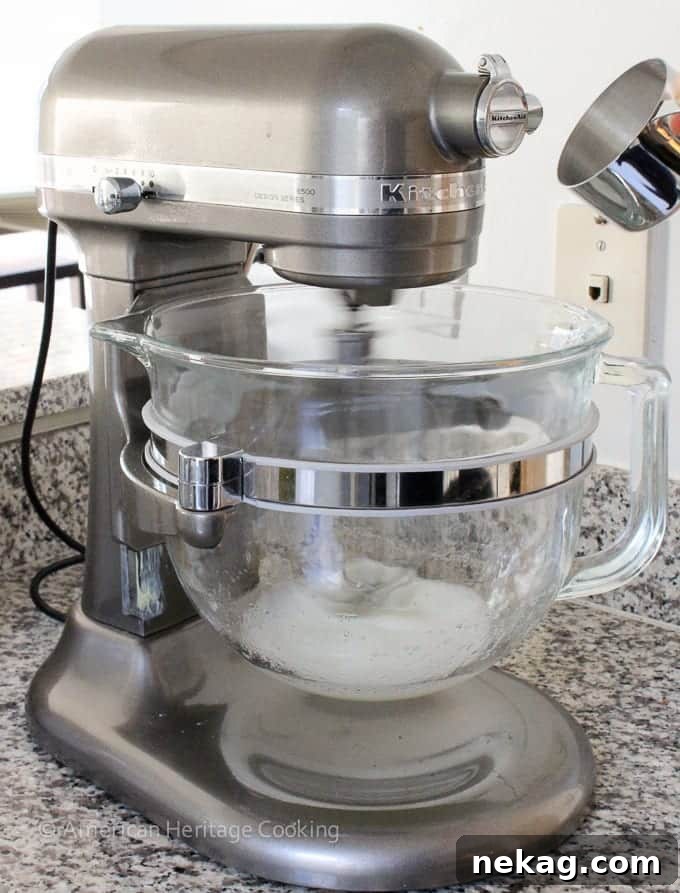
Step 4: Start Whipping Egg Whites. The moment your sugar syrup starts to visibly bubble, begin whipping your egg whites in the bowl of a stand mixer fitted with the whisk attachment. For added stability, you may choose to include a small pinch of kosher salt and/or cream of tartar at this stage. As your egg whites become frothy and begin to gain volume, slowly start incorporating the remaining granulated sugar, continuing to whip constantly on medium-high speed. This gradual addition helps to build a stable meringue structure.
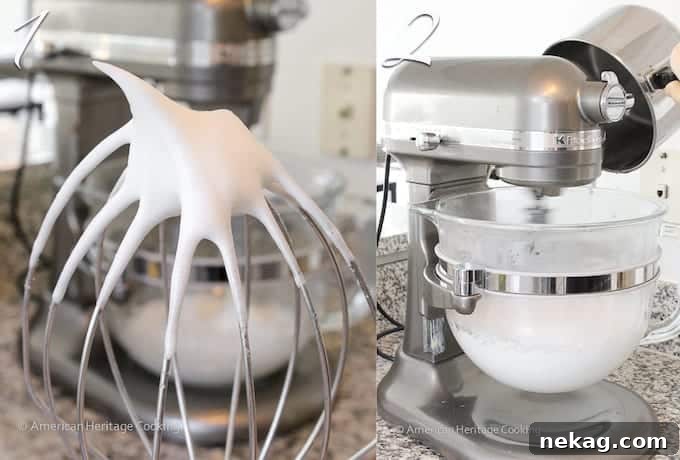
Step 5: Achieve Stiff Peaks and Synchronize Temperatures. Continue whipping your egg whites vigorously until they form glossy, stiff peaks. This means when you lift the whisk, the meringue holds its shape firmly. Ideally, your meringue should reach this stiff peak stage at precisely the same time your sugar syrup reaches 235˚F (113˚C), the soft ball stage. This synchronization is a hallmark of perfectly executed Italian Meringue Buttercream.
Pro-Tip for Timing: If your egg whites are whipping up too quickly and reach stiff peaks before your sugar syrup is ready, simply reduce the mixer speed to medium or even low. This maintains the meringue’s structure without over-whipping it. Conversely, you can adjust the heat under your sugar syrup – increasing it slightly to speed up cooking, or lowering it to slow it down. However, be cautious not to turn the heat too low for too long, as this can encourage crystallization. It’s a delicate balance, but with practice, you’ll master it!
Step 6: Confirm Soft Ball Stage. To verify your sugar syrup has reached 235˚F (113˚C), use a reliable candy thermometer. Alternatively, you can use the traditional cold water test: carefully scoop a tiny amount of hot syrup with a spoon and drop it into a bowl of ice water. Reach into the water and attempt to gather the sugar. If it dissolves, it’s not ready. If it forms a small, pliable ball that can be squished between your fingers, it’s perfect! Note: There isn’t a photo of this stage because taking time for a picture would almost certainly lead to overcooking the syrup!
Step 7: Incorporate Hot Sugar Syrup. Immediately after the sugar syrup reaches the soft ball stage, increase your mixer speed to HIGH. With extreme caution, SLOWLY and steadily pour the hot sugar syrup in a thin, continuous stream down the inside wall of the mixing bowl. It is absolutely crucial to avoid hitting the whisk directly, as this could cause hot syrup to splatter. Aim for one single stream along the edge of the bowl; the syrup will solidify where it makes contact with the cold bowl, so pouring it in multiple spots will lead to sugar loss and reduced meringue volume. This step effectively cooks the egg whites, creating a stable, pasteurized meringue.
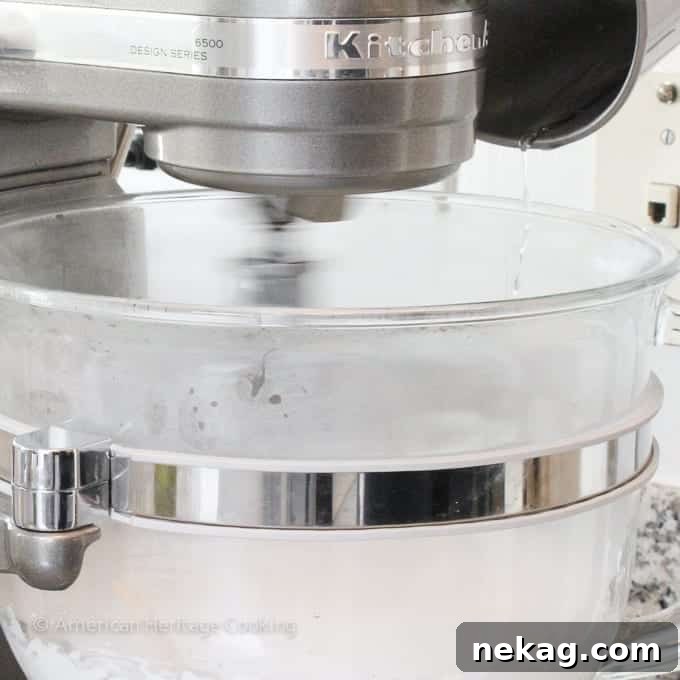
If you examine the above photo closely, you can discern the faint trace where the sugar syrup precisely struck the side of the bowl – a single, elegant stream. This detail signifies zero excess sugar wasted, a testament to meticulous technique. Indeed, this is the very definition of perfection in buttercream making. 😉
Phase 3: Finishing the Silky Smooth Buttercream
Step 8: Cool the Meringue. Continue whipping the Italian meringue on high speed. It will continue to firm up and form stiff peaks, but more importantly, it needs to cool down. The goal here is for the bottom of the mixing bowl to feel barely warm to the touch before you add the butter. The high sugar content in this meringue makes it very stable, so don’t worry about over-whipping it at this stage. Even if it looks like stiff peaks (as shown in the first photo below), you may still need to whip it for several more minutes to ensure it’s sufficiently cooled.
Understanding Meringue Cooling: The sheer quantity of sugar in this Italian meringue acts as a powerful stabilizer, meaning it’s highly resistant to over-whipping. Even if your meringue appears to have reached strong stiff peaks, as illustrated in the initial photo below, it’s imperative to continue whipping for a few more minutes. This extended mixing duration is critical for allowing the meringue to cool down to the proper temperature, which is essential for successful butter incorporation.
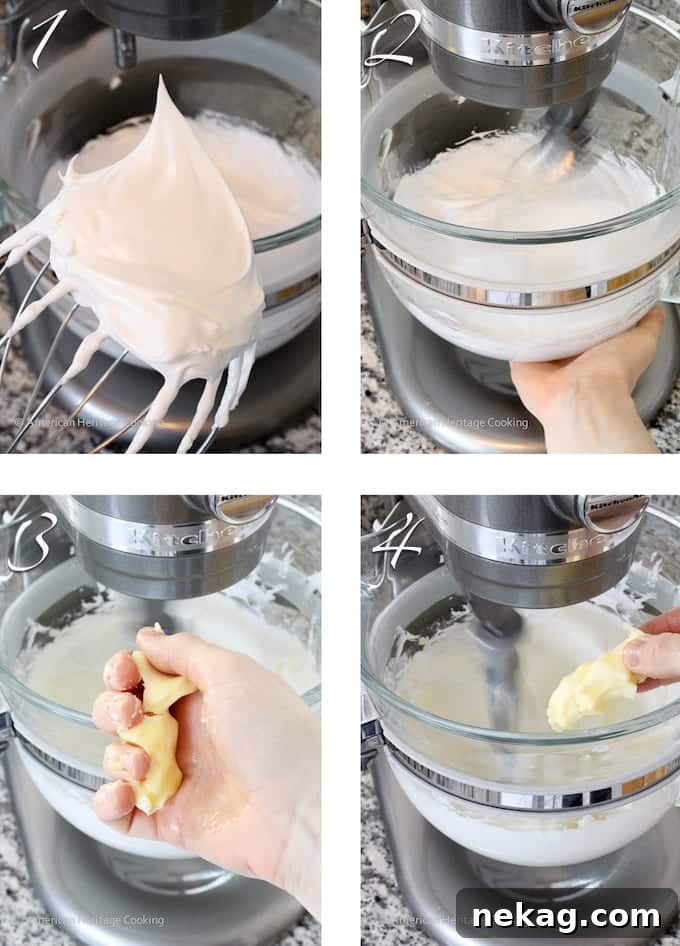
Step 9: Incorporate the Butter. Once the mixing bowl feels only slightly warm to the touch, switch your stand mixer from the whisk attachment to the paddle attachment. Begin adding your softened unsalted butter, one piece at a time, as depicted in the third image below. My personal practice is to remove the butter from the refrigerator right when I start measuring my other ingredients, giving it ample time to soften. Before adding each piece, I often give it a gentle squeeze – this not only helps to further warm it slightly but also confirms it’s at the ideal pliable temperature. While this squeezing step isn’t strictly necessary and I’ve often skipped it as my confidence grew, it’s a helpful habit for beginners to ensure proper butter consistency.
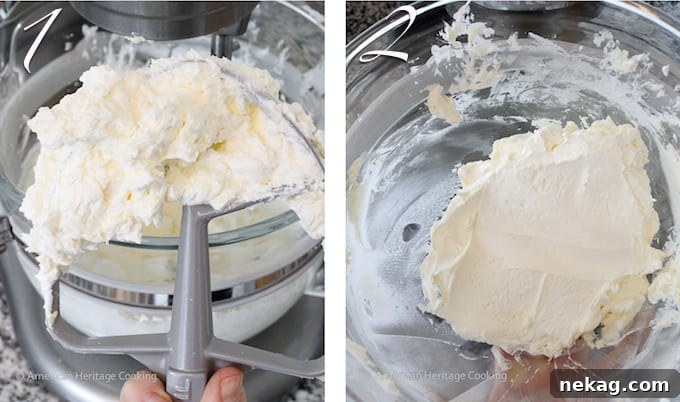
Step 10: Achieve Smoothness and Fluffiness. Continue to beat the butter into the meringue on medium-high speed. At first, the mixture might appear lumpy or curdled, as seen in earlier stages of the photos. Do not be alarmed – this is a normal part of the process! Keep beating until the buttercream becomes completely smooth, creamy, and unified, with no visible pieces of butter remaining. The second photo above illustrates the desired smooth and velvety texture. At this point, I like to switch back to the whisk attachment, add any desired flavorings (such as vanilla extract), and beat the buttercream on high for another minute or two until it becomes wonderfully light and fluffy. Your luxurious Italian Meringue Buttercream is now ready for frosting!
Step 11: Add Your Favorite Flavorings. Once your buttercream has reached its smooth and fluffy state, it’s the perfect time to incorporate your chosen flavorings. Gently mix in extracts like vanilla, vibrant lemon curd, rich salted caramel sauce, cooled melted chocolate, fruit jams, or smooth nut pastes. Mix on low speed until just combined, then give it a final whip on high with the whisk for extra fluffiness if desired.
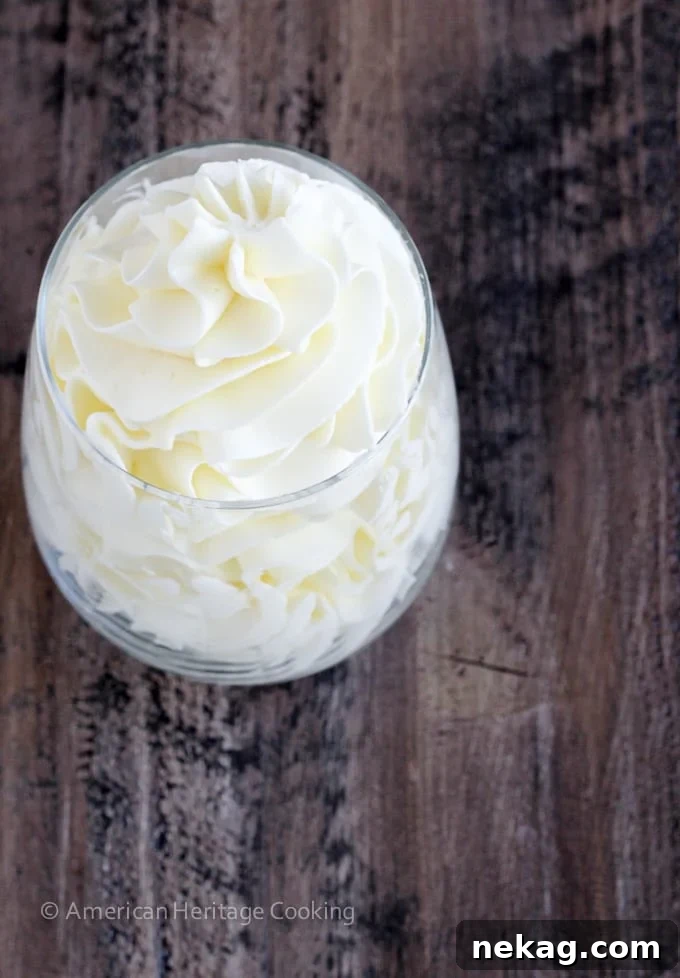
Chef Lindsey’s Golden Rule for Buttercream Mastery
The most important takeaway when making Italian Meringue Buttercream is this: YOU are in control! You dictate the heat and cooking speed of your sugar syrup; you manage the pace at which your egg whites whip into a perfect meringue; and you precisely control the temperature difference between your butter and your meringue. If any single element seems to be veering off course, don’t panic. Simply adjust your technique – slow down the mixer, briefly warm the bowl, or let the meringue cool longer – and confidently continue the process. With patience and attention, you have the power to guide your buttercream to perfection!
Reviving Refrigerated or Frozen Italian Meringue Buttercream: Effortless Refreshing
One of the fantastic benefits of Italian Meringue Buttercream is its excellent shelf life and freezer-friendly nature. However, after being chilled or frozen, it will need a little refreshing to return to its silky smooth consistency. Here’s how:
- To Refresh Refrigerated Buttercream: When your buttercream has been stored in the refrigerator, it will become quite firm. Simply transfer it to the bowl of your stand mixer, attach the paddle attachment, and beat it on medium speed. Initially, it will appear curdled and chunky, but as it warms slightly from the friction of mixing, it will gradually come together into a smooth, cohesive mass. Once smooth, switch to the whisk attachment and beat on high speed for a minute or two until it becomes light, airy, and fluffy again, ready for use.
- To Refresh Frozen Buttercream: For frozen buttercream, the process is similar but requires an initial thawing period. Transfer the frozen buttercream to the refrigerator and allow it to thaw completely overnight. Once thawed, let it sit at room temperature for about 30 minutes to an hour until it is slightly softened but still cool. Then, follow the instructions above for refreshing refrigerated buttercream, starting with the paddle attachment.
- Speed Up the Process (with Caution!): If you’re short on time, you can accelerate the refreshing process. While beating the buttercream with the paddle attachment, gently warm the outside of the mixing bowl using a gas stovetop flame (briefly holding it over a low flame) or a kitchen torch. It is crucial to keep the heat source moving constantly and to warm the bowl *gently*. The goal is to bring the buttercream to the ideal temperature, not to melt it. Overheating will result in a soupy mess.
Troubleshooting Italian Meringue Buttercream: Common Issues and Solutions
Why is my Italian Meringue Buttercream curdled or chunky?
A curdled appearance is usually a sign that your buttercream is too cold. This is a very common issue, especially when attempting to refresh or re-whip buttercream that has been stored in the refrigerator. The butter in the buttercream has become too firm, preventing it from emulsifying smoothly with the meringue. The simplest fix is to gently warm the outside of your mixing bowl with a kitchen torch while the mixer is running on medium speed with the paddle attachment. Keep the torch moving constantly to ensure even heating and avoid melting localized spots of butter. Alternatively, you can simply let the mixer run on medium-low speed with the paddle attachment; the friction from the mixing itself will gradually warm the buttercream and bring it back together. Patience is your friend here!
Why is my Italian Meringue Buttercream soupy and liquidy?
Soupy buttercream indicates that it is too warm. This typically happens if your meringue was still too warm when you started adding the butter, or if your butter was too soft (room temperature or warmer) and melted into the warm meringue. While it’s sometimes okay to add slightly cooler butter to a warm meringue, adding overly soft butter to an already warm meringue is a recipe for soup. To rescue soupy buttercream, remove the mixing bowl (with the buttercream and attachment still inside) and place it in the refrigerator. Chill it for 30 minutes to 2 hours, depending on how warm it is. Once chilled and firmer, return it to the mixer and continue beating on medium speed with the paddle attachment. It will likely look curdled at first, but keep mixing, and it should come back together. As a last resort, when all else fails, sometimes your buttercream just needs time. Continue mixing it on medium speed with the paddle attachment, walk away, and come back. Often, all it needed was a little more time to gather itself. We can all relate to that!
Why are there hard butter chunks in my meringue buttercream?
Hard butter chunks are a clear sign that the butter was too cold when it was added to the meringue. The cold butter wasn’t able to properly emulsify and incorporate into the meringue. You can attempt to fix this by gently warming the entire bowl with a kitchen torch while continuously beating the buttercream with the paddle attachment. As with curdled buttercream, keep the torch moving to avoid melting the butter in one spot. However, to fully eliminate stubborn lumps, you might need to warm the buttercream to a point where it becomes too soft or soupy to use immediately. If this happens, pop the bowl into the refrigerator to chill and firm up, then beat it again with the paddle attachment once it’s cool. Alternatively, you might decide to simply proceed with slightly chunky buttercream, especially if you plan to cover your cake in sprinkles – no one will ever notice! This is my honest professional opinion.
I accidentally melted my butter in the Italian Meringue Buttercream. Is it ruined?
Unfortunately, if a significant amount of your butter melts completely into the meringue, this is often the one mistake that is irreversible. The melted butter separates and forms an oily mess that cannot be properly re-emulsified. If you notice the butter melting as you add it, stop immediately. Continue beating the meringue (without adding more butter) to allow it to cool down significantly. Once the meringue is cool again, you *might* be able to slowly resume adding *new, properly softened* butter. A small amount of melted butter might be salvageable, but if all the butter has melted, it’s best to start over.
Storage Guidelines for Italian Meringue Buttercream
Italian Meringue Buttercream is remarkably stable and stores exceptionally well, making it perfect for preparing ahead of time:
- Room Temperature: You can store freshly made Italian Meringue Buttercream in an airtight container at cool room temperature (below 70°F / 21°C) for 2 to 3 days.
- Refrigeration: For longer storage, refrigerate the buttercream in an airtight container for up to 2 weeks.
- Freezing: IMB freezes beautifully! Place it in an airtight, freezer-safe container and freeze for up to 3 months.
To Use Stored Buttercream: Before using any refrigerated or frozen buttercream, ensure it comes to a cool room temperature (thaw frozen buttercream overnight in the refrigerator first). Transfer it to the bowl of a stand mixer fitted with the paddle attachment and beat on medium speed. It will initially appear curdled and separated, which is perfectly normal. Don’t worry or stress; just keep mixing! As the buttercream warms slightly from the friction of the mixer, it will magically come together, becoming smooth and silky again. For extra lightness and fluffiness, you can switch to the whisk attachment for a minute or two after it’s smooth.
If you’ve tried this incredible recipe and absolutely loved it, please take a moment to leave a 🌟 star rating and share your experience in the comments below. Your feedback truly brightens my day, and I love hearing from you!
Italian Meringue Buttercream
Chef Lindsey
30 minutes
30 minutes
24
cupcakes
Comment
Print Recipe
Ingredients
-
2
cups
granulated sugar
divided -
⅔
cup
water -
5
large egg whites
-
pinch
kosher salt
optional -
pinch
cream of tartar
optional -
2
cups
unsalted butter
cubed, cool but not cold -
2
teaspoons
vanilla extract
Instructions
-
Begin by ensuring all your ingredients are measured out and ready (mise en place). This recipe demands seamless execution, so preparation is key. Crucially, make sure your mixing bowl is immaculately clean and free of any residual fat, as grease will prevent your meringue from whipping correctly. Also, ensure your saucepan is clean to avoid sugar crystallization.
-
In a medium saucepan, combine half of the granulated sugar with the water. Heat over medium heat, stirring just until the sugar completely dissolves. Once the pan heats up and the syrup begins to bubble, use a clean pastry brush dipped in water (or a rolled-up paper towel if you don’t have a brush) to gently brush down any sugar crystals clinging to the sides of the pot. This prevents crystallization of the entire syrup.
-
As soon as your sugar syrup starts to bubble, begin whipping your egg whites in the bowl of a stand mixer fitted with the whisk attachment. You can add a pinch of kosher salt and/or cream of tartar at this point for enhanced stability, if desired. Once the egg whites become frothy, gradually and slowly begin adding the reserved half of the sugar, whipping constantly on medium-high speed.
-
Continue whipping the egg whites until they form firm, glossy stiff peaks. Ideally, your meringue should reach this stage at the same time your sugar syrup reaches 235˚F (113˚C). If your egg whites are whipping too quickly, simply reduce the mixer speed to medium or low. You can also slightly adjust the heat under the sugar syrup to synchronize the timing.
-
To test if your sugar syrup is at the soft ball stage, either use a candy thermometer for precision, or perform the old-fashioned ice water test. Take a tiny spoonful of syrup and drop it into ice water. Reach in and check: if it dissolves, it needs more cooking. If it forms a small, malleable ball, it’s ready!
-
Immediately turn your mixer speed up to high. SLOWLY and carefully pour the hot sugar syrup in a steady stream down the inside wall of the mixing bowl, avoiding the whisk. Pouring it down the side prevents splattering and ensures the syrup solidifies in a controlled manner, preventing loss.
-
Continue whipping the Italian meringue on high speed. While stiff peaks are important, the most critical factor at this stage is the meringue’s temperature. Before adding butter, the bottom of the mixing bowl should feel barely warm to the touch. Keep whipping until it cools down adequately.
-
When the bowl is just slightly warm, switch to the paddle attachment. Begin adding your cubed unsalted butter, one piece at a time. The butter should be cool but pliable – I typically take mine out of the fridge when I start measuring ingredients. For best incorporation, you can gently squeeze each piece of butter before adding it to ensure it’s at the perfect softness.
-
Continue beating the butter into the meringue on medium-high speed until the buttercream is completely smooth, creamy, and free of any visible butter chunks. Initially, it may look curdled or separated, but persist, and it will come together beautifully. Now, add the vanilla extract or any other desired flavorings. For an extra light and fluffy texture, switch back to the whisk attachment and beat on high until airy. Your Italian Meringue Buttercream is now ready to pipe or spread as desired!
Video
Notes
Storage – Store your Italian Meringue Buttercream with ease! It can be kept at cool room temperature for 2-3 days, refrigerated in an airtight container for up to 2 weeks, or frozen for an impressive 3 months. Always bring to cool room temperature and re-whip before use.
Yield – This recipe makes a generous amount of buttercream, sufficient to beautifully frost a 2-3 tiered cake or elegantly decorate 24 standard cupcakes.
Nutrition
Calories:
203
kcal
|
Carbohydrates:
17
g
|
Protein:
1
g
|
Fat:
15
g
|
Saturated Fat:
10
g
|
Polyunsaturated Fat:
1
g
|
Monounsaturated Fat:
4
g
|
Trans Fat:
1
g
|
Cholesterol:
41
mg
|
Sodium:
133
mg
|
Potassium:
15
mg
|
Sugar:
17
g
|
Vitamin A:
473
IU
|
Calcium:
5
mg
|
Iron:
1
mg
Dessert
French
203
Enjoyed this? Share your thoughts below!
Before You Go
I sincerely hope you found this professional chef-tested recipe for Italian Meringue Buttercream enjoyable and empowering. Mastering this technique opens up a world of elegant baking possibilities. Don’t stop here! Be sure to explore our other delicious, chef-developed cake frosting recipes, and consider pairing this exquisite buttercream with my perfectly moist vanilla cake recipe for an unforgettable dessert experience. Happy baking!