
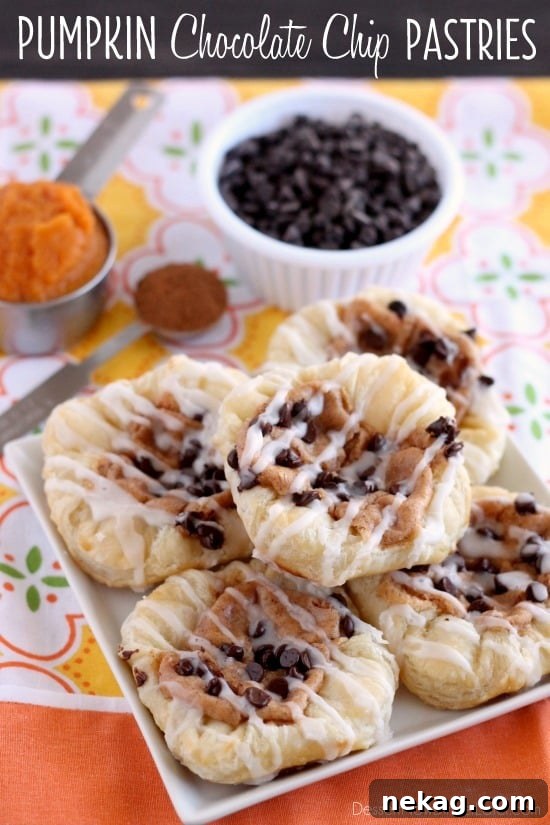
Irresistible Pumpkin Chocolate Chip Pastries: Your New Favorite Fall Treat
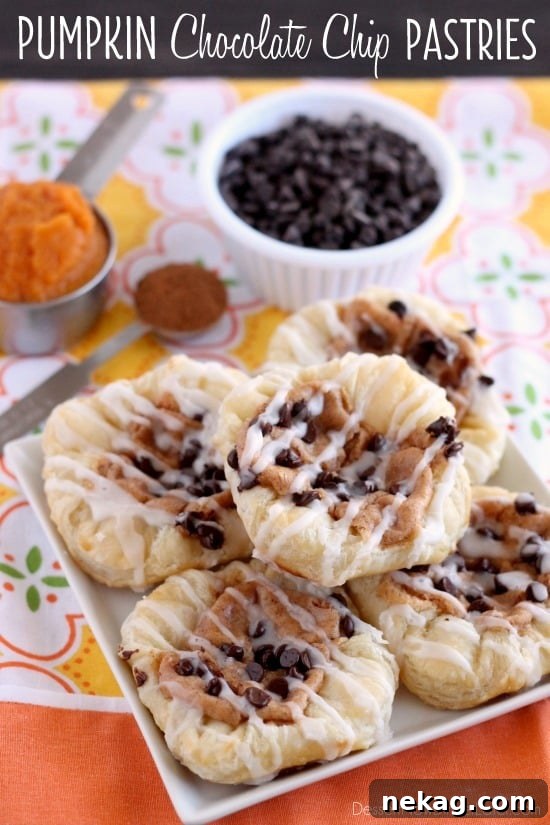
Experience the ultimate autumn delight with these incredibly easy-to-make Pumpkin Chocolate Chip Pastries. Crafted from convenient frozen puff pastry dough, a warmly spiced pumpkin cream cheese filling, and an abundance of miniature chocolate chips, these treats are a symphony of fall flavors. Best enjoyed warm from the oven and drizzled with a simple, sweet powdered sugar glaze, they promise a moment of pure bliss with every flaky bite. Perfect for breakfast, brunch, or a cozy dessert, this recipe brings bakery-quality taste right into your home.
From Bakery Beginnings to Beloved Home Baking
Before my days as a stay-at-home mom, I had the incredible opportunity to work in a bustling bakery, a period of my life rich with early mornings and the sweet aroma of freshly baked goods. One of my primary responsibilities at my last “real” job involved crafting a wide array of pastries for Utah State University’s various eateries and catering events. This hands-on experience taught me the nuances of baking on a commercial scale, where precision and efficiency were paramount when dealing with vast quantities of dough and fillings.
Transitioning from enormous slabs of Danish dough and industrial-sized sheeters to a home kitchen offered a different, yet equally rewarding, kind of joy. Recreating these bakery-style delights at home recently brought back a flood of fond memories, not just for me, but especially for my husband. He immediately recalled the days when he’d “sample all the good stuff” – a perk of living with a baker! It’s been almost five years since I hung up my bakery apron, but the taste of these particular Pumpkin Chocolate Chip Pastries clearly left a lasting impression, prompting him to confess how much he missed them. This personal connection makes these pastries even more special, transforming a simple recipe into a nostalgic journey back to those flavorful bakery days.
Why You’ll Fall in Love with These Pumpkin Pastries
These Pumpkin Chocolate Chip Pastries are more than just a seasonal treat; they’re an experience designed for ease, flavor, and pure autumnal comfort. Here’s why this recipe will quickly become a cherished part of your fall baking tradition:
- Effortlessly Delicious: Thanks to store-bought frozen puff pastry, you can achieve a sophisticated, flaky pastry without the time-consuming process of making dough from scratch. It’s a true baking hack that yields impressive results.
- A Symphony of Fall Flavors: The combination of warm, earthy pumpkin puree, rich cream cheese, aromatic pumpkin pie spice, and sweet mini chocolate chips creates a harmonious blend that perfectly captures the essence of autumn. Each bite offers a delightful balance of creamy, spiced, and sweet.
- Versatile for Any Occasion: While they shine as a holiday breakfast (think Thanksgiving morning!), these pastries are equally perfect for a leisurely weekend brunch, an afternoon pick-me-up with coffee, or a comforting dessert after dinner.
- Visually Appealing: The golden-brown, puffed edges, a dollop of creamy filling, and a generous drizzle of glaze make these pastries as beautiful to look at as they are delicious to eat. They’re sure to impress guests or bring a smile to your family’s faces.
- Customizable: While the recipe is fantastic as is, it also offers room for personalization. Adjust the spice level, add a pinch of cinnamon, or even experiment with different types of chocolate for a unique twist.
Mastering the Magic of Puff Pastry
My time in a commercial bakery involved immense sheets of Danish dough, rolled out to perfection using a powerful sheeter. At home, however, convenience reigns supreme, and that’s where frozen puff pastry truly shines. I typically opt for a 17.3 oz box of Pepperidge Farm Frozen Puff Pastry Sheets, which conveniently contains two square sheets. Each sheet is designed to yield about 9 small to medium-sized pastries, making a total of 18 delightful treats per box.
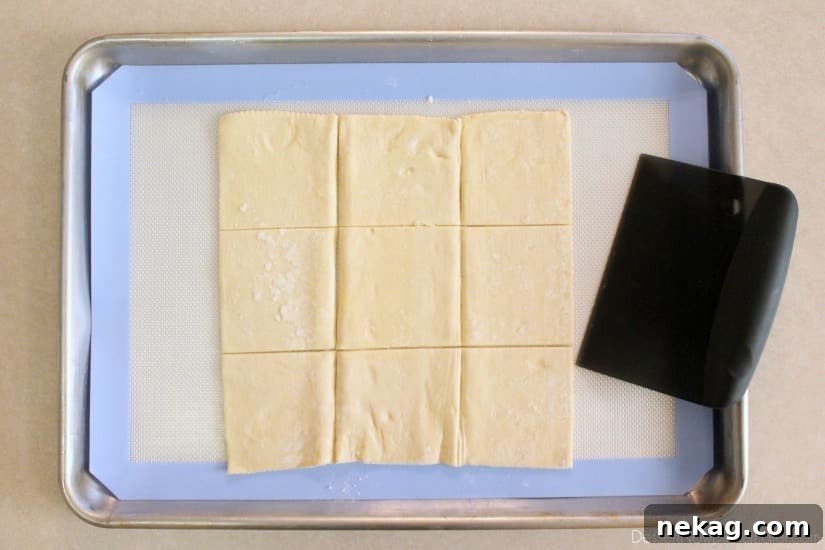
The key to working with frozen puff pastry is proper thawing. You’ll need to remove the sheets from their box and let them sit at room temperature for approximately 40 minutes, or simply follow the specific instructions on your package. This thawing process is crucial; it allows the delicate layers of dough to become pliable enough to unfold without cracking or tearing. Once thawed, carefully unfold each large square onto a prepared surface. I recommend using a silicone mat or a sheet of parchment paper laid over a baking sheet to prevent sticking and ensure easy transfer.
With the pastry unfolded, the next step is to transform the large square into individual pastry bases. Using a sharp tool like a bench scraper or a pizza cutter, meticulously cut each large pastry sheet into 9 smaller, even squares. Precision here helps ensure uniform baking and presentation. If the dough starts to feel too warm or sticky, pop it back into the refrigerator for a few minutes to firm up slightly before continuing. This small detail ensures your pastries maintain their beautiful shape as you work with them.
The Art of Folding and Egg Washing
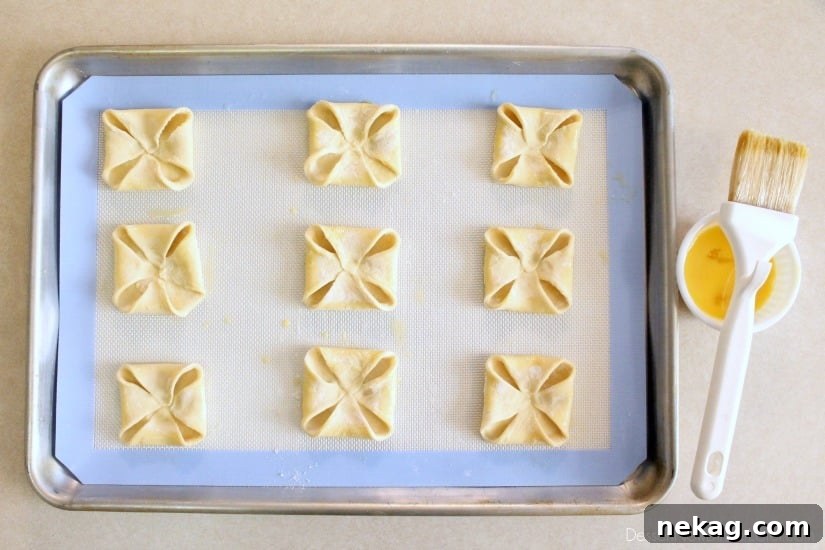
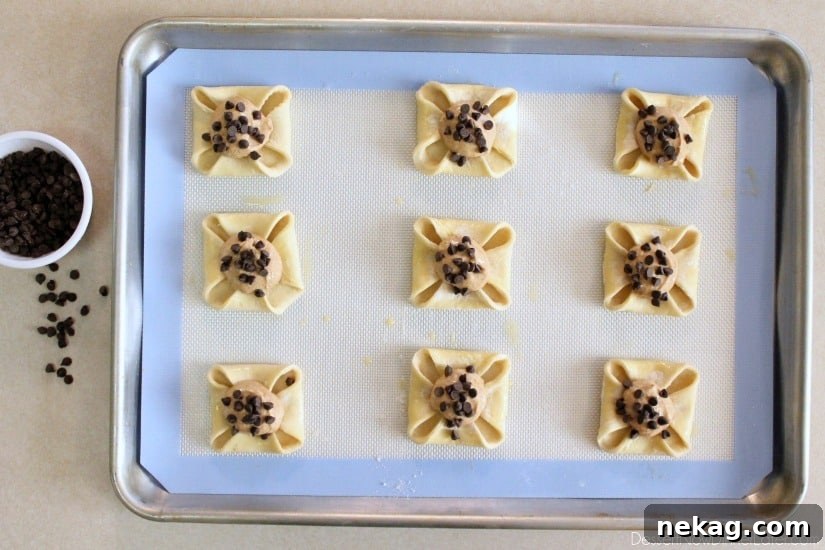
Once you have your 9 individual pastry squares, it’s time to prepare them for the filling. This step involves a simple yet elegant folding technique. Gently fold each of the four corners of a square inward, towards the center of the pastry. This creates a slightly raised border and a neat well in the middle, perfect for holding your delicious pumpkin cream cheese filling securely as it bakes.
Next, grab your whisked egg. This “egg wash” is a golden secret in baking, providing a beautiful, glossy, golden-brown finish to your pastries as they bake. Using a pastry brush, carefully apply the egg wash along the folded edges of each pastry. It’s important to avoid brushing the egg wash onto the very center where the filling will go. If the center is egg-washed, the filling might simply slide off the slick surface during baking, leading to a messy pastry and an uneven bake. Focus solely on the exposed edges to achieve that perfect color and slight crispness. This attention to detail will elevate both the appearance and texture of your finished pastries.
Crafting the Perfect Pumpkin Cream Cheese Filling
The heart of these pastries lies in their exquisite spiced pumpkin cream cheese filling. This creamy concoction brings together the rich, tangy flavor of cream cheese with the sweet, earthy notes of pumpkin, all elevated by a blend of warming spices. The combination of pumpkin and chocolate is, in my opinion, simply fabulous—a match made in autumnal heaven!
To prepare the filling, ensure your cream cheese is softened to room temperature; this will make it much easier to beat into a smooth consistency. In a bowl, combine the softened cream cheese with granulated sugar and beat them together using a hand-held mixer until the mixture is light, fluffy, and completely free of lumps. Then, gently fold in the pumpkin puree (and remember, it’s crucial to use pure pumpkin puree, not pumpkin pie filling, as the latter contains added sugars and spices that would alter the flavor profile). Finally, add your pumpkin pie spice. This blend typically includes cinnamon, nutmeg, ginger, and cloves, delivering that quintessential fall aroma and taste.
Once your filling is ready, it’s time to spoon it into the prepared puff pastry squares. A heaping teaspoon or about half a tablespoon of filling for the center of each pastry is usually perfect. Don’t be tempted to overfill, as this can cause the filling to bubble over and seep out during baking. After placing the creamy pumpkin mixture, generously sprinkle a few mini chocolate chips directly onto the filling. Mini chocolate chips are ideal here because their smaller size allows for a more even distribution of chocolatey goodness in every bite without overwhelming the delicate pastry. This delightful addition provides a burst of rich sweetness that perfectly complements the spiced pumpkin.
Baking to Golden Perfection and Glazing with Sweetness
With your pastries assembled, it’s time for the final transformation in the oven. Preheat your oven to 400°F (200°C). Arrange the filled puff pastry squares on your prepared baking sheets, ensuring there’s enough space between each pastry for even airflow and baking. If you have a smaller oven or are baking a full batch, it’s often best to bake one tray at a time to achieve consistent results, preventing some pastries from being under-baked or over-browned.
Bake the pastries for approximately 15 minutes, or until the edges and bottoms are a beautiful golden brown. You’ll notice the puff pastry rising and expanding, creating those characteristic flaky layers. Keep a close eye on them towards the end of the baking time, as oven temperatures can vary. Once baked, carefully remove the trays from the oven and allow the pastries to cool slightly on the baking sheets before transferring them to a wire rack. This brief cooling period helps them set.
While the pastries are cooling, prepare the simple powdered sugar glaze. In a small bowl, combine powdered sugar with a small amount of water. Start with about 2 tablespoons of water for 1.5 cups of powdered sugar, then add more tiny drops if needed, whisking until you achieve a thick, smooth, and pourable consistency. The goal is a glaze that’s white and opaque but still liquid enough to drizzle. A little water goes a long way, so add it cautiously!
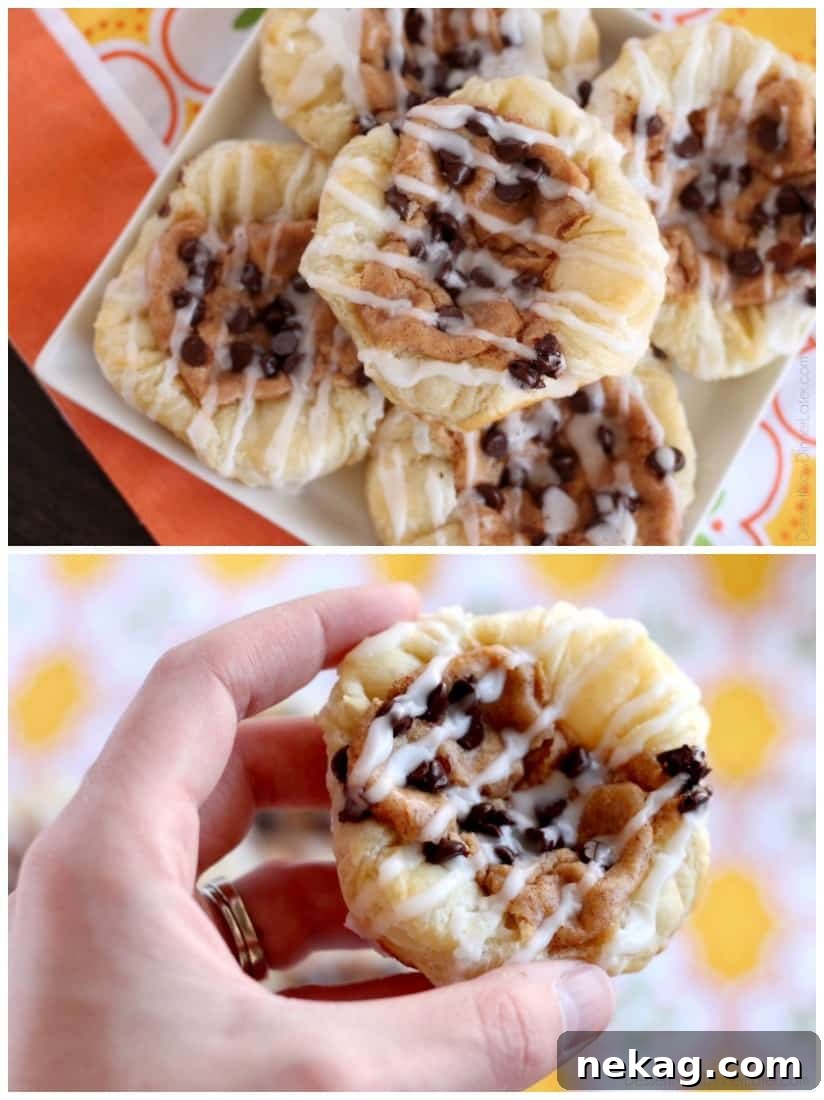
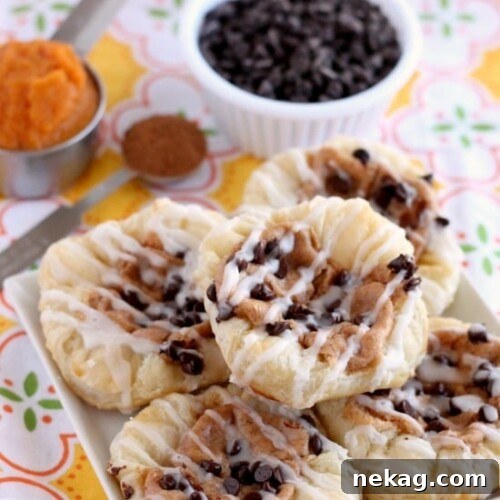
Once your pastries have cooled enough to handle but are still warm, take a spoon and drizzle the luscious glaze back and forth over the tops of each pastry. The warmth of the pastries will help the glaze set slightly, creating a beautiful finish. Allow the glaze to firm up for a few minutes before serving. The combination of the warm, flaky pastry, the creamy pumpkin filling, the melted chocolate, and the sweet glaze is truly irresistible. These are particularly delightful when enjoyed fresh and warm, perhaps with a cup of coffee or tea. They are an absolute showstopper, especially if you’re looking for a delightful treat for Thanksgiving breakfast or any fall gathering.
Tips for Perfect Pumpkin Chocolate Chip Pastries Every Time
- Thaw Gently: Don’t rush the puff pastry thawing process. Allow it to sit at room temperature as directed on the package to prevent cracking when unfolding. If it’s too warm, it becomes difficult to handle; too cold, and it will break.
- Room Temperature Cream Cheese: For a smooth, lump-free filling, ensure your cream cheese is fully softened to room temperature before beating.
- Don’t Overfill: A heaping teaspoon or half a tablespoon of filling per pastry is plenty. Overfilling can cause the filling to overflow during baking.
- Precision with Egg Wash: Apply egg wash only to the folded edges. Avoid the center where the filling goes, as a slick, egg-washed surface can cause the filling to slide off.
- Bake One Tray at a Time: For best results and even baking, bake one sheet of pastries at a time, especially if your oven tends to have hot spots. This ensures all your pastries puff up beautifully and brown uniformly.
- Watch for Doneness: Keep an eye on the pastries as they bake. They should be deeply golden brown on the edges and bottom, indicating they are fully cooked and flaky.
- Glaze Consistency is Key: When making the powdered sugar glaze, add water very gradually. You want a thick but pourable consistency. If it’s too thin, it will run off; too thick, and it won’t drizzle smoothly.
- Serve Warm: While delicious at any temperature, these pastries are truly spectacular when served slightly warm, allowing the chocolate chips to be gooey and the pastry to be at its flakiest.
Serving Suggestions and Flavor Variations
These Pumpkin Chocolate Chip Pastries are incredibly versatile and can be enjoyed in many ways. Serve them as a special breakfast or brunch item, an afternoon snack with tea or coffee, or a delightful fall dessert.
- The Ultimate Brunch Item: Pair them with fresh fruit, yogurt, and a mimosa or coffee for an elegant fall brunch spread.
- Coffee Companion: Their rich, spiced flavor makes them a perfect match for your morning coffee or an afternoon latte.
- Thanksgiving Treat: Offer them alongside other breakfast favorites on Thanksgiving morning to kick off the holiday festivities.
- Spice it Up: Feel free to adjust the amount of pumpkin pie spice in the filling to your preference. A pinch of extra cinnamon or ginger can add more depth.
- Nutty Addition: For added texture and flavor, finely chop some pecans or walnuts and sprinkle them over the chocolate chips before baking.
- Chocolate Swap: While mini chocolate chips are recommended, you could experiment with white chocolate chips or even a mix of dark and milk chocolate for different flavor profiles.
Storage and Reheating Instructions
These pastries are best enjoyed fresh from the oven, but if you have leftovers, they can be stored and reheated to maintain their deliciousness.
- Storage: Once completely cooled, store the pastries in an airtight container at room temperature for up to 2 days, or in the refrigerator for up to 5 days.
- Reheating: To revive their flaky texture and warm goodness, reheat pastries in a preheated oven at 300°F (150°C) for about 5-10 minutes, or until warmed through. Avoid microwaving, as it can make the pastry soft and less flaky.
- Freezing (Unbaked): You can assemble the pastries (without glazing), place them on a parchment-lined baking sheet, and freeze until solid. Once frozen, transfer them to a freezer-safe bag or container for up to 1 month. When ready to bake, place them directly on a baking sheet (no need to thaw) and bake at 400°F (200°C) for 20-25 minutes, or until golden brown. Then, glaze as directed.
Frequently Asked Questions (FAQ)
Can I use homemade puff pastry?
Absolutely! If you’re feeling ambitious and have a homemade puff pastry recipe you love, it will undoubtedly elevate these pastries even further. Just ensure it’s rolled out to a similar thickness as store-bought sheets before cutting.
What if I don’t have pumpkin pie spice?
No problem! You can create your own blend by mixing common spices. A good substitute for 1.5 teaspoons of pumpkin pie spice would be: 1 teaspoon ground cinnamon, 1/4 teaspoon ground nutmeg, 1/8 teaspoon ground ginger, and a tiny pinch of ground cloves or allspice.
Why did my filling slide off during baking?
This usually happens if the egg wash was brushed into the center of the pastry where the filling sits. The egg wash creates a slick surface, preventing the filling from adhering to the dough. Always apply egg wash only to the edges.
Can I prepare these ahead of time?
Yes, you can prepare the pumpkin cream cheese filling a day in advance and store it in the refrigerator. You can also assemble the pastries (without baking or glazing) and refrigerate them on a baking sheet for a few hours before baking. For longer storage, see the freezing instructions above.
Can I use regular chocolate chips instead of mini?
You can, but mini chocolate chips are recommended as they distribute more evenly across the smaller pastry surface and melt more uniformly without creating large pockets of chocolate, which can sometimes be too heavy for the delicate pastry.
Pumpkin Chocolate Chip Pastries
Yields: 18 pastries
Ingredients
- 17.3 oz box Pepperidge Farm Frozen Puff Pastry Sheets (2 count)
- 4 oz cream cheese, softened
- ¼ cup granulated sugar
- 2 Tbsp pumpkin puree (not pumpkin pie filling)
- 1 ½ tsp pumpkin pie spice
- 1 large egg, whisked (for egg wash)
- Mini Chocolate Chips, for sprinkling
For the Glaze:
- 1 ½ cups powdered sugar
- 2 Tbsp water (or more, gradually, for desired consistency)
Instructions
- Remove the puff pastry sheets from the box and let them thaw at room temperature for about 40 minutes, or according to package directions. The dough should unfold easily once thawed.
- In a bowl, using a hand-held mixer, beat the softened cream cheese and granulated sugar together until smooth and all lumps are gone. Stir in the pumpkin puree and pumpkin pie spice until well combined. Set aside.
- Once the puff pastry is thawed, carefully unfold each sheet onto a silicone mat or parchment-lined baking sheet. (You might need two baking sheets for the two sheets of puff pastry). Using a bench scraper or pizza cutter, cut each large pastry sheet into 9 equal squares.
- Fold each of the four corners of each square in towards the center. Brush the whisked egg onto the folded edges of the pastries. Be careful to avoid brushing the egg wash into the center where the filling will go, as this can cause the filling to slide off during baking.
- Spoon approximately half a tablespoon (or a heaping teaspoon) of the pumpkin cream cheese filling into the center of each pastry. Sprinkle the tops generously with mini chocolate chips.
- Preheat your oven to 400°F (200°C). Bake the pastries for 15 minutes, or until the bottom and edges are golden brown and puffed. (Bake one tray at a time for best results). Allow the pastries to cool slightly on the baking sheet before transferring to a wire rack.
- While the pastries are cooling, prepare the glaze: In a small bowl, mix the powdered sugar with 2 tablespoons of water. Whisk until you achieve a thick, smooth, and pourable consistency. Add additional water drop by drop if the glaze is too thick.
- With a spoon, drizzle the glaze back and forth over the still-warm pastries. Allow the glaze to set for a few minutes before serving. Enjoy your delicious Pumpkin Chocolate Chip Pastries!
Notes
Nutritional values are estimations based on common ingredient data and should be used as a guide only. Actual values may vary.
Sharing this recipe with a link to this page is both encouraged and greatly appreciated. Please refrain from copying, pasting, or taking screenshots of the full recipe for sharing on any social media platforms. All content and photographs are copyright protected.
Did you make this?
Don’t forget to leave a rating below and make sure to follow us on Pinterest and Instagram for more delicious recipes!