
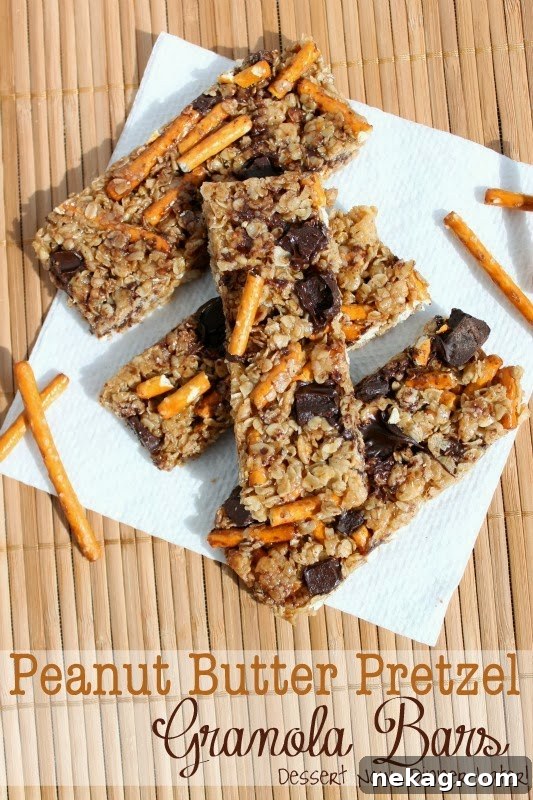
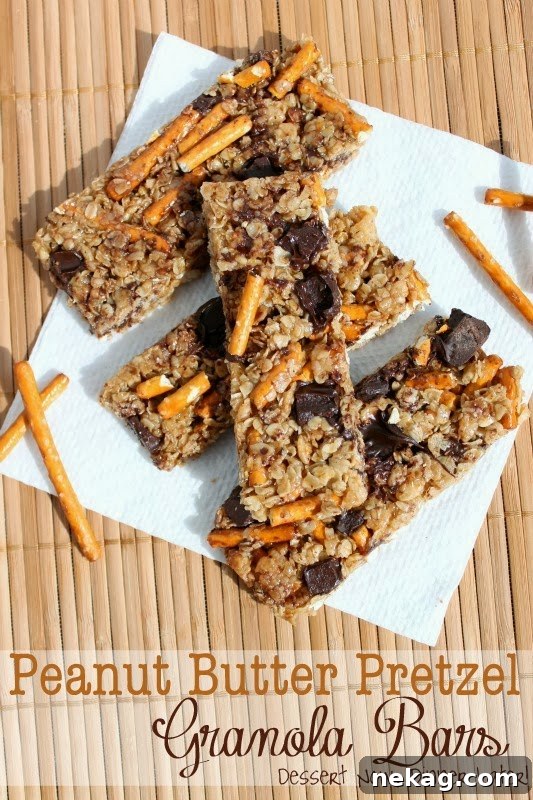
Irresistible No-Bake Peanut Butter Pretzel Granola Bars: Your Ultimate Salty-Sweet Snack
Do you ever find yourself craving that perfect blend of salty and sweet? That irresistible combination that hits all the right notes? If so, then you’re in for a treat with these incredible Peanut Butter Pretzel Granola Bars! For anyone with a serious salty/sweet addiction – and trust me, I’m at the top of that list – these bars are an absolute dream come true. You might already be familiar with my Caramel Pretzel Magic Bars, Peanut Butter Chocolate Chip Pretzel Bars, and Caramel Pretzel Chocolate Chip Cookies, but these granola bars bring that beloved flavor profile into a convenient, wholesome, and utterly delicious snack form.
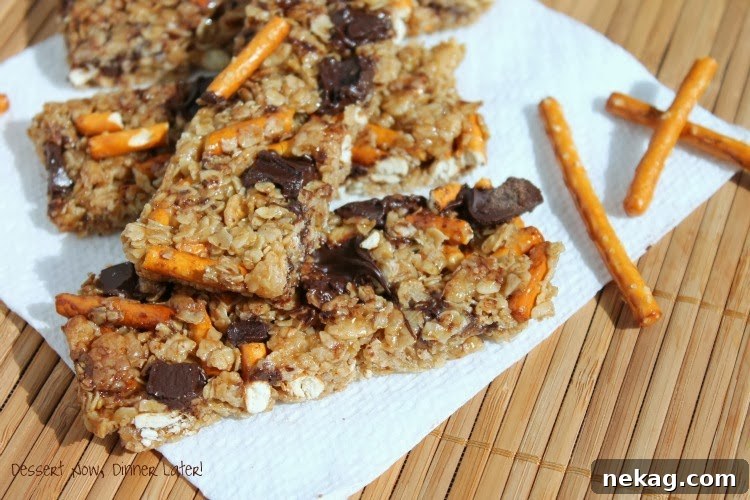
Imagine a snack that perfectly balances the creamy richness of peanut butter with the crisp, savory crunch of pretzels, all held together in a chewy, satisfying bar. These homemade granola bars are not just incredibly easy to make; they are designed to satisfy your cravings while offering a better-for-you alternative to store-bought options. They are particularly fantastic when enjoyed straight from the refrigerator, offering a firm yet soft and delightfully chewy texture. They’re so simple, you’ll wonder why you haven’t been making them forever!
Why You’ll Fall in Love with These Granola Bars
There’s a multitude of reasons why these Peanut Butter Pretzel Granola Bars will become a staple in your kitchen. Beyond their captivating flavor, they offer convenience and versatility that make them perfect for any occasion.
The Ultimate Salty-Sweet Symphony
The combination of peanut butter and pretzels is truly a match made in heaven. The deep, nutty flavor of peanut butter perfectly complements the crisp, salty bite of pretzels. Add in a touch of sweetness from honey and brown sugar, and a hint of vanilla, and you have a harmonious blend that is simply irresistible. This dynamic duo creates a taste experience that is both comforting and exciting, ensuring every bite is packed with flavor.
Effortless No-Bake Perfection
One of the best features of this recipe is that it’s entirely no-bake! This means no oven, no fuss, and no heating up your kitchen. It’s a fantastic option for warmer months, or for those days when you simply don’t want to turn on the oven. The process is straightforward: combine your dry ingredients, prepare a simple binder on the stovetop, mix, press, and chill. It’s so easy, even novice bakers can achieve perfect results.
Perfectly Soft and Chewy (Even When Cold!)
Unlike some homemade granola bars that can turn hard or crumbly, these bars maintain an incredible soft and chewy texture, especially when kept in the refrigerator. The secret lies in the precise ratio of butter, brown sugar, honey, and peanut butter, which creates a rich, pliable binder that keeps the oats and pretzels perfectly tender. This makes them a delightful snack straight from the fridge, offering a refreshing and satisfying bite.
Ideal for On-the-Go Snacking and Meal Prep
Whether you need a quick breakfast on a busy morning, a pick-me-up during the workday, or a wholesome treat for after-school snacking, these granola bars are incredibly versatile. They are perfectly portioned and easy to grab, making them an excellent option for meal prepping. Make a batch on Sunday, and you’ll have delicious, homemade snacks ready to go throughout the week.
Kid-Friendly and Approved by All Ages
Let’s be honest, kids (and adults!) adore peanut butter and pretzels. These bars are a fantastic way to offer a homemade snack that’s packed with flavor and a little more wholesome than many store-bought alternatives. They are robust enough to handle lunchboxes and active play, providing sustained energy without a sugar crash.
Decoding the Key Ingredients for Granola Bar Success
Every ingredient in this recipe plays a crucial role in achieving the perfect texture and flavor. Understanding their function can help you appreciate the simplicity and genius of these bars.
Oats: The Wholesome Foundation
Old-fashioned rolled oats are the backbone of these granola bars. They provide a hearty, fibrous base that gives the bars their characteristic chewiness and keeps you feeling full. Rolled oats absorb the liquid binder beautifully, creating a cohesive texture that holds together well without being too dense.
Rice Krispies Cereal & Pretzel Sticks: The Texture Power Duo
This is where the magic truly happens! Rice Krispies add a light, airy crispness, while the broken pretzel sticks deliver that essential salty crunch and a delightful textural contrast. The pretzels are not just for saltiness; their unique shape and snap contribute significantly to the overall enjoyment of these bars, making each bite interesting.
Butter, Brown Sugar, & Honey: The Sweet and Sticky Binder
This trio forms the luscious, sticky sauce that binds all the dry ingredients together. Butter adds richness and helps create a smooth texture. Brown sugar contributes a deeper, caramel-like sweetness, while honey provides natural sweetness and acts as a powerful adhesive, ensuring your bars don’t crumble apart. The brief boiling time is crucial here to ensure the mixture thickens sufficiently to hold the bars together.
Creamy Peanut Butter: The Flavorful Star
Peanut butter is, of course, the undeniable star! It brings its signature nutty, creamy flavor and also contributes significantly to the binder’s texture. Its richness is what makes these bars so satisfying and pairs perfectly with the salty pretzels.
Vanilla Extract & Chocolate Chunks: The Finishing Touches
Vanilla extract enhances all the other flavors, adding a warm, aromatic depth. Chocolate chunks (or chips) are an optional but highly recommended addition, melting slightly into the bars and providing pockets of delightful sweetness that further elevate the salty-sweet experience. Sprinkling some extra pretzels and chocolate on top adds visual appeal and another layer of texture.
Tips for Granola Bar Perfection
While this recipe is incredibly easy, a few tips can ensure your Peanut Butter Pretzel Granola Bars turn out perfectly every time.
- Choose Your Oats Wisely: For the best texture, always use old-fashioned rolled oats. Quick oats can become mushy, and steel-cut oats won’t bind properly in a no-bake recipe.
- Pretzel Prep is Key: Ensure your pretzel sticks are broken into small, manageable pieces, about a third of their original size or smaller. This ensures they distribute evenly throughout the bars and aren’t too large to bite into. Remember to reserve about ½ cup for the topping for that extra crunch and visual appeal.
- Don’t Rush the Boil: When heating the butter, brown sugar, honey, and peanut butter, make sure it comes to a light boil and continues for a full 2 minutes. This brief boiling period is essential for activating the sugars and creating a strong, stable binder that prevents your bars from being too crumbly.
- Mix Thoroughly but Gently: Once you pour the hot liquid mixture over the dry ingredients, fold gently but ensure all the oats, Rice Krispies, and pretzels are thoroughly coated. This even coating is vital for uniform texture and binding.
- Press Firmly: After spreading the mixture into your prepared pan, use a rolling pin or the back of a spoon (or even your hands, slightly moistened) to press the mixture down very firmly and evenly. This compaction is crucial for creating solid bars that won’t fall apart when cut. Don’t forget to press in the reserved chocolate and pretzels on top!
- Refrigeration is Mandatory: These are no-bake bars, and chilling is what sets them. Give them at least 30 minutes in the refrigerator to firm up completely before cutting. For best results, I often chill them for an hour or two. Keeping them refrigerated after cutting ensures they maintain their shape and chewy texture. Covering the pan with plastic wrap during chilling also helps prevent them from drying out.
Variations and Customizations
One of the joys of homemade granola bars is how easily they can be customized to suit your taste or dietary needs. Here are a few ideas:
- Nut Butter Alternatives: While peanut butter is classic, feel free to experiment with other creamy nut butters like almond butter or cashew butter for a different flavor profile. Just ensure they are smooth and not too oily.
- Add-Ins Galore: Elevate your bars with extra ingredients!
- Nuts: Add chopped almonds, walnuts, or pecans for extra crunch and healthy fats.
- Seeds: Chia seeds, flax seeds, or hemp hearts can boost the nutritional content without significantly altering the flavor.
- Dried Fruit: A handful of dried cranberries, raisins, or chopped apricots can add a touch of fruity sweetness.
- Different Chocolates: Instead of milk chocolate, try dark chocolate chunks, white chocolate chips, or even butterscotch chips.
- Chocolate Drizzle: For an extra touch of decadence, melt some chocolate chips and drizzle them over the cooled bars before cutting. Let the drizzle set in the fridge for a few minutes.
- Thicker Bars: If you prefer thicker, chewier bars, you can use a smaller 9×13-inch pan instead of a jelly roll pan. Adjust chilling time accordingly.
Frequently Asked Questions (FAQs)
Here are some common questions about making and enjoying these delicious granola bars:
Can I make these gluten-free?
Absolutely! Simply use certified gluten-free oats and ensure your rice krispies cereal and pretzels are also gluten-free. Many brands now offer these options.
How long do these granola bars last?
When stored in an airtight container in the refrigerator, these bars will stay fresh and delicious for 1-2 weeks. Their chewy texture even improves over time!
Can I freeze these granola bars?
Yes, these bars freeze beautifully! Wrap individual bars tightly in plastic wrap, then place them in a freezer-safe bag or container. They can be frozen for up to 3 months. Thaw at room temperature or enjoy them frozen for a super chewy, cold treat.
Why are my granola bars falling apart?
This is usually due to one of two reasons:
- The wet binder mixture wasn’t boiled long enough (or at all). Boiling for 2 minutes helps it reach the right consistency to hold everything together.
- The mixture wasn’t pressed firmly enough into the pan. Compacting the mixture is essential for solid bars.
Ensure you follow the boiling time and press the mixture down very firmly.
Can I use crunchy peanut butter?
While creamy peanut butter is recommended for its smooth consistency, which helps with binding, you can certainly try crunchy peanut butter for an extra layer of texture. Just be aware that the bars might be slightly more crumbly, but still delicious.
Peanut Butter Pretzel Granola Bars
Pin Recipe
36
granola bars
Ingredients
- 4 cups (320 g) old-fashioned oats
- 1 cup (27 g) rice krispies cereal
- 2 cups (85 g) pretzel sticks, broken into thirds or smaller (reserve ½ cup for topping)
- ½ cup (113 g) unsalted butter
- ½ cup (100 g) light brown sugar, packed
- ½ cup (168 g) honey
- ½ cup (132 g) creamy peanut butter
- 1 Tbsp pure vanilla extract
- ½ cup (85 g) chocolate chunks or chips
Instructions
-
In a large mixing bowl, combine the oats, rice krispies cereal, and all but ½ cup of the broken pretzel pieces. Set aside.
-
In a medium saucepan over medium heat, melt the butter. Add the brown sugar, honey, and creamy peanut butter. Bring the mixture to a light boil, stirring constantly, and let it boil gently for exactly 2 minutes.
-
Remove the saucepan from the heat and carefully stir in the vanilla extract. (Be cautious, as the mixture may bubble up.)
-
Pour the hot wet mixture into the bowl of dry ingredients. Using a sturdy spatula, fold gently but thoroughly, ensuring all the oat mixture is evenly coated with the peanut butter sauce.
-
Immediately spread the mixture evenly into a greased jelly roll pan (approximately 10×15 inches). Using a rolling pin, the back of a spoon, or your hands, firmly press the mixture flat and compact it into the pan.
-
Sprinkle the top of the pressed mixture with the chocolate chunks and the reserved ½ cup of pretzel pieces. Gently press these toppings into the granola bars with the rolling pin or your hand to secure them.
-
Immediately transfer the pan to the refrigerator and chill for at least 30 minutes, or until completely firm. Once chilled, cut into desired bar sizes (e.g., 3×12 cuts for 36 average-sized bars). Keep the finished granola bars refrigerated in an airtight container for optimal freshness and texture.
Notes
* May substitute a 9×13-inch pan for thicker bars. Adjust chilling time as needed.
* If using a jelly roll pan, cut bars into approximately 3×12 pieces for an average granola bar size, yielding about 36 bars.
Disclaimer: Nutritional values were calculated using a third-party tool and are provided as an estimation only. For precise nutritional information, please consult a professional.
Sharing this recipe with a link is both encouraged and appreciated. Copying/pasting and/or screenshots of full recipes to any social media is strictly prohibited. Content and photographs are copyright protected.
Final Thoughts on Your New Favorite Snack
These No-Bake Peanut Butter Pretzel Granola Bars are more than just a recipe; they’re an experience in satisfying your deepest salty-sweet cravings with minimal effort. From their easy preparation to their delightful texture and incredibly balanced flavor, they are designed to be a go-to snack for families, busy individuals, or anyone who appreciates a truly delicious treat. The best part? You have complete control over the ingredients, ensuring a wholesome snack free from unnecessary additives.
So, gather your ingredients, follow these simple steps, and prepare to be amazed by how quickly these bars disappear! Whether it’s for an after-school snack, a quick breakfast, or just a little something to curb that afternoon craving, these homemade granola bars are sure to become a beloved staple in your home. Don’t forget to leave a rating below once you’ve tried them, and share your creations!
Did you make this?
Don’t forget to leave a rating below and make sure to follow on Pinterest and Instagram for more delicious recipes and inspiration!