
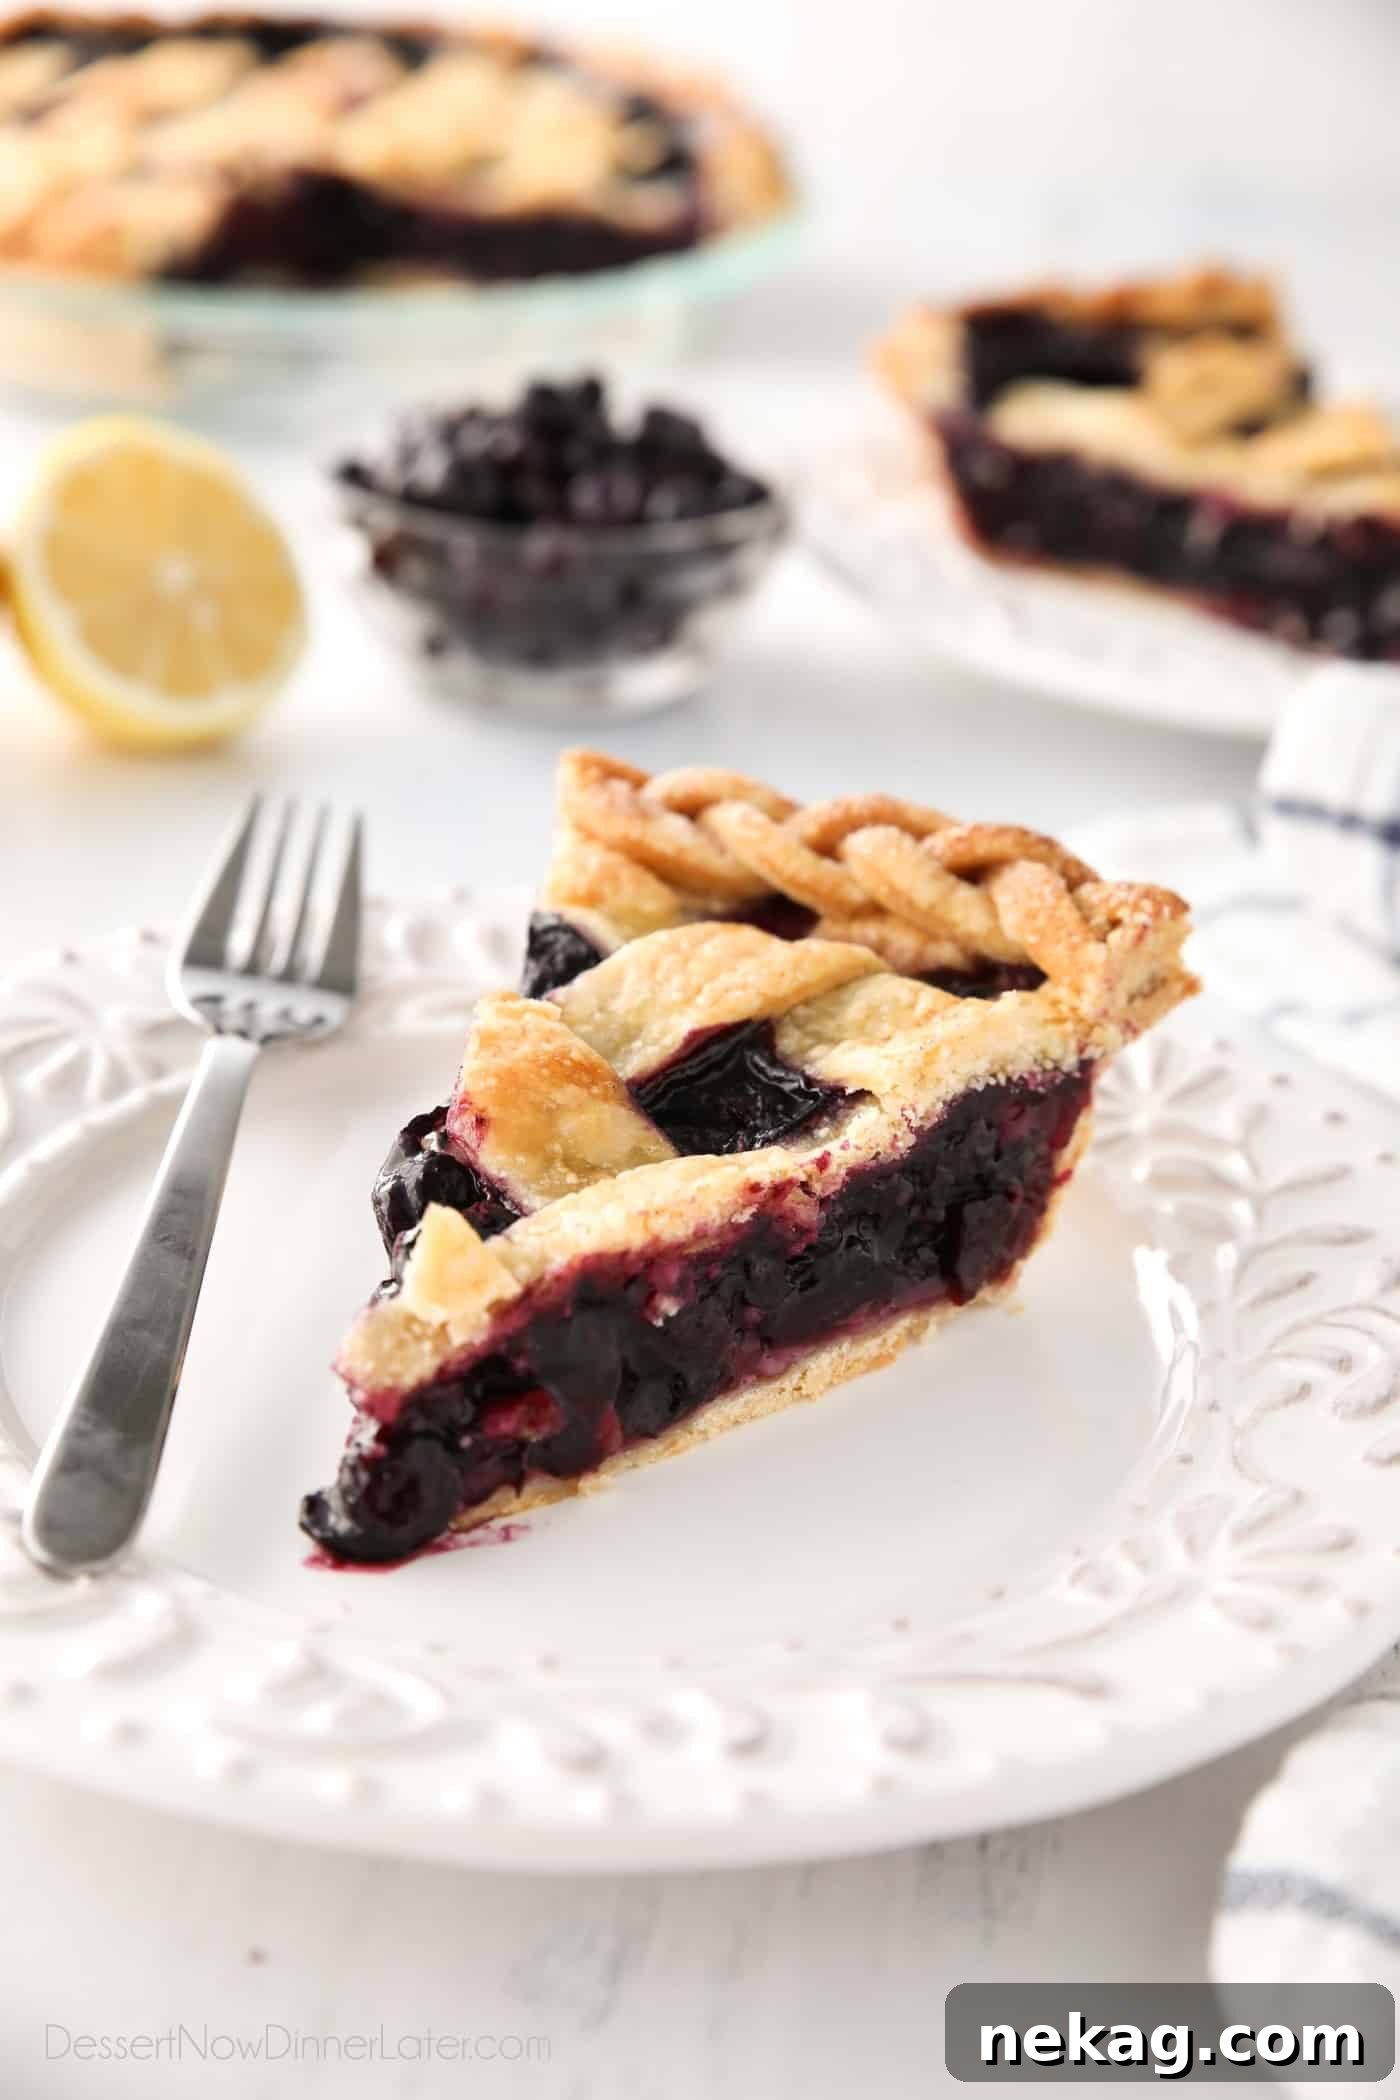
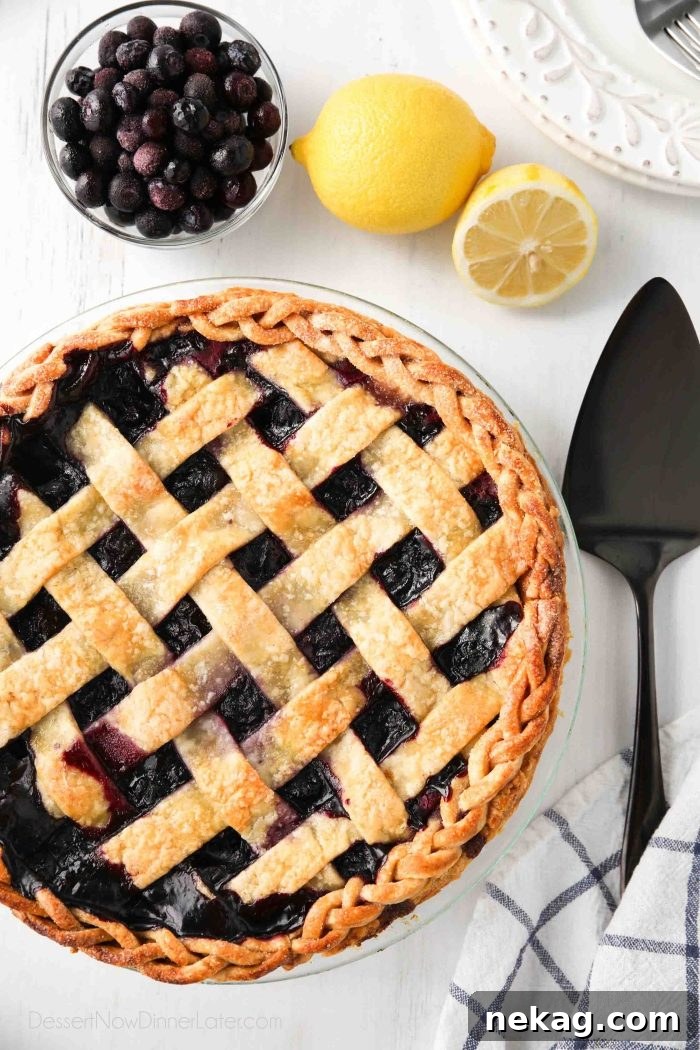
Welcome to the ultimate guide for crafting a spectacular **homemade blueberry pie**, even when blueberries aren’t in season. This recipe leverages the convenience of frozen blueberries, making it a delightful dessert you can enjoy year-round, from a summer picnic to a cozy holiday gathering like Thanksgiving. Our goal is to create a lusciously thick, not runny, pie filling from scratch, encased in a perfectly golden, flaky crust. Get ready to bake a pie that will impress every time!
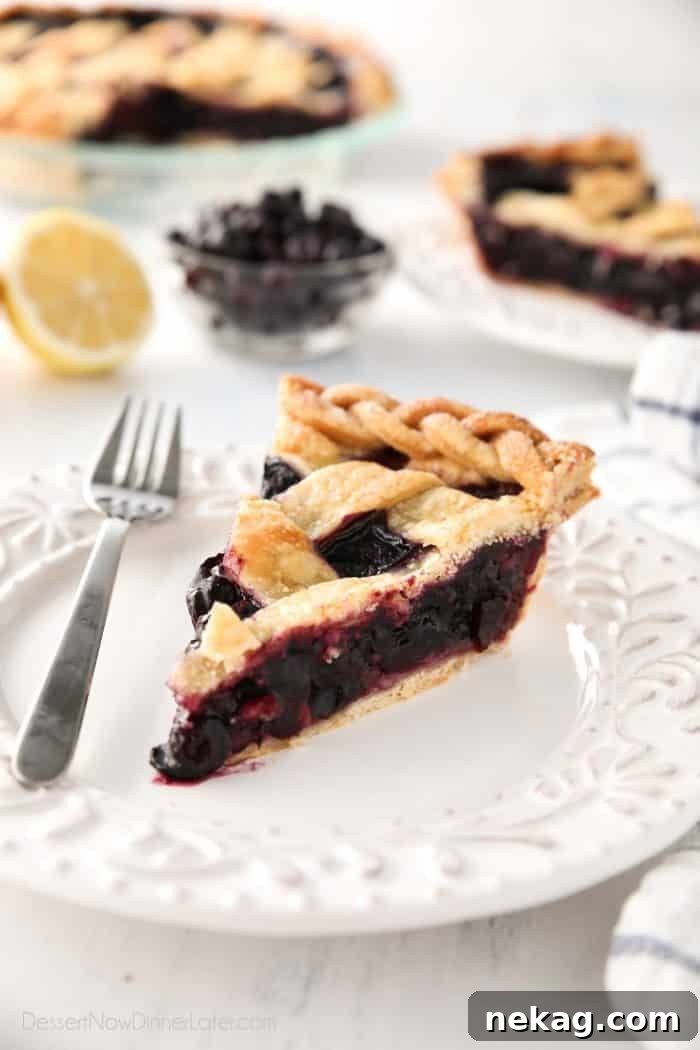
While the peak season for fresh blueberries might be limited to the warmer summer months, the joy of a warm, comforting blueberry pie doesn’t have to be. Thanks to the magic of frozen fruit, you can indulge in this classic dessert any time the craving strikes. Frozen blueberries are picked at their peak ripeness and flash-frozen, locking in their vibrant flavor and nutritional value, making them an ideal choice for baking.
Fresh vs. Frozen Blueberries for Pie: What’s the Difference?
Many berry pies, including this delicious blueberry pie, offer the flexibility of using either fresh or frozen fruit. The primary distinction between the two, particularly when baking, lies in their moisture content and, consequently, the baking time required. Fresh blueberries have less excess water compared to their frozen counterparts. When frozen berries thaw, they release a significant amount of liquid, which can lead to a runny pie filling if not properly managed. This extra moisture necessitates a slightly longer baking duration and careful thickening techniques to achieve that perfect, gelled consistency we all desire in a classic **homemade blueberry pie**.
Should You Thaw Frozen Blueberries Before Baking Pie?
A common question when baking with frozen fruit is whether to thaw it first. The good news is, for a **frozen blueberry pie recipe**, you absolutely do not need to thaw your blueberries before baking. In fact, many bakers prefer to use them straight from the freezer. Using frozen blueberries directly helps maintain their shape and prevents them from becoming mushy during the mixing process. While thawing them won’t necessarily ruin your pie, it will introduce more liquid, which you would then need to account for by perhaps increasing the thickener slightly. The most important consideration when using unthawed frozen fruit is the extended baking time required. Expect your pie to bake longer than if you were using fresh or pre-thawed fruit, ensuring the filling has ample time to thicken and the crust cooks through completely.
How to Achieve a Perfectly Thick Blueberry Pie Filling
One of the keys to a truly exceptional **homemade blueberry pie** is a perfectly thick, spoonable filling that holds its shape when sliced. There are several excellent thickeners available for pie fillings, each with unique properties. Common choices include cornstarch, all-purpose flour, quick-cooking tapioca, and arrowroot powder. While flour is a readily available pantry staple and might seem like an easy choice, I consistently recommend using **cornstarch** for blueberry pies. Cornstarch is a superior thickener for fruit pies because it creates a clear, glossy finish that doesn’t cloud the vibrant color of the blueberries, unlike flour. It also provides a smoother, more elegant texture and requires less quantity than flour to achieve the desired consistency (you’d typically use about 1.5 times more flour than cornstarch for the same thickening power). This makes cornstarch a highly effective and efficient option for your **thick blueberry pie filling**.
Expert Tip for Cornstarch: To prevent clumps and ensure even distribution, always combine your cornstarch with the granulated sugar first before adding it to the blueberries. This simple step helps disperse the cornstarch molecules, allowing them to dissolve smoothly and activate effectively when heated, guaranteeing a consistent, lump-free filling.
If cornstarch isn’t available, or you prefer to experiment with other thickeners, a quick reference chart can help you determine the correct substitution ratios. For instance, quick-cooking tapioca creates a slightly grainier texture but is very effective, especially with juicy fruits. Arrowroot powder is another excellent gluten-free alternative that also yields a clear, glossy filling, similar to cornstarch. However, it’s best added towards the end of cooking as prolonged high heat can reduce its thickening power.
How to Avoid a Runny Blueberry Pie Filling: The Golden Rule of Baking
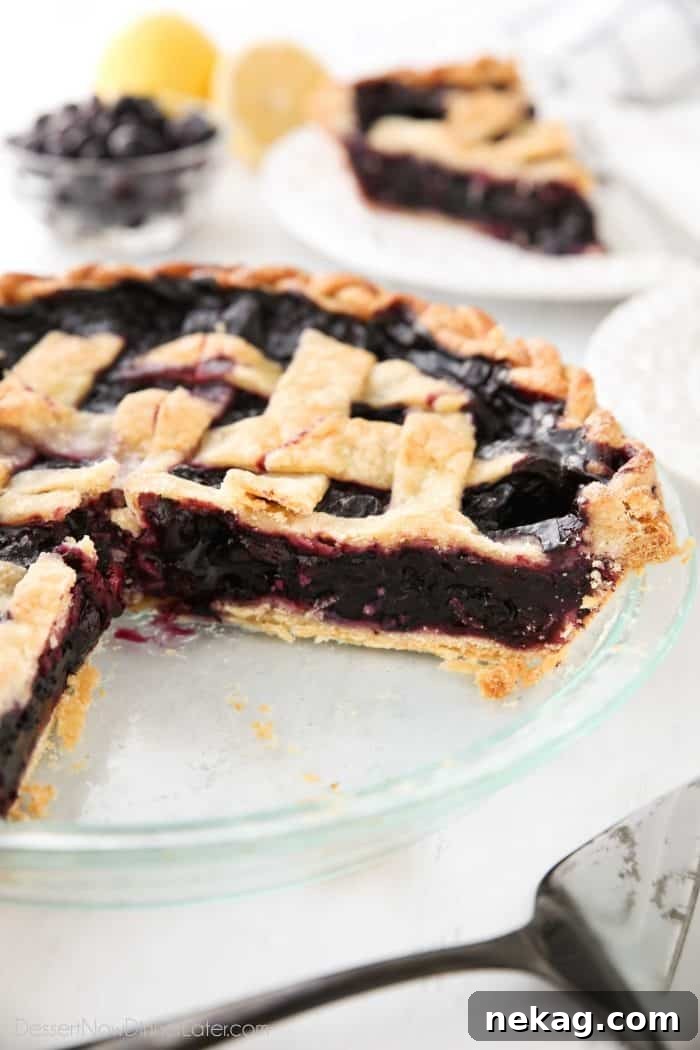
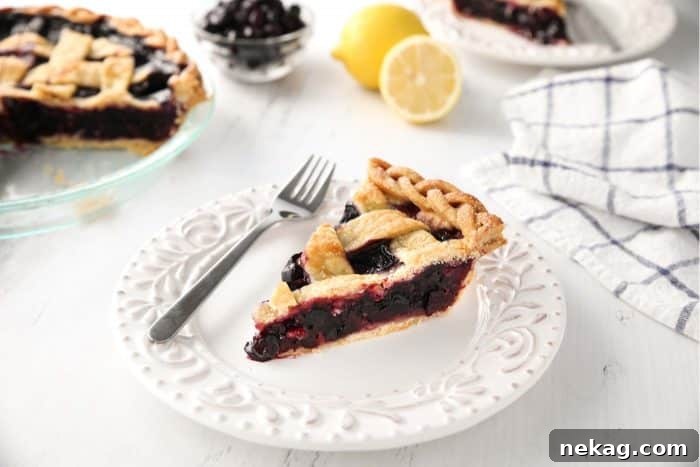
The secret to a **blueberry pie that is not runny** lies almost entirely in the baking process, specifically in baking it long enough. It’s crucial to resist the temptation to pull your beautiful pie from the oven too soon. Cornstarch, our preferred thickener, requires sustained high temperatures to fully activate and create that firm, gelled structure. This means your pie must be baked until the filling is visibly bubbling not just around the edges, but robustly in the very center of the pie. The bubbling action indicates that the filling has reached the necessary temperature for the cornstarch to perform its magic.
When baking a pie, especially one made with frozen fruit, patience is key. The extra moisture from the frozen blueberries means the pie will need more time in the oven for the liquid to evaporate and the thickener to do its job. A typical **frozen blueberry pie** can take anywhere from 90 minutes to two hours to bake completely. During this extended baking time, it’s common for the pie crust to brown much faster than the filling reaches its ideal temperature. This is where foil becomes your best friend.
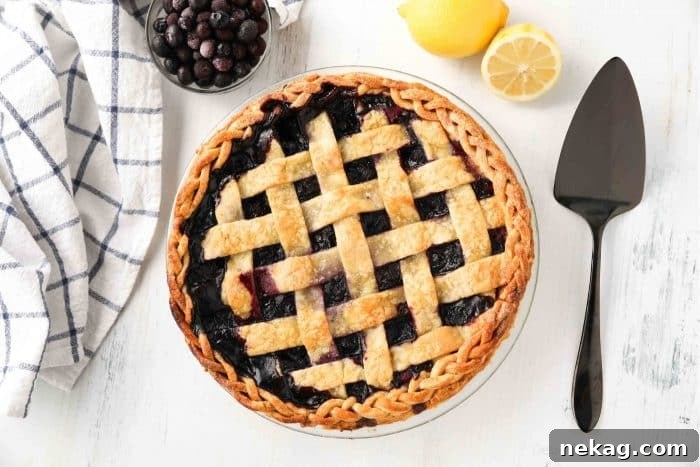
Pro Baker’s Strategy: Around 45-60 minutes into baking, check your pie crust. If it’s already turning a beautiful golden brown, gently cover the edges or the entire top of the pie with aluminum foil. This clever trick shields the crust from further browning while allowing the filling to continue cooking and bubbling in the center until perfectly thickened. Ensuring the bottom crust is also cooked through is essential for preventing a soggy pie bottom, which is where a clear pie dish can be incredibly helpful.
Essential Ingredients for Your Best Blueberry Pie
Crafting this delightful **homemade blueberry pie** requires a few simple yet crucial ingredients. Each plays a vital role in achieving that perfect balance of flavor and texture:
- Pie Crust: You’ll need enough dough for both the bottom and top layers of your pie. A homemade crust is highly recommended; recipes like the Pioneer Woman’s pie crust are often hailed as fool-proof and yield a wonderfully flaky result that can withstand longer bake times. This is especially important when dealing with the extra moisture of frozen fruit.
- Blueberries: Whether you choose fresh or frozen, the quantity remains the same. The main difference will be in the baking time required, with frozen blueberries needing a bit longer to achieve optimal thickness.
- Granulated Sugar: This provides the necessary sweetness to balance the tartness of the blueberries. A little extra is also sprinkled on top of the crust for a beautiful finish and added crunch.
- Cornstarch: As discussed, this is our chosen thickener, crucial for transforming the juicy berries into a perfectly set, **thick blueberry pie filling** that won’t run when sliced.
- Lemon Juice and Zest: These are absolute game-changers! The lemon juice brightens the overall flavor profile, adding a delightful tang that cuts through the sweetness and enhances the natural taste of the blueberries. The zest contributes aromatic oils, elevating the pie with a fresh, citrusy perfume. While optional, it’s highly recommended for a more complex and vibrant flavor.
- Egg: A single whisked egg creates an “egg wash” used to brush over the top crust. This achieves a beautiful golden-brown color and helps adhere the extra sugar, giving your pie a professional, glossy finish.
Step-by-Step Guide: How to Make Blueberry Pie From Scratch
Embarking on the journey to create a **homemade blueberry pie from scratch** is a rewarding experience. Follow these steps for a perfect result:
1. Prepare Your Perfect Pie Crust
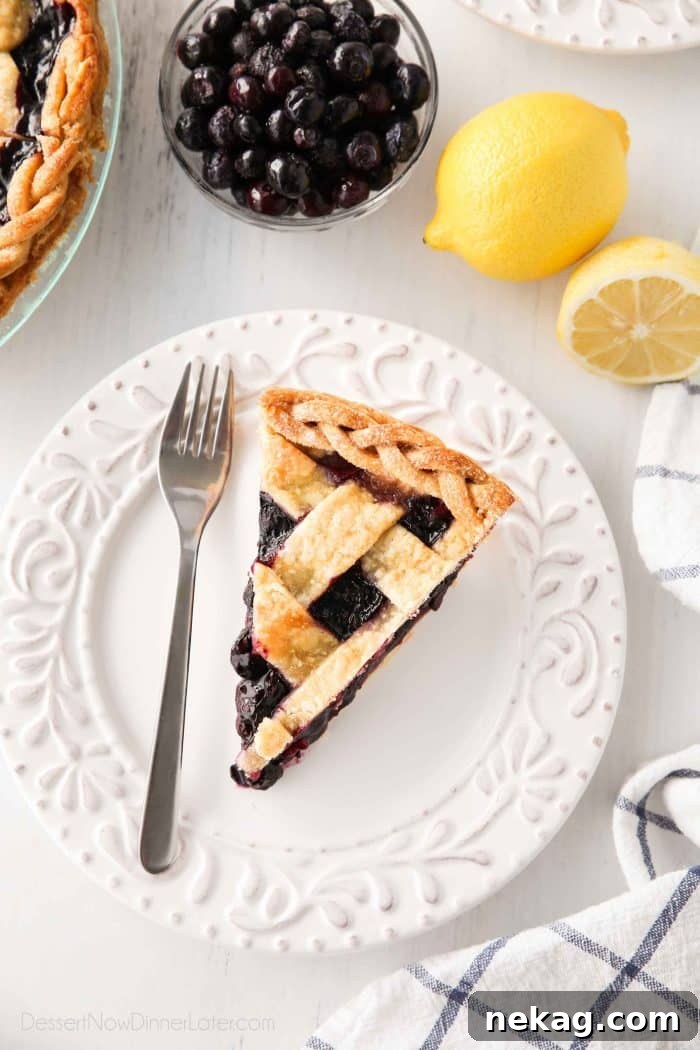
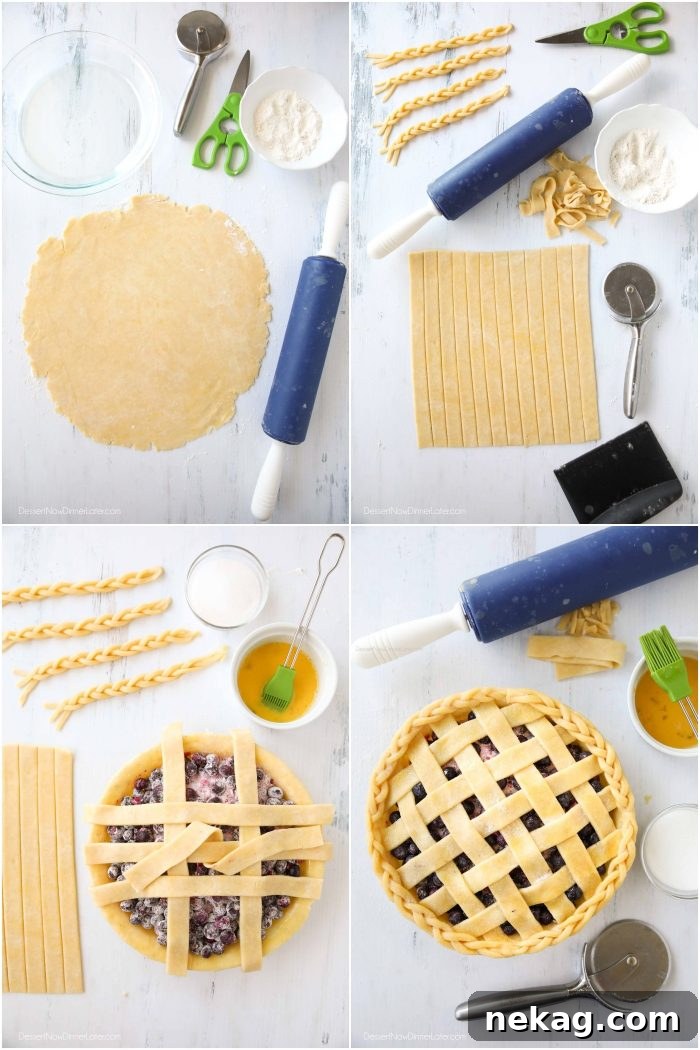
Begin with your pie crust. I cannot stress enough the importance of homemade pie crust. It not only tastes infinitely better than store-bought varieties but also holds up significantly better to the longer baking times required when using frozen fruit. Ensure your pie dough has sufficient time to chill before you attempt to roll and shape it. This chilling period is crucial for a tender, flaky crust. If you’re feeling ambitious, consider a decorative top crust, such as a criss-cross (lattice) design or even a beautiful braided edge. These techniques, while adding a touch of elegance, are simpler than they appear. If you can braid hair, you can certainly braid pie dough!
2. Craft Your Blueberry Pie Filling
While your pie crust is chilling, prepare the exquisite blueberry filling. This step is incredibly straightforward. Gently toss the (fresh or) frozen blueberries with granulated sugar and cornstarch. As mentioned earlier, the addition of lemon zest and lemon juice is highly recommended to brighten and enhance the rich blueberry flavor in this **blueberry pie recipe**. The zest provides an aromatic lift, while the juice adds a subtle tang that beautifully complements the sweetness of the berries.
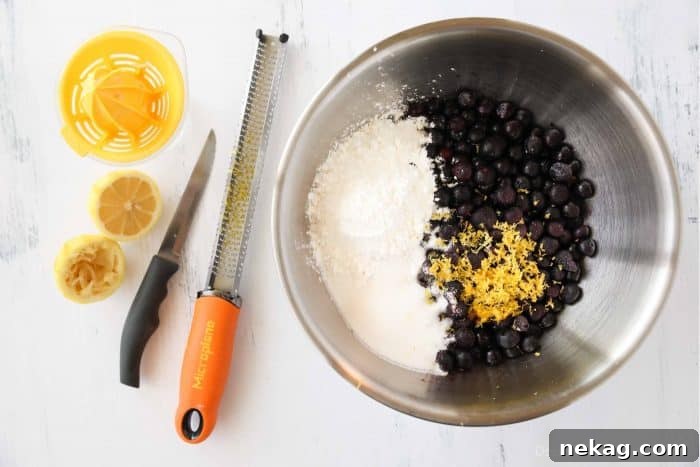
3. Assemble Your Pie
Once your bottom crust is nestled securely in a 9-inch pie plate, pour the prepared blueberry filling evenly inside. For the top, you have creative freedom. If you opt for a lattice pie crust, carefully weave your strips of dough over the filling. If you prefer a simpler design, place a full sheet of dough over the filling and remember to cut several slits in the top. These slits are not just decorative; they are essential for ventilation, allowing steam to escape during baking and preventing the crust from puffing up excessively.
4. The Golden Touch: Egg Wash and Sugar
Before baking, brush the top crust with an egg wash (a single whisked egg). This serves multiple purposes: it acts as a natural glue, helping to seal the top and bottom crusts together, preventing the filling from bubbling out. More importantly, it creates that coveted beautiful golden-brown sheen as the pie bakes. For this **homemade blueberry pie**, the egg wash also helps the extra granulated sugar adhere to the crust, adding a delightful sweetness and a subtle sparkle to the finished pie. Don’t skip this step for that professional, irresistible look!
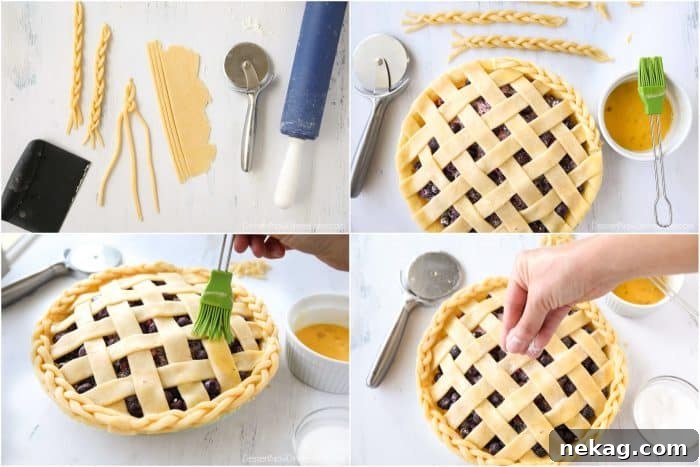
5. Bake to Perfection
With your pie fully assembled and prepped, it’s time for the oven. Place your pie in a preheated oven and bake until the crust is beautifully golden and, most importantly, the filling is visibly bubbling in the center. Remember, patience is crucial here, especially with frozen fruit. For **frozen blueberry pie**, this can take up to two hours. To manage any potential overflow from the bubbling filling, place a foil-covered baking sheet or one lined with a silicone mat on the rack directly below your pie.
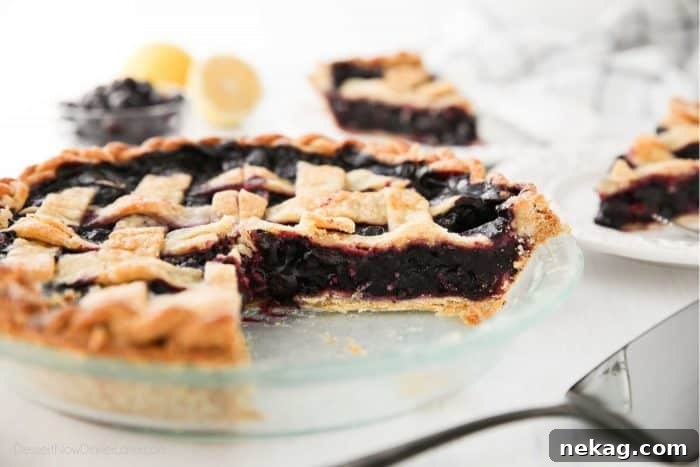
Other Delicious Pies to Make with Frozen Fruit
The versatility of frozen fruit extends far beyond just blueberry pie. Many other fantastic pies can be made with equal success using frozen berries:
- Frozen Mixed Berry Pie
- Frozen Raspberry Pie Recipe
- Blueberry Pie with Streusel Topping
- Cherry Crumble Pie
- Blueberry Cream Pie
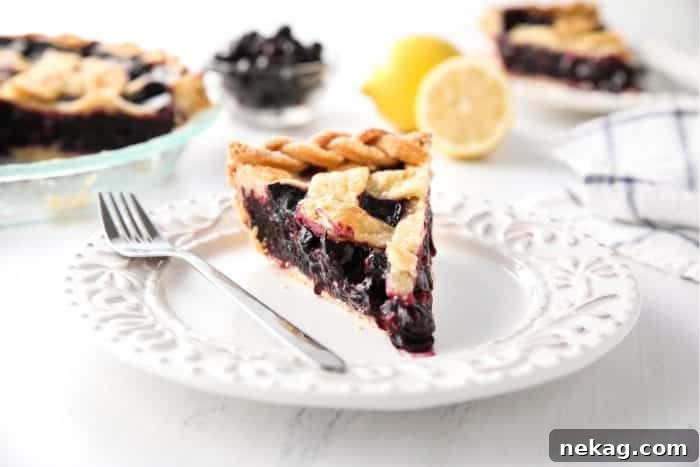
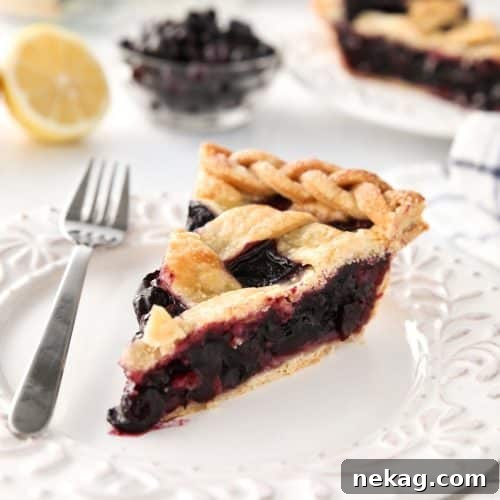
Homemade Blueberry Pie
Pin
Rate
SaveSaved!
Ingredients
- 2 pie crusts, (for top and bottom of pie)
- 5 cups (700 g) frozen blueberries
- 1 cup (200 g) granulated sugar, (+ extra for sprinkling on top)
- 6 Tbsp cornstarch
- 1 Tbsp lemon juice
- zest of 1 lemon, optional
- 1 egg, whisked for brushing
Equipment
-
Rolling Pin
-
9-inch Standard Glass Pie Dish
-
Pizza Cutter
Instructions
-
Preheat oven to 350 degrees Fahrenheit.
-
Prepare pie crust recipe and divide dough in half. Keep cold. Tightly cover with plastic wrap and refrigerate/freeze for 15 minutes if needed. Roll out one half and fit it inside the pie dish, cutting off excess crust.
-
Gently toss the blueberries with the sugar, cornstarch, lemon juice and zest. Empty into pie crust shell.
-
Roll out the other half of the pie crust and cut 1-inch strips. Weave the strips into a lattice crust. Brush the edges of the bottom crust with a whisked egg (egg wash) and press the lattice strips on top to seal the two crusts together. Crimp edges. [Alternately use leftover crust to make a braided edge. Cut excess pie dough into thin strips. Using three strips, alternate bringing the outer strips over the center piece to braid the dough. Repeat until you have enough braids to cover the edges. Brush edges with egg wash and press braided pieces on top. See images in post or in tutorial here.]
-
Lightly brush the crust with the whisked egg and sprinkle with extra granulated sugar.
-
Bake at 350˚F until crust browns and filling bubbles in the center (not just the edges). Time will vary. Frozen fruit may take 90-120 minutes. (Fresh fruit will finish in 60-75 minutes.) Cover pie with foil if crust browns faster than filling bubbles. Check pie 45-60 minutes into baking to add foil. Allow pie to cool completely for the filling to gel/thicken.
Notes
- A clear pie dish is recommended to see that the bottom of the crust is fully cooked/browned.
- TIP: Place sheet tray covered with foil or lined with a silicone mat on the rack below the pie to catch any filling that may bubble over.
Nutrition
Disclaimer: Nutritional values were calculated using a third-party tool and are provided as an estimation only.
Sharing this recipe with a link is both encouraged and appreciated. Copying/pasting and/or screenshots of full recipes to any social media is strictly prohibited. Content and photographs are copyright protected.
Did you make this?
Don’t forget to leave a rating below and make sure to follow on Pinterest and Instagram for more!
Frequently Asked Questions about Homemade Blueberry Pie
The ultimate indicator that your **blueberry pie** is perfectly baked and will yield a **thick, not runny, filling** is when the crust achieves a beautiful golden-brown color, and, critically, the filling is actively bubbling in the center of the pie, not just around the edges. This vigorous bubbling signifies that the cornstarch has fully activated and the fruit juices have thickened to their optimal consistency. After removing it from the oven, remember that the filling will continue to set and thicken further as the pie cools completely. Cutting into it too soon will almost certainly result in a runny slice.
For optimal freshness and taste, your **homemade blueberry pie** can last approximately 2-3 days when stored at room temperature, loosely covered with foil or plastic wrap. If you wish to extend its shelf life, refrigerating the pie can keep it fresh for up to 5 days. Ensure it’s well-wrapped to prevent it from drying out or absorbing other odors from the refrigerator. For longer storage, you can freeze individual slices or the whole pie for up to 2-3 months.
A soggy bottom crust is a common frustration, but there are several effective strategies to combat it. Firstly, using a clear glass pie dish is highly recommended because it allows you to visually confirm that the bottom crust is indeed golden brown and fully cooked, just like the top. This typically happens once the center of the pie filling begins to bubble vigorously. Another excellent method is to blind bake (or pre-bake) your bottom crust before adding the blueberry filling. This partially cooks the crust, creating a barrier against the moist fruit and ensuring a crisp, flaky base. Additionally, ensure your pie crust recipe uses cold butter or shortening, as this creates steam during baking, leading to a flakier texture that is less prone to sogginess.