
The Ultimate Tender Almond Flour Pie Crust: A Recipe for Homemade Perfection
Unlock the secret to a truly exceptional homemade dessert with this incredible almond flour pie crust recipe. Known for its distinct tenderness and delightful crumbly texture, this lightly sweetened crust is astonishingly versatile. It’s the perfect foundation for a classic banana cream pie, a vibrant fruit tart, or even a rich chocolate pie. Forget store-bought alternatives; once you try this recipe, you’ll understand why it’s been a cherished favorite since its original publication in 2013.

This almond flour pie crust holds a special place, being one of the foundational recipes first shared. Its unique blend of ingredients creates a crust so tender it practically melts in your mouth, making it an ideal partner for a wide array of sweet fillings. Over the years, this recipe has graced countless dessert tables, forming the base for beloved pies like strawberry rhubarb pie, peach pie, cherry pie, blueberry pie, and peach blackberry pie, among many others.
The magic truly lies in the combination of vegetable shortening and almond flour, which works in harmony to produce an unparalleled tenderness. While it achieves a superior melt-in-your-mouth quality, it remains as straightforward to prepare as any traditional Crisco pie crust recipe, simply elevated with the nuanced flavor and texture of almond flour. This recipe bridges the gap between classic baking techniques and modern ingredient preferences, promising a result that is both familiar and excitingly new.
Table of Contents
- Why You Will Love This Almond Flour Pie Crust Recipe
- Key Ingredients for Success
- Creative Substitutions & Variations
- Step-by-Step: Crafting Your Almond Flour Pie Crust
- Chef Lindsey’s Expert Baking Tips
- Frequently Asked Questions About Almond Pie Crust
- Almond Flour Pie Crust Recipe Card
- Explore More Delicious Pie Creations
Why This Almond Flour Pie Crust Will Become Your Go-To Recipe
This recipe isn’t just another pie crust; it’s a culinary experience designed to impress with its unique characteristics and delightful flavor. Here’s why you’ll fall in love with it:
- Superior No-Shrink Pie Dough: One of the biggest frustrations in pie making is crust shrinkage. Our secret lies in the precise balance of vegetable shortening and a blend of all-purpose and almond flours. Shortening, when properly incorporated, coats the flour particles, inhibiting excessive gluten development. This results in a tender dough that resists shrinking during baking, ensuring your pie always fits its dish perfectly. The almond flour further contributes to this stability while adding an extra layer of richness.
- Intriguing Savory-Sweet Flavor Profile: Almond flour introduces a subtle, sophisticated nutty and savory note to the crust, setting it apart from purely butter-based or shortening-based crusts. This unique flavor complements the sweetness of fruit fillings beautifully, enhancing the overall depth of your pie. Imagine this nuanced crust paired with a vibrant classic pumpkin pie – a truly intriguing twist that will elevate your holiday baking. It adds an unexpected layer of complexity that will have everyone asking for the recipe.
- Old-Fashioned Charm Meets Modern Pastry Expertise: This recipe is a thoughtful adaptation from The American Woman’s Cookbook (1944 Edition), a testament to timeless baking principles. However, I’ve infused it with my professional pastry chef knowledge, refining techniques and offering contemporary tips and tricks that guarantee a foolproof result every time. You get the comforting nostalgia of a classic recipe combined with the precision and ease of modern baking. It’s the best of both worlds, ensuring a perfect pie crust, even for novice bakers.
Key Ingredients for a Perfect Almond Flour Pie Crust
Creating an exceptional pie crust starts with understanding the role each ingredient plays. Here’s a breakdown of what you’ll need and why:
- All-Purpose Flour: This is the backbone of our crust. All-purpose flour contains just the right amount of gluten to give the dough structure and a wonderfully tender, flaky texture when handled correctly. Its moderate protein content is crucial for achieving a balanced crust that holds together without being tough. For an even more delicate crumb, you could opt for pastry flour, which has a slightly lower protein content.
- Almond Flour: The star ingredient, bringing unique flavor and texture. I highly recommend using blanched almond flour because its finer grind results in a smoother, more uniform dough and a less coarse final texture. While almond meal will work, blanched almond flour (like Bob’s Red Mill, a personal favorite for its consistent quality) provides a superior finish and flavor profile. It also contributes to the crust’s coveted tender, crumbly nature.
- Granulated Sugar: Beyond merely adding sweetness, sugar plays a multi-faceted role in this pie crust. It aids in the caramelization process during baking, giving the crust a beautiful golden-brown hue and a subtle depth of flavor. Furthermore, sugar tenderizes the dough by interfering with gluten development, ensuring a delicate bite rather than a tough one.
- Kosher Salt: Do not underestimate the power of salt in baking! Kosher salt, with its larger crystals, is less concentrated than table salt, allowing for easier measurement and a more balanced seasoning. It’s essential for enhancing all the other flavors in the crust, preventing it from tasting bland or flat. Crucially, salt also helps to inhibit gluten formation, which is vital for maintaining the desired tender texture in pie crust.
- Vegetable Shortening: The secret weapon for supreme tenderness. This recipe specifically calls for vegetable shortening because it has a higher melting point than butter and is 100% fat. When cut into the flour, it creates distinct layers, coating the gluten strands and preventing them from forming a strong, elastic network. This results in a crumbly, exceptionally tender crust that truly melts in your mouth, as opposed to a distinctly flaky one. For similar results, you could substitute an equal amount of solid coconut oil, ensuring it is very cold.
- Whole Egg: The egg is a crucial binder and flavor enhancer. It introduces additional fat from the yolk, which contributes richness and helps hydrate the dough without over-activating the gluten. This hydration, combined with the fat, keeps the crust incredibly soft and tender. The egg white also acts as a binding agent, helping to hold the dough together. For an extra layer of flavor, consider adding 1 teaspoon of vanilla extract with the beaten egg.
- Ice Cold Water: Water is the final hydration component, bringing all the ingredients together to form a cohesive dough. Using ice-cold water is paramount as it keeps the shortening firm and prevents it from melting too quickly. This helps maintain distinct pockets of fat, which are key to a tender crust. Additionally, working the dough as little as possible after adding the water further limits gluten development, ensuring your crust remains soft and easy to handle.
For precise measurements and quantities, please refer to the detailed recipe card below.
Creative Substitutions & Flavor Variations for Your Pie Crust
While this recipe is perfect as written, don’t hesitate to experiment with these suggestions to tailor the crust to your taste or dietary needs:
- Almond Flour Alternatives: If blanched almond flour is unavailable or you prefer a DIY approach, you can create your own. Simply grind blanched whole almonds in a food processor until they reach the finest consistency possible. Be careful not to over-process, or you’ll end up with almond butter! Alternatively, if you’re looking for a slightly different texture and a more rustic feel, almond meal (made from unblanched, ground almonds) can be used, though it will result in a coarser crust.
- Exploring Other Nut Flours: This recipe is incredibly adaptable to other nut flours. Substituting almond flour with hazelnut flour, pecan flour, or even pistachio flour can introduce exciting new flavor dimensions that perfectly complement your pie filling. Imagine a toasted hazelnut crust with a chocolate ganache pie, or a pecan crust for a rich sweet potato pie! For seasonal flair, infuse the dry ingredients with citrus zest (lemon, orange) or warm spices like cinnamon, nutmeg, or cardamom, especially lovely for apple or pumpkin pies.
Note on Grain-Free: While this recipe is not entirely grain-free due to the all-purpose flour, if you are aiming for a gluten-free pie crust, you would need to use a blend of gluten-free flours (e.g., rice flour, tapioca starch) and likely additional binders like xanthan gum, as simply swapping all-purpose flour for more nut flour would significantly alter the dough’s structure and binding properties. - Considering Butter vs. Shortening: This specific recipe leverages shortening for its unique tender, crumbly texture. While an almond flour tart crust recipe made with butter is available (and offers a more flaky, rich profile closer to a keto pie crust), this particular recipe has not been tested with butter. The different fat compositions of butter and shortening mean they behave differently in dough. If you prefer a butter-based crust, I recommend trying a recipe specifically formulated for butter to ensure optimal results.
Step-by-Step: Crafting Your Ultimate Almond Flour Pie Crust
Follow these detailed instructions to achieve a tender, delicious almond flour pie crust every single time. For precise ingredient measurements, please consult the recipe card below.
Part 1: Preparing the Pie Dough
- Gather and Chill Your Ingredients: While not strictly mandatory, it significantly helps if all your ingredients are cold. This is particularly true for the shortening. I often freeze my shortening for 15-20 minutes before use, as it warms up quickly, especially in warmer kitchens. Cold ingredients are key to preventing the shortening from melting prematurely, which can lead to a tough crust.
- Combine Dry Ingredients and Cut in Shortening: In a large mixing bowl, or the bowl of a stand mixer fitted with the paddle attachment, whisk together the all-purpose flour, almond flour, granulated sugar, and kosher salt until well combined. Add the cubed, cold vegetable shortening. Using a pastry blender, two knives, or the stand mixer on low speed, cut the shortening into the dry ingredients. Continue until the shortening pieces are roughly the size of small peas.
Chef’s Visual Cue: Pay close attention to the dough’s appearance. When the shortening is “under-cut in,” the flour mixture will look visibly white and dry. As the shortening is properly mixed, it will coat the flour particles, giving the mixture the appearance and texture of wet sand. This visual change is often a more reliable indicator of proper mixing than just the size of the shortening pieces.
- Incorporate the Egg: In a separate small bowl, beat the whole egg thoroughly with a fork until smooth and no distinct whites remain. This ensures even distribution in the dough. Add the beaten egg to the flour-shortening mixture. Gently toss with a fork or mix on low speed in the stand mixer until just incorporated. The egg adds essential moisture and richness without over-developing the gluten.
- Add Cold Water Gradually: Begin by adding just enough ice-cold water (start with 2 tablespoons and add more only if needed) to bring the dough together. The exact amount can vary based on humidity and flour absorption, so add it sparingly, a teaspoon at a time, until the dough just barely holds together when squeezed. You want the dough to form a cohesive ball without being sticky or overly wet. If chunks are falling out, add a tiny bit more water. It’s crucial not to over-hydrate the dough.
- Form and Chill the Dough Disk: Once the dough comes together, gently roll it into a ball. Avoid overworking the dough, as this will develop gluten and make the crust tough. Place the dough ball onto a piece of plastic wrap, flatten it into a disk about 1-inch thick, and wrap it tightly. Refrigerate for at least several hours, or ideally, overnight. Chilling allows the gluten to relax, the fats to firm up, and the flavors to meld, making the dough much easier to roll and preventing shrinkage during baking.
Part 2: Rolling & Decorating Your Pie Dough
- Prepare for Rolling: Remove the chilled dough from the refrigerator. If it feels too firm or cracks immediately when you try to roll it, let it sit at room temperature for 5-8 minutes to soften slightly. Dust your work surface and rolling pin lightly with all-purpose flour.
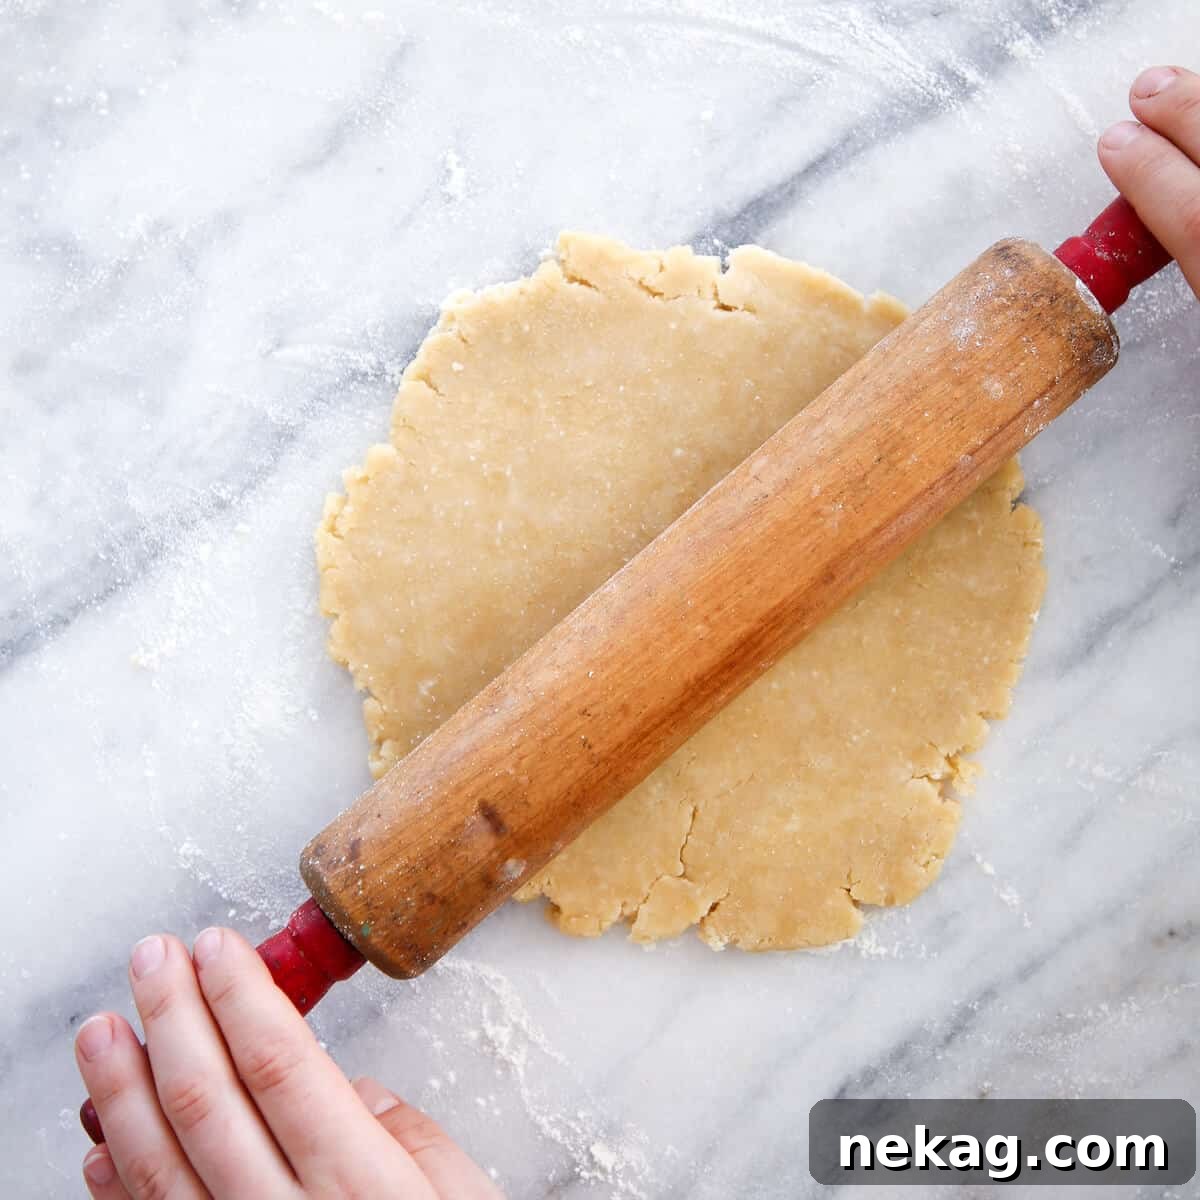
- Roll Out the Dough: Roll the dough out evenly to approximately ¼ inch thick, working from the center outwards. Rotate the dough frequently to prevent sticking and to ensure an even thickness.
This almond flour dough is inherently more tender and slightly more fragile than traditional all-butter or all-shortening crusts. For seamless transfer to your pie pan, I highly recommend the rolling pin method: gently roll the dough around your rolling pin, then carefully unroll it over your pie dish, centering it before gently pressing it into place.
- Prepare for Single or Double Crust:
- For a Single Crust Pie: Carefully place the rolled dough into a 9-inch pie pan. Trim any excess dough, leaving about a 1-inch overhang. Fold this overhang under itself, creating a thicker edge. Decoratively crimp the edges using your fingers or a fork. Once crimped, place the pie shell back into the refrigerator for 20-30 minutes. This final chill helps the crust hold its shape and minimizes shrinkage during baking. After chilling, you can either add your desired filling immediately or proceed with pre-baking (blind baking) the crust as per your recipe’s instructions.
- For a Double Crust Pie: If your pie requires a top crust, roll out the second dough disk following the same technique. You have several options for the top layer:
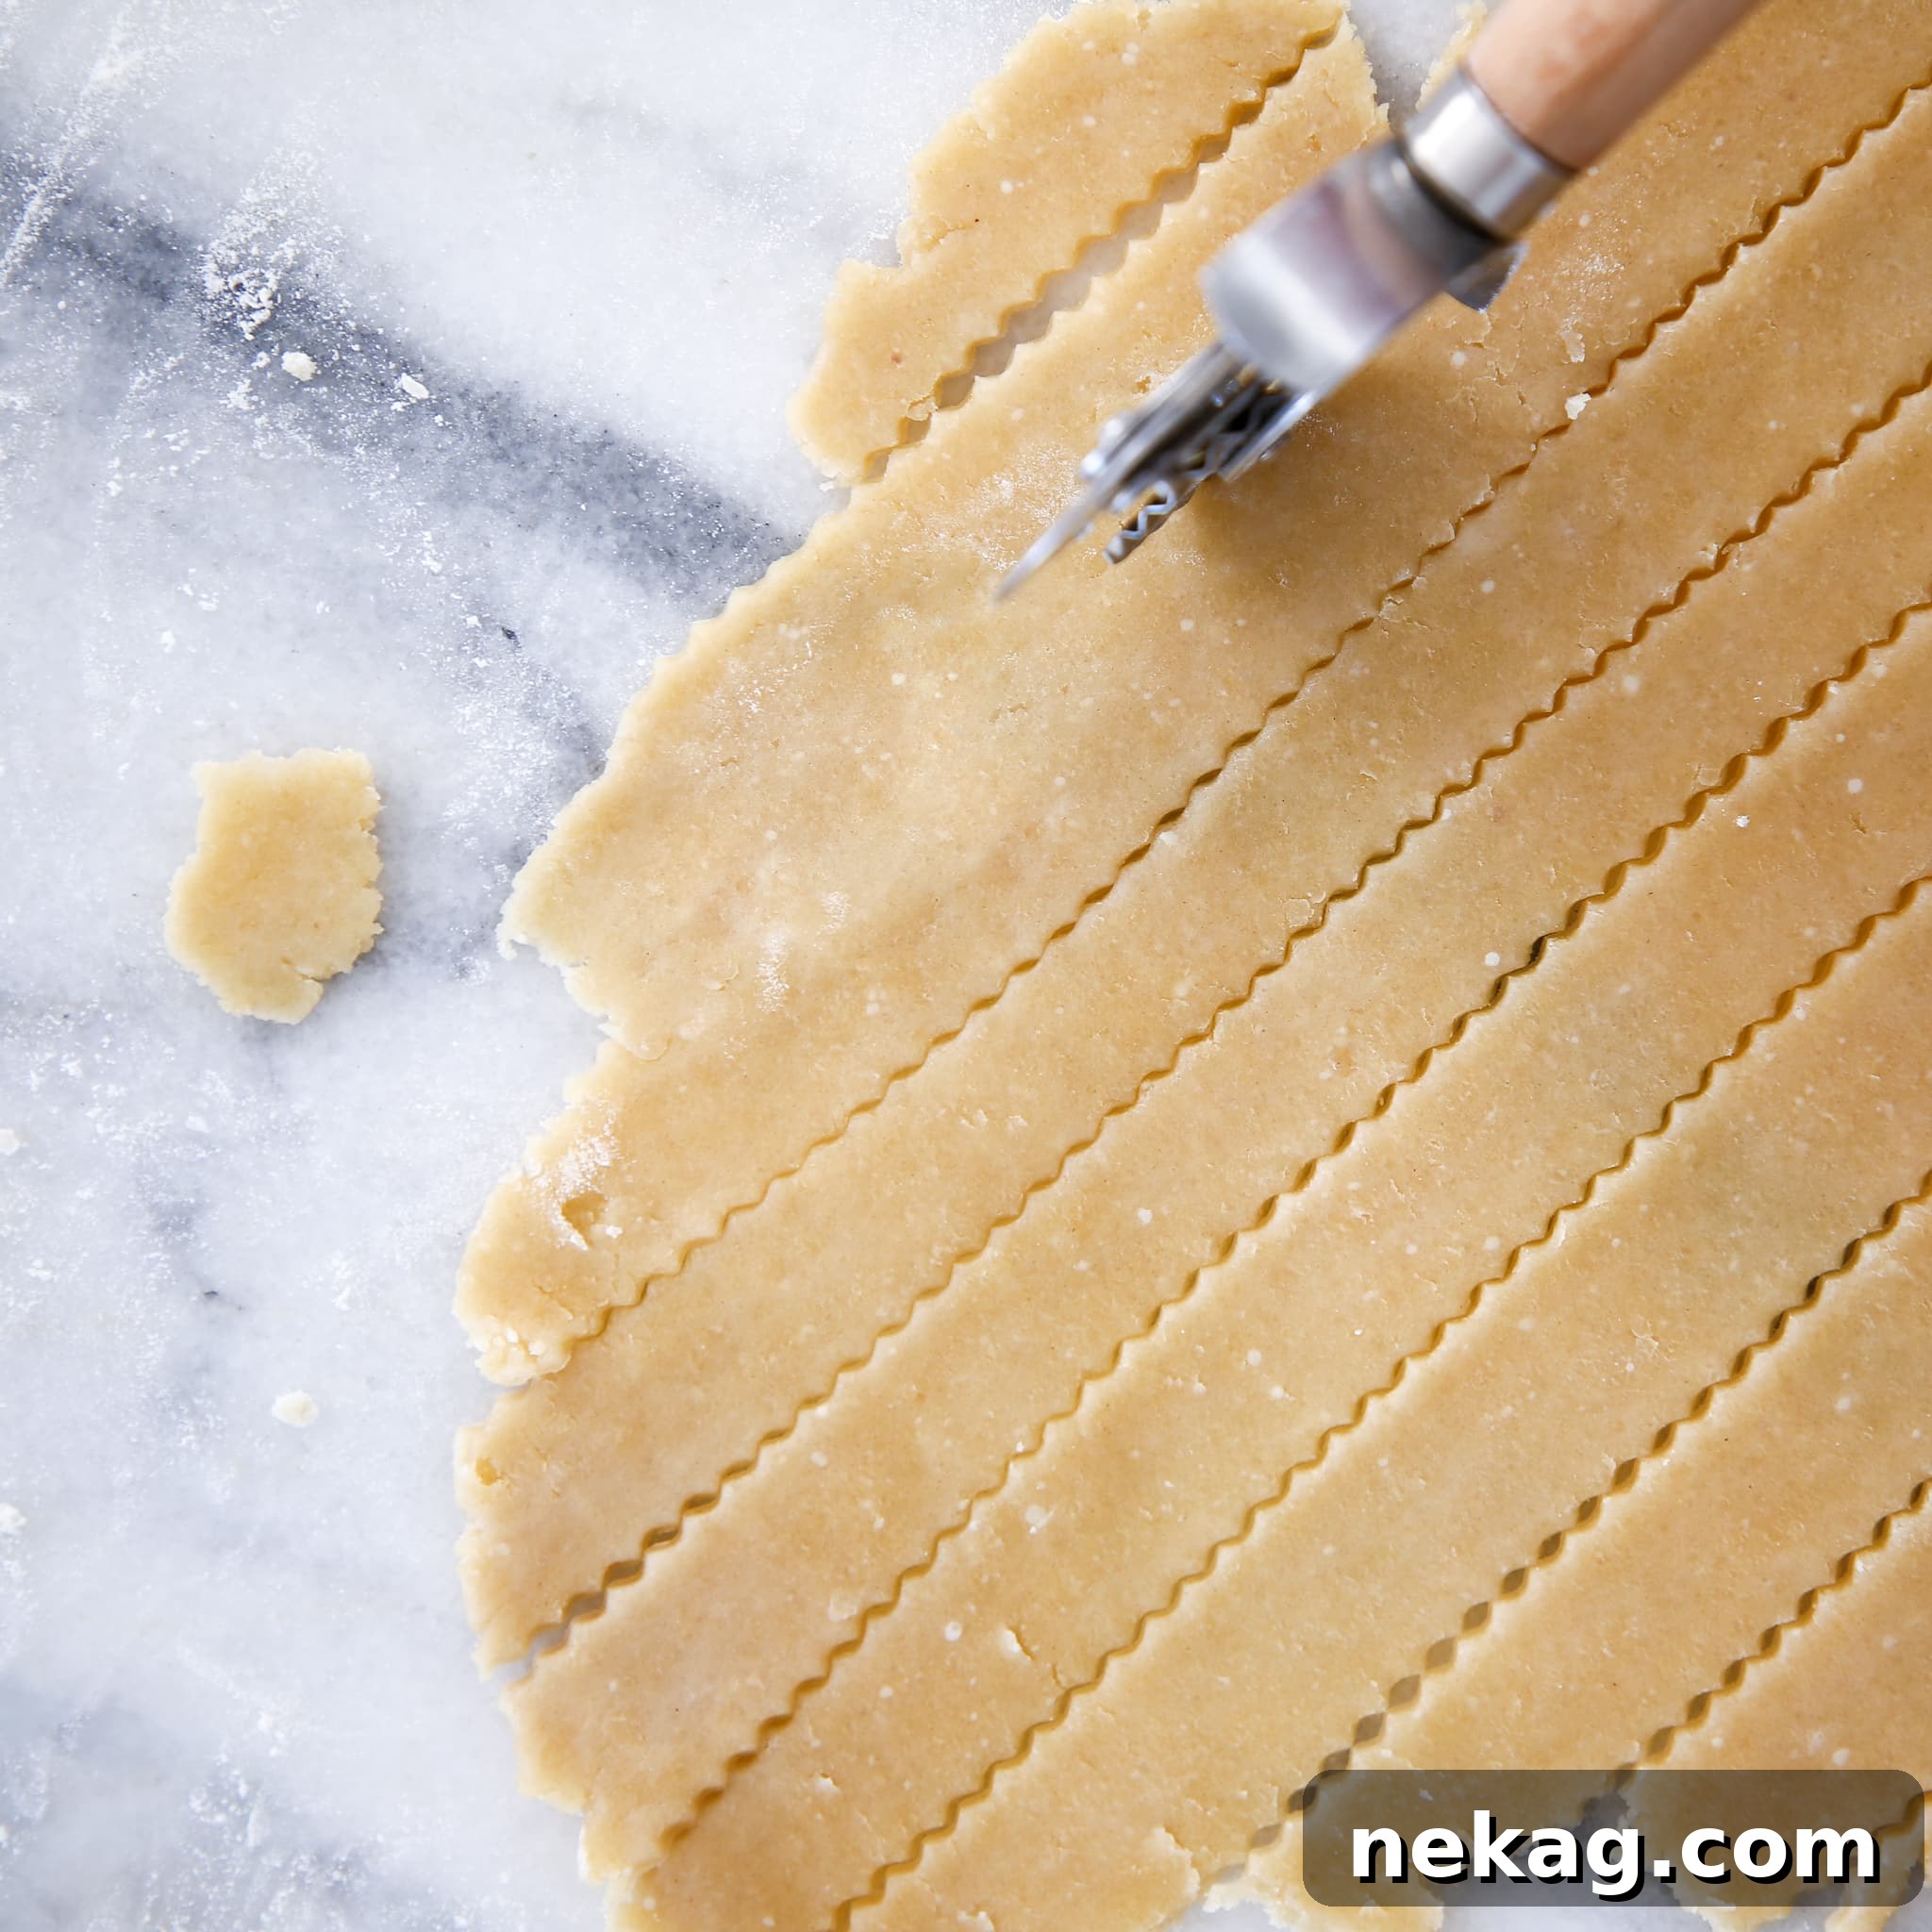
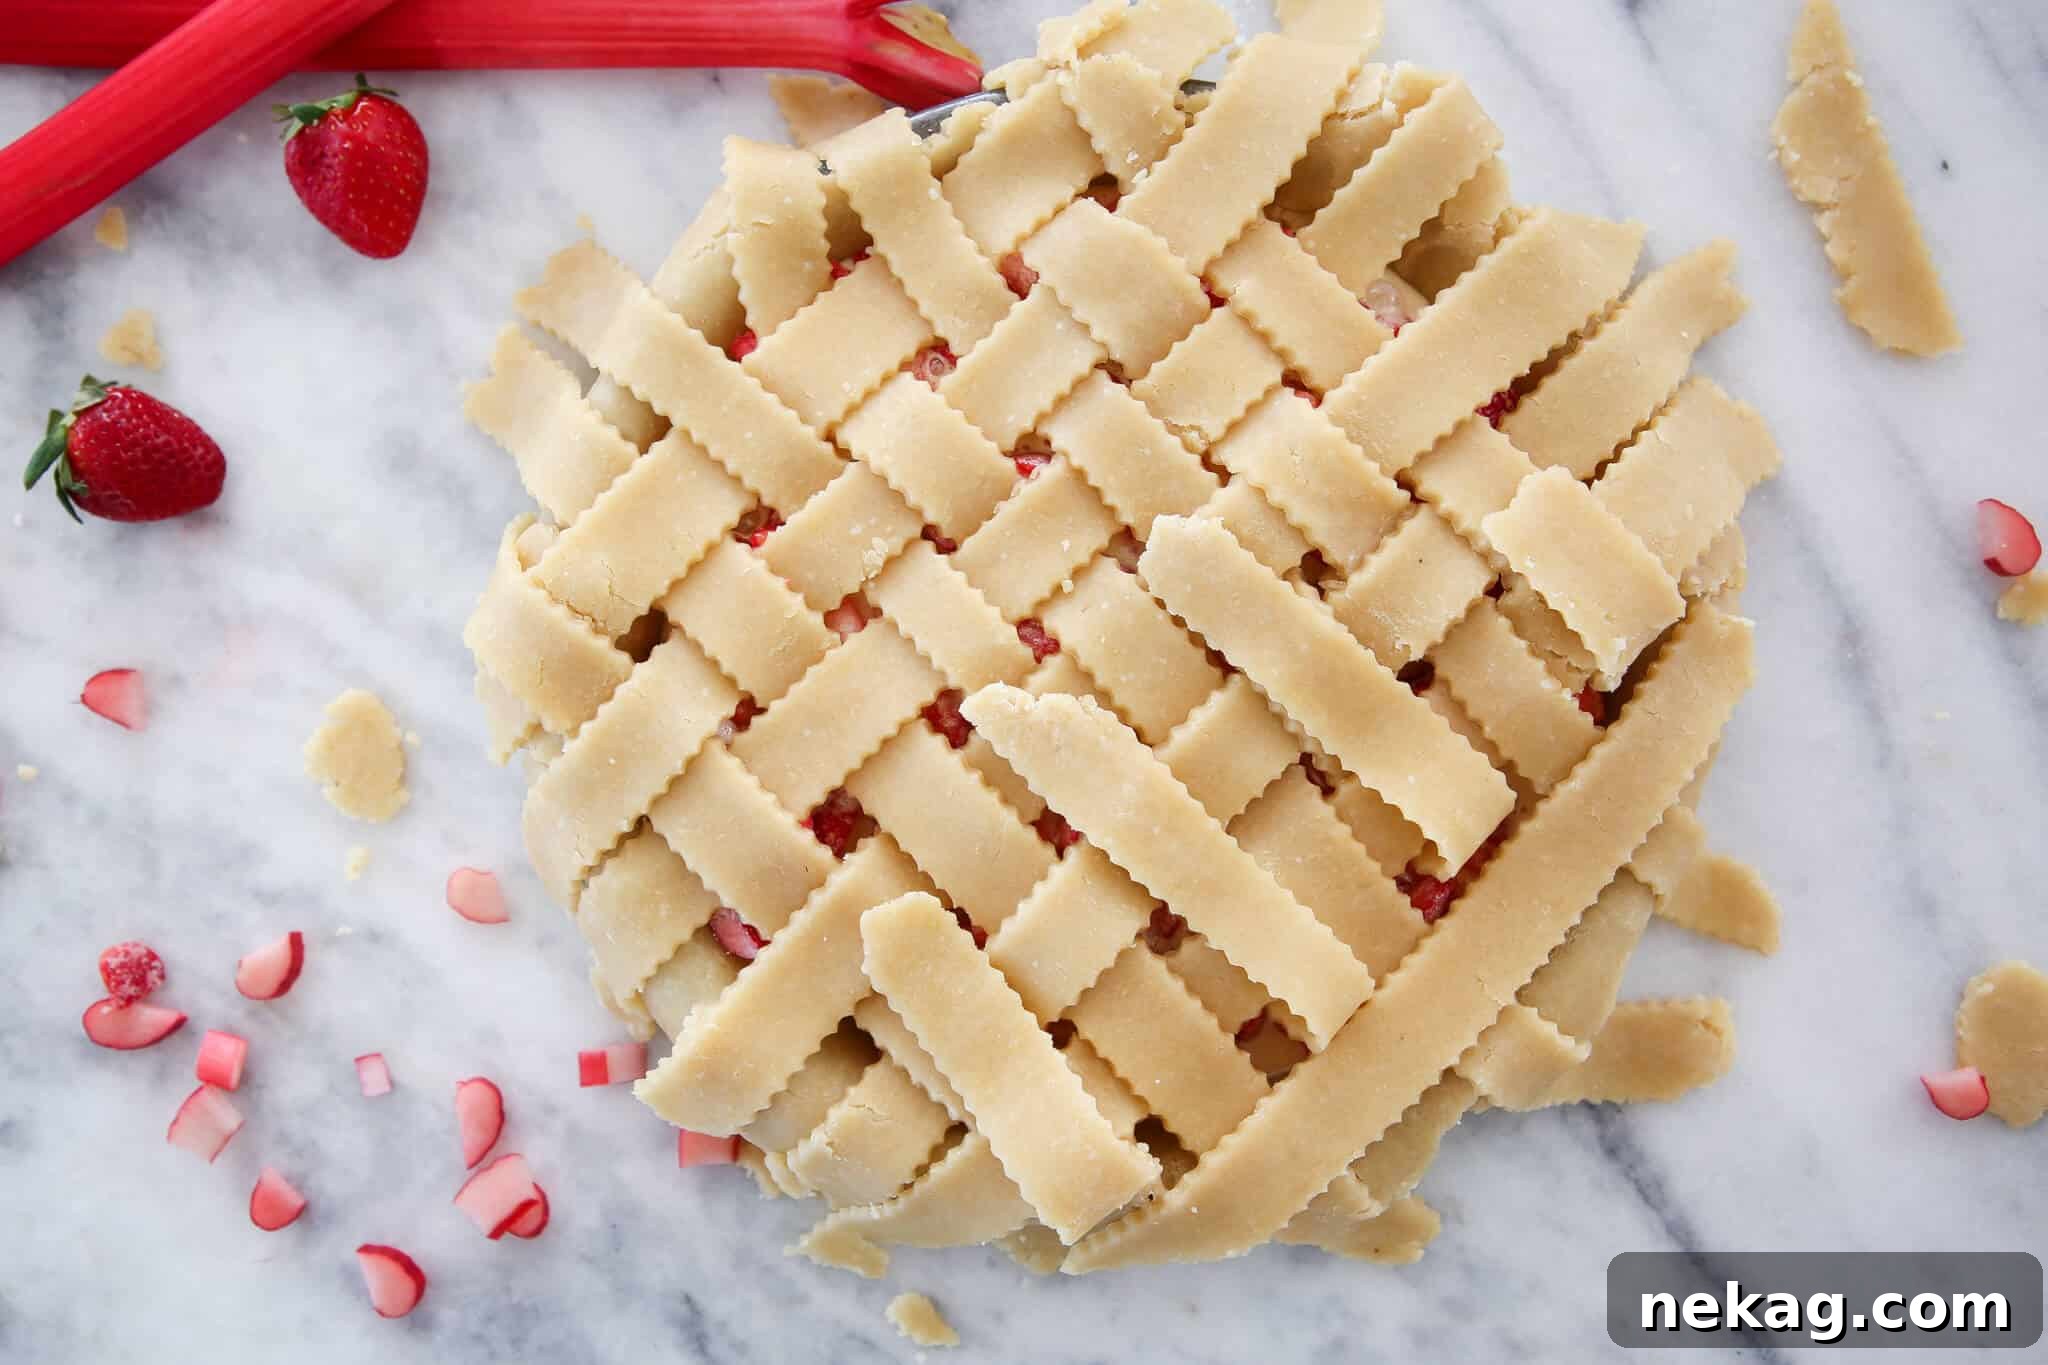
- Lattice Top: For a stunning presentation, create a lattice top like the one I made for my strawberry rhubarb pie. This involves cutting the dough into strips and weaving them over the filling. You can find detailed visual guidance on how to lattice a pie crust on my YouTube channel. Be aware that the tenderness of this dough means latticing requires a gentle touch!
- Full Top with Vents: For a simpler approach, cover the pie entirely with the rolled dough. Trim and crimp the edges as you would for a single crust. Then, use a sharp knife to cut a few decorative vent holes in the center of the top crust. These vents allow steam to escape during baking, preventing the crust from becoming soggy or bubbling up. An example of this can be seen in my peach pie.
How to Pre-Bake (Blind Bake) Your Almond Flour Pie Crust
Blind baking is essential for pies with wet fillings (like quiches) or fillings that don’t require further baking (like cream pies). It ensures a crisp bottom crust and prevents sogginess.
- Preheat Oven & Prepare Parchment: Preheat your oven to a hot 425°F (220°C). Before you add pie weights, cut a sheet of parchment paper large enough to completely cover the inside of your pie crust and extend over the edges. Crumple the parchment paper into a tight ball, then smooth it out. This crumpled paper becomes much more flexible and will conform to the curves of your pie dish without tearing the delicate dough or poking holes.
- Line with Parchment and Add Weights: Place the crumpled, smoothed parchment paper directly into the chilled pie crust, ensuring it snugly lines the bottom and sides, with the edges curled over the entire crimped crust to protect it from over-browning. Fill the parchment-lined crust generously with pie weights, dried beans, or even dry rice. Distribute the weights evenly to prevent the crust from bubbling up and to maintain its shape during baking.
- Bake and Finish: Bake in the preheated oven for 20 minutes. Carefully remove the parchment paper and pie weights.
- For a Partially Baked (Par-baked) Crust: If your recipe calls for a partially baked crust (meaning it will be baked again with a filling), let it cool completely before adding the filling. The crust should still be pale but set.
- For a Fully Baked Crust: If your pie filling requires no further baking (e.g., banana cream pie or French silk pie), continue baking the uncovered crust for another 10-15 minutes, or until it’s golden brown all over and no longer looks doughy in the center. Keep an eye on the edges; if they start to brown too quickly, you can use a pie shield or aluminum foil strips to protect them.
This crust’s incredible melt-in-your-mouth quality means it can be slightly more delicate to handle, especially when creating intricate designs like a lattice. However, with a patient and gentle hand, it’s entirely achievable, as beautifully demonstrated in my strawberry rhubarb pie, which uses this very almond pie crust!
Chef Lindsey’s Expert Baking Tips for Pie Success
Mastering pie crust takes a bit of practice, but these professional tips from Chef Lindsey will set you up for success:
- Scaling for Your Pie: This recipe yields enough dough for a single-crust pie, such as a rich pecan pie or a vibrant lemon meringue. If you’re planning a double-crust pie (like most apple pies or savory pot pies), simply double the recipe. You can easily adjust the quantities in the recipe card by mentally doubling each ingredient, ensuring you have ample dough for both top and bottom crusts.
- Freezing Dough for Future Use: Save time and effort by making extra dough! This almond flour pie dough freezes beautifully. After forming it into a disk and wrapping it tightly in plastic wrap (and then an airtight freezer bag), it can be stored in the freezer for up to two months. Thaw overnight in the refrigerator before rolling out and using as directed. This makes spontaneous pie baking a breeze!
- Handle with Care: Remember, the goal is tenderness. Avoid overworking the dough at every stage – from mixing the shortening to adding water and rolling it out. Excessive handling develops gluten, leading to a tough crust. Work quickly and with a light touch.
- Embrace the Chill: Don’t skip the chilling steps! Chilling the dough after mixing and again after forming into the pie dish is vital. It allows the gluten to relax, the fat to firm up, and results in a more stable, easier-to-handle dough that shrinks less during baking.
Frequently Asked Questions About Almond Flour Pie Crust
This versatile almond flour pie crust is an excellent choice for a wide variety of fillings! Its subtle nutty flavor and tender crumb complement sweet fruit pies exceptionally well, such as strawberry rhubarb pie and cherry pie. Beyond fruit, it’s also wonderfully delicious with creamy fillings like easy chocolate pie, rich buttermilk pie, or even a comforting, foolproof pumpkin pie. Its unique profile adds a gourmet touch to any dessert.
No, this specific recipe is not gluten-free, as it incorporates all-purpose flour. I have not personally tested a completely gluten-free version of this particular recipe. If you are looking for a dedicated gluten-free almond pie crust, I recommend seeking out a recipe specifically formulated for gluten-free baking, such as this highly-rated almond pie crust from Wholesome Yum, which is also paleo and low-carb.
This pie dough is excellent for preparing in advance! For refrigeration, wrap the dough disk tightly in plastic wrap to prevent it from drying out, then place it in an airtight container or a resealable bag. It will keep well in the refrigerator for up to one week. For longer storage, you can freeze the well-wrapped dough for up to two months. When ready to use, simply thaw it overnight in the refrigerator before rolling it out as usual.
Absolutely! Preparing the dough in advance is a great time-saver. As mentioned above, you can store the unbaked dough disk in the refrigerator for up to a week or in the freezer for up to two months. This allows you to break up your baking process and enjoy fresh pie with minimal fuss on the day you plan to serve it.
Blanched almond flour is made from almonds that have had their skins removed (blanched) before being finely ground. This results in a lighter color and a very smooth, fine texture, which contributes to a more delicate and uniform pie crust. Almond meal, on the other hand, is made from raw, unblanched almonds with their skins still on. It has a coarser texture and a slightly speckled appearance, which will give your pie crust a more rustic feel and appearance. While both can be used, blanched almond flour is preferred for this recipe for its superior texture.
If you tried this recipe and absolutely loved it, please take a moment to leave a 🌟 star rating and share your experience in the comments section below. Your feedback truly brightens my day and helps other bakers discover this wonderful recipe!
Almond Flour Pie Crust Recipe
Leave a Comment
Print Recipe
Ingredients (US Customary)
- 1 ½ cups all-purpose flour
- 3 tablespoons almond flour (I used Bob’s Red Mill Blanched Almond Flour for best texture)
- 3 tablespoons granulated sugar
- ½ teaspoon kosher salt
- ½ cup vegetable shortening, very cold and cut into small pieces
- 1 whole egg, well beaten
- 2-4 tablespoons cold water (start with 2 and add more as needed)
Instructions
Make the Pie Dough:
- Ensure all ingredients are as cold as possible. For best results, freeze your cubed shortening for 15-20 minutes before use, as it warms rapidly.
- In a large bowl (or stand mixer with paddle attachment), combine all-purpose flour, almond flour, sugar, and salt. Add the cold, cubed shortening. Cut in the shortening using a pastry blender or by mixing on low speed until the mixture resembles coarse meal with pea-sized pieces of shortening. The flour mixture will transition from white and dry to resembling wet sand when properly mixed.
- Beat the whole egg with a fork until smooth. Add to the flour mixture and toss with a fork or mix on low speed until just combined.
- Gradually add 2 tablespoons of cold water, mixing until the dough just comes together. Add more water, a teaspoon at a time, only if necessary, to form a cohesive ball. Do not overmix.
- Roll the dough into a ball, then flatten into a disk. Wrap tightly in plastic wrap and refrigerate for several hours or overnight to chill thoroughly.
Rolling & Decorating the Dough:
- On a lightly floured surface, roll out the chilled dough to ¼ inch thick. If the dough cracks, let it sit at room temperature for 5-8 minutes to soften slightly.
- Gently roll the fragile dough onto your rolling pin, then unroll it over your 9-inch pie dish. Trim and crimp the edges as desired for a single crust. For a double crust, roll out a second disk. Create a lattice top (watch video) or cut vent holes in a full top crust. Chill the formed crust for 20-30 minutes before filling or blind baking.
How to Pre-Bake (Blind Bake) the Almond Flour Pie Crust:
- Preheat oven to 425°F (220°C). Crumple a sheet of parchment paper, then smooth it out to make it flexible. Line the chilled pie crust with the prepared parchment, curling the edges over the crust.
- Fill the parchment-lined crust with pie weights or dried beans, distributing them evenly.
- Bake for 20 minutes. Remove parchment and weights. Continue baking uncovered for another 10-15 minutes until golden brown for a fully baked crust (for cream pies) or cool for a par-baked crust (for pies that will bake again with filling).
Notes
Flavor Variations: Experiment with hazelnut flour or other nut flours for different flavor profiles.
Storage: Unbaked dough stores well, wrapped, in the refrigerator for up to a week, or in the freezer for two months.
Recipe inspired by The American Woman’s Cookbook (1944 Edition).
This recipe yields one single pie crust. Double all ingredients for a double-crust pie.
Nutrition Facts
Per serving (assuming 12 servings for a single crust):
- Calories: 159 kcal
- Carbohydrates: 15g
- Protein: 2g
- Fat: 10g
- Saturated Fat: 2g
- Polyunsaturated Fat: 3g
- Monounsaturated Fat: 4g
- Trans Fat: 1g
- Cholesterol: 14mg
- Sodium: 103mg
- Potassium: 22mg
- Fiber: 1g
- Sugar: 3g
- Vitamin A: 20IU
- Calcium: 8mg
- Iron: 1mg
Your feedback helps us grow and inspires other bakers!
Explore More Delicious Pie Creations by Chef Lindsey
I genuinely hope you enjoyed perfecting this professional chef-tested almond flour pie crust recipe. It’s a fantastic foundation for countless sweet and savory delights. Now that you’ve mastered this essential, why not broaden your baking horizons? Dive into our extensive collection of chef-developed pie crust recipes designed to suit every occasion and filling. Perhaps you’re ready to tackle a show-stopping mile high apple pie, or explore other unique crust variations? Your next favorite pie awaits!
Happy Baking!