
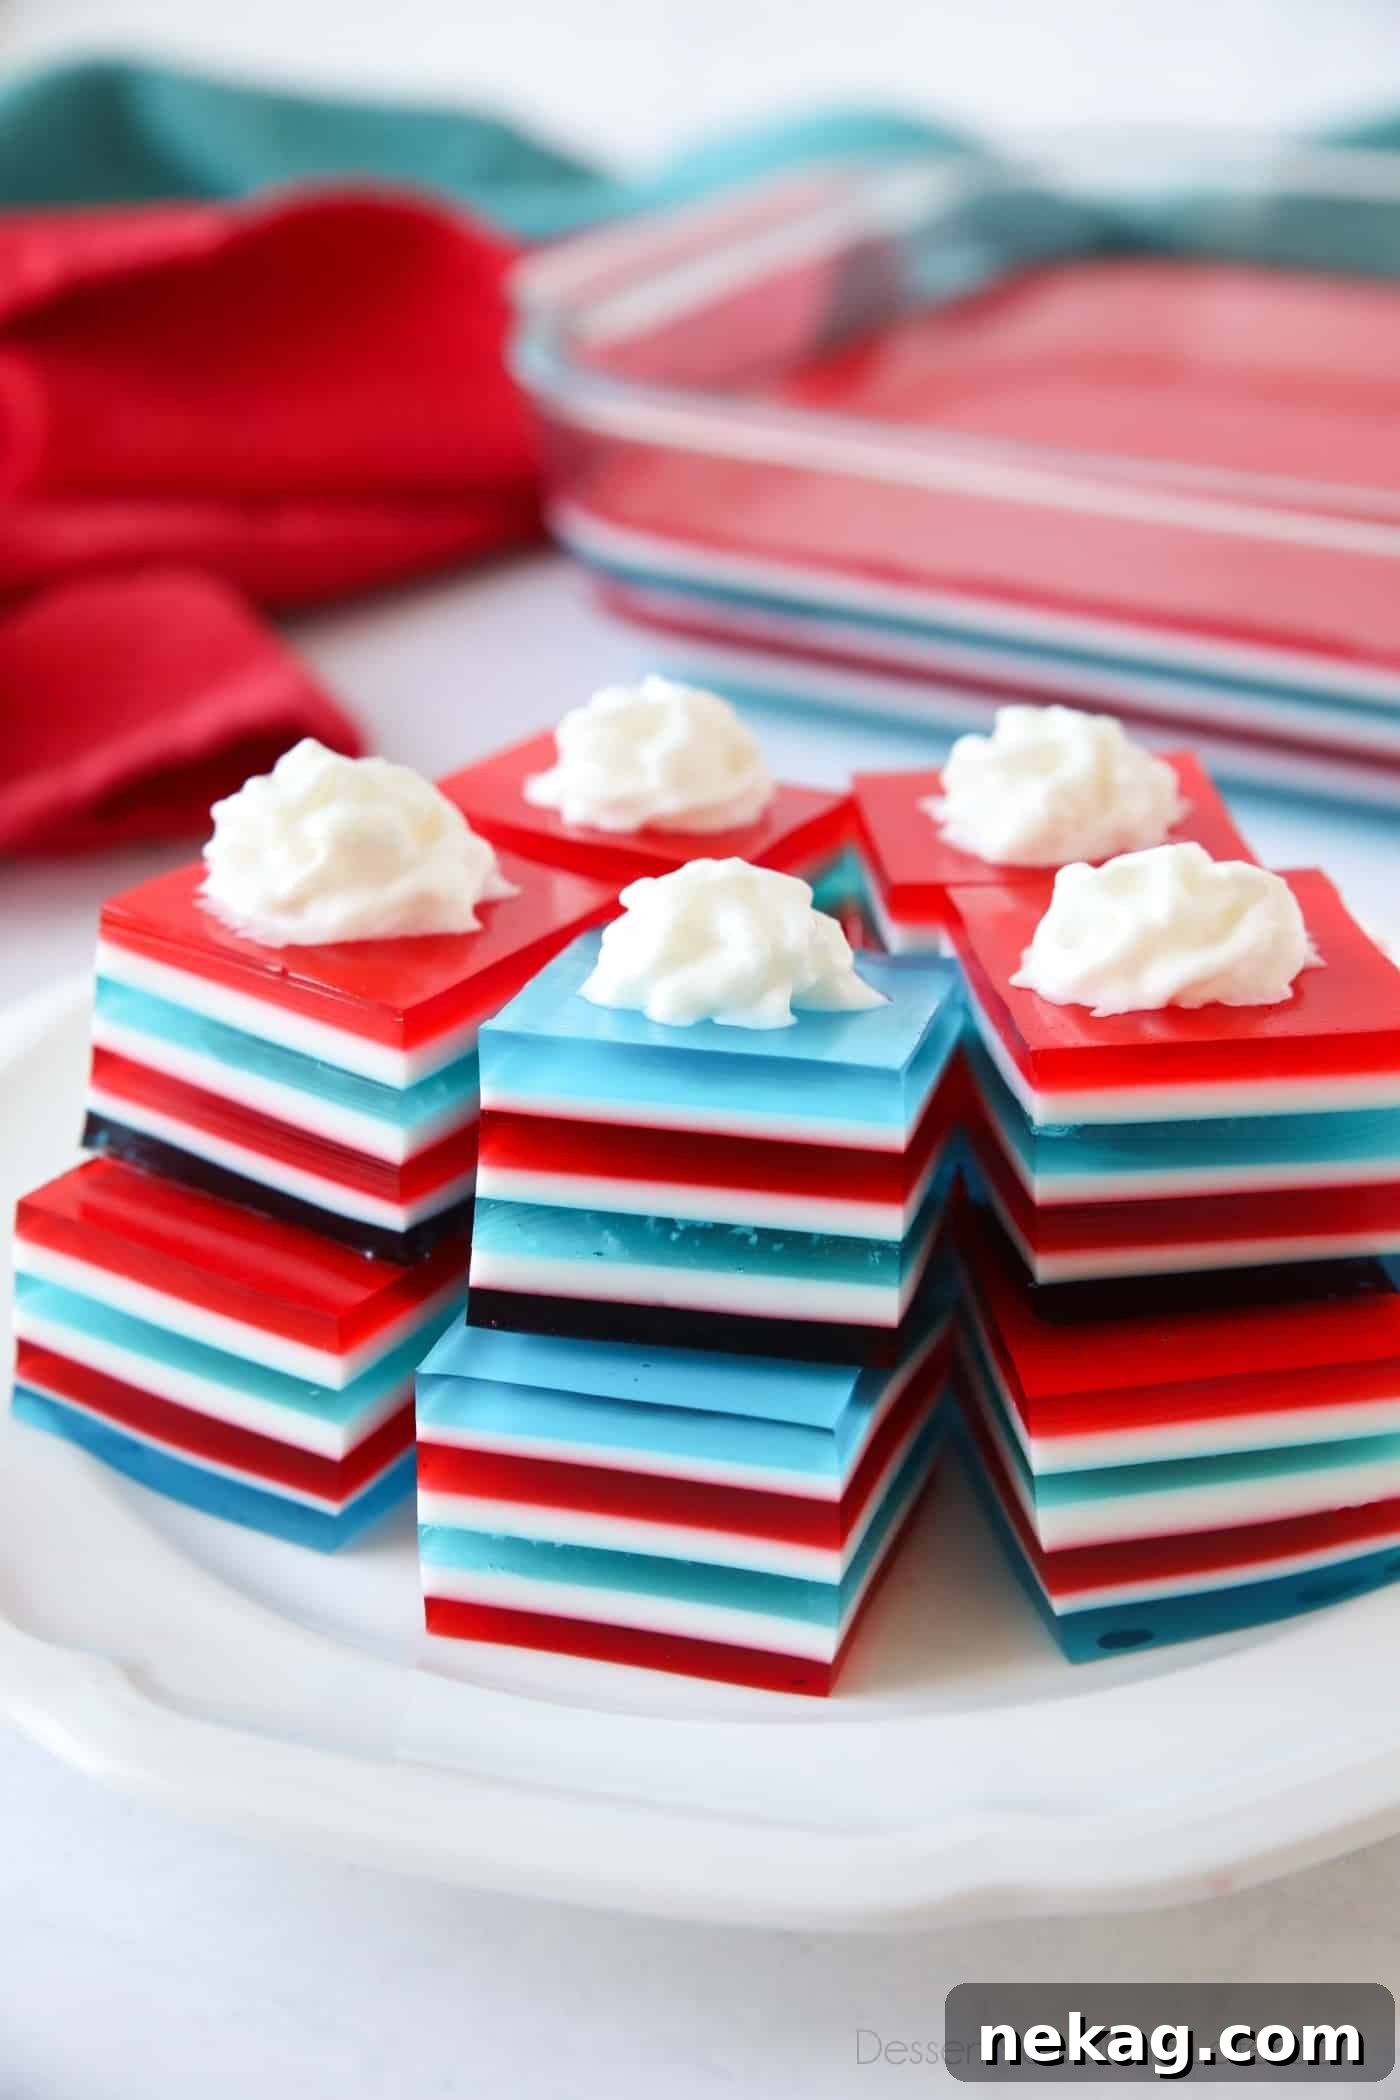
Creating a truly memorable dessert for the 4th of July doesn’t have to be complicated. Enter Red White and Blue Jello, a patriotic masterpiece that’s as delightful to look at as it is to eat. This layered jello recipe, often lovingly referred to as Jello Jigglers or Knox Blocks, offers a refreshingly easy, vibrant, and utterly delicious way to celebrate Independence Day. Imagine a dazzling display of red, white, and blue, perfectly stacked to capture the spirit of the holiday in every bite. It’s a guaranteed crowd-pleaser and a nostalgic treat that transcends generations.
*Disclaimer: This post is not sponsored and in no way affiliated with Jell-O or the Kraft Heinz brand. All opinions and recipes are independently developed.
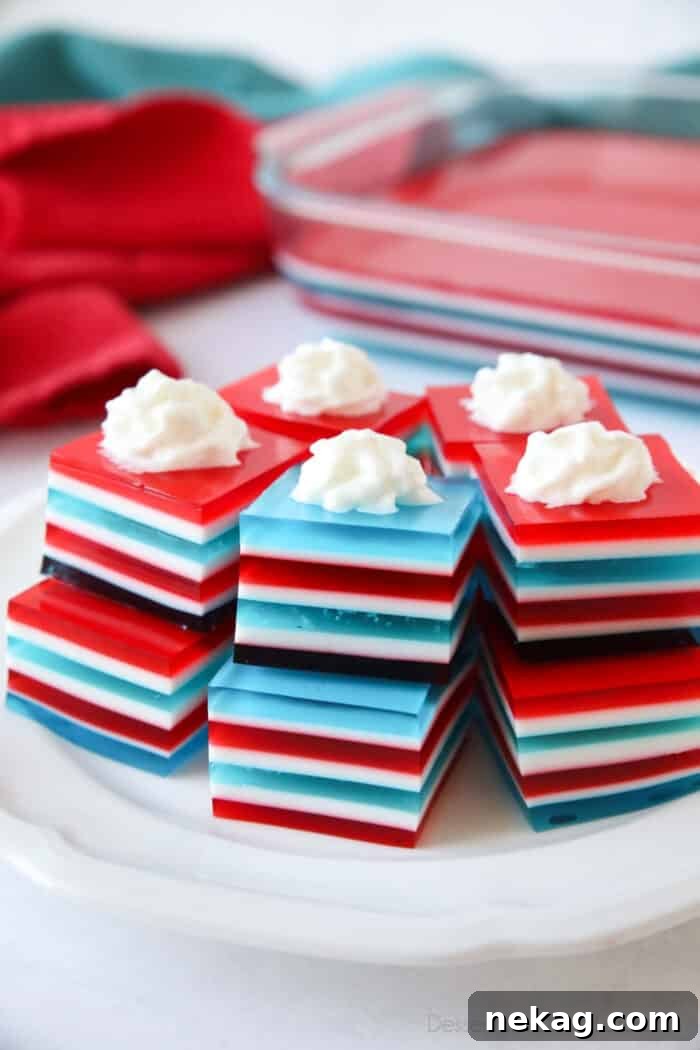
If you’re searching for that ideal, no-bake dessert that screams “summer celebration” and embodies effortless charm, these festive red, white, and blue jello cubes are your answer. Their stunning layered appearance, coupled with their simple ingredients and preparation, makes them a standout addition to any Independence Day feast or summer gathering. Forget the stress of intricate baking; this recipe delivers maximum visual impact with minimal fuss, leaving you more time to enjoy the festivities.
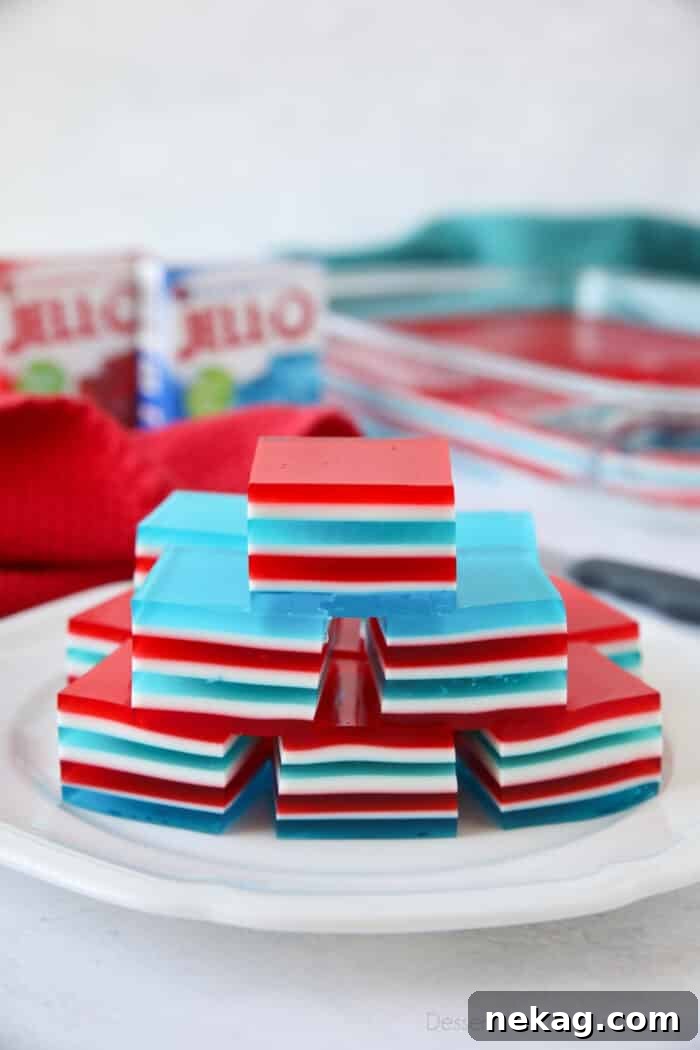
The Allure of Layered Jello for Celebrations
Layered jello isn’t just a dessert; it’s a nostalgic experience, bringing smiles to faces young and old. The vibrant colors and fun, wobbly texture make it an instant hit at any party, especially for patriotic holidays like the 4th of July, Memorial Day, or Labor Day. This particular 4th of July Jello recipe goes above and beyond with its impressive seven distinct layers of red, white, and blue. While it might appear complex at first glance, the truth is, it’s surprisingly simple to make, relying on readily available boxed gelatin mixes and a touch of unflavored gelatin for that perfect jiggle.
The secret to its ease lies in the “make-ahead” nature of this dessert. The most challenging aspect isn’t the technique, but rather the patience required to allow each individual layer to set. With a refrigeration time of approximately 20-30 minutes per layer, you can easily spread the preparation over an afternoon, or even prepare it the day before your event. This makes layered jello an ideal choice for busy hosts who want a visually stunning dessert without last-minute stress. The end result is not just food; it’s a celebratory centerpiece that’s sure to earn rave reviews.
Essential Ingredients for Your Patriotic Jello
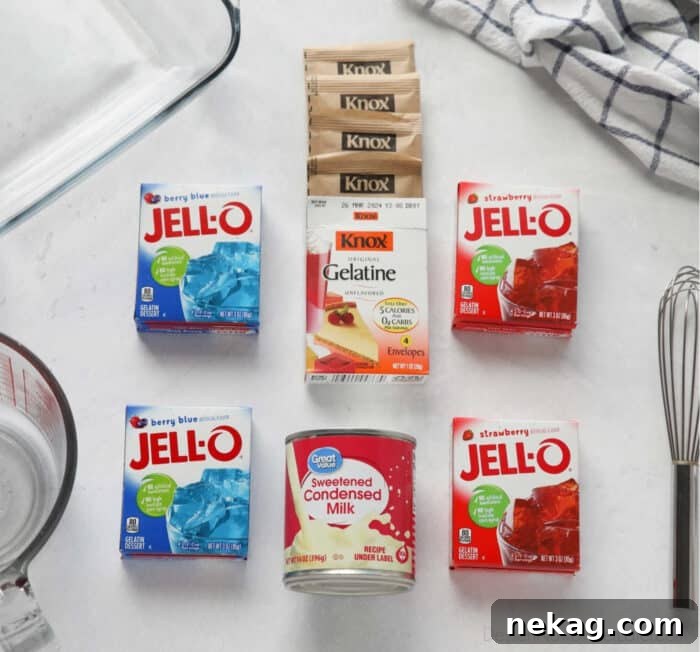
Creating this festive Red White and Blue Jello requires just a handful of simple ingredients, most of which are pantry staples. The key is to select quality gelatin and ensure you have enough of each component to build those beautiful, distinct layers. Here’s what you’ll need to gather:
- 2 small (3 oz) boxes of Berry Blue Jello: This provides the vibrant blue hue that contrasts so beautifully with the red and white.
- 2 small (3 oz) boxes of Strawberry Jello: For the classic red, any red-flavored gelatin like cherry or raspberry would also work.
- 4 (0.25 oz) envelopes Unflavored Gelatin (like Knox Gelatine): This is crucial for creating the solid, sliceable “jigglers” texture, especially for the white layers.
- 1 (14 oz) can Sweetened Condensed Milk: The secret behind the creamy, opaque white layers. It adds sweetness and body.
- 6 cups Boiling Water, separated: Essential for dissolving the gelatin thoroughly and creating the liquid base for each layer.
Crafting Your Patriotic Masterpiece: A Step-by-Step Layering Guide
The beauty of this Patriotic Jello lies in its distinct layers. You will be building a stunning seven-layer design within a 13×9-inch pan. Careful attention to the order and the setting time for each layer is key to achieving that perfect presentation. Here’s the sequence you’ll follow, ensuring each color stands out:
- Blue (bottom layer)
- White
- Red
- White
- Blue
- White
- Red (top layer)
Remember, the golden rule for layered jello is patience. Prepare your next layer’s mixture immediately after placing the current layer in the refrigerator. This allows the hot liquid to cool down to a lukewarm temperature, preventing it from melting or drilling holes into the set layer below.
Starting with the Blue Layer
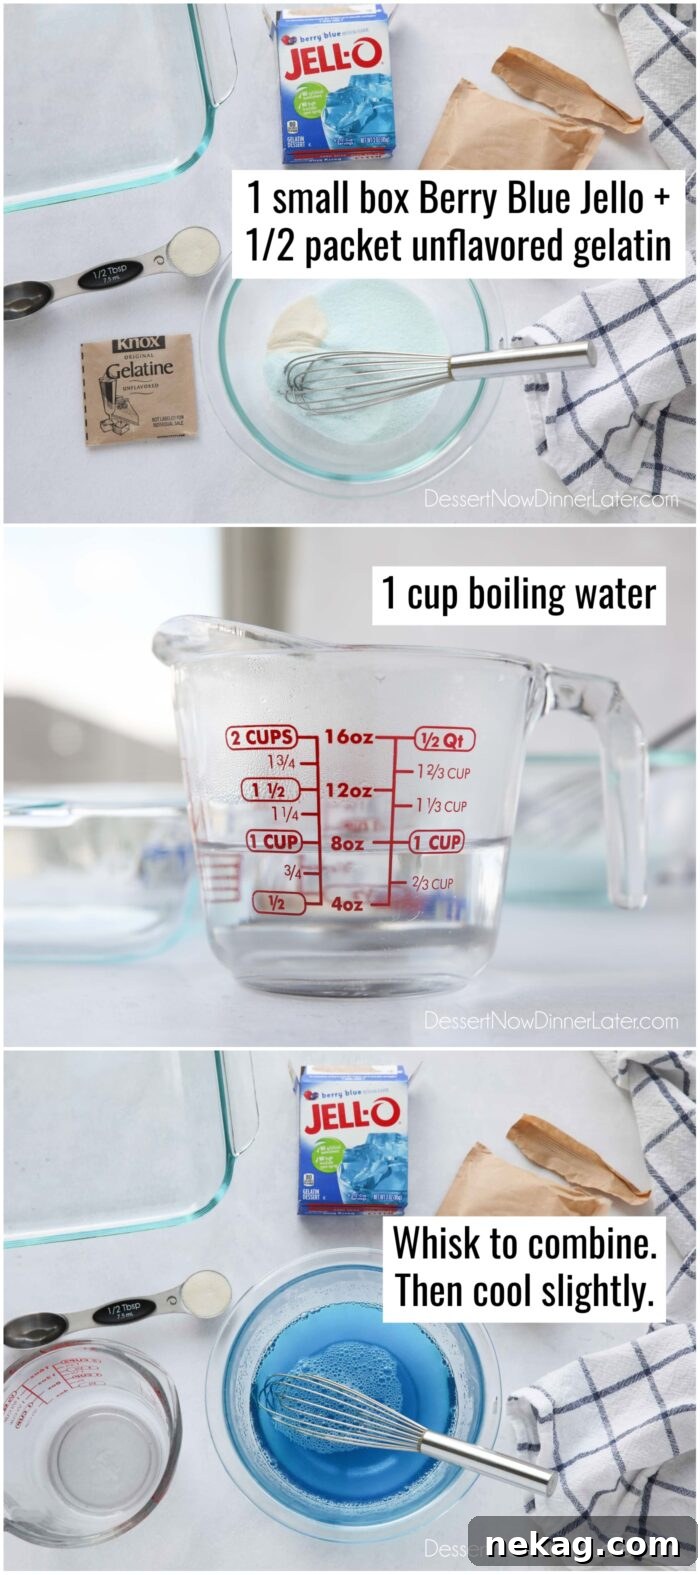
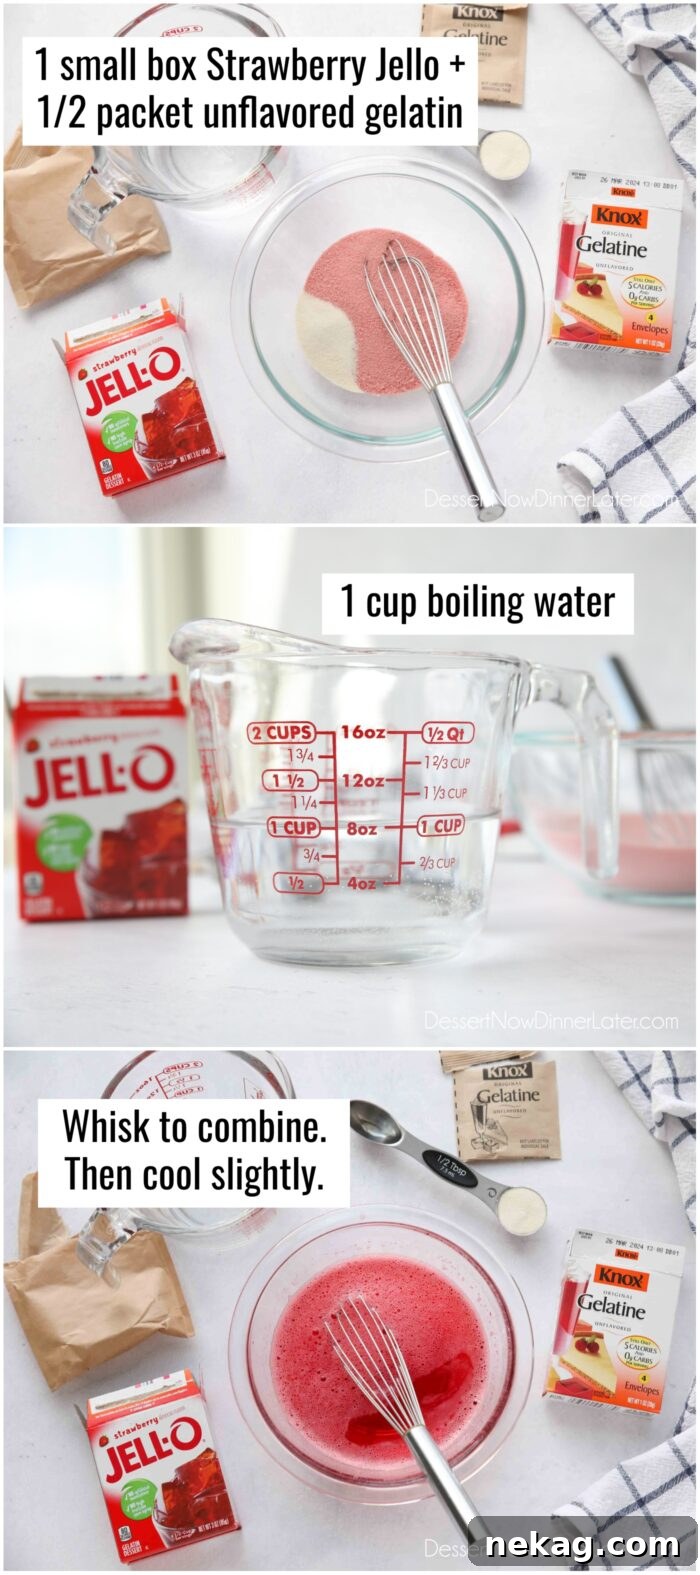
Begin your patriotic creation with the vibrant blue base. In a large bowl, whisk together one box of Berry Blue Jello with approximately half a packet of unflavored gelatin (about 1.5 teaspoons or 0.5 Tablespoon). This addition of unflavored gelatin helps firm up the colored layers, creating a more robust “jiggler” texture. Carefully add 1 cup of boiling water to the mixture, whisking continuously until both the flavored and unflavored gelatins are completely dissolved. Ensure there are no grainy bits at the bottom of the bowl.
Once dissolved, pour this blue mixture into your clean, dry 13×9-inch pan. Gently place the pan into the refrigerator and allow it to chill for 20-30 minutes, or until the gelatin is sufficiently set. It should be firm enough to support the next layer without breaking.
Crafting the Creamy White Layer
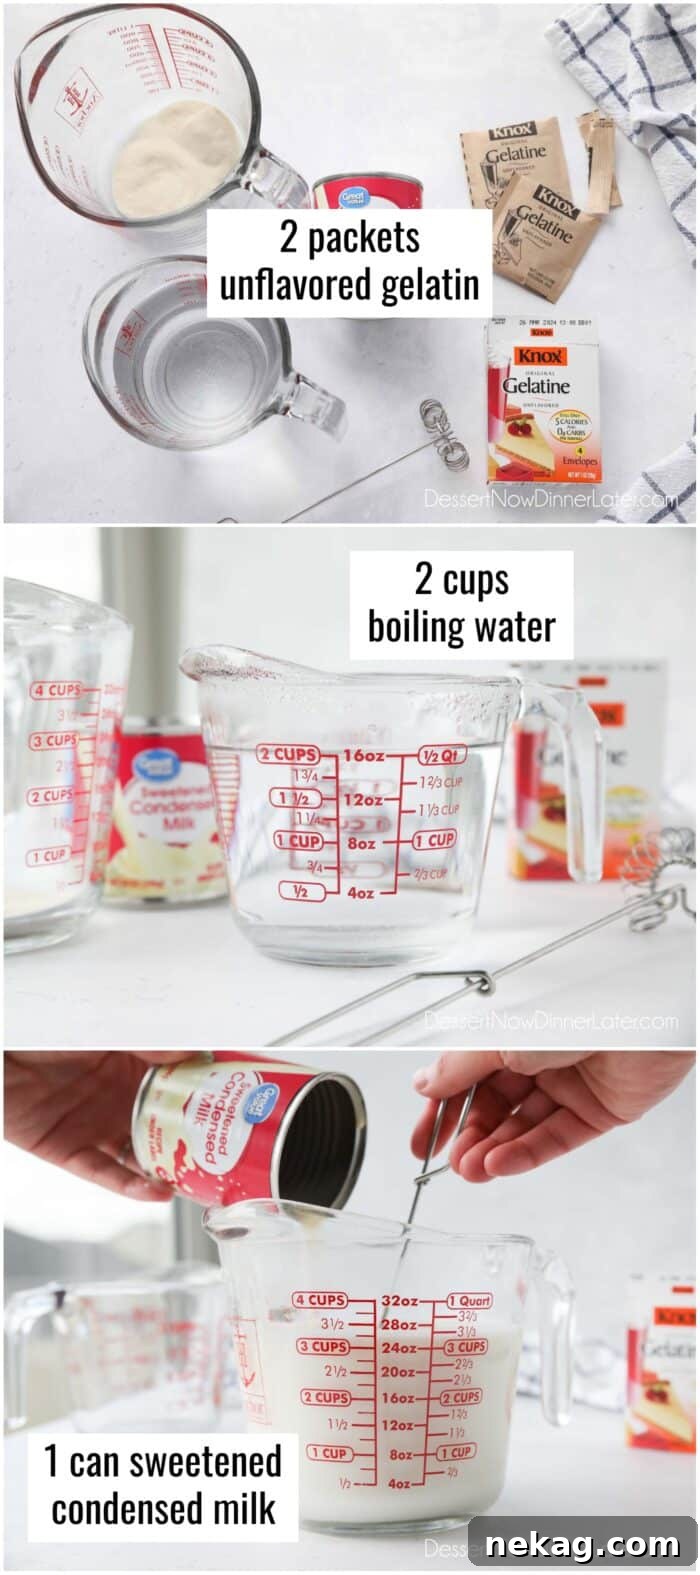
The white layers are what truly make this layered jello visually pop. For these, we combine unflavored gelatin with sweetened condensed milk. In a large, 4-cup, microwave-safe measuring cup (this will be useful for reheating later), whisk together 2 packets of unflavored gelatin with 2 cups of boiling water until the gelatin is fully dissolved and the mixture is clear. Next, incorporate one can of sweetened condensed milk, whisking until thoroughly combined and smooth. It’s crucial to allow this white mixture to cool down to a lukewarm temperature before you pour it onto any set layer. Pouring hot liquid will melt the layer below and ruin your beautiful stripes.
NOTE: This entire white mixture will be divided into three equal portions, approximately 1 cup each, for the three white layers in your dessert. The microwave-safe measuring cup is a pro tip: it allows you to easily re-heat the mixture for a few seconds if it begins to set while you wait for other layers to firm up.
Adding the First White Layer
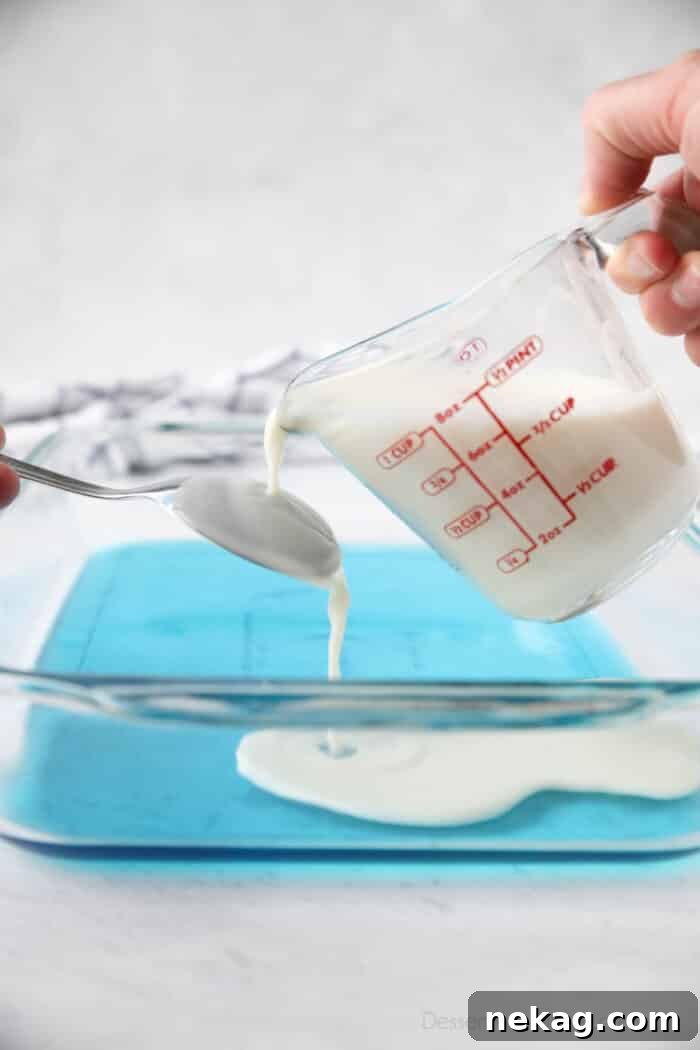
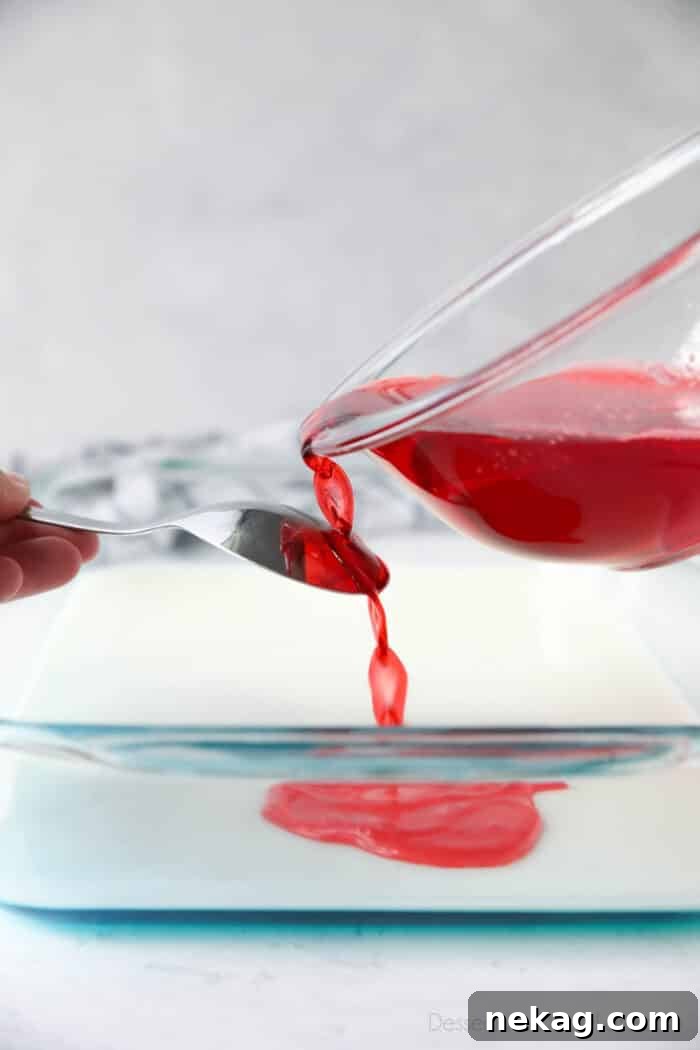
Once your blue bottom layer is perfectly set, it’s time to introduce the first white stripe. Gently pour about 1 cup of your cooled white jello mixture over the firm blue layer. A clever technique to prevent the liquid from drilling a hole into the established layer is to pour it slowly over the back of a spoon. This helps to disperse the liquid evenly as it flows, creating a smooth, unbroken surface. Set the remaining white mixture aside for your subsequent white layers.
Return the pan to the refrigerator and chill for another 20-30 minutes, or until this white layer is set.
Introducing the Vibrant Red Layer
Following the white layer, you’ll prepare your first red segment. In a clean large bowl, whisk together one box of Strawberry Jello with the remaining half packet of unflavored gelatin (again, about 1.5 teaspoons). Add 1 cup of boiling water and whisk until all powders are completely dissolved. Just like the white mixture, allow this red liquid to cool to a lukewarm temperature while your white layer finishes setting in the fridge. This temperature control is critical for maintaining clear, distinct lines between your patriotic colors.
Adding the Third Layer with Care
Once your second (white) layer is fully set and the red jello mixture has cooled to lukewarm, it’s time for the next step. Gently pour the red jello over the white layer. Remember the pro tip: pouring slowly and close to the set jello, or using the back of a spoon to guide the liquid, will ensure a smooth, even application without disturbing the layer underneath. This attention to detail is what creates those sharp, beautiful lines in your finished product.
Return the pan to the refrigerator and chill for another 20-30 minutes, allowing the red layer to set completely.
Completing the Seven-Layer Spectacle
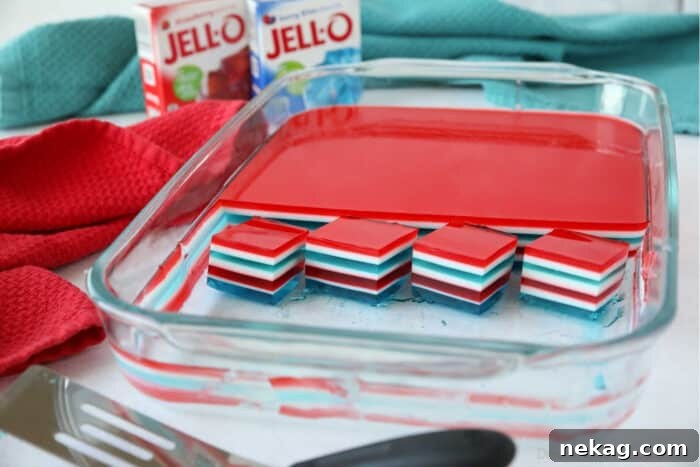
Now that you’ve mastered the technique, you’ll simply repeat the layering process, ensuring a white layer is always placed between each colored layer. The full sequence will be: blue, white, red, white, blue, white, red. Continue chilling each layer for 20-30 minutes until set before adding the next. This consistent approach will ensure a firm, beautifully striped dessert.
After approximately 3.5 hours of layering and chilling, you will be rewarded with a magnificent display of red, white, and blue jello – a truly patriotic and impressive dessert! The anticipation builds with each layer, culminating in a stunning treat that’s well worth the wait.
Cutting, Serving, and Storing Your Festive Jello
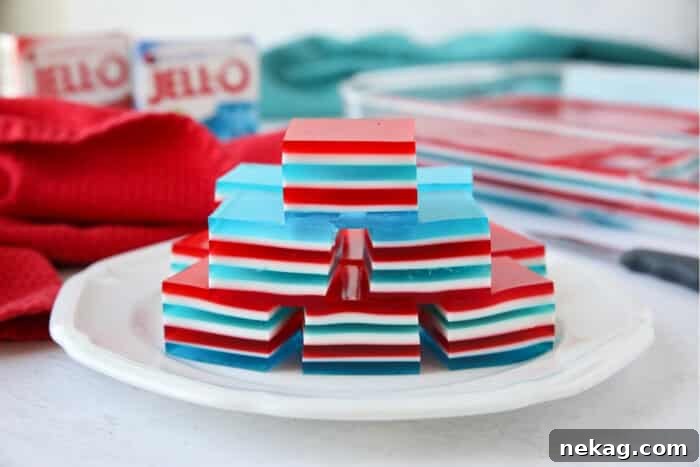
This 4th of July jello is not only a feast for the eyes but also incredibly practical for entertaining. Its firm texture, achieved by incorporating unflavored gelatin, makes it ideal for cutting into small, easy-to-handle blocks, often called “jigglers” or “knox blocks.” This finger-food format is perfect for potlucks, barbecues, and parties, allowing guests to grab a colorful bite without needing utensils.
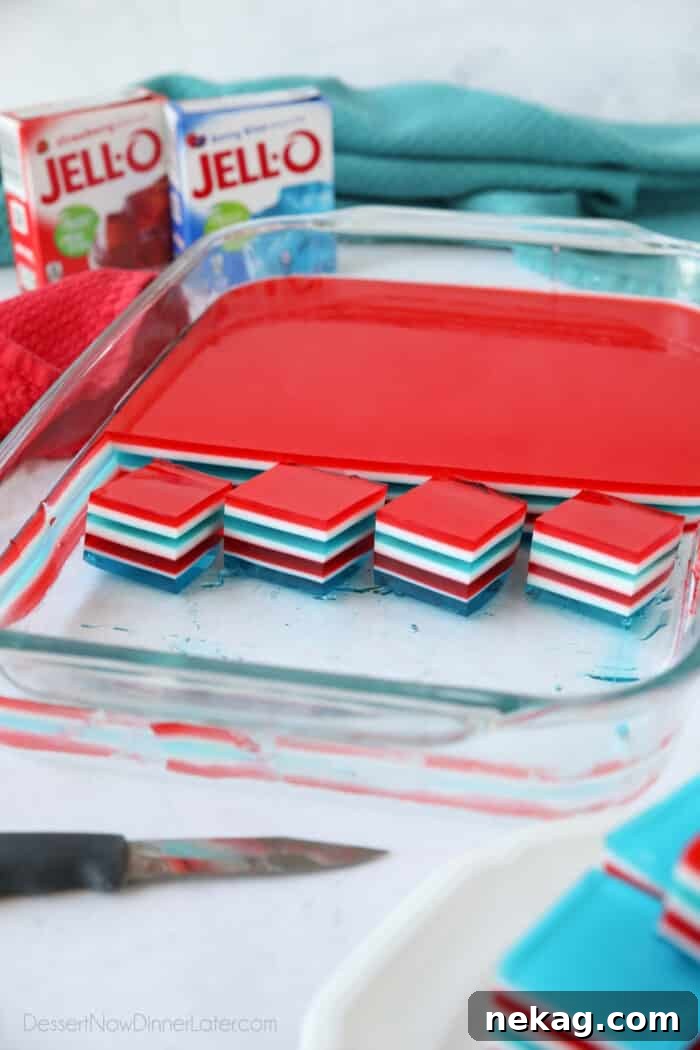
From a standard 13×9-inch pan, you can easily yield 48 delightful jello jigglers by cutting it into 6×8 rows. To remove the squares cleanly, first run a thin, non-serrated knife along all edges of the pan. Then, carefully use a serving spatula to lift the individual squares out. For optimal freshness and texture, keep your layered jello in a covered container in the refrigerator. It will stay delicious for up to 7-10 days, making it an excellent dessert to prepare a few days in advance of your celebration.
Essential Tips for Jello Perfection
While this recipe is straightforward, a few key tips can elevate your Red White and Blue Jello from good to absolutely perfect:
- Dissolving Gelatin Flawlessly: Always pour boiling water directly into the gelatin powder while whisking vigorously. Avoid sprinkling the powder into already hot water, especially with unflavored gelatin. This technique ensures complete dissolution and prevents any unwanted lumps, resulting in a smooth, clear jello.
- Temperature Control is Key: Prepare the next layer of jello immediately after the previous one goes into the fridge. This allows your liquid jello mixture ample time to cool to a lukewarm temperature. Pouring hot jello onto a set layer is a common pitfall; it will inevitably create holes or even melt the layer beneath, compromising the crisp lines of your patriotic dessert.
- Keeping the White Mixture Ready: Since the white jello mixture is prepared once but used for three separate layers, it’s prone to setting up in its container while waiting. Keep it in a microwave-safe dish. Stir it occasionally to keep it loose. If it starts to firm up too much, a quick zap in the microwave for 15-20 seconds will bring it back to a pourable consistency. This is particularly useful for the final white layer.
- The Importance of a Level Surface: For perfectly even layers, ensure your pan is placed on a level shelf in the refrigerator. Before you start layering, clear out a nice, flat space. After the first few layers, bend down and observe the layers through the clear glass pan to check for evenness. Adjust the pan’s position as needed to prevent lopsided layers, ensuring a uniformly beautiful presentation.
- Boiling Water Hacks: You don’t need fancy equipment for boiling water. A standard tea kettle works perfectly, or you can simply microwave the water in a heat-safe measuring cup for approximately 3-5 minutes, depending on your microwave’s power.
Beyond the 4th: Adapting Your Layered Jello
While this recipe is a star for the 4th of July, its versatility means you can adapt it for almost any holiday or theme! Imagine vibrant green and red layers for Christmas, pastel pink and blue for a baby shower, or team colors for a sports party. You can also experiment with different flavors of Jell-O to match your chosen palette. For an extra touch of flair, consider adding fresh fruit (like blueberries or raspberries) to the colored layers once they’ve partially set, or topping your finished jigglers with a dollop of whipped cream and a sprinkle of patriotic sprinkles. The possibilities are endless for customizing this fun and flexible dessert.
More Red White and Blue Desserts for the 4th of July
If you’re looking to expand your patriotic dessert spread, here are some other fantastic red, white, and blue treats that are sure to impress:
- Cheesecake Stuffed Strawberries
- Patriotic Trifle
- Red White and Blue Popcorn
- Red White and Blue Pie Parfaits
- 4th of July Slab Pie
- Red White and Blue Whoopie Pies
- Patriotic Punch
- Red White and Blue Poke Cake
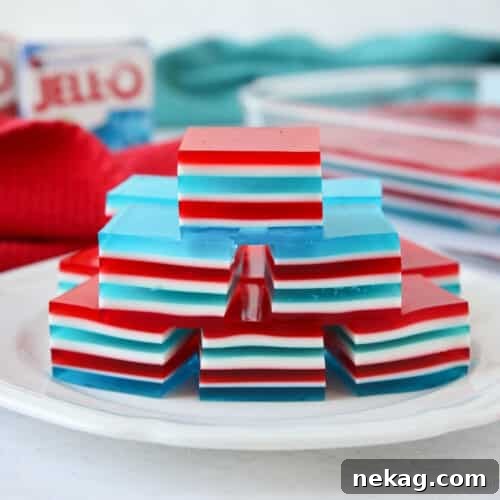
Red White and Blue Jello
Red White and Blue Jello is a fun dessert to make for the 4th of July. This layered jello recipe is easy, festive, and delicious. You’ll love the patriotic colors in this finger food, aka Jello Jigglers or Knox Blocks.
Created by: Amber Brady
Prep Time: 10 mins | Chill Time: 3 hrs 30 mins | Total Time: 3 hrs 40 mins
Yields: 48 squares
Ingredients
- 2 small (3 oz / 170 g) boxes Berry Blue Jell-o
- 2 small (3 oz / 170 g) boxes Strawberry Jell-o
- 4 (0.25 oz / 7.2 g) envelopes unflavored gelatin (Knox)
- 1 (14 oz / 396 g) can sweetened condensed milk
- 6 cups (1420 ml) boiling water, divided
Equipment
- Silicone Whisks
- Glass Measuring Cup Set (4-cup recommended)
- 13×9-inch pan (clear glass recommended)
Instructions
NOTE: Prepare the next layer of jello immediately after placing the previous layer in the fridge to set, so it has time to cool down slightly (lukewarm to touch).
For the Blue Jello:
- In a large bowl, whisk together one box of Berry Blue Jello with 1/2 a packet of unflavored gelatin (about 1.5 teaspoons or 0.5 Tablespoon). Add 1 cup of boiling water and whisk until dissolved.
- Pour into a clean and dry 13×9-inch clear glass pan. Refrigerate for 20-30 minutes or until gelatin is set.
For the White Jello: (NOTE: This mixture will be divided into thirds, about 1 cup each.)
- In a large, 4-cup, microwave-safe measuring cup, whisk together 2 packets of unflavored gelatin and 2 cups of boiling water until dissolved.
- Add one can of sweetened condensed milk and whisk to combine. Allow mixture to cool to lukewarm temperature while previous layer sets.
- Gently pour 1-cup of the white jello over the blue layer. Set remaining white mixture aside. Refrigerate for 20-30 minutes or until gelatin is set. (PRO TIP: Pour slowly and close to the set jello, or pour the mixture over the back of a spoon so it spreads out as it pours and doesn’t drill a hole into the previous layer.)
For the Red Jello:
- In a large bowl, whisk together one box of Strawberry Jello with 1/2 a packet of unflavored gelatin (about 1.5 teaspoons or 0.5 Tablespoon).
- Add 1 cup of boiling water and whisk until dissolved. Allow mixture to cool to lukewarm temperature while white layer sets.
- Gently pour the red jello over the white layer. Refrigerate for 20-30 minutes or until gelatin is set.
Repeat Process Layering the Jello with a Layer of White in Between Each Color:
- Blue (bottom)
- White
- Red
- White
- Blue
- White
- Red (top)
- After all layers have been poured and chilled long enough in the fridge to set up, run a thin (non-serrated) knife around the edge of the pan and cut the red white and blue jello into 6×8 rows — for 48 jello squares. Remove the patriotic jello with a serving spatula. Keep layered jello covered in the refrigerator up to 7-10 days.
Notes
- Always pour the boiling water into the gelatin powder while whisking (not sprinkling the gelatin powder into the boiling water — especially the unflavored gelatin) to ensure the mixture dissolves completely, without lumps.
- Prepare the next layer of jello immediately after placing the previous layer in the fridge to set, so it has time to cool down slightly (lukewarm to touch).
- May need to microwave the white jello mixture for 15-20 seconds if it starts to set up in the measuring cup (most likely on the 3rd/last white layer).
- May use a tea kettle or heat water in the microwave for boiling water.
- Be sure to chill jello on a level shelf in your fridge for even layers.
Nutrition
Serving: 1 square | Calories: 56kcal | Carbohydrates: 11g | Protein: 2g | Fat: 1g | Saturated Fat: 0.5g | Polyunsaturated Fat: 0.03g | Monounsaturated Fat: 0.2g | Cholesterol: 3mg | Sodium: 45mg | Potassium: 31mg | Sugar: 11g | Vitamin A: 22IU | Vitamin C: 0.2mg | Calcium: 24mg | Iron: 0.03mg
Disclaimer: Nutritional values were calculated using a third-party tool and are provided as an estimation only.
Sharing this recipe with a link is both encouraged and appreciated. Copying/pasting and/or screenshots of full recipes to any social media is strictly prohibited. Content and photographs are copyright protected.
Did you make this?
Don’t forget to leave a rating below and make sure to follow on Pinterest and Instagram for more delicious recipes and inspiration!