
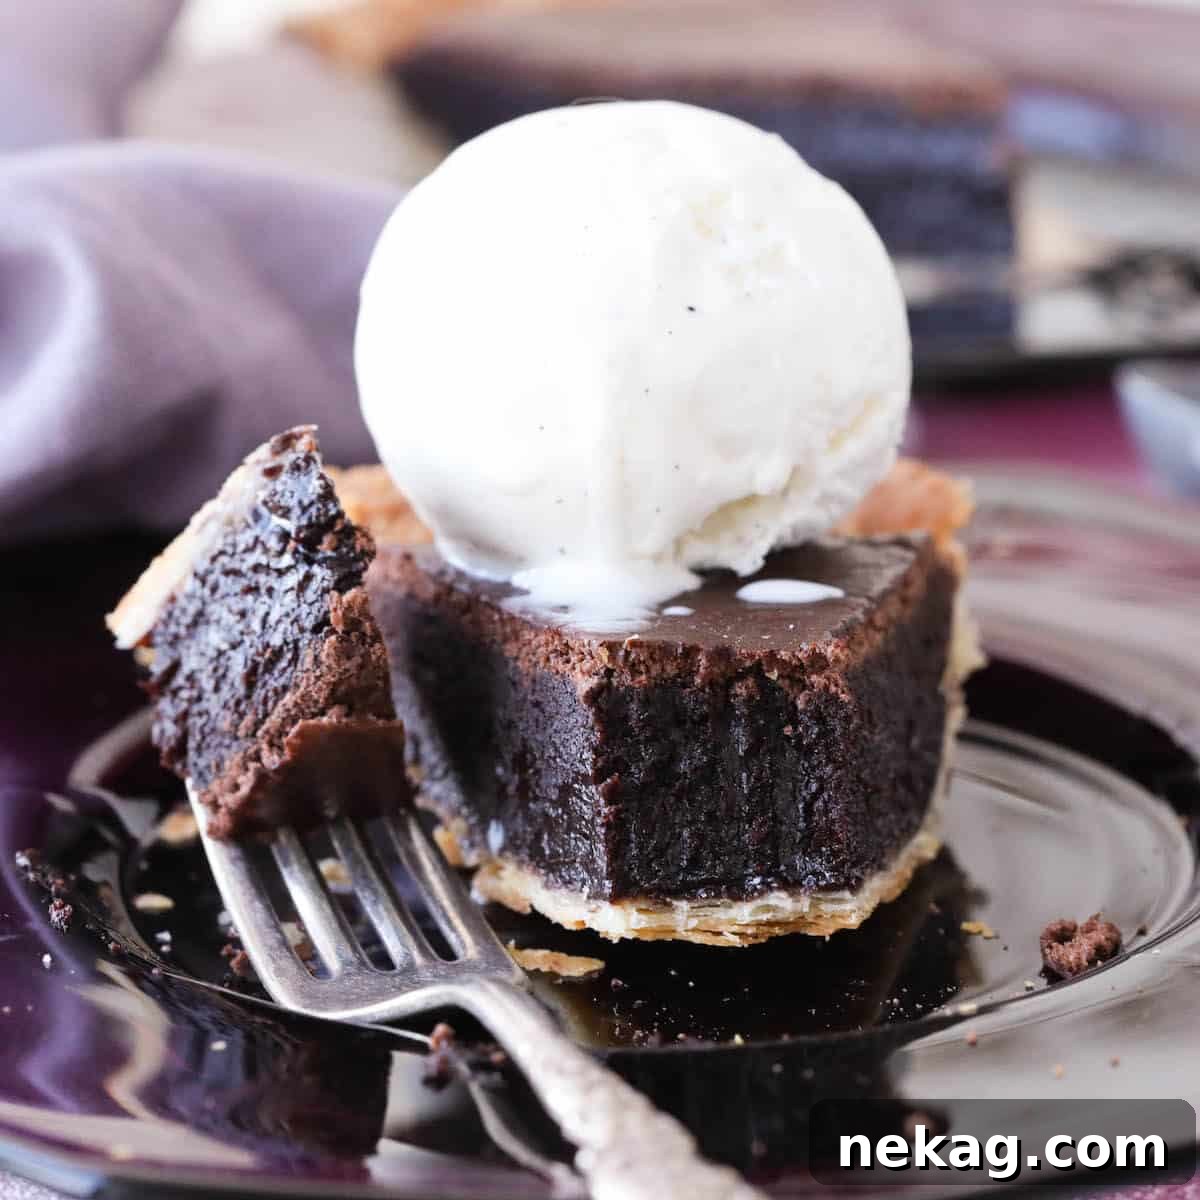
Indulge in the ultimate chocolate experience with this incredibly easy and intensely satisfying **chocolate fudge pie**. Boasting a luxuriously thick, undeniably fudgy, and remarkably rich texture, this dessert is a true delight for any chocolate lover. Perfectly baked within a **flaky, all-butter pie crust**, its simple yet elegant chocolate filling achieves a silky smoothness, elevated by subtle, harmonious notes of espresso. This recipe promises a decadent treat that’s surprisingly effortless to create, making it ideal for both seasoned bakers and beginners seeking a show-stopping dessert.
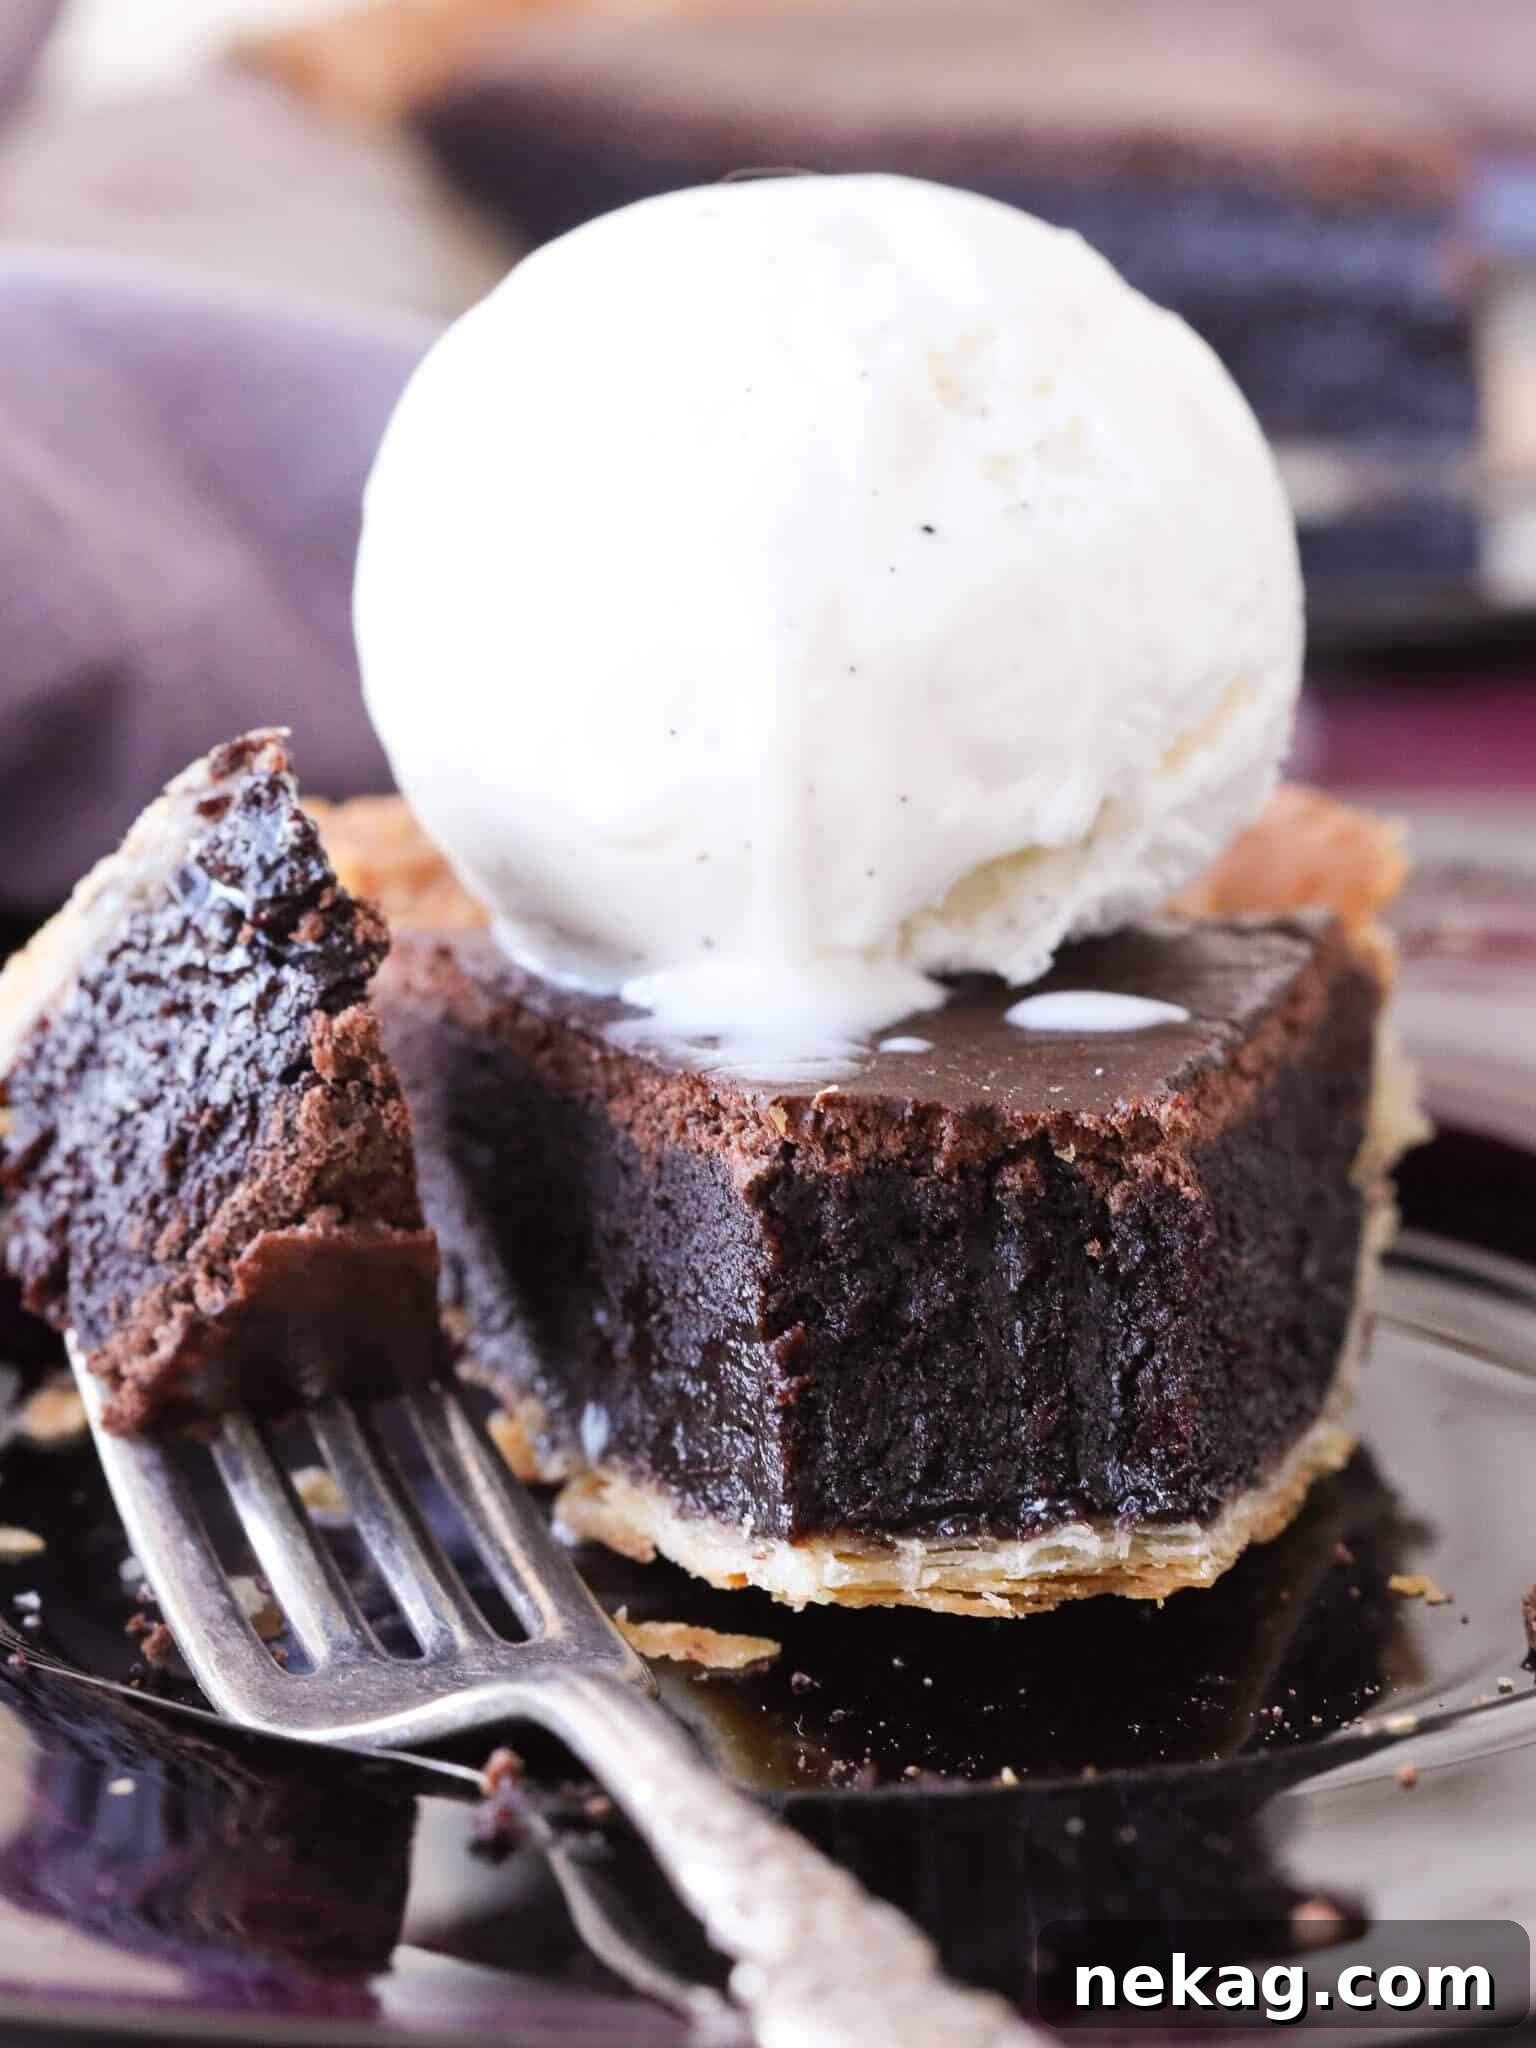
Prepare to **satiate your most intense chocolate cravings** with this quick and truly indulgent chocolate pie! Every bite offers a texture reminiscent of a rich, dense fudge brownie, complete with that desirable, delicately crackly top. The deep sweetness of the chocolate is impeccably balanced by the use of premium dark chocolate, robust cocoa powder, a touch of salt, and the quintessential flaky, buttery pie crust. The secret weapon in this recipe is a hint of espresso powder, a brilliant ingredient that remarkably enhances the natural depth of the chocolate, transforming this decadent pie into an even more profoundly chocolatey sensation than you’ve ever imagined!
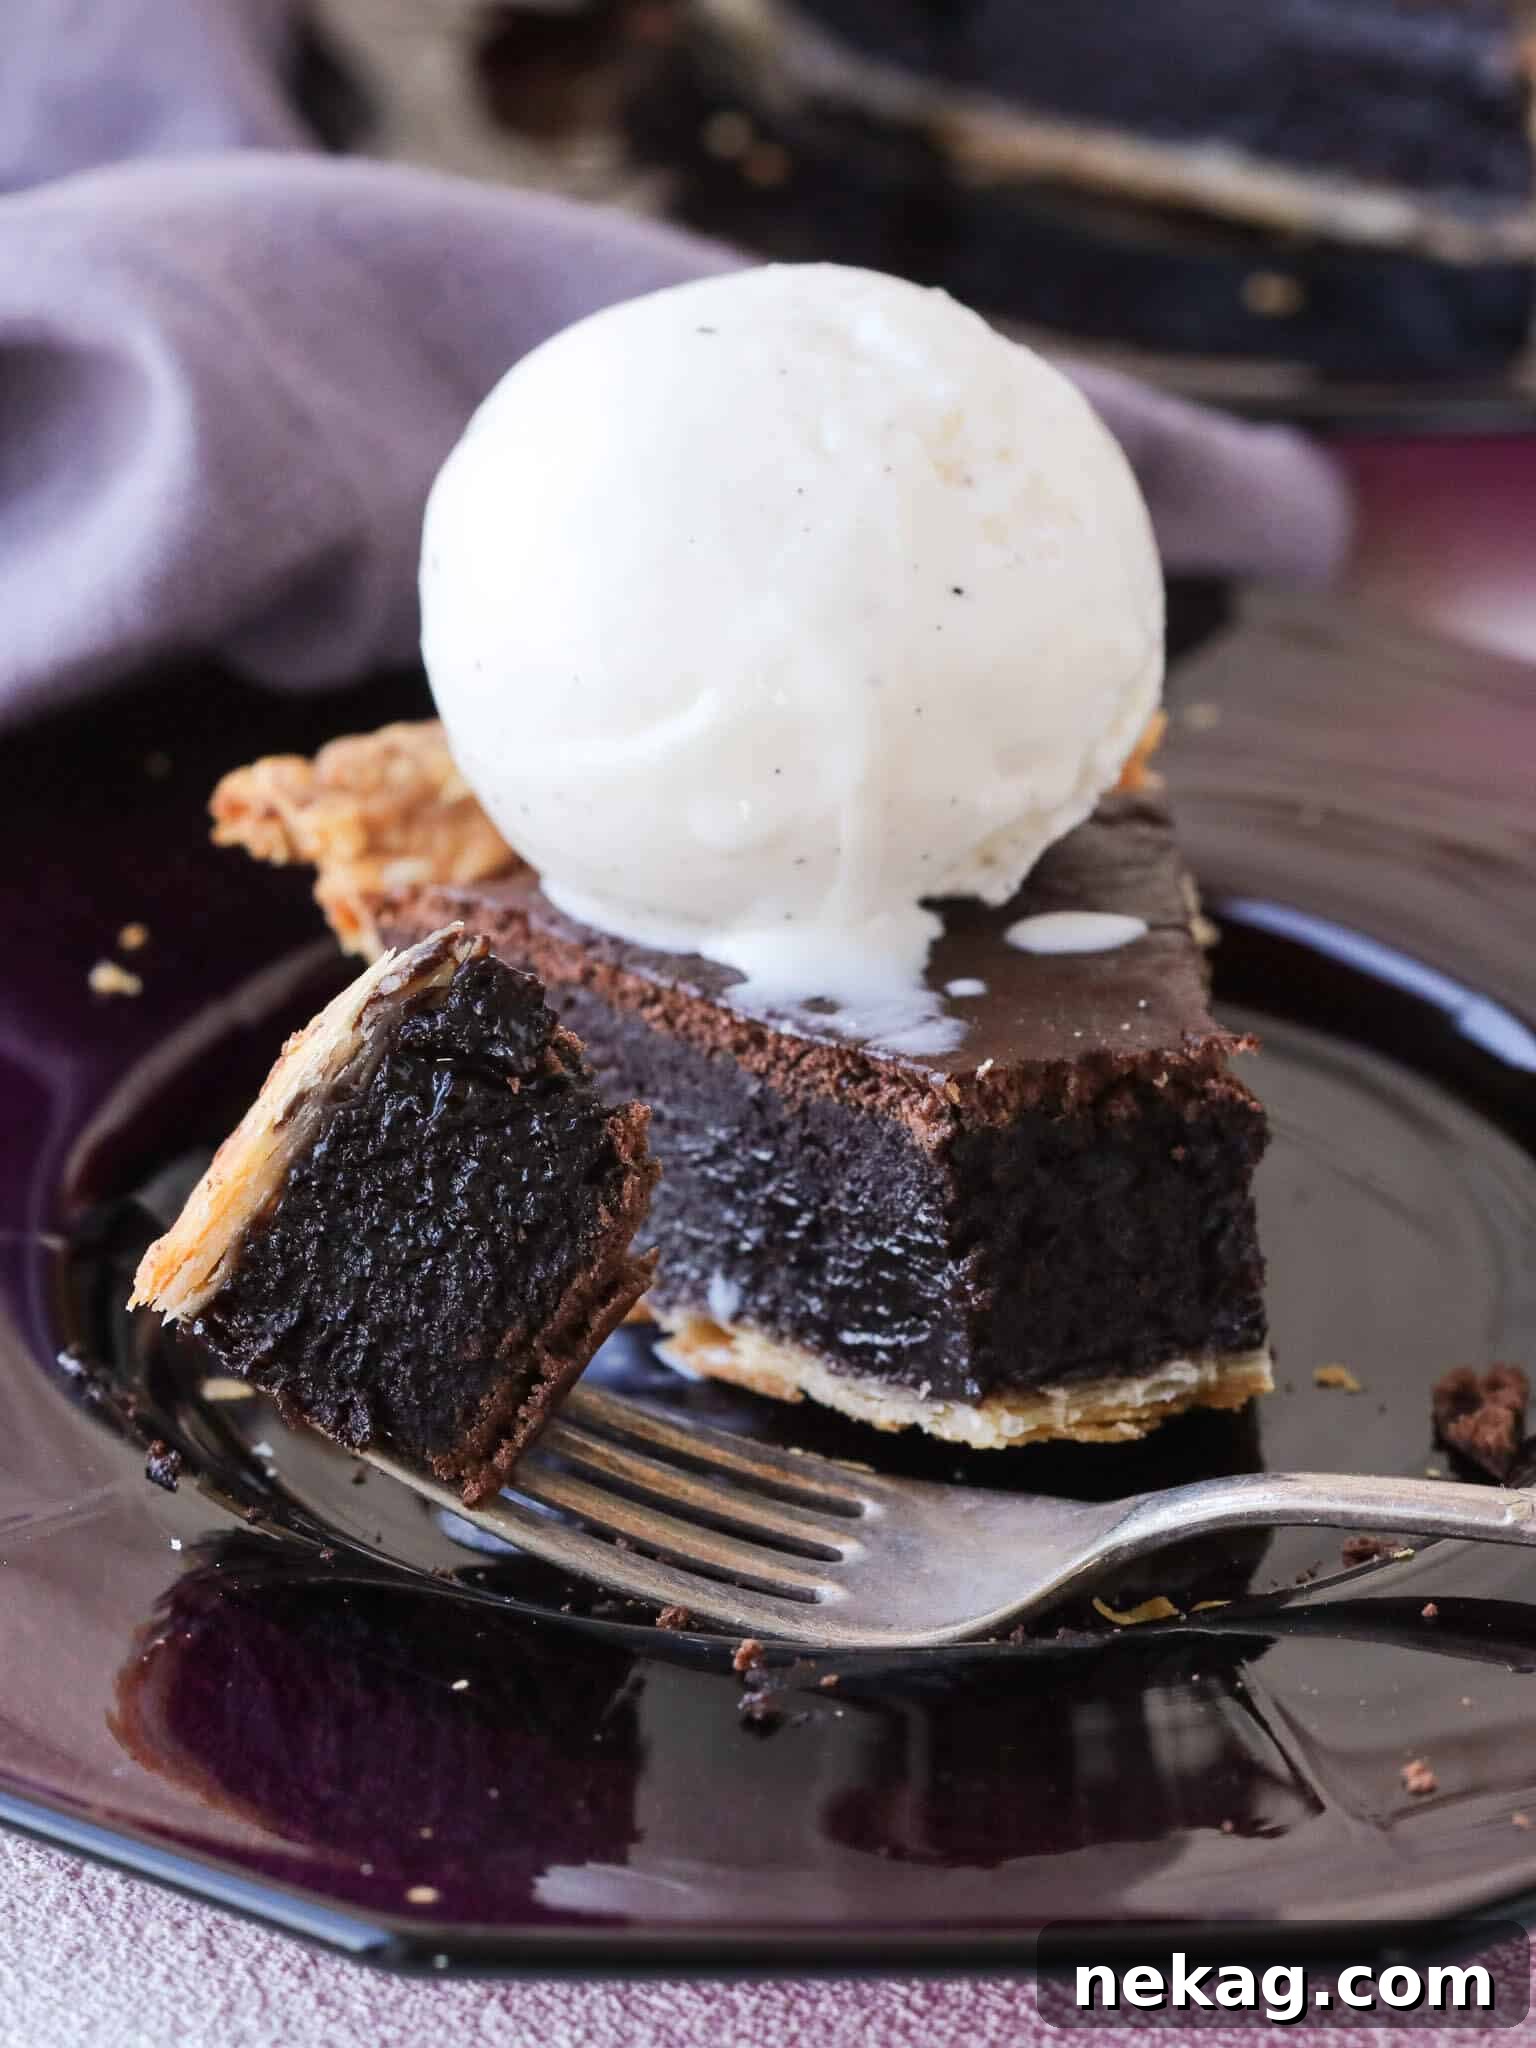
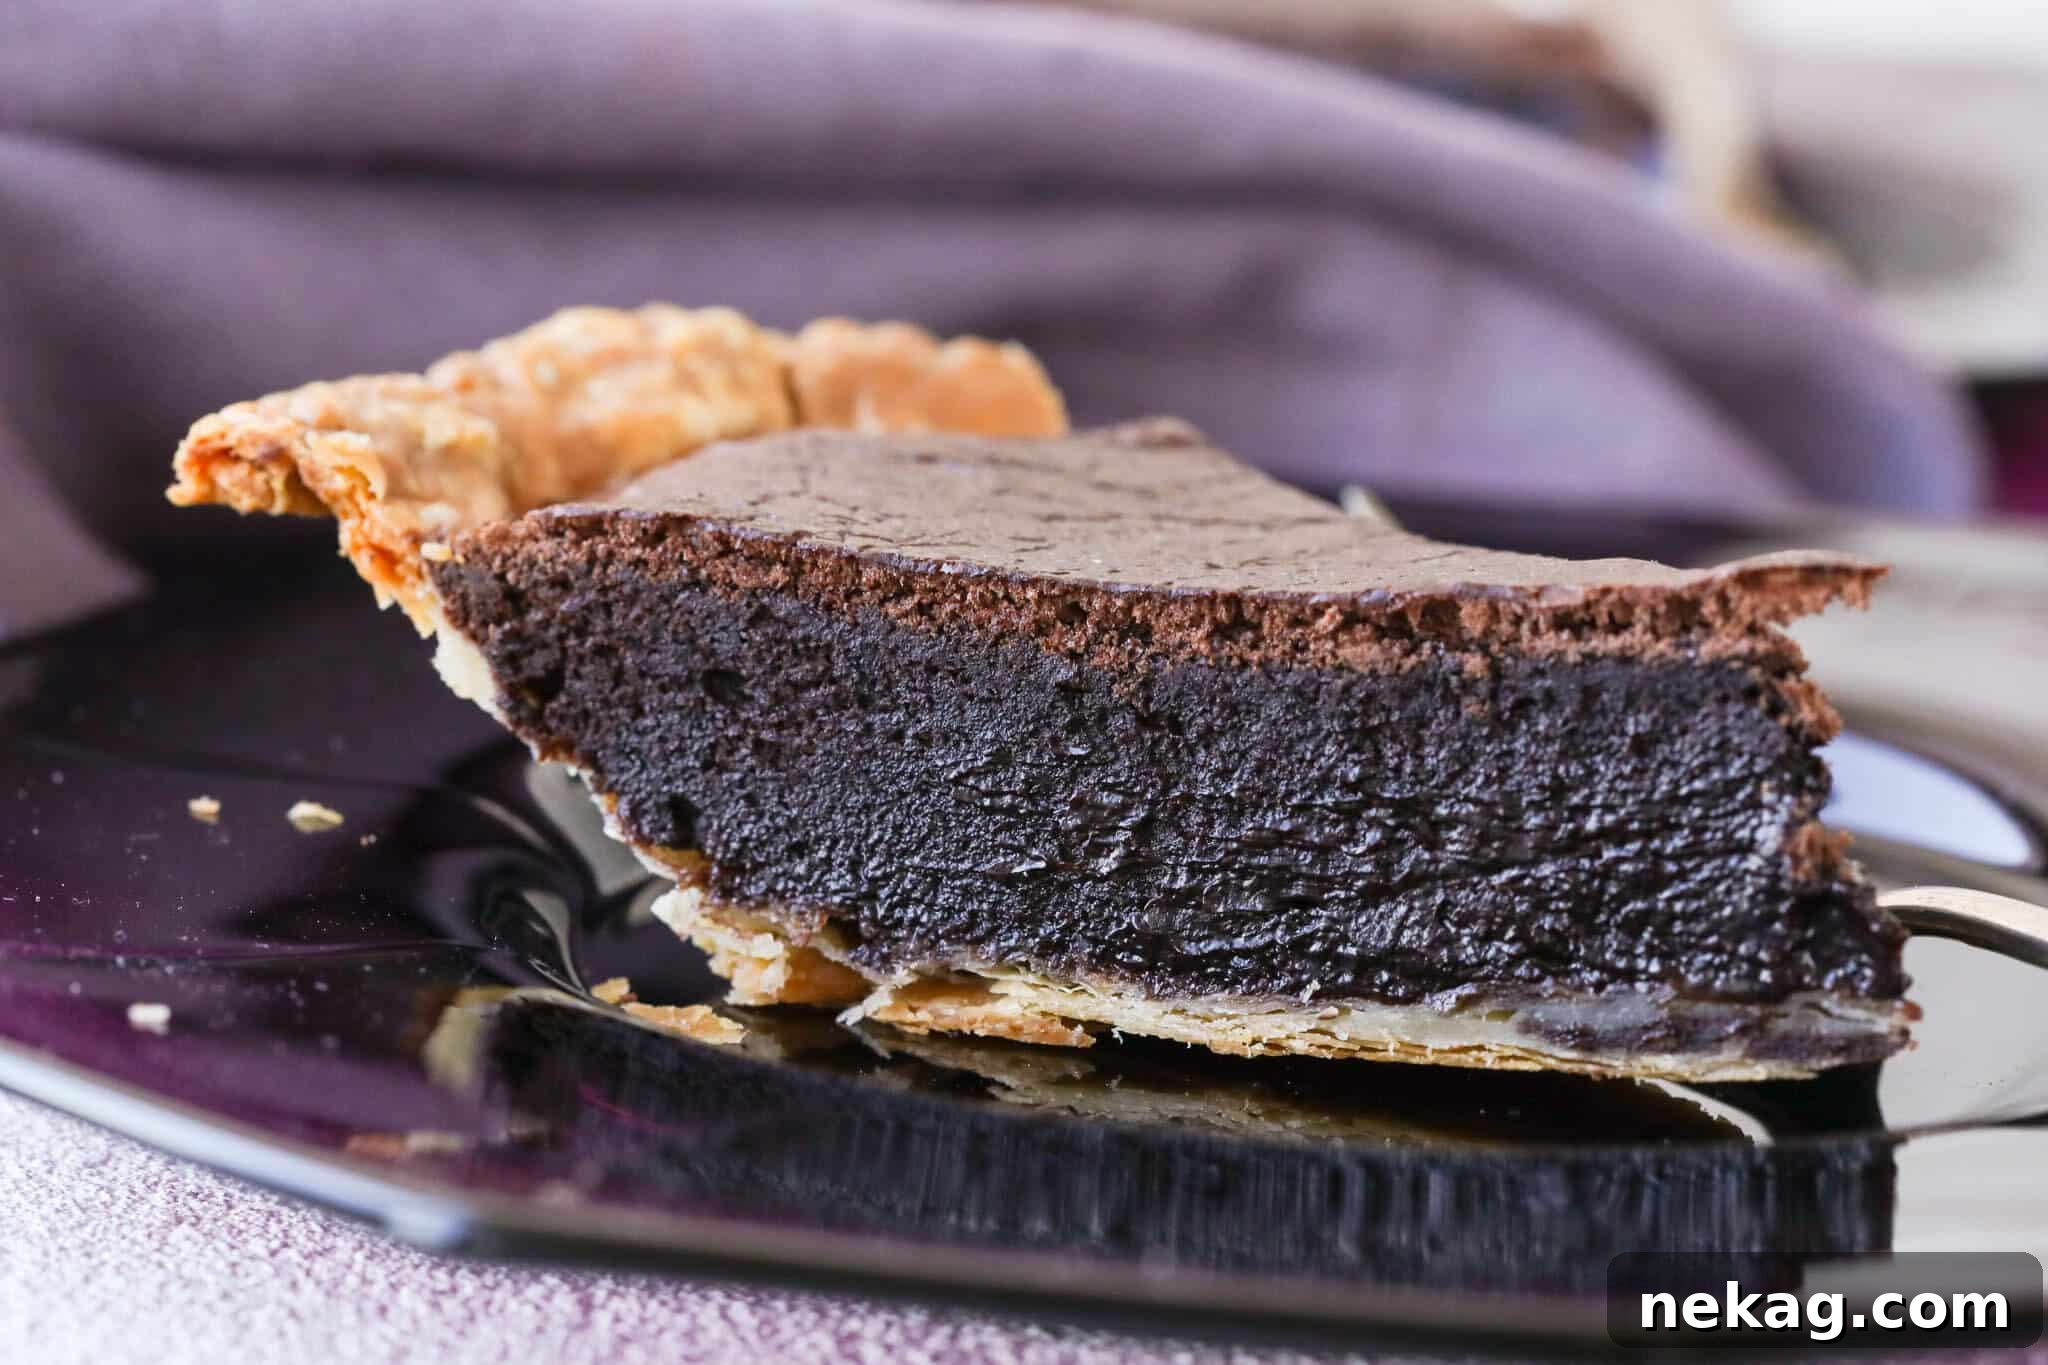
The careful whisking of eggs and sugar introduces a delightful lightness and airiness to the filling, mirroring the perfect texture found in my renowned **Fudgy Brownie Recipe**. This chocolate fudge pie confidently takes its place among other celebrated chocolate perfections, standing tall alongside my no-bake French Silk Pie, the impressive Chocolate Bundt Cake, and the comforting Chocolate Pound Cake. For an unparalleled serving experience, pair a generous slice with a scoop of creamy **vanilla bean ice cream**. Alternatively, for the ultimate chocolate overload, dish out some of **the best chocolate ice cream** or a warm drizzle of **homemade hot fudge sauce**. This pie isn’t just a dessert; it’s a celebration of chocolate in its finest form.
Table of Contents
- Why This is the Ultimate Chocolate Fudge Pie
- Expert Tips for Crafting the Perfect Fudge Pie
- Key Ingredients for Your Decadent Chocolate Pie
- Creative Variations & Flavor Enhancements
- Step-by-Step Guide: How to Bake This Incredible Fudge Pie
- Chef Lindsey’s Secret Ingredient Tip
- Perfect Pairings: Serving Your Chocolate Fudge Pie
- Frequently Asked Questions About Chocolate Pie
- Easy Chocolate Fudge Pie Recipe
- Explore More Delicious Desserts
Why This is the Ultimate Chocolate Fudge Pie: Unveiling Its Irresistible Qualities
- Unrivaled Rich, Creamy Texture: This chocolate fudge pie is renowned for its profoundly rich and velvety smooth texture. The secret lies in a luxurious combination of whole milk, which imparts a deep, dairy richness, seamlessly integrated with high-quality bittersweet chocolate and meticulously whisked eggs. Together, these ingredients form a thick, luscious baked custard filling that delivers pure fudgy goodness in every decadent forkful. Unlike other recipes, this one uses no added water, ensuring an intensely concentrated chocolate flavor and an unbelievably dense, yet tender, consistency.
- Effortless One-Bowl Preparation for Minimal Cleanup: Streamline your baking process and minimize post-dessert cleanup with this ingenious one-bowl recipe! Designed for convenience without compromising on flavor or texture, the entire chocolate filling can be mixed in a single bowl. This thoughtful approach saves you precious time and effort, making homemade pie more accessible than ever. What’s more, the filling is remarkably forgiving; you can even leave it on the counter for up to two hours while you attend to other kitchen tasks or prepare the rest of your meal. This pie is truly a no-fuss wonder, far less demanding than many other classic chocolate pie recipes.
- Quick and Efficient Prep, Chef-Developed Excellence: Drawing upon years of experience in bustling professional kitchens, this recipe has been meticulously developed to include only the most crucial and impactful elements. This commitment to efficiency means you can prepare this exquisite chocolate fudge pie quickly and effortlessly, even on a busy weeknight. Every step is optimized to deliver maximum flavor and perfect results with minimal complexity, allowing you to create a gourmet-quality dessert without the extensive time commitment typically associated with such indulgence.
- The Unique Secret Ingredient: Espresso Powder for Unforgettable Chocolate Depth: Prepare for an intensely chocolate experience, a pastry chef’s promise! The secret weapon in this recipe is a carefully measured touch of espresso powder. Far from making the pie taste like coffee, this remarkable ingredient acts as a powerful flavor enhancer, deepening and amplifying the natural complexity of the chocolate. It draws out the rich, roasted notes, making the chocolate flavor more pronounced and vibrant, without adding any bitterness. The result is a profoundly chocolatey pie that will leave a lasting impression on your palate.
Expert Tips for Crafting the Perfect Fudge Pie: Achieve Bakery-Quality Results
- Always Par-Bake Your Pie Shell: To guarantee a perfectly crisp and flaky crust with no dreaded “soggy bottom,” par-baking your pie shell is an absolute must. This crucial step pre-cooks the crust partially, creating a protective barrier against the moist chocolate filling. For a comprehensive guide, including detailed instructions and troubleshooting tips, refer to my dedicated post on how to par-bake a pie crust. Following these guidelines will ensure your rich fudge filling rests on a beautifully golden, buttery foundation every single time.
- Whisk the Filling Until Completely Homogeneous: Achieving a perfectly smooth and even texture in your baked pie filling begins with thorough whisking. Ensure you whisk the chocolate and egg mixtures until absolutely no streaks of egg are visible. A homogenous filling is critical for even baking and prevents any pockets of raw or overcooked egg, resulting in a consistently silky, flawless custard. Dedicate a few extra moments to this step for a truly perfect outcome.
- Exercise Caution When Melting Chocolate: When combining chocolate and butter, precision and patience are key. Melting these ingredients together slowly and evenly, ideally over a gentle double boiler, prevents the chocolate from seizing. Chocolate can seize (become grainy and thick) if it gets too hot too quickly, if the heat source is too direct, or if even a tiny drop of water comes into contact with it during melting. To avoid these issues, ensure the water in your double boiler is simmering gently, not boiling vigorously, and that the bottom of your bowl never touches the water. Release steam carefully to prevent any stray water droplets from falling into your precious pie filling.
- Gently Jiggle to Check for Doneness: Resist the urge to poke your chocolate pie with a knife or cake tester to check if it’s done. This can disrupt the delicate custard structure. Instead, you can tell your pie is perfectly baked when the center appears slightly puffed, and the entire filling jiggles cohesively as a single unit when gently moved. Think of the consistent jiggle of a perfectly set cheesecake or gelatin (Jell-O). This indicates that the proteins have coagulated just enough for a firm, yet tender, set.
Key Ingredients for Your Decadent Chocolate Pie: Crafting Flavor and Texture
- Par-Baked Pie Crust: The foundation of any great pie. You can opt for the convenience of a good quality store-bought pie dough, but for the best flavor and flakiest texture, I highly recommend making your own. My flaky butter pie crust or **vodka all-butter pie crust** are both excellent choices, crafted with all-purpose flour for superior results. Consider making two crusts and freezing one for future baking endeavors!
- Unsalted Butter: In baking, using **unsalted butter** is crucial because it allows you complete control over the total salt content in your recipe. The rich fat and dairy solids in butter are essential for rounding out the complex flavors of the chocolate and contributing to the incredible smoothness and luxurious mouthfeel of this baked custard filling.
- Dark Chocolate: The type of chocolate you choose significantly impacts the final flavor. For this chocolate pie, I prefer a **dark chocolate** with a cocoa solid percentage between 54% and 65%. This range provides a deep, intense chocolate flavor that perfectly balances the sweetness of the pie without being overly bitter. Always opt for chopping a quality chocolate bar rather than using chocolate chips, as bar chocolate melts more smoothly and incorporates better into the filling for a truly uniform texture.
- Cocoa Powder: I exclusively use **Dutch-processed cocoa powder** for its rich, deep flavor and distinctively darker color. Dutch-processed cocoa has been treated with an alkaline solution, which neutralizes its acidity and results in a smoother, less bitter taste profile compared to natural cocoa. It’s also the secret ingredient that elevates my Best Red Velvet Cake Recipe to unparalleled heights!
- Espresso Powder: This is the *secret ingredient* that truly amplifies the chocolate flavor in this recipe. **Espresso powder** doesn’t make your pie taste like coffee; instead, it deepens and enriches the chocolate notes, making the pie taste “more chocolatey.” While you can omit it if preferred, I strongly recommend its inclusion. For superior results, I only use Medaglia D’Oro instant espresso when baking, as its flavor and quality are consistent, never bitter, and it dissolves effortlessly even in cold liquids.
- Kosher Salt: **Kosher salt** is preferred in baking because it is less concentrated than table salt, and a teaspoon of kosher salt weighs less than finer ground varieties. Its primary role here is not just to add saltiness, but critically, to enhance and brighten the complex chocolate notes, bringing out the full spectrum of its flavor.
- Granulated Sugar: Beyond simply providing sweetness, **granulated sugar** plays a vital structural role. When beaten with the eggs, it helps to incorporate air, contributing to a lighter texture, and it also acts as a protective agent, shielding the delicate egg proteins from the direct heat of baking, preventing them from scrambling.
- Whole Eggs: As a fundamental component of any baked custard, the **whole eggs** are integral to the thickening process. The proteins in the egg whites and yolks coagulate during baking, setting the liquid ingredients into a firm yet tender custard. Whisking them thoroughly with sugar before combining with other ingredients ensures a smooth, even texture and prevents premature cooking.
- Egg Yolks: In addition to whole eggs, extra **egg yolks** are added to this baked custard for their unparalleled thickening power. Yolks contribute more fat and richness than whole eggs, without introducing additional moisture from the whites. This results in an exceptionally thick, intensely rich, and utterly luxurious chocolate pie. However, it’s a delicate balance; too many yolks can impart an undesirable “eggy” flavor, which is why the precise ratio in this recipe is key.
- Light Brown Sugar: While granulated sugar provides primary sweetness, light brown sugar adds a subtle hint of molasses and moisture. This slight variation in sugar not only contributes a deeper, more nuanced sweetness but also helps to achieve that desirable fudgy texture and crackly top by interacting uniquely with the other ingredients during baking.
For precise measurements and full ingredient details, please refer to the comprehensive recipe card below.
Creative Variations & Flavor Enhancements: Personalize Your Chocolate Pie
- Add Toasted Nuts for Crunch and Flavor: Elevate your chocolate pie with a delightful textural contrast and nutty flavor. Feel free to incorporate up to 2 cups of your favorite roasted, chopped pecans or walnuts into the filling before baking. The warmth of the pie will subtly toast them further, releasing their aromatic oils and adding a wonderful dimension to each bite.
- Transform it into a Caramel Chocolate Pie: For a truly decadent treat, turn this into a glorious caramel chocolate pie. Once the pie has completely cooled, generously pour about a cup of my rich **salted caramel sauce** over the top. Chill the pie thoroughly before slicing and serving; as it slowly warms to room temperature, the luscious caramel sauce will slightly loosen, creating a luxurious cascade over each slice. Alternatively, for a more integrated caramel flavor, you can whisk up to ½ cup of the caramel sauce directly into the pie filling before baking. Imagine the delightful fusion of my caramel pudding and dark chocolate pudding, now in irresistible pie form!
- Indulge in a Peanut Butter Chocolate Pie: For those who adore the classic combination of chocolate and peanut butter, this variation is a must-try. Simply add ½ cup of your favorite creamy peanut butter to the chocolate filling mixture before baking. This simple addition transforms the pie into a rich, nutty, and utterly comforting chocolate peanut butter masterpiece. It’s a flavor pairing my great-grandma adored, as evidenced by her beloved Old Fashioned Peanut Butter Cookies!
- Crown Your Pie with a Delicious Streusel Topping: Introduce a fantastic crumbly texture and additional sweetness by adding an easy and delicious streusel topping. For streusel pieces that hold together beautifully and offer a satisfying chew, opt for my **brown sugar streusel** recipe. If you prefer a lighter, more delicate crumb topping, the recipe from my **pumpkin coffee cake** would be an exquisite choice.
- Experiment with Different Pie Crusts: While the all-butter crust is magnificent, this old-fashioned chocolate pie is wonderfully versatile and tastes delicious in various other crusts. Consider baking it in a delicate pâte sablée (sweet shortcrust pastry) for a more refined texture, a crunchy **baked graham cracker crust** for a hint of honeyed spice, or for the ultimate childhood nostalgia, an **Oreo pie crust**, which perfectly complements the rich chocolate filling.
Step-by-Step Guide: How to Bake This Incredible Fudge Pie
Further precise details and exact measurements for each ingredient can be found in the comprehensive recipe card located at the end of this article.
**Phase 1: Expertly Par-Baking Your Pie Crust**
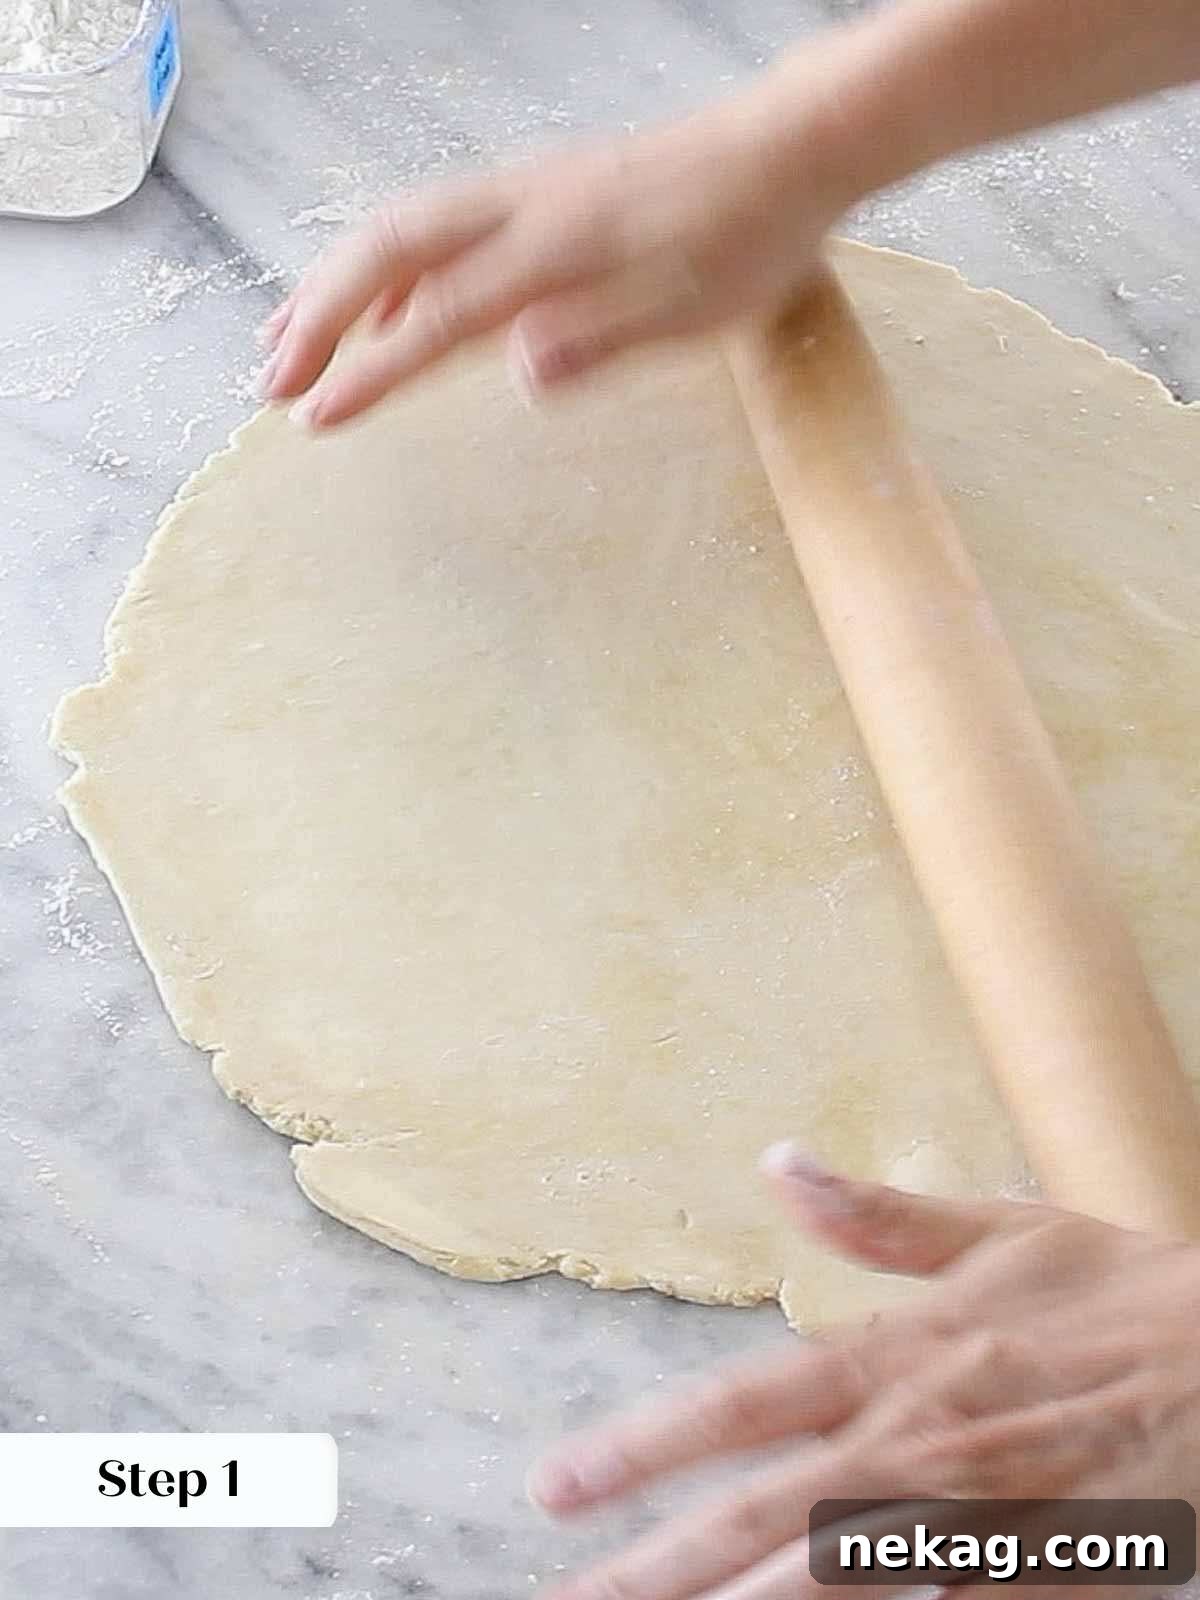
Step 1: Prepare and Chill the Dough. Begin by preheating your oven to 350°F (175°C) for convection ovens, or 375°F (190°C) for conventional ovens. If you’re using homemade pie dough, gently roll out one portion of the dough on a lightly floured surface until it reaches an even thickness of approximately 1/8th inch. This precise thickness is crucial for a tender, flaky crust. Once rolled, carefully transfer the dough to a flat baking sheet and chill it in the refrigerator for at least 30 minutes. This essential chilling period allows the gluten strands in the dough to relax, preventing shrinkage during baking, and ensures the butter re-solidifies, which is key to achieving that desirable flaky texture.
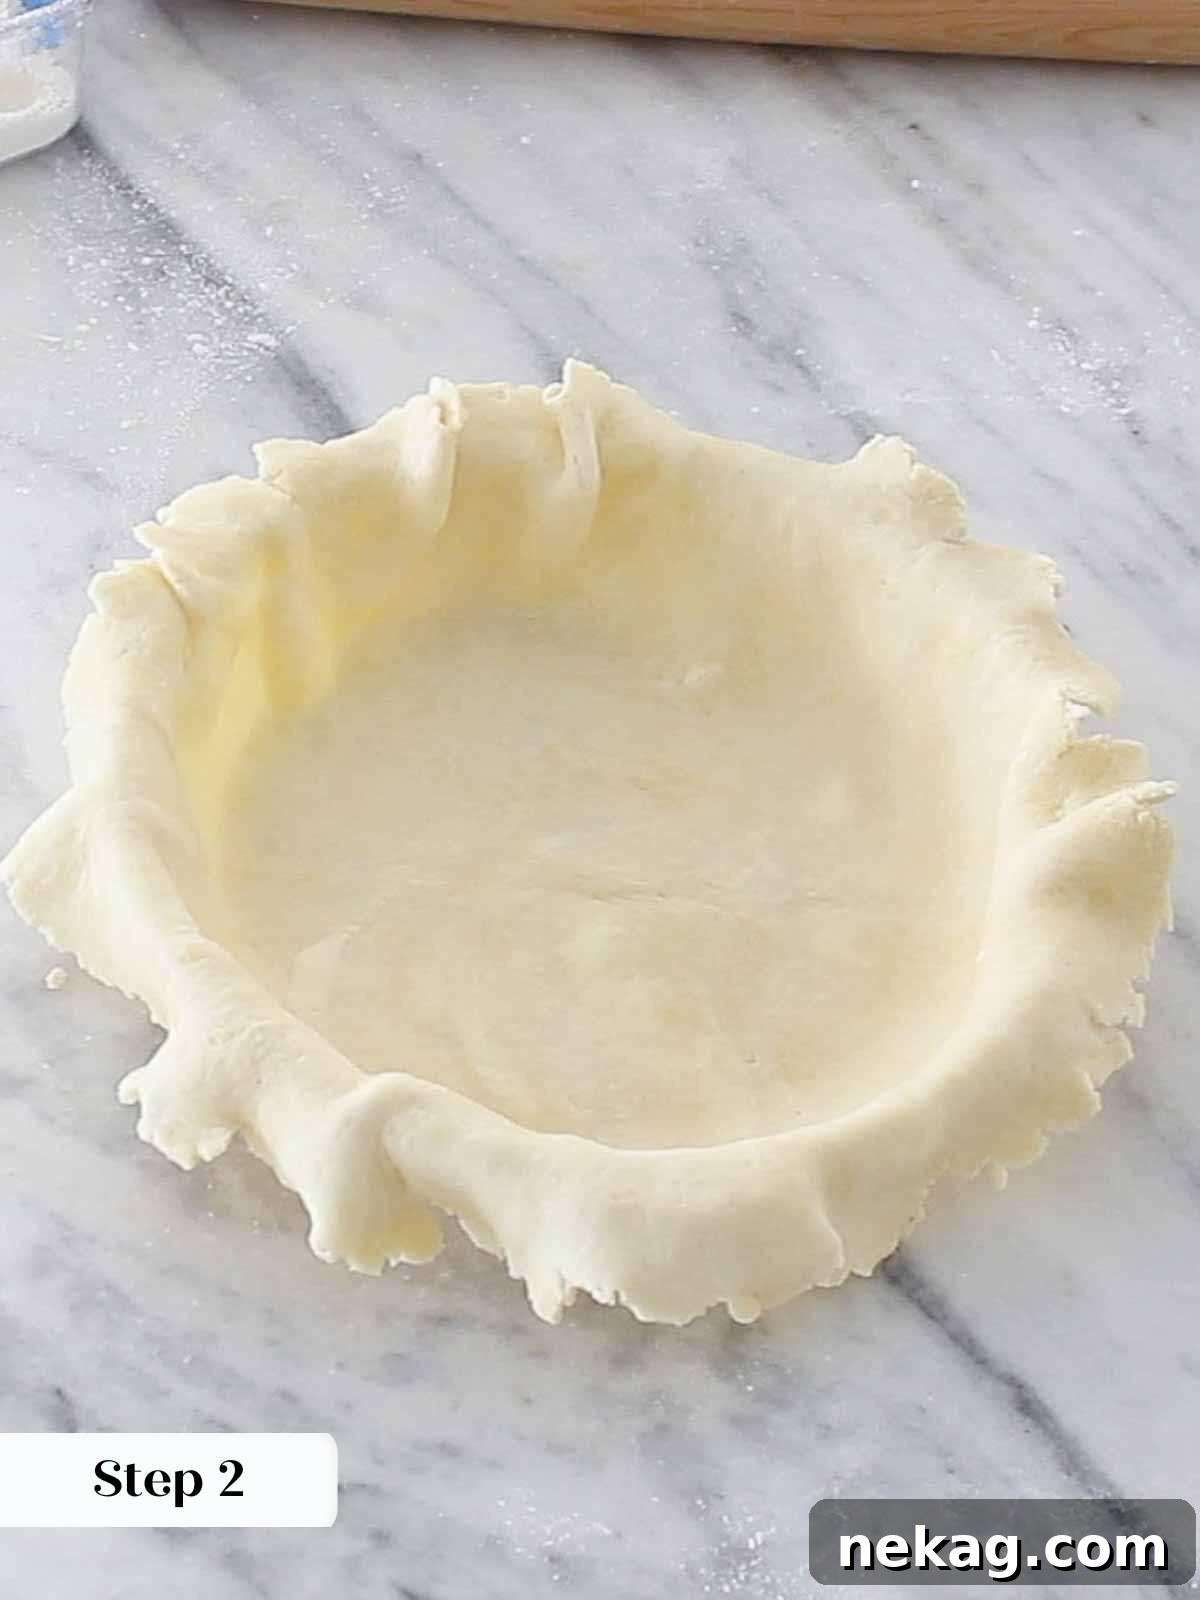
Step 2: Fit and Trim the Crust. Remove the chilled pie dough from the refrigerator and delicately place it over a 9-inch pie plate or tin. Allow the dough to warm up slightly, just enough to become pliable and workable without tearing. Carefully lift the edges of the dough, allowing it to gently settle into the bottom and sides of the pie dish. Do not stretch or pull the dough, as this can cause it to retract during baking. Gently press the dough against the sides of the dish, ensuring it fits snugly, and allow the excess edges to generously overhang the dish. Begin on one side, rolling the overhanging edges neatly underneath towards the dish. Continue rolling until the edge is flush with the rim of the pie dish, then gently press it down onto the dish to create a secure seal. Repeat this process around the entire circumference of the crust, creating a clean, sturdy edge.
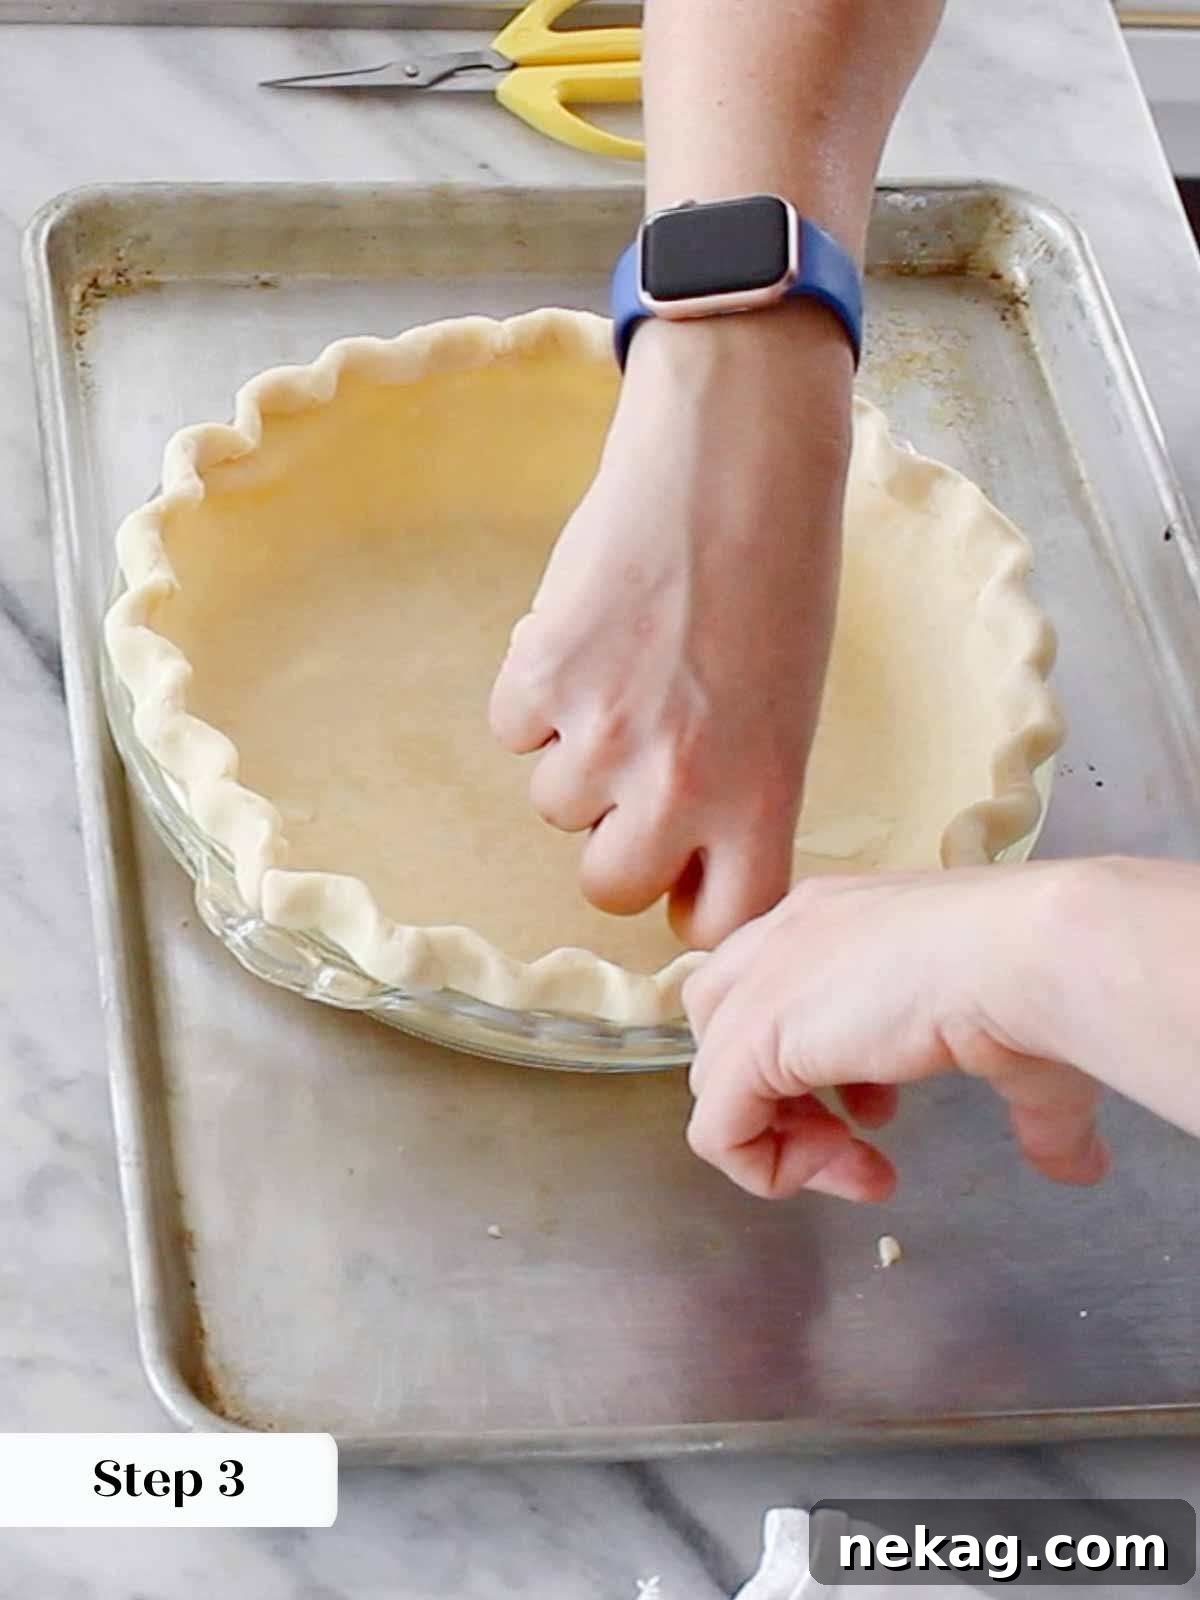
Step 3: Flute and Re-Chill. To create a beautiful, decorative edge, flute the pie crust by pressing one knuckle from the outside of the crust while simultaneously pressing two knuckles or fingertips around it from the inside. I personally prefer using my knuckles for a more defined flute, but fingertips also work effectively. Once fluted, return the pie crust to the refrigerator and chill for another 10 to 30 minutes. The chilling time depends on how warm the dough became during handling. If the dough remained relatively cold, a brief 10-minute chill will suffice to firm it up. This step helps the fluted edges hold their shape during baking.
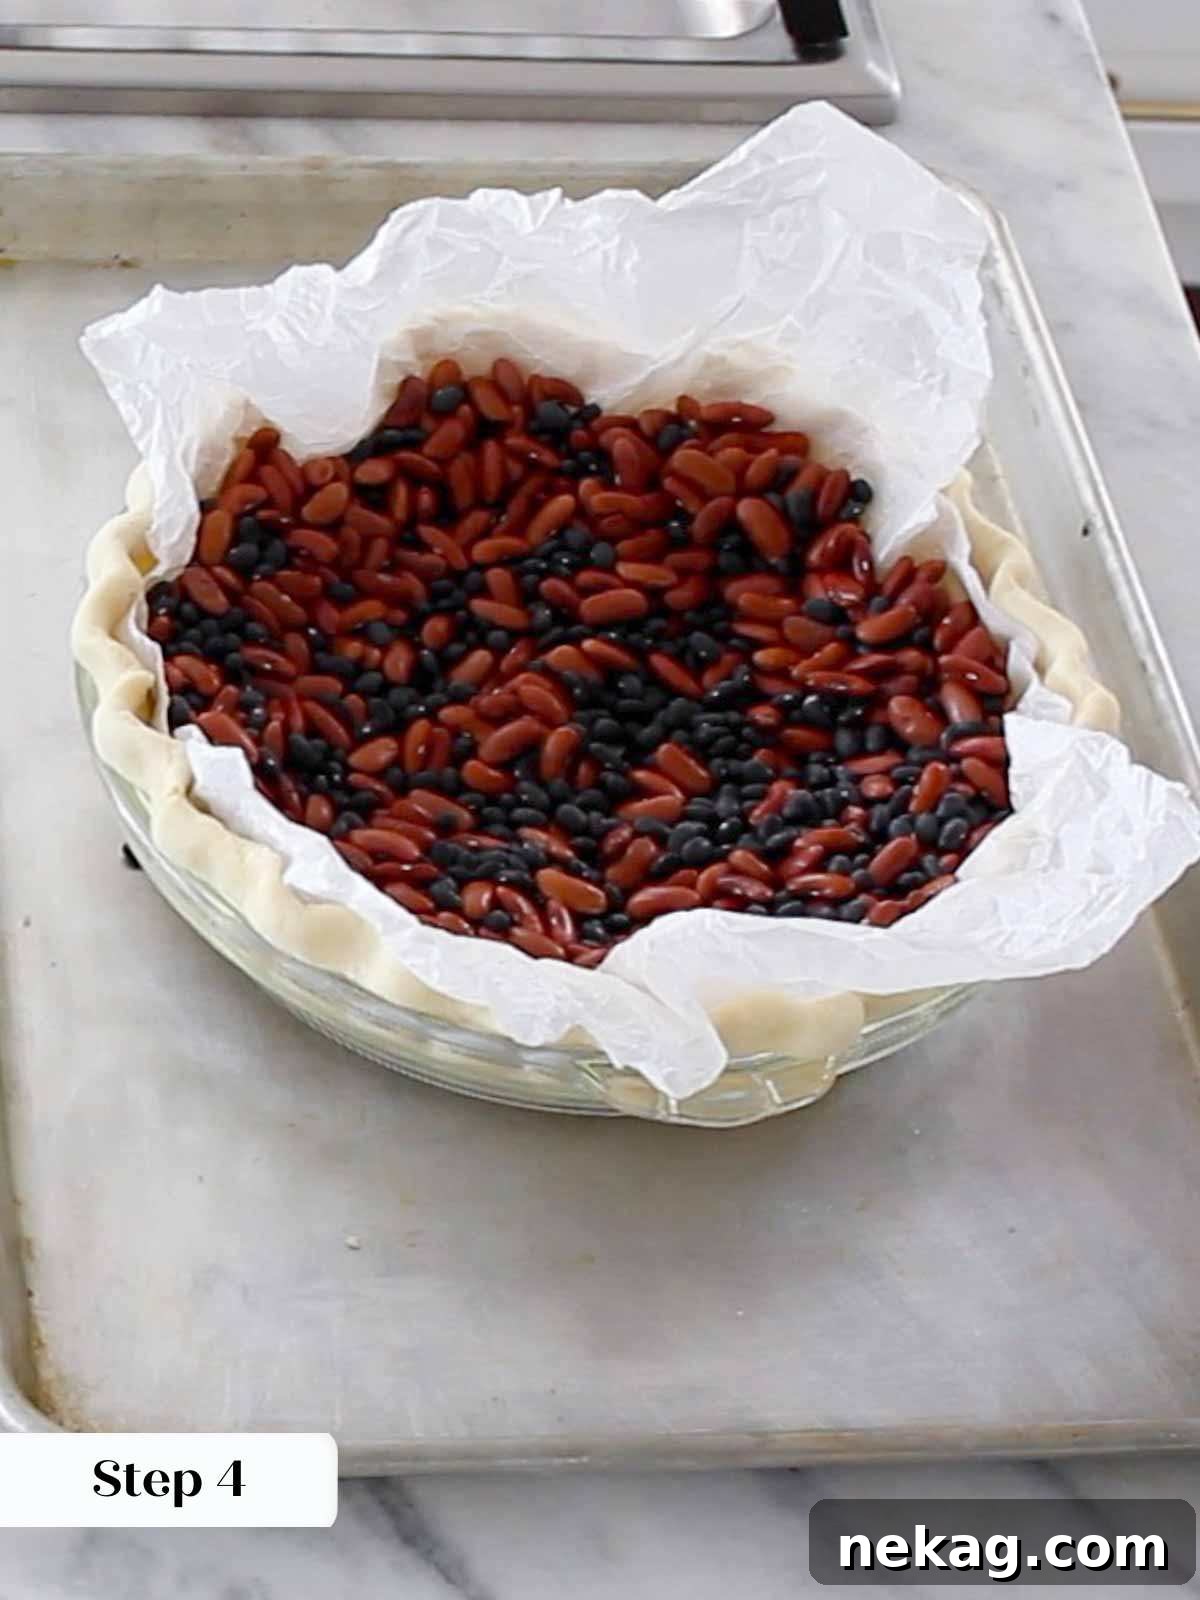
Step 4: Prepare for Blind Baking. Take a piece of parchment paper and crumple it thoroughly. This crumpling makes the parchment more pliable and allows it to conform perfectly to the shape of your chilled pie crust. Carefully line the inside of the crust with the crumpled parchment paper, ensuring it covers the bottom and extends up the sides. Fill the parchment-lined crust with pie weights, dried beans, or uncooked rice. I’ve found that dried beans work exceptionally well for providing even weight distribution, preventing the crust from bubbling up during baking.
It’s crucial not to dock the dough (prick it with a fork) for this recipe. If you’re eager to delve deeper into the intricacies and techniques of par-baking, I’ve thoroughly explained every detail in my comprehensive How to Blind Bake a Pie tutorial!
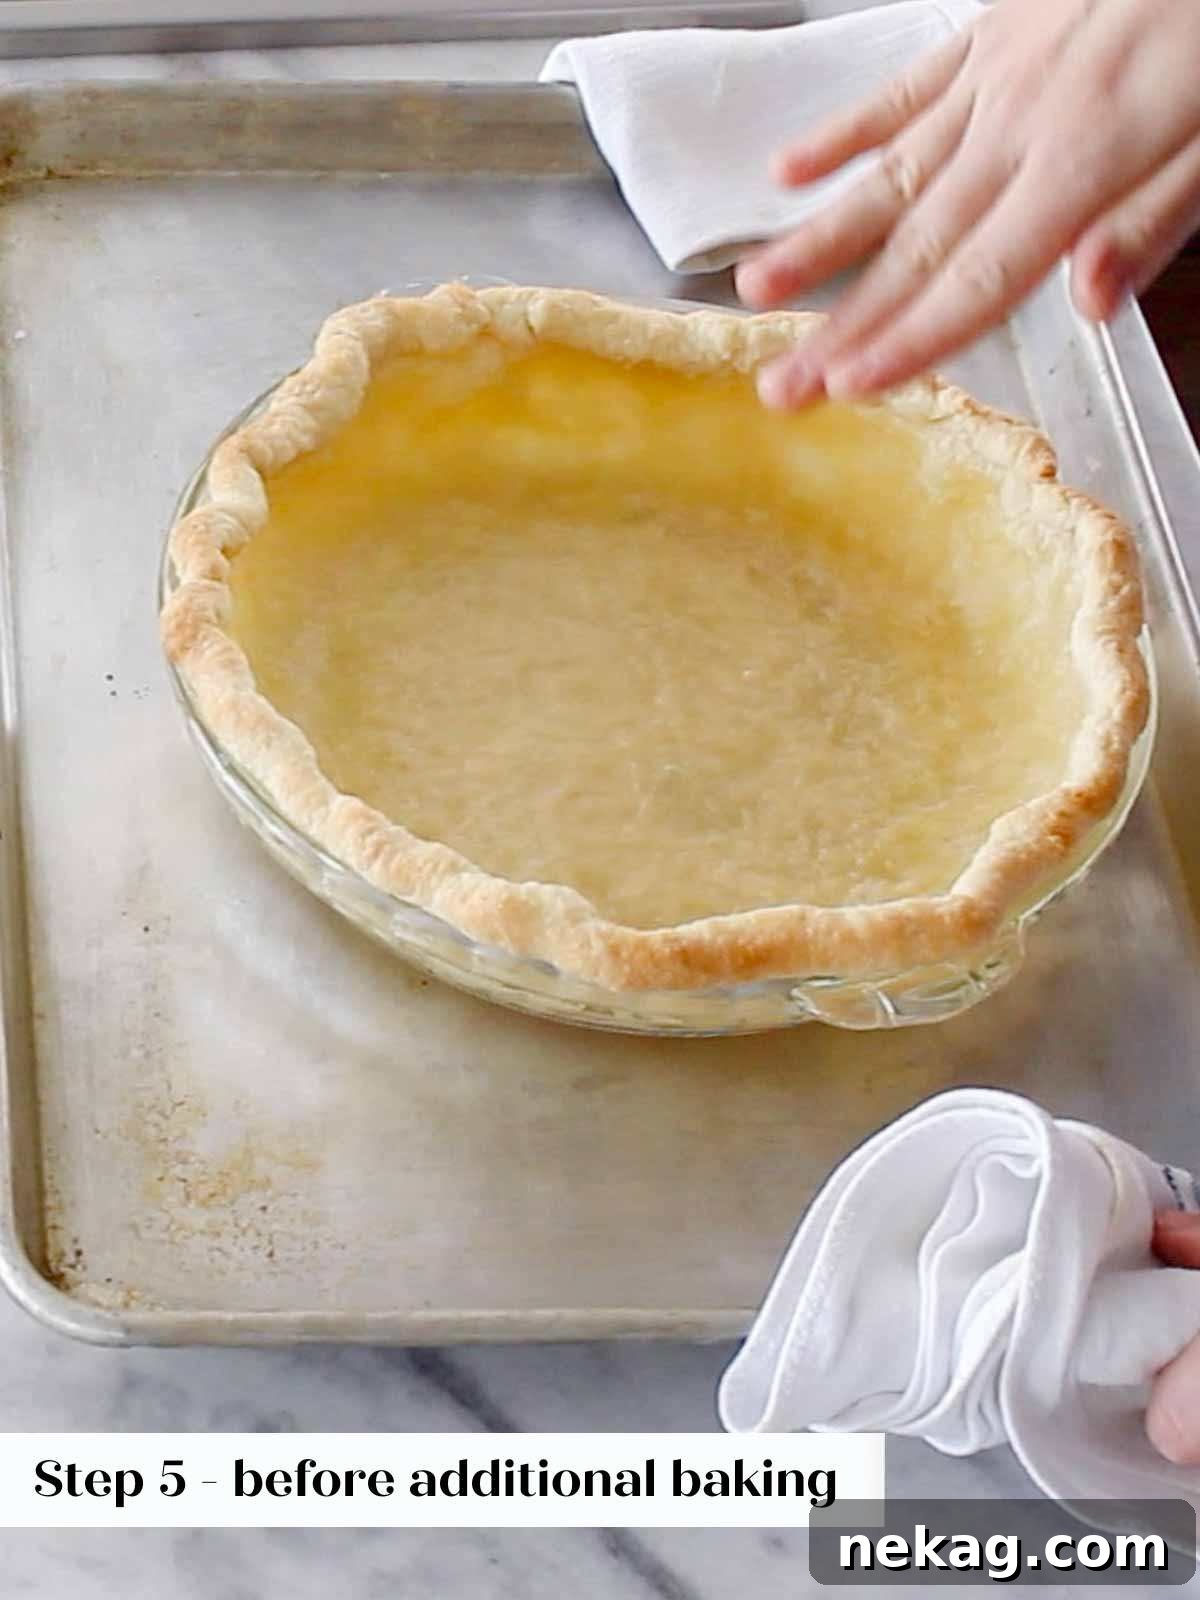
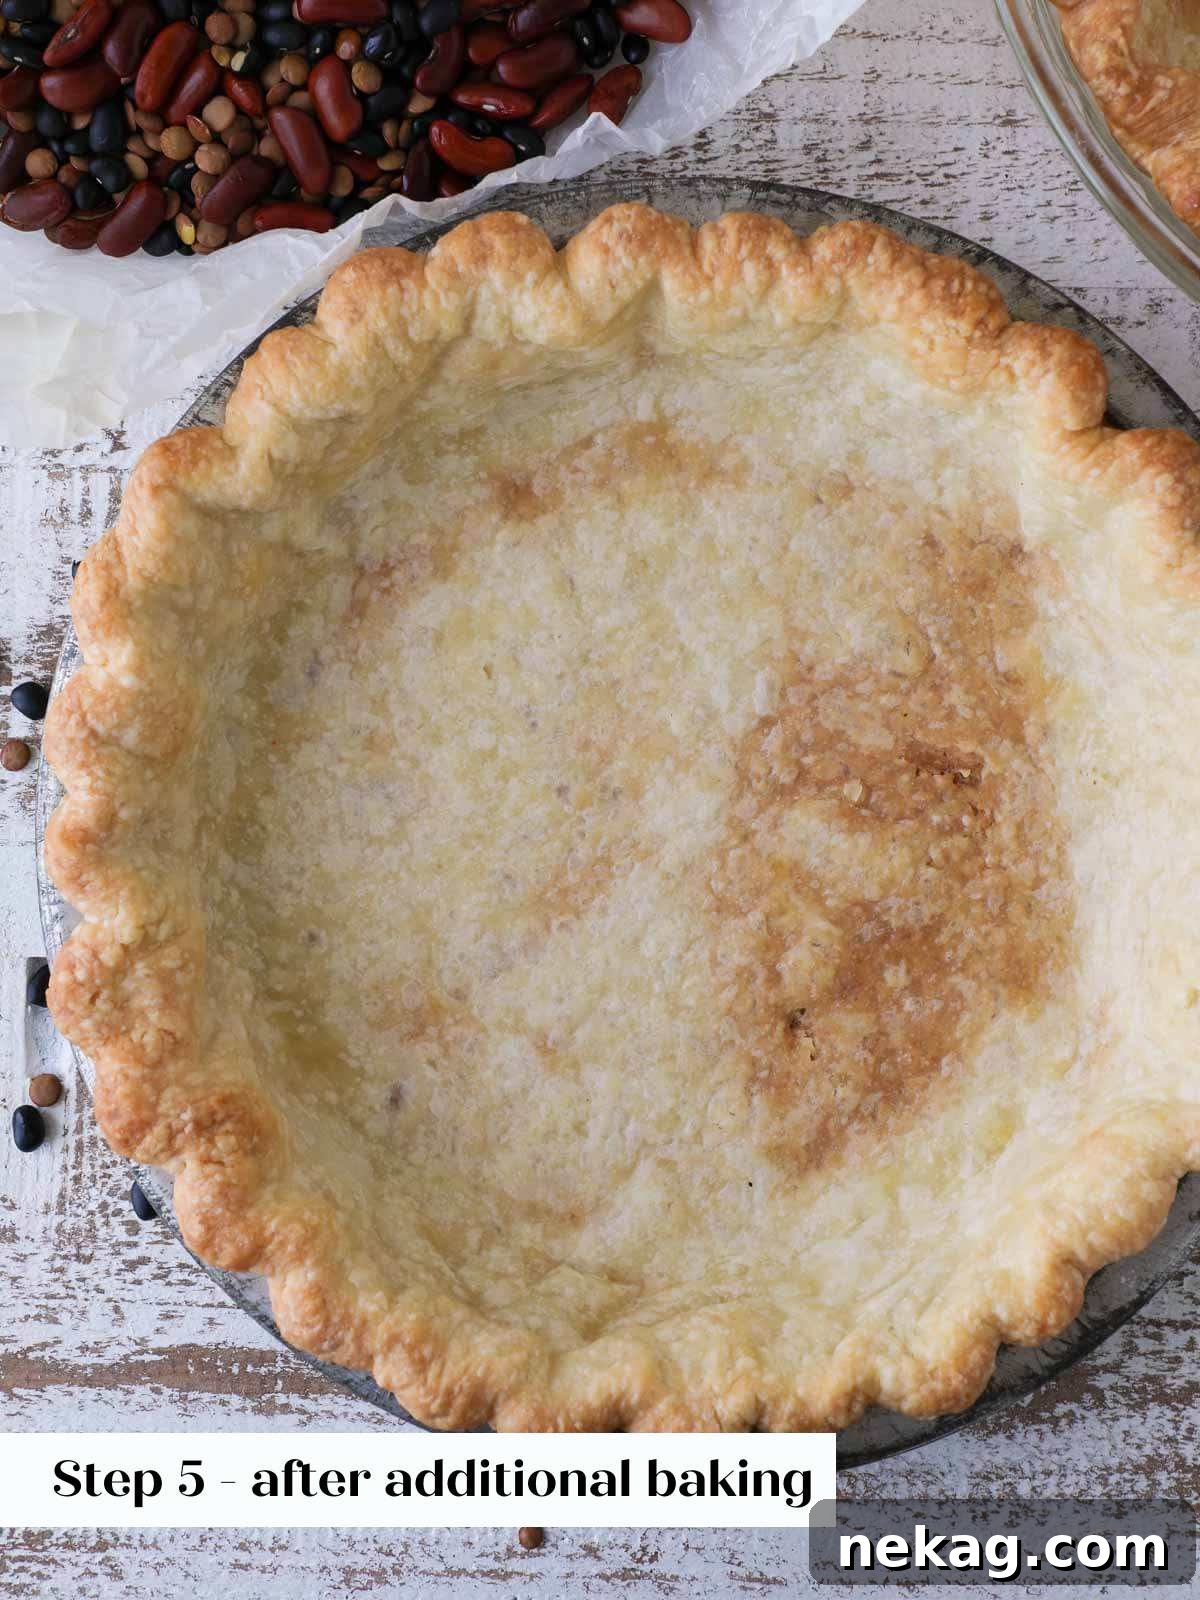
Step 5: Bake the Crust to Par-Baked Perfection. Place the pie crust, filled with weights, into your preheated oven and bake for 15-20 minutes. After this initial baking period, carefully remove the pie weights and the parchment paper. The crust should appear lightly golden brown and no longer raw – this is the crucial “par-baked” stage. The crust will continue to bake and crisp up further with the addition of the chocolate filling. A properly par-baked crust ensures a wonderfully flaky and structural base for your rich pie.
Once your pie crust has reached the par-baked stage, it offers remarkable flexibility. You can proceed directly to fill it while it’s still warm from the oven, or you can cool it completely, wrap it tightly, and freeze it for convenient use at a later date. A par-baked crust can also be stored at room temperature for up to 3 days, making it an excellent component for make-ahead meal planning.
**Phase 2: Crafting and Baking the Decadent Pie Filling**
Step 6: Adjust Oven Temperature and Prepare Double Boiler. Reduce your oven temperature to 325°F (160°C) for convection settings, or 350°F (175°C) for conventional ovens (ensure the fan is off for conventional). On your stovetop, find a medium-sized saucepot and pour approximately one inch of water into the bottom. This will serve as the base for your double boiler setup, providing gentle, indirect heat for melting the chocolate.
This recipe is perfectly scaled for one standard 9-inch pie. If you’re using a deep-dish pie pan or a slightly larger pie dish, I highly recommend increasing the recipe quantities by 1.5 times to ensure your pie is adequately filled. When using a larger quantity of filling, you’ll need to adjust the baking time accordingly, cooking the pie for closer to 50 minutes to achieve the perfect set.
Step 7: Melt Chocolate Mixture. Select a large, heat-proof bowl that can comfortably rest on top of your saucepot. Crucially, the bottom of this bowl should not touch the simmering water; it should be suspended above it, allowing steam to gently heat the contents. In this top bowl, combine the cubed unsalted butter, chopped dark chocolate, cocoa powder, espresso powder, and kosher salt. Bring the water in the bottom pot to a gentle simmer. As the steam rises, it will slowly and evenly melt all the ingredients in the upper bowl. Stir the mixture occasionally with a heat-proof spatula or whisk to ensure a smooth, lump-free consistency and prevent any scorching.
Step 8: Whisk Eggs and Sugars. While the chocolate mixture is melting, turn your attention to the eggs. In a separate, clean bowl, whisk together the whole eggs and egg yolks. Continue whisking until the mixture becomes slightly lightened in color, perfectly smooth, and absolutely no visible streaks of egg white remain. Achieving this homogenous consistency is vital for a uniform custard. Next, incorporate the granulated sugar and light brown sugar into the egg mixture. Continue whisking vigorously until the eggs become light, fluffy, and significantly increased in volume. This aeration adds a wonderful texture to the final pie.
While it is possible to prepare this entire recipe in a single bowl, I personally prefer to use two separate bowls. This allows me to ensure that the eggs are thoroughly and properly whisked to their ideal consistency, which is a critical step for achieving the perfect texture in the pie filling.
Step 9: Cool Chocolate Mixture. As soon as the chocolate mixture in the double boiler is completely melted and smooth, promptly remove it from the stovetop. It’s important that the mixture is melted but not excessively hot, as extreme heat can cook the eggs prematurely in the next step. Give it a final stir or whisk to ensure it’s well combined and slightly cooled.
Step 10: Combine Mixtures Swiftly. Pour the melted chocolate mixture into the whisked egg mixture all at once. This step requires swift action. Work quickly and efficiently to whisk the two mixtures together thoroughly. Speed is essential here to prevent the chocolate from cooling and seizing, and equally important, to prevent the warm chocolate from prematurely cooking the delicate egg proteins, which could lead to a scrambled texture rather than a smooth custard.
Step 11: Pour into Par-Baked Shell. Once the chocolate and egg mixtures are fully combined and homogenous, carefully pour the luscious filling directly into your perfectly par-baked pie shell. Ensure the filling is distributed evenly across the crust.
If your par-baked pie crust isn’t quite ready at this precise moment, there’s absolutely no need to worry! This completely mixed chocolate filling is remarkably stable and can comfortably sit at room temperature for up to two hours, patiently waiting for your crust to be prepared. Furthermore, you can even pour the filling into a pie crust that is still warm from the oven; no additional waiting time is required before proceeding to the baking step.
Step 12: Bake to Perfection. Place the filled pie into your preheated oven and bake for approximately 40 minutes. The pie is perfectly baked when the center appears slightly puffed, and when the entire filling, when gently nudged, jiggles slightly and cohesively as a single unit—much like a perfectly set Jell-O or a rich cheesecake. It’s vital to resist the temptation to poke the pie with a knife or a cake tester to check for doneness, as this can mar the smooth surface and disrupt the delicate custard structure.
Step 13: Cool and Chill for Optimal Slicing. Once baked, remove the pie from the oven and allow it to cool completely at room temperature on a wire rack. This slow cooling process allows the custard to fully set and solidify. After it has reached room temperature, wrap the cooled pie securely in plastic wrap and transfer it to the refrigerator. This pie slices best when thoroughly chilled, resulting in clean, elegant pieces that showcase its dense, fudgy interior.
Chef Lindsey’s Secret Ingredient Tip: Mastering Espresso Powder
Espresso powder, while seemingly unassuming, is a remarkably powerful secret ingredient in chocolate desserts. However, with great power comes great responsibility. To truly unlock its magic, be sure you’re using a brand of espresso powder that you genuinely love and trust for its quality and flavor profile. Crucially, measure it carefully and precisely. The goal is to enhance and deepen the rich, complex notes of the chocolate, subtly amplifying its inherent deliciousness, without ever allowing the espresso flavor to overpower your palate or become detectable as a distinct coffee taste. It’s all about balanced amplification.
Perfect Pairings: Elevate Your Chocolate Fudge Pie Experience
- Go Traditional with a Cloud of Whipped Cream: For a timeless and universally loved pairing, serve your chocolate fudge pie with a generous dollop of **lightly sweetened homemade whipped cream**. The airy, cool cream provides a wonderful contrast to the dense, warm chocolate. For an unexpected and sophisticated twist, try a dollop of crème fraiche whipped cream, offering a subtle tangy note that beautifully cuts through the richness of the pie.
- Drizzle with a Luxurious Sauce: Elevate the pie with a decadent sauce. A luscious drizzle of my **salted caramel sauce** introduces a delightful interplay of sweet and salty, complementing the chocolate’s depth. If you’re serving this pie during the autumn months, consider a delicate touch of **maple caramel sauce** for a warm, seasonal embrace.
- Ice Cream: The Quintessential Accompaniment: A scoop of ice cream is undoubtedly a classic and always welcome accompaniment. I particularly enjoy serving each slice with a scoop of fragrant **vanilla bean ice cream**. The bright, floral notes of vanilla perfectly complement the deep chocolate flavor, while the cool, creamy texture provides a refreshing balance to the rich pie filling. Alternatively, a spoonful of **Vanilla Bean Crème Anglaise**—essentially a refined, pourable custard akin to melted ice cream—offers a sophisticated twist.
- Add a Satisfying Crunch: Introduce an exciting textural element with a savory crunch. A sprinkle of toasted nuts, such as pecans or walnuts, or even sophisticated cocoa nibs, will delight true chocolate lovers. For an extra touch of culinary flair, you could also get wonderfully fancy and craft some homemade pumpkin seed brittle to crumble over the top. The varied textures make each bite an adventure!
Frequently Asked Questions About This Decadent Chocolate Pie
Once fully baked and cooled, chocolate pie can be stored at cool room temperature for up to 3 days, especially if your kitchen isn’t overly warm. For extended freshness, or if you prefer a firmer texture, it can be refrigerated for up to 1 week. For longer-term storage, the pie freezes beautifully for up to 2 months. Always ensure the cooled pie is wrapped tightly in plastic wrap, or placed in an airtight container, before storing to prevent it from drying out or absorbing other odors.
No, it is generally not recommended to dock the crust when making a chocolate pie, especially one with a baked custard filling like this recipe. The rich, baked custard filling is inherently quite loose and liquid before it sets. If you were to prick holes in the crust, the filling could easily seep through these perforations and potentially burn on the pie tin, or worse, make the bottom of your carefully par-baked crust soggy and unappetizing. The par-baking process, as described in this recipe, is sufficient to prevent the crust from puffing excessively.
Absolutely! This chocolate fudge pie is an excellent make-ahead dessert, perfect for entertaining or holiday preparation. You can prepare and par-bake the pie crust up to a week in advance; I often wrap these pre-baked shells and store them in the freezer for ultimate convenience. The entire pie, once assembled and baked, can also be prepared up to one week in advance and stored in the refrigerator. For added flexibility, the chocolate filling itself can be mixed up to two hours before you plan to pour it into the crust and bake, allowing for seamless assembly on baking day.
If you tried this wonderful **chocolate fudge pie recipe** and absolutely loved it, please take a moment to leave a 🌟 star rating and share your experience in the comments below. I truly cherish hearing from you; your feedback and comments always make my day!
Easy Chocolate Fudge Pie
Chef Lindsey
50
40
1
30
1
9-inch pie
Comment
Print Recipe
Ingredients
- 1 par-baked pie crust using store-bought or homemade pie crust
- ¼ cup unsalted butter cubed
- 3 oz dark chocolate chopped
- ⅓ cup cocoa powder Dutch-processed or regular
- ¼ teaspoon espresso powder
- ¼ teaspoon kosher salt
- 1 cup granulated sugar
- ¼ cup light brown sugar
- 3 whole eggs
- 2 egg yolks
Instructions
Par-Bake Your Pie Crust:
-
Preheat the oven to 350°F convection or 375°F conventional. If using homemade pie dough, roll out one portion of pie dough on a lightly floured surface until about 1/8th inch thick. Chill 30 minutes flat on a baking sheet. This allows the gluten to relax and the butter to re-solidify.
-
Place chilled dough on top of a 9-inch pie dish or tin. Allow to warm up just enough to be workable. Lift up the edges and allow it to settle on the bottom. Gently press the sides to fit the dish allowing the edges to overhang the dish. Start on one side and roll the edges under towards the dish. Roll until you reach the dish then gently press it down on the dish to seal. Repeat with the rest of the crust.
-
Flute the edges by pressing one knuckle on the outside and two knuckles around it from the inside of the crust. I prefer using my knuckles but you could also use your fingertips. Chill for 10-30 minutes depending on how warm it got. If it is still cold, just 10 minutes will do.
-
Crumple a piece of parchment paper and line the inside of the chilled crust. Fill with pie weights, beans or rice. I find beans work best.
-
Bake crust for 15-20 minutes and then remove the weights and parchment. I remove the parchment and weights when the crust has just begun to brown and doesn’t look raw anymore. This is the par-baked stage. The crust will bake again with the chocolate filling.
Make & Bake the Pie:
-
Reduce the oven temperature to 325°F convection or 350°F conventional (no fan). On the stovetop, cover the bottom of a medium saucepot with about an inch of water.
-
Choose a large bowl that will fit on top of the pot. The bottom of the bowl should not touch the water. In this bowl, place butter, dark chocolate, cocoa powder, espresso powder and kosher salt. Bring the water in the pot to a simmer and melt all the ingredients together, stirring occasionally.
-
Meanwhile in another bowl, whisk the whole eggs and egg yolks together until they are slightly lightened, smooth, and no visible whites remain. Whisk in the granulated sugar and light brown sugar until the eggs are light and fluffy.
-
Remove the chocolate mixture from the stove as soon as it melts. You want it to be melted but not hot. Stir or whisk.
-
Pour the chocolate into the egg mixture at one time. Work quickly to keep the chocolate from cooling and seizing or the eggs from cooking prematurely in the warm chocolate. Whisk together thoroughly.
-
Pour into the parbaked shell.
-
Bake in a preheated oven for 40 minutes or until it puffs in the center and jiggles slightly as a unit like Jell-O or a cheesecake. Try not to poke the pie with a knife or cake tester to test for doneness.
-
Allow to cool completely at room temperature before wrapping and refrigerating. This pie slices best when cold.
Video
Notes
Presentation: Achieving perfectly clean and elegant slices of this rich chocolate fudge pie is simple with three key steps: First, allow the pie to cool completely at room temperature. Second, wrap it tightly and refrigerate until it is thoroughly cold throughout. Finally, use a sharp, thin-bladed knife that has been dipped in hot water and wiped clean. Dip and wipe the knife between each cut for the cleanest, most precise slices every time, showcasing the beautiful fudgy interior.
Flavor Tips: The choice of chocolate significantly influences the pie’s taste. I highly recommend using dark chocolate with at least 54% cocoa solids but no more than 65%. This range provides a balanced richness that prevents the pie from being overly sweet while delivering a deep, complex chocolate flavor. Furthermore, don’t underestimate the power of espresso powder; it acts as a phenomenal flavor amplifier for the chocolate, making it taste even more intense and delicious. However, it can be omitted if you prefer, or if you don’t have it on hand.
Technique: To prevent a disappointing soggy bottom, especially with a moist custard filling, it is absolutely essential to par-bake your pie crust. This preliminary baking step creates a firm barrier that keeps the crust crisp and flaky underneath the rich chocolate filling. This technique is detailed in our step-by-step instructions and is crucial for a successful pie.
Storage: Proper storage is key to enjoying your chocolate pie for longer. Cooked chocolate pie can be kept at room temperature for up to 3 days. For a firmer set and extended freshness, refrigerate it for up to 1 week. If you plan to enjoy it much later, the pie can be frozen for up to 2 months. Always ensure the cooled pie is well-wrapped in plastic wrap before storing to maintain its quality and prevent freezer burn.
Note on Pan Size: This recipe yields enough filling for one standard 9-inch pie. If you are using a deep-dish pie pan or a pie dish that is slightly larger than a standard 9-inch, I recommend increasing all ingredient quantities by 1.5 times to ensure your pie is generously filled. Be aware that a larger pie will require an adjustment in baking time, typically needing closer to 50 minutes in the oven.
Nutrition
Calories: 3042kcal
|
Carbohydrates: 394g
|
Protein: 46g
|
Fat: 153g
|
Saturated Fat: 74g
|
Polyunsaturated Fat: 12g
|
Monounsaturated Fat: 54g
|
Trans Fat: 2g
|
Cholesterol: 1004mg
|
Sodium: 1528mg
|
Potassium: 1530mg
|
Fiber: 24g
|
Sugar: 275g
|
Vitamin A: 2685IU
|
Calcium: 313mg
|
Iron: 22mg
Dessert
American
3042
Like this? Leave a comment below!
Explore More Delicious Desserts: Before You Go
After savoring every rich bite of this decadent chocolate fudge pie, don’t stop your culinary journey here! I invite you to explore our extensive collection of other delightful, chef-developed Pie Recipes. Whether you’re craving fruit-filled classics, creamy custards, or more innovative creations, you’ll find a pie to suit every taste and occasion. Furthermore, if you’re planning a holiday feast, be sure to discover invaluable tips for pairing this magnificent chocolate pie with other festive treats in my curated guide: 20 Best Thanksgiving Pie Recipes. Happy baking, and happy indulging!