
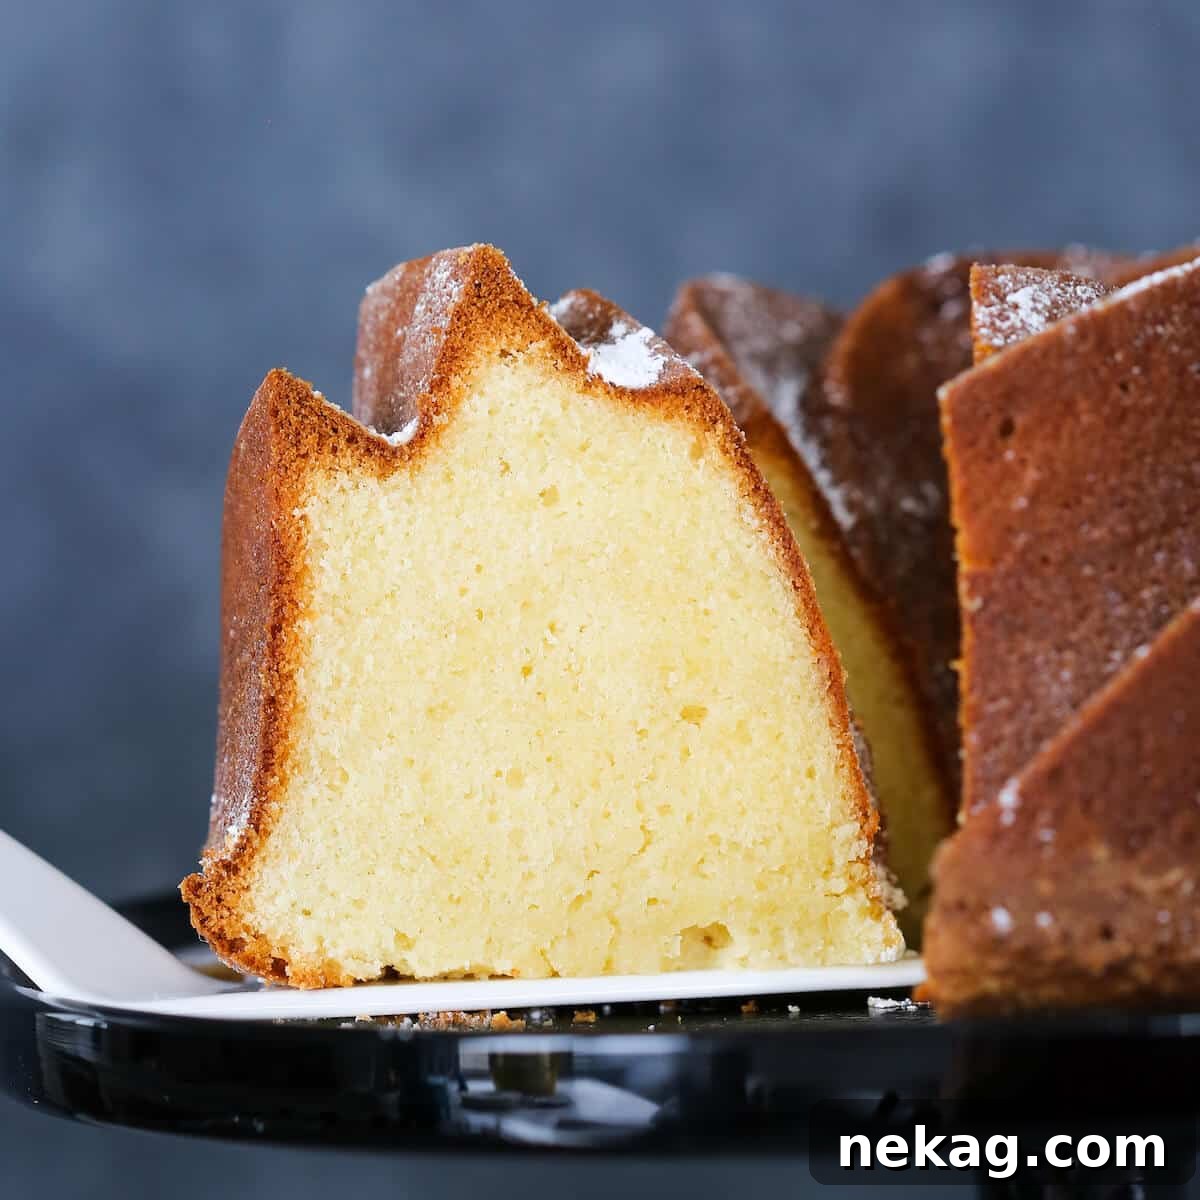
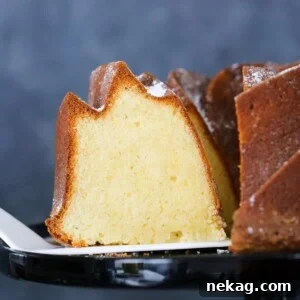
Welcome to the ultimate guide for crafting a truly exceptional Sour Cream Pound Cake. This isn’t just any pound cake; it’s a masterpiece of texture and flavor, celebrated for its incredibly moist, dense, and super tender crumb. What truly elevates this particular recipe is a subtle yet distinctive character contributed by a splash of quality brandy, transforming a classic into an unforgettable culinary experience. If you’ve been searching for the perfect pound cake recipe – one that consistently delivers perfection – your journey ends here.
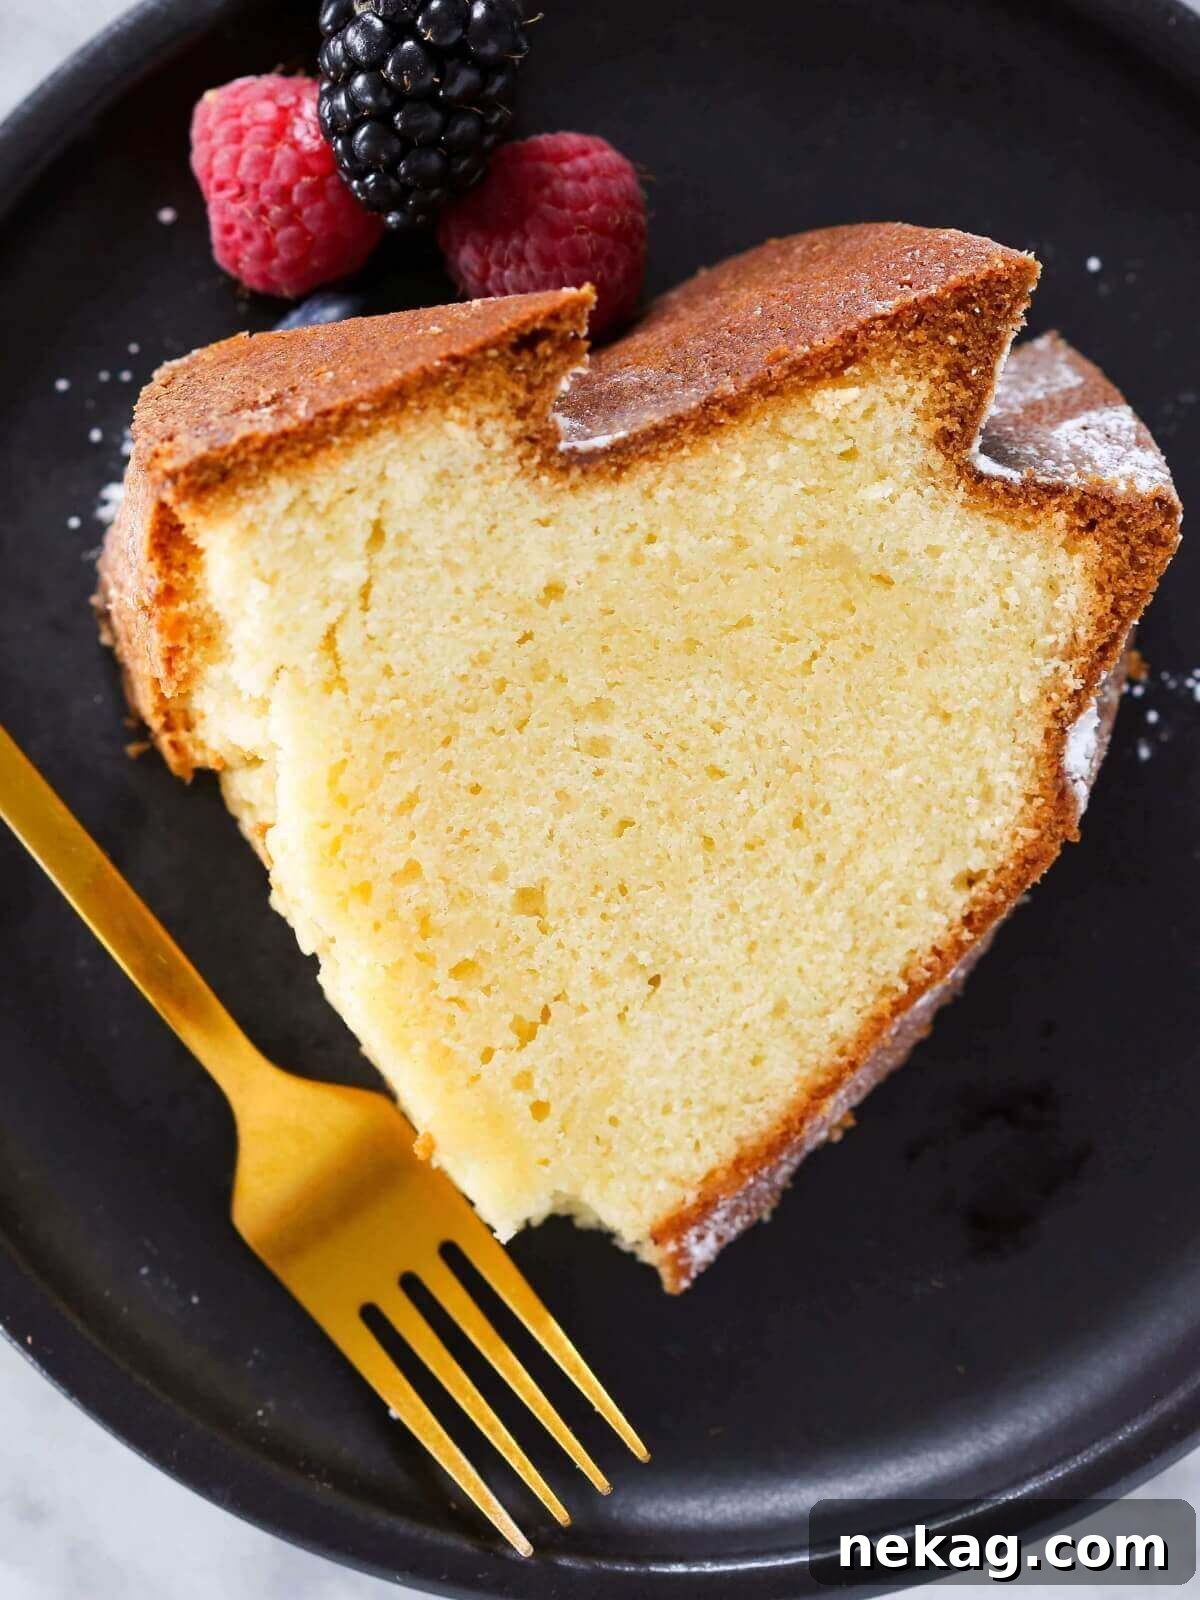
The hallmark of an extraordinary pound cake lies in its delicate balance: a tight crumb that promises substance, yet an ethereal quality that melts delightfully in your mouth. This Sour Cream Pound Cake achieves precisely that, leaving you craving just one more bite, eager to confirm that it’s as magnificent as you initially perceived. It’s a dessert that invites contemplation and pure enjoyment.
My quest for the perfect pound cake texture began with an Apricot Brandy Pound Cake, and since then, I’ve dived deep into the wonderful world of bundt cakes. Join me on this delicious journey to explore other variations, including my decadent Chocolate Pound Cake, a Red Velvet Pound Cake that’s truly life-changing, and delightful seasonal options like my Cherry Almond Pound Cake or vibrant Strawberry Pound Cake. Each offers a unique twist while maintaining that coveted pound cake excellence.
Why You Will Adore This Sour Cream Pound Cake
This Sour Cream Pound Cake isn’t just a recipe; it’s an experience waiting to happen. Here’s why it’s destined to become your go-to pound cake:
- The Epitome of Pound Cake Perfection: This simple yet sophisticated cake offers an exquisite balance of rich density and a melt-in-your-mouth tender crumb. The secret ingredient – a touch of brandy – adds a subtle depth of flavor and an extra layer of moisture that truly pushes it over the top, making every slice an indulgence.
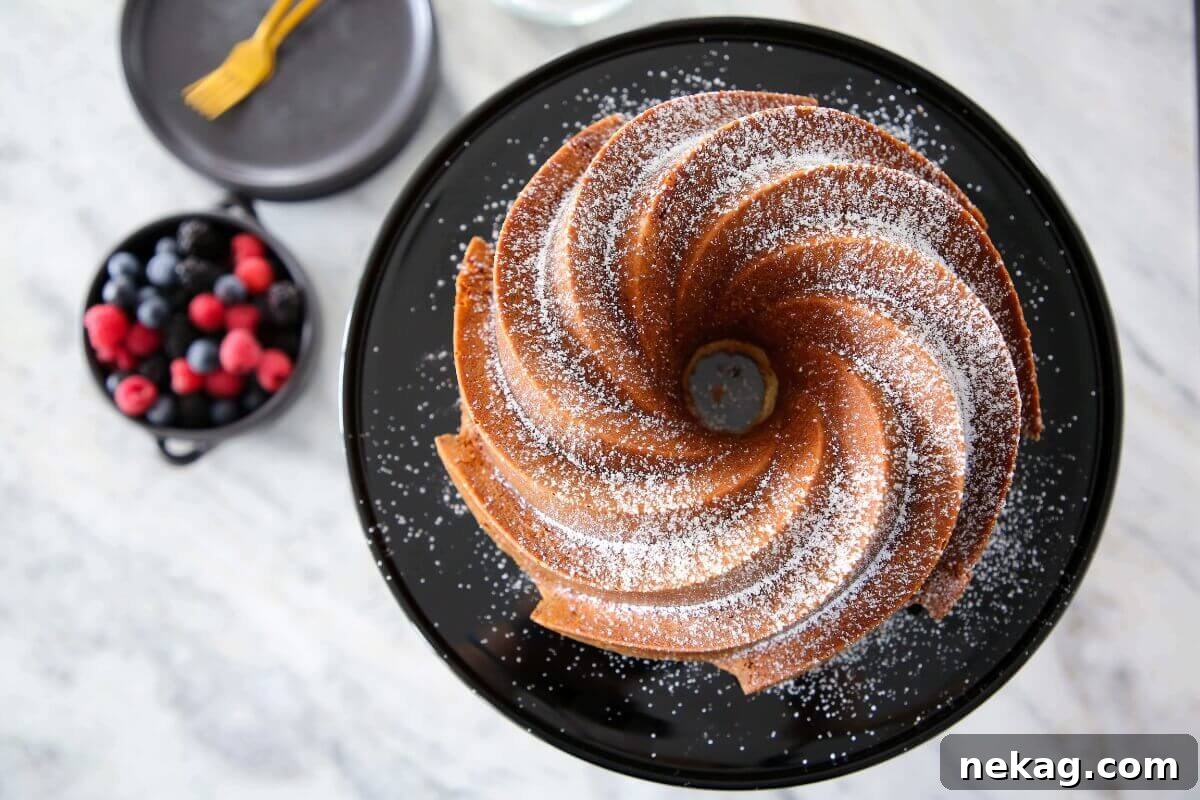
- Naturally Gorgeous, With or Without Glaze: Pound cakes possess an inherent elegance. Their beautiful golden crust and the intricate designs imparted by a bundt pan mean they shine brilliantly even without elaborate adornments. Whether served “naked” for a rustic charm or drizzled with a simple glaze, its aesthetic appeal is undeniable. It’s a cake that always looks impressive, making it ideal for any occasion, from casual gatherings to formal celebrations.
- Perfected by a Professional Pastry Chef: This recipe has undergone rigorous testing and re-testing by a seasoned pastry chef (that’s me!). This meticulous process ensures that you receive a foolproof, step-by-step guide with precise ingredient ratios, provided in both weight and volume measurements. You can bake with confidence, knowing every detail has been refined for optimal success, guaranteeing a flawless result every time.
Table of Contents
- Why You Will Adore This Sour Cream Pound Cake
- Essential Ingredients for Your Perfect Pound Cake
- The Magic of Sour Cream in Baking Pound Cake
- Sour Cream Substitutes: What to Use if You Don’t Have Sour Cream
- Professional Baking Tips for Pound Cake Success
- Step-by-Step: How to Make Sour Cream Pound Cake
- Chef Lindsey’s Recipe Tip for a Flawless Bake
- Storing Your Sour Cream Pound Cake for Maximum Freshness
- Frequently Asked Questions About Pound Cake
- More Irresistible Pound Cake Recipes
- Sour Cream Pound Cake Full Recipe
- Before You Go
Essential Ingredients for Your Perfect Pound Cake
Crafting the perfect Sour Cream Pound Cake begins with understanding the role of each ingredient. Quality and temperature are key to achieving that desired dense, moist texture:
- Unsalted Butter: I always opt for unsalted butter in my baking to maintain precise control over the overall salt content in the recipe. It’s crucial for the butter to be at a cool, yet pliable room temperature – not melted, but soft enough to yield to gentle pressure. This ensures it creams beautifully with the sugar, creating the foundational structure of the cake.
- Granulated Sugar: You’ll notice a significant amount of granulated sugar in this recipe. Beyond sweetness, sugar plays a vital role in the cake’s structure and texture. It contributes to that desirable tight crumb while ensuring the cake remains incredibly moist and literally melts in your mouth. It also aids in browning the crust to a beautiful golden hue.
- Large Whole Eggs: Eggs are multifunctional powerhouses in baking. They add essential fat, contribute significantly to moisture, and act as a leavening agent, helping the cake to rise slightly. Ensure your eggs are at room temperature; this allows them to emulsify more effectively with the butter and sugar, creating a smoother, more uniform batter.
- All-Purpose Flour: The backbone of any cake, all-purpose flour provides the necessary structure. While pound cakes are known for their dense nature, proper flour measurement is critical to avoid a dry or overly tough result. Always measure flour by weight for the most accurate results, or use the “spoon and level” method if using volume measurements.
- Kosher Salt: Just a touch of kosher salt is essential. It doesn’t just add salinity; it enhances and balances the sweetness of the sugar and deepens the overall flavor profile of the cake, making all the other ingredients sing.
- Sour Cream: This is the star ingredient! Full-fat sour cream is non-negotiable for the best results. Its high fat content and relatively low liquid content are paramount. Sour cream adds an incredible richness and tang, locks in moisture, and tenderizes the cake by shortening gluten strands. This contributes directly to the dense, yet impossibly moist and tender texture that defines a perfect pound cake. Avoid lower-fat varieties, as they can break easily under heat and acidity, compromising the cake’s texture.
- Baking Soda: A mere ¼ teaspoon of baking soda works wonders here. Though a small amount, it immediately reacts with the natural acidity in the sour cream. This reaction provides just enough gentle leavening to give the pound cake a slight lift without making it overly airy, preserving its characteristic density.
- Vanilla Extract: High-quality vanilla extract isn’t just for flavor; it’s a flavor enhancer. It imparts its own classic, comforting aroma and taste while also boosting and harmonizing the flavors of all the other ingredients, adding depth and warmth to the cake.
- Brandy: The secret weapon for an extra layer of complexity and moisture! Adding brandy (or any other alcohol you prefer) to a cake serves two main purposes: it enhances flavor and contributes to a supremely tender crumb. Alcohol hydrates the gluten in flour differently than water, resulting in a softer, more delicate texture. Feel free to experiment with your favorite spirit; tequila, rum, or a fruit liqueur could offer exciting variations.
For precise quantities and a detailed list, please refer to the comprehensive recipe card below.
The Magic of Sour Cream in Baking Pound Cake
Sour cream is an unsung hero in many baking recipes, but it truly shines in a pound cake. Its unique composition contributes significantly to the cake’s superior texture and flavor. The primary reasons for its inclusion are its high fat content and its distinct acidity, alongside its thicker consistency compared to other dairy liquids.
The extra fat in sour cream is key to a rich, moist crumb. Fat lubricates the gluten strands that form when flour is mixed with liquid, effectively “shortening” them. This prevents the gluten from developing too much, which would result in a tough or rubbery cake. Instead, you get a tender, fine-textured crumb that melts effortlessly in your mouth. Furthermore, this fat contributes a luxurious richness and depth of flavor that can’t be achieved with less fatty ingredients.
The low liquid content of sour cream is also a crucial factor. Unlike milk or buttermilk, which can thin out a batter and lead to a less dense cake, sour cream maintains a thick, substantial consistency. This ensures the pound cake retains its characteristic density without becoming dry. It hydrates the flour just enough to activate the baking soda and develop some structure, but not so much that the cake loses its signature tight crumb.
Finally, the acidity of sour cream plays a double role. It reacts with baking soda to provide a gentle lift, creating a delicate airiness within the dense structure. This acidity also contributes a subtle tang that balances the sweetness of the sugar, adding complexity and preventing the cake from tasting overly sugary. It brightens the overall flavor, making the cake more dynamic and enjoyable.
Sour Cream Substitutes: What to Use if You Don’t Have Sour Cream
While full-fat sour cream is ideal for this recipe, sometimes you might find yourself without it. Here are some viable alternatives, along with considerations for each:
- Greek Yogurt: This is by far your best substitute. Its thickness and tangy flavor profile are very similar to sour cream. I highly recommend using full-fat or Fage 2% Greek Yogurt (as linked to in the original recipe if available) due to its superior texture and fat content. Avoid fat-free or regular, thinner yogurts, as they lack the richness and density needed for the perfect pound cake crumb. Greek yogurt will yield a cake that is still wonderfully moist and tender, perhaps with a slightly less pronounced tang depending on the brand.
- Cream Cheese: If you’re feeling adventurous and only have cream cheese on hand, you can make it work! I haven’t personally tested this specific substitution in this recipe, but generally, you’d need to thin it out slightly. Whisk about 8 ounces (one block) of softened cream cheese with a tablespoon or two of milk and a squeeze of lemon juice until it reaches a sour cream-like consistency. The lemon juice helps replicate the acidity. This will impart a richer, cheesier flavor to your cake, which could be a delightful variation! Please share your results in the comments to help fellow bakers.
- Buttermilk or Regular Milk: These are less ideal substitutes for this specific recipe due to their significantly thinner consistency and lower fat content. Buttermilk, while acidic, is much thinner than sour cream, and regular milk even more so. Using them directly will alter the batter’s consistency and likely result in a cake that is less dense, less moist, and has a different crumb structure than intended. If you only have these, I’d suggest seeking out a pound cake recipe specifically formulated for buttermilk or milk, such as my Lemon Pound Cake with Strawberry Icing.
- Non-Dairy Substitute: For a vegan or dairy-free alternative, the best options mimic sour cream’s texture and tang. Cashew yogurt or coconut yogurt (full-fat versions) would be your best bet. Ensure they are plain and unsweetened to avoid unexpected flavors, and check their consistency – you might need to strain them slightly if they are too thin.
Professional Baking Tips for Pound Cake Success
Achieving a truly professional-quality pound cake is within your reach with these expert tips:
- Weigh Your Ingredients for Precision: While pound cake appears simple, it relies on a delicate balance of ingredients. The most significant variable is flour: a “cup” can vary by as much as 50 grams depending on how it’s scooped. Egg sizes also fluctuate. Investing in a kitchen scale is the single best way to ensure consistent, perfect results. If you must measure by volume, fluff your flour in its bag, then spoon it gently into the measuring cup until mounded. Use a straight edge, like a knife, to level off the excess without tapping or compressing the flour. This minimizes variability.
- Avoid Over-Creaming Butter and Sugar: This is a critical step for pound cake’s signature dense texture. Unlike light, airy cakes where extensive creaming incorporates a lot of air, for pound cake, you want to cream your softened butter and granulated sugar just until a thick, uniform paste forms and the mixture is light in color. Over-creaming will whip too much air into the mixture, leading to a cakier, less dense texture than desired for a traditional pound cake. Aim for light and fluffy, but not excessively aerated.
- Cool Your Cake in Two Essential Stages: Patience is paramount after baking. First, allow your pound cake to cool in its pan for precisely 15-20 minutes. This crucial resting period allows the cake’s structure to set and firm up, preventing it from crumbling when inverted. After this initial cooling, carefully loosen the edges with a paring knife and invert the cake onto a wire rack to cool completely. Cutting into a warm pound cake will compress its tender crumb, resulting in a dense, gummy, and inferior texture. Ensure it’s entirely cool before slicing for the perfect structure and taste experience.
- All Ingredients at Room Temperature: This tip applies to butter, eggs, and sour cream. Room temperature ingredients emulsify much better, creating a smooth, homogenous batter that traps air more efficiently and bakes more evenly. Cold ingredients can cause the batter to curdle and affect the final texture.
- Don’t Overmix the Batter: Once you add the flour, mix only until just combined. Overmixing develops the gluten in the flour excessively, leading to a tough, chewy cake. A few small lumps of flour are better than an overmixed batter.
- Prepare Your Pan Meticulously: Pound cakes are notorious for sticking, especially in intricate bundt pans. Thoroughly grease your pan with a non-stick baking spray containing flour, or use softened butter and then dust generously with flour, tapping out any excess. Get into every crevice to ensure an easy release.
Step-by-Step: How to Make Sour Cream Pound Cake
Creating this sublime Sour Cream Pound Cake is a straightforward process when you follow these clear steps. Further details and precise measurements can be found in the recipe card below!
Make the Cake Batter:
Step 1: Prepare Your Oven and Pan. Begin by preheating your oven to 325°F (160°C), whether using a convection or standard oven setting. This ensures a consistent baking temperature from the moment your cake enters. Next, prepare your bundt pan. Thoroughly spray the entire interior with a non-stick cooking spray designed for baking (which contains flour), or grease it liberally with softened butter and then dust generously with all-purpose flour. Tap the pan and rotate it until every inch of the surface, especially the intricate nooks and crannies, is coated with a thin layer of flour. Tap out any excess flour to prevent white patches on your baked cake.
Step 2: Combine Dry Ingredients. In a medium-sized bowl, whisk together your dry ingredients: the measured all-purpose flour, baking soda, and kosher salt. Whisking ensures these ingredients are thoroughly combined and evenly distributed throughout the batter, preventing pockets of leavener or salt.
Step 3: Cream Butter and Sugar. In the bowl of a stand mixer fitted with the paddle attachment, cream together the softened unsalted butter and granulated sugar. Beat on medium speed until a thick, pale yellow paste forms – this should take about 3-5 minutes. The mixture should be light in color and fluffy, but avoid over-creaming, as this can incorporate too much air, making the cake less dense. Next, add the large eggs one at a time, beating well after each addition until fully incorporated. Remember to scrape down the sides and bottom of the bowl frequently with a rubber spatula to ensure all ingredients are evenly mixed.
Step 4: Incorporate Flour and Sour Cream. Reduce the mixer speed to low. Begin to alternately add the flour mixture and sour cream to the butter-sugar-egg mixture, starting and ending with the dry ingredients. Add about one-third of the flour mixture, mix just until combined, then add half of the sour cream, mix just until combined. Repeat with another third of the flour, the remaining sour cream, and finally the last third of the flour. Mix only until the ingredients are just combined before each new addition. This approach helps prevent overmixing, which can lead to a tough cake.
Pro-Style Batter Mixing: You don’t need to wait for every speck of flour to disappear before adding the next batch of wet ingredients. Keep the mixer on low and work efficiently with both hands, adding flour and sour cream in sequence. However, I always pause the mixer and use a rubber spatula to thoroughly scrape out the last of the sour cream from its measuring cup or container, ensuring nothing is left behind for maximum flavor and moisture.
Step 5: Add Flavorings. Once all the flour and sour cream have been incorporated, gradually add the brandy and vanilla extract. Increase the mixer speed to medium-low and beat until everything is fully incorporated and the batter appears silky and smooth. Do not overmix at this stage; just mix enough to distribute the flavorings evenly.
Bake and Glaze:
Step 6: Bake to Perfection. Pour the luscious batter evenly into your meticulously prepared bundt pan. Use the back of a spoon or an offset spatula to smooth the top, ensuring an even rise. Bake in the preheated oven. The baking time can vary significantly depending on your oven, but typically ranges between 60-85 minutes. My cake usually takes around 70 minutes. Test for doneness by inserting a long cake tester or a wooden toothpick into the deepest part of the cake. It should come out with just a few moist crumbs clinging to it, not wet batter. If it comes out clean, it might be slightly over-baked, so aim for those few crumbs.
Step 7: Cool the Cake. After removing the cake from the oven, let it cool in the pan on a wire rack for exactly 20 minutes. This critical cooling period allows the cake to firm up and pull away from the sides of the pan slightly, making it easier to release. After 20 minutes, carefully run a thin paring knife around the edges (and the center tube if using a bundt pan) to ensure it’s fully loosened. Then, invert the cake onto the wire rack to cool completely. Resist the urge to cut into it while warm; patience will be rewarded with the best texture!
Optional Glaze or Frosting: While your pound cake cools to perfection, this is the ideal time to prepare a delicious glaze or frosting if you desire one. For a delightful creamy finish, I highly recommend the cream cheese glaze from my Cinnamon Scones recipe. Alternatively, a simple yet elegant Classic Donut Glaze would also be a fantastic complement.
Step 8: Serve and Enjoy! Once the cake is completely cooled (this can take 1-2 hours depending on ambient temperature), you can choose to dust it simply with powdered sugar for an elegant presentation, or drizzle your chosen glaze over the top. Slice and savor every exquisite bite of your homemade Sour Cream Pound Cake!
Chef Lindsey’s Recipe Tip for a Flawless Bake
Vigilantly Monitor Your Cake While Baking. The line between a perfectly moist pound cake and a dry one is surprisingly thin, and overbaking is the primary culprit for dryness. The exterior of your cake might appear perfectly golden and done, while the interior still requires more time. Always rely on a cake tester inserted into the deepest part of the cake, not just its appearance. Aim for a tester that comes out with a few moist crumbs attached, indicating perfect doneness. If it comes out completely clean, your cake might already be heading towards dryness. This careful attention ensures maximum moisture and tenderness.
Storing Your Sour Cream Pound Cake for Maximum Freshness
Proper storage is essential to maintain the moisture and tender crumb of your Sour Cream Pound Cake. Here’s how to keep it fresh for as long as possible:
Store your Sour Cream Pound Cake tightly wrapped in plastic wrap or in an airtight container at room temperature, refrigerated, or frozen. For optimal freshness and that “just baked” taste, it’s best enjoyed within 2 days of baking. However, it will keep beautifully for:
- At Room Temperature: Up to 5 days, if properly wrapped. Ensure it’s away from direct sunlight and heat.
- Refrigerated: Up to 2 weeks, again, tightly wrapped. Allow it to come to room temperature before serving for the best flavor and texture.
- Frozen: Up to 3 months. Wrap individual slices or the entire cake tightly in plastic wrap, then an additional layer of aluminum foil, or place in a freezer-safe bag. Thaw in the refrigerator overnight or at room temperature for a few hours before serving. Freezing is an excellent option for longer-term storage or for enjoying a quick treat whenever a craving strikes.
Don’t let any leftover pound cake go to waste! It makes a fantastic base for other desserts, such as a delightful Berry Trifle.
Frequently Asked Questions About Pound Cake
While sour cream itself can technically be frozen, its texture significantly changes upon thawing, often becoming grainy or separating. For this reason, I wouldn’t recommend freezing raw sour cream or pound cake batter. However, once baked into a cake, the sour cream integrates into the structure, making the *baked cake* perfectly suitable for freezing without major textural issues. So, yes, you can freeze this cake after it’s baked, but not the raw batter.
Preventing a bundt cake from sticking is paramount, especially with an intricate pan like the one I used (highly recommended). The key lies in meticulous pan preparation. Do not underestimate the power of a well-greased and floured pan. I go a step further: after generously greasing (with a baking spray that contains flour or butter), I add a tablespoon or two of flour directly to the pan. Then, I tap and rotate the pan repeatedly, ensuring every single millimeter of the surface, including all the detailed patterns, is thoroughly coated. Once completely covered, invert the pan and tap out any excess flour. This prevents those undesirable white patches on your baked cake and guarantees a clean, perfect release every time. No cake left behind!
Sour Cream Pound Cake is incredibly versatile and pairs beautifully with a variety of accompaniments. For a classic touch, I adore it with a dollop of homemade whipped cream, or for an extra zing, a lemon-infused whipped cream. A scoop of rich vanilla bean ice cream is always a winner. You can also simply serve it with a medley of fresh seasonal berries for a light and refreshing contrast. For those who crave more indulgence, a warm chocolate fudge sauce adds a decadent chocolatey dimension. A bright and tangy lemon curd provides a delightful citrusy counterpoint, while a drizzle of my salted caramel sauce offers a wonderfully sweet and savory twist. The possibilities are endless!
More Irresistible Pound Cake Recipes
If you’ve fallen in love with the classic charm of pound cakes, explore these other delicious, chef-developed recipes from my kitchen:
Cake Recipes
Red Velvet Pound Cake
Cake Recipes
Maple Pound Cake with Maple Glaze
Cake Recipes
Chocolate Pound Cake
Cake Recipes
Lemon Pound Cake
If you tried this recipe and loved it, please consider leaving a 🌟 star rating and share your experience in the comments below. Your feedback truly brightens my day!
Sour Cream Pound Cake
By: Chef Lindsey
This Sour Cream Pound Cake is incredibly moist, wonderfully dense, and super tender, with an added depth of character from a splash of brandy. It is truly the perfect pound cake recipe, delivering exceptional results every time.
Prep Time: 20 mins
Cook Time: 1 hr 10 mins
Total Time: 1 hr 30 mins
Servings: 16 people
Course: Dessert
Cuisine: American, British
Ingredients
- 1 ½ cups unsalted butter, cool but pliable (340g)
- 3 cups granulated sugar (600g)
- 6 large eggs, at room temperature
- 3 cups all-purpose flour (360g)
- 1 teaspoon kosher salt
- ¼ teaspoon baking soda
- 1 cup full-fat sour cream, at room temperature (240g) – essential for best flavor & texture
- 2 teaspoons vanilla extract
- ¼ cup brandy (60ml) – or other preferred alcohol for moisture and flavor
Instructions
- Prepare Oven & Pan: Preheat your oven to 325°F (160°C). Generously grease and flour a 10-12 cup bundt pan, ensuring every crevice is covered. Tap out any excess flour.
- Combine Dry Ingredients: In a medium bowl, whisk together the flour, baking soda, and salt until well combined. Set aside.
- Cream Butter, Sugar & Eggs: In the bowl of a stand mixer fitted with the paddle attachment, cream the softened butter and sugar on medium speed until a thick, pale paste forms (3-5 minutes). Beat in the eggs one at a time, scraping down the sides of the bowl after each addition until fully incorporated.
- Alternate Wet & Dry: With the mixer on low speed, alternately add the dry ingredient mixture and the sour cream, beginning and ending with the flour. Add about one-third of the flour mixture, mix just until combined. Then add half of the sour cream, mix just until combined. Repeat with another third of the flour, the remaining sour cream, and finally the last third of the flour. Mix only until just combined after each addition to prevent overmixing.
- Add Flavorings: Once all ingredients are incorporated, gradually add the brandy and vanilla extract. Increase mixer speed to medium-low and mix until the batter is silky smooth and thoroughly combined.
- Bake the Cake: Pour the batter into the prepared pan and smooth the top with a spatula. Bake in the preheated oven for 60-85 minutes, or until a cake tester inserted into the center comes out with a few moist crumbs clinging to it. (My oven takes 70 minutes.)
- Cool & Invert: Let the cake cool in the pan on a wire rack for 20 minutes. Then, carefully loosen the edges with a paring knife and invert the cake onto the wire rack. Allow it to cool completely before slicing (1-2 hours).
- Garnish & Serve: Once cooled, dust the cake with powdered sugar, or drizzle with your preferred glaze. Slice and enjoy!
Video
Notes
Yield: 1, 10-12 cup bundt cake
Flavor Tips: While you can substitute the brandy with water, I strongly suggest using an alcohol you enjoy. Alcohol hydrates the flour differently than water, contributing to a more tender and moist cake. Experiment with rum, bourbon, or an orange liqueur for different flavor profiles!
Technique: The two-stage cooling process is vital! Cooling for 20 minutes in the pan allows the cake’s crumb to set. If you cut the cake while it’s still warm, the crumb will be compressed, and the texture will suffer significantly. Always let it cool completely on a wire rack.
Storage: Store Sour Cream Pound Cake tightly wrapped in plastic wrap or an airtight container. It keeps for up to 5 days at room temperature, 2 weeks refrigerated, or 3 months in the freezer. For the best flavor and texture, serve within 2 days of baking or freeze for longer storage.
Nutrition
Calories: 444kcal | Carbohydrates: 56g | Protein: 5g | Fat: 22g | Saturated Fat: 13g | Polyunsaturated Fat: 1g | Monounsaturated Fat: 6g | Trans Fat: 1g | Cholesterol: 116mg | Sodium: 328mg | Potassium: 73mg | Fiber: 1g | Sugar: 38g | Vitamin A: 710IU | Vitamin C: 1mg | Calcium: 33mg | Iron: 1mg
Before You Go
I sincerely hope you enjoyed baking and tasting this professional chef-tested Sour Cream Pound Cake recipe. It’s truly a delight! For more delectable creations and expertly crafted treats, be sure to explore our other fantastic, chef-developed Cake Recipes. You might discover your next favorite, whether it’s an elegant Classic White Cake or my personal favorite, the comforting Maple Cake!