
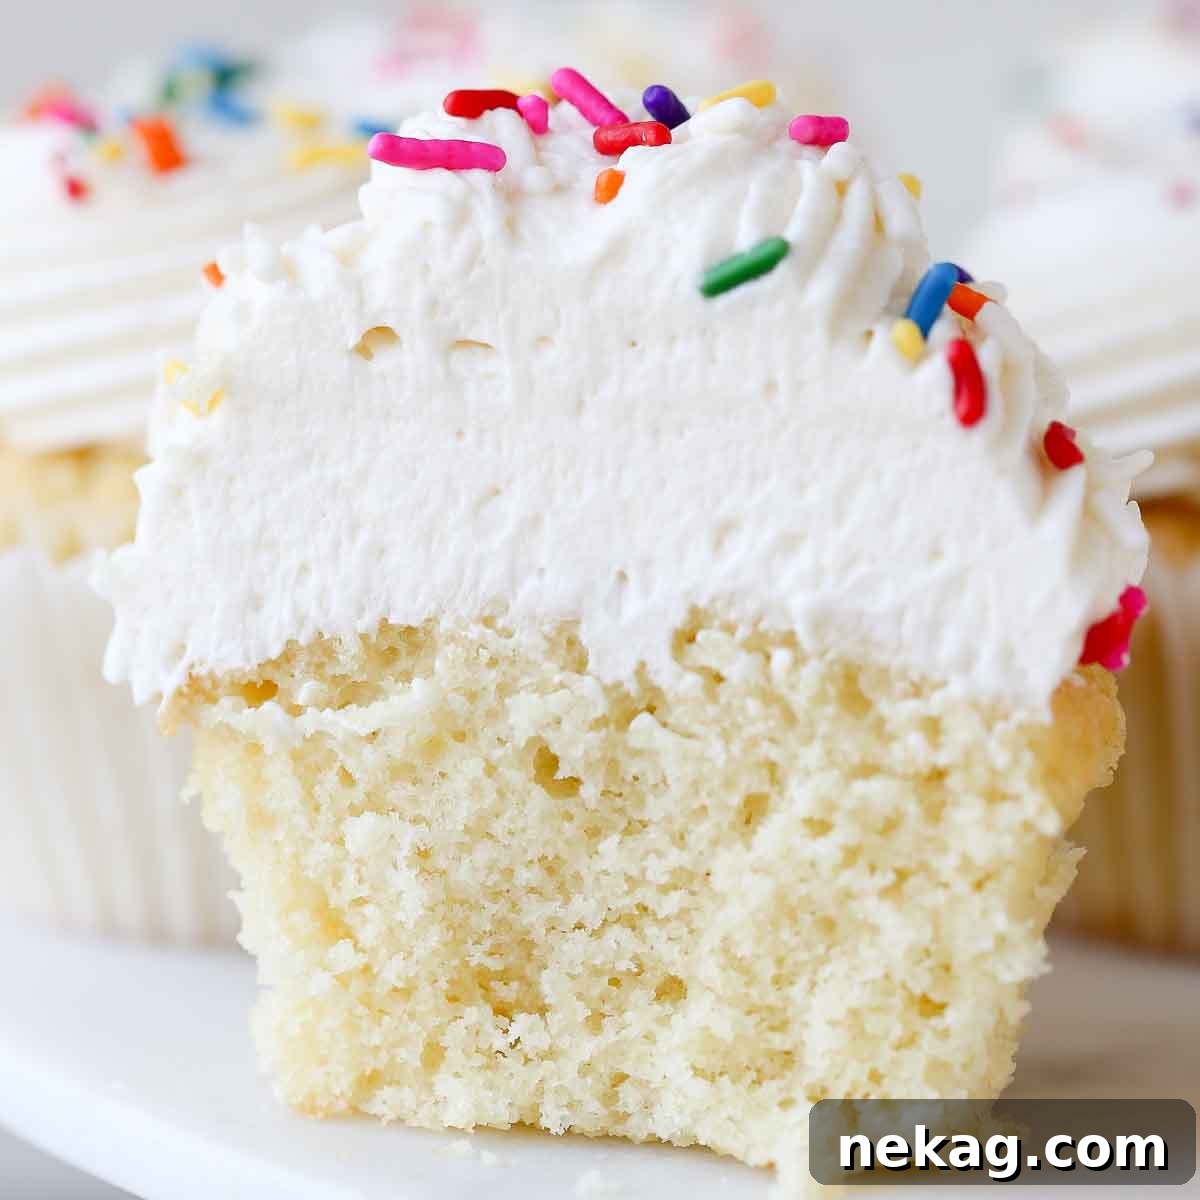
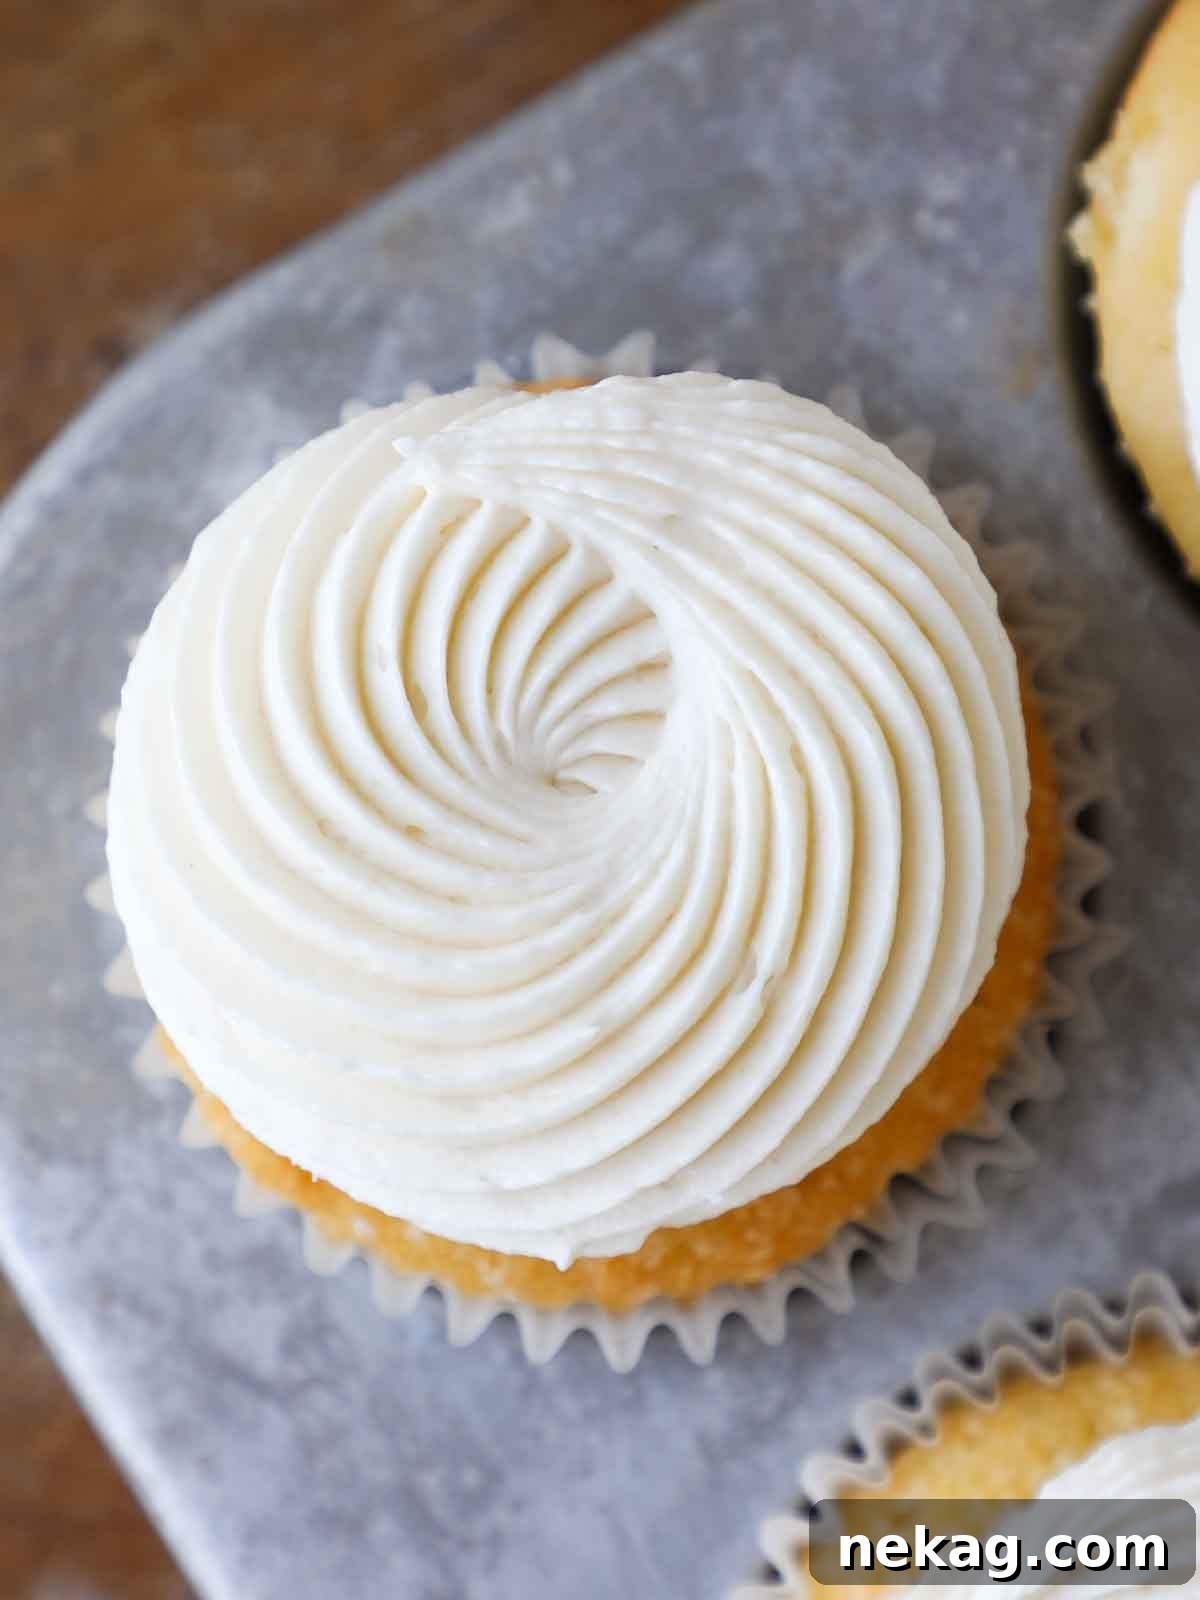
Discover the magic of ermine frosting, a truly exceptional confectionery creation that boasts the light and airy texture of whipped cream, yet offers the robust stability of a Swiss meringue buttercream. This classic, often underrated frosting, is made from a unique cooked flour base, setting it apart from its more common counterparts and making it a must-try for any baking enthusiast.
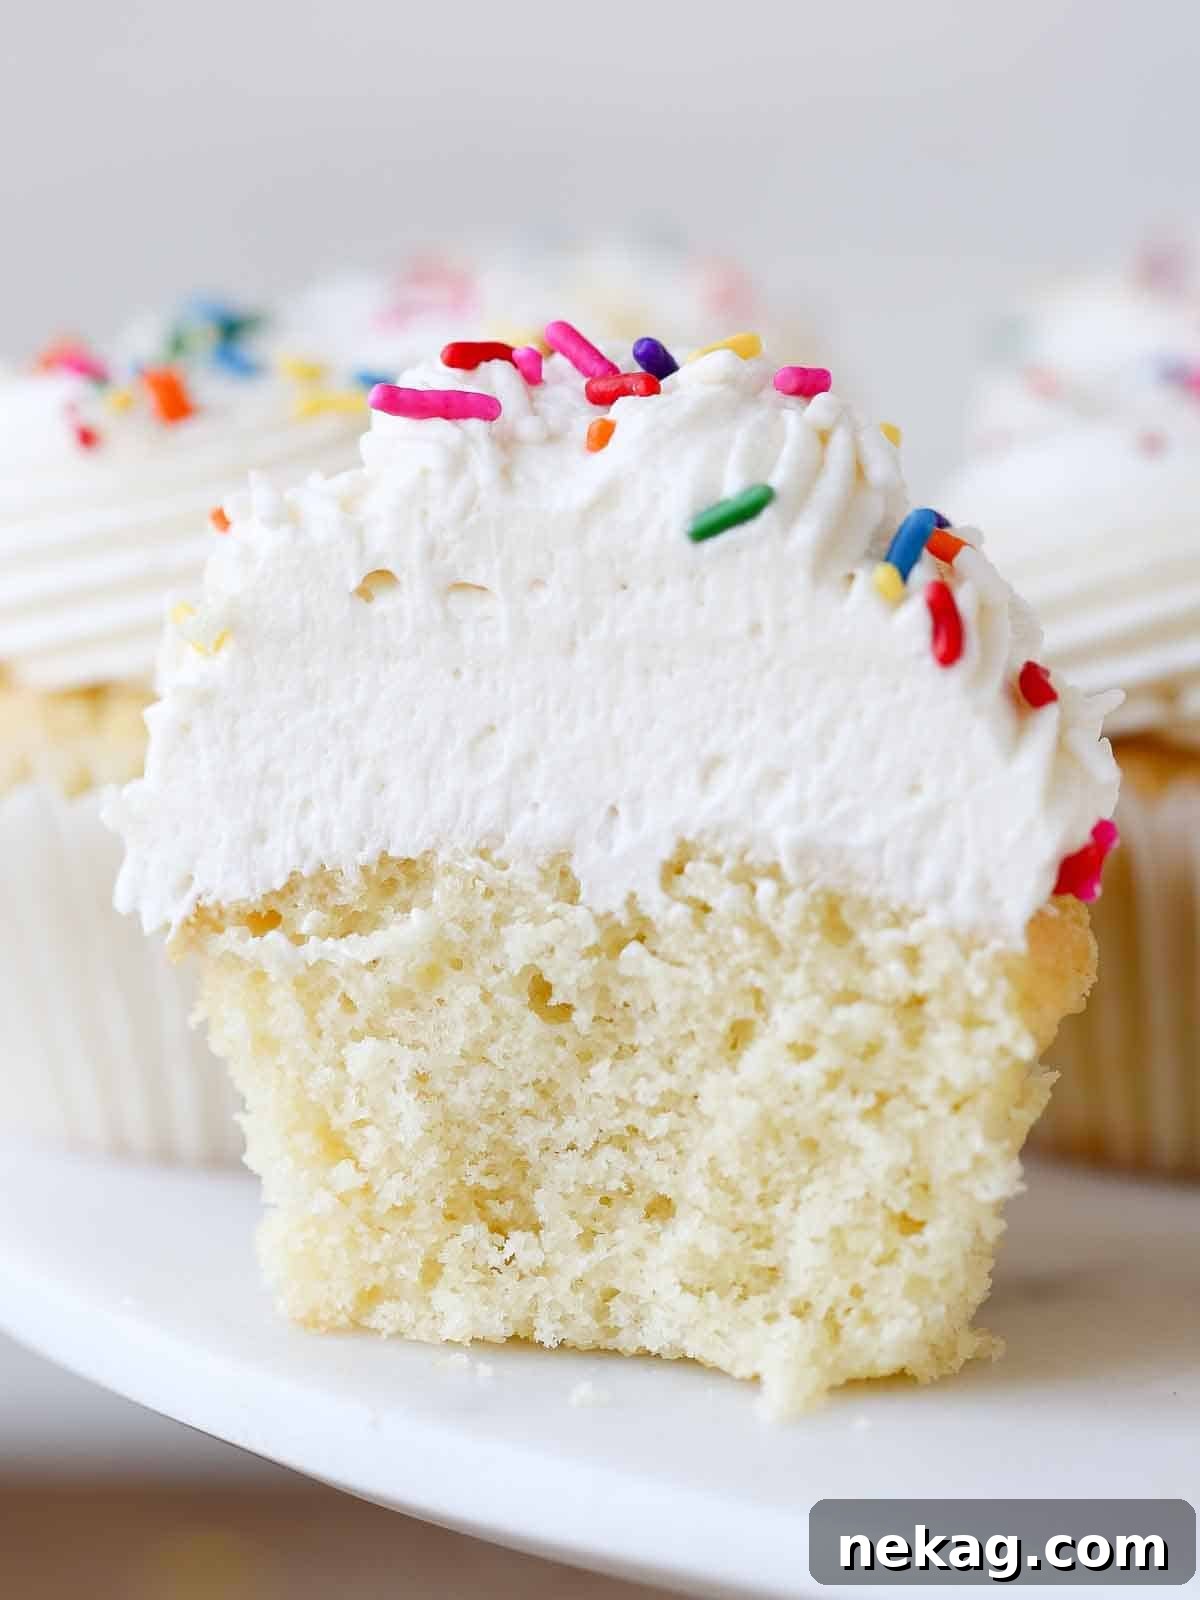
Ermine Frosting: The Ultimate Light, Stable, and Less-Sweet Buttercream Alternative
As a pastry chef with over a decade of professional baking experience, I consider myself unflappable in the kitchen. It takes something truly extraordinary to pique my interest and get me genuinely excited. So, when I first encountered the exquisite qualities of ermine frosting, I was completely captivated!
It’s a rare treat to stumble upon a genuinely novel technique or flavor profile in the vast world of baking. Upon diving into the history of this remarkable frosting, I delved into my collection of vintage cookbooks. My research led me to two intriguing recipes for a “boiled frosting thickened with flour” within the Southern Living Cookbook Desserts 1968 edition. The particular recipe that forms the foundation of this guide is an adaptation from Mrs. Elsie Ramey of Winchester, Virginia, and was originally titled “Dreamy Frosting” in the book. While the precise origins of the name “Ermine” remain somewhat elusive, I wholeheartedly agree that “Dreamy” is a perfectly apt description for this ethereal creation!
Let’s take a moment to truly appreciate what makes this cooked flour frosting so special. It is remarkably light, incredibly fluffy, wonderfully airy, and refreshingly not overly sweet. In my tests, using one cup of granulated sugar resulted in a sweetness level that was more pronounced than my go-to Swiss meringue buttercream, yet still perfectly balanced. For those who prefer an even more subtly sweetened and cloud-like frosting, you have the flexibility to reduce the sugar content to as little as ½ cup. This adaptability in sweetness, combined with its unique texture, truly blew me away. It’s a revelation for anyone seeking a delightful alternative to traditional buttercreams.
Table of Contents
- Why Ermine Frosting Will Become Your New Favorite
- What is the Taste and Texture of Ermine Frosting?
- Expert Tips for Mastering Cooked Flour Frosting
- Key Ingredients & Smart Substitutions
- Creative Variations to Flavor and Color Your Frosting
- Step-by-Step Guide: How to Make Ermine Frosting
- Perfect Applications for Ermine Frosting
- FAQs & Troubleshooting Your Ermine Frosting
- Ermine Frosting (Boiled Milk Frosting) Recipe
- Explore More Baking Delights
Why Ermine Frosting Will Become Your New Favorite
Ermine frosting, also known as boiled milk frosting or cooked flour frosting, offers a unique combination of characteristics that make it stand out in the world of sweets. Here’s why you’ll fall in love with it:
- Unrivaled Light and Fluffy Texture: My recipe notes simply exclaimed, “Dang. This is amazing!” Even after over a decade in professional baking, I was genuinely astonished by its texture. It’s reminiscent of a delicate whipped cream – incredibly light, airy, and utterly delightful on the palate. Unlike heavier buttercreams, it won’t weigh down your desserts.
- Exceptional Stability, Egg-Free: Despite its cloud-like lightness, ermine frosting provides impressive stability, akin to more complex frostings like Italian meringue buttercream. It sets beautifully firm and solid in the refrigerator, making it ideal for cakes that need to hold their shape. What’s more, it’s entirely egg-free, making it an excellent option for those with egg allergies or dietary preferences, and simpler to prepare without the need for tempering eggs. Furthermore, its lower butter content compared to Italian or Swiss meringue buttercreams makes it more pleasant to eat when chilled.
- Perfectly Balanced Sweetness: For many, traditional American buttercream can be overly sweet. Ermine frosting strikes a harmonious balance, being significantly less sweet than American buttercream but also less buttery than meringue-based frostings. This makes it a versatile choice for a wide array of baked goods. It’s particularly delightful on my vanilla cupcakes, but its versatility extends to a moist vanilla cake or even a rich red velvet cake. Fun fact: ermine frosting was actually the original frosting used on red velvet cake in the 1800s, proving its timeless appeal and perfect pairing with that classic dessert.
What is the Taste and Texture of Ermine Frosting?
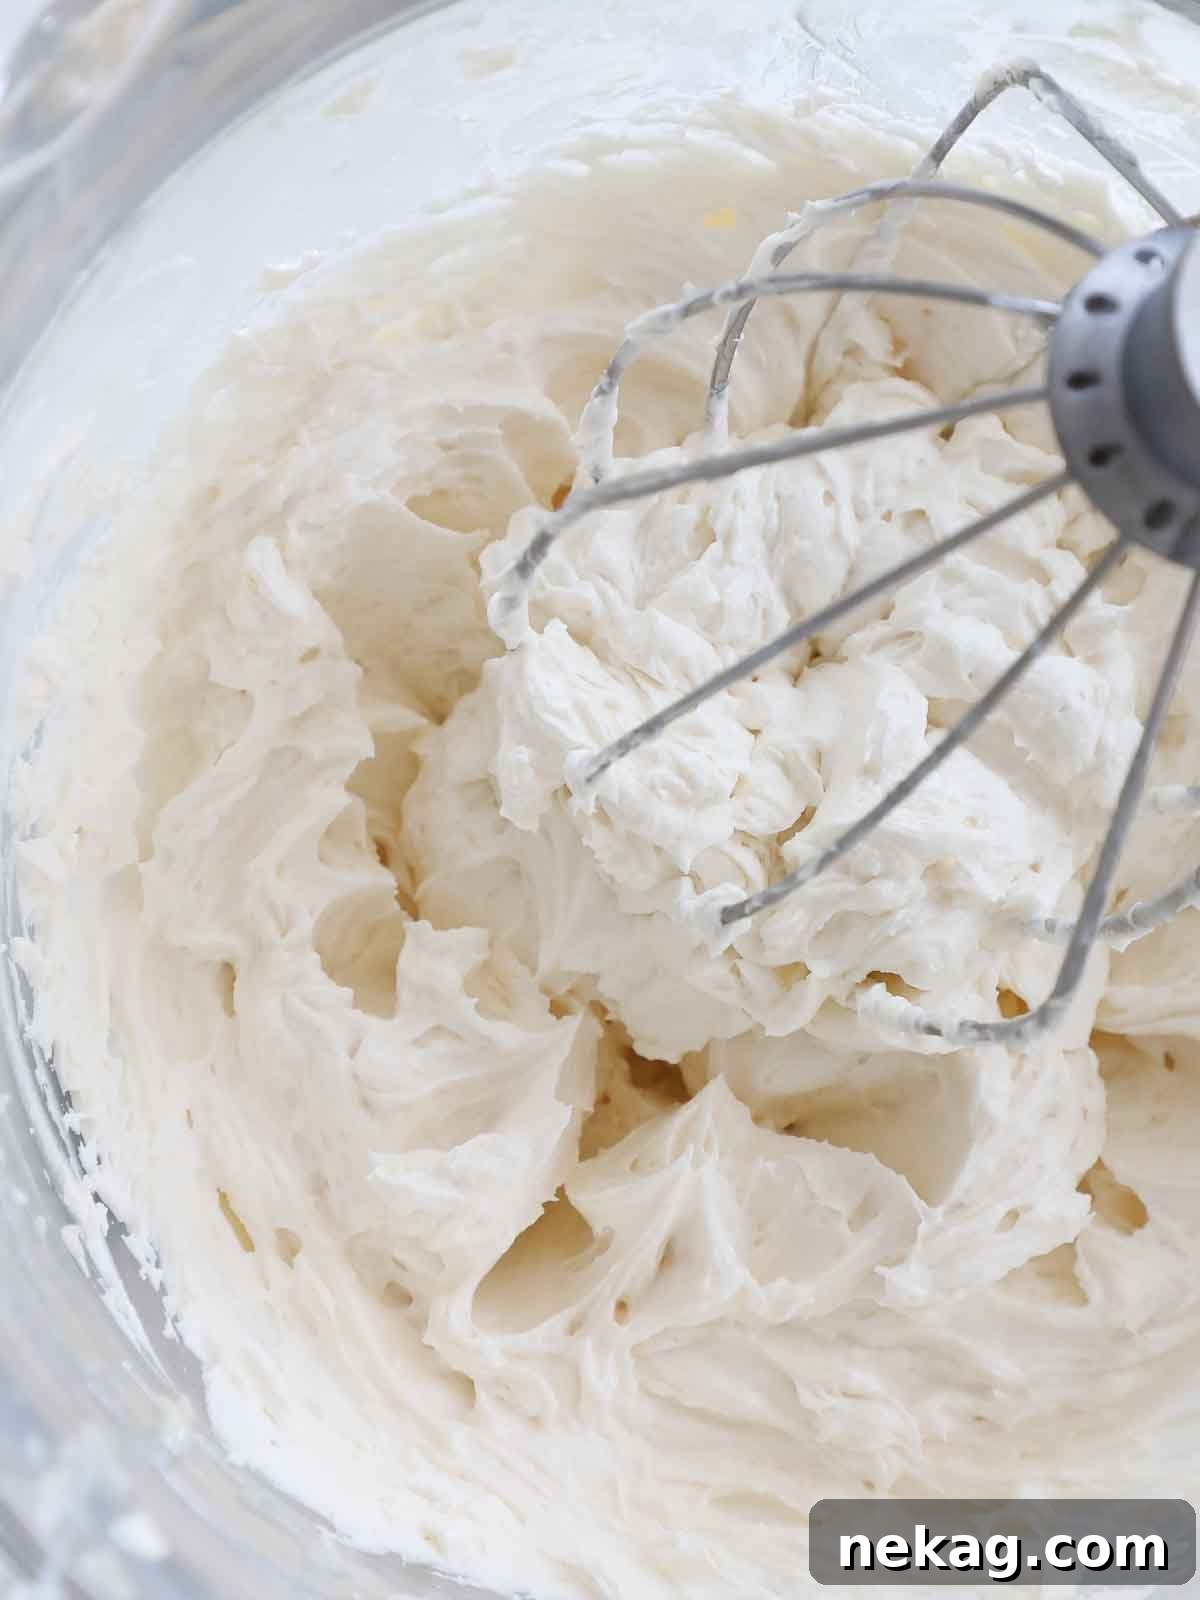
Ermine frosting offers a distinct taste and texture that truly sets it apart. Imagine a frosting that possesses the comforting, familiar sweetness of a classic American buttercream, but with a lighter, less cloying profile. Its sweetness is refined and balanced, allowing other flavors to shine through beautifully.
The texture is where ermine frosting truly excels. It’s incredibly light and airy, almost ethereal, reminiscent of freshly whipped cream. This delightful airiness is achieved through the unique cooked flour base combined with expertly whipped butter. The cooked milk and butter in its composition contribute to a subtle, creamy richness that is both comforting and sophisticated, without ever feeling heavy or greasy. It’s a perfect harmony of sweetness, creaminess, and a wonderfully buoyant mouthfeel.
Expert Tips for Mastering Cooked Flour Frosting
Achieving the perfect ermine frosting requires attention to detail, especially during the cooking and cooling phases. As a professional, I’ve honed these techniques to ensure consistent, flawless results every time:
- Butter Temperature is Crucial: The consistency of your butter will significantly impact the final texture of your frosting. Aim for butter that is cool to the touch but still pliable – it should indent easily when gently pressed with your finger. If your butter is too warm, it will result in a soft, runny frosting that struggles to hold its shape, especially when piped. A clever trick is to chill your butter *before* you begin mixing in the cooked flour base. This helps maintain its ideal temperature throughout the creaming process.
- Understanding the Flour Base: Not a Roux: My background as a savory cook compels me to clarify a common misconception. The base of this frosting, while involving flour and liquid, is distinctly *not* a roux. A roux is traditionally made by cooking fat (like butter) and flour together first, then slowly incorporating liquid to create a thickened base for sauces such as gravy or cheesy dishes like white cheddar mac and cheese. For ermine frosting, the flour is cooked with sugar, salt, and milk, creating a thick, pudding-like consistency that is then beaten into butter. This distinction is key to achieving the characteristic light texture.
- The “Plop” Test for Perfect Thickening: Knowing precisely when to stop cooking the flour-milk mixture can be tricky. Don’t panic; there’s a practical indicator. You’re looking for a range of thicknesses that will ultimately yield a beautifully pipeable frosting. As you stir, observe the mixture carefully. It will transition from a free-flowing liquid to a point where it no longer smoothly streams off your spoon or spatula. Instead, it will begin to “plop” off in distinct clumps or pieces. This “plop” consistency is your ideal stopping point, indicating that the starch has fully gelatinized and thickened sufficiently.
Key Ingredients & Smart Substitutions
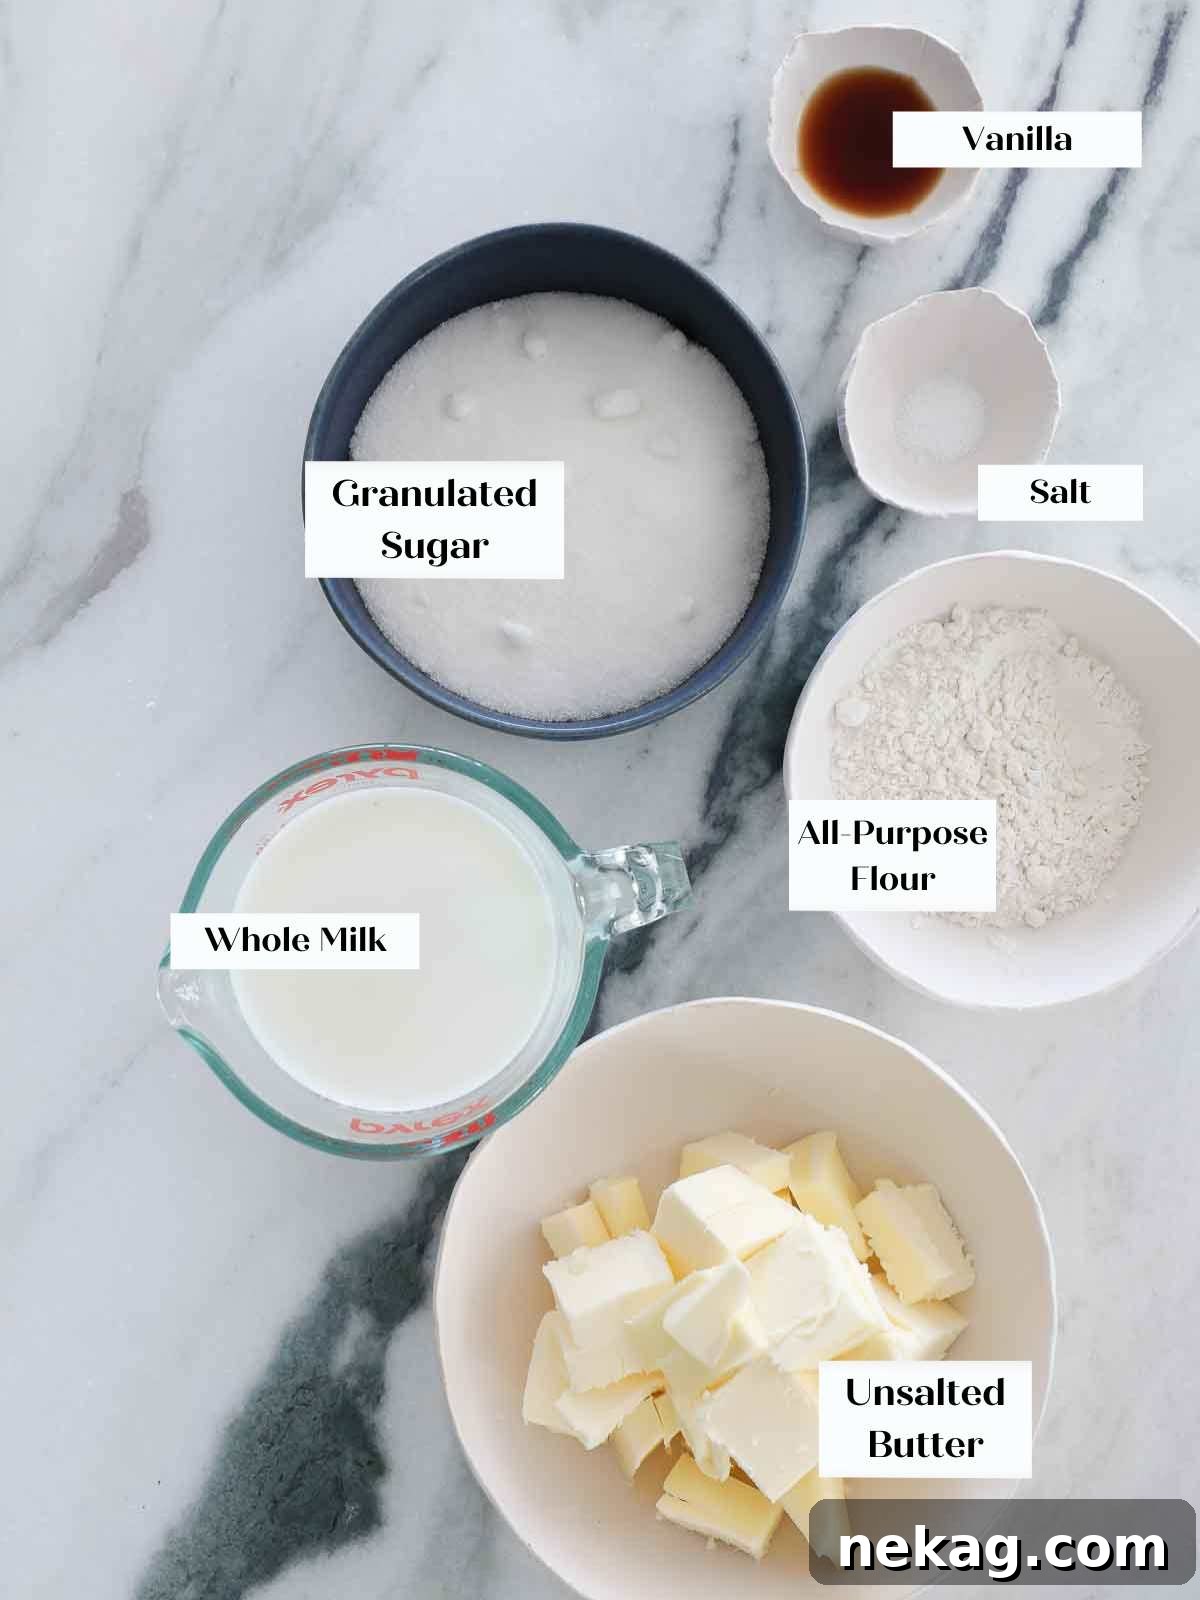
Each ingredient in ermine frosting plays a vital role in its unique texture and flavor. Understanding them will help you achieve the best results:
- All-Purpose Flour: This is the structural backbone of ermine frosting, responsible for its unique cooked base and thickening power. Unfortunately, using gluten-free all-purpose flour can be challenging; rice flour, often a component in GF blends, tends to make the frosting grainy. If a gluten-free frosting is a must, I highly recommend opting for alternatives such as American buttercream frosting or Swiss meringue buttercream for superior texture.
- Whole Milk: Whole milk provides the necessary fat and richness for the cooked flour base, contributing to a creamy mouthfeel. While I haven’t extensively tested alternative milks, I anticipate that many, such as oat milk or soy milk, would work well. Be mindful that they will subtly alter the flavor profile of your frosting. For a distinct flavor, coconut milk might offer an interesting twist compared to almond milk.
- Granulated Sugar: Granulated sugar not only sweetens the frosting but also contributes to the cooked base’s smooth texture. My recipe, as written, uses one full cup, which places its sweetness between American buttercream and Italian Meringue buttercream. However, one of the great advantages of ermine frosting is its flexibility: you can reduce the sugar to as little as ½ cup (or anywhere in between) for a delightfully subtle sweetness that truly allows the other flavors to shine.
- Vanilla Extract: Vanilla is more than just an accent; it’s a significant flavor component in this frosting. Therefore, invest in a high-quality vanilla extract that you genuinely enjoy, such as Nielson Massey. A good vanilla can elevate the entire frosting experience. For a pristine white frosting, consider using clear vanilla extract.
- Kosher Salt: A pinch of kosher salt is essential for balancing the sweetness and enhancing all the other flavors, bringing a subtle complexity that makes the frosting truly irresistible.
- Unsalted Butter: While ermine frosting contains less butter than Italian or Swiss meringue buttercreams, it still uses a substantial quantity crucial for its rich texture and stability. Always opt for unsalted butter to control the overall salt content of your frosting. Remember, the butter should be cool but pliable, not at room temperature, for optimal results.
For precise measurements and detailed instructions, please refer to the complete recipe card below.
Creative Variations to Flavor and Color Your Frosting
Ermine frosting is a fantastic canvas for culinary creativity. Its neutral base readily absorbs various flavors and colors, allowing you to customize it for any occasion:
- Infusing Flavors with Extracts and Oils: Expand your frosting’s flavor horizons beyond vanilla. Consider adding lemon extract for a bright, zesty note, coffee extract for a sophisticated depth, or peppermint extract for a refreshing holiday treat. For an extra pop of fun and vibrant flavors, especially when topping cupcakes, explore concentrated flavor oils. Brands like LorAnn offers a wide array of fruit flavors that work wonderfully.
- Transforming it into Chocolate Frosting: To create a delectable chocolate version, simply add ¼ cup of unsweetened cocoa powder to the cooked flour mixture after it’s been removed from the heat and cooled slightly, before you begin incorporating it into the butter. The cocoa powder will dissolve into the warm base, ensuring a smooth, rich chocolate flavor.
- Adding Vibrant Color to Ermine Frosting: Ermine frosting accepts color remarkably well, making it ideal for festive or themed desserts. For deep, rich, and saturated hues, much like with Italian meringue buttercream or royal icing, I recommend using a high-quality gel food coloring. For softer, delicate pastel shades, readily available liquid food coloring will do the trick. While I haven’t personally experimented with powdered food coloring in this specific frosting, I anticipate it would also yield excellent results, especially for intense, natural colors.
Step-by-Step Guide: How to Make Ermine Frosting
Follow these detailed instructions to craft a perfectly smooth, light, and stable cooked flour frosting every single time. More precise measurements and ingredient quantities can be found in the comprehensive recipe card located further down this page.
Part 1: Preparing the Cooked Flour Base
This cooked base is the heart of your ermine frosting, providing its unique texture and stability.
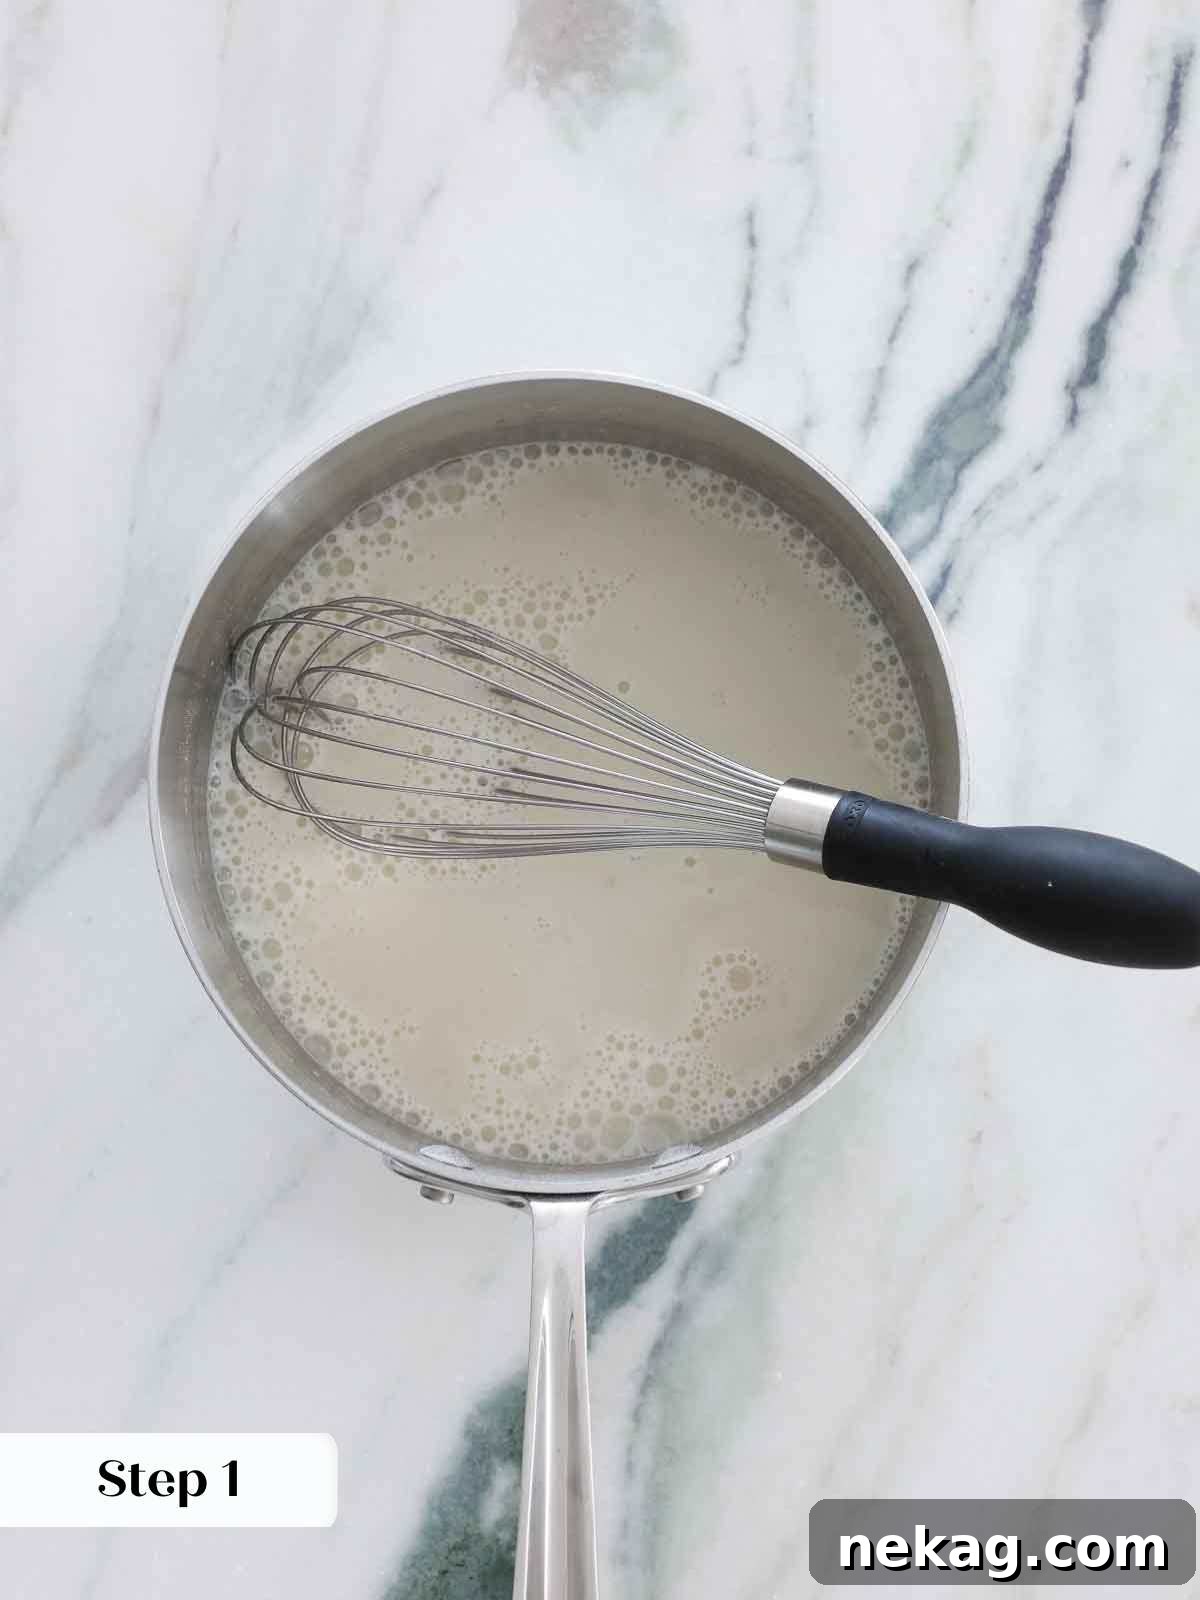
Step 1: Combine Dry Ingredients and Toast. In a large, heavy-bottomed saucepan, thoroughly combine the all-purpose flour, granulated sugar, and kosher salt. Stir these dry ingredients together to ensure an even distribution. Place the saucepan over medium heat and gently toast the mixture for approximately 30 seconds to 1 minute. This subtle toasting process helps to deepen the flavor of the flour and remove any raw taste, contributing to a more nuanced final frosting.
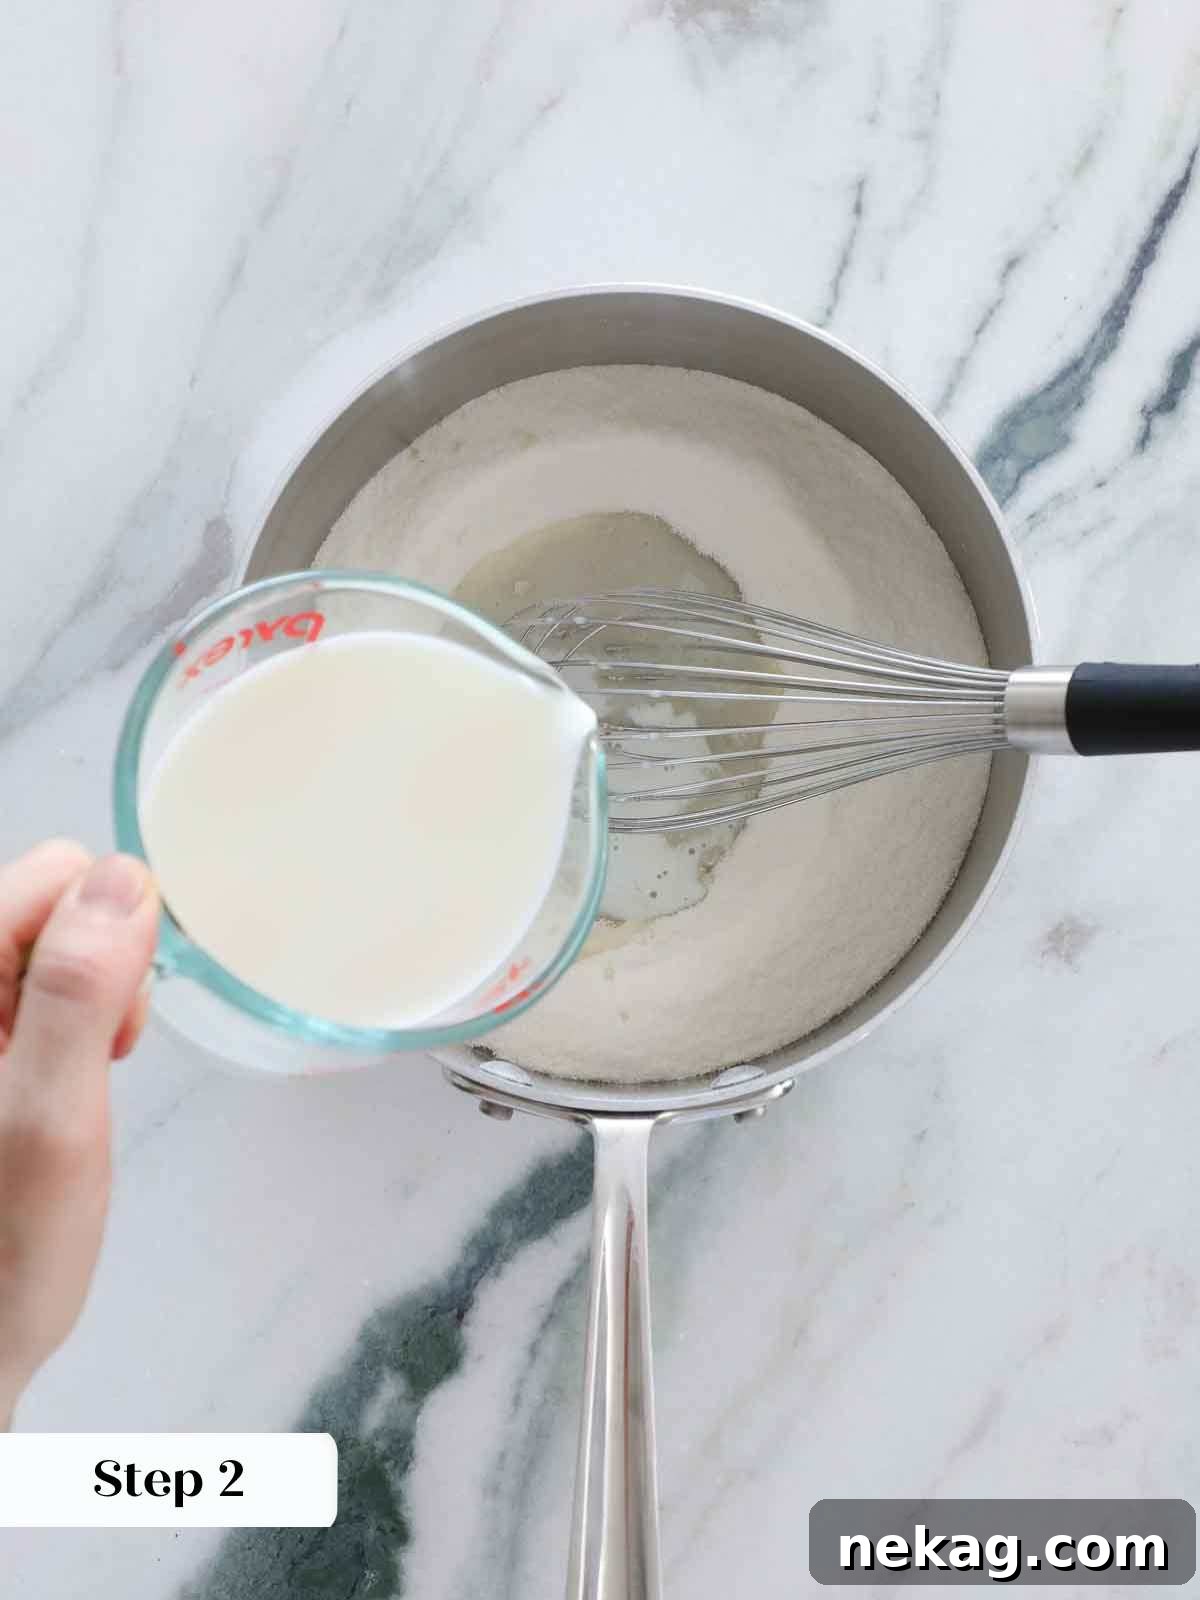
Step 2: Slowly Whisk in Milk for a Lump-Free Base. Begin slowly whisking in the whole milk, adding just a small amount at a time. It is crucial to ensure that each addition of milk is fully incorporated into the flour mixture before adding more. This careful, gradual incorporation prevents lumps from forming, similar to the technique used when making a smooth roux for savory sauces. Patience here will be rewarded with a silky-smooth base.
Step 3: Constant Stirring for Even Cooking. Once the milk is fully incorporated, switch from a whisk to a sturdy silicone spatula. Continue stirring the mixture constantly over medium heat. This constant movement is essential to prevent the mixture from sticking to the bottom of the pan and burning, which can introduce an undesirable flavor and texture to your frosting base.
To ensure thorough and even cooking without scorching, I recommend using a specific stirring pattern: move your spatula in a zig-zag motion across the bottom of the pot, making sure to scrape all corners and then around the edges. Repeat this pattern continuously. This technique is identical to what I employ when making delicate vanilla pudding, rich crème anglaise, or vibrant lemon curd, guaranteeing a perfectly smooth consistency every time.
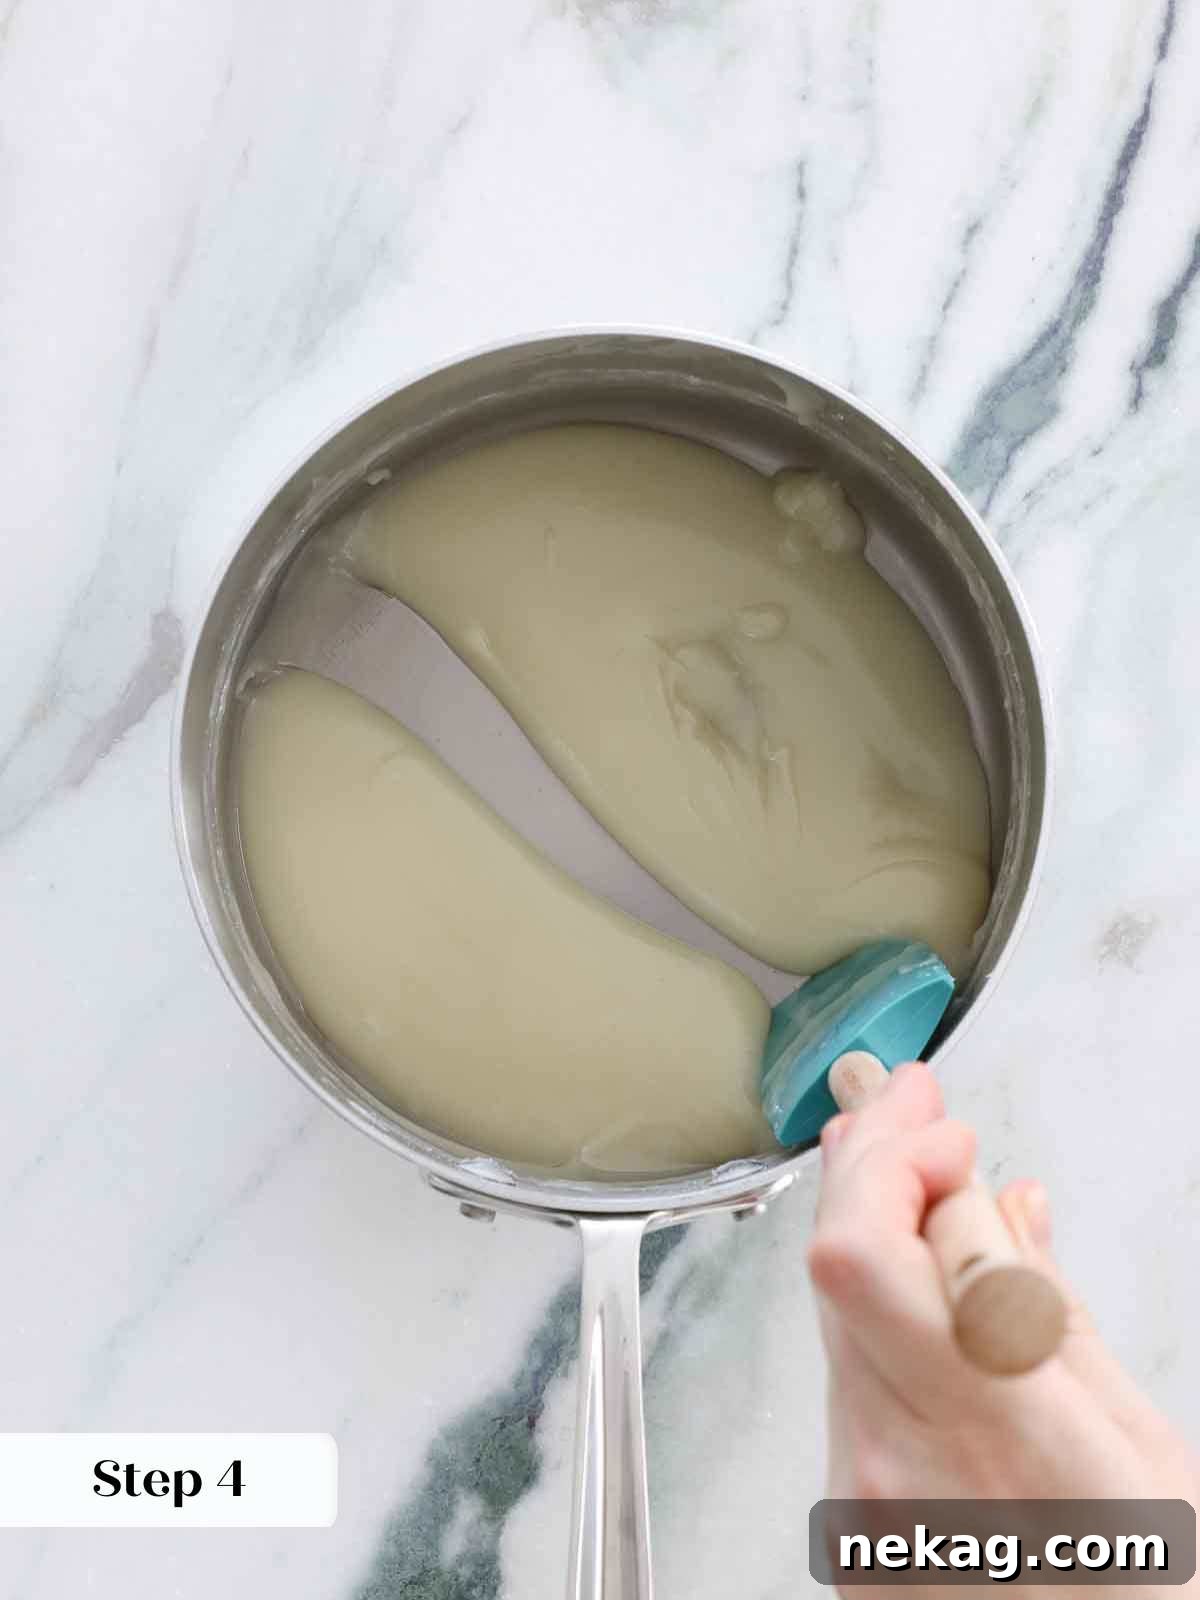
Step 4: Cook Until Thickened to the “Plop” Stage. Continue cooking and stirring the flour mixture until it has visibly thickened. You’ll know it’s ready when, instead of pouring off your spoon in a continuous stream, it drops off in distinct clumps or pieces. Another visual cue is when you can draw a line with your spatula on the bottom of the pot, and the mixture holds that line without immediately running back together. The series of photos below illustrates this perfect consistency. The thickness achieved at this stage is critical, as it directly influences the final consistency and stability of your frosting. A properly thickened base will result in a pipeable frosting that maintains crisp, beautiful lines and details, even in challenging warm or humid conditions.
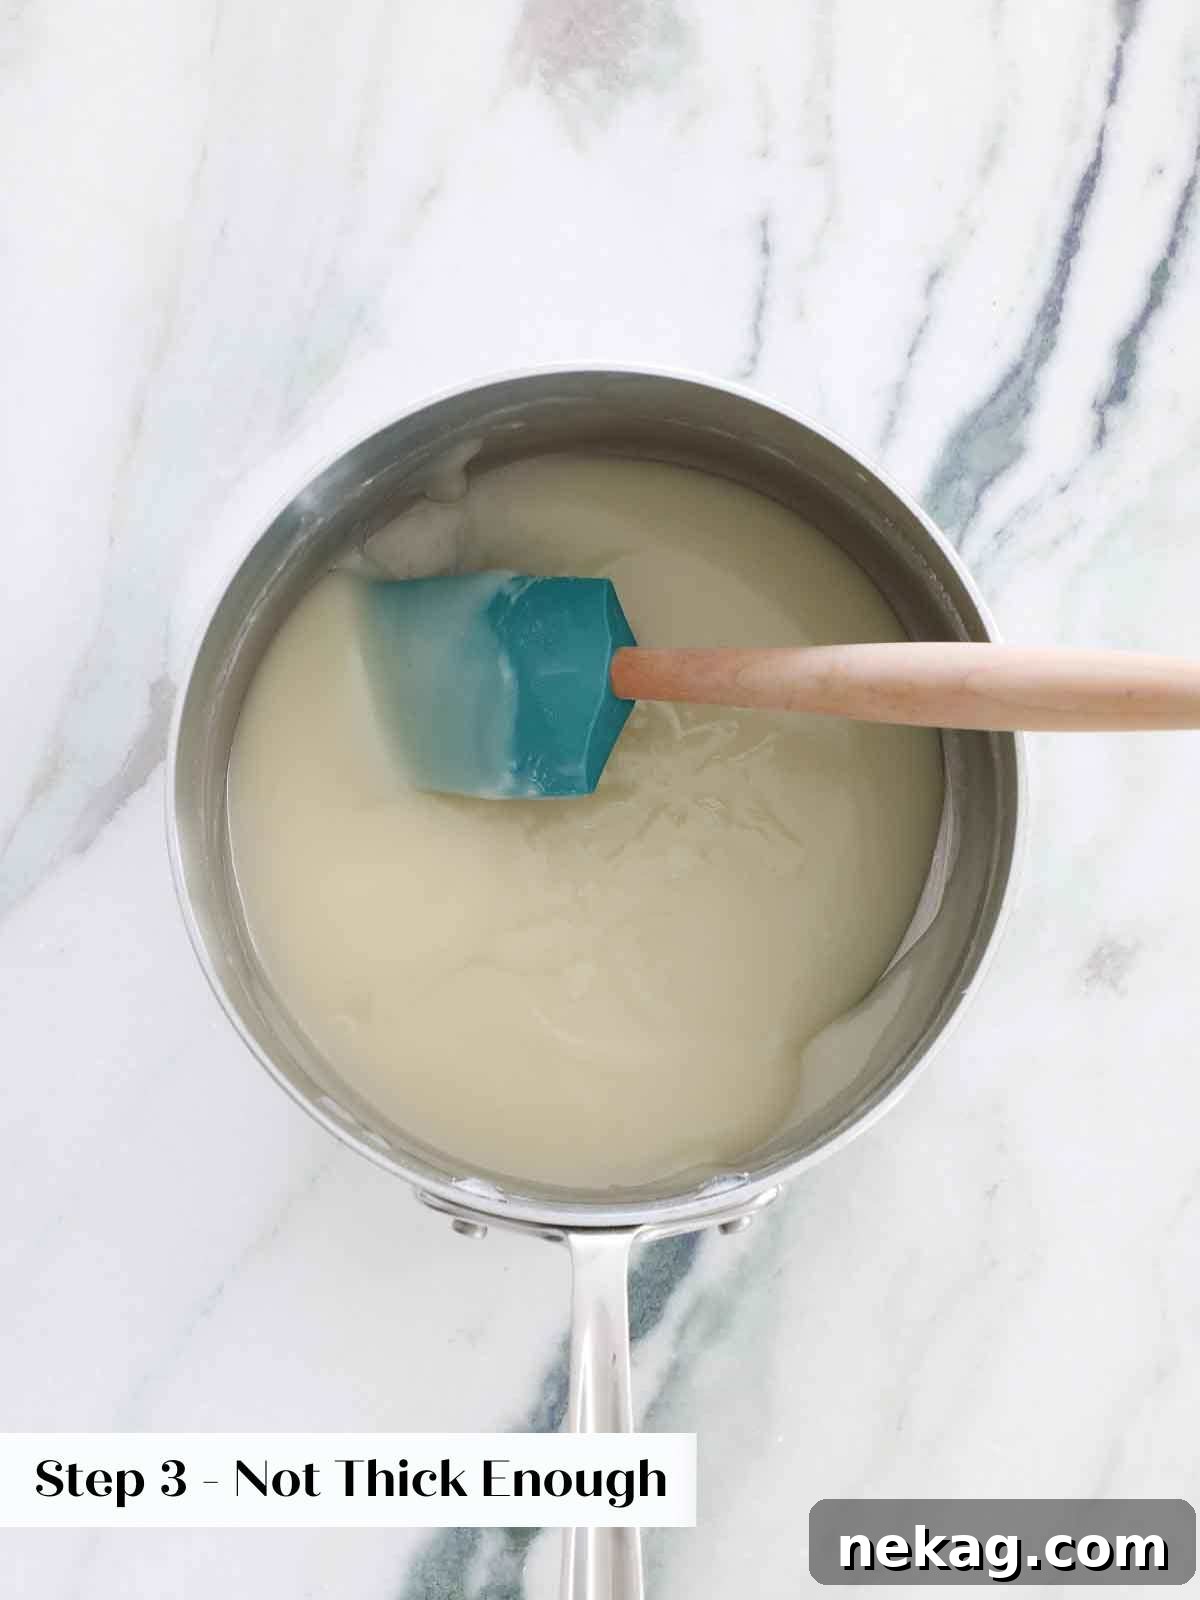
The final thickness of this base directly dictates the consistency of your finished frosting. A meticulously thickened base will yield a resilient, pipeable frosting that maintains beautiful lines and intricate details, even when subjected to higher temperatures and humidity.
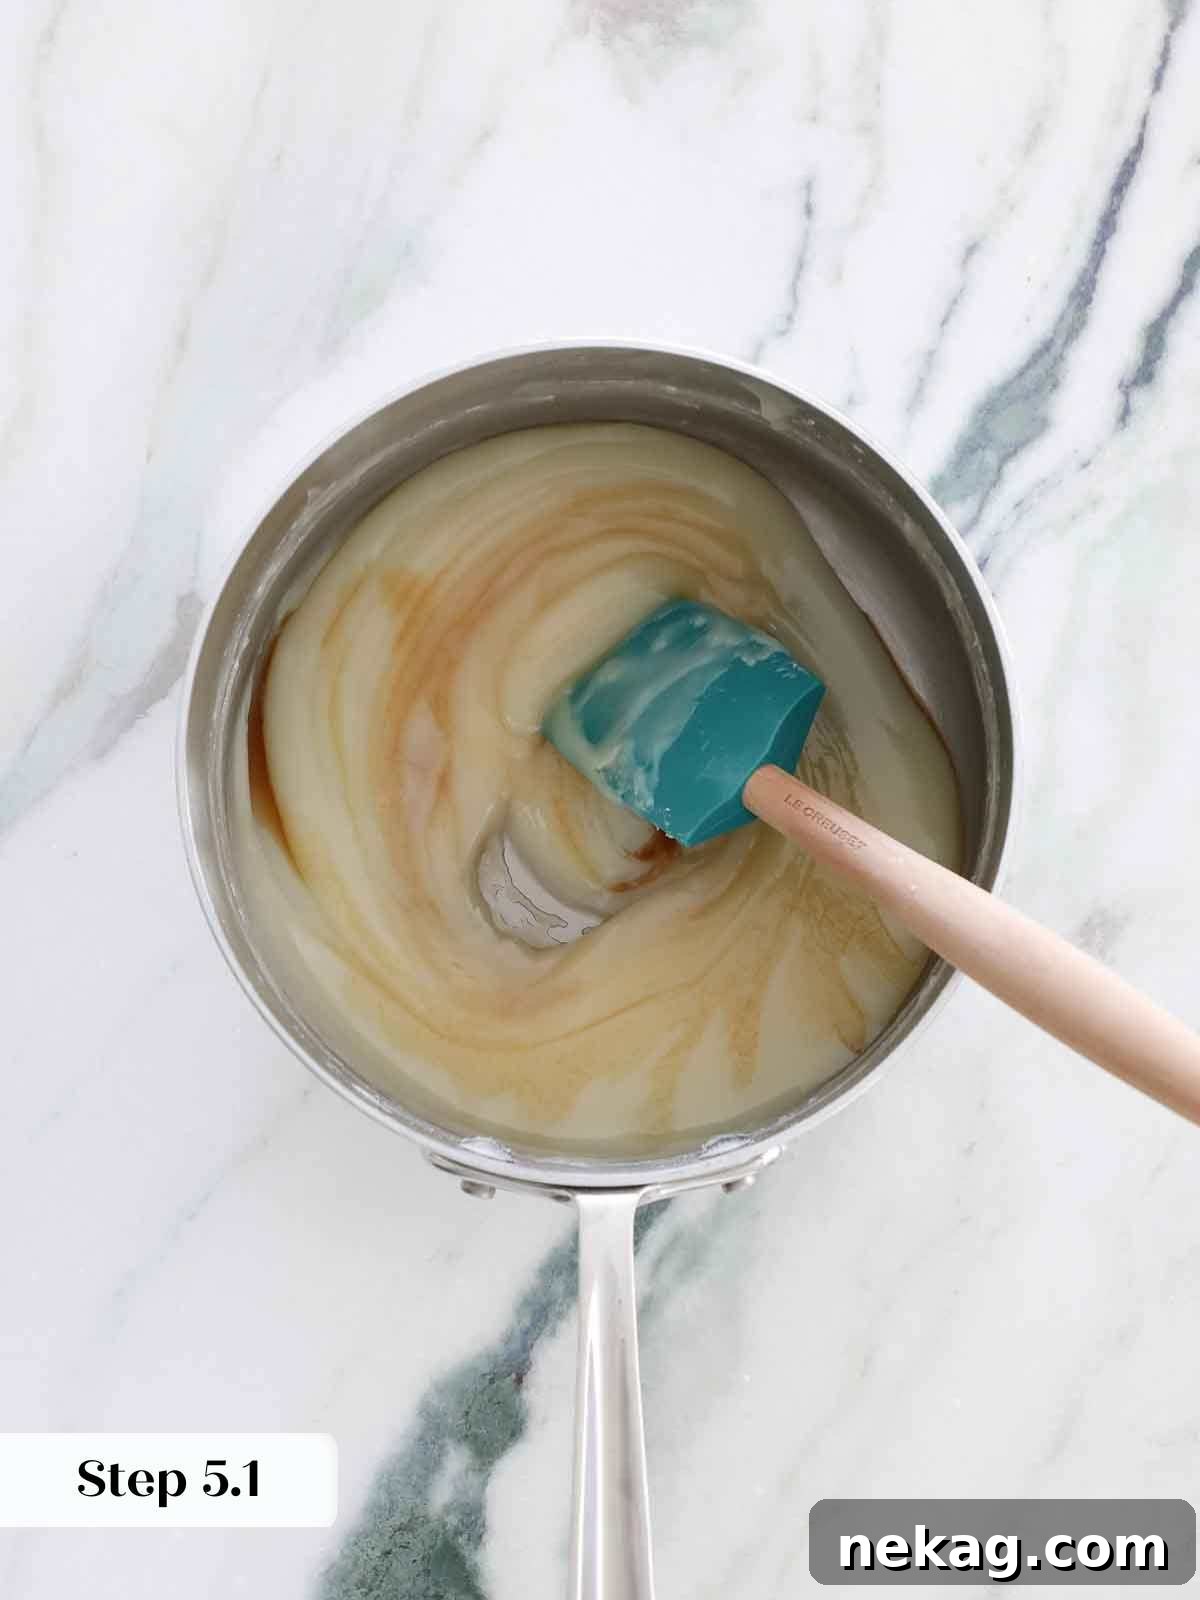
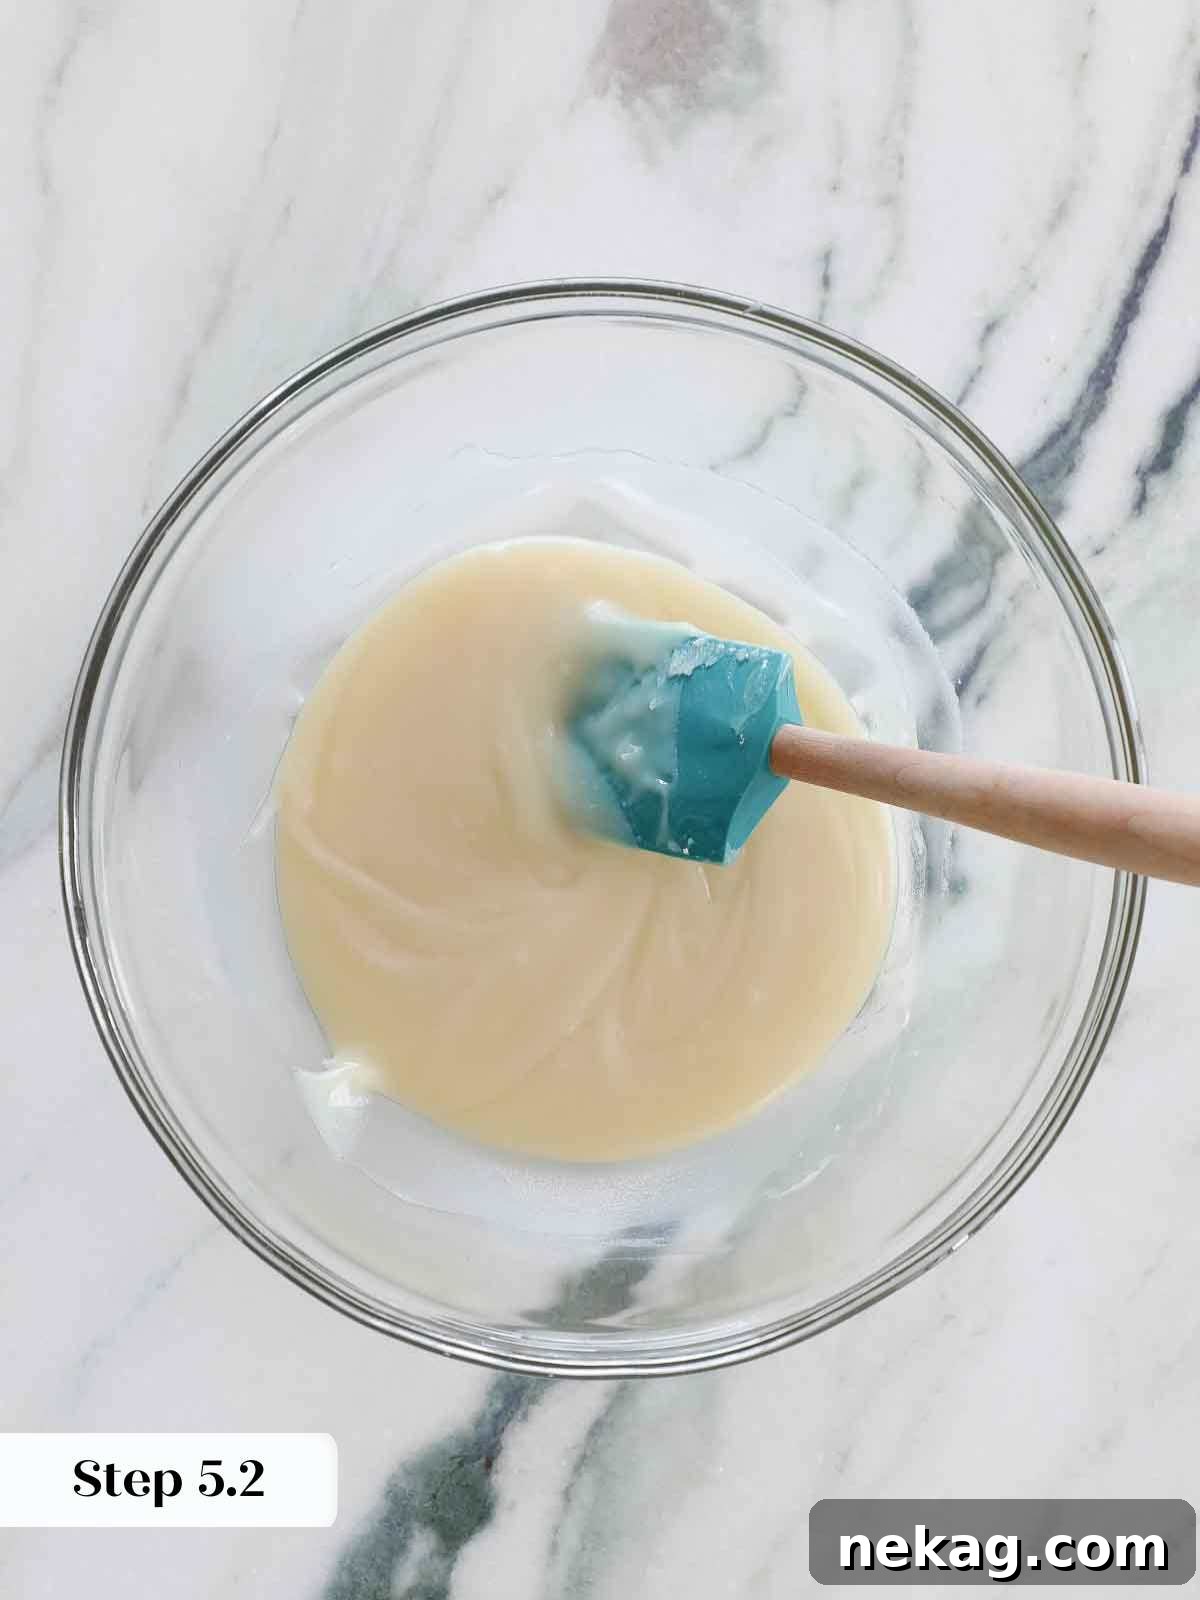
Step 5: Add Vanilla and Cool Properly. Once the mixture reaches the desired thickness, remove it immediately from the heat. Stir in the vanilla extract until fully combined. Using your spatula, scrape the entire mixture into a clean bowl. This next step is crucial for the final texture: cover the surface of the cooked flour base directly with plastic wrap, ensuring no air is trapped between the mixture and the wrap. Allow it to cool completely at room temperature until it is no longer warm to the touch. To expedite this process, you can cool the bowl in the refrigerator in 20-minute intervals, stirring it thoroughly after each interval, until it reaches approximately body temperature (around 70-75°F or 21-24°C). Proper cooling prevents your butter from melting prematurely in the next stage.
Part 2: Assembling the Frosting
With your cooked base cooled, it’s time to transform it into luxurious ermine frosting.
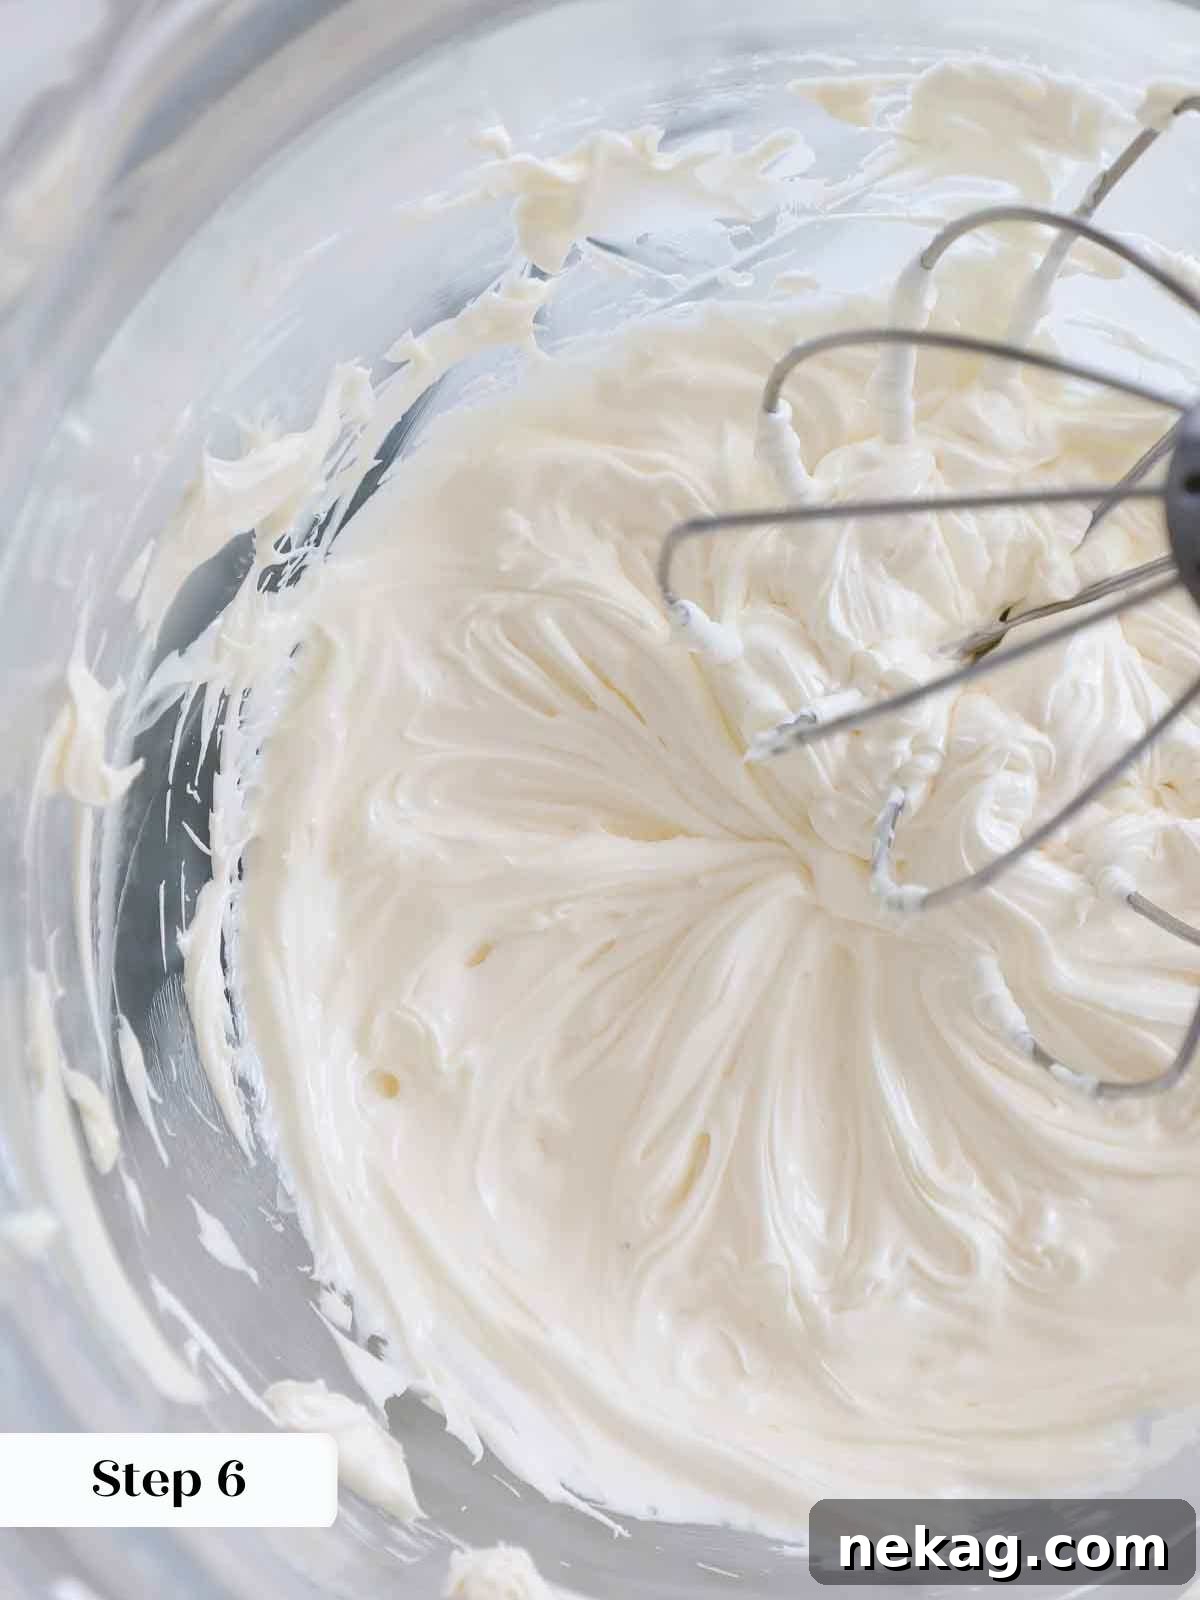
Step 6: Cream the Butter. In the bowl of a stand mixer fitted with the whisk attachment, beat the cool, pliable unsalted butter on medium-high speed. Continue beating until the butter becomes noticeably fluffy and light, almost white in color. This creaming process incorporates air, which is essential for the light and airy texture of the final frosting.
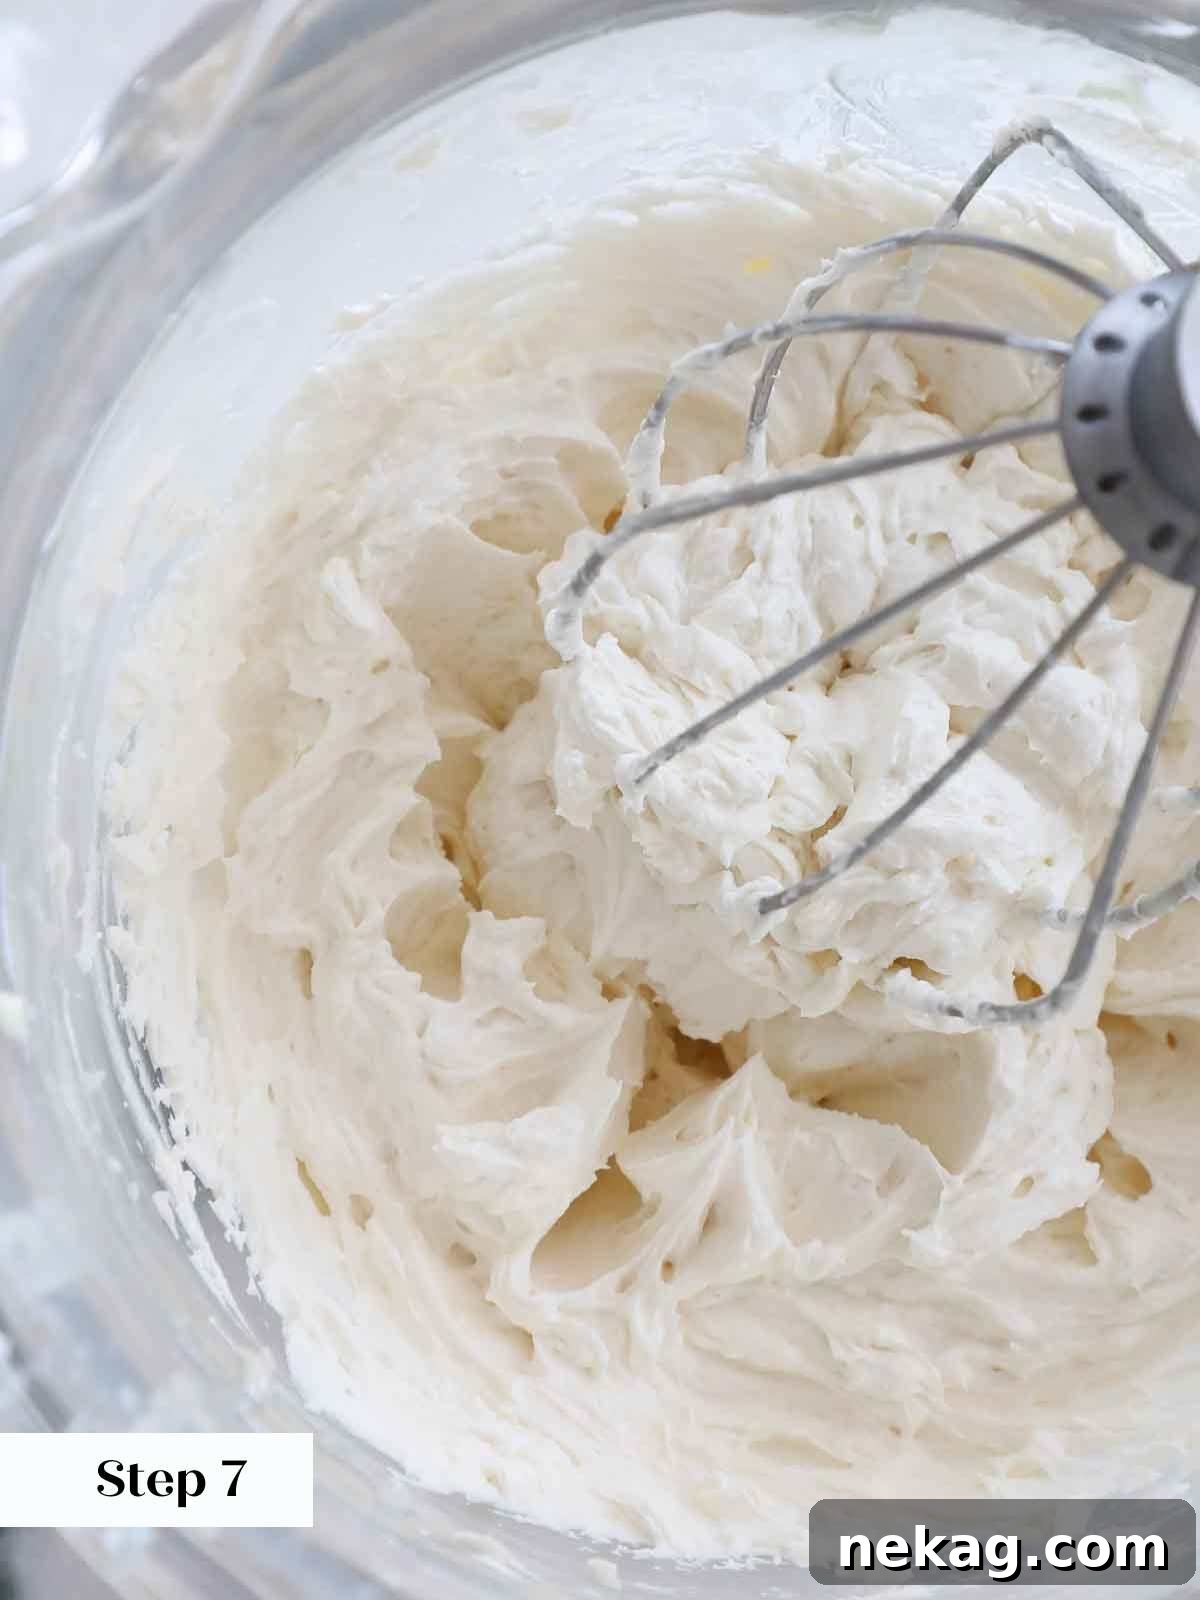
Step 7: Gradually Incorporate the Flour Mixture. With the mixer still running on medium speed, begin adding the cooled flour mixture, one spoonful at a time. Allow each spoonful to be fully incorporated into the butter before adding the next. This gradual addition ensures a smooth emulsion and prevents the frosting from separating. Periodically, stop the mixer to scrape down the sides and bottom of the bowl with your spatula, ensuring all ingredients are thoroughly combined.
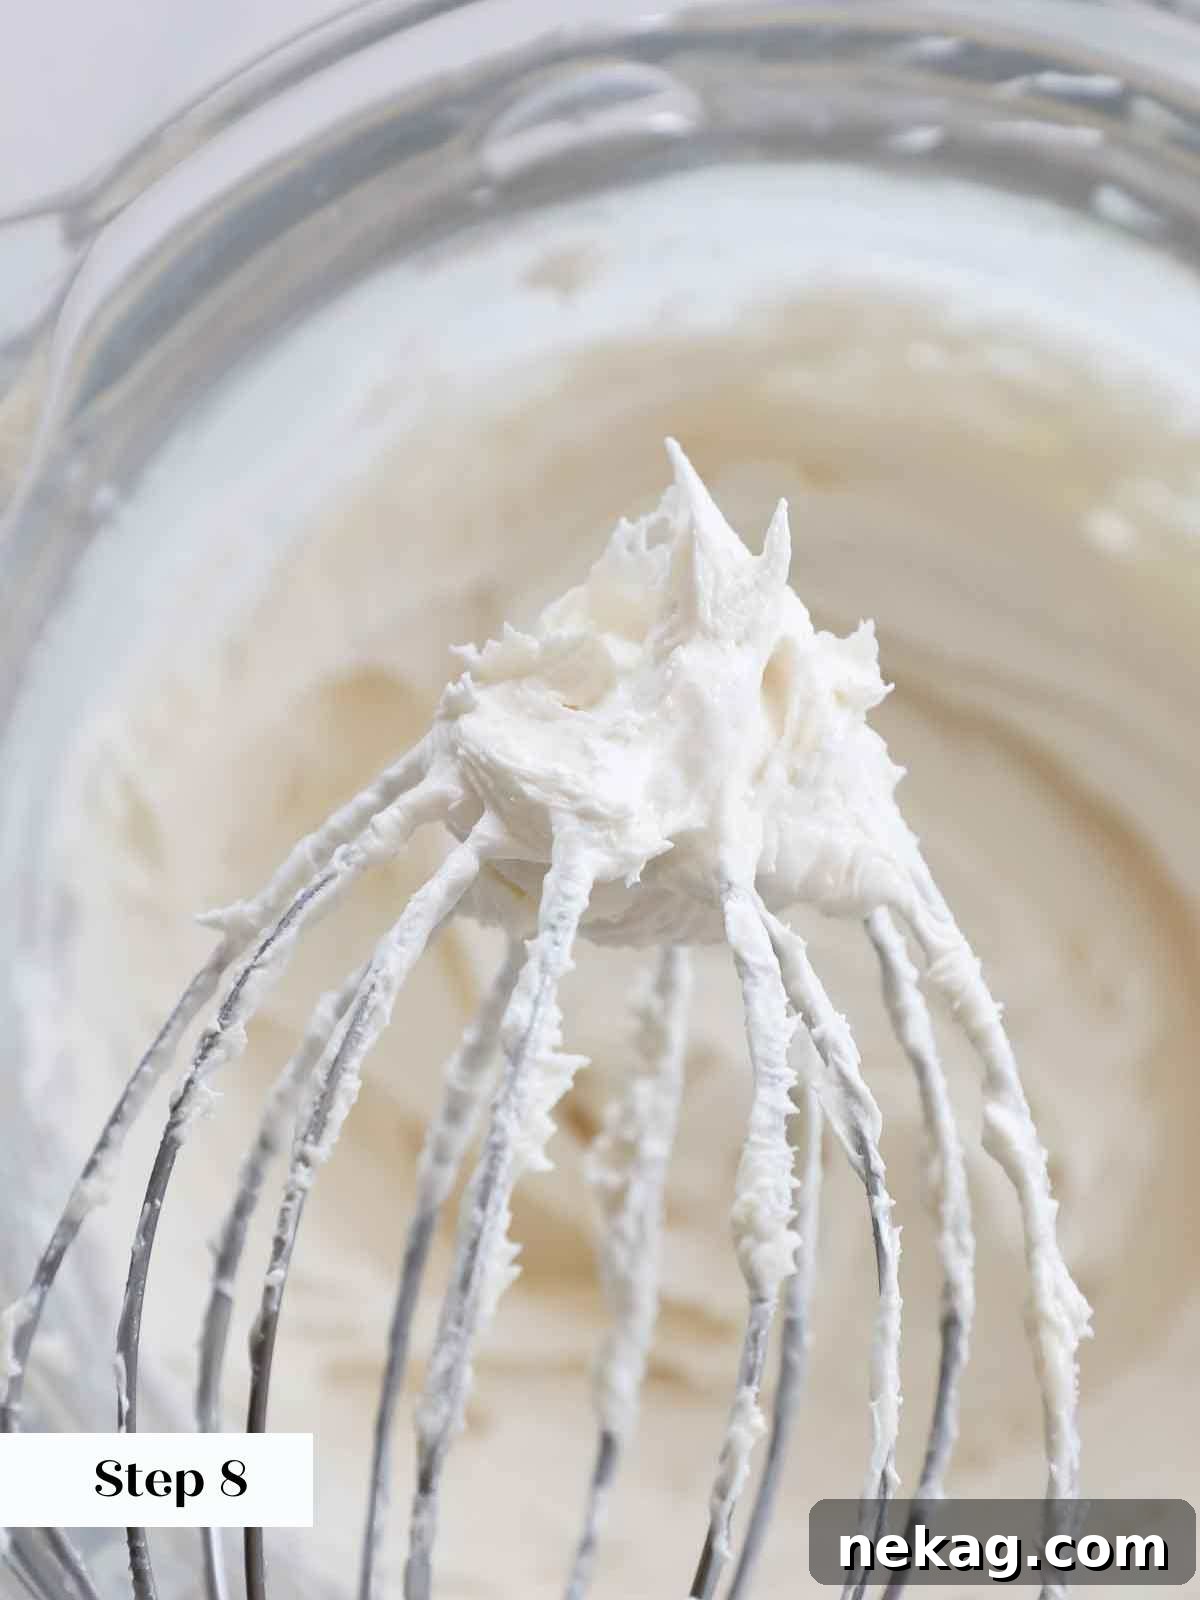
Step 8: Whisk to Stiff Peaks. Once all the flour mixture has been added and fully incorporated, add the remaining vanilla extract (if not already added in step 5, or an extra dash for intensified flavor). Increase the mixer speed to high and continue to whisk vigorously. The frosting will gradually become lighter, fluffier, and increase in volume, eventually holding stiff, defined peaks when the whisk is lifted. This indicates it’s perfectly aerated and ready.
Step 9: Ready to Use. Once your ermine frosting has reached the desired stiff peak consistency, it is ready for immediate use. Carefully transfer the fluffy frosting into a piping bag for decorative applications or use a spatula to spread it generously onto your cakes and cupcakes. Enjoy the delightful, unique texture and flavor!
Perfect Applications for Ermine Frosting
Ermine frosting’s unique balance of lightness and stability makes it incredibly versatile for a wide range of desserts. Here are some of my favorite ways to use this dreamy frosting:
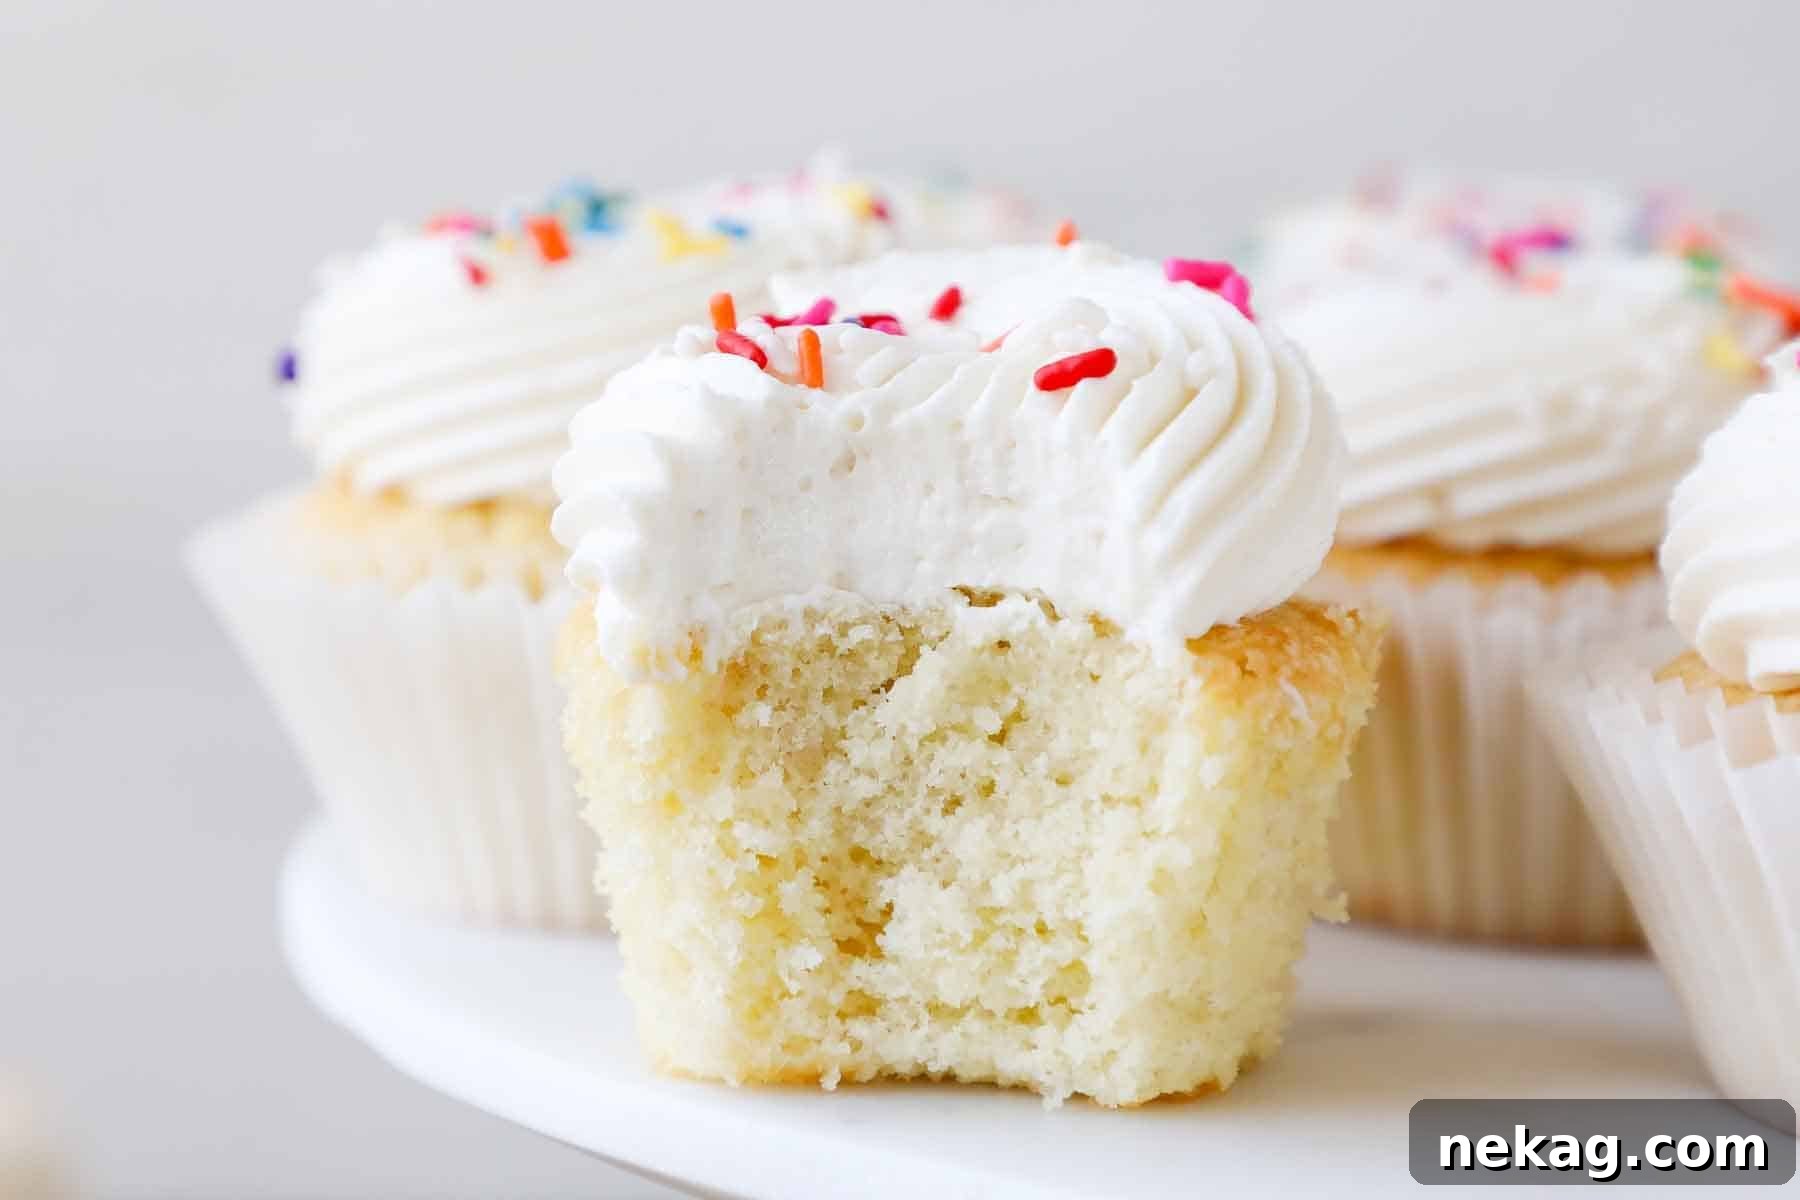
- Frosting for Sky-High Cupcakes: If you love your cupcakes with a generous swirl of frosting, ermine frosting is your ideal choice. Its light and airy nature means that what might be “too much” American buttercream feels “just right” with ermine! The frosting offers a delightful balance without overwhelming the cupcake. It’s truly spectacular with red velvet cupcakes, bright lemon cupcakes, classic vanilla cupcakes, or rich yellow cupcakes.
- Elegant Layer Cakes with Textured Finishes: While ermine buttercream’s airy quality might make achieving perfectly smooth, sharp edges on a layer cake a bit more challenging than with other buttercreams, its incredible texture and exquisite flavor make it an outstanding choice. Instead of striving for glass-smooth sides, embrace its natural charm by creating decorative swirled sides and tops. It’s particularly fantastic on cakes like the best carrot cake, a classic white cake, a simple one-bowl chocolate cake, or an old-fashioned chocolate fudge cake. Emulate the beautiful swirled finish I used for my classic yellow cake with chocolate frosting. For simpler celebrations, swirl it onto sheet cakes such as a cheerful funfetti cake or a festive old-fashioned gingerbread, especially delightful during Christmas.
- A Superior Topping for Brownies & Bars: Often, the sweetness of American buttercream can overpower rich brownies and bars. Ermine frosting, especially when made with a reduced ½ cup of sugar, provides a remarkably balanced and delicious topping. It elevates the experience of desserts like this classic chewy blondies recipe, incredibly moist one-bowl brownies, or indulgent butterscotch brownies. For a refreshing twist, try it with vibrant lemon blondies!
FAQs & Troubleshooting Your Ermine Frosting
Even with the best intentions, questions and minor mishaps can arise in the kitchen. Here are answers to common questions and solutions for troubleshooting your ermine frosting:
Ermine frosting is wonderfully adaptable for storage. You can store it in an airtight container in the refrigerator for up to two weeks, or in the freezer for up to two months. While it’s always best to use freshly made frosting for optimal texture, you can certainly prepare it in advance. If stored in the refrigerator, simply allow it to come to a cooler room temperature (about 65°F / 18°C) and then re-whip it in your stand mixer until it regains its light and fluffy consistency. Alternatively, you can prepare the cooked flour base ahead of time and store it in the fridge; just ensure it reaches body temperature before you incorporate it into the softened butter.
Yes, absolutely! Ermine frosting hardens beautifully when chilled in the refrigerator. This firm set is attributed to the solidifying butter and the gelatinized starches (flour) in its cooked base. Despite hardening, it remarkably retains its wonderfully light and airy texture even when served cold, making it a stable choice for layered cakes and piped decorations.
Yes, as this recipe is written, ermine buttercream is distinctly less sweet than a classic American buttercream frosting. Furthermore, you have the flexibility to reduce the sugar content to as little as ½ cup. At this reduced sweetness level, it becomes considerably less sweet than both Swiss meringue buttercream and Italian meringue buttercream, appealing to those who prefer a more subtle sugary note in their desserts.
If your ermine frosting looks curdled, grainy, or appears to have separated, the most probable cause is that the butter was too cold when you began incorporating the cooked flour mixture. This temperature difference prevents the ingredients from emulsifying smoothly. Don’t despair! Often, you can remedy this by continuing to beat the frosting on medium-high speed. The friction from the mixer can generate enough warmth to bring the butter and cooked base to a more harmonious temperature, allowing them to come together into a smooth consistency. If it’s still not coming together, try gently warming the bowl briefly over a double boiler or with a heat gun for just a few seconds, then continue beating.
A runny ermine frosting can typically be traced back to one of three common issues:
- Insufficiently Cooked Flour Mixture: The flour base was not cooked long enough to thicken properly. It needed to reach the “plop” consistency described in the instructions.
- Warm Flour Mixture: The cooked flour mixture was not adequately cooled before being added to the butter. If it’s too warm, it will melt the butter, resulting in a soft, soupy frosting.
- Overly Soft Butter: The butter itself was too soft to begin with. Remember, it should be cool but pliable, not at full room temperature, which can make it too liquidy when beaten.
In any of these scenarios, there’s usually a fix. Try chilling the entire frosting (or the butter/flour base if you catch it early) in 20-minute intervals in the refrigerator. After each interval, beat the mixture again until it starts to firm up and come together. Repeat until the desired consistency is achieved.
If you’ve tried and loved this incredible ermine frosting recipe, please consider leaving a 🌟 star rating and sharing your experience in the comments below. Your feedback truly makes my day and helps other bakers discover this amazing frosting!
Ermine Frosting (Boiled Milk Frosting)
Chef Lindsey
30 mins
45 mins
1 hr
15 mins
12
Cupcakes
Comment
Print Recipe
Ingredients
-
5 tablespoons all-purpose flour -
1 cup granulated sugar -
1/8 teaspoon kosher salt -
1 cup whole milk -
1 teaspoon vanilla extract -
1 cup unsalted butter cool but pliable
Instructions
-
In a large saucepan combine the flour, sugar and salt. Stir to combine. Toast over medium heat for 30 seconds to 1 minute.
-
Slowly whisk in the milk, adding just a little at a time making sure it is completely incorporated before adding more. This will keep the frosting lump free just like with a roux.
-
Switch from the whisk to a silicone spatula and stir constantly over medium heat. I like to use a zig-zag pattern across the pot and then around the edges. I repeat this same pattern to ensure that I am scraping the whole bottom and none will burn. It is the same technique that I use for vanilla pudding or lemon curd!
-
Continue cooking until the flour mixture has thickened and will drop off a spoon in clumps rather than pour off in a stream. This thickness will determine the consistency of your final frosting. A thicker base will make a pipeable frosting that holds beautiful lines and details even in high heat and humidity.
-
Remove from the heat and scrape into a bowl with the spatula. Cover the top with plastic wrap that is touching the surface, and allow to cool at room temperature until it is no longer warm to the touch. You can speed this up by cooling it in 20 minute intervals in the refrigerator, stirring and repeating until it is body temperature.
-
In the bowl of a stand mixer fitted with the whisk attachment, beat the butter on medium-high speed until fluffy and almost white in color.
-
With the mixer running, add a spoonful of the flour mixture and allow it to beat in fully before adding the next. Stop the mixer to scrape in the last of the flour mixture and scrape down the sides and bottom of the bowl.
-
Add the vanilla extract and continue to whisk on high until it holds stiff peaks.
-
Transfer to a piping bag or spread on cakes.
Notes
Presentation – For a pristine white frosting, ensure your butter is thoroughly whipped and consider using clear vanilla extract.
Variations – Easily create a chocolate version by adding cocoa powder at the end of the base cooking. Experiment with various extracts to introduce new flavors.
Storage – Store in an airtight container in the refrigerator for up to 2 weeks, or in the freezer for up to 2 months. While best used fresh, it can be re-whipped from the refrigerator if made in advance.
Origins – This recipe is adapted from Mrs. Elsie Ramey of Winchester, Virginia, as found in the Southern Living Cookbook Desserts 1968 edition. The cooking method is influenced by Recipe Tin Eats, whose recipe (attributed to The New York Times) shares similar techniques.
Nutrition
Calories: 224kcal
|
Carbohydrates: 20g
|
Protein: 1g
|
Fat: 16g
|
Saturated Fat: 10g
|
Polyunsaturated Fat: 1g
|
Monounsaturated Fat: 4g
|
Trans Fat: 1g
|
Cholesterol: 43mg
|
Sodium: 34mg
|
Potassium: 39mg
|
Fiber: 0.1g
|
Sugar: 18g
|
Vitamin A: 506IU
|
Calcium: 30mg
|
Iron: 0.2mg
Dessert
American
224
Explore More Baking Delights
I sincerely hope you enjoyed creating and tasting this professional chef-tested ermine frosting recipe. It’s truly a game-changer! Don’t stop your baking adventure here; explore our other incredible frosting & buttercream recipes to expand your repertoire. Or, dive deeper into our extensive collections of cake recipes and cupcake recipes, where you’ll find the perfect base for this light, fluffy, and perfectly stable frosting!