
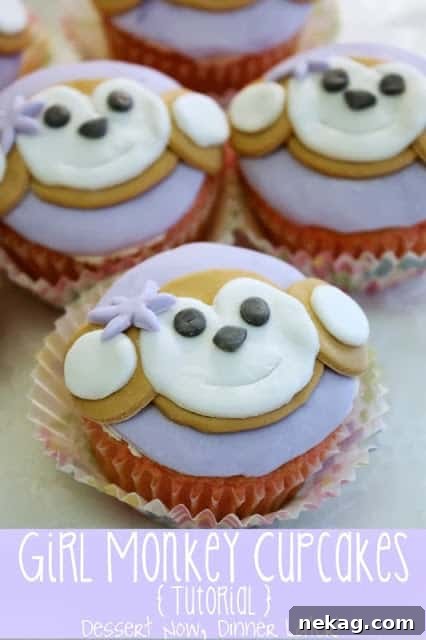
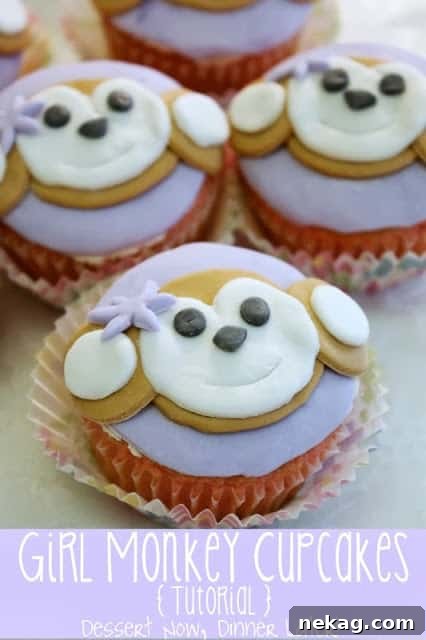
Charming Girl Monkey Cupcakes: An Adorable Fondant Tutorial for Unforgettable Parties
There’s something truly special about homemade birthday treats, especially when they’re crafted with love and a touch of creativity. As a parent, I understand the desire to make birthdays memorable, and sometimes, that means embracing a bit of “stress” in the kitchen to create something spectacular. While elaborate cakes are always an option, this year, I ventured into the world of decorated cupcakes – a choice that proved to be both delightful and a fantastic opportunity to hone my decorating skills. These adorable Girl Monkey Cupcakes, made with a wonderfully pliable Marshmallow Fondant, are not only cute but also surprisingly achievable for home bakers looking to impress!
Cupcakes offer a perfect canvas for individual artistry and are often easier to serve at parties. This detailed tutorial will guide you through creating charming girl monkey faces using colorful fondant, transforming simple cupcakes into a whimsical delight that will surely be the talk of any celebration. Whether you’re a seasoned baker or just starting your decorating journey, these steps are designed to be clear, concise, and incredibly fun. Let’s dive in and create some edible art!
Why Choose Marshmallow Fondant for Your Cupcakes?
Before we get into the nitty-gritty of decorating, let’s talk about our star ingredient: marshmallow fondant. If you’ve ever been intimidated by traditional fondant, you’re in for a treat. Marshmallow fondant is a game-changer for several reasons:
- Delicious Taste: Unlike some store-bought fondants that can be bland or overly sweet, marshmallow fondant tastes exactly like what it’s made of – sweet marshmallows! This makes it far more palatable for both kids and adults.
- Easy to Make: With just a few simple ingredients (marshmallows, powdered sugar, and a little water or shortening), you can whip up a batch in no time. It’s a fantastic DIY option that saves on cost and gives you complete control over consistency.
- Pliable and Forgiving: Marshmallow fondant is incredibly elastic and easy to work with. It stretches beautifully without tearing, making it ideal for cutting intricate shapes and smoothing over surfaces. If it gets too dry, a quick knead can often revive it.
- Cost-Effective: Making your own fondant is significantly cheaper than purchasing pre-made rolls, especially when you need multiple colors.
For this project, the pliability of marshmallow fondant is particularly beneficial, allowing us to create distinct layers and delicate features for our monkey faces. It’s truly a decorator’s dream material!
Essential Tools and Ingredients for Your Monkey Cupcakes
Gathering all your supplies before you begin will make the decorating process smooth and enjoyable. Here’s a detailed list of what you’ll need to create 24 adorable Girl Monkey Cupcakes:
Ingredients:
- 24 Baked and Cooled Cupcakes: Any flavor you love will work perfectly. Ensure they are completely cool before frosting. Vanilla or banana cupcakes would complement the monkey theme wonderfully.
- 1/2 Cup Buttercream Frosting: This acts as the “glue” that adheres the fondant to your cupcakes. A thin layer is all you need. You can use homemade or store-bought buttercream.
- 1 Batch Marshmallow Fondant: You’ll need a generous amount, following this recipe for marshmallow fondant. Make sure it’s fresh and pliable.
- Food Coloring Gels:
- Purple: For the main background color and flower. Gel colors provide rich, vibrant hues without adding too much moisture to your fondant.
- Brown: For the monkey’s muzzle and ears.
- Black: For the eyes and nose.
- (Optional) White: While the base fondant is white, having extra white gel can help intensify the color for specific features if needed.
- Powdered Sugar (Confectioners’ Sugar): Essential for dusting your work surface and rolling pin to prevent the fondant from sticking. Keep a generous supply on hand.
- Water: A tiny bit of water acts as the adhesive to stick fondant pieces together.
Tools:
- Rolling Pin: A non-stick rolling pin is ideal for rolling out fondant evenly.
- Set of Small Circle Cutters: You’ll need various sizes for the different parts of the monkey face. A set like this set of three is perfect. You’ll need:
- One large circle (cupcake top size)
- One medium circle (muzzle and white face details)
- Two small circles (ears and eyes)
- Wilton Piping Tips (or similar small round cutters): For very small cut-outs like the brown ears and black eyes. Alternatively, this set of plain cutters is also excellent.
- Sharp Paring Knife or Fondant Tool: For drawing the mouth and other fine details.
- Small Paintbrush (food-safe): For dabbing water onto fondant pieces. Dedicate one brush specifically for food use.
- Plastic Wrap: To keep your fondant from drying out while you work.
- Work Surface: A clean, smooth surface (like a silicone mat or countertop) for rolling out fondant.
Step-by-Step Tutorial: Crafting Your Girl Monkey Cupcakes
Let’s get started on creating these adorable monkey faces! Precision and patience are your best friends here.
Step 1: Prepare and Color Your Fondant
Divide your marshmallow fondant into several portions: a large portion for purple, a medium portion for brown, a small portion for black, and a small portion to remain white. Knead the food coloring gels into each portion until the color is evenly distributed and no streaks remain. This takes a bit of elbow grease, but the vibrant results are worth it. Keep any fondant you’re not immediately working with wrapped tightly in plastic wrap to prevent it from drying out.
Step 2: Create the Purple Cupcake Base
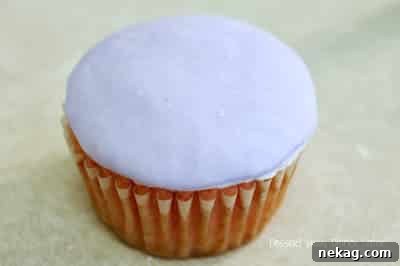
Lightly dust your work surface with powdered sugar. Roll out the purple fondant to an even thickness, about 1/8 inch. Use your largest circle cutter to cut out a purple circle that perfectly matches the size of the top of your cupcake. Frost a thin, even layer of buttercream on top of a cooled cupcake. Immediately place the purple fondant circle on top, gently smoothing out any bumps or air pockets with your finger or a fondant smoother. This creates the vibrant background for your monkey face. Repeat for a few cupcakes at a time to keep the buttercream fresh and receptive to the fondant.
Step 3: Add the Brown Muzzle
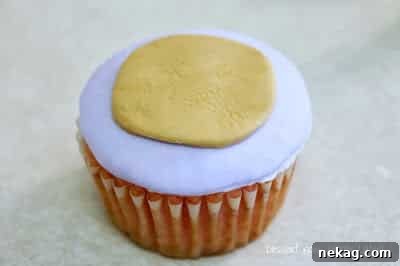
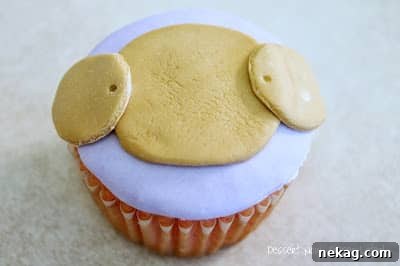
Roll out the brown fondant. Using a medium-sized circle cutter (smaller than the purple base), cut out a brown circle. This will form the monkey’s muzzle. Dip your food-safe paintbrush into a tiny bit of water and lightly dab the back of the brown circle. This thin layer of water acts as an adhesive. Carefully center and adhere the brown circle onto the purple base of the cupcake. Gently smooth it down with your finger to ensure good contact and remove any imperfections.
Step 4: Shape the Ears
Roll out more brown fondant. Using a small circle cutter or a wide piping tip (like a Wilton 1A or 2A), cut out two small brown circles for the ears. If using a piping tip, you may need to gently push the fondant out. Lightly dab the back of each ear with water and position them at the top sides of the brown muzzle, slightly overlapping onto the purple background. Gently press and smooth them into place with your finger.
Step 5: Create the White Face Details
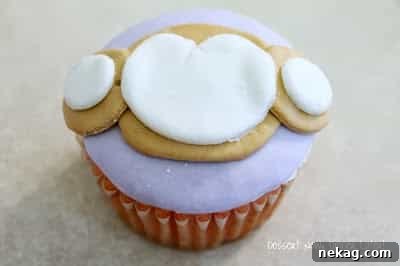
Roll out the white fondant. Cut out two small white circles and one medium white circle. To create the unique shape for the monkey’s upper face, take the medium white circle and use one of your small circle cutters (the same one used for the ears) to cut a gentle, curvy “V” shape from the top edge. This creates an indentation that resembles the top of a monkey’s mouth area. Dab the back of each white piece (the two small circles and the shaped medium piece) with water and carefully adhere them to the brown muzzle, positioning the shaped piece at the bottom, centered, and the two small circles above it. Smooth gently with your finger.
Step 6: Add the Flower, Eyes, and Nose
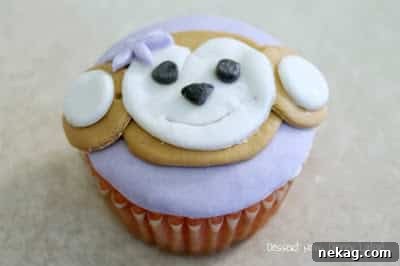
Roll out your purple fondant again. Use a small flower cutter (or cut a simple flower shape freehand with a knife) to create a cute purple flower. This is a key “girl monkey” detail! Roll out the black fondant. Cut out three tiny black circles. Use two of these for the eyes, placing them above the white face details. Take the third black circle and gently shape it into a small triangle or an oval for the nose. Dab the back of each piece (flower, eyes, and nose) with a tiny amount of water and carefully position them on the monkey’s face. Smooth gently to secure.
Step 7: Draw the Mouth
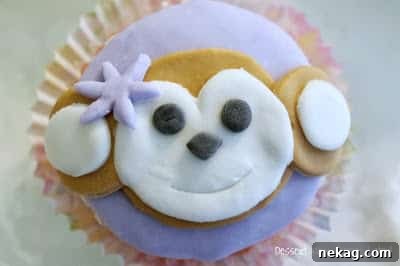
Finally, to give your monkey a cheerful expression, use a sharp paring knife or a fine-tipped food-safe marker (if you have one) to gently draw a curved mouth beneath the nose on the white fondant. Be precise and steady with your hand. And voilà! Your adorable Girl Monkey Cupcake is complete! Repeat these steps for the remaining cupcakes, working in batches to maintain efficiency and freshness.
Helpful Tips for Fondant Decorating Success
Working with fondant can be incredibly rewarding, but a few insider tips can make the process even smoother and more enjoyable. Here are some pro tips to help you achieve perfect results:
- Work in Small Batches: Instead of frosting all 24 cupcakes at once, work on 4-6 cupcakes at a time. This prevents the buttercream from drying out before you can apply the fondant, ensuring better adhesion.
- Keep Fondant Covered: Fondant dries out quickly when exposed to air. Always keep any colored fondant you are not actively using wrapped tightly in plastic wrap. If your fondant starts to feel stiff or dry while you’re working, re-knead it for a minute or two to warm it up with your hands. This often restores its pliability.
- Rehydrating Dry Fondant (Use Caution!): If your fondant becomes significantly dry and hard to knead, you can try a very brief microwave trick. Place the fondant on a microwave-safe plate and microwave for 5-10 seconds MAX. This should soften the marshmallows just enough to make it pliable again. BE EXTREMELY CAREFUL: If it melts even slightly, it can be incredibly hot and sticky. Do not touch it directly if it’s melted; let it cool slightly. Once softened, you might need to knead in a little more powdered sugar to get it back to a workable consistency.
- Dust Your Cutters: To prevent fondant from sticking to your circle cutters and other tools, dip them lightly into powdered sugar before each cut. This ensures clean, crisp shapes every time.
- Water as Your Fondant Glue: Keep a tiny bowl of water and a small, dedicated food-safe paintbrush nearby. A very light dab of water is all you need to adhere fondant pieces together. Too much water will make the fondant gooey and difficult to work with.
- Even Thickness is Key: When rolling out your fondant, strive for an even thickness. This ensures consistent results across all your cupcakes and helps the fondant layers sit smoothly. Silicone rolling pin guides can be very helpful for this.
- Smooth with Care: After applying each fondant layer, gently smooth it with your fingertips or a fondant smoother. This removes air bubbles and creates a professional finish.
Creative Variations and Customization
Once you’ve mastered the basic Girl Monkey Cupcake, don’t hesitate to get creative! This technique can be adapted for countless variations:
- Boy Monkey Cupcakes: Simply omit the flower and perhaps use a blue or green background color for a boy version. You could even add a tiny fondant bow tie or a little fondant hat!
- Different Expressions: Experiment with drawing different mouth shapes or eye placements to give your monkeys varied personalities – happy, sleepy, mischievous!
- Other Animals: The layered circle technique is versatile. With different colors and minor adjustments, you could create bears, pigs, owls, or even fantastical creatures.
- Themed Parties: Customize the background color and accessories to match a specific party theme. For example, a jungle theme could use green bases with leaves.
- Flavor Pairings: While these designs are adorable, don’t forget the taste! Consider pairing your monkey cupcakes with banana-flavored cupcakes, chocolate, or peanut butter frosting for an extra thematic touch.
Storage and Presentation
Proper storage is key to keeping your beautiful cupcakes fresh and photo-ready:
- Storage: Fondant-decorated cupcakes are best stored at room temperature in an airtight container for up to 2-3 days. Refrigeration can sometimes cause fondant to “sweat” or become sticky due to condensation. If you must refrigerate, allow them to come to room temperature slowly in the container before opening to minimize condensation.
- Presentation: Arrange your monkey cupcakes on a tiered stand for a stunning display, or place them in individual cupcake liners for easy serving. These cupcakes are so charming, they hardly need any extra adornment!
Creating these Girl Monkey Cupcakes is a fantastic way to add a personal, adorable touch to any birthday party or special occasion. The process is a rewarding journey of creativity, and the smiles these treats bring are truly priceless. So, have fun with it, unleash your inner decorator, and enjoy the magical experience of bringing these sweet little monkeys to life!
Happy baking and decorating!