
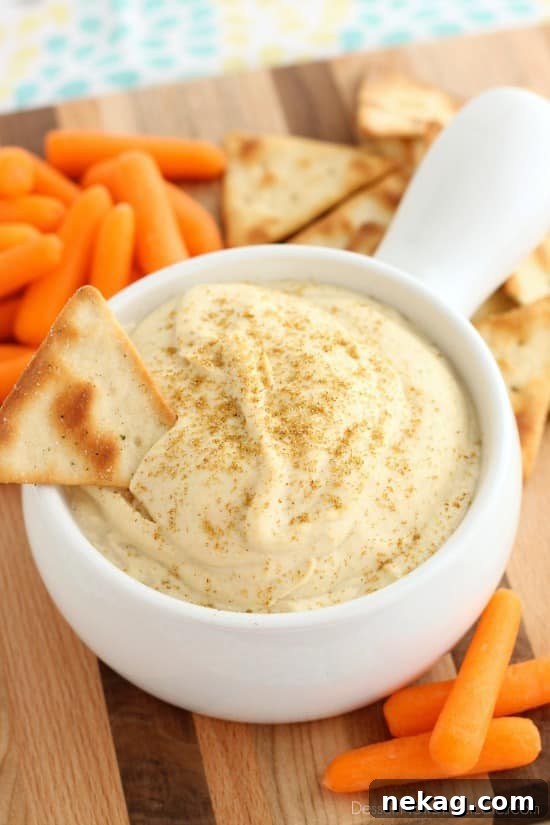
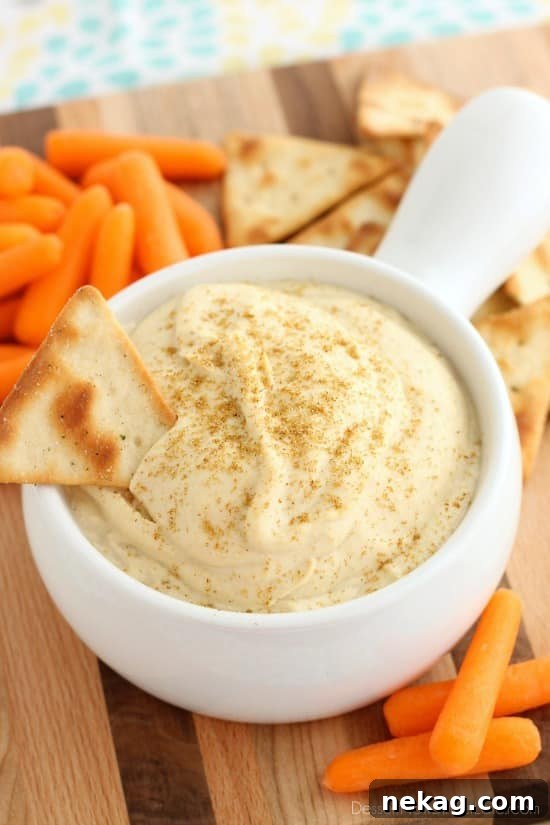
Welcome to the easiest and most delicious journey into homemade hummus! If you’re looking for a vibrant, healthy, and incredibly flavorful dip that comes together in mere minutes, you’ve come to the right place. This Easy Garlic Hummus recipe is a game-changer, promising a smooth, creamy texture and a rich, garlicky taste that will elevate any snack time or meal. Forget store-bought versions; once you experience the freshness and simplicity of making your own, there’s no turning back. It’s truly a delight to whip up a batch of this Mediterranean staple and enjoy its wholesome goodness with your favorite dippers.
The Unmatched Appeal of Homemade Hummus
In our busy lives, finding quick, healthy snacks that genuinely satisfy can often feel like a challenge. That’s precisely where homemade hummus shines. It’s far more than just a dip; it’s a versatile, protein-packed staple that can anchor a meal or serve as the perfect pick-me-up any time of day. Unlike many store-bought options that can be laden with preservatives, artificial flavors, and unnecessary oils, crafting your own hummus gives you complete control over the ingredients. This ensures a product that is not only fresh and wholesome but also perfectly customizable to your taste preferences every single time. Moreover, there’s an immense sense of satisfaction that comes from creating something so delicious and nutritious from scratch.
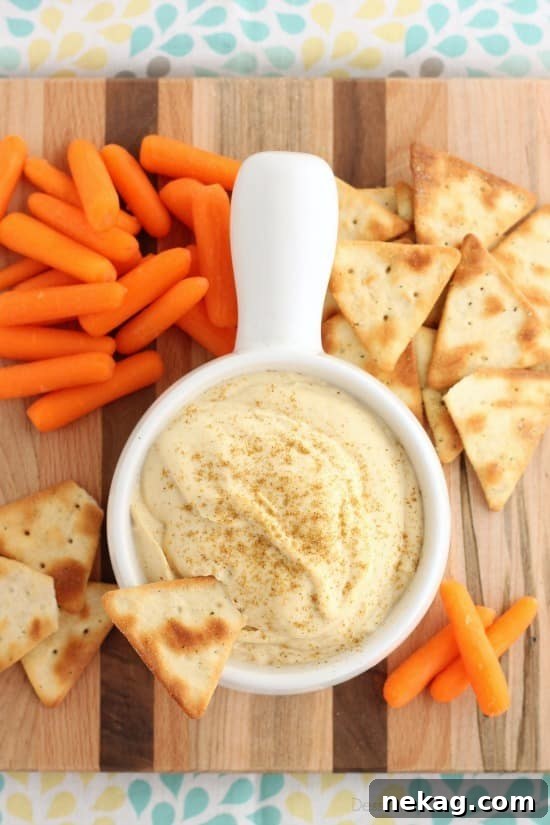
There’s something incredibly appealing about a healthy binge – those periods when your body instinctively craves crisp fruits and fresh, vibrant vegetables. For many, these moments are often accompanied by a desire for nourishing dips that complement the natural goodness of raw produce, and hummus consistently rises to the top of that list. It serves as the ideal companion for crunchy carrot sticks, refreshing cucumber slices, or vibrant bell pepper strips. The luxurious, creamy texture of the hummus beautifully complements the natural sweetness and satisfying crunch of raw vegetables, transforming a simple snack into a truly delightful culinary experience. And with this particular recipe, you’ll achieve that dreamy, silky creaminess with minimal effort and maximum flavor, making healthy eating both easy and enjoyable.
The Secret to Unbelievably Creamy Hummus: Simple Ingredients, Maximum Flavor
You might assume that achieving restaurant-quality hummus at home requires complex techniques or exotic ingredients, but it’s surprisingly straightforward. This recipe is designed for maximum ease and impressive speed, allowing you to whip up a fresh batch in under five minutes – often even faster! The true secret to its success lies in utilizing readily available ingredients and harnessing the power of a good food processor or high-speed blender to achieve that coveted silky-smooth consistency everyone adores. The simplicity of the process belies the rich, complex flavors you’ll unlock.
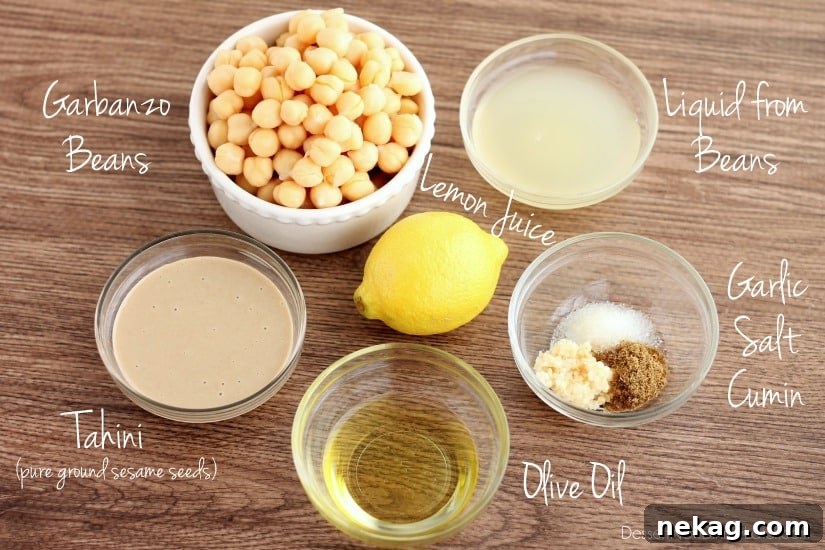
Let’s talk about the stars of our ingredient list. While some traditionalists might advocate for soaking and cooking chickpeas from scratch, using canned garbanzo beans is a brilliant shortcut that doesn’t compromise on flavor or texture when handled correctly. A crucial tip often overlooked is to reserve a portion of the liquid from the can, frequently referred to as aquafaba. This humble liquid is a magical emulsifier that contributes significantly to the hummus’s overall creaminess and helps achieve that desirable light, airy texture. So, resist the urge to discard it entirely!
Another indispensable ingredient is tahini, a rich, nutty paste made from ground sesame seeds. Tahini provides hummus with its distinctive earthy flavor profile and contributes immensely to its rich, emulsified texture. While it might seem like a specialty item, a single jar of good quality tahini typically lasts through many batches of hummus, proving to be a worthwhile investment for any healthy kitchen. Beyond these key players, you’ll likely find the remaining ingredients are common pantry staples: fresh lemon juice for a burst of vibrant acidity and brightness, minced garlic for that irresistible pungent kick, a dash of salt to enhance and balance all the flavors, ground cumin for warmth and aromatic depth, and a good quality extra virgin olive oil for richness and a beautiful, glossy finish. These simple components, when combined thoughtfully, create a symphony of flavors that will have you reaching for more.
Mastering the Method: Quick Steps to Perfect Hummus Every Time
The true beauty of this Easy Garlic Hummus recipe lies not just in its exquisite taste, but in its astonishing simplicity and speed of preparation. You certainly don’t need to be a seasoned culinary expert or dedicate hours in the kitchen to create a dip that tastes like it came straight from a gourmet Mediterranean cafe. In fact, your trusty food processor or high-speed blender will be your best friend here, doing all the heavy lifting to transform humble, everyday ingredients into a luxurious, spreadable delight in a blink.
The process couldn’t be more straightforward. Begin by combining all your prepped ingredients into the bowl of your food processor. This includes the drained chickpeas (remembering to reserve some of that valuable liquid!), freshly minced garlic, the creamy tahini, bright lemon juice, a drizzle of olive oil, the essential salt, and aromatic ground cumin. Once all components are in, simply switch on your appliance. The magic happens remarkably quickly. Within a minute or two, you’ll witness a fascinating transformation as the separate elements coalesce into a unified, impossibly creamy dip. Don’t hesitate to pause and scrape down the sides of the bowl to ensure every last bit is thoroughly incorporated and blended to perfection. If you find yourself desiring an even thinner, silkier consistency, feel free to add a touch more of the reserved chickpea liquid or a splash of fresh water, one tablespoon at a time, until your hummus reaches its ideal, velvety smoothness.

Serving Suggestions: Beyond the Basics
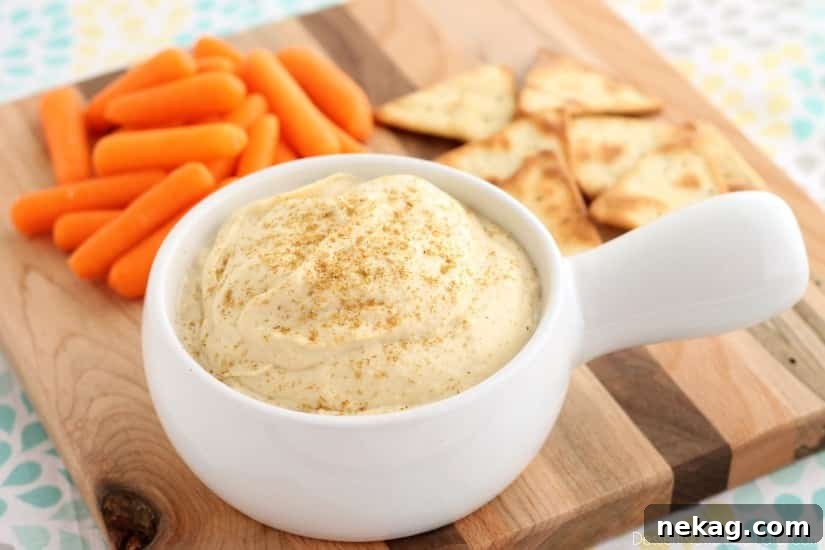
While my personal favorite way to enjoy this homemade garlic hummus is undeniably with crisp, sweet carrots – a combination that truly epitomizes a perfect snack – its versatility knows virtually no bounds. If you’re committed to maintaining a healthier snacking routine, pairing this creamy dip with an assortment of other fresh vegetables is a fantastic and flavorful choice. Think cooling cucumber slices, vibrant snap peas, colorful bell pepper strips (red, yellow, orange!), crunchy radish rounds, or even tender blanched asparagus spears. The refreshing crunch of these raw veggies provides a delightful textural contrast to the smooth, rich dip, making for an incredibly satisfying and nutritious bite that keeps you coming back for more.
But why limit yourself to just raw vegetables? This easy garlic hummus is incredibly adaptable and tastes phenomenal with a wide array of other accompaniments:
- Pita Chips: A classic and universally loved pairing, offering a satisfying crunch and a sturdy vehicle for the creamy dip.
- Warm Pita Bread: Tear off soft, fluffy pieces of warm pita bread for a wonderfully chewy and comforting complement to the smooth hummus.
- Crackers: Any type of cracker, from simple water crackers to rustic multigrain varieties or even gluten-free options, works wonderfully as a dipper.
- Sandwiches & Wraps: Elevate your lunch by spreading a generous layer of this flavorful hummus instead of mayonnaise or other condiments for a healthier, more nutrient-dense, and incredibly tasty base.
- Salad Bowls & Grain Bowls: Dollop it generously onto vibrant grain bowls, protein-packed salads, or buddha bowls for an extra boost of plant-based protein, healthy fats, and luxurious creaminess.
- Breakfast Toast: A surprising but absolutely delicious option! Spread this garlic hummus onto toasted sourdough or your favorite bread, then top with slices of avocado, a fried egg, or a sprinkle of everything bagel seasoning for a savory morning treat.
- As a Side Dish: Serve alongside perfectly grilled meats (like chicken or lamb), crispy falafel, roasted vegetables (such as zucchini, eggplant, or sweet potatoes), or alongside a fresh tabouleh salad for a complete and authentic Mediterranean-inspired meal.
Tips for the Best Easy Garlic Hummus Every Time
While this easy garlic hummus recipe is remarkably forgiving and difficult to get wrong, a few simple tips can help you achieve hummus perfection that rivals your favorite Middle Eastern restaurant. Paying attention to these small details will consistently yield a dip that is not only incredibly flavorful but also boasts that coveted, ultra-smooth texture.
- Don’t Skimp on Tahini: Tahini is undeniably crucial for both the authentic flavor and the signature creamy texture of hummus. Invest in a good quality tahini, and always remember to stir it thoroughly before measuring, as the natural oils can separate and settle at the bottom of the jar. A well-mixed tahini ensures even distribution of its rich flavor and emulsifying properties.
- Fresh Lemon Juice is Key: While bottled lemon juice can work in a pinch, fresh lemon juice truly makes a world of difference. It provides a brighter, more vibrant, and complex flavor that elevates the hummus significantly, cutting through the richness and adding a delightful tang.
- Adjust Garlic to Your Liking: The recipe calls for ½ tablespoon of minced garlic, which delivers a noticeable but generally not overpowering garlic flavor. If you’re a true garlic aficionado, feel absolutely free to add a bit more to suit your palate! For those who prefer a milder garlic presence, consider roasting your garlic cloves before adding them to the processor; this mellows their pungency and adds a subtle sweetness.
- Control the Consistency: The amount of chickpea liquid (aquafaba) or water you add is the primary determinant of the final consistency of your hummus. Start with the recommended ¼ cup and then add more, one tablespoon at a time, until you achieve your desired level of creaminess and thickness. Some individuals prefer a thicker, more spoonable dip, while others enjoy a looser, more spreadable texture perfect for drizzling.
- Chill for Flavor Development: While you can certainly enjoy your freshly made hummus immediately, it often tastes even better after chilling in the refrigerator for at least 30 minutes. This resting period allows all the incredible flavors – the garlic, lemon, tahini, and cumin – to meld and deepen, resulting in a more harmonious and pronounced taste.
- Garnish for Presentation and Enhanced Flavor: A simple yet elegant drizzle of extra virgin olive oil over the top, a vibrant sprinkle of paprika (sweet or smoked), a scattering of fresh chopped parsley or cilantro, or even a few whole chickpeas can add both visual appeal and an extra layer of flavor and texture to your finished hummus.
Variations to Explore
Once you’ve confidently mastered this foundational Easy Garlic Hummus recipe, you’ll feel empowered to get wonderfully creative and experiment with a myriad of different flavor profiles to suit any craving or occasion. The possibilities are truly endless!
- Roasted Red Pepper Hummus: For a sweet and smoky twist, simply add one large roasted red bell pepper (ensure it’s peeled and deseeded) to the food processor along with all the other ingredients. The roasted pepper adds a beautiful color and depth of flavor.
- Spicy Hummus: If you love a bit of heat, incorporate a pinch of cayenne pepper, a dash of your favorite hot sauce, or a few slices of fresh or pickled jalapeño to the food processor for a delightful kick.
- Sun-Dried Tomato Hummus: For a rich, tangy, and intensely savory variation, add 2-3 tablespoons of oil-packed sun-dried tomatoes (make sure they are well-drained) to your hummus mixture. The concentrated tomato flavor pairs wonderfully with the garlic and tahini.
- Herbed Hummus: Freshen up your hummus by mixing in a handful of fresh herbs. Great options include fragrant cilantro, bright parsley, aromatic basil, or cooling mint for a burst of green flavor.
Storage and Make-Ahead Tips
One of the many advantages of homemade garlic hummus is how beautifully it stores, making it an excellent candidate for meal prepping healthy snacks and components for meals throughout the week. Once prepared, simply transfer your finished hummus to an airtight container. When properly sealed and refrigerated, it will maintain its fresh taste and creamy texture for up to 5-7 days. For optimal freshness and to prevent the surface from drying out and forming a crust, drizzle a thin layer of extra virgin olive oil over the top of the hummus before sealing the container.
For longer-term storage, you’ll be pleased to know that hummus can also be frozen. Prepare a larger batch and divide it into freezer-safe airtight containers or heavy-duty freezer bags. It will keep well in the freezer for up to 3-4 months. When you’re ready to enjoy it, simply thaw the frozen hummus overnight in the refrigerator. Once thawed, give it a good stir, and if necessary, you might need to add a splash of water or a tiny bit more lemon juice and give it a quick re-blend in the food processor to restore its original creamy, luscious texture. This ensures you always have a healthy, delicious dip on hand!
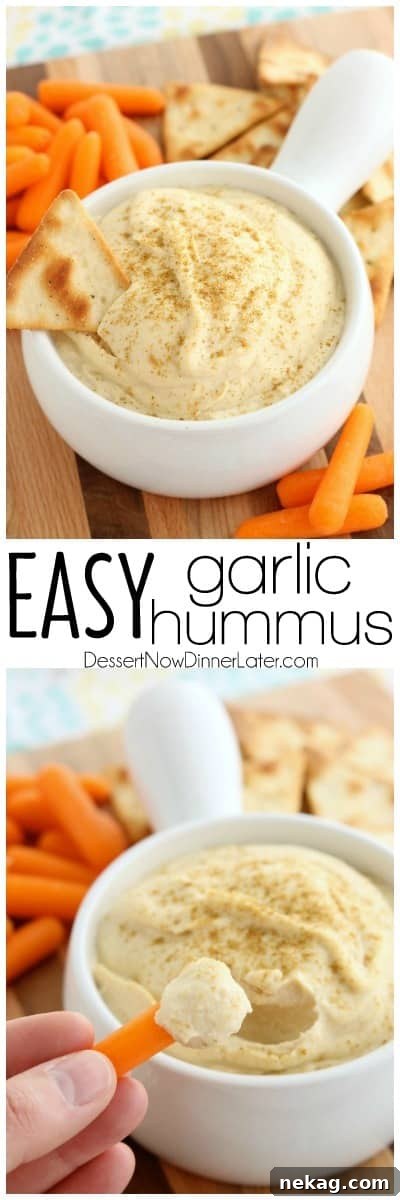
Ready to Make Your Own Easy Garlic Hummus? Here’s the Recipe!
Now that you’re thoroughly equipped with all the essential knowledge, invaluable tips, and creative ideas for crafting the perfect homemade hummus, it’s time to roll up your sleeves and get blending. This recipe is meticulously designed for maximum flavor with minimum fuss, virtually guaranteeing a delightful and satisfying result every single time you make it. Enjoy the process, savor the fresh taste, and embrace the joy of healthy snacking!
Easy Garlic Hummus
Created by Amber Brady (Adapted from Like Mother, Like Daughter)
Yields: 8 servings
Rated 5 out of 5 stars based on 5 user ratings.
Ingredients
- 15 oz can chickpeas (garbanzo beans), drained – reserve ¼ cup liquid from can
- ½ Tbsp minced garlic
- 1 Tbsp olive oil
- ¼ cup tahini (pure ground sesame seeds)
- 3 Tbsp lemon juice
- ¼ cup liquid from can of chickpeas, or water
- ½ tsp salt, to taste
- ½ tsp ground cumin
Instructions
- Place all ingredients into a food processor or blender.
- Blend until smooth, about 1 minute, scraping the sides if needed.
- Serve with carrots, pita chips, crackers, or other vegetables.
Notes
For an extra creamy texture, ensure your tahini is well-stirred before measuring. Adjust salt and lemon juice to your personal preference for the perfect balance. A final drizzle of extra virgin olive oil and a sprinkle of paprika make for a beautiful and appetizing presentation.
Sharing this recipe with a link is both encouraged and appreciated. Copying/pasting and/or screenshots of full recipes to any social media is strictly prohibited. Content and photographs are copyright protected.
Did you make this recipe?
We’d love to hear from you! Don’t forget to leave a rating and share your experience below. Make sure to follow us on Pinterest and Instagram for more delicious recipes and healthy snack ideas!