
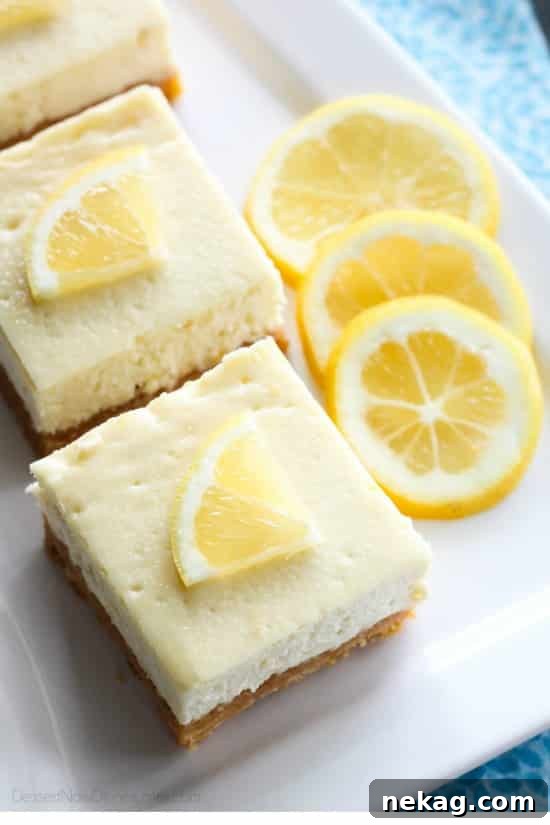
Lemon Cheesecake Bars: Your Ultimate Guide to a Zesty Spring Dessert
Welcome the sunshine with these incredible Lemon Cheesecake Bars! Boasting a delightful creamy texture and a perfectly balanced sweetness, these bars are infused with a bright, tangy lemon flavor that sings of spring. Whether you’re planning a holiday gathering, a casual weekend treat, or simply craving something irresistibly zesty, these easy-to-make cheesecake bars are guaranteed to be a hit. Forget complicated desserts; this recipe brings gourmet flavor right to your kitchen with minimal fuss.
Why These Lemon Cheesecake Bars Will Be Your New Favorite
If you’re a lover of all things lemon, you’re in for a treat! This recipe isn’t just “lemon-flavored”; it’s a true celebration of citrus, designed to deliver a burst of fresh lemon in every single bite. We’ve layered the lemon essence into both the crunchy crust and the silky-smooth cheesecake filling, creating a harmonious symphony of textures and tastes. Unlike some lemon desserts that can be overly tart or surprisingly bland, these bars strike the ideal balance, making them wonderfully refreshing and utterly satisfying.
The beauty of cheesecake bars lies in their simplicity. While a traditional cheesecake can be intimidating, requiring springform pans and water baths, these bars offer all the rich indulgence with none of the stress. They bake beautifully in a standard square pan, cool quickly, and slice into convenient, shareable portions. Perfect for picnics, potlucks, or an elegant dessert spread, they offer the gourmet appeal of cheesecake in a portable, effortless format.
The Zesty Secret: How We Pack So Much Lemon Flavor In
Our quest for the ultimate lemon experience led us to a few secret weapons. First, the crust! Instead of a traditional graham cracker base, we’ve opted for Lemon Oreos. Yes, you read that right – Lemon Oreos! These provide a subtle, sweet lemon crunch that perfectly complements the creamy filling. If Lemon Oreos are hard to find, Golden Oreos make a fantastic substitute, offering a similar texture and a neutral canvas for the lemon filling to shine. The crushed cookies are simply blended with melted butter, pressed into the pan, and lightly baked to create a sturdy, flavorful foundation.
The cheesecake filling is where the true lemon magic happens. We start with rich, block-style cream cheese and a touch of granulated sugar for sweetness. But the real game-changers are the additions of fresh lemon juice, vibrant lemon zest, and a secret ingredient: lemon Greek yogurt. The yogurt not only intensifies the lemon flavor but also adds an incredible tang and an extra layer of creaminess that elevates the cheesecake to new heights. The zest provides aromatic oils, while the juice delivers that quintessential tartness. Together, they create a multi-dimensional lemon profile that’s both bright and comforting.
Initially, I admit, I had a slight concern. Using Lemon Oreos, fresh lemon juice, lemon zest, and lemon Greek yogurt might sound like an overload of lemon. Even my husband, who appreciates a good lemon dessert, tends to draw a line at “too much” lemon. However, after these Lemon Cheesecake Bars emerged from the oven and had their crucial chilling time, those intense flavors beautifully mellowed out. The result? A perfectly balanced, tangy lemon pleasure that even the skeptics couldn’t resist. The Greek yogurt proved to be a stroke of genius, contributing not just tang, but also an unparalleled smoothness to the cheesecake filling.
Cheesecake Bars: Easier Than You Think
Don’t let the word “cheesecake” intimidate you! Cheesecake bars are infinitely less daunting than baking a full-sized cheesecake in a springform pan. There’s no worrying about cracks, no fiddling with water baths, and the baking time is significantly shorter. This makes them an ideal choice for both novice bakers and seasoned pros looking for a quick yet impressive dessert. The simple press-in crust and straightforward filling come together in minutes, leaving you more time to enjoy the delightful process of baking and, of course, the finished product.
The beauty of a bar recipe is also in its portion control. While a whole cheesecake can be a commitment, bars are easy to cut and serve, making them perfect for sharing or savoring solo. They hold their shape wonderfully, making them a fantastic portable dessert for any occasion.
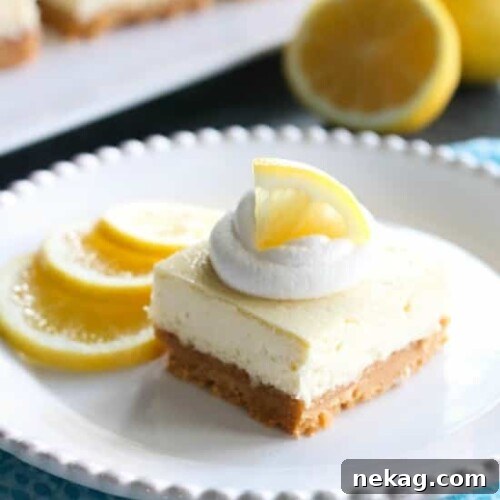
Lemon Cheesecake Bars Recipe
Created by: Amber Brady
Prep Time: 20 mins |
Cook Time: 40 mins |
Total Time: 1 hr
Yields: 9 bars
Ingredients
Crust
- 20 Lemon Oreos (use Golden Oreos, if you can’t find lemon)
- 4 Tbsp (57 g) butter, melted
Filling
- 16 oz (452 g) block-style cream cheese, two 8oz blocks (full-fat OR Neufchatel, NOT fat free), room temperature
- 5.3 oz (150 g) container lemon Greek yogurt (I used regular, not fat free), room temperature
- ½ cup (100 g) granulated sugar
- 2 large eggs, room temperature
- 1 large egg yolk, room temperature
- zest of 1 lemon
- 1 Tbsp fresh lemon juice (about 1/2 lemon)
Instructions
-
Preheat oven to 350 degrees Fahrenheit (175°C). Lightly grease an 8×8-inch square baking dish with cooking spray. For easier removal, you can alternately line the baking dish with parchment paper, leaving an overhang on two sides to lift the cheesecake out once it’s cooled.
-
To prepare the crust, place the Lemon Oreos (or Golden Oreos) into the bowl of a food processor. Blend until very fine crumbs are formed. Transfer these crumbs to the prepared baking dish. Pour the melted butter evenly over the crumbs. Use your hands or the back of a spoon to mix until all crumbs are thoroughly moistened. Press the mixture evenly and firmly onto the bottom of the pan to form the crust. Bake for 12 minutes, or until the crust appears lightly golden brown and matte (not shiny). Let cool slightly, for about 15 minutes, while you prepare the filling.
-
For the filling, in the bowl of a stand mixer fitted with the paddle attachment (or using a hand mixer), beat together the softened cream cheese, lemon Greek yogurt, and granulated sugar on medium speed until the mixture is completely smooth and free of lumps. Stop the mixer and scrape down the sides and bottom of the bowl with a spatula to ensure everything is well combined. Add the large eggs, the extra egg yolk, fresh lemon zest, and lemon juice. Mix thoroughly on low speed until just combined. Be careful not to overmix the batter at this stage, as too much air can cause cracks in the cheesecake.
-
Carefully pour the creamy lemon cheesecake mixture over the partially cooled, baked crust in the baking dish. Gently tap the pan on the counter a few times to release any trapped air bubbles. Return the dish to the preheated oven and bake for an additional 28 minutes, or until the edges of the cheesecake appear set and the center only jiggles slightly when you gently wiggle the pan. The cheesecake should not look wet in the middle.
-
Once baked, turn the oven off immediately. Crack the oven door open slightly (about 2-3 inches) and allow the cheesecake to cool inside the oven for 1 hour. This slow cooling process helps prevent cracking. After 1 hour, remove the cheesecake from the oven, let it cool completely to room temperature on a wire rack. Then, cover the cooled cheesecake with plastic wrap and chill it in the refrigerator for a minimum of 4 to 8 hours. For best results and optimal firmness and flavor development, chilling overnight is highly recommended. Once thoroughly chilled, cut the cheesecake into bars and serve. These bars are delightful plain, but can be topped with a dollop of fresh whipped cream, a sprinkle of extra lemon zest, or fresh berries for an elegant finish.
Notes
*Recipe adapted from Well Plated
Room Temperature Ingredients: Ensure your cream cheese, Greek yogurt, and eggs are at room temperature. This is crucial for a smooth, lump-free cheesecake batter. Cold ingredients won’t emulsify properly and can result in a lumpy texture.
Don’t Overmix: After adding the eggs, mix just until combined. Overmixing incorporates too much air, which can cause the cheesecake to puff up too much and then crack as it cools.
Cooling is Key: The slow cooling process in the oven is vital for preventing cracks and achieving that perfect creamy texture. Don’t rush it!
Disclaimer: Nutritional values were calculated using a third-party tool and are provided as an estimation only.
Sharing this recipe with a link is both encouraged and appreciated. Copying/pasting and/or screenshots of full recipes to any social media is strictly prohibited. Content and photographs are copyright protected.
Did you make this?
We’d love to hear about it! Don’t forget to leave a rating and a comment below to let us know how your Lemon Cheesecake Bars turned out. Be sure to follow us on Pinterest and Instagram for more delicious dessert ideas and dinner inspiration!
Expert Tips for Flawless Lemon Cheesecake Bars
Achieving bakery-quality cheesecake bars at home is easier than you think with these expert tips:
- Room Temperature Ingredients are Non-Negotiable: This cannot be stressed enough! Cream cheese, Greek yogurt, and eggs must be at room temperature. Cold ingredients will lead to a lumpy batter and a cheesecake with an inconsistent texture. Plan ahead and take them out of the fridge at least 1-2 hours before baking.
- Don’t Overmix the Batter: Once you’ve added the eggs, mix only until just combined. Overmixing incorporates too much air, which can cause the cheesecake to rise excessively during baking and then fall and crack as it cools. A smooth, creamy texture is achieved by beating the cream cheese and sugar well initially, then gently folding in the rest.
- The Power of Parchment Paper: Lining your baking pan with parchment paper, allowing an overhang on two sides, is a game-changer. Once the cheesecake is chilled, you can simply lift the entire slab out of the pan for clean, easy cutting.
- Slow and Steady Cooling Wins the Race: The step of turning off the oven and leaving the cheesecake inside with the door ajar is crucial. This gradual cooling prevents drastic temperature changes that can shock the cheesecake and cause cracks. Patience here will be rewarded!
- Chill Thoroughly: For the best texture and clean cuts, ensure your cheesecake bars are thoroughly chilled, ideally overnight. This allows the cheesecake to fully set, firm up, and for the flavors to deepen and meld beautifully.
Creative Variations to Try
While these Lemon Cheesecake Bars are perfect as is, feel free to get creative with these delicious variations:
- Different Crusts: Not a fan of Oreos? A classic graham cracker crust is always a winner. You could also try a shortbread cookie crust for a buttery, crisp base, or even vanilla wafers.
- Add a Topping: Enhance the lemon flavor with a swirl of homemade lemon curd on top of the cheesecake batter before baking. Alternatively, once chilled, top with fresh berries (raspberries, blueberries, or strawberries), a simple powdered sugar glaze, or a dollop of fluffy meringue for a lemon meringue pie-inspired twist.
- Citrus Medley: Experiment with other citrus flavors! Add a touch of lime zest or orange zest to the filling for a multi-citrus sensation.
- Spice It Up: A pinch of ground cardamom or ginger in the crust or filling can add an unexpected depth and warmth that pairs wonderfully with lemon.
Storage and Make-Ahead Tips
These Lemon Cheesecake Bars are fantastic for making ahead, which means less stress when entertaining!
- Refrigeration: Store leftover cheesecake bars in an airtight container in the refrigerator for up to 3-4 days. For best flavor and texture, allow them to come to just below room temperature for about 15-20 minutes before serving.
- Freezing: Yes, you can freeze cheesecake bars! Once completely chilled and firm, cut the bars and place them on a baking sheet lined with parchment paper. Freeze until solid (about 2 hours). Once frozen, transfer the individual bars to an airtight freezer-safe container or freezer bag, separated by parchment paper to prevent sticking. They will keep in the freezer for up to 1-2 months.
- Thawing: To thaw frozen bars, simply transfer them from the freezer to the refrigerator and let them thaw overnight, or for several hours until soft enough to enjoy.
Perfect Pairings: How to Serve Your Cheesecake Bars
These versatile lemon cheesecake bars can be enjoyed in many delightful ways:
- Classic Whipped Cream: A simple dollop of freshly whipped cream adds a touch of elegance and balances the tangy lemon.
- Fresh Berries: A scattering of fresh raspberries, blueberries, or sliced strawberries provides a beautiful color contrast and burst of natural sweetness.
- Lemon Zest Garnish: A final sprinkle of fresh lemon zest enhances the aroma and brightens the presentation.
- With Tea or Coffee: These bars make an exquisite accompaniment to your afternoon tea or after-dinner coffee.
- Dessert Platter: Cut into smaller squares and arrange on a dessert platter with other treats for a stunning presentation.
Frequently Asked Questions About Lemon Cheesecake Bars
- Can I use low-fat cream cheese or Greek yogurt?
- For the best texture and richest flavor, it’s highly recommended to use full-fat block-style cream cheese (or Neufchatel) and regular lemon Greek yogurt. Fat-free versions can result in a less creamy, sometimes rubbery, texture.
- My cheesecake cracked, what went wrong?
- Cracks are usually caused by overmixing the batter (introducing too much air), opening the oven door too frequently during baking, or cooling the cheesecake too quickly. Ensure ingredients are at room temperature and follow the slow cooling instructions carefully.
- How do I know when the cheesecake is done baking?
- The edges should appear set and slightly puffed, while the very center (about a 1-2 inch circle) should still have a slight wobble when you gently shake the pan. It will continue to set as it cools.
- Can I use regular yogurt instead of Greek yogurt?
- While lemon Greek yogurt is preferred for its thicker consistency and intense flavor, you could substitute it with regular full-fat lemon yogurt, though the cheesecake might be slightly less firm. Ensure it’s not a watery yogurt.
- Do I need a food processor for the crust?
- A food processor makes quick work of crushing the Oreos, but you can also place them in a zip-top bag and crush them finely with a rolling pin or the bottom of a heavy glass.