
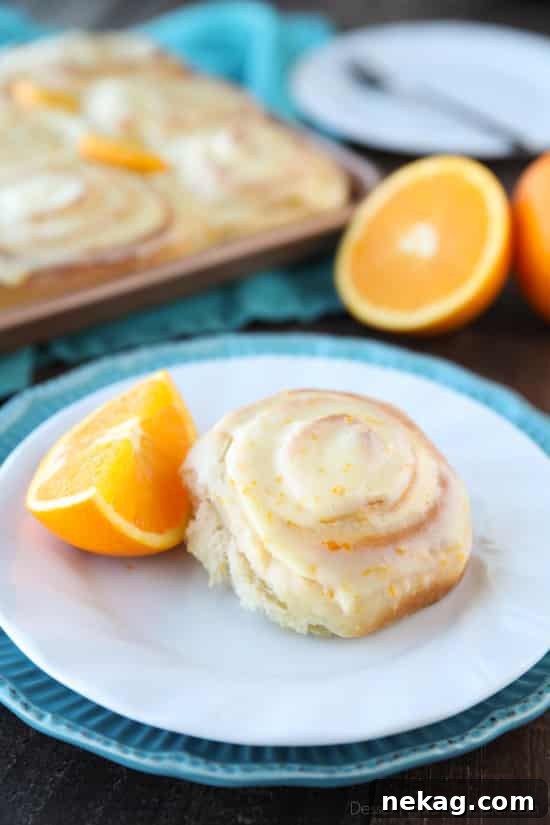
Orange Rolls are a truly delightful sweet roll, renowned for their incredibly soft and fluffy texture, achieved through a unique potato dough. Each roll is generously filled with a vibrant, zest-infused sugar mixture and crowned with a luscious, fresh orange glaze. These irresistible treats are not just for special occasions; they are perfect for enhancing any breakfast, elevating a weekend brunch, or adding a touch of bright, citrusy comfort to holiday celebrations like Easter. Discover the secret to baking these exceptional rolls that promise a burst of sunshine in every bite.
The quest for the ultimate soft and fluffy sweet roll often leads to an unexpected hero: the humble potato. Just like my beloved Mom’s Cinnamon Rolls, these Orange Rolls harness the magic of potato dough. We’re not talking about leftover mashed potatoes from dinner, but rather simple potato flakes rehydrated with water. This addition works wonders, transforming ordinary dough into something exceptionally tender and moist. If you’ve ever experienced the delicate texture of potato bread or rolls, you’ll instantly understand the unparalleled softness and rich mouthfeel this ingredient brings.
The secret lies in the starch content of potatoes. When incorporated into yeast dough, potato flakes contribute to a higher moisture retention, resulting in a significantly softer crumb that stays fresh longer. This unique characteristic prevents the rolls from drying out quickly, ensuring that each bite remains pillowy and delightful. The slight earthy undertone from the potato also adds a subtle depth of flavor that complements the bright citrus notes of the orange beautifully, creating a well-rounded taste experience. It’s a game-changer for anyone seeking truly exceptional homemade sweet rolls.
Having witnessed the incredible results firsthand with my cinnamon rolls, I consistently turn to potato dough for all my sweet roll creations. It’s a reliable method that guarantees consistently soft, airy, and truly fluffy rolls every single time. Integrating this technique into these Orange Rolls was a natural choice, and the outcome speaks for itself – they turned out absolutely perfect! The potato dough provides the ideal canvas for the vibrant orange flavors, allowing them to shine without overpowering the delicate texture of the roll itself.
Crafting the Perfect Orange Rolls: A Step-by-Step Guide
These exquisite Orange Rolls draw inspiration from a fusion of beloved recipes. The vibrant citrus notes are borrowed from my popular Lemon Sticky Rolls, while the foundational, incredibly soft potato dough is a direct inheritance from my family-favorite Mom’s BEST Cinnamon Rolls recipe. Of course, the star of the show remains the bright, aromatic essence of fresh oranges, which infuses every component of these delightful treats.
The journey to creating these fluffy orange rolls begins with the dough. It requires careful kneading to develop gluten, which is essential for that signature chewy yet tender texture. After kneading, the dough needs a crucial resting period to rise, allowing the yeast to work its magic and create a light, airy structure. Once adequately rested and doubled in size, the dough is gently rolled out into a large, even rectangle, ready for its flavorful additions. A thin, even layer of softened unsalted butter is then delicately brushed across the entire surface of the rolled dough, providing a rich base for the zesty filling to adhere to.
The Zesty Orange Filling: Infusing Flavor
To achieve an optimal and truly vibrant orange flavor throughout the rolls, we take a special step with the filling. Fresh orange zest, bursting with essential oils, is combined with granulated sugar. This allows the oils from the zest to infuse into the sugar, creating an aromatic and intensely flavored mixture. This zest-infused sugar is then evenly spread over the butter layer on the dough. The addition of a touch of freshly squeezed orange juice transforms this sugary mixture into a thick, delightful paste that clings perfectly to the dough, ensuring a consistent burst of citrus in every spiral.
This method of infusing the sugar with zest is key to maximizing the citrus impact. As the rolls bake, the fragrant oils from the zest are released, permeating the dough and creating an irresistible aroma that fills your kitchen. The slight tartness from the orange juice also balances the sweetness of the sugar, preventing the filling from being overly cloying and ensuring a refreshing taste profile. It’s a simple yet effective technique that elevates the entire orange roll experience, making it much more flavorful than simply adding zest and sugar separately.
Rolling and Slicing for Perfect Spirals
Once the butter and orange filling are meticulously spread, the dough is then carefully rolled up into a snug log. Begin rolling from one of the longer edges, ensuring a tight, even spiral that will hold its shape beautifully. After the log is formed, it’s time to slice it into twelve equal pieces. For truly neat and perfectly round rolls, consider this expert TIP: use unwaxed, unflavored dental floss. Simply slide a piece of floss under the log, cross it over the top, and pull to create a clean cut. This technique prevents the dough from being compressed and squashed, unlike using a knife, which can distort the delicate spirals.
After slicing, these raw, sweet orange rolls are arranged on a baking sheet, ideally with a bit of space between them. They are then covered and allowed to undergo a second rise, also known as proofing. This critical step provides them with ample time to become wonderfully puffy and light, contributing significantly to their ultimate soft and airy texture once baked. The second rise allows the yeast to produce more carbon dioxide, creating tiny air pockets that expand during baking, resulting in a tender and fluffy crumb. Don’t rush this step, as it’s vital for achieving the desired light consistency.
Baking to Golden Perfection
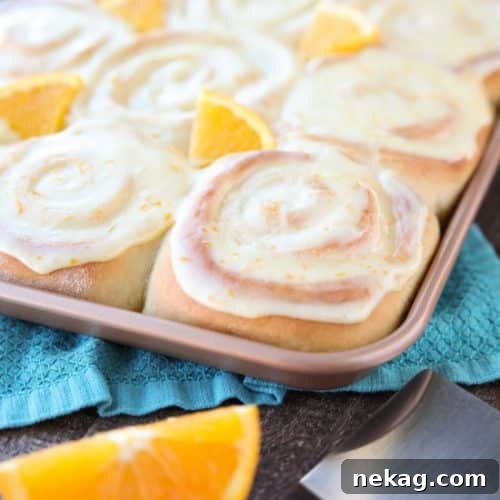
I find that baking sweet rolls on a large sheet tray, rather than in a cramped baking dish, yields superior results. This method provides each roll with ample space to spread out and rise without crowding. This ensures that the rolls bake evenly, developing a beautiful golden-brown crust and a thick, consistent bread texture within each spiral. Over-crowding can lead to rolls that are underbaked in the center or unevenly cooked, so giving them room to breathe is essential for a perfect finish.
The Irresistible Orange Cream Cheese Glaze
To further enhance their citrusy appeal, these orange rolls are generously finished with a luscious, sticky glaze. This glaze is perfectly balanced, offering a light sweetness that complements the rich dough and a creamy texture that melts beautifully over the warm rolls. Its vibrant flavor comes from a careful infusion of fresh orange zest and juice, mirroring the flavors within the roll itself. The zest provides a bright aromatic kick, while the juice ensures a tangy counterpoint to the sweetness of the powdered sugar. This final touch truly elevates the orange rolls from delicious to absolutely irresistible, making them a standout treat for any occasion.
These Homemade Orange Rolls are truly the epitome of comfort and joy, making them an ideal choice for a special breakfast or a memorable dessert, especially during festive seasons like Easter. The bright, fresh orange flavor perfectly marries with the comforting, pillowy softness of the sweet rolls, creating a harmonious and utterly satisfying experience. Whether you’re gathering with family or simply treating yourself, these rolls are sure to impress and delight. I poured my heart into perfecting this recipe, and I sincerely hope you will fall in love with these delightful citrusy spirals as much as I have!
Tips for Success with Your Orange Rolls
Creating these perfect Orange Rolls is an enjoyable baking adventure, and a few extra tips can ensure your success. Always use fresh, good quality oranges for both the zest and juice, as this is where the majority of your vibrant flavor will come from. Navel oranges or Valencia oranges are excellent choices for their juicy pulp and fragrant zest. When zesting, be careful to only remove the brightly colored outer layer and avoid the bitter white pith underneath.
For the potato flakes, ensure they are plain, unflavored instant mashed potato flakes. These are purely dehydrated potato and will integrate seamlessly into your dough. Different brands can vary slightly in absorption, so be prepared to adjust the flour quantity by a tablespoon or two if your dough feels overly sticky or too stiff. The goal is a dough that is soft and slightly tacky, but still manageable after kneading.
When it comes to kneading, don’t skimp on the time. Developing the gluten is crucial for that chewy-soft texture. If you’re using a stand mixer, let it work for the full 5-10 minutes until the dough is smooth and elastic. If kneading by hand, be patient and consistent. The dough should pass the “windowpane test,” meaning you can stretch a small piece thin enough to see light through it without tearing.
Proofing conditions are also important. A warm, draft-free environment is ideal for the dough to rise properly. If your kitchen is cool, you can place the covered bowl of dough in a slightly warmed (but turned off) oven, or near a warm spot like a sunny window. The visual cue of the dough doubling in size is more important than strict adherence to the time.
Make-Ahead and Storage Options
These Orange Rolls are best enjoyed warm, fresh from the oven, but they can certainly be prepared in advance to fit your schedule. To make them ahead, follow all the steps up to the second rise. Instead of letting them rise at room temperature for 30-60 minutes, cover the sliced rolls tightly with plastic wrap and refrigerate them overnight, or for up to 18 hours. The cold temperature will slow down the yeast activity. The next morning, remove them from the refrigerator and let them sit at room temperature for 1-2 hours until they become visibly puffy before baking as directed.
Once baked, leftover orange rolls can be stored in an airtight container at room temperature for up to 2-3 days. For best results, gently reheat them in the microwave for 15-30 seconds or in a warm oven (around 250°F / 120°C) for 5-10 minutes until warmed through. You can also freeze baked and cooled orange rolls (without the glaze) for up to 1 month. Thaw them at room temperature, then warm in the oven and add fresh glaze before serving. The glaze itself can be made a day in advance and stored in the refrigerator in an airtight container; just whisk it well before topping the warm rolls.
Orange Rolls
Pin
Rate
SaveSaved!
Ingredients
Yeast Mixture:
- ¼ cup (59 ml) warm water
- 0.25 oz (7 g) packet instant yeast
- 2 Tbsp granulated sugar
Milk Mixture:
- 1 cup (237 ml) milk
- ¾ tsp salt
- ¼ cup (50 g) granulated sugar
- 4 Tbsp (57 g) unsalted butter
Dough:
- 1 large egg, beaten
- ⅓ cup (18 g) potato flakes
- ⅓ cup (80 ml) HOT water
- 4 cups (480 g) + all-purpose flour
Orange Filling:
- 3 Tbsp (42 g) unsalted butter, softened
- 1 cup (200 g) granulated sugar
- ½ tsp ground ginger
- 2 tsp orange zest
- ¼ cup (59 ml) freshly squeezed orange juice
Orange Cream Cheese Glaze:
- 4 oz (113 g) block-style cream cheese
- 1 cup (120 g) powdered sugar
- 2 tsp orange zest
- 2 Tbsp freshly squeezed orange juice
Instructions
-
YEAST MIXTURE: In a small bowl, combine the warm water, instant yeast, and 2 tablespoons of granulated sugar. Stir gently until the yeast and sugar are mostly dissolved. Set this mixture aside for 5-10 minutes until it becomes frothy, indicating the yeast is active.
-
MILK MIXTURE: Gently scald the milk either on the stovetop over medium heat (just until small bubbles form around the edges, do not boil) or in the microwave. Remove from heat and stir in the salt, ¼ cup granulated sugar, and 4 tablespoons of unsalted butter until fully dissolved. Allow this mixture to cool down to a lukewarm temperature (around 105-115°F or 40-46°C), as too hot milk will kill the yeast.
-
POTATO MIXTURE: In a separate small bowl, combine the potato flakes with the hot water. Stir well until a smooth, thick mashed potato consistency is achieved. If the mixture seems too dry, add a tiny bit more water, a teaspoon at a time, until it’s smooth but firm. Set aside to cool slightly.
-
DOUGH: In the bowl of a stand mixer fitted with the dough hook attachment, add the beaten large egg. Pour in the activated yeast mixture, the lukewarm milk mixture, and the prepared mashed potatoes. Gradually add the 4 cups of all-purpose flour, one cup at a time, mixing on low speed until just combined before adding the next. The dough will be quite sticky; avoid adding too much extra flour beyond the initial 4 cups, as this can make the rolls tough. The dough should be sticky but still move around the bowl as it kneads. Increase the speed to medium-low and knead for 5-10 minutes until the dough is smooth, elastic, and pulls away from the sides of the bowl.
-
Lightly grease a large bowl with cooking spray or a little butter. Transfer the sticky dough into the greased bowl, turning once to coat. Cover the bowl tightly with plastic wrap or a clean kitchen towel. Let the dough rise in a warm, draft-free place for 1 hour, or until it has doubled in size.
-
ORANGE FILLING: While the dough is undergoing its first rise, prepare the filling. In a medium-sized bowl, combine the 1 cup of granulated sugar, ground ginger, and 2 teaspoons of orange zest. Rub the zest into the sugar with your fingertips; this helps release the aromatic oils and infuse the sugar with intense orange flavor. Once the dough has finished its first rise, add just enough freshly squeezed orange juice (approximately ¼ cup) to the sugar mixture to create a thick, clumpy, wet sand-like consistency. Stir well to combine.
-
Once the dough has risen, gently punch it down to release the air. Transfer the dough onto a lightly floured surface. Sprinkle the top of the dough with a little more flour, then pat it gently into a flat shape. Using a floured rolling pin, roll the dough into a rectangle measuring approximately 10×15 inches, and about ½-inch thick. Periodically lift and rotate the dough to ensure it isn’t sticking to your countertop, dusting with additional flour underneath as necessary.
-
Evenly spread the 3 tablespoons of very soft, unsalted butter across the entire surface of the rolled-out dough, leaving a small border free along one long edge. Then, carefully spread the prepared orange-sugar mixture over the butter layer, ensuring a consistent coating. Starting from the long edge opposite the small free border, tightly roll the dough up into a neat log. As you roll, gently stretch and pull the dough taut to keep the orange-sugar filling firm and prevent gaps within the spirals.
-
Using unwaxed, unflavored dental floss or a sharp, serrated knife, cut the dough log into 12 even rolls. To use floss, slide it under the log, cross the ends over the top where you want to cut, and pull firmly. Arrange the cut rolls onto a generously greased baking sheet, placing the ends inwards to help maintain their round shape as they rise. Cover the rolls loosely with a clean kitchen towel (a LIGHTLY damp towel can prevent them from drying out) and let them rise for another 30-60 minutes, or until they look puffy and have nearly doubled in size. This second rise is crucial for a light and airy texture.
-
Preheat your oven to 350 degrees Fahrenheit (175 degrees Celsius). Once the rolls have risen sufficiently, place the baking sheet into the preheated oven. Bake for 20-25 minutes, or until the tops are golden brown and a thermometer inserted into the center of a roll reads 190 degrees Fahrenheit (88 degrees Celsius). Another way to check for doneness is to gently press the center of a roll; if it springs back, it’s typically done.
-
While the orange rolls are baking, prepare the delightful glaze. In a medium-sized bowl, use a hand mixer to beat the block-style cream cheese until it is light, smooth, and fluffy. Gradually add the powdered sugar, 2 teaspoons of orange zest, and 2 tablespoons of freshly squeezed orange juice. Continue blending until the glaze is completely smooth and creamy, with no lumps. As soon as the rolls come out of the oven, generously top the warm rolls with the fresh orange cream cheese glaze. Serve immediately while they are still wonderfully warm for the best taste and texture experience.
Notes
- This recipe typically requires 2 medium to large oranges to yield enough zest and juice.
- As a general guideline, 1 average orange provides about 2 teaspoons of zest and approximately ½ cup of juice, though this can vary based on size and ripeness.
- Ensure all cold ingredients (like milk, butter, and egg) are at room temperature unless specified otherwise, as this helps with yeast activation and dough consistency.
- For the warmest, softest rolls, glaze them immediately after they come out of the oven. The warmth helps the glaze slightly melt and seep into the rolls.
Nutrition
Disclaimer: Nutritional values were calculated using a third-party tool and are provided as an estimation only.
Sharing this recipe with a link is both encouraged and appreciated. Copying/pasting and/or screenshots of full recipes to any social media is strictly prohibited. Content and photographs are copyright protected.
Did you make this?
We’d love to hear how your Orange Rolls turned out! Don’t forget to leave a rating below and make sure to follow us on Pinterest and Instagram for more delicious recipes and baking inspiration!